 Previously, I showed you photographs of the worn and ragged Rumford Cookbook that served as my grandmother’s journal and recipe collection. She evidently never cooked out of the book, but used it to record family events and geneologies and favorite recipes which consisted almost totally of desserts! Now I know where I get my sweet tooth. 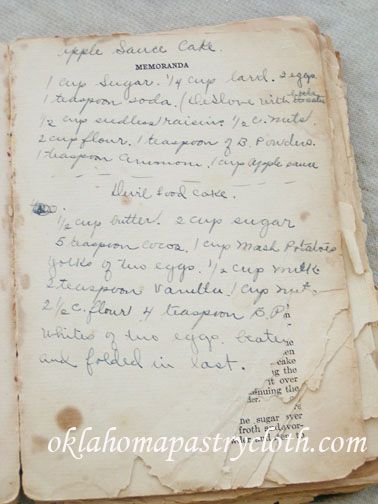 It is a precious thing to have this book with my grandmother’s writing scribbled throughout, but to make it even more special, my father, who will be 84 on July 4th, wrote a book about his early life in Missouri and his experiences in Germany during the WWII era and it includes the story of the Rumford Cookbook. Dad’s book is a volume of memories that I can pass on to my grandchildren and great-grandchildren in a way that my parents, grandparents, great-grandparents, aunts and uncles will never be forgotten. They will always be alive in words and photographs. Here is an exerpt from the book that I thought you might enjoy: According to the old saw, some people eat to live, meaning they aren’t particular about what they eat or how it is prepared. Well, I think it is fair to say my family “lived to eat.” We enjoyed food!! It may not have been prepared in a fancy way, but it was fixed with love. Don’t ask me why but the folks said “fixed” instead of “prepared” as in “I’ll have supper fixed directly.” Mom, Grandmother Hightower and other members of the family prided themselves on being good cooks and well they should. Light rolls were high and light. Fried catfish was crisp on the outside and moist on the inside. Steak was tender enough to cut with a fork. And who could stop with just one piece of red devil’s food cake with fudge icing? 1/2 cp butter 2 cups sugar 5 tsps cocoa 1 cup mashed potatoes 2 eggs, separated (beat whites to fluffy) 1/2 cup milk (I used half and half) 2 tsps vanilla 1 cup nuts 2 1/2 cup flour 4 tsp baking powder Icing 2 squares chocolate 2 cups sugar 2 tbsps syrup (I assume Karo White but I used plain old pancake syrup and it was great) 1/2 cup milk (I used half and half) 2 sticks butter 1 tsp vanilla powdered sugar to thicken if needed 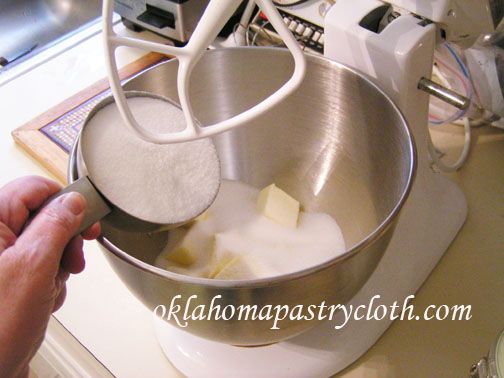 Cream sugar and butter until fluffy 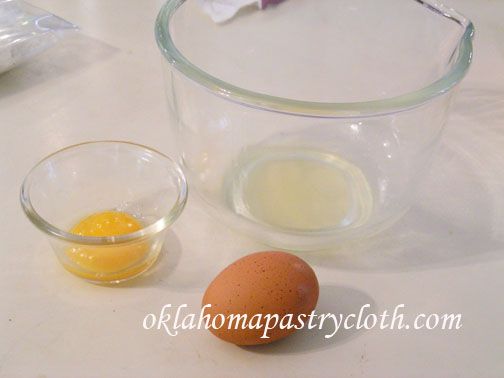 Separate eggs and place egg whites into a bowl to be whipped. 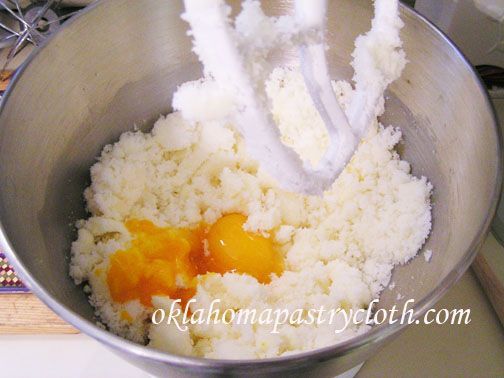 Add yolks to the sugar and butter mixture and mix 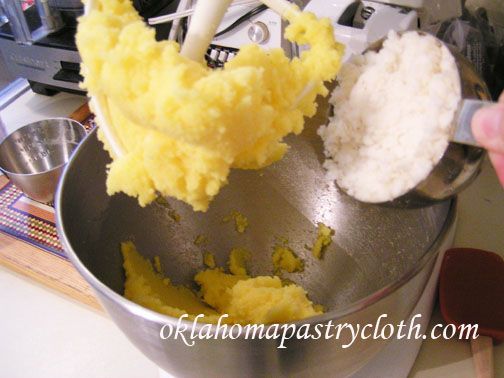 Add potatoes and beat 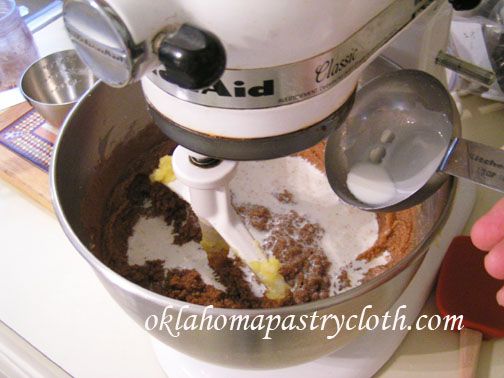 Add cocoa and milk and mix thoroughly 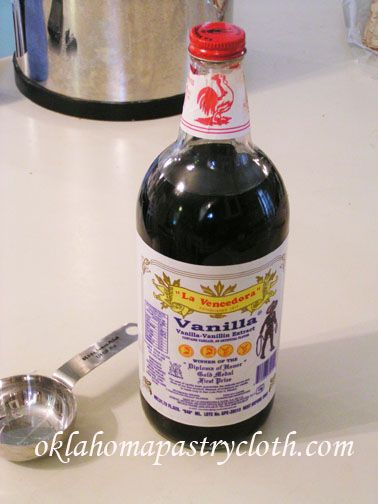 Add vanilla 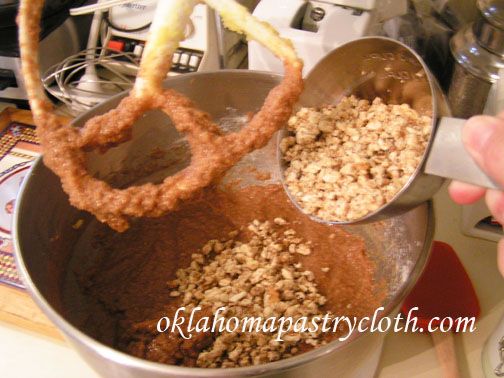 And nuts..I used English walnuts, but pecans would be great too. 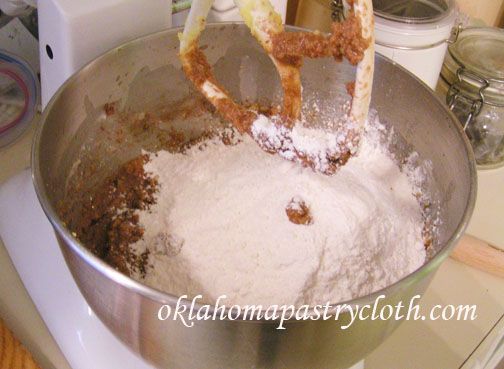 Add the flour that is mixed with the baking powder. Now here, I will caution that because of all of the different flour types, the 2 1/2 cups may be too much with certain types. If you grind your own wheat and are using a soft, white wheat pastry flour, you will definitely not need the full amount. I suggest that you add the flour 1/2 to 1 cup at a time until the consistency is smooth and not too dry. This batter is not a thin batter like we are used to with boxed cakes. It is almost the consistency of whipped icing. 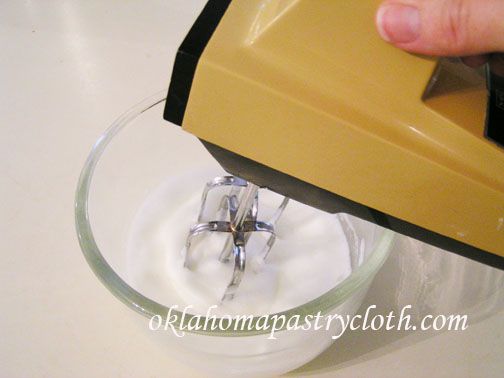 Beat the egg whites until stiff and fluffy 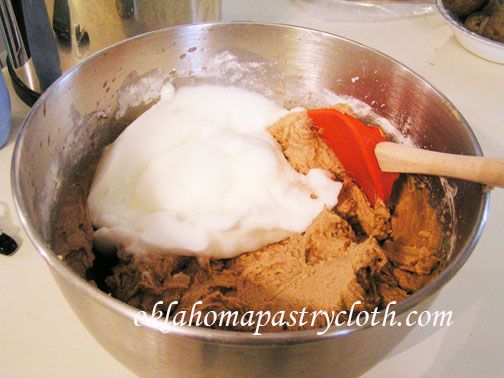 Fold in the egg whites with a spatula by gently turning the batter over on top of the whites again and again until the egg whites are incorporated into the batter. 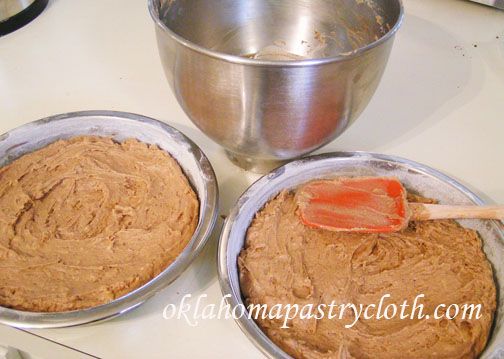 Divide the batter equally between two greased and floured 9″ round cake pans. Bake in a preheated 350º oven for 30 – 35 minutes. Test with a toothpick or sharp knife to make sure it comes out clean. DO NOT OVERBAKE. Check at 30 minutes and if it is not quite done add a minute at a time. 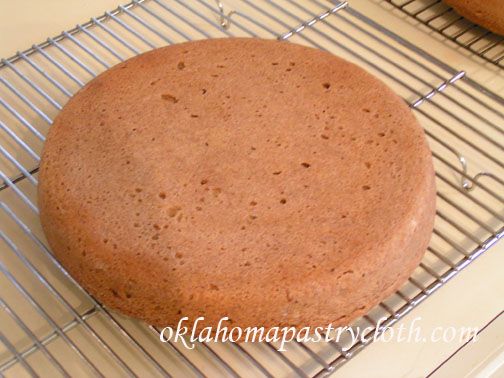 Invert cakes onto cooling racks and allow to cool 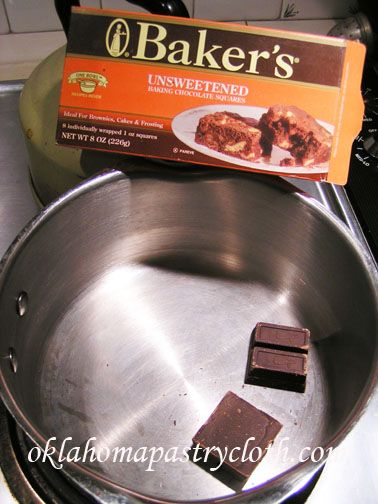 Meanwhile, place two squares of Baker’s Chocolate into a 1 1/2 quart saucepan. 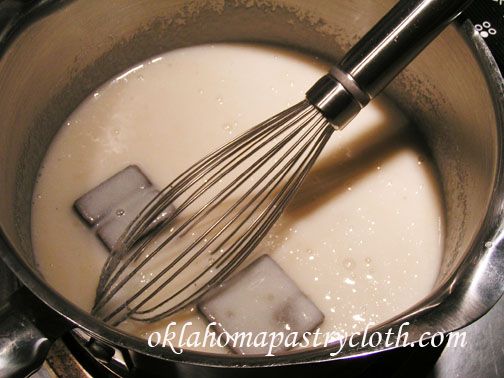 Add sugar and milk or half and half and stir, with a whisk, over low heat until sugar is dissolved. Turn up the heat and, continually stirring, as the chocolate melts and the mixture comes to a low boil. 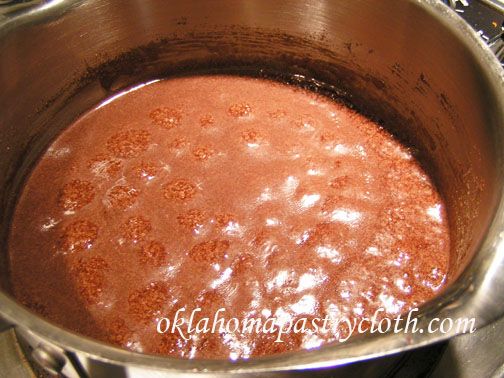 Stop stirring mixture and allow to boil for 2 full minutes. 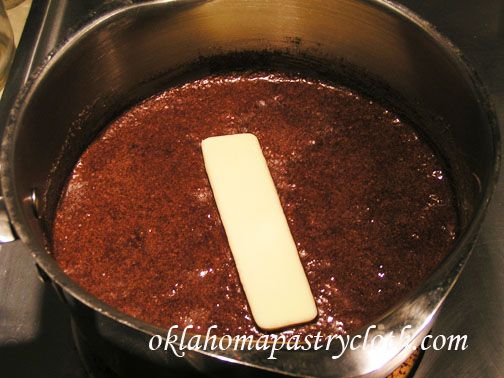 Remove from heat and add butters and vanilla. Stir until butter is melted and incorporated. Cool until the icing becomes hard. Stir to whip to spreadable consistency. If you want a thicker spread then you feel you are getting, add powdered sugar, 1/4 of a cup at a time until you reach the consistency you want. 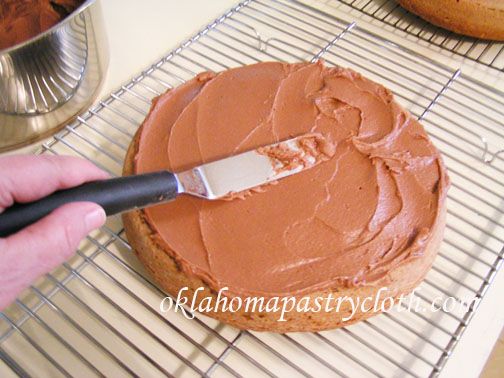 I like to place my bottom layer of the cake onto a piece of wax paper. Then, I can slide the cake onto a cake plate after I am finished icing, for a nice, clean look. Ice the top of the bottom layer of the cake with a thick layer. Place the top layer of the cake onto the bottom layer and make sure they are centered on top of one another. 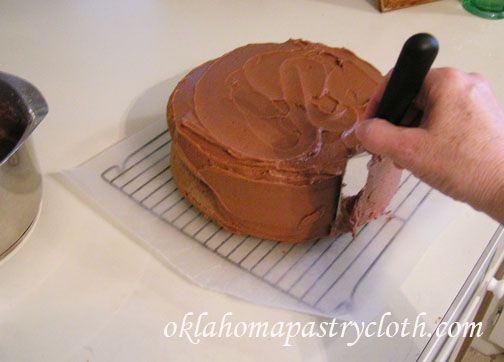 Ice the tops and the sides of the cake 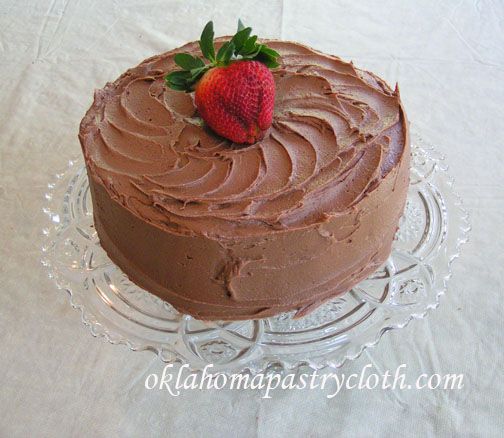 Garnish with a strawberry or chocolate shavings. 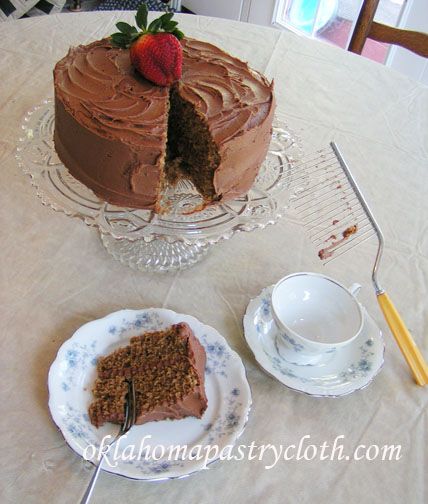 Of course, I had to use my vintage cake cutter that I found at an antique store. It is just like the one that I grew up with that my mom used to cut her cakes. It beats a knife to smithereens!! The cake is tasty, especially with strawberries and the longer it sits, the more most it seems to get. Next time, I’ll do the Red Devil Food Cake that Dad talked about and we will see what it is like!  |
|
|
Oklahoma Pastry Cloth™ Company on Facebook
|
|
 |
|
|
Posts Tagged ‘vintage’
Cooking In the 1930’s Part II
Monday, April 2nd, 2012
Popovers
Monday, August 8th, 2011
  Don’t you just love to go through old family albums, giggling over moments frozen in time through a cameral lens, stretching your brain to the limit while trying to remember dates, places, faces and what you were thinking when you were sure colorful striped bellbottoms with a plaid, ruffled shirt made you look like an Ives St. Laurent model? The camera had to be one of the best inventions of all time – well, next to chocolate. At my age, I’ve seen cameras evolve exponentially. Movie cameras too. Note: I have movies – 8 millimeter mind you – that show a third grade me dancing around with my sisters in our ’60’s dresses (we wore dresses alot back then) pretending we were the Three Little Pigs. There is no sound and every second or so a flash of yellow or green runs across the picture indicating aging film. Among my vintagge pictures are the 3″ x 3″ photos from my dad’s Argus camera, a heavy black and chrome metal invention, housed in a real leather case. He bought it when he got home from the army after WWII. I used that camera in college and now my daughter has it. Remember the Brownie cameras? – Oh! Oh! And the Polaroids. Now those were cool. The photographs were nearly instant and you didn’t have to wait a week while the film was being developed! There was such excitement, pulling the film paper out of the camera and counting the minutes before carefully pulling back the cover sheet to reveal a very over-exposed likeness of your cousin making faces. Polaroids went by the wayside and I can’t imagine why. Slides were a big deal in the 1960’s and it was every television sitcom’s joke for a family to be invited to dinner only to be imprisoned on the couch while the host presented a slide show of the family vacation to Disneyland. “Yep. That’s Carol kissing Goofy. No, that’s Goofy on the left. Carol is the one on the right!” The guests would endure 40 gazillion slides of everything from standing in line at the Flying Teacups to standing in line for an ice cream cone and then the guests would look at their watches and say, “Oh dear! Look at the time. We have to let the cat out!” I remember the projectors where the slides were placed one at a time in a rack and then pushed into the projector to view. Then came the carousel projectors and we thought those were amazing. They were even remote controlled. When my family got one of those, I thought we were Up Town. 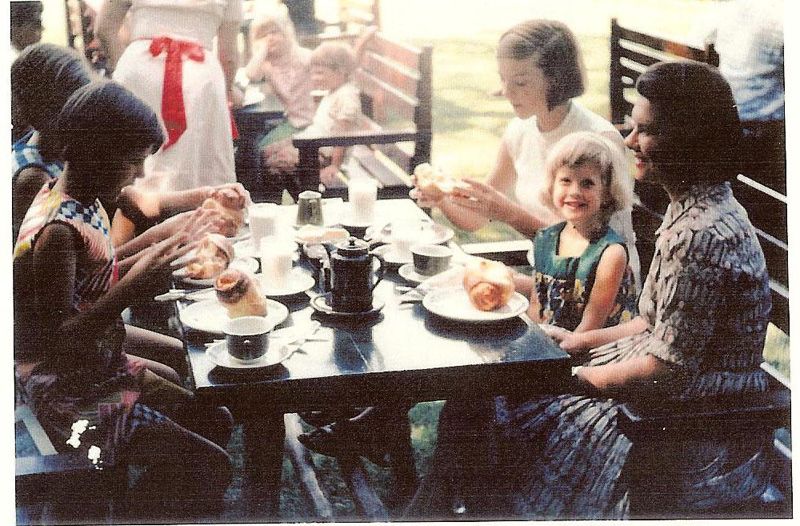 My parents were so wonderful to take tons of pictures of our childhood and our family life in general. We really do have a grand collection of memories on film. One of my favorite memories includes a tea house that my family frequented many a summer. My father was a college professor and during many of the summers of my growing up, he taught at the University of Maine as a visiting professor for the summer sessions. He and my mother introduced us girls to a treat with which we absolutely fell in love – the Popover. The tea house at Jordan Pond at Acadia National Park was our first experience with these hot, puffy pockets of air and the eating was only made more fantastic by the rustic outdoor tables overlooking a gorgeous lake with mountains in the background. Hot tea, coffee or milk accompanied our orders, as well as fresh strawberry jam and fresh butter. Delightfully, the tea house is still in operation and we were able to gather there again during a family reunion for my parents’ 50th anniversary a number of years ago, making memories with our own children. Of course, at that point I had to learn how to make popovers so that I can now eat them anytime I choose right here in Okieland. I thought I’d share what I learned with a recipe and directions. 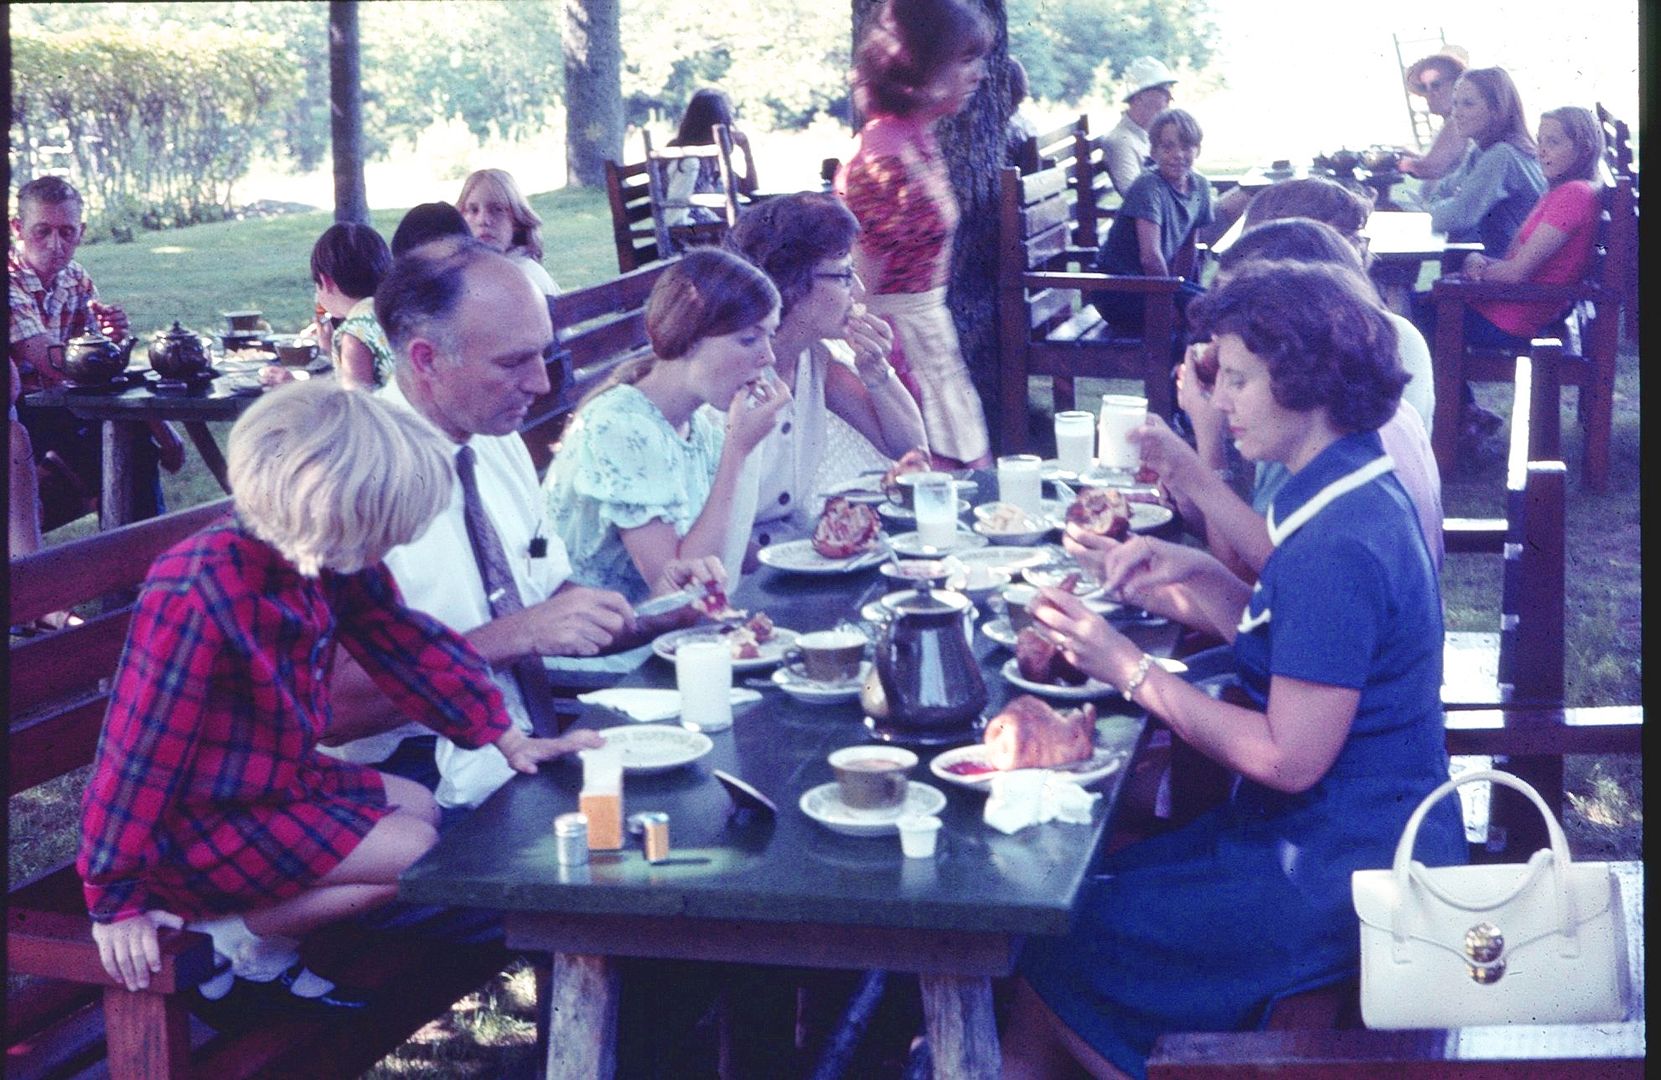 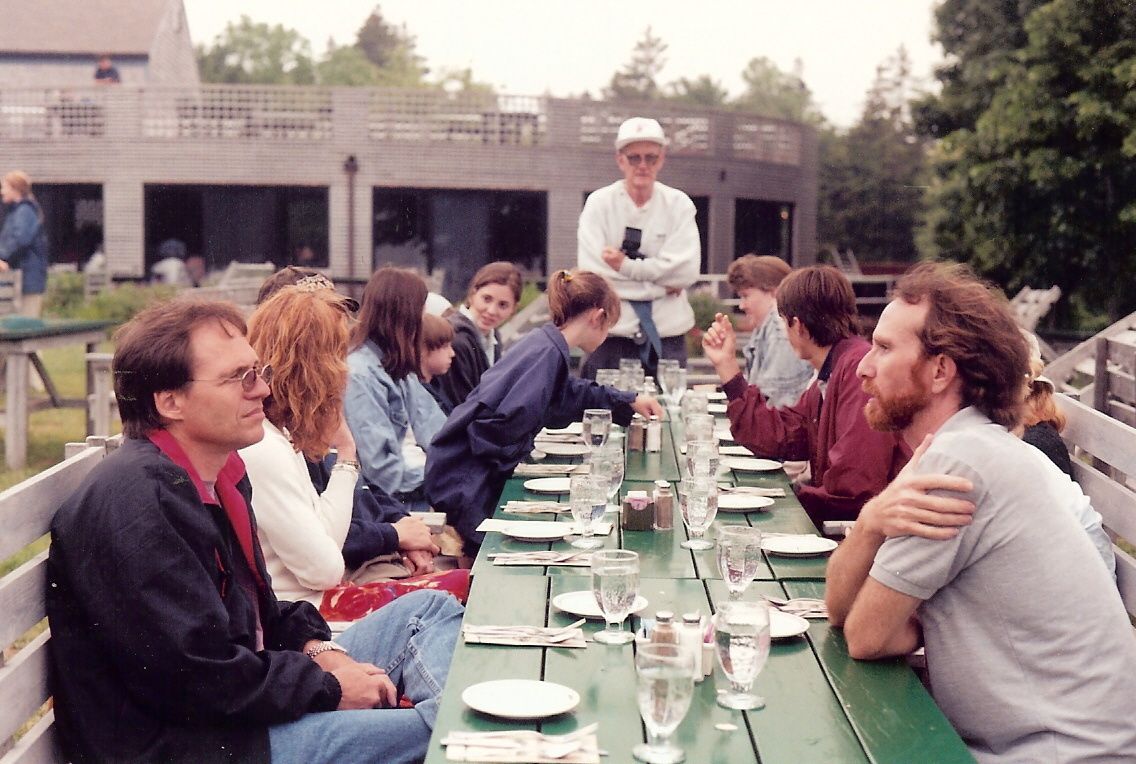 Of all the things my parents gave me, my memories with family are what have stay with me to this day. Those memories are made more vivid by the lovely photographs and movies taken by my parents and grandparents. They have been given to me and to my sisters to share recollections with our children and grandchildren, in the same way that our parents shared with us from their childhoods. It is a way to stay connected with our heritage. Take time to make memories with your family. Take trips, have picnics, sing songs and laugh together. All of the trinkets in the world will never be remembered like time spent together.
 Preheat oven to 425º and lightly grease a 6 cup popover pan with either shortening or butter. You can find popover pans online and I found a very inexpensive one for you to check out here. JUST A NOTE: You CAN put all of the ingredients into a blender and just blend the fire out of the batter. But if you do not have a blender or would rather use the more traditional method, follow the directions below: 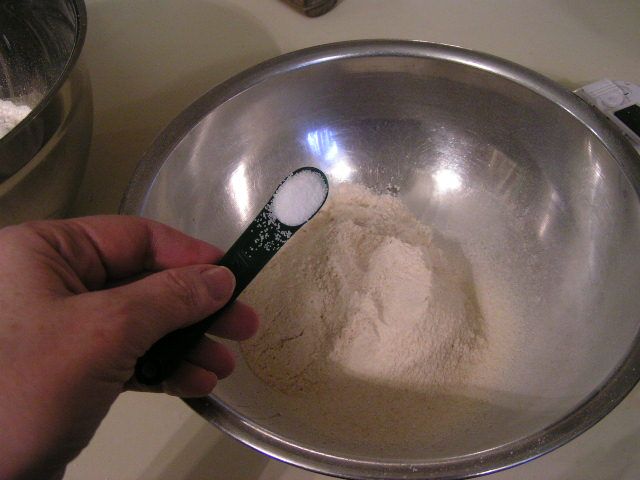 In a shallow bowl, add flour and salt. Set aside. 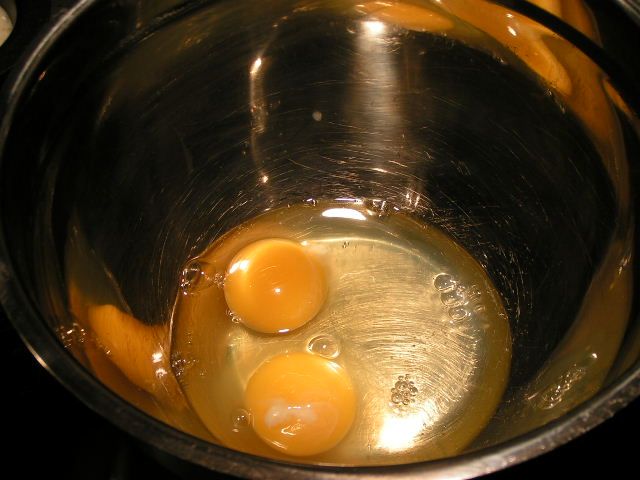 In another shallow bowl, break two large eggs that have sitting at room temperature 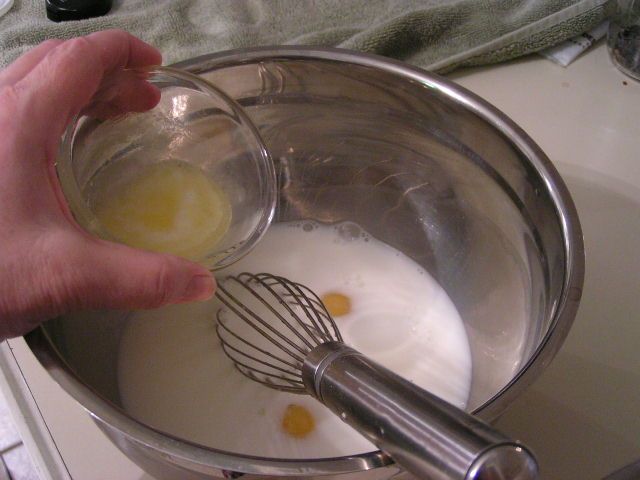 Add milk or half and half and melted butter 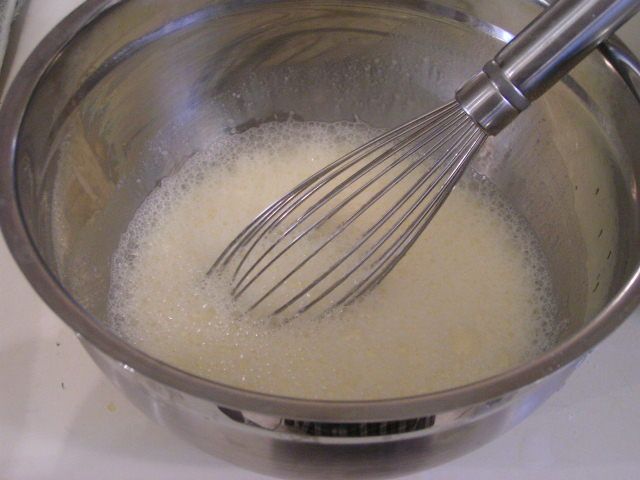 Vigorously whip the egg mixture until it is light and frothy. 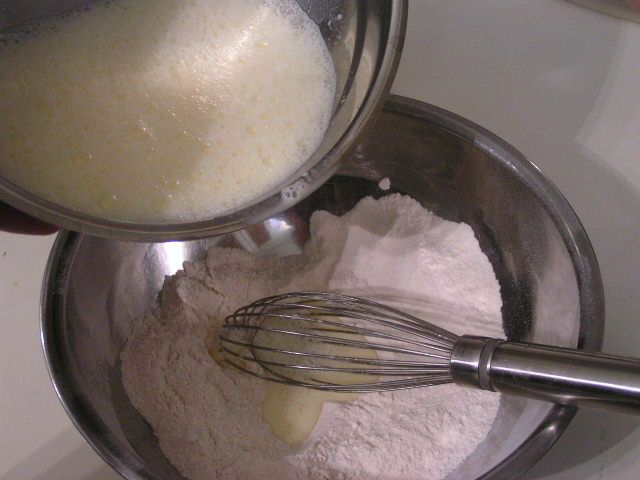 Add whipped egg mixture to flour mixture 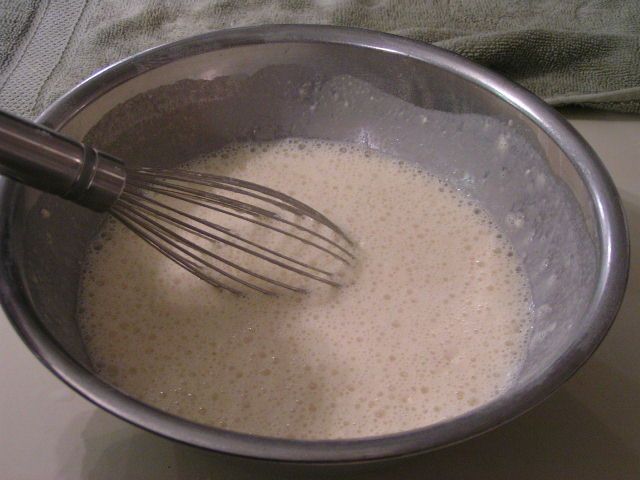 Whip the fire out of the batter! 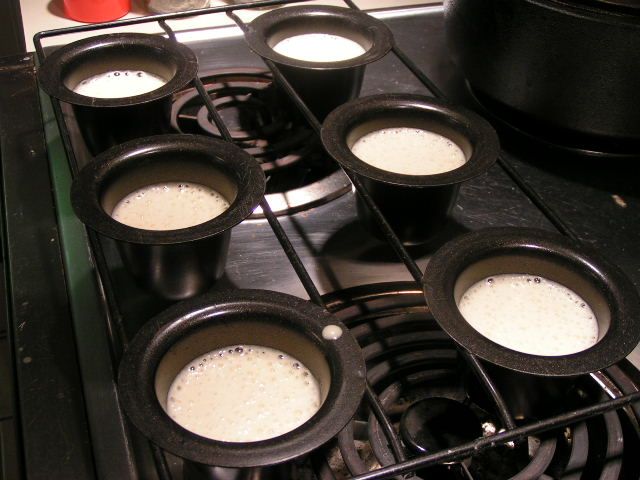 Now here, you can try both methods and see which works best for you. Some people heat the popover pan in the oven for 5 minutes and then pour the batter into the hot cups. Or you can use a cold pan and evenly pour the batter into the greased popover cups 1/3 to 1/2 full. 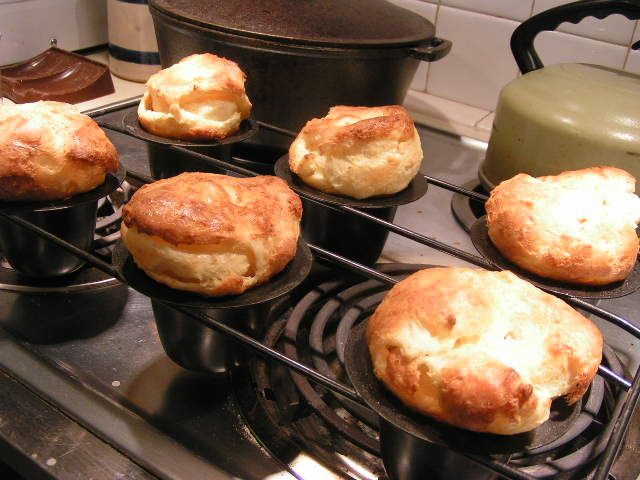 Bake on the center oven rack for 15 minutes and then turn down the oven temp to 350º and contine baking for 20 – 25 minutes until golden brown. Turn off the oven. Using a sharp knife, pierce the top of each popover to allow the steam to escape. Leave in the oven 30 seconds. 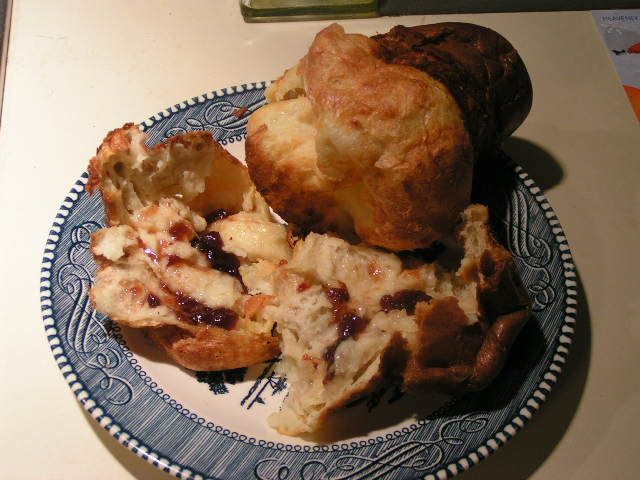 Serve immediately with butter and jam. Great for breakfast. |
|
|
Oklahoma Pastry Cloth™ Company on Facebook
|
|
 |
|
|
The Vintage Kitchen
Thursday, April 7th, 2011
 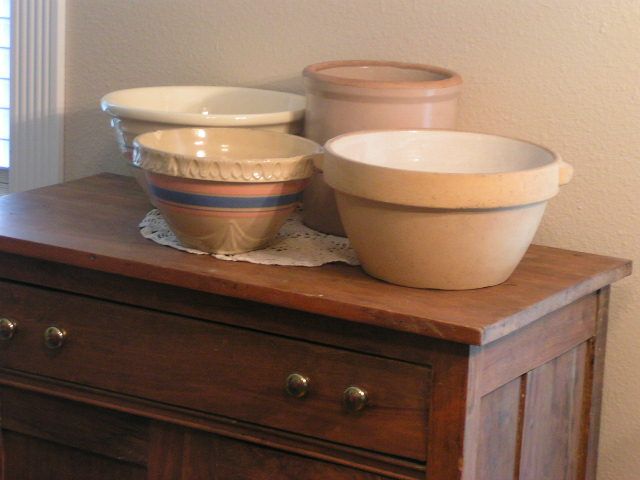 Martha Stewart has a really neat site for women in business where they can share their accomplishments, new products, business ideas, accounting help and countless other types of discussions. One of the women has started a forum about the vintage lifestyle and I decided to join these lovely ladies. Jolene encouraged me to do a post about some of the things that I have from the vintage kitchen. I thought that would be fun and so I grabbed the camera and just started taking pictures. Of course, that led to the vintage lighting and furniture and everything else, so I got a boatload of photos. These are things that have been in my family for generations or that we have picked up along the way. I have used many of the items in my kitchen just for the fun of it and it makes me feel a bond with grandmothers and great-grandmothers as I imagine them standing in their kitchens, hands grasping the very same utensils. Hope you have fun scrolling through yesteryear! 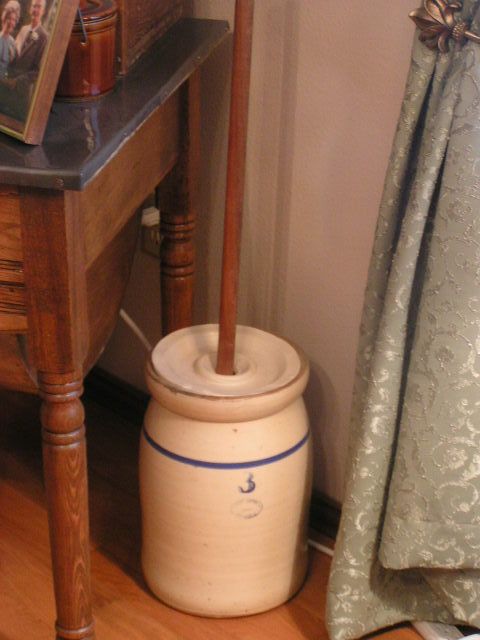 The country kitchen had a butter churn for all that sweet cream carried in from an early morning milking 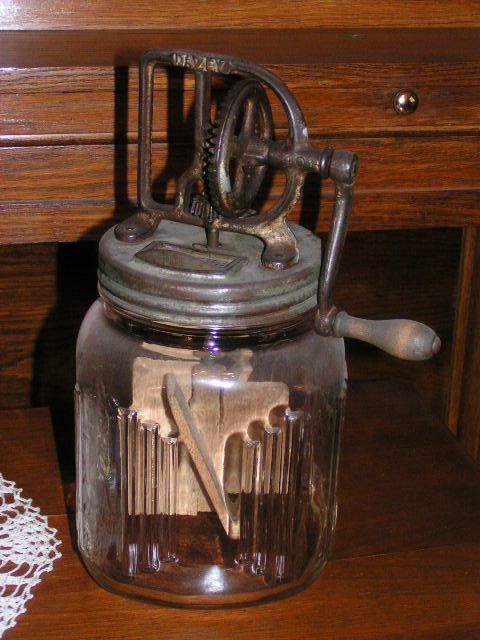 And if they were lucky, they could afford a Daisy Churn with paddles and a handle that turned for faster butter. 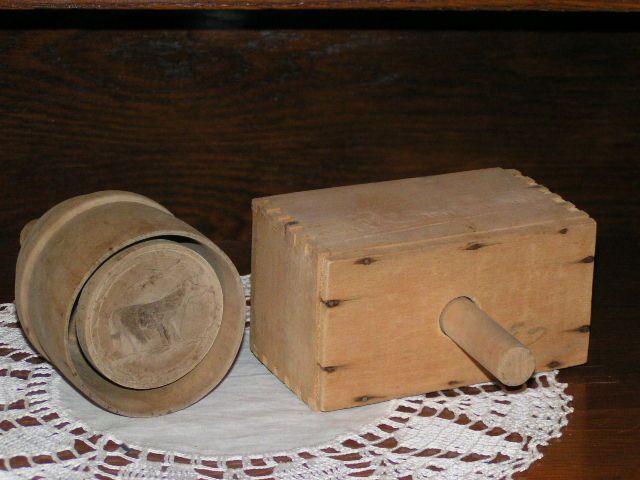 And of course, that butter was put into butter molds to shape into blocks for the table 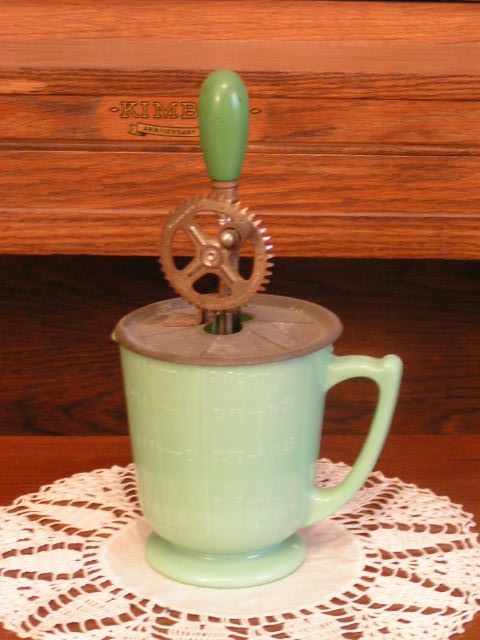 Sometimes the cream was whipped with sugar to top some dessert and a jadite beater bowl with accompanying hand mixer was just the thing for the job. 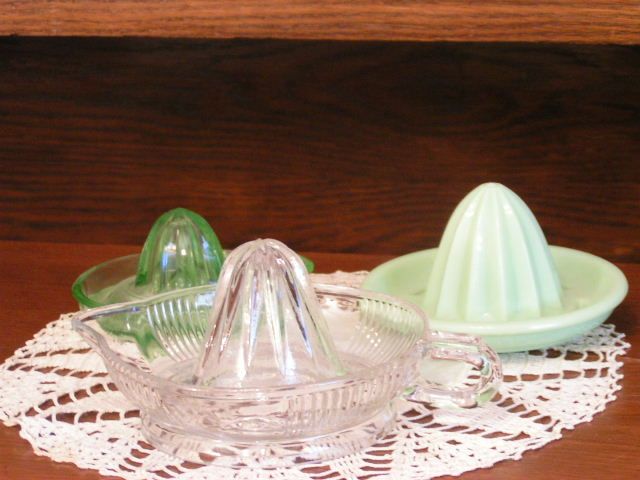 Juicers were a necessity for juicing oranges, lemons and limes. These glass juicers are made of jadite, Vaseline Depression glass, and clear, pressed glass. 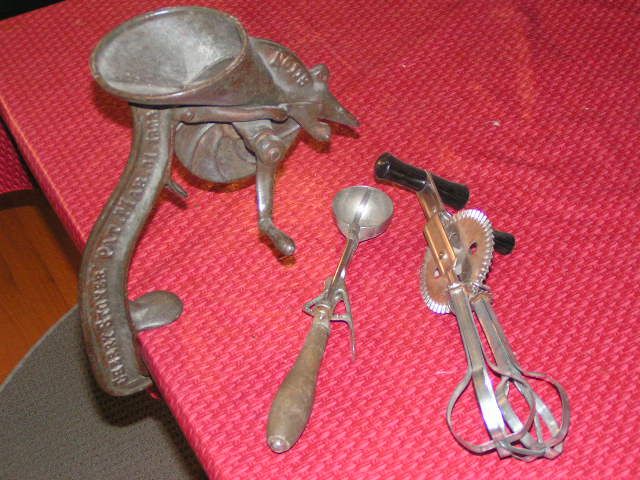 When turned, a cherry pitter clamped to the table, pressed the stones out of fresh cherries that were dropped into the hopper. Ice cream was served with this wooden handled dipper and this hand beater did a number on the eggs! 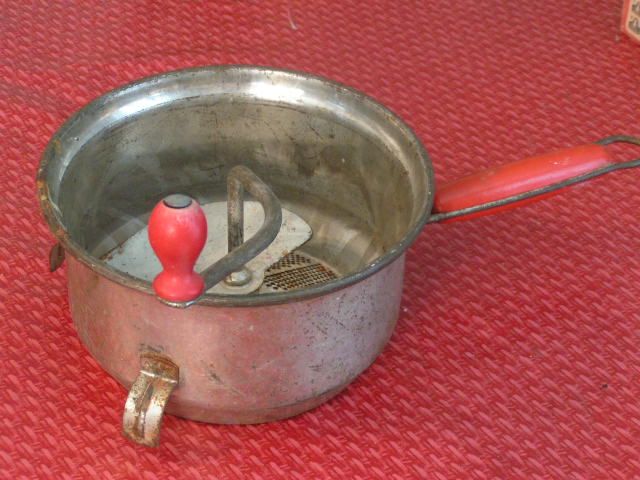 A Foley Food Mill pressed potatoes, peaches, cooked apples and anything else that required mashing. This particular mill was used for pressing ripe persimmons for persimmon pudding. 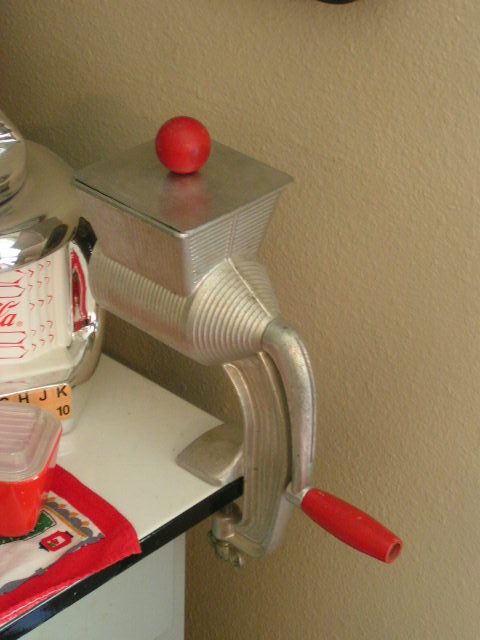 The modern food processor of the day was not electric! Different drums were placed inside the mouth of this utensil depending on whether the cook wanted grated, sliced or zested. The food was fed through the hopper with the turn of the handle. 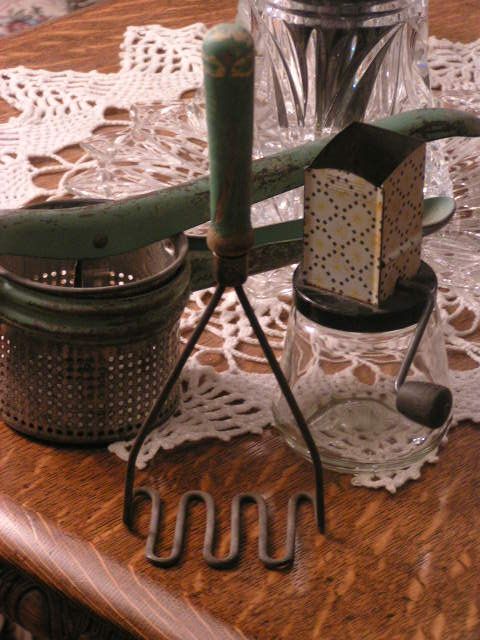 This nut chopper was my grandmother’s and I still use it. You turn the handle and the nuts are grabbed by sharp teeth that cut them and then push them through more blades. The potato ricer to the left is from my husband’s family as is the wooden handled potato masher in the foreground. 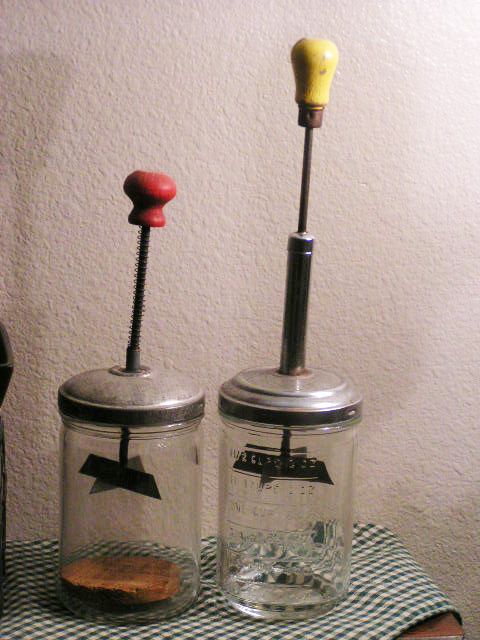 Other choppers were used to dice onions, garlic and other small veggies. 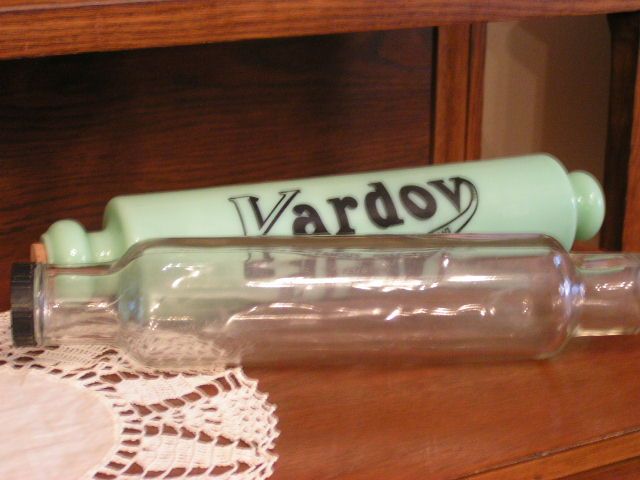 Wooden rolling pins, as today, were common and cherished. But glass rolling pins were not uncommon either. They were great for buttery pastry dough because they were filled with ice and water , capped and provided an icy cold surface to roll out the dough. The clear glass rolling pin was my grandmother’s. The jadite is not antique, but is a replica of an old rolling pin. 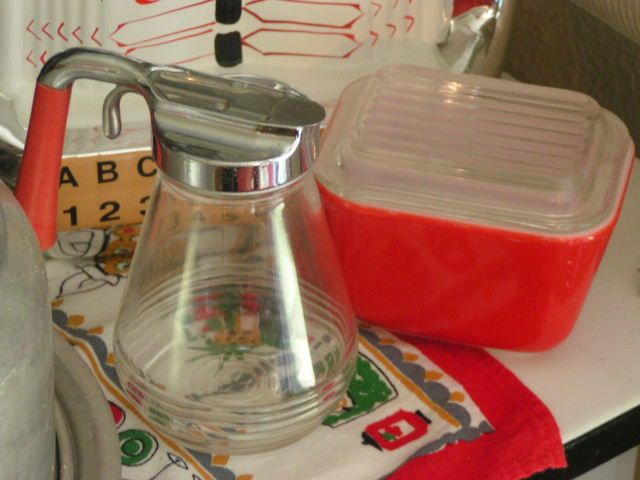 Syrup dispensers haven’t changed much over the years, except for the telltale wooden handle of the vintage ones. A red, glass refrigerator dish brightly colored the refrigerator. 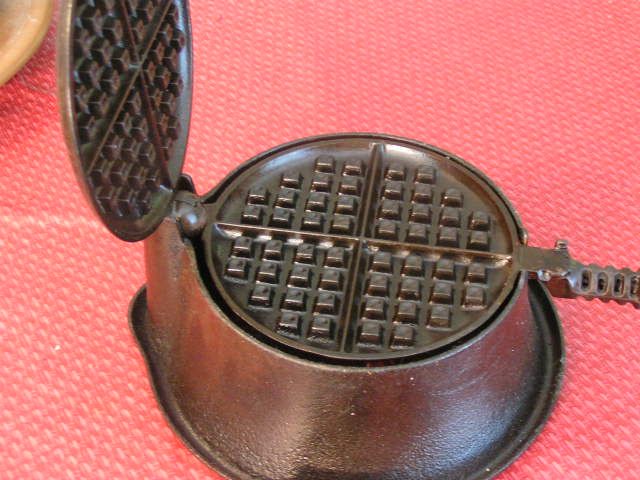 Of course, no household could do without a waffle iron and for the early 20th century, wood cookstove, a Griswold cast iron model was just the ticket with its tall base for perfect waffles. And perfectly seasoned, this was the first “nonstick” cookware! 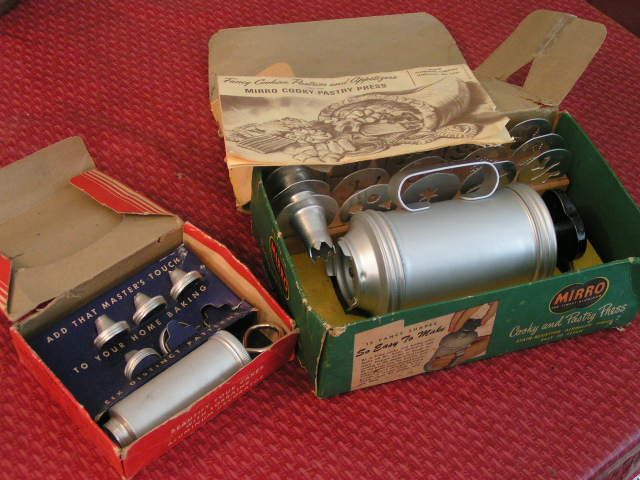 In the ‘50’s Mirro introduced a handy cookie press with all kinds of wonderful shapes to create beautiful cookies. I grew up turning out cookies at Christmas, sprinkling colored sugar balls and sugars on them to decorate. An aluminum cake decorator came in handy too. 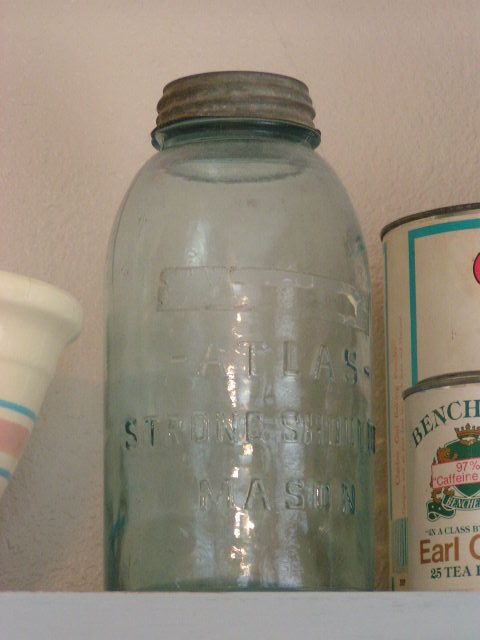 Blue Atlas and Ball canning jars were sealed with zinc lids to hold meats and goodies from the garden. 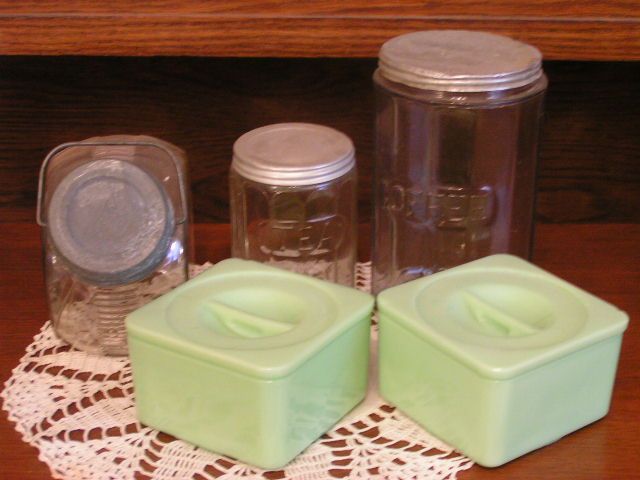 There was no Tupperware or Rubbermaid back then and for the early “ice boxes” and newer electric Frigidaires, glass refrigerator dishes provided safe keeping for leftovers. These are made of Agite Jadite. And for those with special kitchen cabinets first created in Nappanee, Indiana, called Hoosier, tea, coffee and sugar were kept in special glass canisters. 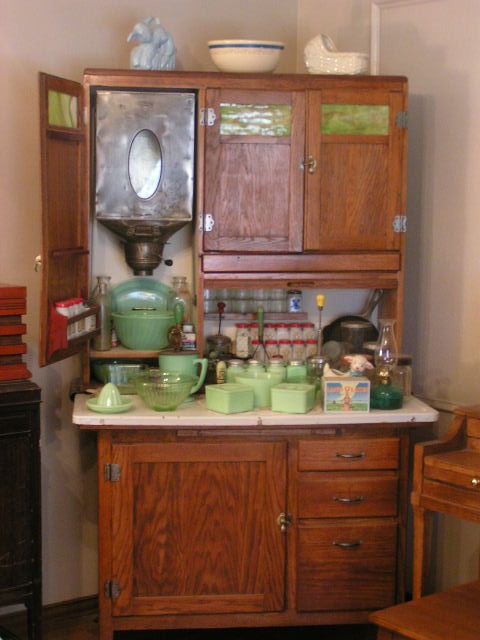 This original Hoosier style cabinet called a Boone Cabinet – circa early 1920’s – was kitchen central for the lucky cook. The large sifter holds an enormous amount of flour and actually pulls out on jointed arms over the floor to make it easier to load the flour. The white jars with red caps are vintage spice jars. The doors are decorated with the original cuts of agite glass and the open cupboard below can be hidden with the tambour door that smoothly rolls down. 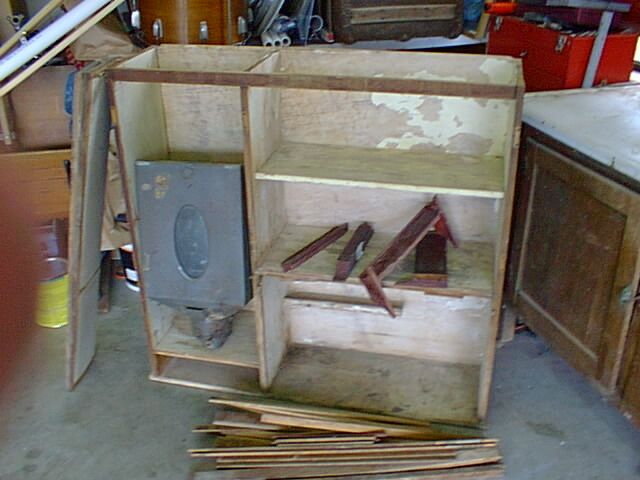 This is what the cabinet looked like before I refinished it and put it back together!! The pile of sticks is the tambour door in pieces. I am rather proud of that project. Mr. Fix-It wasn’t convinced that I could fix it. 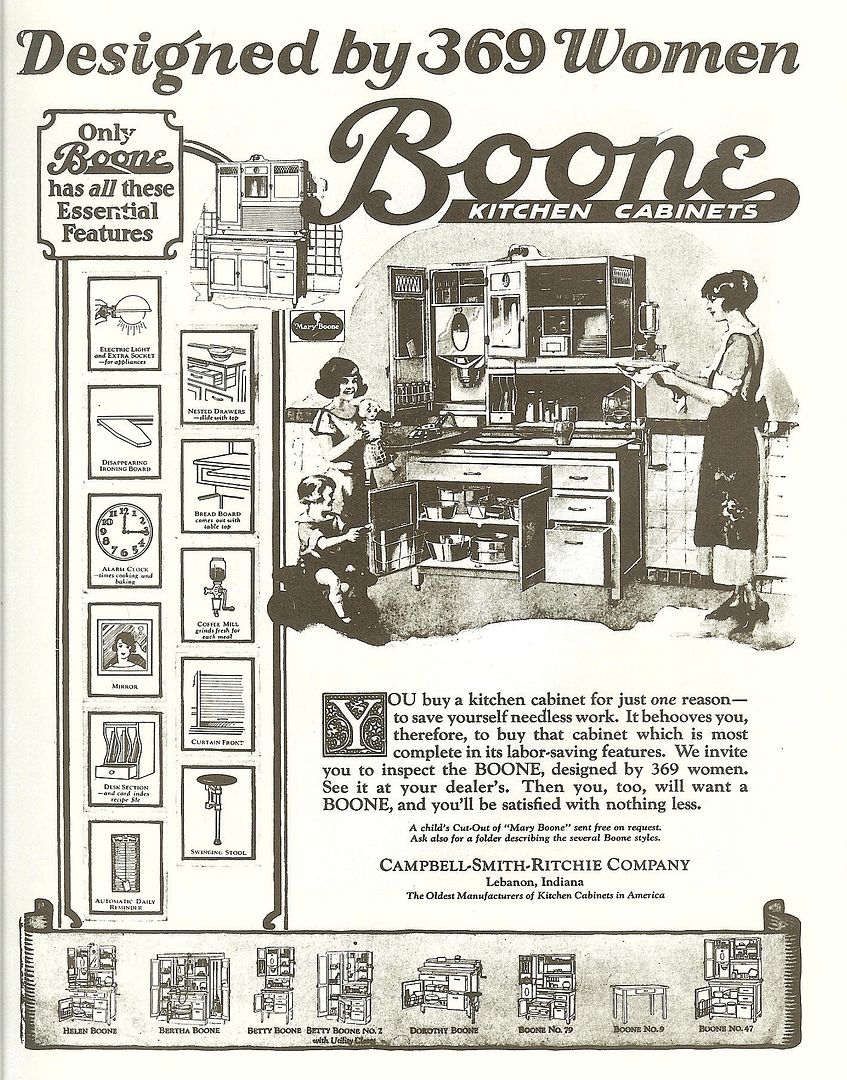 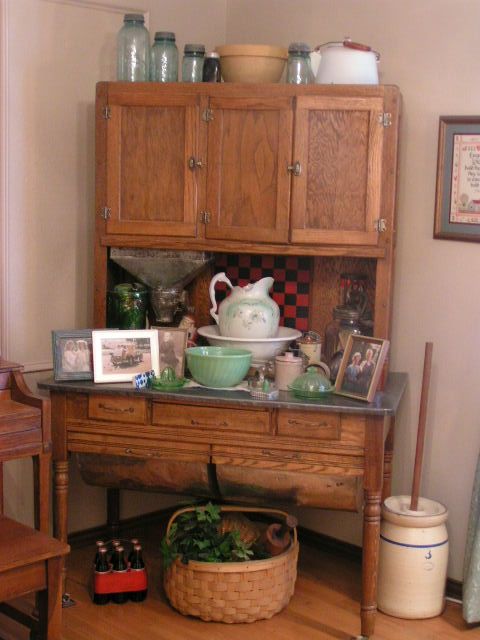 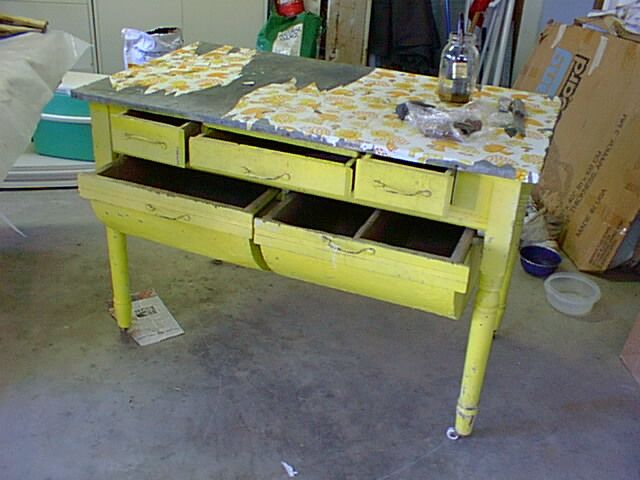 This cabinet was a real pill to refinish too. Somebody had spray-painted it yellow and covered the zinc top with 60’s era psychedelic mushroom contact paper . The turned legs were fun too. A wire brush was all that got the paint out of the cracks. I love to refinish furniture because I love working with wood, but I also enjoy watching the process of going from ugly to beautiful. 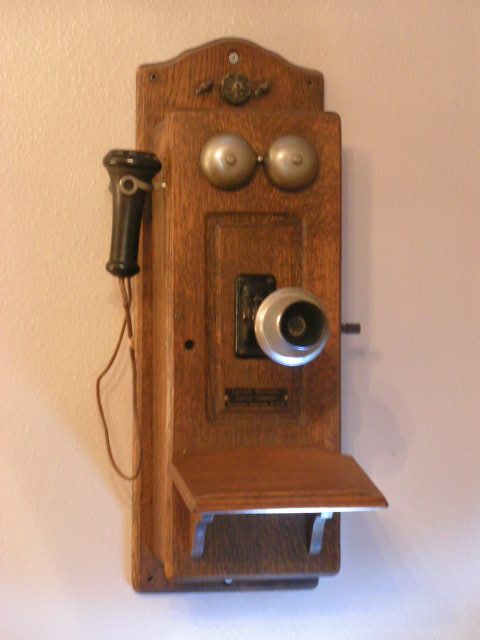 Life changed drastically when people were able to call each other on the new telephones. This one has been in my family since it was my great aunt’s. 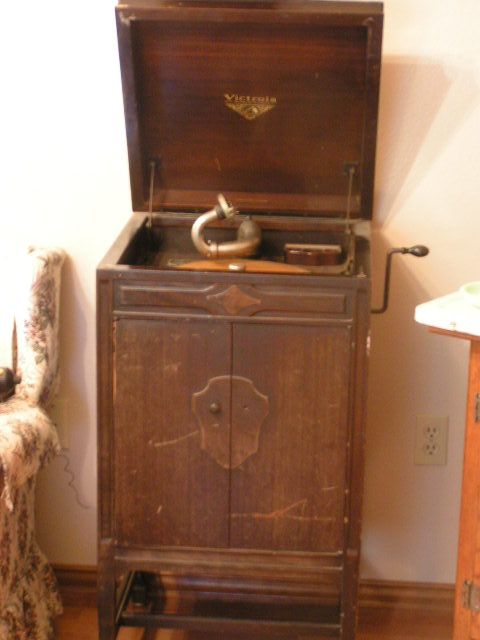 The Victrola entertained the family with music and talking records. This was my great-grandmother’s and is one of my next refinishing projects. 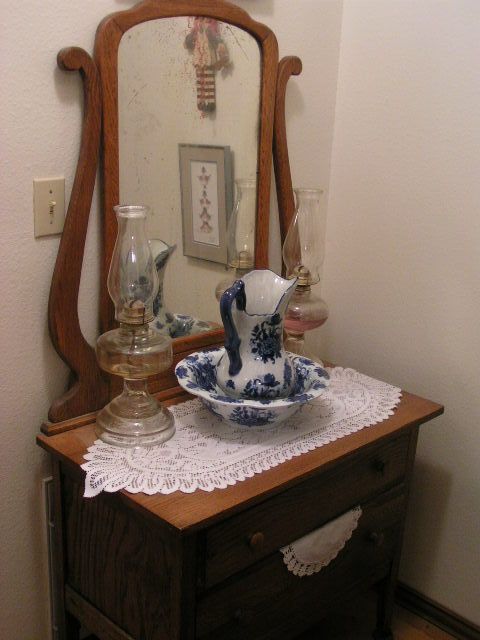 The bowl and pitcher was a must for daily cleansing and kerosene lamps gave light in the evenings. An oak washstand was the precursor to our bathroom vanities. Just a little bit of info: the lamp on the left is from the early 20th century as the wick section is threaded to screw into the bottom half. The one on the right is a newer lamp since the wick section has a threaded ring that screws over the bottom half. 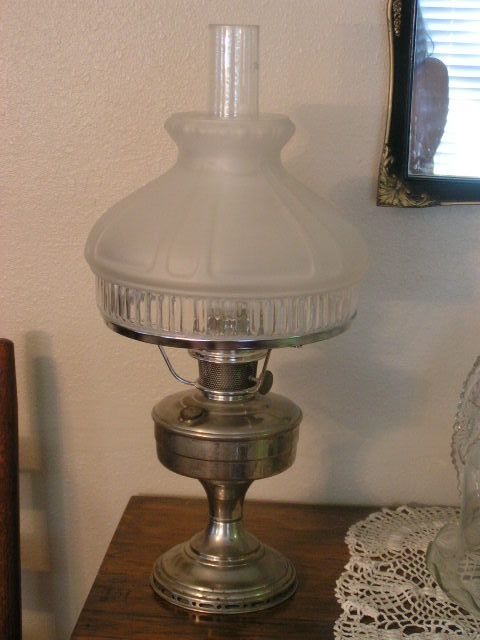 More elegant lamps graced stately homes. This pewter lamp with frosted glass globe is very pretty. 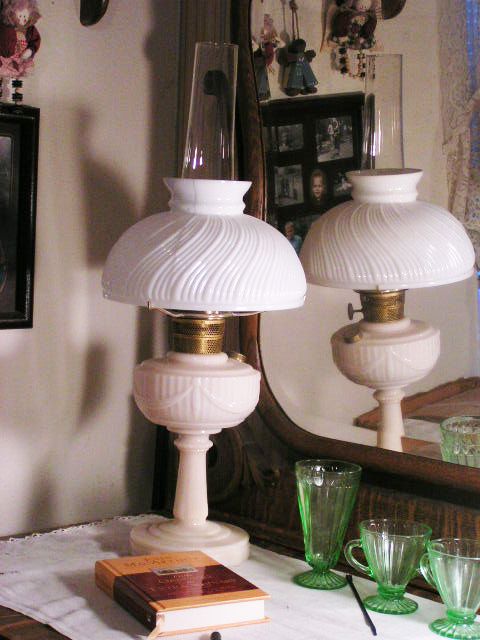 But nothing compared to the towering Lincoln Drape lamp. It was elegance deluxe and is made of agite glass all the way to the base. This was Mr. Fix-It’s mother’s. And so there you have a little bit of history in pictures. I hope you enjoyed the tour.  |
|
Oklahoma Pastry Cloth™ Company on Facebook
|
 |
You Rip What You Sew
Wednesday, March 17th, 2010

|

|
 |
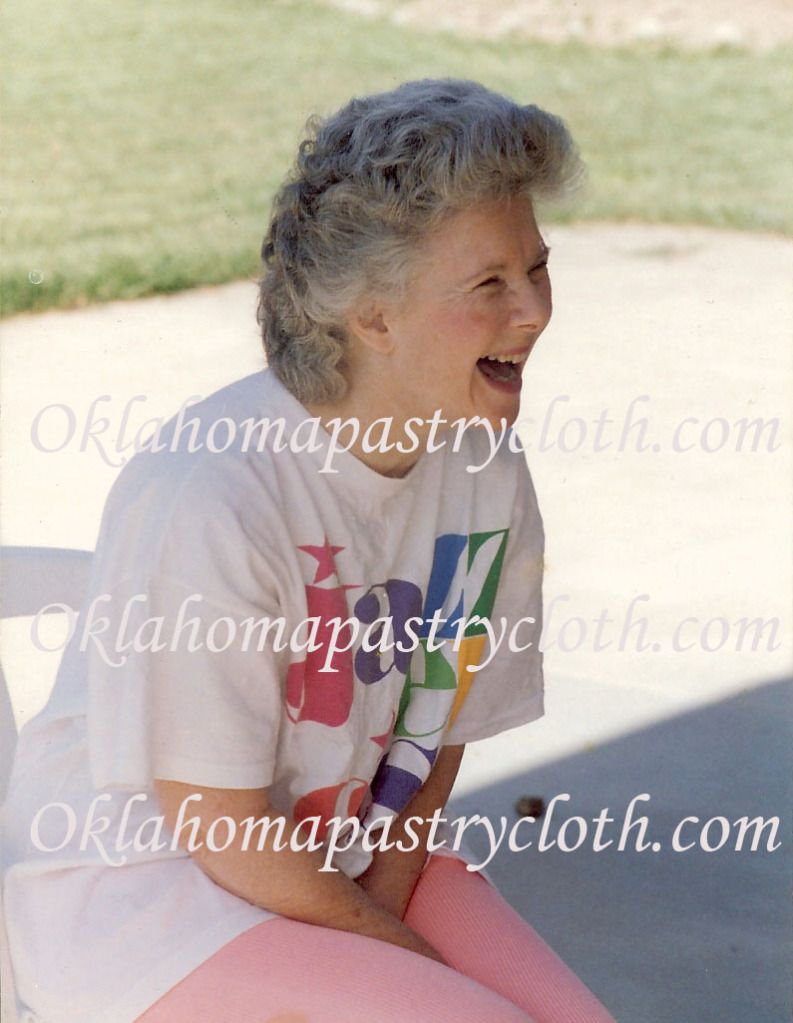
| Today is my mother’s birthday. She is 79 years old and among the many things she has taught us four girls and 6 grandchildren, she has proved that age is all about attitude. My mother is a member of Jazzercise, which she attends 3 days a week, and participates in national Jazzercise activities when they are close by. However, the most valuable lesson that she has given us is that joy is an inner peace in Jesus Christ that transcends circumstance and emotion. She is the picture of joy and her laughter is infectious even in the most serious of situations. |
 |
|
I have written before about the traditions that are handed down in my family and I have usually shared those traditions passed on from my father’s branches of the family tree. There are also stories and skills from my mother’s side and there is one skill, in particular, that my mother passed on to us – the skill of sewing.
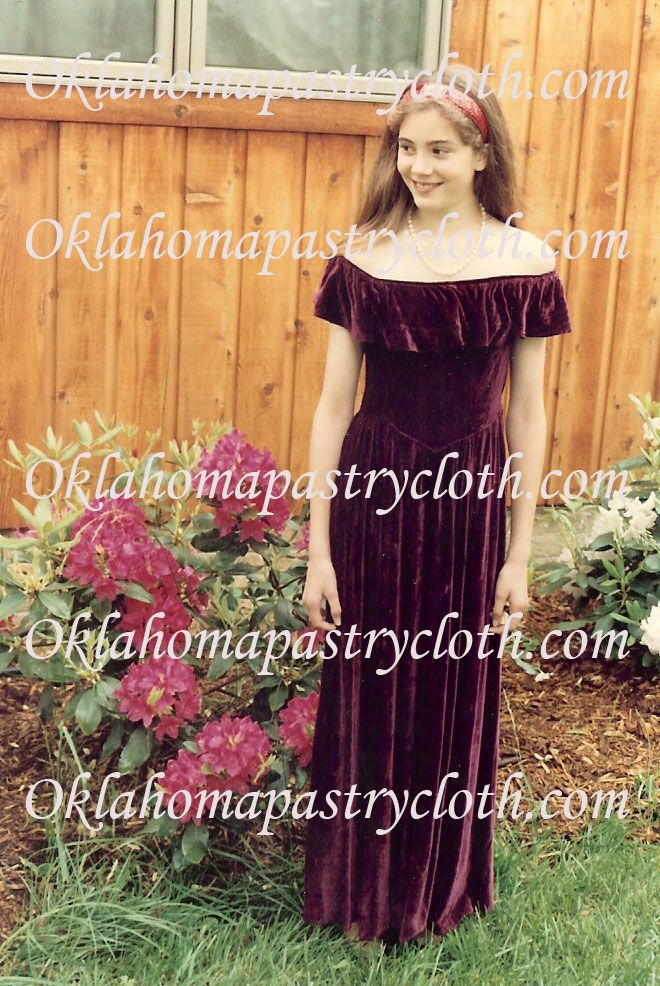
My mother is a seamstress deluxe. She has made my father suit coats, shirts, robes, etc. and made most of the clothes that we girls wore until we were old enough to make our own. Sixty years ago, she made her wedding dress. She has made quilts for all family members and knits and crochets to boot. Anybody remember those loosely knitted or crocheted vests of the 60’s and 70’s that were worn over a long-sleeved shirt and with a short, short skirt? Well, I have one. I still have it. My mom made it and I wore it with pride! I remember one shirt and short set that she made for the three of us older girls. The shorts were red and the tops were red gingham with appliqued cherries on the left bodice. I think that I would have been in around the third grade! Do I dare admit that this would have been in the 60’s too? We looked like we should have been the characters in a children’s sleuth series! Mom shared a few of her thoughts on plying the needle and I am posting them here for your enjoyment: “Sewing is something I love to do for those I love. When your Dad and I were first married, I found some fabric printed with a design that looked like some of the little German villages we both loved when we were dating. I got enough of it to make him a shirt for his birthday. My grandmother Allen sewed dresses for me from the time I was a little girl. She made me my first long dress, a pink organdy one I wore when I was crowned “Queen of the 4th Grade.” My mother also sewed for me. One day I came home from high school and she was down on her hands and knees in the living room surrounded by beautiful wine-colored velvet. I said, “Oh, what a beautiful new rug!” I didn’t realize that she was cutting out a long dress for me to wear to a dance. When I was about 9 years old, I decided to make some napkins for my mother. I pulled the threads on the edges to make a fringe and I hand appliqued a design of cherries on the corner of each. I wanted them to be a surprise, so I stayed in my bedroom to work on them. One day I was working on one and suddenly thought of a question I wanted to ask Mother, so I just walked into the kitchen with the napkin in my hand. That kind of ruined the “surprise”, but she loved the fact that I had thought of and made them all by myself. Sewing has been handed down in our family from grandmother, mother to daughter to granddaughters and grandson I’ve enjoyed teaching not only my daughters and granddaughters and my grandson to sew, but also our Japanese friends. I helped Toshie make herself a cape and showed another Japanese friend how to alter her jeans so they fit her tiny waist. It’s great to be able to pass on a skill to the next generation.” I still have the pillow that my son, at age 8 and the one grandson, made with my mother’s patient hand guiding him on the sewing machine. It made such an impression on him that he hand stitched another one and painted ‘MOM’ on the corner. I still have that one too. Oh, and he is now 26 years old! I’m sure that he loves my sharing this with you! The wine-colored velvet dress that my mother wore to the dance is still around as well. One of the granddaughters is now making the costumes for college video projects. And the tradition goes on. |
 |
|
A Granddaugther Plays Dress-up In The Wine-Colored Gown |
|
My first project involved a shift – remember shifts – you know, those dresses with all of five seams (one on each side, one down the back and one at each shoulder strap and two darts?) They could be worn with or without a blouse underneath and they were about as flattering as a flour sack that had a hole cut in the top for the head to go through. And just to add a final touch of ugly, one accessorized with a silver chain belt that dropped just to the top of the hipbone and left about a foot of chain to dangle and clink-clink with each stride. It was 1967 don’t you know?! Go-Go boots would have been the piece-de-resistance, but I wasn’t allowed to have those white, zippered treasures. I remember that the material of this dress was white with brightly colored flat, cutout-style flowers with round middles. I mean bright. Red, Yellow, Royal Blue, Green Green. Could I have tried any harder to destroy any semblance of taste that my parents had attempted to pass on to me? Hyacinth Bucket would have died. I am constantly reminded of this dress because my dear grandmother, who made beautiful quilts, used the scraps of the dresses that we made, to create all manner of fine works of art. I have a flower garden quilt that she lovingly pieced, by incorporating many scraps of my first attempt at dressmaking. These scraps were also used for my first try at hand-piecing a quilt, guided by my grandmother, when I was in my teens. |
 |
|
A glimpse at the material from my first dress, put into my first attempt at a bowtie quilt |
|
I am happy to say that my sewing skills increased exponentially from that first project and my favorite machine is still my old Kenmore 15814300, a gift from my parents when I left for college in 1972. They just don’t make them like that anymore. It will sew through three layers of canvas without a single huff or puff. I still have many of my old patterns from the days of bell bottoms and mini skirts and I am so pleased to also have some of the patterns that were my grandmother’s – my mother’s mom. Of those patterns from the past, a few are of the old aprons that my grandmother always wore. She made them for herself and I remember her ‘clothes pin’ apron that she would wear in the backyard as she hung out clothes to dry on the line. It is from these patterns that I am very excited to introduce a new item that is being offered on the shopping page, produced by a lovely young entrepreneur who’s first goal is to purchase a new sewing machine! She has taken my grandmother’s patterns and put her own artistic skills to color and design and has come up with some beautiful aprons. The aprons will be debuted at the Taste Of Home Cooking Show in Shawnee, Oklahoma on April 9th. They will then be available online at the Shopping Page |
 Some of my grandmother’s patterns |
 A new Spring apron from a vintage design! |
| So Mom, as you see, another generation and even another family tree is carrying on the tradition. Happy Birthday and thank you for all you’ve given us! |

|

|
 |

 Homestead Revival
 Paratus Familia
 Rural Revolution