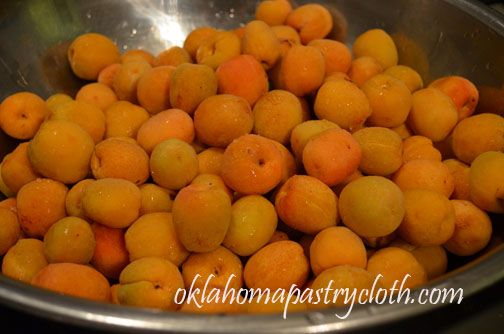
  Well, it appears that my internet is totally hosed for who-knows-how-long. It has been down and I have waited patiently for a reawakening, only to find out that the company is down all the way into Kansas!! Somebody cut a cable. Dear Mr. Fix-It got me hooked into a mobile unit and so I get to write a really fast post!! Today, the subject is “Apricots”. Growing up, I loved dried apricots. We kids would get a bag and devour them instead of candy. I still love them today and I still call them what we used to call them, “Dried Ears”. Seeing my cousin recently, she affirmed that THEY call them dried ears as well! You can’t deny that dried apricots look like something some faraway, cannibal tribe collected from unsuspecting captives, not to mention that which Van Gogh sent to his lady love. OK, so now I’ve really made them appetizing, eh? Apricots are a member of the same family as peaches, plums, apples and pears but are most closely associated with plums. They grew wild in China as long ago as 2000 BC and it was the Chinese, through the silk and spice trade, that brought the fruit to the Middle East and Mediterranean countries. Romans made the apricot trees part of their culture around 100 BC as did the Greeks who called them, “the golden eggs of the sun”. By the Middle Ages, apricots were being cultivated throughout Europe. The Spanish brought the fruit trees to the New World, first planting in Mexico and later in what is today’s California, which is the leading producer in our country today. Because of our climate in Oklahoma, apricot trees produce quite well and quite prolifically. If you remember from the past post on the bunnies, Sir Flying Ace’s dog found those bunnies in an underground nest beneath his apricot tree. Last month, I joyfully emptied that tree of as many of the jewels as I could reach and then Sir Flying Ace brought me another sack that he had gathered. Mr. Fix-It and I have a young apricot tree, but it will not be ready to produce for another two years. From Sir Flying Ace, I got enough apricots to make some amazing jam, some baby food for the grandbaby and a goodly amount of dehydrated halves for snacks and dried apricot fried pies. I thought I’d give a few pictures of what that included. Apricot Jam 5 exact cups diced fruit (about 3-1/2 lb. fully ripe apricots) 1/4 cup fresh lemon juice 7 cups sugar, measured exactly into a separate bowl 1 box SURE-JELL Fruit Pectin 1/2tsp. butter or margarine 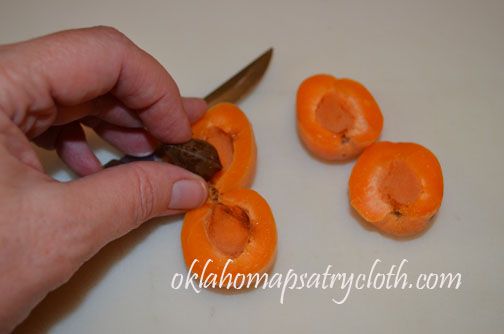 Apricots are easy, easy to prepare. They are used – minus the pit – skin and all. All you have to do is make a cut all the way around the fruit, to the pit, and then pull the halves away to lift out the pit. The pit doesn’t even stick. 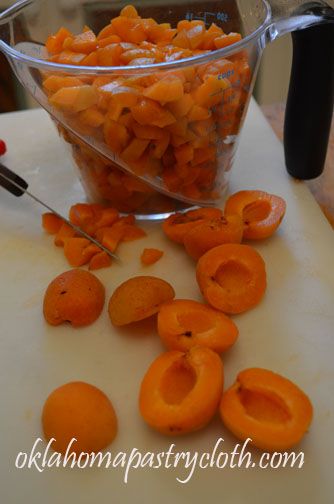 I use a food processor to chop my apricots. I use the pulse feature so that I don’t liquify them and make the pieces too small. 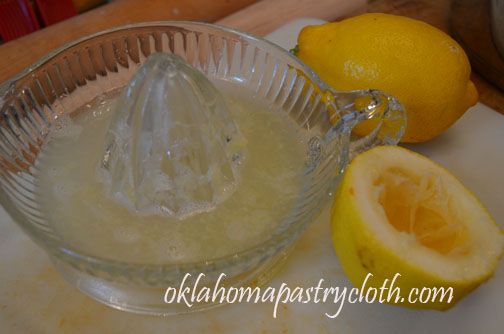 The chopped apricots are put into a large pot with lemon juice and the SureJel is sprinkled onto the fruit and stirred in until well dissolved. The butter is then added to keep frothing down.  On medium-high to high heat, the fruit is brought to a rolling boil. At this point, the sugar is added consistently and quickly as you stir. I use a wire whisk to stir the jam as I pour in the sugar. It is important to have the sugar measured out ahead of time because you will not have time to do that once the fruit has started boiling. Anyway, once the sugar is stirred in well, bring the jam back to a rolling boil and boil for one minute.  After one minute of boiling, remove the pot from heat and skim any froth off of the top with a spoon. You can put the froth into a bowl and use for jam yourself. Removing the froth just makes the jars prettier. 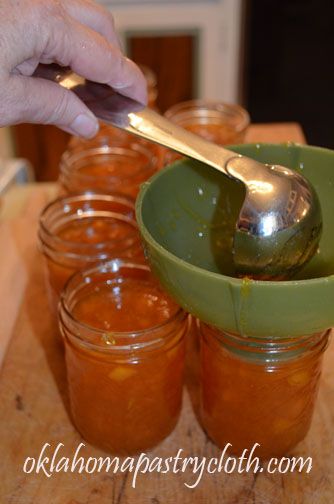 Ladle the hot jam into sterilized jelly jars to 1/2″ head space. 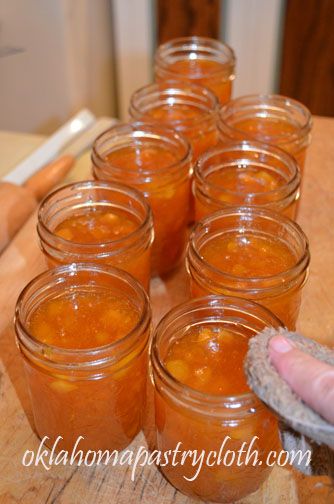 Wipe rims of jars with a warm, wet cloth to remove any drips or oils from your hands. 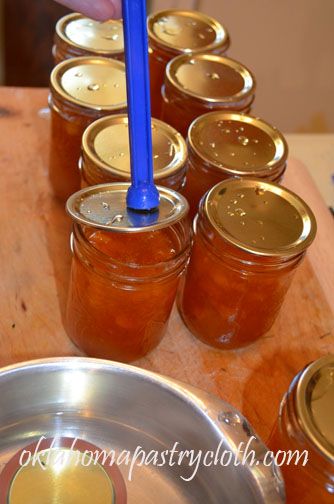 Place lids that have been warming in hot water onto the jars. Add rings and tighten and then back them off a smidge. 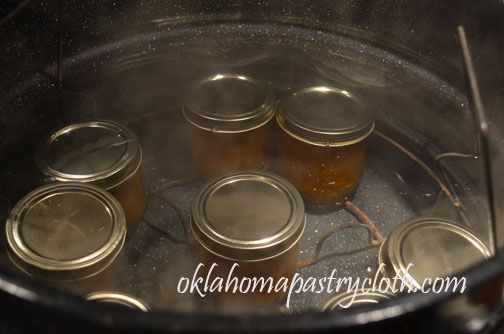 Place in a waterbath canner of warm water and process for 15 minutes.  I also dehydrated a bunch of apricot halves. First, I cut the halves into a very large bowl and tossed them with a couple of tablespoons of Fruit Fresh. The apricots are not skinned. 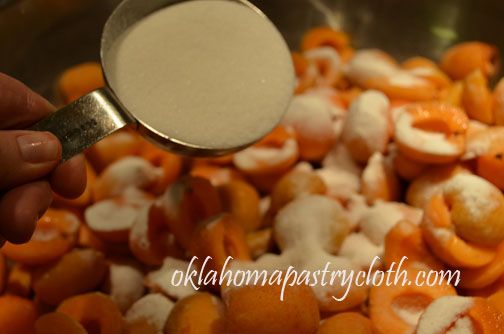 I then toss about 1/2 cup of sugar into approximately two gallons of apricot halves because I like for there to be a little bit of a glaze when they are dried. 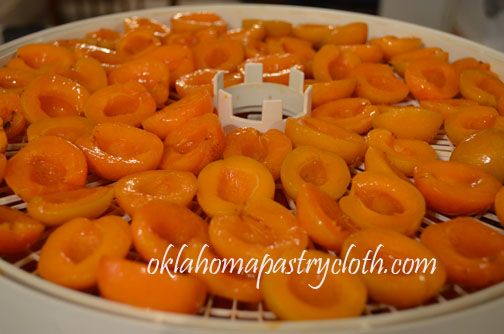 The halves are placed on the dehydrator trays. The trays have been sprayed with olive oil to keep the apricots from sticking. 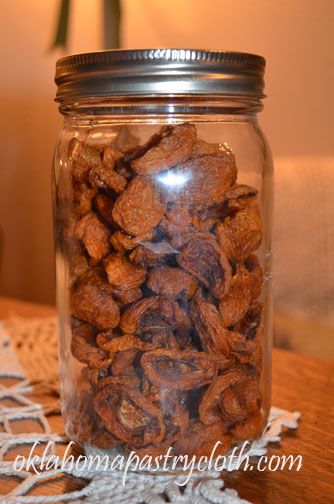 I store the dried apricots in quart jars that have been vacuum sealed with a FoodSaver.  |
|
| |
|
Oklahoma Pastry Cloth™ Company on Facebook
|
|
 |
|
|
|
Posts Tagged ‘food processing’
Dried Ears
Tuesday, July 31st, 2012
Adventures In Canning
Tuesday, May 1st, 2012
  I like to think of myself as “Low-maintenance”. It doesn’t sound all that spectacular, I know. Mr. Fix-It says that he considers me to be “pretty low maintenance”. I think he appreciates that I don’t beg him for the latest $250 shoes or a bigger house with swimming pool and hot tub.. I’m positive he was relieved when I liked a Nissan Versa rather than a Mercedes (as if we could afford a Mercedes!). And it’s been a really, really, really long time since I’ve gotten a piece of jewelry. I don’t wear it and so I don’t care about it. I’m at the age where I’ve finally figured out that “you can’t take it with you”, and so practical and useful in the here and now is more on my wish list than gorgeous and flashy. Out here in the country, the squirrels, cows and bunny rabbits could care less whether any of us has a diamond or a cubic zirconia. I guess what I’m trying to say is that I get more excited over kitchen items then I do a fur coat! So, you can understand how excited I’ve gotten over a new product introduced to me by friend and reader, Shari. As an avid canner and as a canning teacher, any new-fangled canning item is a treat for me. When I learned about the Tattler Reusable Lids, I just had to try them. These lids can be used over and over instead of tossing them as one must do with traditional lids after use. The website offers free shipping, which is awesome, and sometimes there is a sale – which is how I ordered mine! I have been waiting until my first crop – the strawberries – came in to try the lids out and so this past weekend’s pick of 8 quarts of strawberries gave me the opportunity. 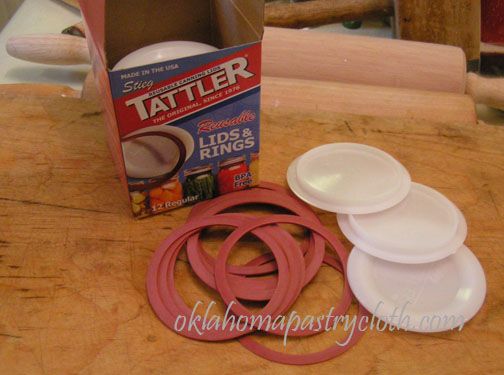 A box of 12 reusable lids includes 12 plastic lids and 12 rubber rings. These items are BPA free. 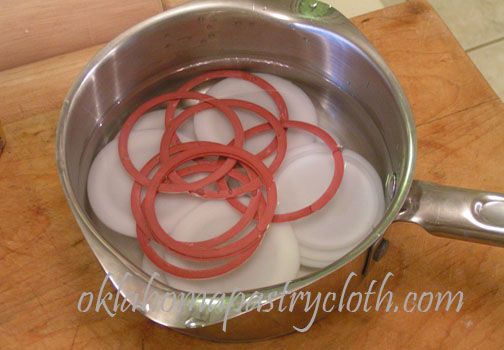 The lids and the rubber rings are prepared in hot water (do not boil) just like the traditional metal lids. 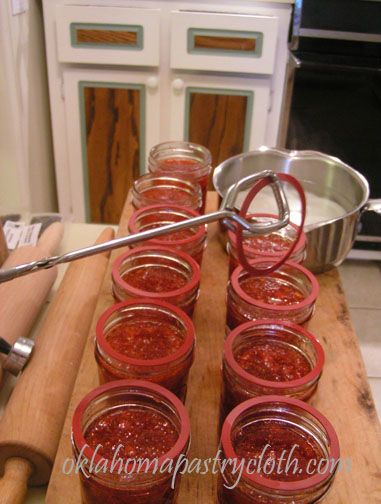 After washing the rims of filled jars, the rubber rings are placed onto the rims. 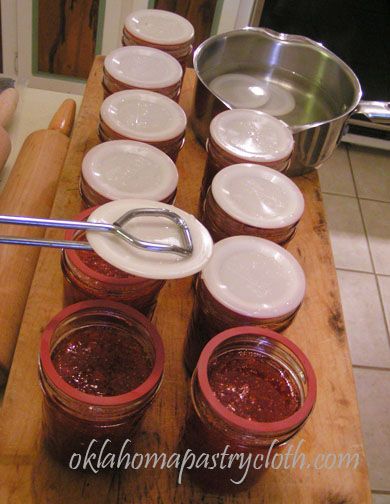 Then the lids are carefully placed over the rubber gaskets. 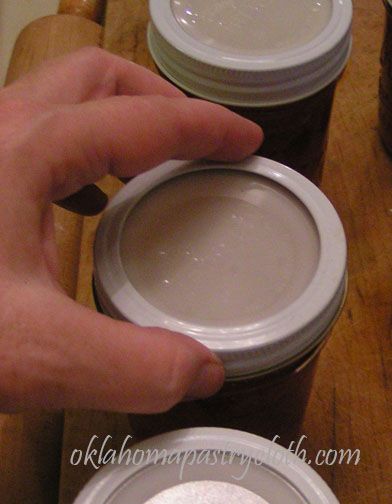 Metal rings are screwed onto the jars but not tightened. Using one finger to press onto the lid, finger tighten the ring. (I had to use one hand to take the picture so no finger on the lid!!)  Jars are processed exactly as jars with the traditional lids. Since this is strawberry jam, I waterbathed the jars for 15 minutes. When jars are removed, the lids are immediately tightened. When the jars have cooled completely, remove the metal rings and pull gently on the lids to make sure they have sealed. You can either store with the metal ring reattached or without it. To use the food in a jar, a dull table knife is gently inserted between the rubber gasket and the glass rim to pry up the lid. Once used, just wash the lid and rubber ring in warm, soapy water and store for next time. Reusable! Cool, huh?  |
|
|
Oklahoma Pastry Cloth™ Company on Facebook
|
|
 |
|
|
Canning Turkey
Friday, February 24th, 2012
 Mr. Fix-It’s birthday was yesterday and I was all ready to surprise him with tickets to a Thunders basketball game. I was going to go all out with a Beef Wellington complete with deuxelles! (Just had to throw that in to mess with you all!) 🙂 And then….he got called out on big job. I guess people don’t matter, but let a computer situation arise and the whole world comes to a screeching halt. So I got him the two movies, “Flywheel” and “Courageous” with one of those buckets of Orville Redenbacher’s Movie Popcorn. We’ll have a movie night this weekend! Just as good as any ol’ Thunders game, wouldn’t you say? 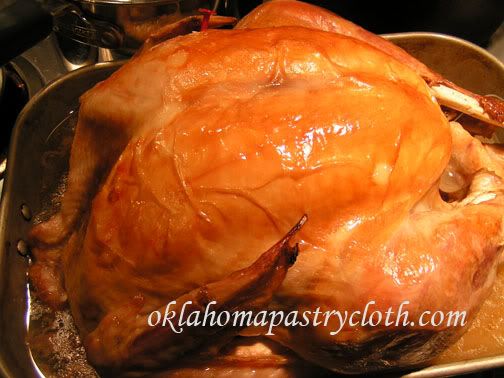 I was going through pictures and found a couple that I forgot to post awhile back and so I thought that I would take the opportunity to put them up. I don’t know about you, but we eat turkey more than just at Thanksgiving. We love Turkey, but with fewer people in the house, a big Turkey could go to waste. So, I rectify that problem by canning the leftovers. In a past post, I showed you how to can chicken by using the raw pack method. The chicken cooks in the processing. However, already cooked meat may be canned as well. The steps are the same as in this post. I bone my turkey and cut the pieces into nice chunks and place the meat into jars to about a 3/4″ head space. I then mix the juices from the cooked turkey with water and chicken bouillon to make a broth, or you can mix the drippings with canned chicken stock as well. I pour that over the meat in each jar to 1/2″ from the top of the jar, wipe the rims, add the lids that have been warming in hot water, add the rings and adjust and process in a pressure canner at 10 lbs pressure for 75 minutes. 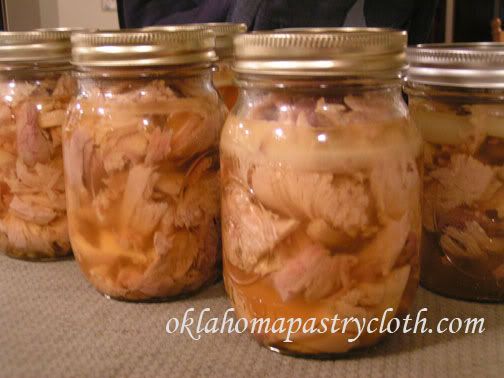 Canned turkey makes the most amazing pot pies. I just make a crust to lie a pie pan, spread the turkey on the bottom (reserve the liquid for the sauce), add some potato chunks that have been parboiled with some chopped carrots (to make sure they cook all the way through in the baking) and some frozen peas, and cover with a sauce mixture of 1 can cream of chicken soup, 1 pouch McCormick’s turkey gravy mix and two to two and a half cups of liquid combining the liquid from the jar with water. I put a pie crust over that, flute it, slice the top in a few places to let air escape and bake at 400º for one hour or until golden brown and bubbly. Yummy!!  |
|
|
Oklahoma Pastry Cloth™ Company on Facebook
|
|
 |
|
|
Canning Citrus Fruits
Monday, January 23rd, 2012
 Boy, today has been quite appropriate for thinking about canning fruits. We are so dry in Oklahoma that I’m having to put a humidifier near my piano to keep the soundboard from cracking!! And today, nearly 50 mph winds stirred up loose dirt from drought stricken fields, sending it airborn, dimming the sun and leaving trees and a horizon with a snow flurry like appearance. It’s pretty certain that a boatload of Okies are thinking back to the days when fruits, vegetables and meats, in glass canning jars processessed when items were in season or available at the stores, were their only defense against starvation during the Dust Bowl days. A very interesting website about the kitchens of that time and of many other eras is The Historic Cooking School where Rena has kindly linked to my posts on vintage cooking. In talking with my dad about those times, he remembers his family buying grapefruit in canning jars and eating this citrus delight because it was not readily available fresh. My family has always been overly fond of oranges, tangerines and grapefruits and when I was growing up we had relatives along the Indian River in Florida which guaranteed us succulent fruit. This year, for Christmas, my parents surprised me with the most wonderful variety of white and ruby red grapefruits, navel oranges and tangerines. There were so many grapefruits that I decided that I had better do something with some of them before they spoiled. In doing research about the history of the canning process, I found this really neat site called Tasteful Inventions where I learned that nearly 250 years ago a French man named Nicolas Appert, encouraged by a 12,000 franc prize issued by the government, introduced his 14-year-in-the-making canning discovery as a way to preserve food for Napolean’s army because, “An army marches on it’s stomach.” Napolean awarded Monsieur Appert the money in 1810. So folks, canning has been around for a long time!!! C’est bon!! I have to say that when citrus fruits are canned, the taste is changed somewhat. Adding sugar or sweetened juices helps to reduce these changes and serving ice cold makes a difference too. Also, it is very important to remove all of the white pulp from any fruit prior to canning because the pulp adds a bitterness that you don’t want. When doing grapefruit, I do not peel and section, but rather slice and use a grapefruit knife to remove sections that easily leaves any pulp behind. Oranges and tangerines are much easier than grapefruits to deal with when peeled. Note: I used half pint jars for single servings, but pints and quarts are fine too. Directions: Place your jars into water to boil for sterilization or run through the dishwasher on sanitize cycle. Place lids into a saucepan and cover with water. Bring to almost a boil and then keep heated. 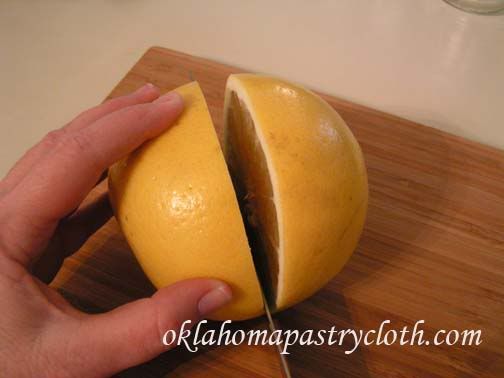 Slice the grapefruits. I used a total of 6 very large grapefruits, both white and ruby red, for this particular project and got 6 half pints. 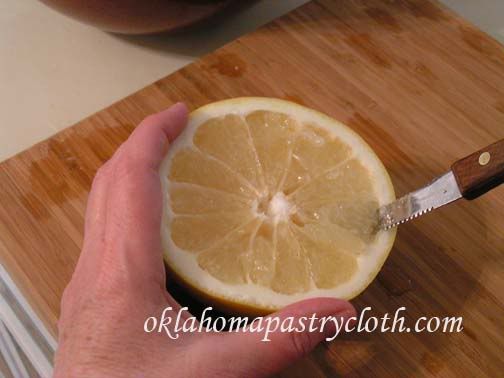 Using a grapefruit knife, which is serrated and curved, cut around each section moving from section to section. 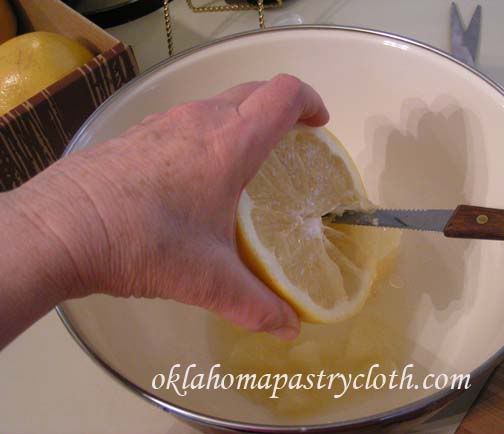 Scoop the grapefruit sections into a large bowl. 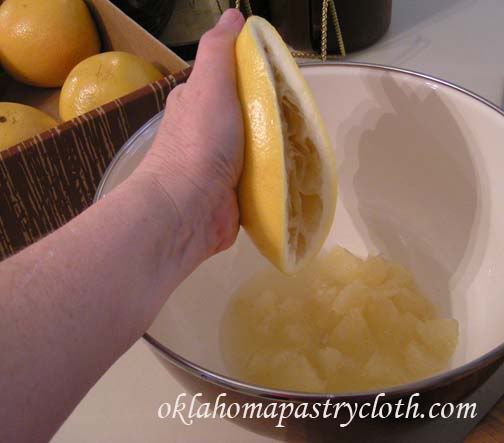 Squeeze grapefruit juice from each half into the bowl 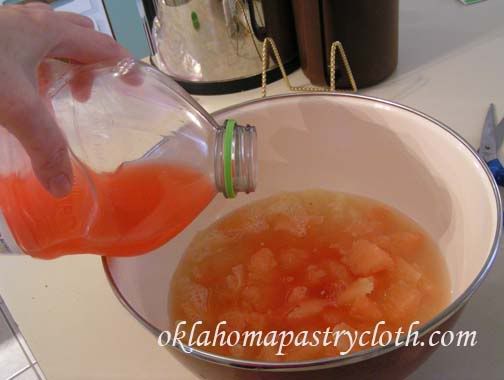 You can make a light syrup with water and sugar, but I like to add real juice that has been naturally sweetened. Any grapefruit juice sweetened with apple juice and white grape juice works great. Add enough juice to cover the fruit.  Using a canning funnel, evenly divide pulp and juice between jars, filling to a 1/2″ headspace. 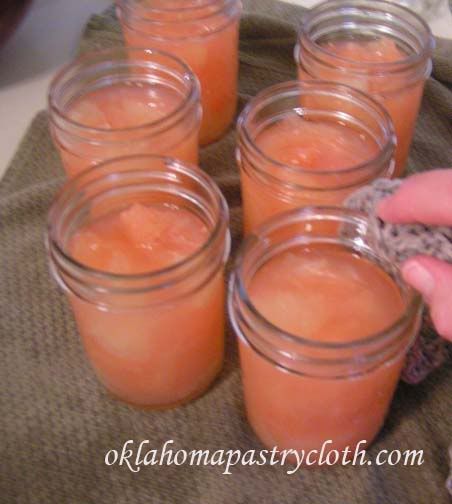 Wipe the rims with a warm, wet washcloth. 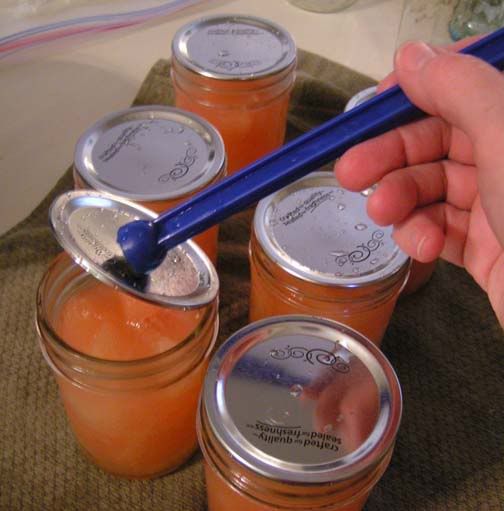 Remove lids from hot water and place onto jars. Add rings and adjust. 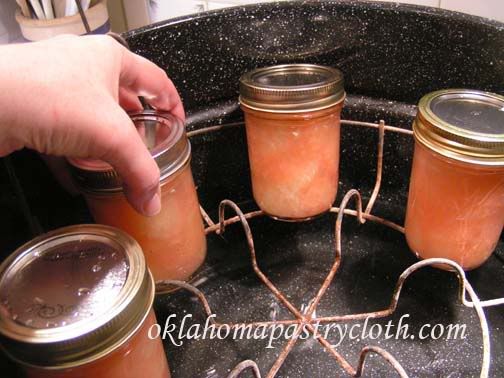 Place jars onto the rack of a waterbath canner that is sitting on a burner and has only slightly warm water in it. Do not place jars into hot water as jars can crack. 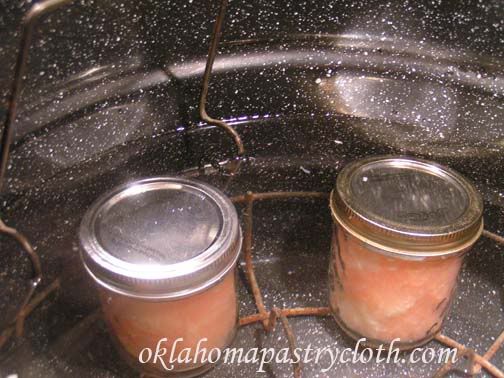 Make sure that the jars are completely submerged with about an inch of water above the lids. Turn the burner on ‘high’. Process the jars for 10 minutes at the point that the water starts boiling. 15 minutes for quarts. Store in a cool dark place and refrigerate before serving.  |
|
|
Oklahoma Pastry Cloth™ Company on Facebook
|
|
 |
|
|
Canning Bacon
Friday, September 2nd, 2011
|
I told Mr. Fix-It the other day that I have decided that my purpose in life is to be a “cup bearer” of sorts – you know, the person who drinks the king’s beverage and dies if it is poisoned. I try foods and processes and if they don’t kill me or taste like they could, I then pass them on to you! You wouldn’t believe how many recipes my poor Mr. Fix-It has had to endure only to have me scratch them with a “Well, THAT one is going in the trash!” He is such a dear and patient man. His worst response to anything I cook is, “It’s ok.” He can say it through clenched teeth and a galant effort to swallow, all the while looking for a way to spit his food out while I am not looking and still graciously offer, “It’s ok.” However, I must admit that he was very sceptical of my newest canning project. I had read about canning bacon at Patrice Lewis’ The Rural Revolution and on Enola Gay’s blog, Paratus Familia, and I have been meaning to try it myself lo these many months. But bacon didn’t go on sale until just recently and so, when it did, I snatched boatloads of it up and made my plans. Believe it or not, I got it for 99¢ a pound because it was nearing its “sell by” date. I have this vague memory of my parents receiving a can of expensive bacon from Denmark and it was rolled in white paper and tied in the middle. We thought it was amazing, so I knew it could be done.  Now, according to instructions that I found, kraft paper or paper sacks were used in the packaging and I used kraft paper on this first run. However, this is where that “cup bearer” roll comes in – I’m suggesting that you use boxed parchment paper. I found in this first run, that the kraft paper leaves a flavor of the paper in the bacon. You know how wet paper bags smell? Well, that’s the hint of flavor left in the bacon. I did not find that in a subsequent run with the parchment paper. Perhaps that is because white parchment paper is meant for cooking!! Duh. The pictures I have here, however, are from my first run and are with the kraft paper. Just pretend it’s white and do the same thing! Finally, be sure and use thick-sliced bacon. The instructions told me this, but you know me. I never follow instructions. I tried a package of regular sliced bacon. You’ll see the results. Not good. The outcome of canning the bacon was amazing. It fried up beautifully and Mr. Fix-It was duly impressed. Talk about a wonderful companion for camping!! (The bacon – not Mr. Fix-It – although he is a wonderful companion for camping.) No need to mess with wet, sloppy packages of bacon floating in melted ice in a cooler. Just open a jar and there you have it! So here are the directions for canning bacon. Just remember – PARCHMENT PAPER!  Lay strips of bacon side-by-side onto sheet of paper, leaving 1/3 of paper to be folded over the the top half of the bacon. You can put a half pound, 3/4 pound or whole pound onto one sheet. I put 1/2 pound for each jar because there are just two of us.  Fold top third of the paper over the top half of the bacon. If your parchment paper is not tall enough, then place a cut strip of parchment paper over the top half of the bacon strips.  Now fold the top over to the bottom, folding the bacon in half. There will be paper between the top and bottom halves of bacon.  Starting at one end, begin rolling “package” like a jelly roll, allowing some end paper to overlap. Cut off any extra paper.  This was my addition to the process. Because I remembered way back into my childhood that bacon we had received in a metal can was tied with a string, I did the same thing because it keeps the roll nice and tight. I did not tie the string snug, but just let it hold the roll together. I used kitchen twine also known as “butcher’s twine”.  Drop the rolls open side down into preferably wide-mouthed quart canning jars (I had to use a couple of small mouth because I was short two jars) that have been washed and sterilized in the dishwasher, in boiling water or in the oven. The wide-mouthed jars make it easier to remove large rolls.  Wipe the rims of the jars with a warm, soapy and wet dish cloth to remove any oils from the glass that would keep the jars from sealing.  Having kept lids warming in nearly boiling water, place them onto the jars and add rings.  Process in a pressure canner at 10 lbs of pressure for 90 minutes.  When jars have cooled, remove rings and wash jars and rings in hot, soapy water to remove any oils that may have escaped. Allow to dry and place rings back on. Store. Jars aren’t real pretty because the bacon fat coats the sides.  To use bacon, remove ring and lid from jar and allow the roll to slide out. Carefully unroll paper package and fold back paper off of bacon.  Carefully remove bacon from paper with a fork. This is where packaging thick bacon comes in. Thin bacon simply falls apart. See below what happens in the removing and the cooking.  The thin bacon made a mess in the removal and cooking!  Place bacon into skillet and add oil that is the bottom of the jar. Fry just like fresh bacon. It takes a little longer to crisp than raw bacon.  A great addition to a good Okie breakfast – Western omelet, grits, English muffins…and bacon. Yum!! And even if Ol’ Man Winter gives us another electricity blackout, I’ll have bacon for breakfast to cook on the wood stove! |
|
|
Oklahoma Pastry Cloth™ Company on Facebook
|
|
 |
|
|
Canning Beef Stew
Tuesday, July 12th, 2011
 How hot is it? It is so hot in Oklahoma the snakes are looking for air conditioning and they’re cold blooded!! It so hot here that the nectarines are going straight from the tree into jars as jam. It’s so hot that the Gila Monsters have moved to Oklahoma from the Mohave Desert because it’s warmer here! Yeah, we’re setting records. The disturbing news for the rest of you is what this is doing to part of your food supply. Grain and cotton crops have simply burned up, causing both to rise in price. As a result, grain is becoming cost prohibitive for ranchers for their livestock. Grass is gone and so many ranchers are having to resort to expensive hay as well. I just talked with a friend, in south-central Oklahoma, who owns a very large cattle ranch and she said they are preparing to sell their entire herd of cows. She said the cows are losing weight so fast that they must be sold this week or she and her family will take an even worse beating. There is no grass and there is no water. I see cheap beef in the grocery stores in the shortrun, from ranchers selling off herds, and a shortage of beef/high prices in the longrun, so plan accordingly!! One would think that in this furnace that is the midwest, one wouldn’t even think of hot meals. But planning ahead is the stuff that makes us prairie folk able to contend with the unexpected. Using garden staples that have managed to survive to can foods for the winter is a great way to use these days indoors. I have been finding beef on sale and so, I’ve been putting up a Fall and Winter supply of beef stew, a veritable meal in a jar! Just open a jar, heat the stew in a pot, mix up a batch of cornbread and you’ve got supper! And if the electricty goes out in one of our famous ice storms, the wood stove or the grill make perfect heat sources for a pot of stew accompanied by bread or crackers. So here is how I do my beef stew for Mr. Fix-It. He loves having this around because he can fix it himself! (carrots, celery, potatoes, onion, etc)
 Pat 10 lbs of meat dry with paper towel. I use either chuck roast or rump roast, depending on what’s on sale. Today I’m using chuck roast.  This is a rump roast. If you will notice, the chuck roast has more fat and more loss, but it is also more flaky.  Cut meat into cubes  Remove fat and membranes by lifting as you cut underneath. As you lift, this gives more area to slice under the membrane or fat and also helps to release them from the meat.  Lightly salt the meat  Add a little of the meat at a time to a very large stock pot that is on medium heat. Brown and add more meat until most meat cubes are lightly browned on at least one side. Juices will begin releasing.  Add 4 1/2 pounds of mixed veggies. I am using potatoes, carrots, onions and celery. You can use whatever amounts of each that you prefer and you can add other vegetables according to taste.  Add water to cover  Add garlic powder  Add thyme  Add bay leaf  Add beef bouillon  Mix package of brown gravy with 1/2 cup water and add to the stew, stirring. At this point, if you like wine or burgandy in your beef stew, add 1/2 cup. Mr. Fix-It likes his without.  Cover and allow to simmer vigorously 1 hour, adding water to keep at the same level and stirring occassionally to keep from sticking.  Mix 1/2 cup corn starch with one cup of cold water. I start out with this much and add more if I need more thickening. I usually wind up using 3/4 cup corn starch with 1 1/2 cup water, however, I like to start out with less and adding more if needed. Do not make the broth too thick. It can always be reduced after opening a jar and bringing to a boil. If you get your broth too thick, it will thicken more in the processing and will become way too thick.  Stir continually as you pour into boiling stew broth to keep from lumping.  Find and remove bay leaf. Place stew into jars, dividing broth evenly between jars. Leave 1″ headspace.  Using a canning spatula or knife, remove any air bubbles by running around the inside perimeter of the jars.  Wipe the rims of the jars to remove any juices or oils  Add lids that have been warming in a pan of nearly boiling water  Add rings, tightening and then backing off just a hair  Place jars into canner, cover and process for 1 hour 30 minutes for quarts and 1 hour 15 minutes for pints at 10 lbs of pressure  Meanwhile, place all the trimmings into a pot and cover with water. Boil until trimmings are cooked down to very tender, continually adding water as needed. Strain broth from the trimmings and add broth to pint jars. Add 1/2 tsp salt to each pint and process with any extra jars of beef stew to make canned beef broth.  Place trimmings, a carrot and about 1/4 cup oatmeal into food processor or blender and turn into a puree. You can put this into jars too, with extra water, leaving 1 inch of head space to can. Or you can freeze it. Use it as canned dog food! Nothing has been wasted. |
|
Oklahoma Pastry Cloth™ Company on Facebook
|
 |
Processing Onions for Long-term Storage
Monday, June 13th, 2011
|
I love onions. Such a mundane little vegetable – but it has such a pleasant shape and flavor, especially the Vidalia variety. Georgia has a right to be proud of that little onion. There is no onion sweeter and you can eat it like an apple – if you like onion flavored apples, I guess! Personally, I think the onion is a necessity in cooking because it makes all the difference in the world…well…second only to tons of garlic. I bet you’d love to have an up close and personal conversation with us at the OPC™ digs, eh? Onions are one of the simplest veggies to put in a garden. Cheap too! A bundle of onions costs around $1.50 to $4 and offers you anywhere from 50 to 100 sets. I usually put out two or three bundles. Row furrows are dug, fertilizer is sprinkled down the center of the furrows and then chopped in and covered to make a raised row. I plant my onions using a stick in one hand to make a hole and then dropping an onion set with the other hand. I then go back and pull the dirt up around each set using both hands (yes, I wear gardening gloves) which also straightens the onions to standing. In my neck of the woods, I have to plant them deeper than usual because our soil is a sandy loam and dries out really fast in our stiff winds. Once the onions are established, I pull the dirt away from them to expose the top of the bulb. Turning the soil between rows can be done by using a hoe, a mantis or a tiller or mulch can be used as well. This year, we had a dickens of a time keeping a really weird grass in check. Hand weeding around each bulb was a not fun necessity, but this has been an unusual year. The only other maintenance that we perform on our growing onions is pinching off any seed heads if they form and a side dress of 10/20/10 fertilizer every three weeks if there has been much rain. Otherwse, a series of soaker hoses does the trick. The nice thing about onions is that you can pick them at any stage of the game. Small onions are great for salads and garnish as ‘green onions’. Medium sized onions are wonderful to throw in with green beans or pintos or they can be left to expand to slicing size.  At the later stage of growth, onions have the soil pulled away from the bulb to allow the bulb free room to grow.  Eventually, the green tops start to fall over.  After the tops fall over, the onions are left for about two weeks before pulling.  Onions are easy to pull out of the ground.  We use 5 gallon buckets to gather our onions. Makes for easy carrying.  I wash my onions a few at a time in a big stainless tub/bowl or in another large bucket. After cutting off green tops no closer than 1 1/2″ from the bulb, I submerge the bulbs in water and use my hand to wash them back and forth.  I separate out sizes of bulbs and freeze the smallest ones for seasoning beans, etc. or cut them up for dehydrating. These I prepare, after washing, by removing the roots, the stem and the outer skin.  The medium to large ones are left whole to cure on racks for use as fresh onions. The roots and the stem will dry up and will be clipped. These onions will stay fresh until as long as November or December, stored in a cool dark place.  The largest are sliced and frozen on cookie sheets covered with wax paper and will be put into freezer bags. These will be used for homemade onion rings, for cooking on the grill and for use in casseroles.  Onions for dehydrating are chopped by hand because the food processor makes the pieces too small. The chopped onion is spead out on dehydrator racks. I start the process outside because the smell is overpowering and keeps you from crying. 🙂 After about 6 hours, I move the dehydrator inside.  After drying about 15 to 18 hours, depending on the moisture content, these onions are packaged into jars. Here, I have dried some of both our yellow and white onions. Storage for these dried onions is years. They are wonderful for using in soups and stews but you can also use them in chicken or tuna salad or for seasoning a cooking hamburger by putting a tablespoon or two into a bowl, covering with water and then placing into the frig overnight. You will have rehydrated onions to use like fresh! That is actually what some restaurants do. |
|
Oklahoma Pastry Cloth™ Company on Facebook
|
 |
A New Generation of Canners!
Tuesday, April 19th, 2011
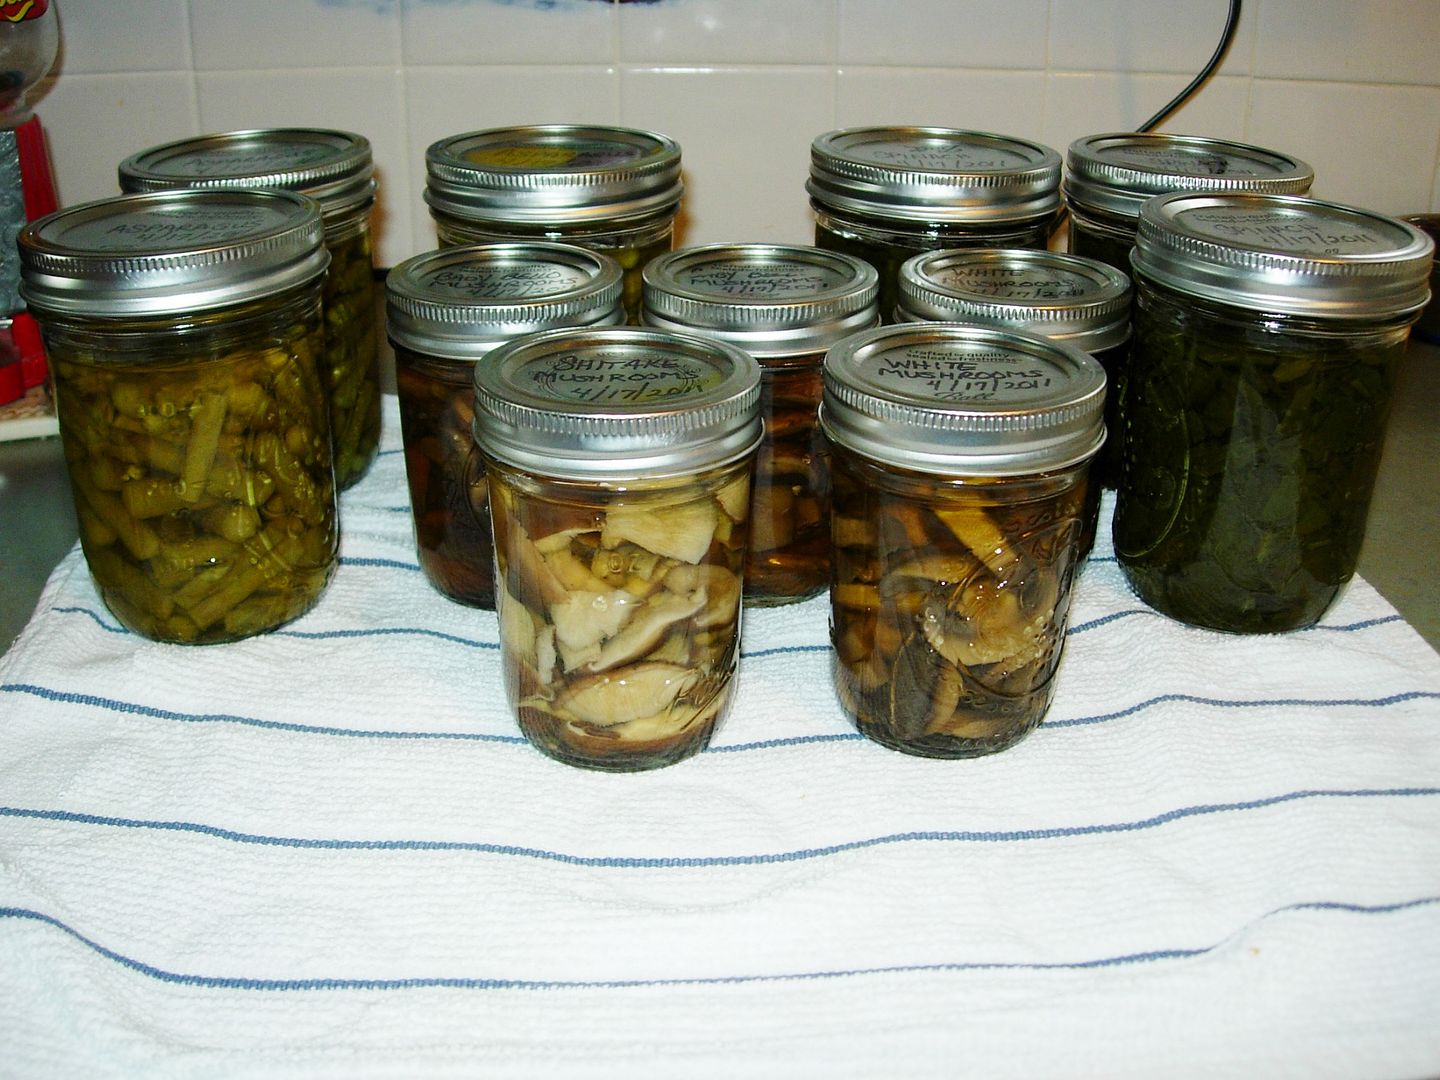 It is always exciting to hear from a reader who has jumped with both feet into the wacky world of canning! I love to hear the stories and see the results because it is wonderful to know that the art is being passed on. As I hear the excitement in the notes attached to photos, it takes me back to my early days of canning with visions of my first little kitchen, its unfinished concrete floor, boxes of bottle lambs in the corner and my brand, spankin’ new pressure canner gleaming on the stove. That was a long time ago. I received this photo from reader, Carol, who really took on some unusual produce to attempt her first experience in pressure canning. She wrote the following: “The farmer’s market started last Saturday and bought some nice fresh asparagus and spinach and had some mushrooms from the grocery. I took my pressure cooker for a test drive then I commenced to canning! 3 pints of asparagus, 3 pints of spinach, 4 1/2 pints of mushrooms. I am so excited. I have always wanted to do this. ( I know, I need to get a life) I have never canned or used a pressure cooker before. My family is terrified of pressure cookers after my Grandma exploded one while cooking stew and for years they found splats of stew around they kitchen and it took forever to get it all off the ceiling…” So I am offering a “congratulations!!!” to Carol for overcoming the family phobia and successfully processing some really unique items! 🙂 Yay! |
|
Oklahoma Pastry Cloth™ Company on Facebook
|
 |
Canning Chicken and A Recipe
Thursday, March 10th, 2011
  Buying chicken on sale is a wonderful thing if you have the room to freeze it, but what do you do when chicken is on sale for a matter of cents per pound and you want to stock up for a good, long time? Freezer longevity for chickens is just a few months and so unless you eat chicken every night, it would be hard to make use of a large number of frozen birds. Canning is your option! Shoot, canning is ALWAYS an option because there’s just very little that can’t be canned! 🙂 And so, here are the steps to canning a whole bird followed by a rather surprising recipe – I thought it was surprising, anyway! The method that I am using here is called the “raw pack” method and does not involve cooking the chicken first. 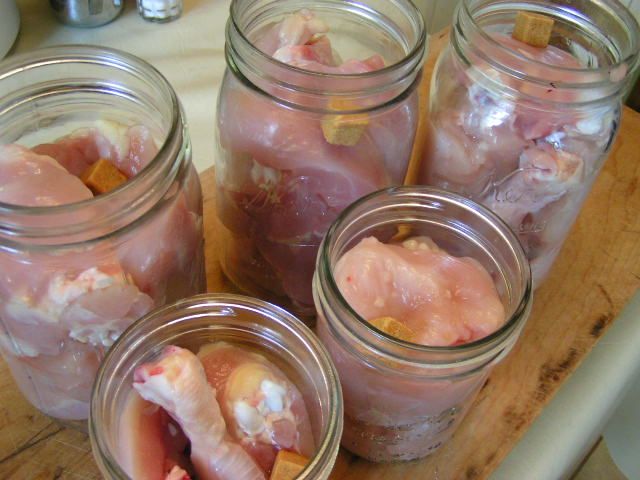 After cutting up the chicken, place it into warm, wide-mouth jars that have been washed and sterilized in the dishwasher or boiled in a large pot. It is important that they are widemouth in order to get the chicken out without tearing it apart. I can get one half of a chicken into a quart jar (minus the back which I use for stock). I also place just the wishbones together sometimes, in a widemouth pint jar, to use for recipes like enchiladas that call for just white meat chicken. I also skin all of my chicken to cut down on fat. I place one cube of chicken bouillon per jar. 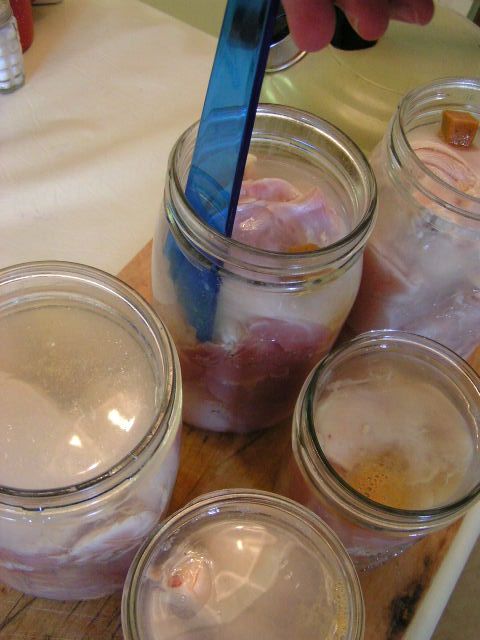 Meanwhile, I have a kettle of water boiling on the stove and slowly pour the hot water over the chicken to leave a 1/2″ headspace. Using a canning spatula or knife, move around the inside perimeter of each jar to release any airbubbles. 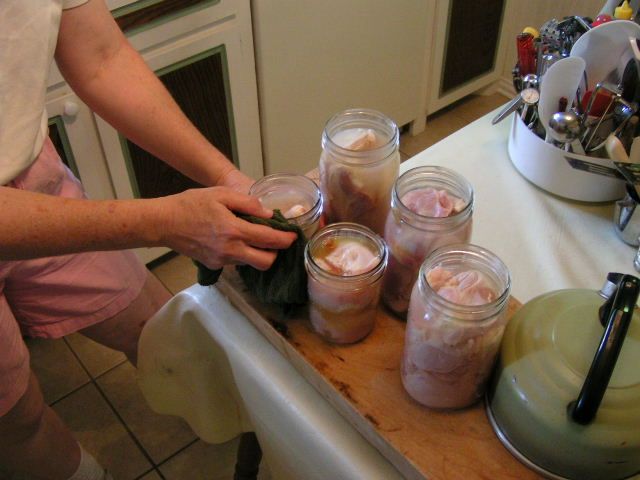 Wipe the top edges of the jars with a wet cloth to remove any chicken juice or oils. 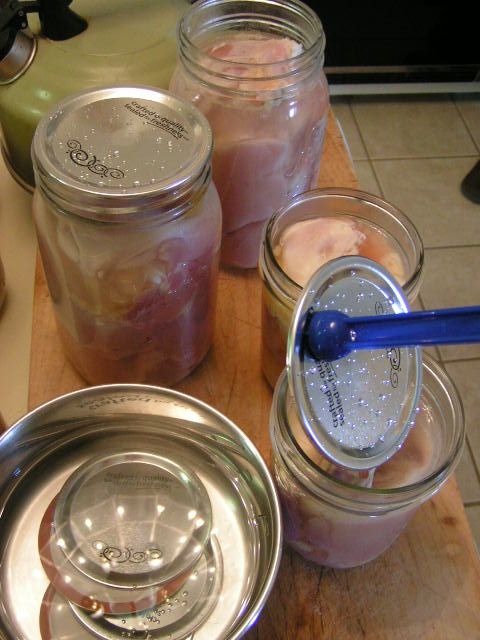 Place lids that have been warmed in a pot of nearly boiling water onto the jars and add rings. Tighten slightly. Place in a pressure canner just like I demonstrated in the post on canning chicken broth. Process for 75 minutes for pints and 90 minutes for quarts once your canner has pressurized. 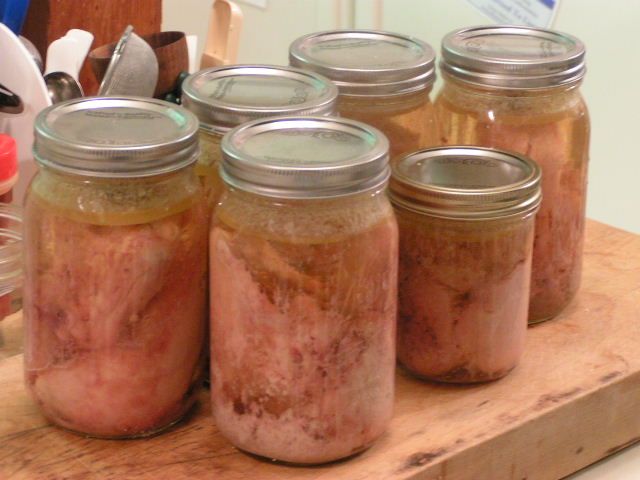 I have to admit that of all the things one may can, chickens make the UGLIEST presentation. The jars just aren’t pretty. There’s no getting around it. Once they come out of the canner and cool, it is a good idea to remove the rings and wash the jars (with the chicken in them) in warm, soapy water and then wash the rings to get any oil off that may have escaped in processing. Let the rings dry and then you can replace them or leave them off, whichever you prefer. Once your chicken is canned, it will last for at least a year. And it is so great for fast meals. Dump a couple of jars into a pot with some onions and broth and bring to a boil and then add dumplings. But that is just normal. How about different? 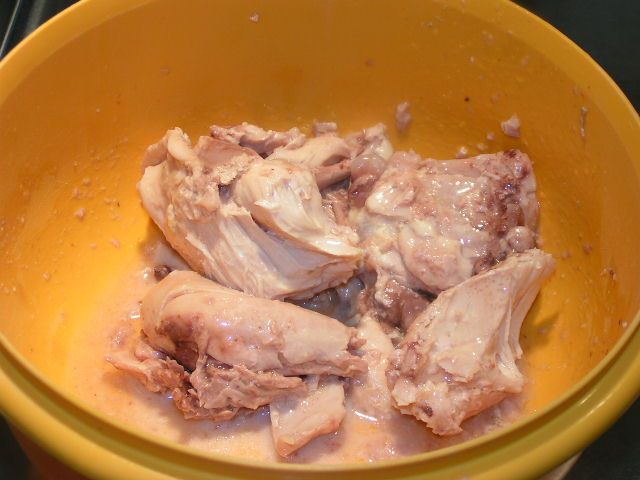 Last night, I opened one quart jar of chicken, drained the broth and carefully slid the chicken pieces into a large bowl. I sprinkled milk over the pieces. 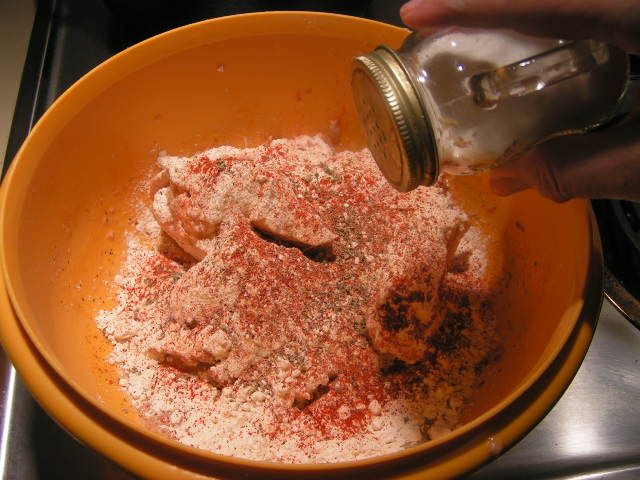 I added a cup of flour, about 1/2 tsp paprika, 1/4 tsp garlic powder, 1/4 tsp thyme, 1/2 tsp sage, 1/2 tsp black pepper and carefully rolled the pieces in this mixture. I salted the pieces at that point. Again, you have to handle the pieces gently or they will fall apart on you. If they do, it’s ok. Just dredge the parts in flour too. 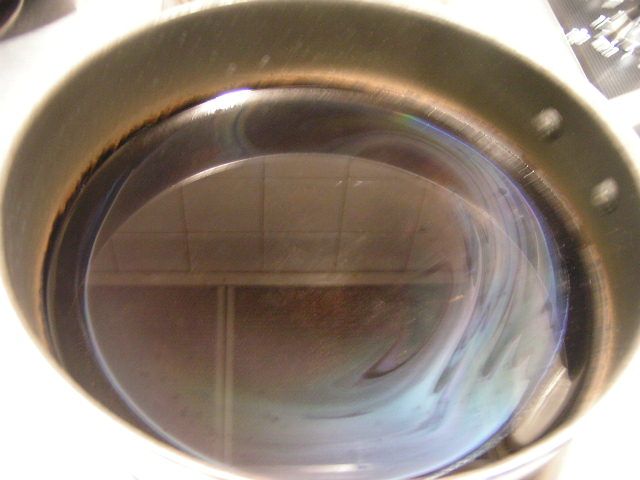 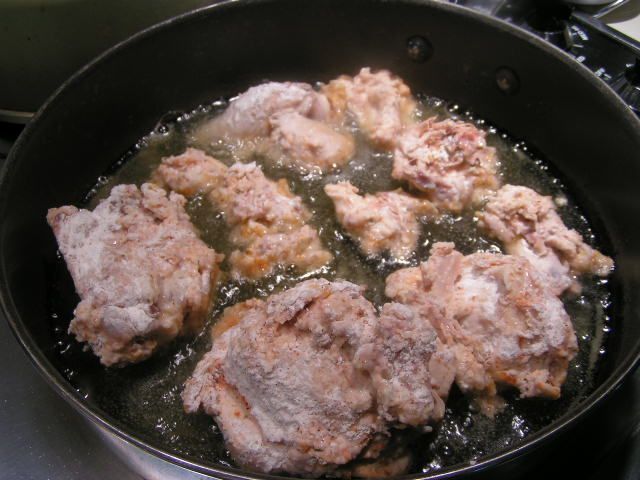 Next, I put just enough canola oil in a skillet to cover the bottom well and heated on medium high. Light olive oil would be fine too. Anything to get those good fats, people! When the oil was hot, I gently placed the floured pieces of chicken in the oil to “fry”. 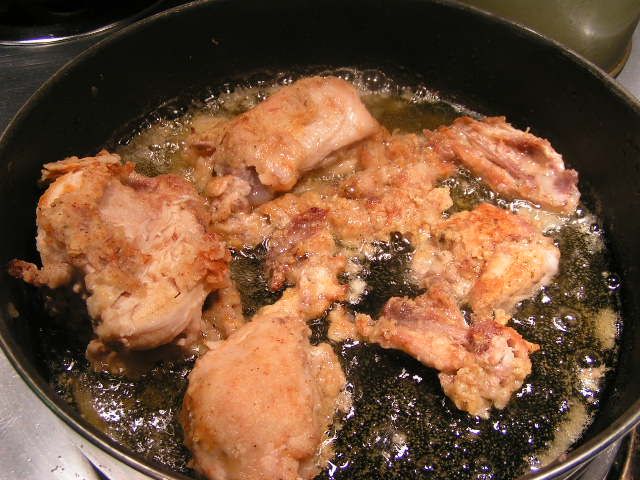 I carefully turned the pieces to brown on the other side. When browned, I transferred the pieces to a cookie rack placed over a cookie sheet and placed in the oven at 250º while I cooked the rest of the meal. This keeps the meat warm, but also lets excess oil drip off of the chicken so that it isn’t too greasy. 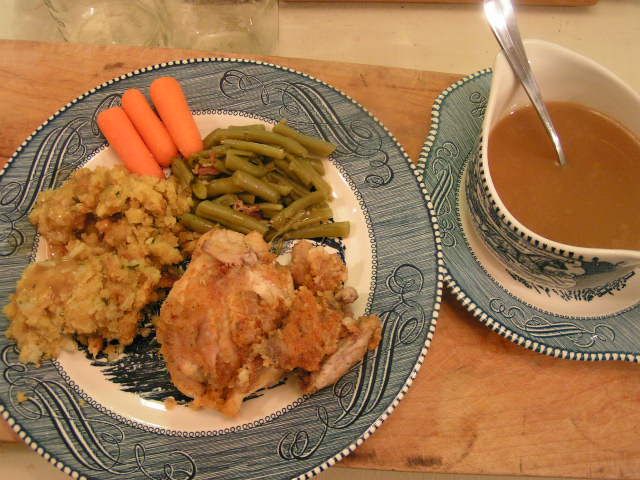  You can make gravy with the broth out of the jar and cornstarch or use a packaged mix. And I added stuffing to this plateful. Since the chicken has been pressure cooked in the canning process, it is tender and falling off the bone even before frying, so frying just gives these tender morsels a crispy covering. Mr. Fix-It was licking his chops and said that the chicken was superb! He’s my most honest critic. So see? You can use canned chicken in all kinds of ways! |
|
Oklahoma Pastry Cloth™ Company on Facebook
|
Canning Butter
Thursday, February 24th, 2011
|
I have a question. If milk is nature’s most perfect food, as we ALL learned in our science classes many years ago and have heard on many a dairy commercial, why isn’t butter perfect too? Why has butter gotten such a bad rap when it is simply the richest part of the milk that has been whipped to a frenzy? All I know is that butter is all-natural and has to be a whole lot better for you than the fake spreads that marketers have tried to pawn off on us as the nutritionally better alternative. We humans seem to always go down the road of trying to improve on what comes naturally and then wind up right back where we started, concluding that the original product isn’t so bad after all.  I have admitted my affinity for butter in past posts but I am in no way an addict to the stuff. Really. I can quit using it anytime. Really. I use it in moderation mixed with olive oil and am known to spread it sparingly on a slice of fresh homemade bread. Really. But there is simply no substitute for the stuff when it comes to sauces, cajun cuisine and toast.  So did you hear about the solar flares that scientists are afraid are going to destroy the earth? Well, not destroy exactly…just leave us in an electronic lurch which would pretty well destroy the majority of us who can’t live without a cell phone, computer or electric toothbrush. How in the world can I keep my precious butter from spoiling if our refrigerators aren’t running? Well, I can it, silly! I gathered all of the info I could from several sources on the internet and have started canning part of my butter when I find it on sale. The Indians in India have been canning clarified butter, called ghee, for ages and ages. I like to can my butter whole. Take a peek at what is working for me: 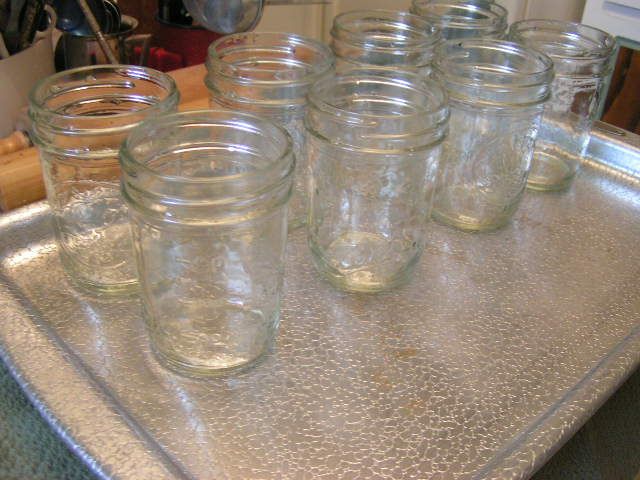 Wash jars in hot soapy water and boil in a large pot or wash on the sterilize cycle in the dishwasher. Place the jars on a cookie sheet. Here I am using 8 oz jars which hold about 1 1/3 sticks of butter. In this run, I used 9 – 8 oz jars for 12 sticks of butter or 3 lbs. Put the cookie sheet of jars into a 250º oven and heat for 20 minutes. 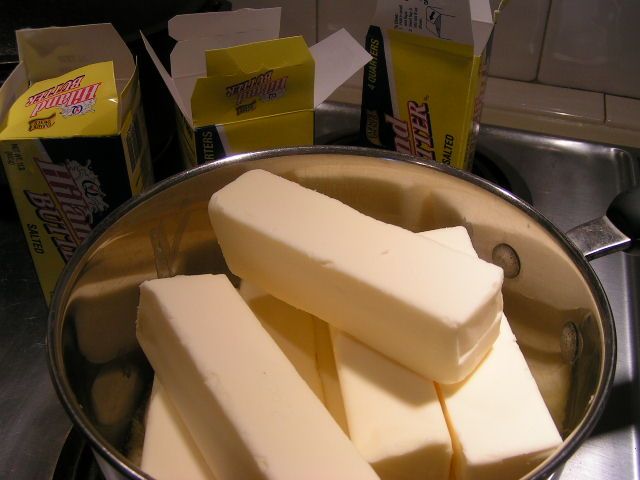 Place sticks of salted butter in a large pan. I do about three pounds at a time simply for ease. The larger pots get too heavy to manipulate and butter gets everywhere. 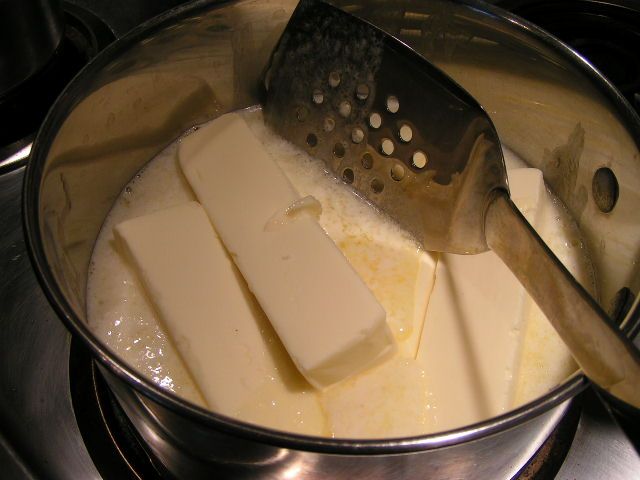 Slowly melt the butter on medium heat, stirring constantly with a metal spatula to keep from scorching on the bottom. A spatula with holes is ideal because the melted butter is pushed through the holes during stirring and helps to keep it uniform. 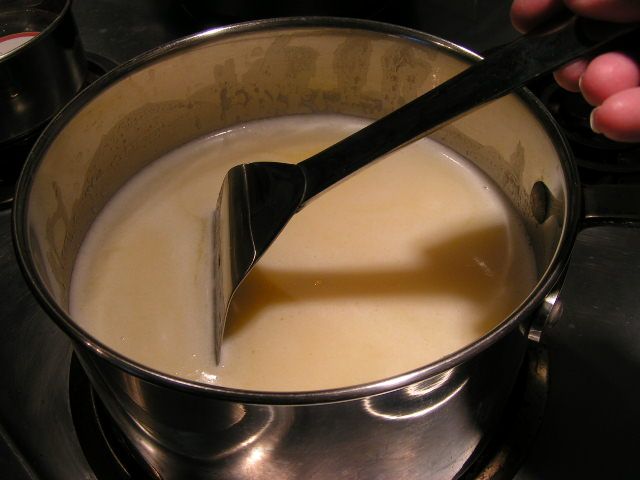 When the butter is totally melted but not quite boiling, continue to stir and allow to simmer for 10 minutes. A thick, white foam will appear. 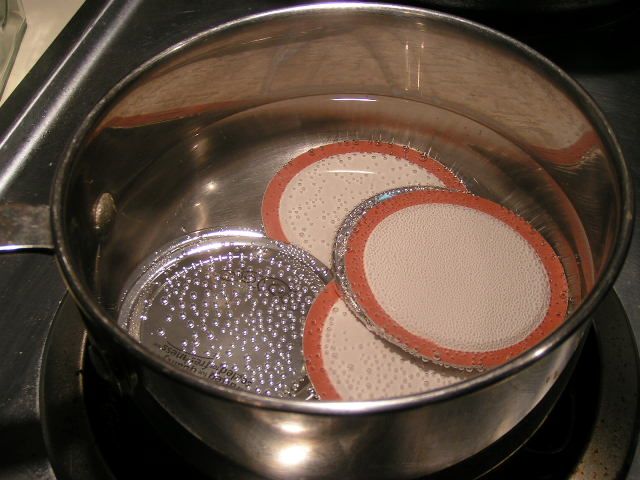 While melting the butter, place lids in a pot of water and bring to a near boil to prepare lids. Turn heat down to keep lids warm. 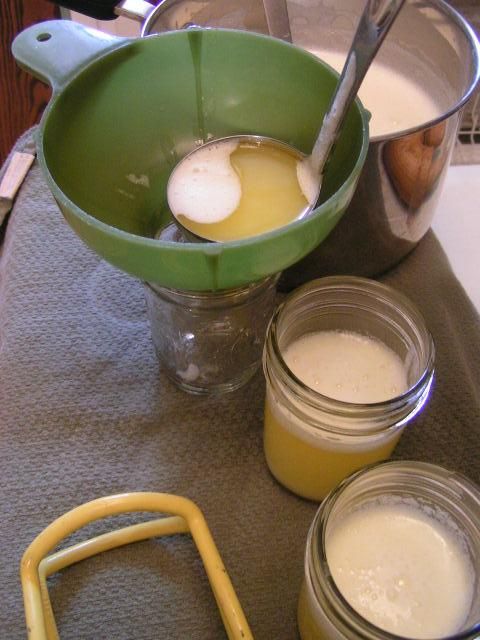 Remove jars from oven and immediately ladel butter into the jars, using a canning funnel. Be sure and stir the butter around and dip deep, pulling up, in order to keep the butter uniform, as it separates. Fill to leave a 3/4″ head space. 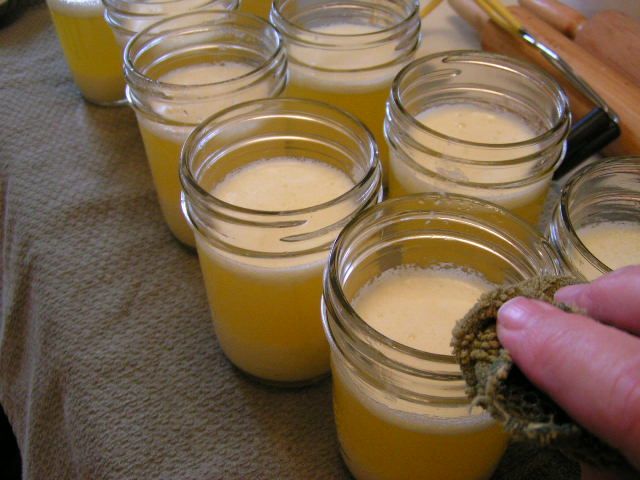 Carefully wipe the edges of the jars with a damp cloth to remove any butter. Butter on the rims will cause the jars not to seal. 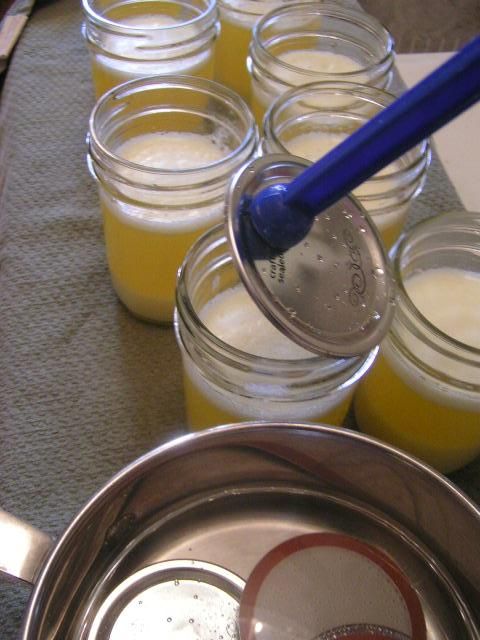 Place the lids on the jars and attach rings, tightening slightly. Place jars into a waterbath canner that has water already heated and enough to cover the jars 1″. The water needs to be heated because the jars of butter are hot and will crack in cool water. As soon as water begins to slowly boil, set timer for 15 minutes. 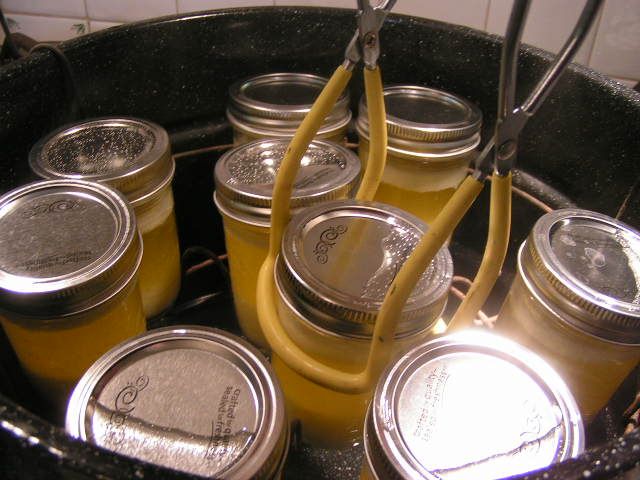 When jars have been processed for 15 minutes, turn off heat and allow to cool down in the water for another 10 minutes. Then, lift the rack to top of canner and remove jars with canning tongs. 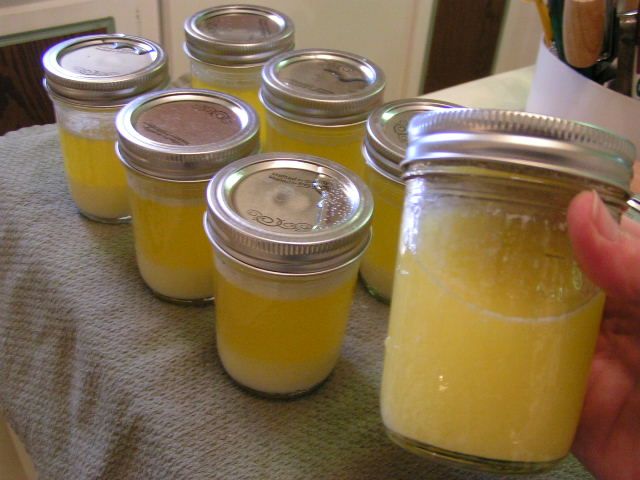 When the jars are cool enough to handle, now comes the tedious part. Every few minutes shake the jars up and down in order to make the butter uniform. If you notice in this photo, the jars to the left have sediment on the bottom and foam on the top. Shaking incorporates this into the clarified portion. Go about your business, but about every 5 minutes, stop and shake the jars. As they cool, they will stay more and more uniform. I set a timer to remind myself so that I can do clean-up. 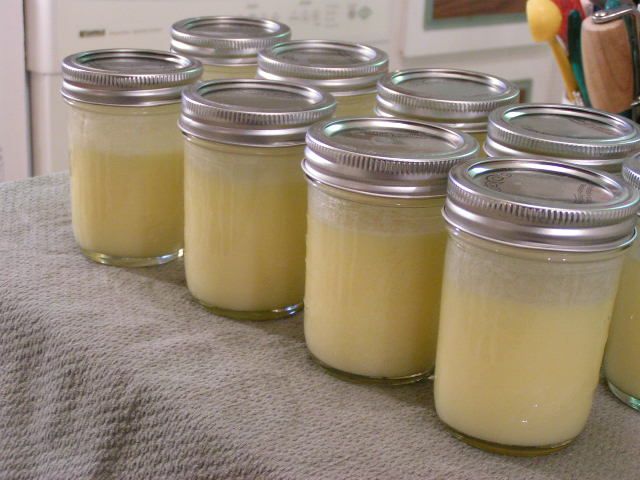 This butter is totally cooled and ready to store in the pantry. Aren’t they pretty? I read one homesteader’s take on canning butter and she said that they actually opened some from 1999 and it was still good. Don’t think I would keep it THAT long, but it wouldn’t matter because it wouldn’t last that long around here anyway!! 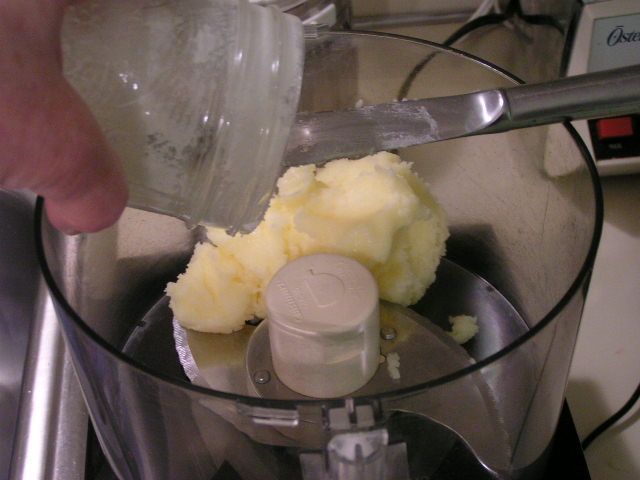 Canned butter is not quite as smooth as fresh butter, but if you are wanting a smooth, healthy spread, you can make the same recipe posted earlier with olive oil or canola oil. Just scrape butter from an 8 oz jar into the food processor or blender. 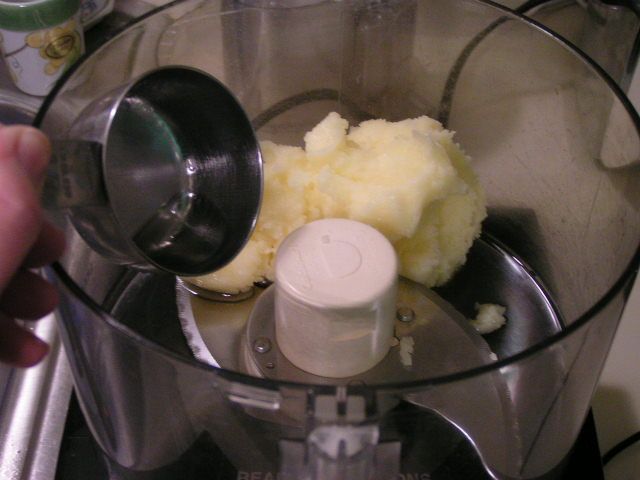 Add 1/3 cup oil. If you have canned your butter in larger jars, adjust amounts of oil. For example, a 1 pt jar of butter would require 2/3 cups of oil. 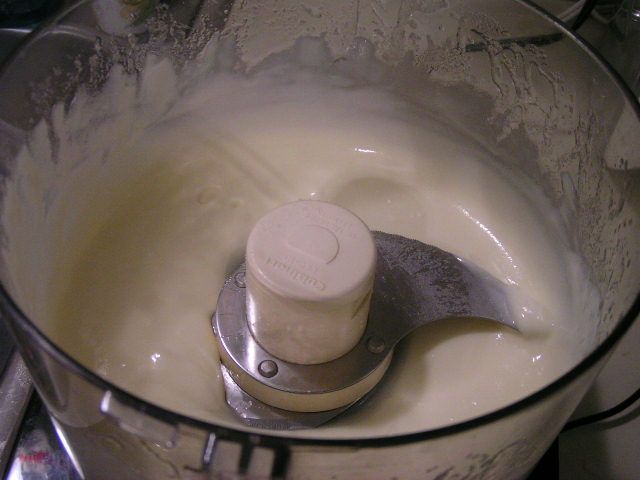 Process until smooth 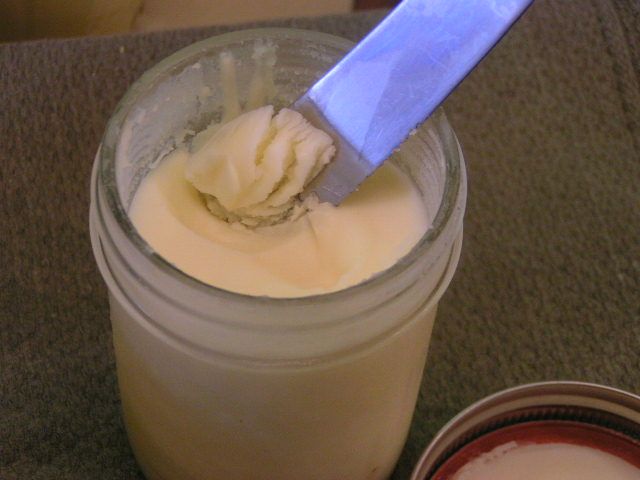 Pour back into jar and allow to harden in the frig. It will go back to the consistency of smooth, spreadable butter. Pass the Lobster, please!! |
|
Oklahoma Pastry Cloth™ Company on Facebook
|

 Homestead Revival
 Paratus Familia
 Rural Revolution