Posts Tagged ‘dehydrator’
Monday, September 12th, 2011

Dried Bananas
I’m not just a huge banana fan – the only time I crave them is when my potassium gets low from drinking too much water. I know exactly when that’s happening. I’ll be standng in the checkout line at the grocery and I’ll see bananas displayed in the middle of the isle. I will think to myself, “I’ve gotta have those!!” And after my purchase, I then I lovingly cradle them in my arms like a baby, get into the car and start peeling those suckers, wolfing them down while I am driving. One of these days, I’ll have a wreck and the police officer will say, “You were on your cell phone, weren’t you?!!” But the police report will indicate, “Under the influence of bananas.”
I like banana bread and banana muffins and banana/nut scones. I love Bananas Foster – hmmm – now there’s a recipe I need to put on here! – and I like to munch on my dehydrated bananas. So this past weekend, I spent most of the time dehydrating a BUNCH (pun intended!!) of bananas. I thought I’d share with you my way of doing that.

I found bananas on sale at 5 lbs for $1. Yep. Can you believe it?? So, I bought 15 lbs. I mean, that’s a whopping $3 so I HAD to buy them, right? And I used a large bottle of lemon juice.

First, I sliced the bananas into a bowl with 2 cups of bottled lemon juice. I always wind up adding a little more juice to nearly cover the bananas. I use a huge slotted spoon to toss the bananas around in the juice to make sure they all get covered. Allow to stand in the juice for 5 minutes.

Sprinkle 1/8 – 1/4 cup of sugar over the bananas and toss. It just depends on your taste. After drying, your bananas are going to be like sweet/sour banana candy. You can use Xylitol instead of sugar.

Using a large slotted spoon, scoop bananas out of the juice and allow to drain. Pour the banana slices onto dehydrator racks.

Arrange slices onto the trays so that none of them overlap. Dehydrate for 15 – 24 hours depending on how pliable you wish your slices. The longer you dehydrate, the less pliable. They will not be crispy, crispy like those in the store but the flavor is phenomenal!

Mr. Fix-It loves the crispy banana chips that can be bought at the store. So I decided to experiment beyond my usual way of doing things. I wasn’t impressed at all. According to all I read, the commercial banana chips are actually deep fried in coconut oil and then dipped into a sugar syrup to be dried. Sooooo, I tried it. I’m never one to shy away from a challenge!

I made a syrup of 2 cups of water to 1/2 cup of sugar that was brought to a boil and then cooled. When the bananas came out of the grease, they were drained, put back into a large bowl and the syrup was poured over the top of them. I then drained them with the large slotted spoon and placed them onto dehydrator trays as shown above and then dried. I’m thinking they must fry them at REALLY high heat and for longer, although I found the bananas could only be fried for 30 seconds before they started disintegrating. What a mess.


The lighter colored banana chips are the ones that were done with the lemon juice and simply dried. The golden colored ones are the ones that were fried and the dark ones used Fruit Fresh instead of lemon juice. I did a batch like that so you could tell the difference. The flavor of the dark ones is not very good either. The flavor of the fried ones is ok. Kind of reminds you of the flavor of Bananas Foster. But the best ones are the ones that were done in lemon juice. I have decided that tried and true is best and I’m sticking to my method!
Happy Dehydrating!
MB
|
Please join us on FaceBook!!
|
Join in the conversation by leaving a comment below!

|
|
|
Tags: coconut oil, dehydrating bananas, dehydrator, lemon juice
Posted in Canning and Food Processing, Let's Cook! | 6 Comments »
Friday, August 19th, 2011
Easy Beef Jerky

Have you ever read the novel Sacajawea by Anna Lee Waldo? It’s a huge work that had to have taken her years to write. I read it a very long time ago. I think it was published in 1978. I learned quite a bit about the everyday life of our early Native Americans and for some reason, one of the things that stuck out to me was the process of making pemmican. Being a jerky lover, her discription of the leather pouches of this high energy food sounded good to me. I would crave beef jerky while reading the book!
One of the things that I really found fascinating was Waldo’s description of the ceremonial butchering of buffalo after a big hunt. According to Waldo, the hunters would go to the first downed buffalo and begin the butchering process, taking the heart and performing what seems to be similar to the ancient Jewish “wave offering”. They would raise the heart to their Great Spirit, to the four corners of the earth – To the sky (the North) and then toward the ground (to the South) and then to the right (to the East) and to the left (to the West), just like the Israelites would do. And if you think about it – in the form of a cross. Interesting, huh?
Well, anyway, Pemmican was the Native American form of today’s energy or protein food. It consisted of thin strips of dried jerky made from whatever game was available: deer, buffalo, moose, elk, etc, and then mixed with pounded and powdered dehydrated fruits and nuts from the area -Blueberries, cranberries, Cherries, currants and chokeberries to name a few. Bone marrow fat was also added and the mixture was stored in leather pouches. Sounds like just the thing for a long hike?
Mr. Fix-It and I have been making jerky forever. We’re that old! Our boys especially love grabbing some to take home with them when they come for a visit. I use rump roasts to make my beef jerky, but you can use flank steak and round steak as well. Venison and Elk work great too. The following is my recipe and method:
Easy Beef Jerky
Approximately 3 lbs meat
2/3 Cup Worcestershire Sauce
1/3 Cup Soy Sauce
2 Tablespoons Brown Sugar
2 teaspoons black pepper
1 teaspoon onion powder
1 teaspoon garlic powder
1 teaspoon liquid smoke
1/2 teaspoon red pepper flakes (optional)

I am using rump roast in these pictures. Start with 3 lbs of meat and trim all fat from the rump roasts and then cut them into sections about 1″ x 2″. It is important that you identify which way the grain is running. You will be slicing across the grain. In the piece to the right, you can see the grain of the meat running lengthwise. In the piece to the left, the meat has been cut so that the ends of the grain are showing and will continue to be sliced that way.

I am using a sharp boning knife to thinly slice the meat. I keep a steel and sharpner close by to keep an edge on my knife.

You can make smaller pieces too by making cubes to slice instead of longer pieces.

I’ve wound up with nearly 2 1/2 lbs of meat strips

I cover the top of the strips with meat tenderizer, stir to incorporate it into all of the meat and then allow to sit for about 30 minutes.

In a separate bowl add 2/3 cup of worcestershire sauce

Add 1/3 cup soy sauce

Mix in 2 Tablespoons of brown sugar

And 2 teaspoons of black pepper, 1 teaspoon onion powder and 1 teaspoon garlic powder and if you like your jerky a little hot, add 1/2 teaspoon of red pepper flakes

Then 1 teaspoon Liquid Smoke which can be purchased at any grocery store. Stir all ingredients until mixed well

Pour the marinade over the meat and stir until all pieces are coated. Cover and place in the refrigerator to marinate for 5 hours, stirring every so often.

After 5 hours, the meat will be dark with the marinade having been absorbed.

Place the strips of meat onto the trays of the dehydrator and cover. Dry for 12 – 15 hours.

Store in plastic bags or in quart jars that can be vacuum sealed for added freshness.
Happy Drying!
MB
|
Please join us on FaceBook!!
|
Join in the conversation by leaving a comment below!

|
|
|
Tags: dehydrator, jerky, Native Americans, pemmican, Sacajawea
Posted in Let's Cook!, Meats and Main Dishes | 6 Comments »
Monday, January 24th, 2011
Part I
Part II
Part III
Dehydrating Part IV
Or
Soup’s On!!
I’m sitting here listening to my sweet hubby laugh his head off as he is pulling up YouTube videos of “Carl” (Billy Bob Thorton) from the movie Slingblade making prank calls to restaurants and asking the clerks for “French fried pertaters and biscuits and I like some mustard with those biscuits, uh-huh”. The clerks are attempting to take this order with as much grace as possible. I have to admit that I’m laughing too. I guess I’m remembering the phone calls I used to make, from our church phone on Wednesday service nights no less, to Weigel’s Dairy Store in Knoxville, Tennessee to tell the clerk, in high pitched squeals, “Your cows are out!” immediately hanging up the phone. Real smooth, huh? Kinda like the phone calls my grandparents used to receive in the ’30’s, at their grocery store, where a voice asked if they carried Prince Albert in a can and with the answer in the affirmative, young voices would yell, “Then let him out!!” We are so brilliant when we are young. However, it seems that Mr. Thorton is still brilliant – he’s entertaining my husband, anyway!
I’ve noticed that in the blog world, bloggers of the feminine persuasion have dubbed their loving husbands with honorary names that reflect everything from their appearance to their personality. The Pioneer Woman refers to her life partner as her Marlboro Man while another at the Rural Revolution refers to hers simply as Husband of The Boss. I’ve been musing for the past few days about what I should title the perfect man in my life – the one who can fix literally anything, including a sad day. He can take a car apart and put it back together, as well as a computer and its software, a refrigerator, an antique telephone and my hair dryer and have them all working as a result. He fixes up Christmas for our adult kids, fixes boo-boos on the animals and is currently fixing a whole new room addition on the house complete with a wood stove. He says he’s suffered through the last ice storm without heat!! He even has a tool belt like Tool Time Tim of Home Improvements. So yep, that’s what the love of my life’s moniker shall be from now on; Mr. Fix-It. And as an aside, just to let you know, he says that he married me because I came with power tools!!

There is nothing I enjoy more than putting a piping hot meal before Mr. Fix-It after a long day’s work. I especially love him because he loves soup and that is one of my favorite things in the whole world on these cold days. But I’m weird. I love it on warm days too – homemade that is. When I go to Olive Garden, I’m the “Never Ending Soup and Salad” kinda gal. Therefore, it is really pleasant to have all of the ingredients for soup right at my fingertips, dried and ready to reconstitute for any quick, hot meal. In this fourth and final in my series on dehydrating, I’ve got a recipe for broccoli cheese soup that will leave you craving more. Let’s go!
Broccoli Cheese Soup
1 Tbsp Olive Oil
1 Tbsp dried celery (1 stalk fresh chopped)
1 tsp dried bell pepper (tbsp fresh)
1 Tbsp dried onion (2 Tbsp diced fresh onion)
1/4 tsp dried garlic (1 tsp fresh, chopped garlic)
1/3 cup dried potatoes (1 cup cubed fresh potatoes)
1/2 cup dried broccoli (1 1/2 cup chopped fresh broccoli)
4 chicken bouillon cubes
4 1/2 cups water
1 can milk or 3/4 cups half and half
1/4 lb Velveeta Cheese + or –
1 Tbsp corn starch + 2 Tbsp water

Put 1 tbsp Olive Oil in a 3 qt sauce pan and add onion and dried garlic. Sauté. If using dried onions, just stir around a little to get the flavors going. That was the only thing I was out of. Gotta dry some more!

Add dried celery and dried bell pepper. For the purposes of less typing, I’ve included fresh equivilents in the recipe above but not in the directions, but you CAN make this with all fresh veggies

Add dried potatoes and continue stirring in the oil

Add dried broccoli

Add three cups of water and stir.

Add 4 chicken bouillon cubes. Bring to a boil and turn heat down to medium for a slow boil and cook for 30 minutes uncovered.
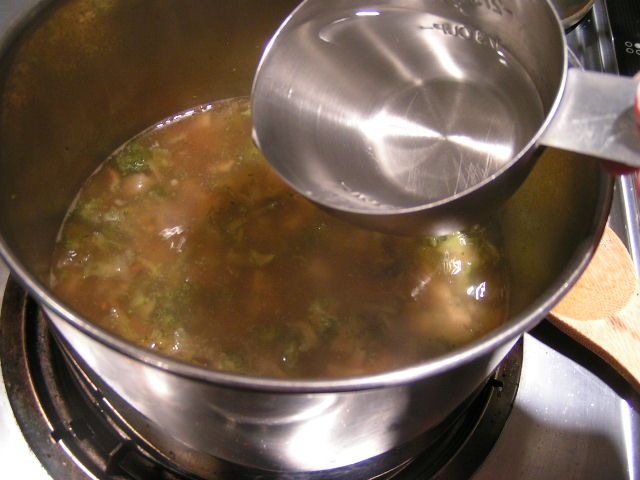
Add 1 1/2 cups additional water
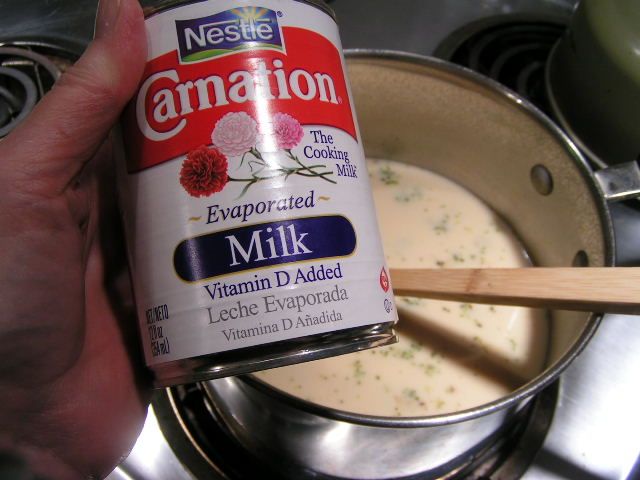
Add one can of milk. The canned 2% and Fat Free is fine too. If you want a richer soup, you can use half and half

I canned Velveeta Cheese that was on sale (I’ll blog about that at a later date) and put it into 8 oz jars. Here, I have heated the jar to soften the cheese and am using 1/2 jar or not quite a 1/4 of a pound of Velveeta. You can add more or less according to your taste.
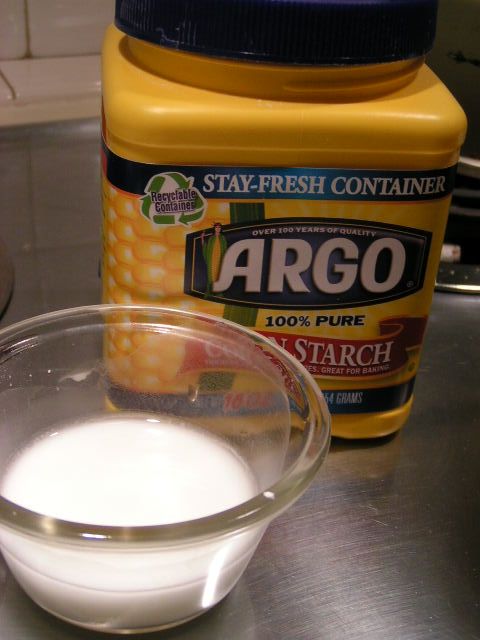
Mix one tablespoon cornstarch with 2 tablespoons COLD water until cornstarch is totally dissolved

As soup is boiling slightly, stir in cornstarch mixture and continue stirring to avoid lumps

You can make some corn muffins with my cornbread recipe and make everybody happy! I used my cast iron muffin pan. I love cast iron!

And there you have it. Soup that, if you dehydrate and can everything, can be made with no need for refrigeration and would be easy to make over a fire if the electricity goes out! In this state, that is no unusual circumstance!!
Happy Cooking!
MB
|
Please join us on FaceBook!!
|
Join in the conversation by leaving a comment below and enter our January Giveaway!
|
Tags: bouillon, broccoli, celery, cheese, dehydrating, dehydrator, drying, Fix-it, garlic, milk, onions, recipe, soup
Posted in Canning and Food Processing, Let's Cook!, Soups | 2 Comments »
Wednesday, January 19th, 2011
Part I
Part II
Dehydrating Part III
OR
The Incredibly Shrinking
Pepper

Another vegetable that is fast and easy to dry is the bell pepper. All peppers can be dried, including jalopenos, but that is one pepper you will want to process in the garage or outside. Your eyes and nose won’t be able to stand the fumes while drying!! Here’s a fast rundown on drying peppers.

Wash peppers. I will be using green, red and yellow bell peppers

Slice peppers

Chop peppers and spread onto racks of your dehydrator

I have trays of green peppers on the bottom, then yellow and then red because I like to have a few of the red and yellow fall through to the greens for a pretty mix and then have a mixture of yellow and red as well.

Dry overnight or for 12-15 hours and the peppers pieces will be shrunken and hard

Dried peppers make a pretty gift for the cooks in the family. They can be used in any recipe that calls for peppers! You can either reconstitute by letting them soak in warm water or just put them into a recipe to reconstitute as it cooks.
Happy Cooking!
MB
Please leave your comments at the comment link that follows! You will be automatically entered in our January Giveaway! And join us for updates on Facebook by clicking on the FaceBook icon below.
|
Tags: bell peppers, dehydrator, drying, peppers, preparedness
Posted in Canning and Food Processing, Let's Cook! | 1 Comment »
Monday, January 10th, 2011
Part II
Dehydrating Series Part I
Or
How To Pack 8 Bags of Celery Into
A One Quart Jar
Here in Oklahoma, most of us are tough old birds. We’ve learned the only thing predictable is that there is nothing much predictable in this state. One minute you can bake a chicken in your car and the next minute you’re trying to figure out how to get that car out of a snow drift. Of course, the car can get cooked in one of our prairie fires as well. Ice storms can paralyze daily life for a week and tornadoes can change lives forever. And then of course, there are the hail storms.
So, we Okies have pretty much figured out that you don’t need a government commission on emergency preparedness to tell us to be prepared. We’ve been prepared since the days of the Land Run when barrels of beans, flour and sugar and a crock of sourdough starter meant protection from starvation when the WalMart shelves were empty. Unfortunately, there ARE some city dwellers here who have either forgotten these facts or who moved here from some foreign country, like Los Angeles, who get caught with their rations down. But for the most part, we’re a pretty prepared and flexible lot. I got tickled the other day when a 30 minute program was aired to remind us that we have the likes of tornadoes and such here in Oklahoma. Ya think? A body would have to be living in a cave 24/7 to miss that little bit of reality. Anyway, the Oklahoma preparedness program has been called “Red Dirt Ready” and the name symbolizes the fact the Okies immediately jump in to help after a disaster, getting all covered in Oklahoma’s famous red dirt. That’s true. We do. It’s what makes this state great.


Imagine this on the power lines. That tree totally disentegrated. So do our electric lines!!
Electricity can be a problem around here. It is not unusual for us to be without for a couple of days and in many areas that can run into a number of weeks. That wreaks havoc on one’s frozen vittles if one hasn’t a generator and so it is nice to have plenty of stock that requires no refrigeration. That would seem impossible for such things as fruits and veggies, but not so! The age old art of dehydrating comes in really handy to offer up a pantry full of wonderful and healthy treats that will last a looooong time.
Having a garden each year, I dehydrate stuff yearly, but lately, I’ve been a dehydrating fool. I have been challenging myself to see what I can dry next and how best to use it. I’ve decided to do a series on using a dehydrator with recipes. Today I’m demonstrating celery and broccoli drying. I was inspired to do the celery because our local store, Firelake Grocery, had celery on sale, 3 large bags for $1. The broccoli was on sale as well – two good sized heads for $1. I use a lot of both.
Now, I need to sidetrack here for a sec because I realize that these are not organic items coming from a local grocer. However, with food prices soaring, many people can’t afford the more expensive organic foods and I want to let them know that it’s ok. This is where my faith comes into play. I see 3 large bags of celery for $1 as a blessing and I see God as my provider of blessings. Therefore, I just trust that all I can do is the best that I can and trust God to take care of me. In other words, I eat as healthily as I can and leave the rest up to the Lord. Shoot, I used to break thermometers when I was young and chase the little balls of mercury around on the table for hours with my friends! I promise, I don’t glow in the dark – although I do have very white hair. Do you suppose – – – ?
Back to the celery and broccoli. The long and the short of it is that I bought 16 bags of celery and a lot of broccoli. Neither of these items is anything you can keep for any amount of time unless you dry them or freeze them. I like to freeze celery by chopping it, leaves and all, and spreading it onto a cookie sheet, freezing it hard and then taking it off of the sheet to place it into freezer bags. That way the pieces stay separate and don’t clump up. Frozen celery is a quick addition for sautéing and putting into chicken salad. However, as I said, frozen is useless when there is no electricity. Plus, I don’t have that much freezer space! I froze one bag of this celery and all of the rest I dried.
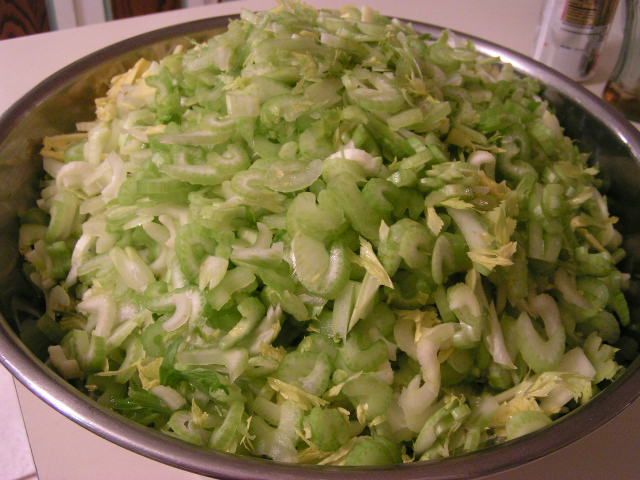
I used electricity on those suckers with a food processor! Beat having to cut them all up by hand. But I could have done it – Really.
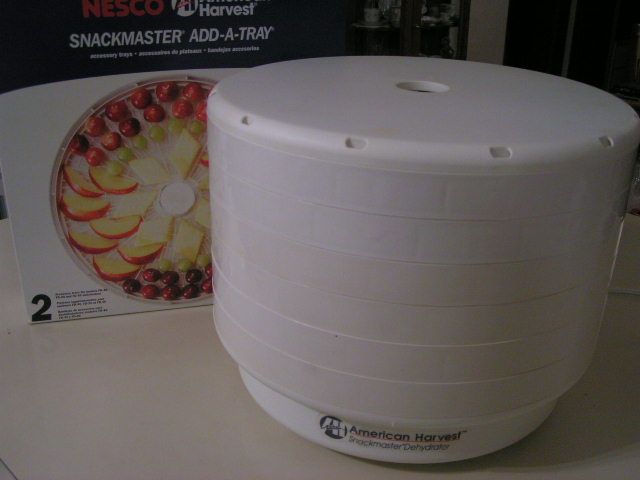
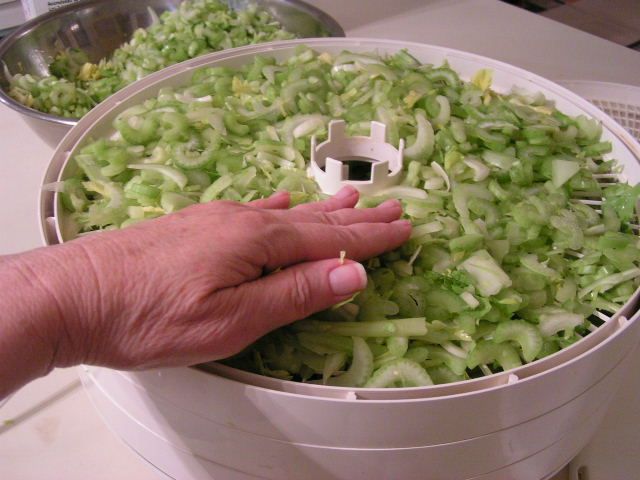
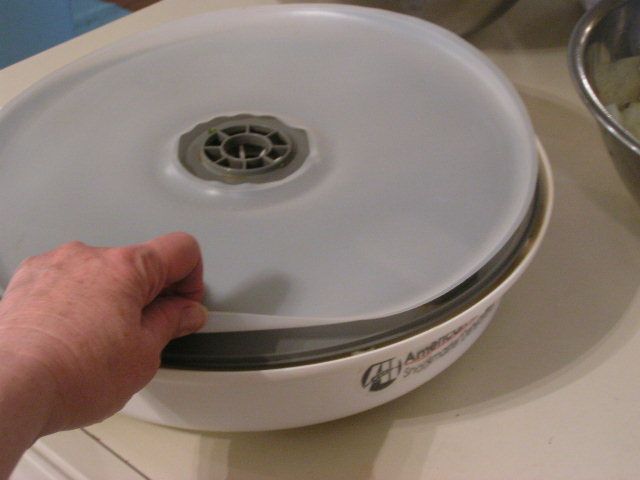
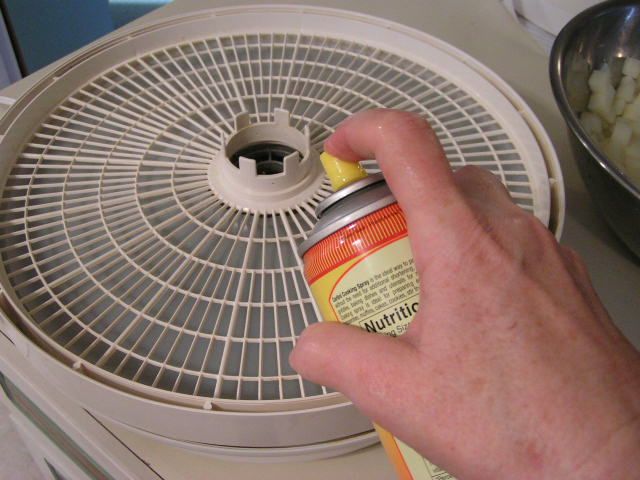
I use an American Harvest dehydrator that I have had for years. Got it at Walmart. They still carry them as far as I know, in season, but they are offered elsewhere as well. I also ordered extra racks from the company. Sprinkle the celery evenly on the dehydrator racks. It doesn’t matter if the celery is several layers thick. Continue adding celery to racks and layer one rack on top of the other. Dry overnight for 12 – 13 hours.
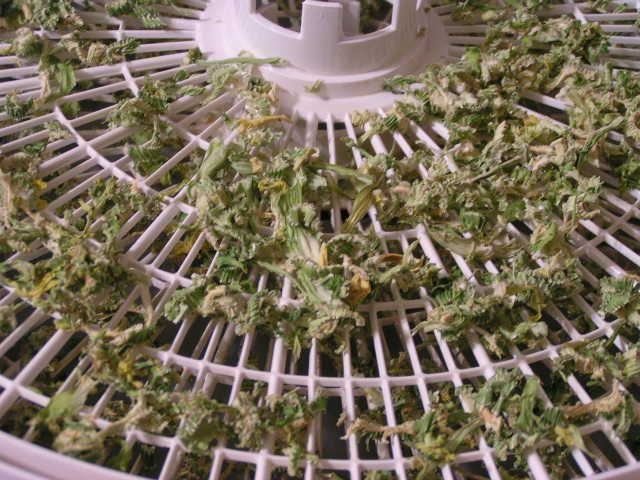
The celery should be totally dry and crisp in thin areas.
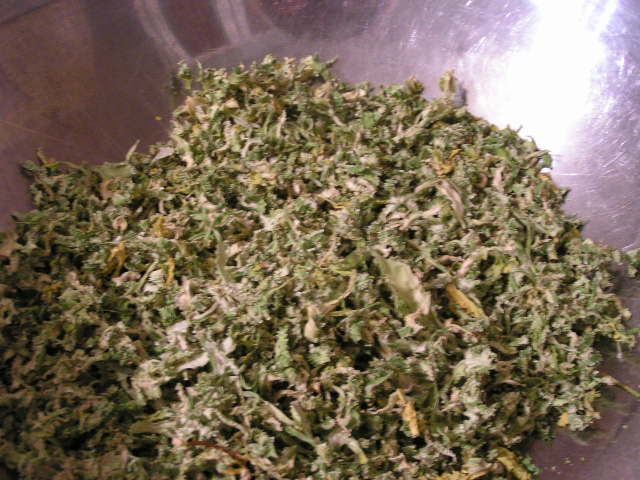
To make it easier to put the celery into jars with less mess, I have a very large bowl into which I shake the pieces. Then, using a canning funnel, I scoop the dried celery into jars. I like to use jars because I can vacuum seal them on my FoodSaver sealer. That takes out all air for good preservation. The nice thing is that you can unseal and reseal these jars with the vacuum sealer.
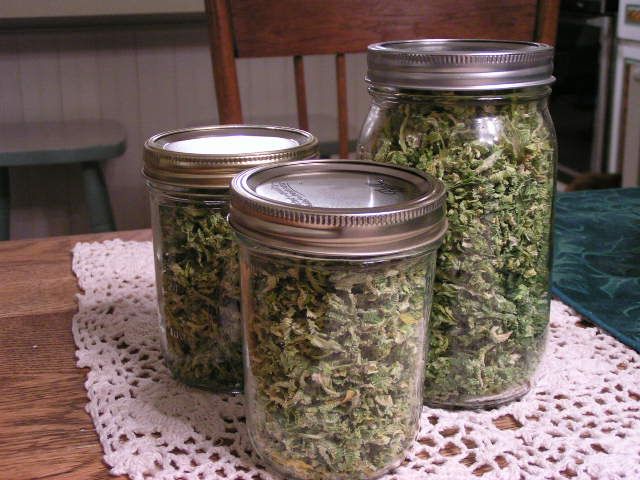
15 bags of celery!! 1 tbsp = 1 stalk of celery
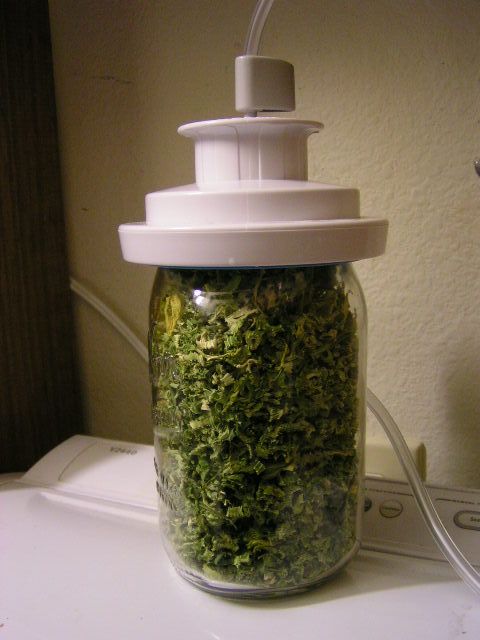
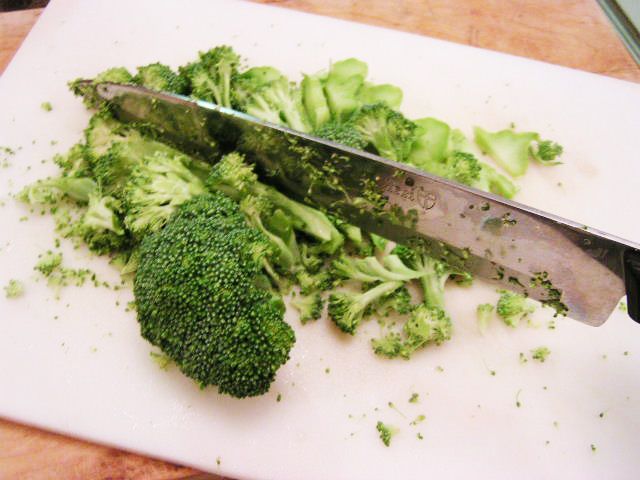
The same can be done with broccoli. You have a choice – if the brocolli is fresh from the garden and tender, I just cut it right up. If it is older or from the grocery store, I blanch in boiling water for 2 minutes, dump into ice water and then dry before cutting it up.
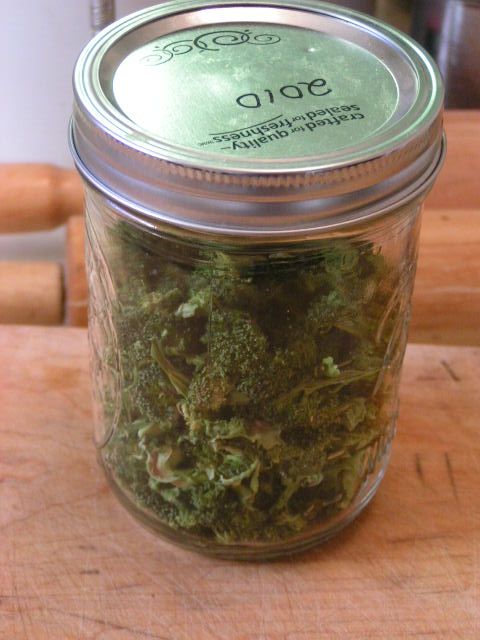
Dried Broccoli
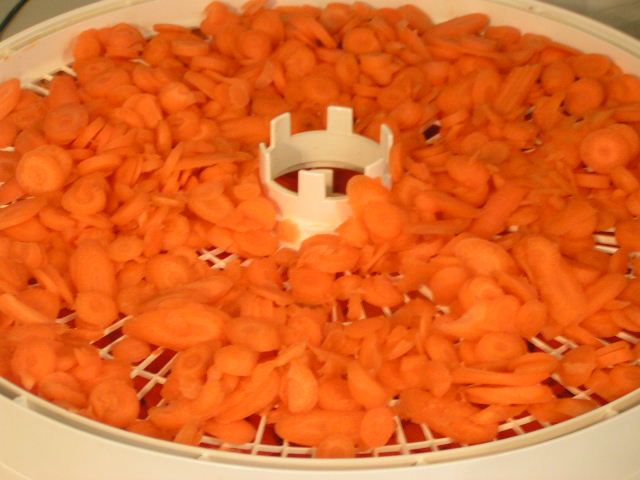
You can dry sliced carrots too
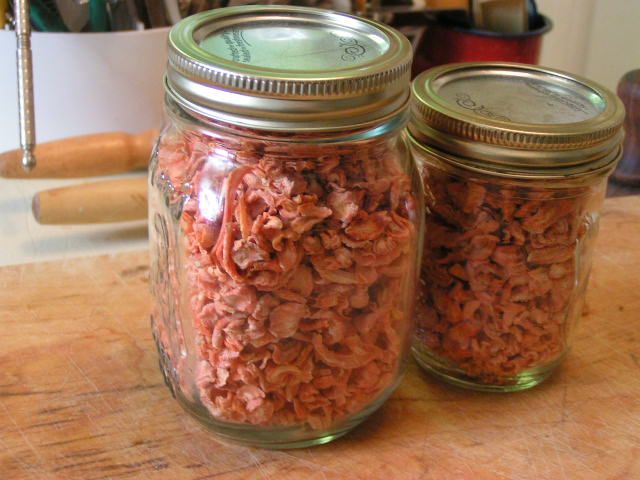
They look pretty in the jar. The one thing about carrots is that they need to be soaked with FruitFresh because they will lose their color over time, if kept for long.
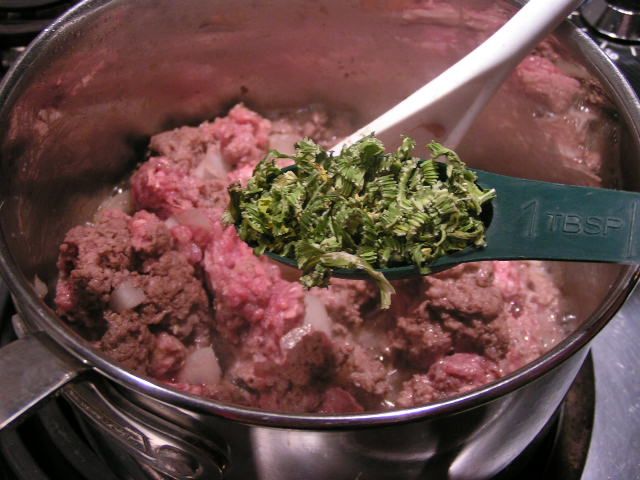
The dried veggies are wonderful for cooking. Add dried celery to browning hamburger for homemade spaghetti sauce or to the tomatoes for meatless sauce.
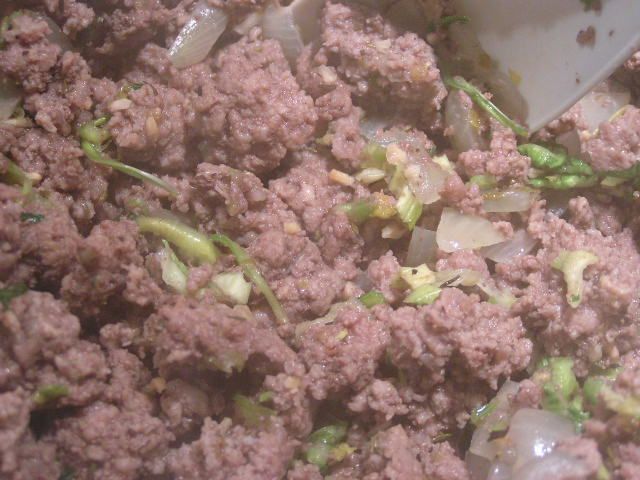
It reconstitutes beautifully! Or, for chicken salad or other times you want crispy celery, place dried celery into a bowl and cover with cold water to an inch over the top of the dried celery. Place in the frig overnight. Drain the next day and you have celery like fresh!!
So there you have it. That will keep you busy for a couple of days and by Thursday, you’ll be ready for a recipe. I’ve made a New Year’s Resolution – I’m going to do my dead level best to post twice a week, hopefully Mondays and Thursdays. Just remember what happens to New Year’s Resolutions – they’re kinda all dried up too.
Happy Cooking!
MB
|
Please join us on FaceBook!!
|
Join in the conversation by leaving a comment below and enter our January Giveaway!
|
Tags: broccoli, celery, dehydrating, dehydrator, drying, preparedness
Posted in A Day In the Life Of An Okie, Canning and Food Processing, Let's Cook! | 23 Comments »





 Homestead Revival
 Paratus Familia
 Rural Revolution