 I know. I know. Where have I been? Did I fall off of the earth? Did I get swallowed by a giant batch of soap? Did I get discovered by Food Network? (I wish!) While none of these scenarios is probable, the fact is that I had a variety of much less exciting happenstances occur at once. First, as I left you last time, I had a house full of teenage young men who stayed with us for 7 nights as they campaigned for our state representative. It was rather hectic here. But on top of that, my eye disease decided to rear its ugly head and I was having a hard time reading or typing for very long. It’s just no fun when you see two of everything!! And then – more company and more cooking. And then – two canning classes and a case of hives and more double vision. All in all, with excuses aside, it all boiled down to one main culprit: Writer’s block!!!! Yep. My brain has been fried. I have not had one single thing to write about. I’d start, but the words wouldn’t come and when they did, there were two of each. Soooo, I gave up. I have now chilled, rested and used not just a few ice packs and I am back in business. And speaking of business, we had a winner for our Fall Giveaway, reader and FaceBook fan, Sue Feely won two packages of our Frontier Fixin’s bread mix. Next week, right after Thanksgiving, a new giveaway will be introduced just in time for Christmas! So be watching. With this being Thanksgiving week, a time for family, memories, gratitude and turkey, I thought that I would give you a way that I like to use my leftover turkey that is pretty tasty. The recipe originated from a cookbook that I’ve had for years and is evidently no longer in print, titled “Favorite Brandname Cookbook”. I tweaked the recipe for leftover turkey but use chicken as well and home canned chicken or turkey is really great in it. If you want to can your turkey after Thanksgiving and then use it later, this is a good way to use that, but straight off the bone is fine too. I like white meat in my recipes but both white and dark work well too. It’s all a matter of preference. In this tutorial, I am using chicken, but will be making it with turkey on Friday!! And just as a note, I use dehydrated celery, mushrooms and onions and they work great. Ingredients: 1 cup sliced carrots 3/4 cup chopped onion 1/2 cup diced celery 1/2 cup chicken or turkey broth 1 can cream of chicken soup 1 pkg turkey gravy mix (if using turkey for the meat) mixed with 1 cup cold water 1 cup sour cream 3 cups cubed or shredded chicken or turkey 1/2 cup sliced mushrooms 1 teaspoon worcestershire sauce 1 teaspoon salt 1/8 teaspoon pepper Topping: 1 cup flour 2 teaspoons baking powder 1/2 teaspoon salt 2 eggs beaten 1/2 cup milk 1 Tbsp. chopped green pepper 1 Tbsp. chopped pimento 1 1/4 cups shredded cheddar cheese (sharp is good) 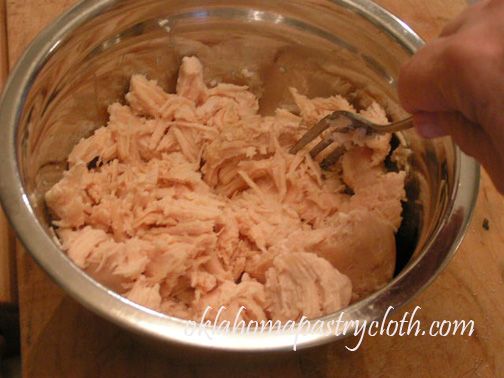 In a bowl, place the meat, either shredded or cubed. If using canned meat, it will shred. 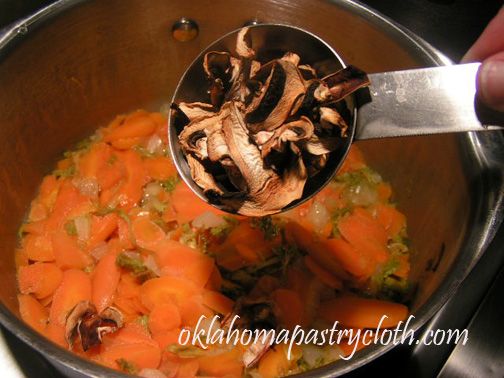 Place veggies, minus the peppers and pimentos, into a saucepan with 1/4 cup chicken broth, cover and simmer for 20 minutes. Add a little water if needed to keep from cooking dry. 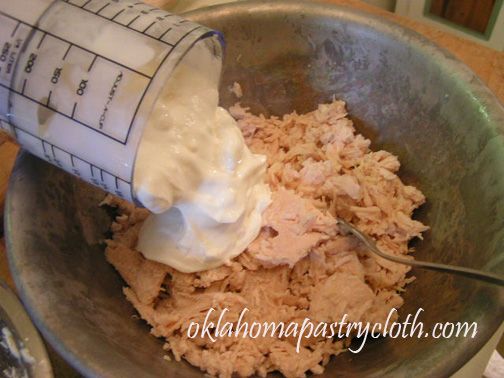 Add sour cream to the meat  Add cream of chicken soup and turkey gravy mixed with 1 cup water to the meat and sour cream  Add Worcestershire sauce, salt and pepper 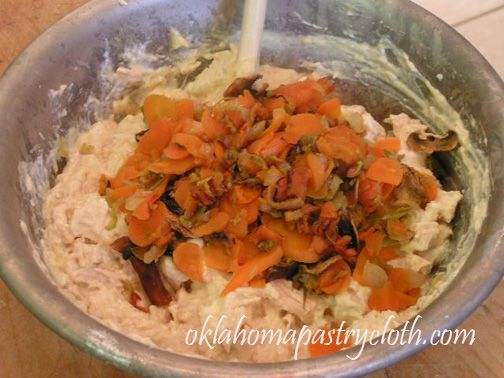 Add vegetables  Add remaining 1/4 cup chicken broth and mix all ingredients well  Pour the meat mixture into a casserole dish. I am using a Pampered Chef stoneware deep dish baker here. Set dish aside. 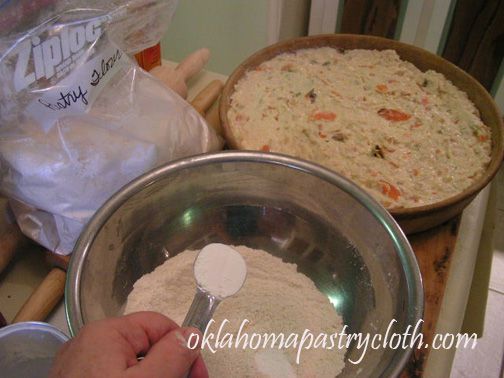 In a bowl, add flour, salt and baking powder and stir.  In a separate bowl, lightly beat eggs and milk together  Add cheese and peppers to the flour mixture and toss until the cheese is totally incorporated with the flour  Pour egg mixture in with the flour mixture and stir well  By spoonfuls, place the batter mixture in a ring around the outside top of the meat mixture in the casserole dish. Bake for 40 – 45 minutes at 350º until golden brown.  It’s pretty and it’s good! Serve hot with a salad and you have a meal!  |
|
| |
|
Oklahoma Pastry Cloth™ Company on Facebook
|
|
 |
|
|
|
Posts Tagged ‘chicken’
A New Meaning To Pot Pie
Tuesday, November 20th, 2012
Quick Curried Chicken
Thursday, November 3rd, 2011
|
Apple Time Giveaway  It’s cold in Okieland!! Who would have believed this past summer, as we suffered through 60 some odd days of triple digit temps, that we could ever reach 30 degrees! It’s glorious. The sun is shining, we got a little rain yesterday and the air is clear. Good times! In this cold weather, this wonderful chicken dish is hot, fast and filling. Accompanied by hearty Indian Basmati rice and fried spinach you’ll think you are in Calcutta. Mr. Fix-It loved this dish and ate two helpings. I think you’ll love it too because it is so easy to fix. So here you go: 4 boneless, skinless chicken breasts, cut into cubes or strips 2 tablespoons olive oil 1 small onion chopped 2 cloves garlic minced or 2 tsps garlic paste 1 14.5 oz can crushed tomatoes 2 tablespoons yellow curry powder 1/2 cup coconut milk salt and pepper to taste 3/4 c. flour 1/4 c. cornstarch 1/4 tsp tumeric 1/2 tsp. soda 1 egg 1/4 – 1/2 cup ice water  Pour olive oil into large skillet  Add chicken and cook on medium high until lightly browned but not cooked all the way through. Remove from skillet and set aside.  Add onions to the skillet  And garlic. I have found this wonderful stuff at Walmart. It is in the produce section. There are a variety of organic herbs in paste form. How cool is that? It takes two teaspoons of this garlic paste. Cook until onions are tender and slightly clear  Reintroduce lightly cooked chicken to the skillet with the onion and garlic and add tomatoes. I am using home canned tomatoes here, that I pulsed in the blender for a few seconds. Stir until ingredients are mixed.  Add two tbslps curry powder and stir until curry is mixed throughout. Simmer the mixture for 30 – 40 minutes, stirring occassionally, until thickened and chicken is cooked and tender. Start your rice.  You can find coconut milk at any grocery store. Shake the can and then pour out 1/2 cup. Store the rest in the frig in a refrigerator dish.  Add coconut milk and stir to incorporate. Allow to simmer 10 more minutes, stirring occassionally.  While the curry is cooking, mix flour, corn starch, tumeric and soda in a bowl and add beaten egg. Slowly add 1/4 cup ice water and stir. Add more water as necessary to form a nice, thick batter like pancake batter. Start a skillet or pan of hot oil about 3″ deep and heat to 350º.  Take a handful of fresh spinach and dip the entire handful into the batter.  It’s messy, I know. It doesn’t matter if all of the spinach is covered. The object is to make all the leaves of spinach stick together.  Drop battered clump of spinach into hot oil and fry on one side until browned and then turn. Drain on a rack over a paper towel.  Put rice onto plates and spoon curry over rice. Add spinach and a salad and you are done!  |
|
|
Oklahoma Pastry Cloth™ Company on Facebook
|
|
 |
|
|
Making a Solar Oven
Thursday, July 28th, 2011
 Yesterday it was somewhere around 110 degrees in Okieland. Shoot, at 7 pm it was still 107! It’s that kind of stifling heat that just puts you in a bad mood. A lot of people are in a bad mood around here. The sad part is that the weatherman says that it will be this way for the next 20 or so days unless a miraculous tropical storm comes ashore and moves north. I never thought that I would hope for a tropical storm! On days like these, one has a tendency to get a little odd. Heat has a way of doing that to people. It’s getting so bad that we in the country are seeing Dairy Queen mirages, in the distance, way down the gravel road and in a film of dust. You take off at a jog, salivating for a frozen, cold, chocolatey Dilly Bar, only to wind up in a cloud of lime dust as the mirage disappears, without so much as a popsicle stick. It is truly sad. Yesterday, to keep myself from going crazy, I decided to do something different. I mean, REALLY different. I had received an email from a reader, and questions from a friend, regarding solar ovens. As I said in the last post, my experience has been with reflector ovens, but a solar oven seemed of utmost interest considering we Okies are not allowed to even say the word fire, let alone strike a match in our parched environs right now. And the thought of not heating up the kitchen gave real incentive. So, I did some research and chose this hottest day of the week to harness the rays of the brutal sun to make dinner for Mr. Fix-It. I settled on a meal of chicken breasts, carrots, new potatoes and onions and thought I would surprise him with this delicious meal. Somehow, I knew his reaction would be, “Chicken cooked in the sun? Nope. Not taking my chances. Sounds like ptomaine poisoning in a box.” However, he always loses and eats whatever I put in front of him. He hasn’t died yet. So the following is a step-by-step process for making a very simple solar oven. I kid you not – it works!!
 Fold the flaps of the small box inside the box or cut them off. Line the inside of the box with aluminum foil and press against the sides as smooth as possible. Tape the foil to the outside of the box or just fold it over in place.  Cut a sheet of construction paper to fit the bottom of the small box. I had to piece this one together and taped it together on the underside of the paper. As I was cutting the construction paper, I felt like Captain Kangaroo with safety scissors showing a craft project on television. I think it was that sound of cutting construction paper. OK. So the heat is getting to me. Just ignore me.  Wad up sheets of newspaper or newsprint and make a cushion on the bottom of the large box.  Center the small box inside the large box and pack wadded paper around the small box as insulation.  Measure the opening of the large box and cut the extra cardboard to measure 4″ longer and wider.  Cover the cardboard with aluminum foil and tape or glue onto the back. Note: I can see using mirrors instead of aluminum foil in this project and getting some hot heat!   Staple the cardboard to the back flap of the large box with the aluminum foiled surface facing toward the box opening. Tape the flap to the cardboard piece for extra strength.  I sprinkled garlic powder, paprika, thyme and pepper on boneless, skinless chicken breasts  I added new potatoes, carrots and onions into the bottom of a dark enamel pot. The pots or pans need to be dark and so cast iron or enamel work well.  Chicken breasts were placed on top of the veggies and 1 tbsp of Italian dressing, 1/3 cup of water and 1 tsp of chicken bouillon granules were added.  The pot is placed inside the small box (a thermometer is hanging from the handle of the pan) and plastic wrap is stretched tightly over the opening of the large box. The plastic wrap is taped to the sides.  Voila – I just covered the front flap with foil to make it look balanced. It’s the artist in me.  Now, I discovered a problem for Oklahomans. We have wind. REAL wind – you know, that comes sweeping down the plain ala the movie. So, I grabbed a trashcan full of 2 x 4 scraps and put it behind the cardboard reflector. I ran packing tape from the reflector around the trash can. That way, I could move the trash can and repostition the cardboard if I needed to in order to catch the sun right.  Within minutes it got up to 160º  I checked it about every 45 minutes but only looked at the food once. It cooked for 8 hours with the highest temperature reaching 190º. When planning your recipes, look at it like a crockpot slow cooker.  All done  It was delicious! Really. So tender! I think that the only thing I might have changed would be that I would add some cream of mushroom soup to the chicken! Now you can bake in the sun and not use a drop of suntan lotion!! |
|
|
Oklahoma Pastry Cloth™ Company on Facebook
|
|
 |
|
|
Creamy Chicken Veggie/Noodle Soup
Monday, May 2nd, 2011
 I don’t know about where you are, but here in Okie Land, it’s just downright cold. Last night, we had a low in the 30’s and it appears to be making a repeat performance tonight. A wonderful rain has continued the entire day, totally breaking the drought for sure. We even had a little pea-sized hail for good measure. The ground is soaked and that’s a good way to be!! A neighbor even burned trash this weekend – something that has been forbidden in these here parts. And so, though this is the first of May, and though we normally have warm weather by this time, I decided to “soup” up my basic chicken soup recipe and make a meal into which Mr. Fix-It could sink his teeth. By his third bowl, I figured that he liked the results. There’s leftovers for tomorrow too! Here is my new concoction! Soup Note: You can substitute dried veggies, canned chicken and canned milk if you want to try your hand at ‘sustainable’ cooking.  Pour one to two tbsp olive oil into a large stock pan or pot.  Add 1 tbsp flour and on medium heat, stir until flour is fully incorporated to make a light roue.  Add 2 quarts chicken broth and 1 bouillon cube and stir. Simmer on medium heat  In a skillet, add one tbsp olive oil and sauté 1/2 cup chopped onions until soft   Chop three large button mushrooms  Add chopped veggies to sautéd onions and toss  Pour vegetables into simmering broth  Add 1/8 tsp thyme  And 1/8 tsp sesame oil  Add chopped raw chicken breast  Add a fresh orange peel. We love this. It makes all the difference, but it is optional  Stir and cover. Simmer for 30 minutes and then remove orange peel  Add 1/2 cup chopped cabbage and simmer, covered, for 10 more minutes  Uncover and add 1/2 cup half and half and stir well  Bring to a boil and gently sprinkle in homemade noodles while stirring to keep from clumping. We much prefer the homemade noodles to packaged and they are so simple to make. They are much more tender, but you can use the packaged. Simmer until tender. The noodles will naturally thicken the soup, but if you want it to be any thicker, just add cornstarch that has been mixed with cold water. Note: If you plan to can this soup, leave out the noodles. Just open a jar of soup later and add noodles prior to serving. Noodles get mushy when canned.  |
|
Oklahoma Pastry Cloth™ Company on Facebook
|
 |
Chicken and Broccoli Bake
Thursday, March 31st, 2011
 Once in awhile I get a wild hair and just start experimenting. Like splashing paint randomly on a canvas, I’ll play a game of “pull out what you have, throw it together and pretend it’s good!!” Most of the time, the result is pretty successful, but once in awhile I’ll end up with a disaster like my ‘seafood casserole’ which has been the subject of really bad jokes for the past 10 years. Or at least I think they are bad. For some reason, at family get togethers, that meal always finds its way into the conversation. That casserole was big enough to feed our family of six and all the neighbors up the road and across the road. Unfortunately, the kids took one bite and asked when I had started combining WWII MREs for dinner. Actually, WWII MREs would have tasted better. Mr. Fix-It, always the gentleman, smiled through gritted teeth and pretended to chew. I gave the casserole to our Labrador, Toby, who is the canine equivalent of “He likes it! Heh, Mikey!” (The Life commercial, silly!) Toby sniffed the casserole and looked at me with those big, brown, soulful eyes that silently queried, “When did you start combining WWII MREs for dinner?” He didn’t eat it either. Mr. Fix-It is my restaurant critic. No thumbs up from him or five stars. It’s number of helpings that determines the quality of my concoctions. One helping that is barely touched is a signal that failure is the operative word while two helpings is the, “Old gal, you did it!!” Well, this was a ‘Mr. Fix-It Two Helping Recipe” and so I thought that I would share it with you. And please, if you don’t like it, don’t tell me. Just go buy a Labrador! 
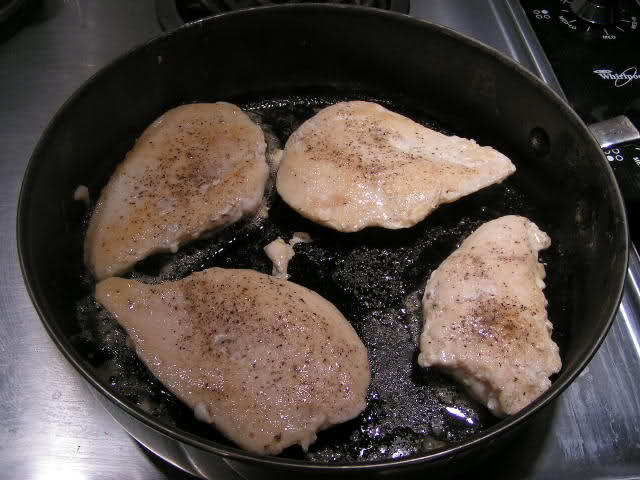 Salt and pepper chicken breasts and brown in 2 tbsp olive oil 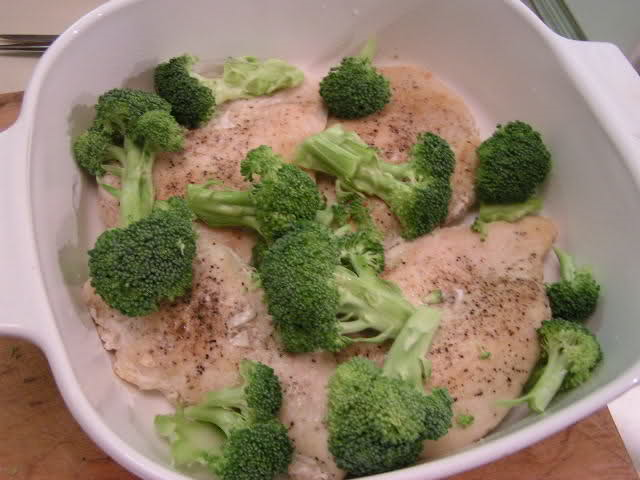 Place chicken in a baking dish. Lay broccoli around and on top of the chicken breasts 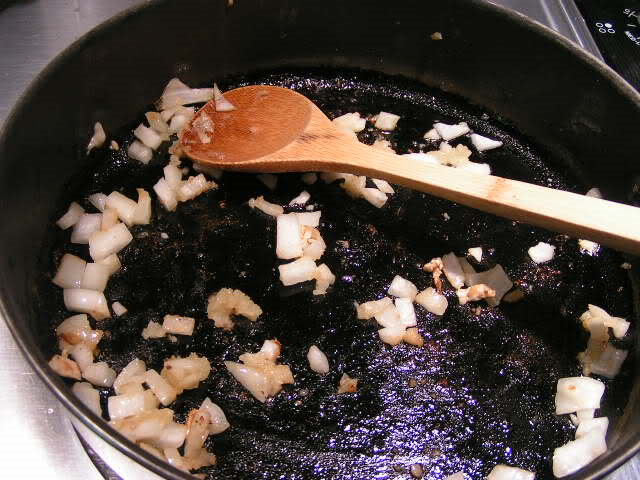 In the same skillet of drippings, sauté onions and garlic until just clear. 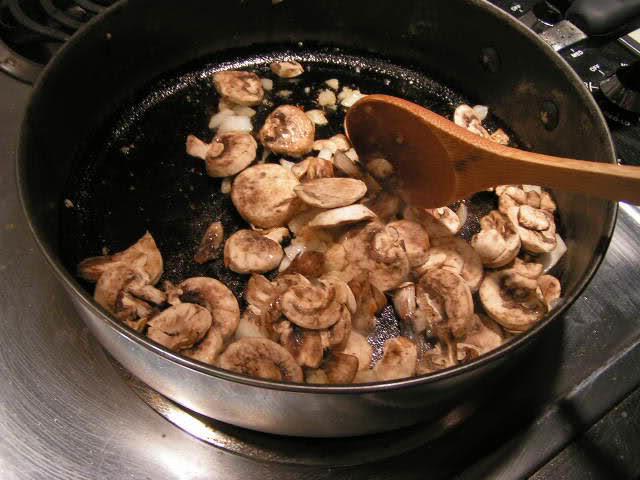 Add mushrooms and cook until tender and browned 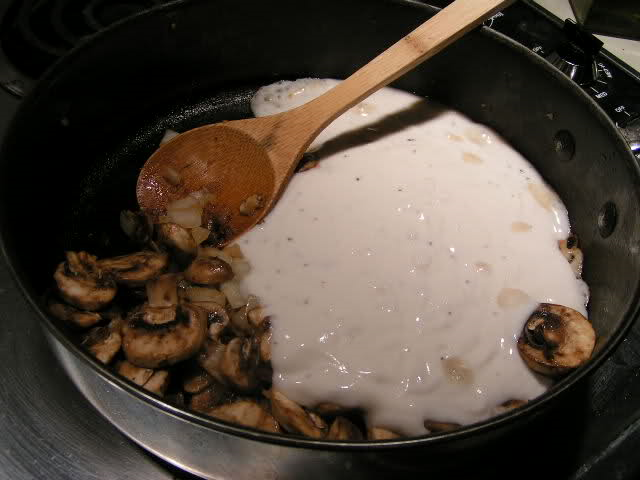 Add prepared gravy mix. I like using the mix because it is lower in calories and fat, but you can make a white gravy mix from scratch, in a saucepan, using equal amounts of melted butter (or other fat) and flour, adding milk a little at a time and stirring until gravy is thickened. Add salt and pepper to taste. 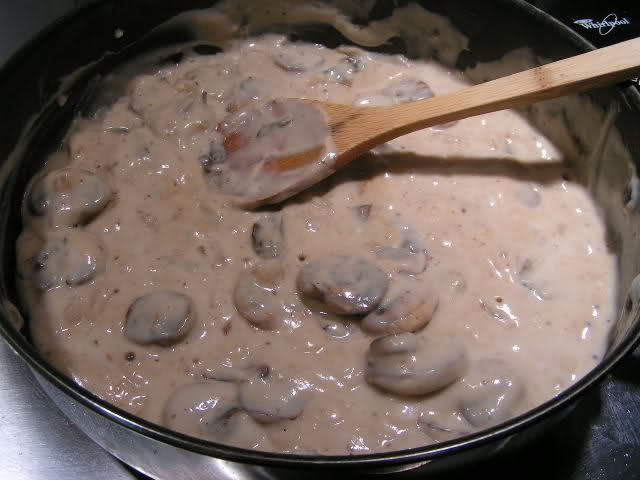 And stir until everything is incorporated 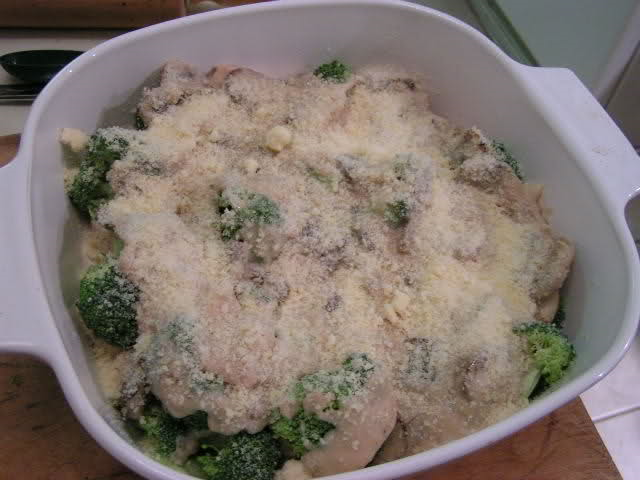 Pour mushroom sauce over the chicken and broccoli and spread to cover and sprinkle parmesan cheese over the sauce 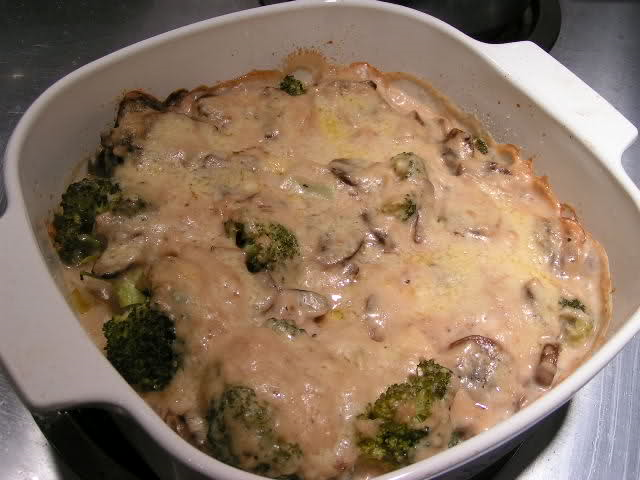 Cover and bake in 350º oven for 30 – 45 minutes until brown and bubbly
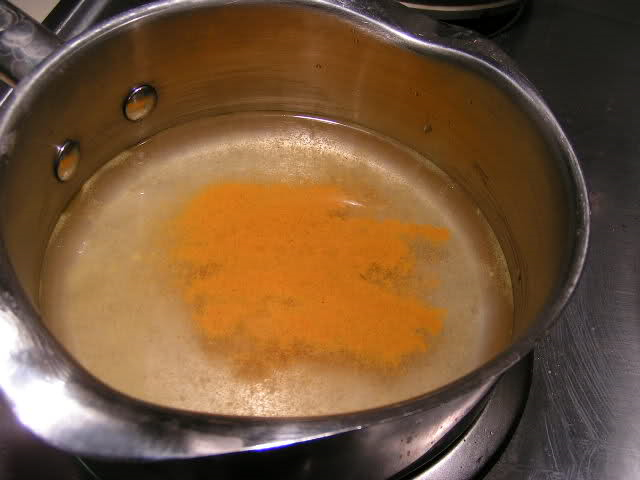 In a large saucepan add bouillon to water and add turmeric 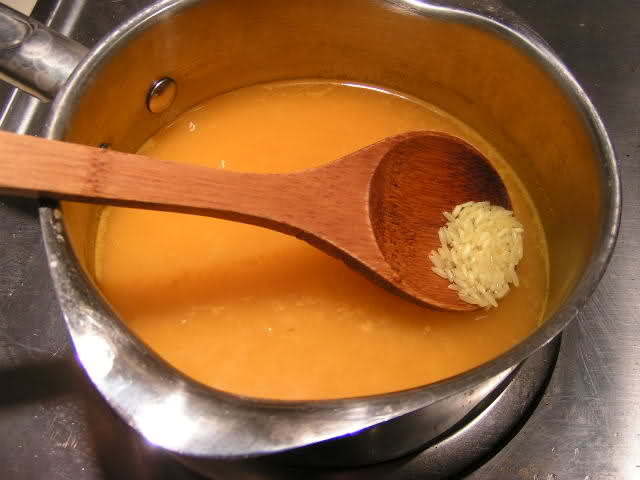 Bring water to a boil and add rice. Cover, reduce heat to simmer for 20 minutes 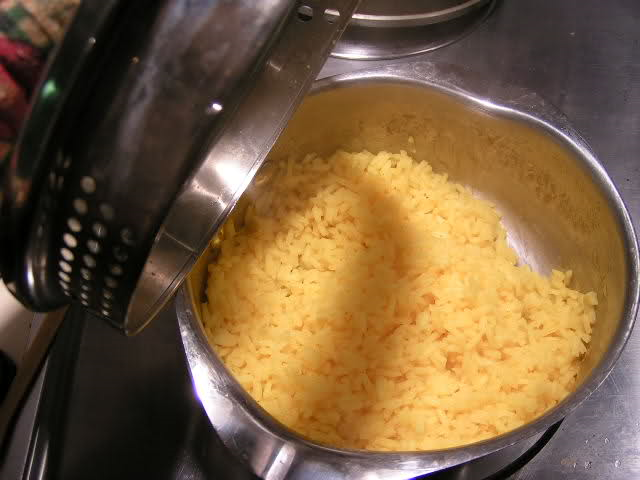 Toss rice and cover to let stand for 5 minutes. 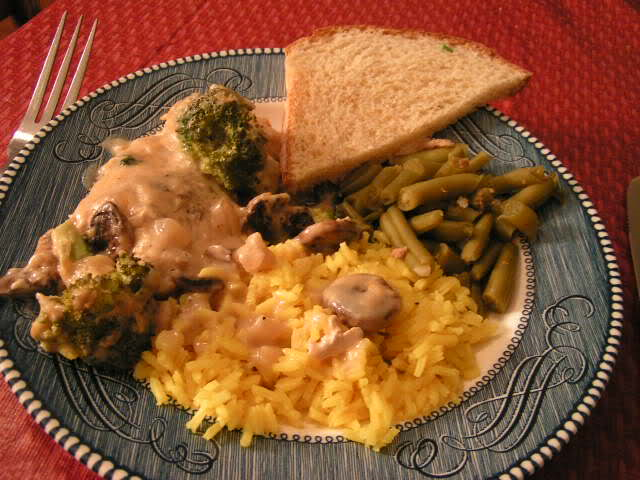 Serve one breast and broccoli with sauce per person. And of course, you’ve gotta have that homemade whole wheat bread! 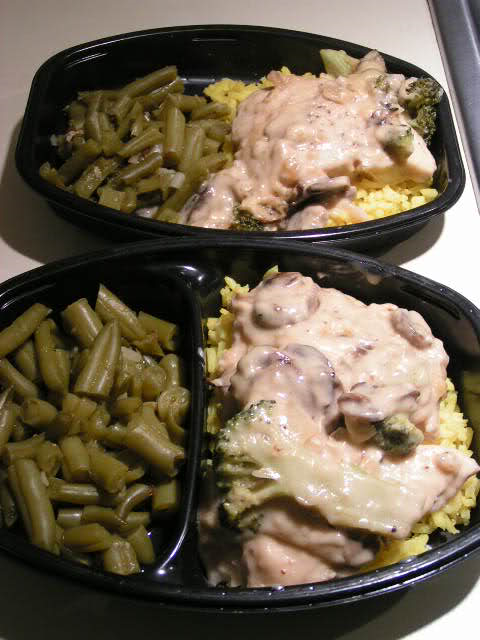 If you have leftovers, pop them into plastic trays, wrap with foil, label and freeze and you have your own ‘TV Dinners’. This is one chicken breast split into two dinners! Can we say, “Lunch?”  |
|
Oklahoma Pastry Cloth™ Company on Facebook
|
 |
Canning Chicken and A Recipe
Thursday, March 10th, 2011
  Buying chicken on sale is a wonderful thing if you have the room to freeze it, but what do you do when chicken is on sale for a matter of cents per pound and you want to stock up for a good, long time? Freezer longevity for chickens is just a few months and so unless you eat chicken every night, it would be hard to make use of a large number of frozen birds. Canning is your option! Shoot, canning is ALWAYS an option because there’s just very little that can’t be canned! 🙂 And so, here are the steps to canning a whole bird followed by a rather surprising recipe – I thought it was surprising, anyway! The method that I am using here is called the “raw pack” method and does not involve cooking the chicken first. 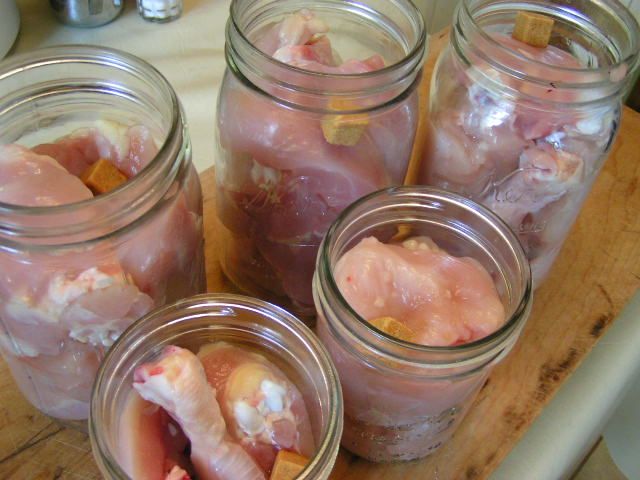 After cutting up the chicken, place it into warm, wide-mouth jars that have been washed and sterilized in the dishwasher or boiled in a large pot. It is important that they are widemouth in order to get the chicken out without tearing it apart. I can get one half of a chicken into a quart jar (minus the back which I use for stock). I also place just the wishbones together sometimes, in a widemouth pint jar, to use for recipes like enchiladas that call for just white meat chicken. I also skin all of my chicken to cut down on fat. I place one cube of chicken bouillon per jar. 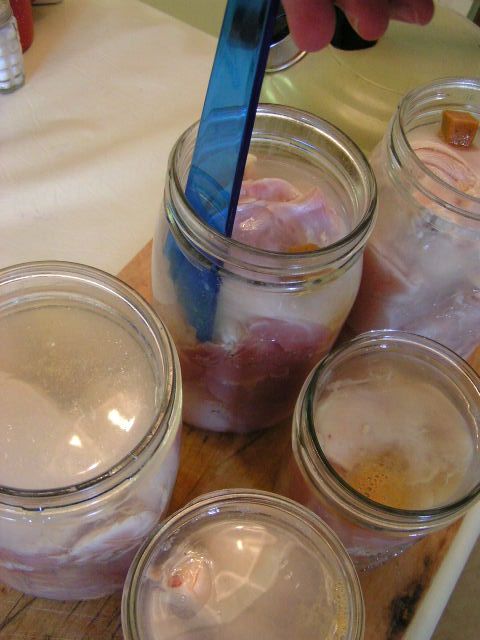 Meanwhile, I have a kettle of water boiling on the stove and slowly pour the hot water over the chicken to leave a 1/2″ headspace. Using a canning spatula or knife, move around the inside perimeter of each jar to release any airbubbles. 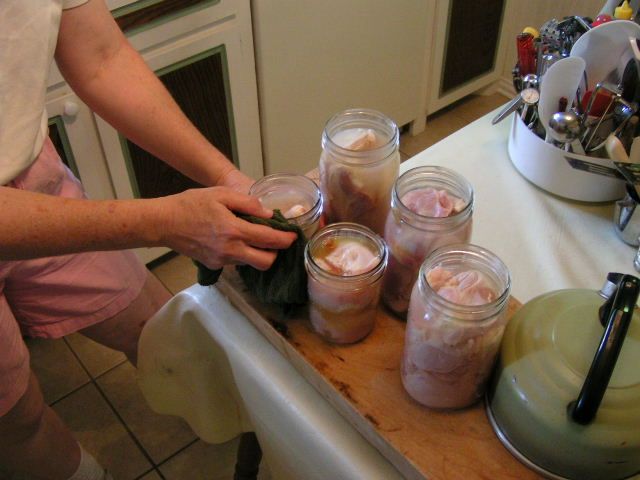 Wipe the top edges of the jars with a wet cloth to remove any chicken juice or oils. 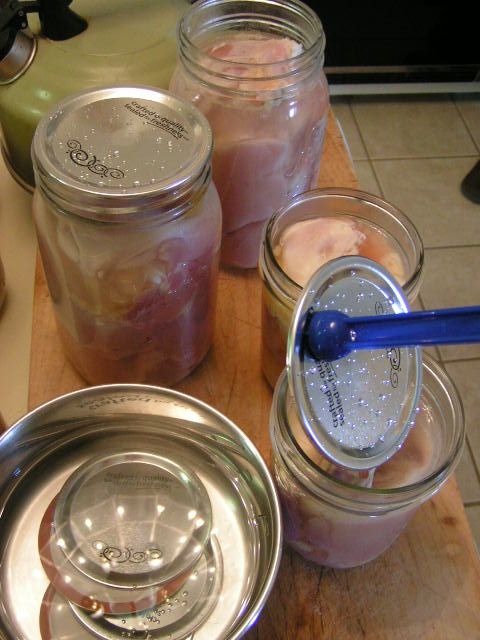 Place lids that have been warmed in a pot of nearly boiling water onto the jars and add rings. Tighten slightly. Place in a pressure canner just like I demonstrated in the post on canning chicken broth. Process for 75 minutes for pints and 90 minutes for quarts once your canner has pressurized. 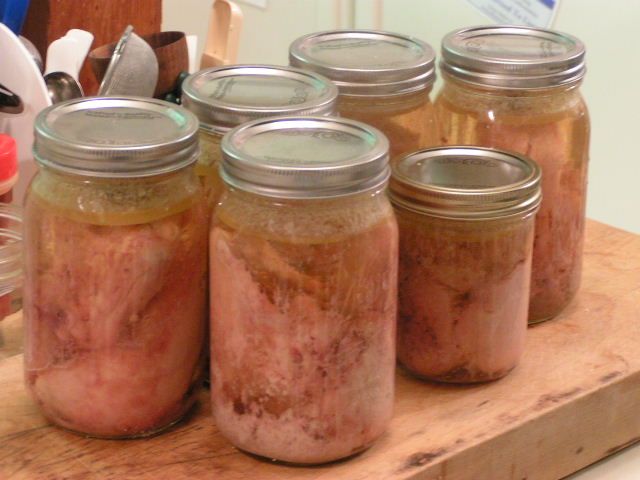 I have to admit that of all the things one may can, chickens make the UGLIEST presentation. The jars just aren’t pretty. There’s no getting around it. Once they come out of the canner and cool, it is a good idea to remove the rings and wash the jars (with the chicken in them) in warm, soapy water and then wash the rings to get any oil off that may have escaped in processing. Let the rings dry and then you can replace them or leave them off, whichever you prefer. Once your chicken is canned, it will last for at least a year. And it is so great for fast meals. Dump a couple of jars into a pot with some onions and broth and bring to a boil and then add dumplings. But that is just normal. How about different? 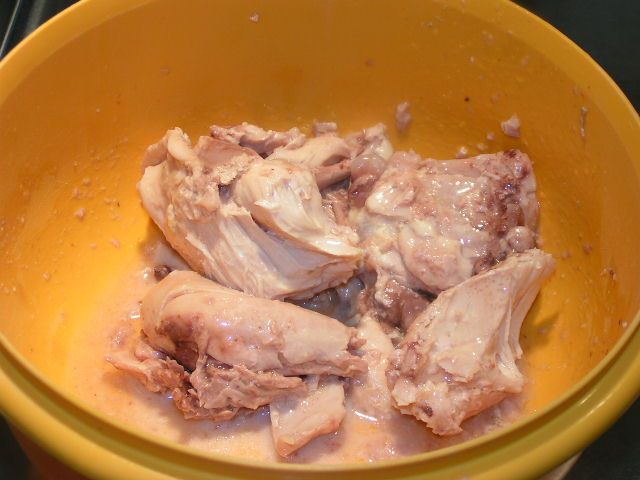 Last night, I opened one quart jar of chicken, drained the broth and carefully slid the chicken pieces into a large bowl. I sprinkled milk over the pieces. 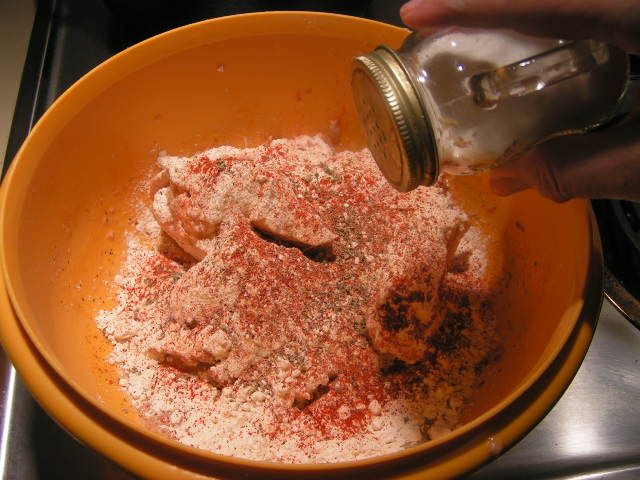 I added a cup of flour, about 1/2 tsp paprika, 1/4 tsp garlic powder, 1/4 tsp thyme, 1/2 tsp sage, 1/2 tsp black pepper and carefully rolled the pieces in this mixture. I salted the pieces at that point. Again, you have to handle the pieces gently or they will fall apart on you. If they do, it’s ok. Just dredge the parts in flour too. 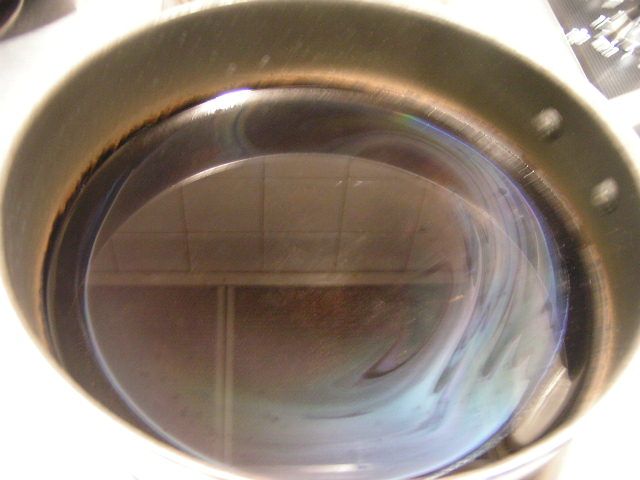 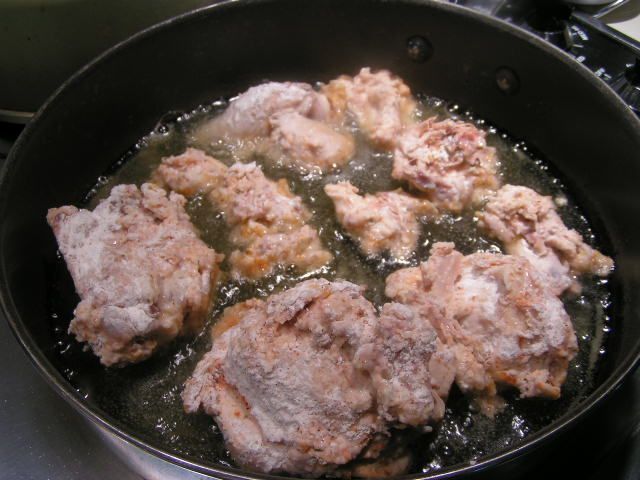 Next, I put just enough canola oil in a skillet to cover the bottom well and heated on medium high. Light olive oil would be fine too. Anything to get those good fats, people! When the oil was hot, I gently placed the floured pieces of chicken in the oil to “fry”. 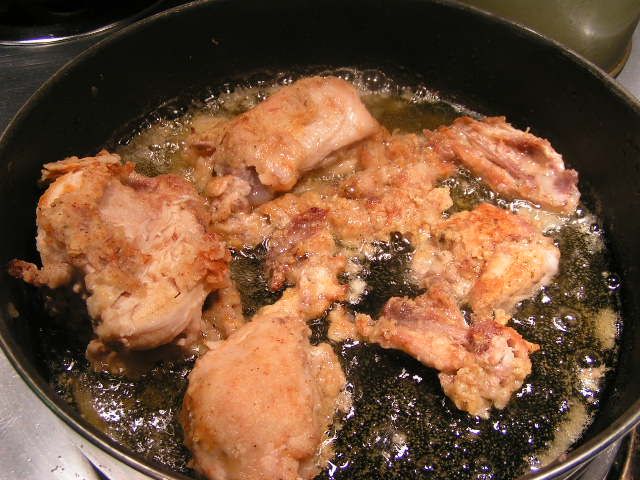 I carefully turned the pieces to brown on the other side. When browned, I transferred the pieces to a cookie rack placed over a cookie sheet and placed in the oven at 250º while I cooked the rest of the meal. This keeps the meat warm, but also lets excess oil drip off of the chicken so that it isn’t too greasy. 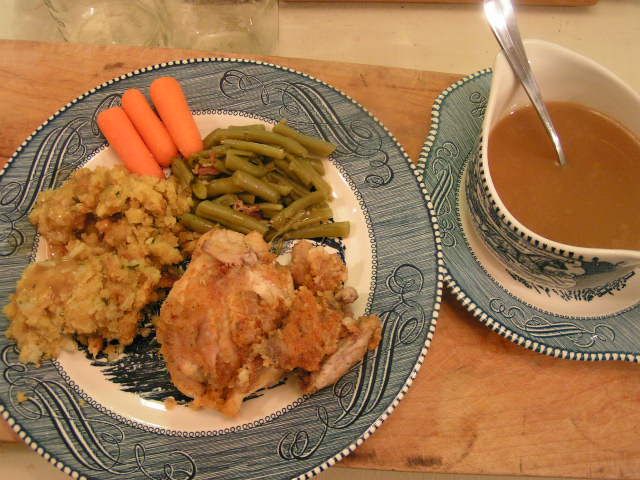  You can make gravy with the broth out of the jar and cornstarch or use a packaged mix. And I added stuffing to this plateful. Since the chicken has been pressure cooked in the canning process, it is tender and falling off the bone even before frying, so frying just gives these tender morsels a crispy covering. Mr. Fix-It was licking his chops and said that the chicken was superb! He’s my most honest critic. So see? You can use canned chicken in all kinds of ways! |
|
Oklahoma Pastry Cloth™ Company on Facebook
|
How To Cut Up A Chicken, Butcher Style
Monday, March 7th, 2011
 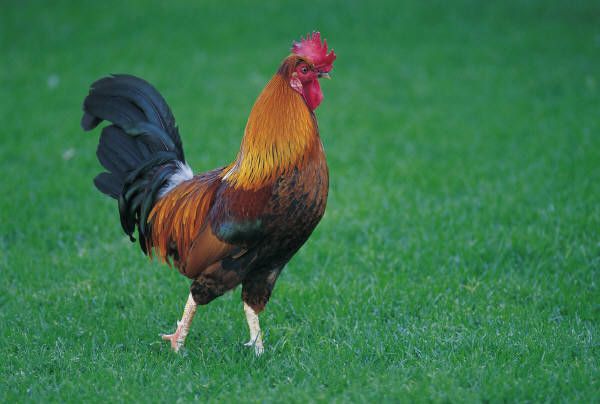 I’ve mentioned in past posts that I worked in the meat department of a grocery store in my previous life. At night, I helped cut and wrap custom beefs, lambs, hogs and deer. During the day, I was a butcher’s assistant, helping to cut, wrap and display all of the meats that were sold in the grocery. It was a fun job, believe it or not, made especially fun because of the people with whom I worked. It was a family operation and they treated their employees like members of the family. Practical jokes and laughs were a daily routine. One time, the butcher and his cousin had me convinced that I had guzzled Hydrogen Peroxide in my tea (the tea was fizzy), put there by a coworker who didn’t know any better, such that I was certain the stomach ache that ensued was due to gastric poisoning. There is a skull and crossbones on the bottle for heaven’s sake!!! I was handed the phone to call the doctor, who had been let in on the joke, and I was only encouraged further down the fantasy road of certain demise right there in the meat department. Finally, the giggles erupted and a bottle of Dr. Pepper was produced. My face could not have gotten any redder. I returnd the prank by heavily lathering the phone earpiece with vaseline and then calling the meat department from the phone at the front of the store. My boss answered the phone. Oh yeah. 🙂 I had to learn fast and hard in this job and being the competitive person that I am, thanks to the genes inherited from my tennis-playing grandfather, I was bound and determined to master whatever I was given to do. One of my first jobs involved wrapping the cuts of custom beefs in freezer paper and labeling the packages. It is a job that I still practice today every single time I freeze our own meats. There IS a method to wrapping! But that is for a later post. In my day job, the first task I was immediately tossed into learning was the job of cutting up a chicken. My first attempt was a joke, but as time went by, I got faster and faster and could finally cut and package a chicken faster than you could say “Cocka-doodle-doo”. This is a skill that has helped me more than you can imagine! Whether raising your own chickens for meat or purchasing yours at the grocery, knowing how to cut them quickly is a blessing. Today, I buy whole chickens on sale and cut them up, dividing them into packages of separate parts. The other day, I found whole chickens for 65¢ per pound. After cutting them, I packaged breasts together, legs together, thighs together, and packaged cut-up wings for hot wings, while cooking the backs, skin and “innards” for broth. A package of breasts for 65¢ a pound? Find THAT in a store near you! So here is the way that I learned to cut up a chicken. I learned from a pro – Greg, the Butcher! Thanks Greg, for all you taught me!! 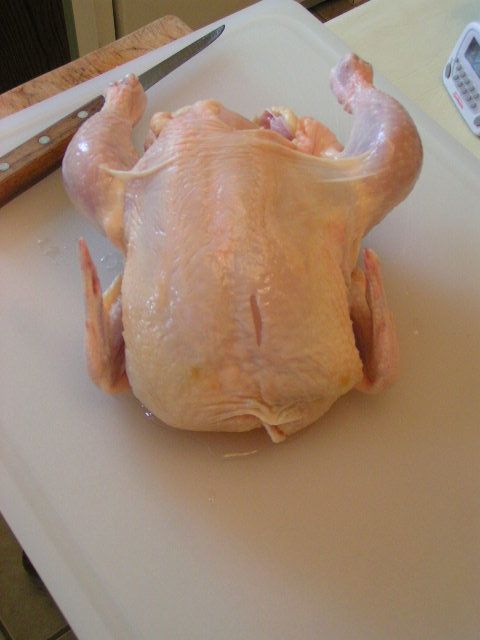 You will need a cutting board that is not wood. Wood soaks up bacteria that is found in chicken and it is very difficult to disinfect afterward. You will also need a good boning knife that is sharp. I use Forschner brand knives which are the brand that we used in the meat department. I like them because the blades are flexible and can bend slightly. Also, if you like, you can do what we used to do in the meat department and use rubber dishwashing gloves. These help you hold the chicken easier to avoid slips, and you are less likely to cut yourself if you do slip. 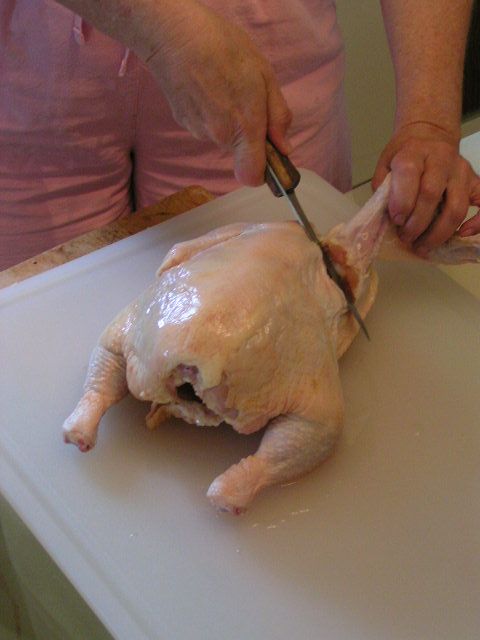 With the breast side down, pull one wing out and away from the body and feel for the main joint. Slice between the two bones of the joint. You will slice down and around the joint bone. 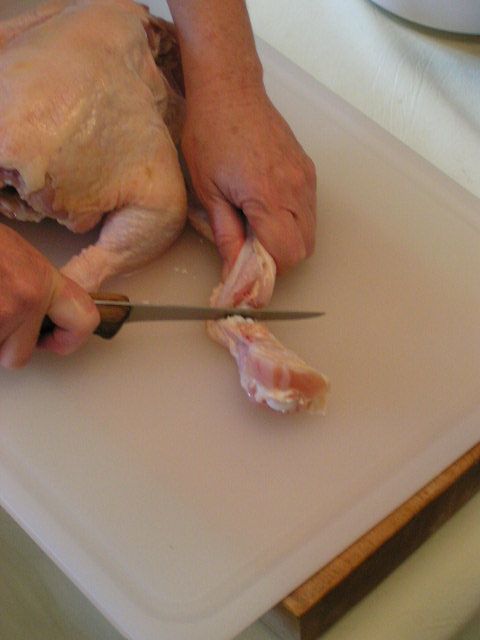 Cut at the joint between the shoulder section of the wing and the “bicep” section of the wing. 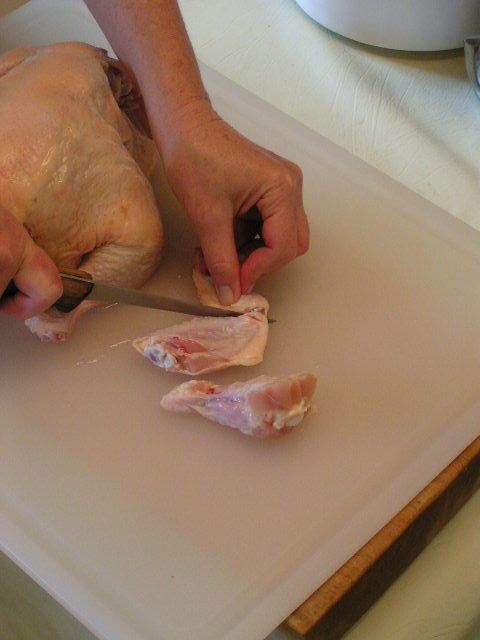 Then cut between the joints that hold the “forearm” of the wing to the “bicep” section. I throw that little front part of the wing in with the back and other excess pieces to stew for broth. The two larger sections are packed together for “hot wings”. 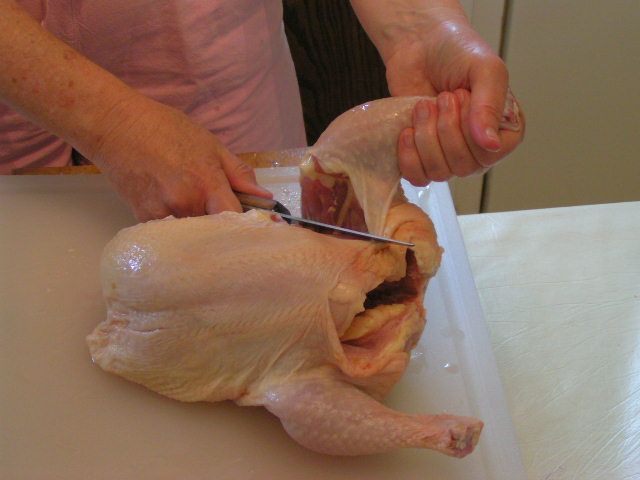 Next, turn the chicken on its side and pull a leg up so that it is pulled away from the body. Slice your knife right through the center of the skin until you hit bone. Stop. 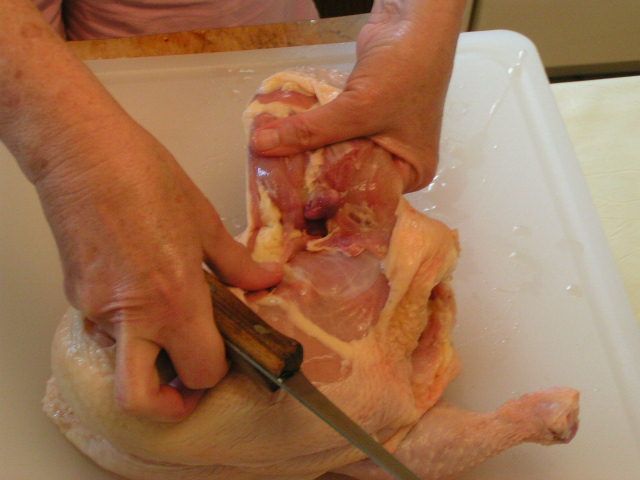 Using both hands, hold the body of the chicken and pop the thigh bone out of joint so that you see the end of it protruding. 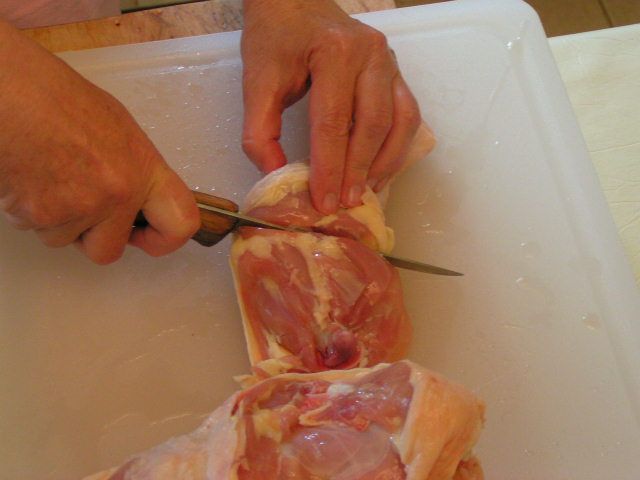 Cut between the round end of the bone and the body to remove leg and thigh section. If you want to separate the leg and the thigh, on the inside of the leg and thigh section, using your first finger, feel for the indention that indicates the joint between the leg and the thigh. Slice between the two bones and separate the leg from the thigh. 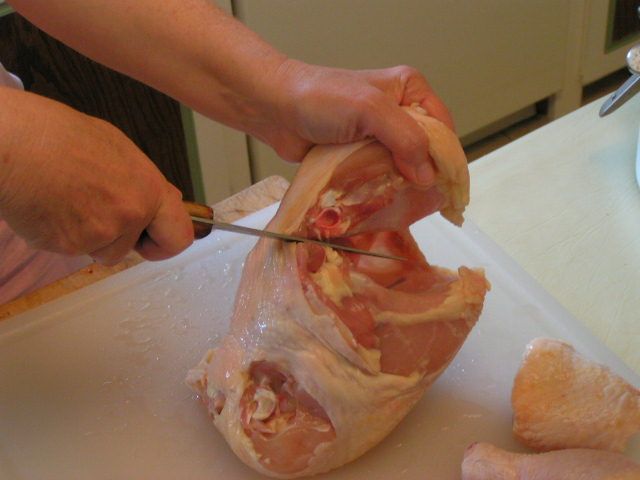 Turn the chicken up on its front end and look for the soft section of skin between the back and the breast section. It is just a flap. Put the knife at a 45º angle to the back and slice in toward the backbone. 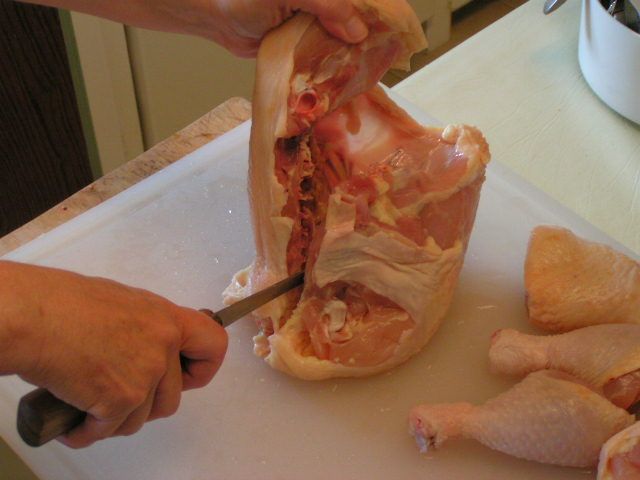 As soon as you hit bone, turn the knife blade down and slide the knife down along and between the backbone and the breast. There will be resistence because you are cutting through soft bone, but just push hard all the way to the end. 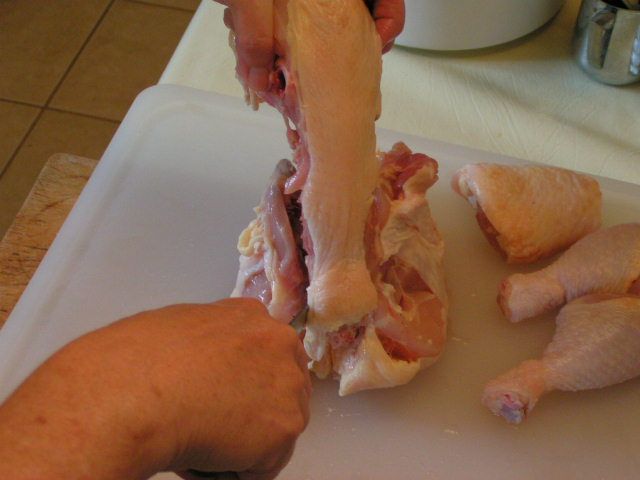 Repeat the same process on the other side of the backbone and lift the backbone out. 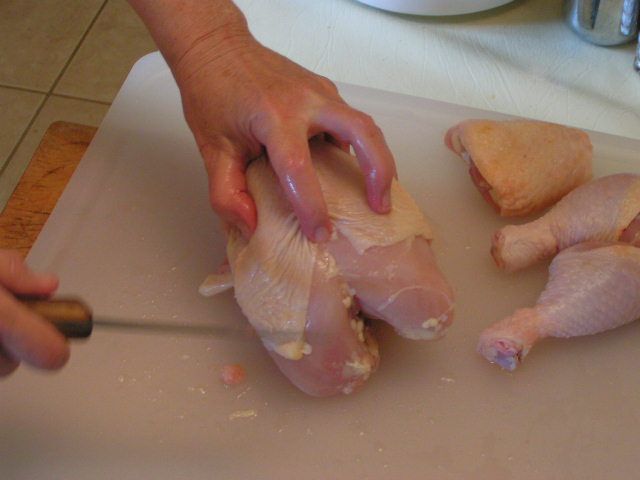 Now you are left with the breast section. If you like the ‘wishbone’ or your kids enjoy breaking it, simply turn the breast section over and slide your first finger down the center until you feel the tip end of the wishbone. 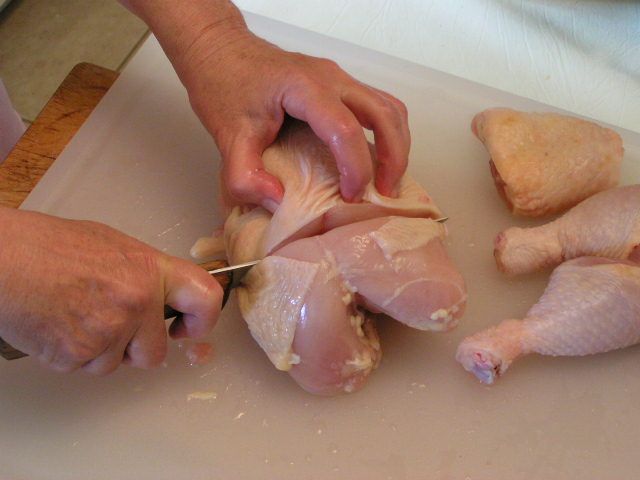 Cut straight down behind the bone tip and between the rest of the breast section and stop when you meet resistance. 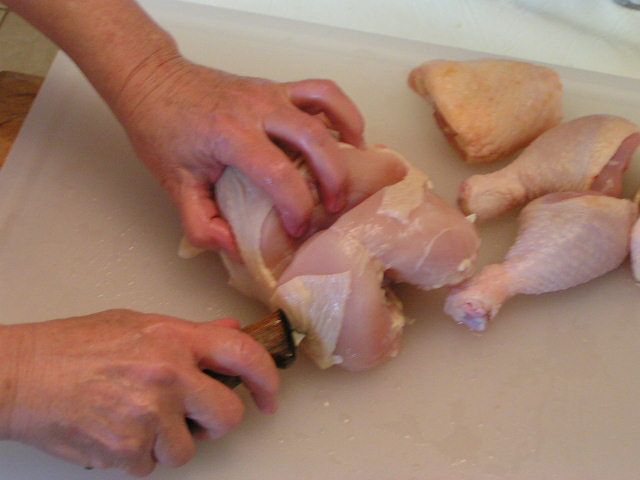 Now turn the knife blade nearly parallel to the cutting board and slice along the front of the breast bone and under the wishbone. 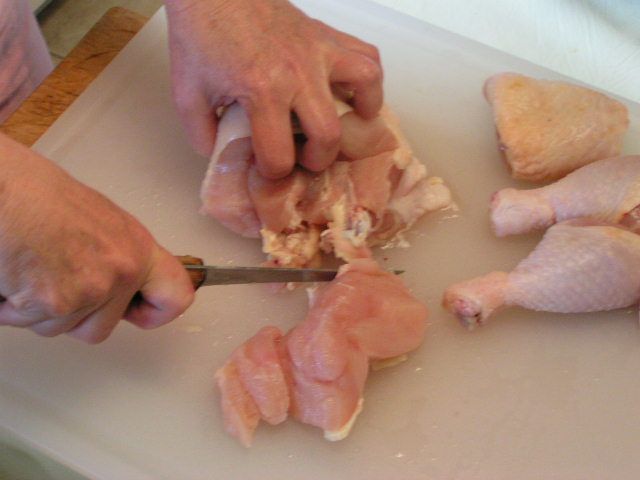 Separate the wishbone from the breast 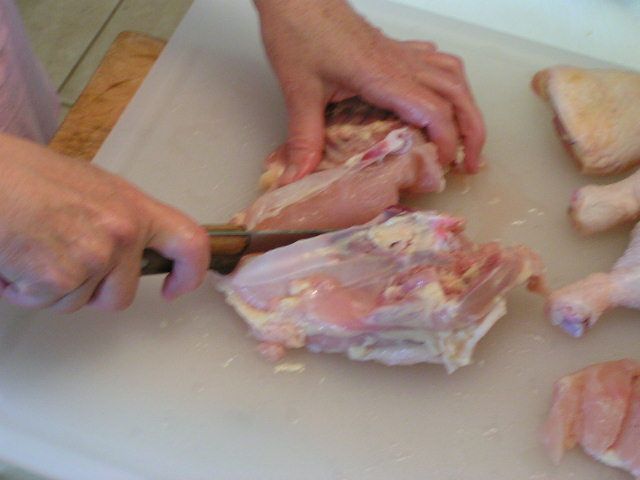 Turn the rest of the breast section on its back and cut right down the middle of the bone. This is soft bone and so with a sharp knife you can cut it. Start by putting the point of the knife down into the bone and press down. It will snap that top of the bone in two and then you can start cutting. 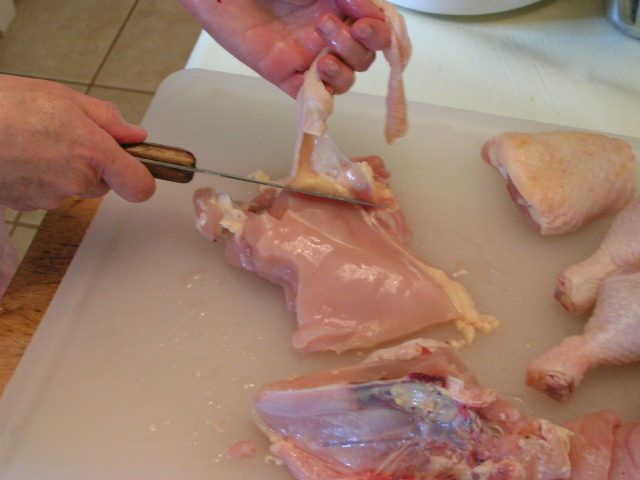 If you are like me and want to cut back on the fat and cholesterol of the skin, you can skin your pieces. This is a simple task, as the chicken skin easily separates from the meat. Just slide the point of the knife under the skin with one hand and with the other, pull the skin up to separate as you cut. And so there you have it – a totally cut-up chicken that you can now cook, can or freeze. I’ll show how I can mine in the next post and how I use it out of the jar. Once you have processed the main pieces, you can boil all of the leftovers into the stock found in this previous post.  |
|
Oklahoma Pastry Cloth™ Company on Facebook
|

 Homestead Revival
 Paratus Familia
 Rural Revolution