Posts Tagged ‘cheese’
Monday, August 14th, 2017

You Can Take The Egg Off’n
The Ranch, But…..


The beauty of living in Oklahoma is all of the different kinds of foods found across the state. Meals are impacted by the influences of the early pioneer and by the German influence and the Polish influence and the Swedish influence and the Italian influence and the Native American influence and, of course, the Mexican influence. No matter, where you go in the state, depending on the early settlers’ cultural background of the area , the foods are sensational and different.
When talking restaurant foods influenced by the Latino culture we have Mexican, Tex/Mex, New Mexico/Mex and American/Mex but “At Home Mex” is a favorite at our home! And since breakfast is our favorite meal, I think that I need to share my own version of Ranch Style Eggs, also known as Huevos Rancheros. They are gooey, cheesy, luscious eggs that will start your day off with a bang or can make you a hit at a potluck brunch with friends. Since our tomatoes are still producing, I use my fresh tomatoes. However, you can use canned tomatoes and they are just as good. The recipe makes three eggs but you can double or triple the recipe into a larger casserole dish and do just fine.
Ranch Style Eggs
Ingredients:
1 Tbsp Olive Oil with 1 Tbsp Butter
1/2 cup chopped sweet onions
1/4 cup chopped bell peppers
1/2 -1 seeded and chopped jalopeno pepper (depending how hot you like your food) Optional
1 1/2 cups fresh or canned tomatoes, diced
1/8 tsp baking soda
1/2 tsp cumin powder
1/2 tsp chili powder
1/2 tsp garlic powder
3 corn tortillas with olive oil for brushing
1 cup shredded, sliced or crumbled cheddar or cojack cheese
salt and pepper to taste
Printable Recipe
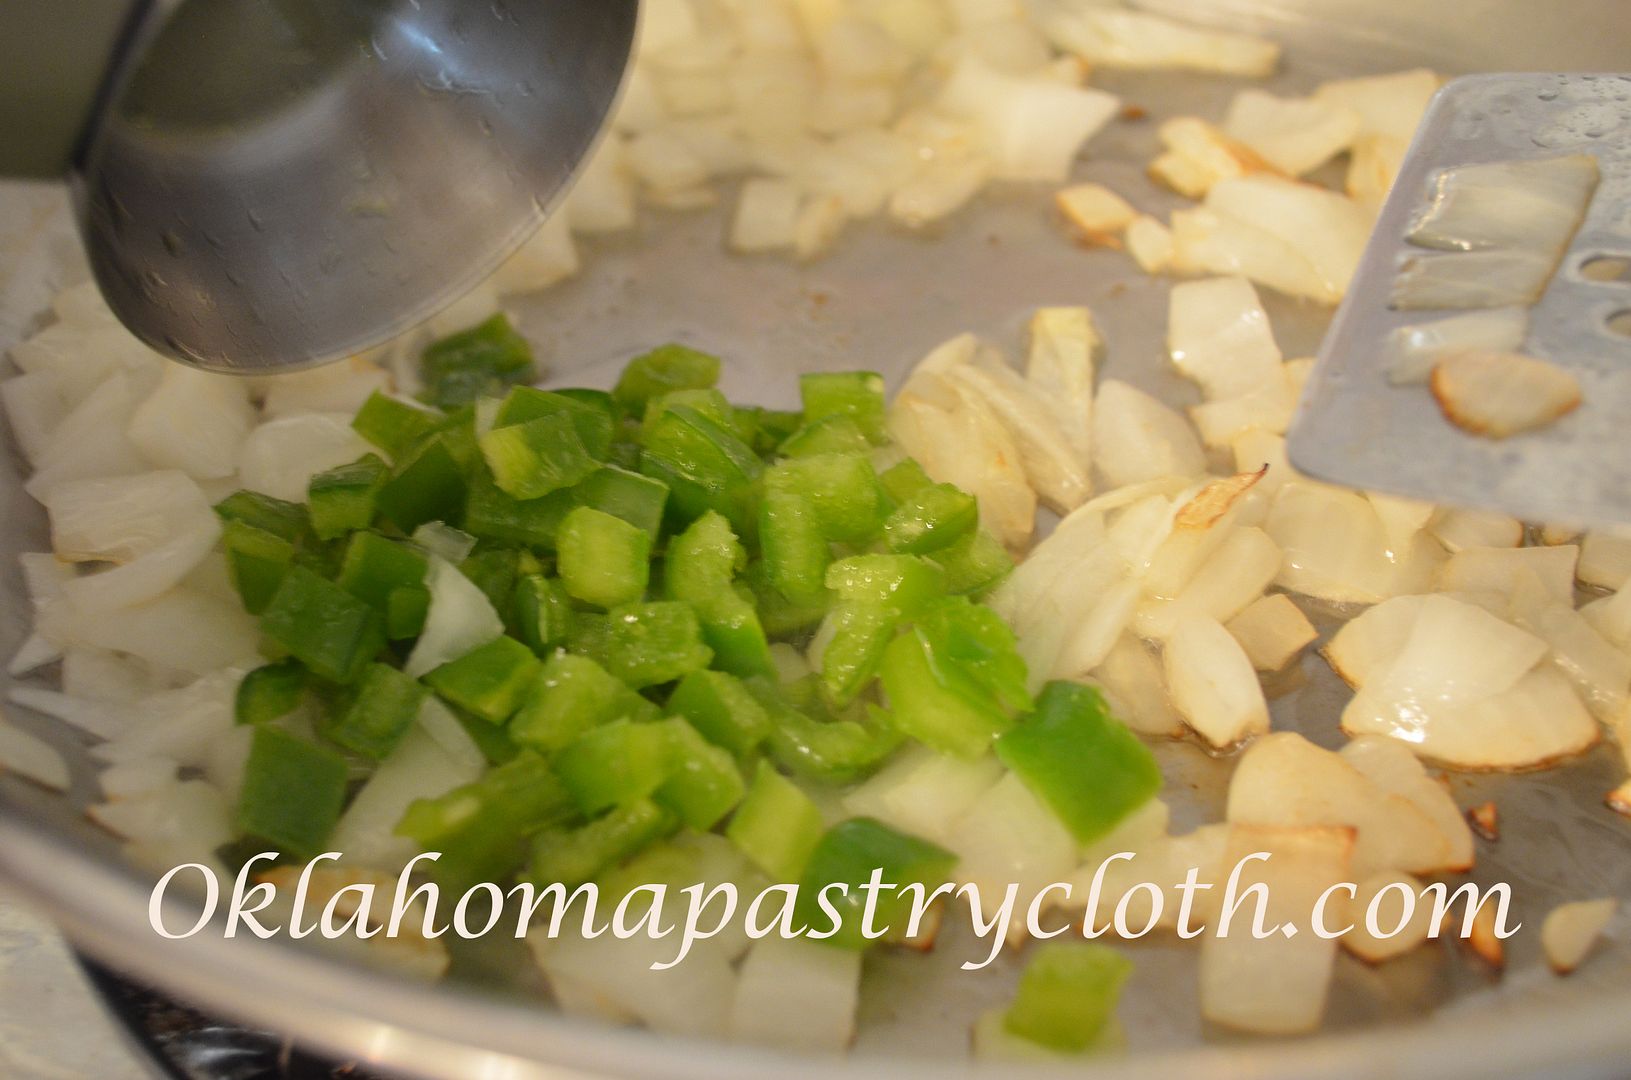
Saute onions in 1 tbsp olive oil with 1 tbsp melted butter until onions are just clear. Add green peppers and saute.
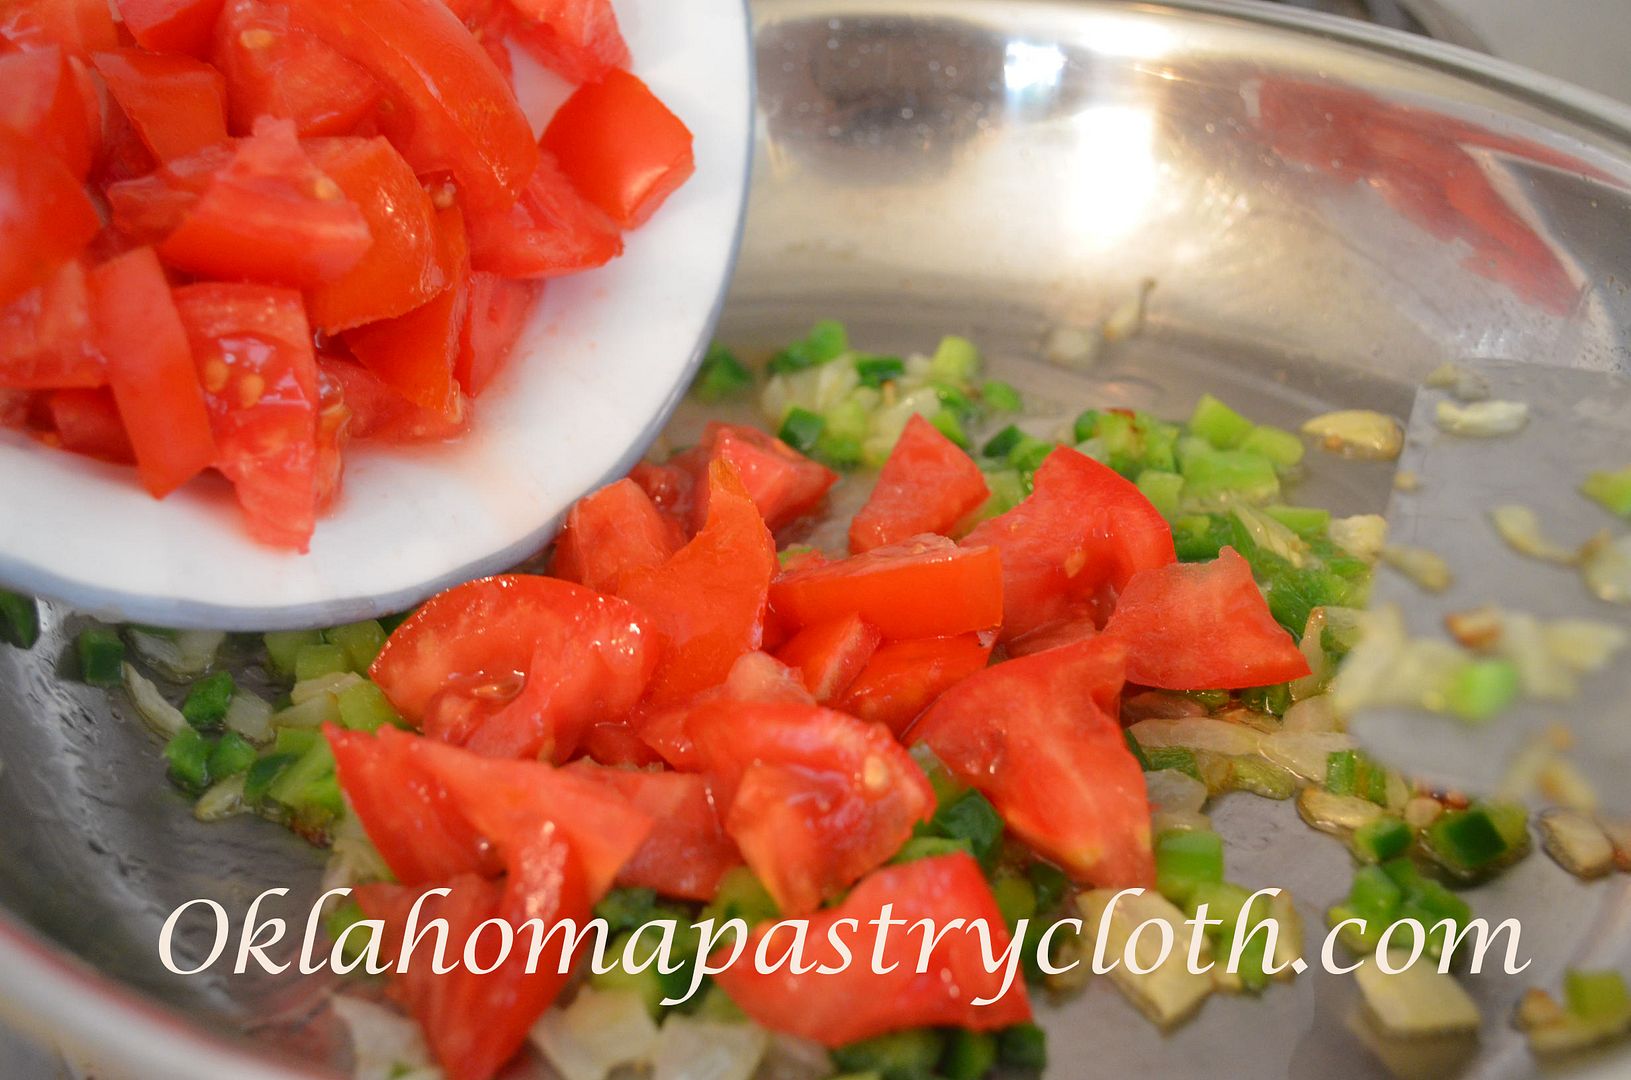
Add either diced fresh tomatoes

or add canned tomatoes. Stir and simmer.

Add soda and stir. A foam will form and just stir it down. The purpose of the soda is to cut the acid and any bitterness of the tomatoes. Add all of the spices and stir. Cook down until thick – about 20 minutes.
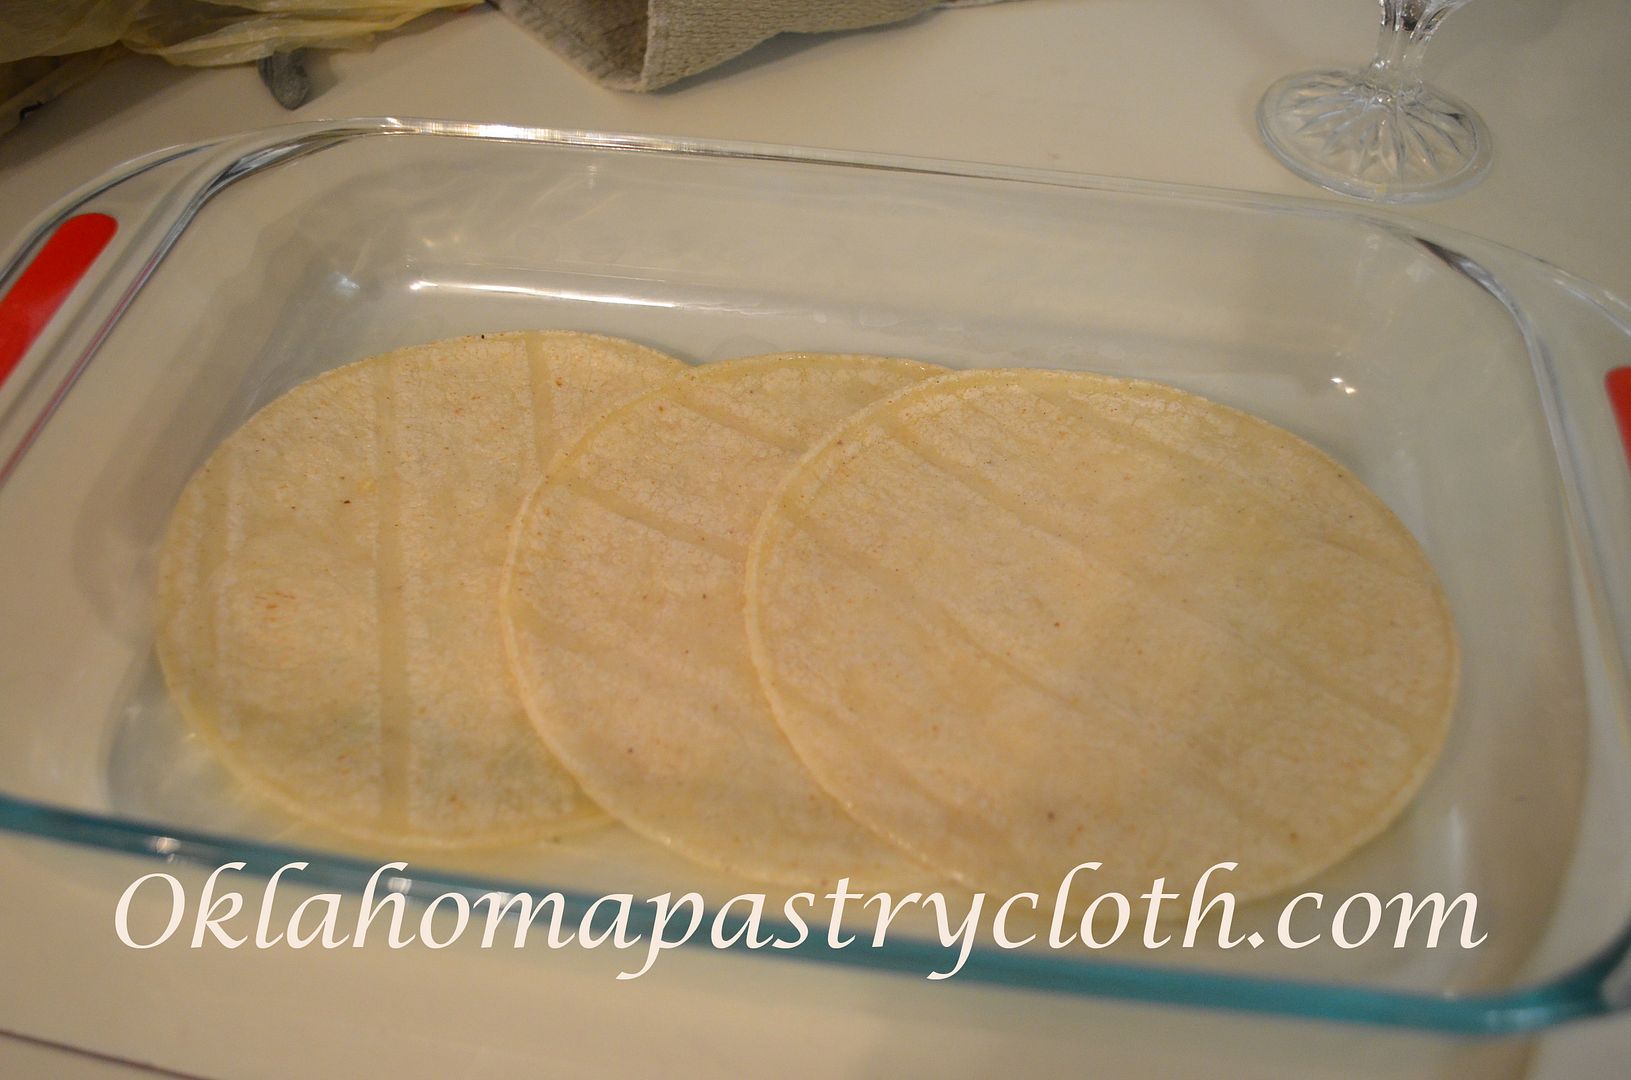
While the tomatoes are simmering, brush tortillas on both sides with olive oil and place into a casserole dish, overlapping to fit.
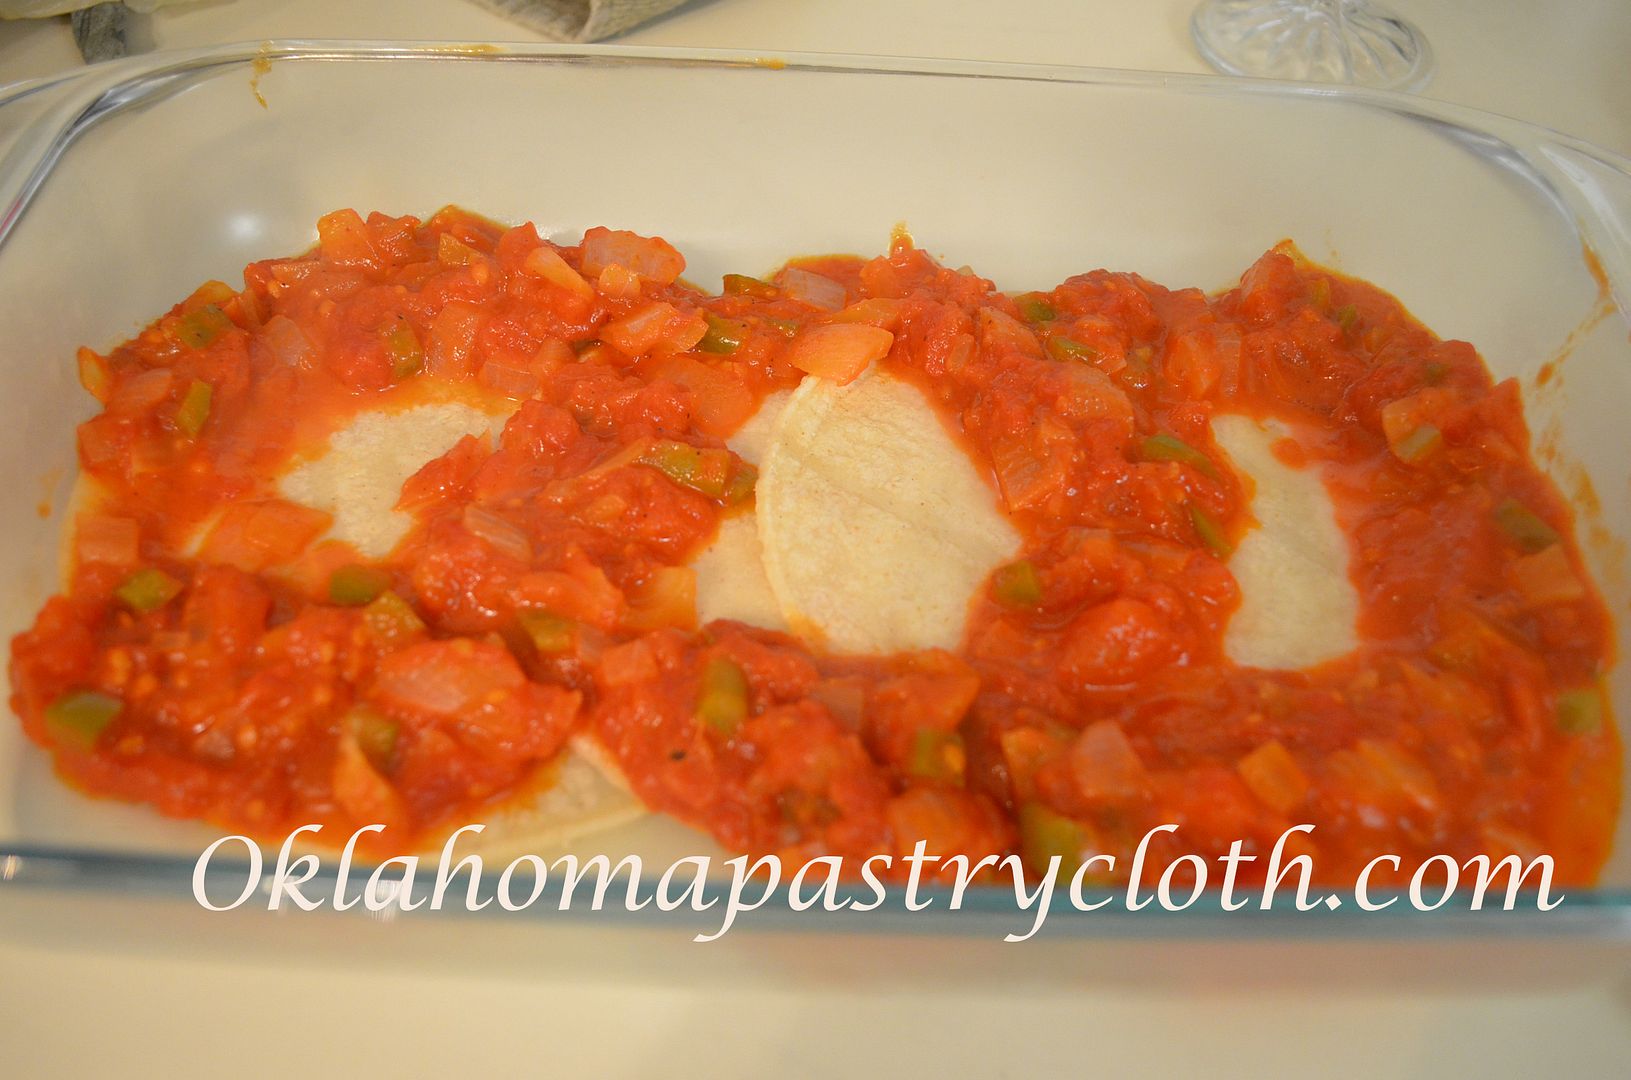
Evenly distribute the tomato mixture around the tortillas, leaving a well in the center of each tortilla. Make sure that the tomatoes form a circular barrier for the eggs that you will be adding.
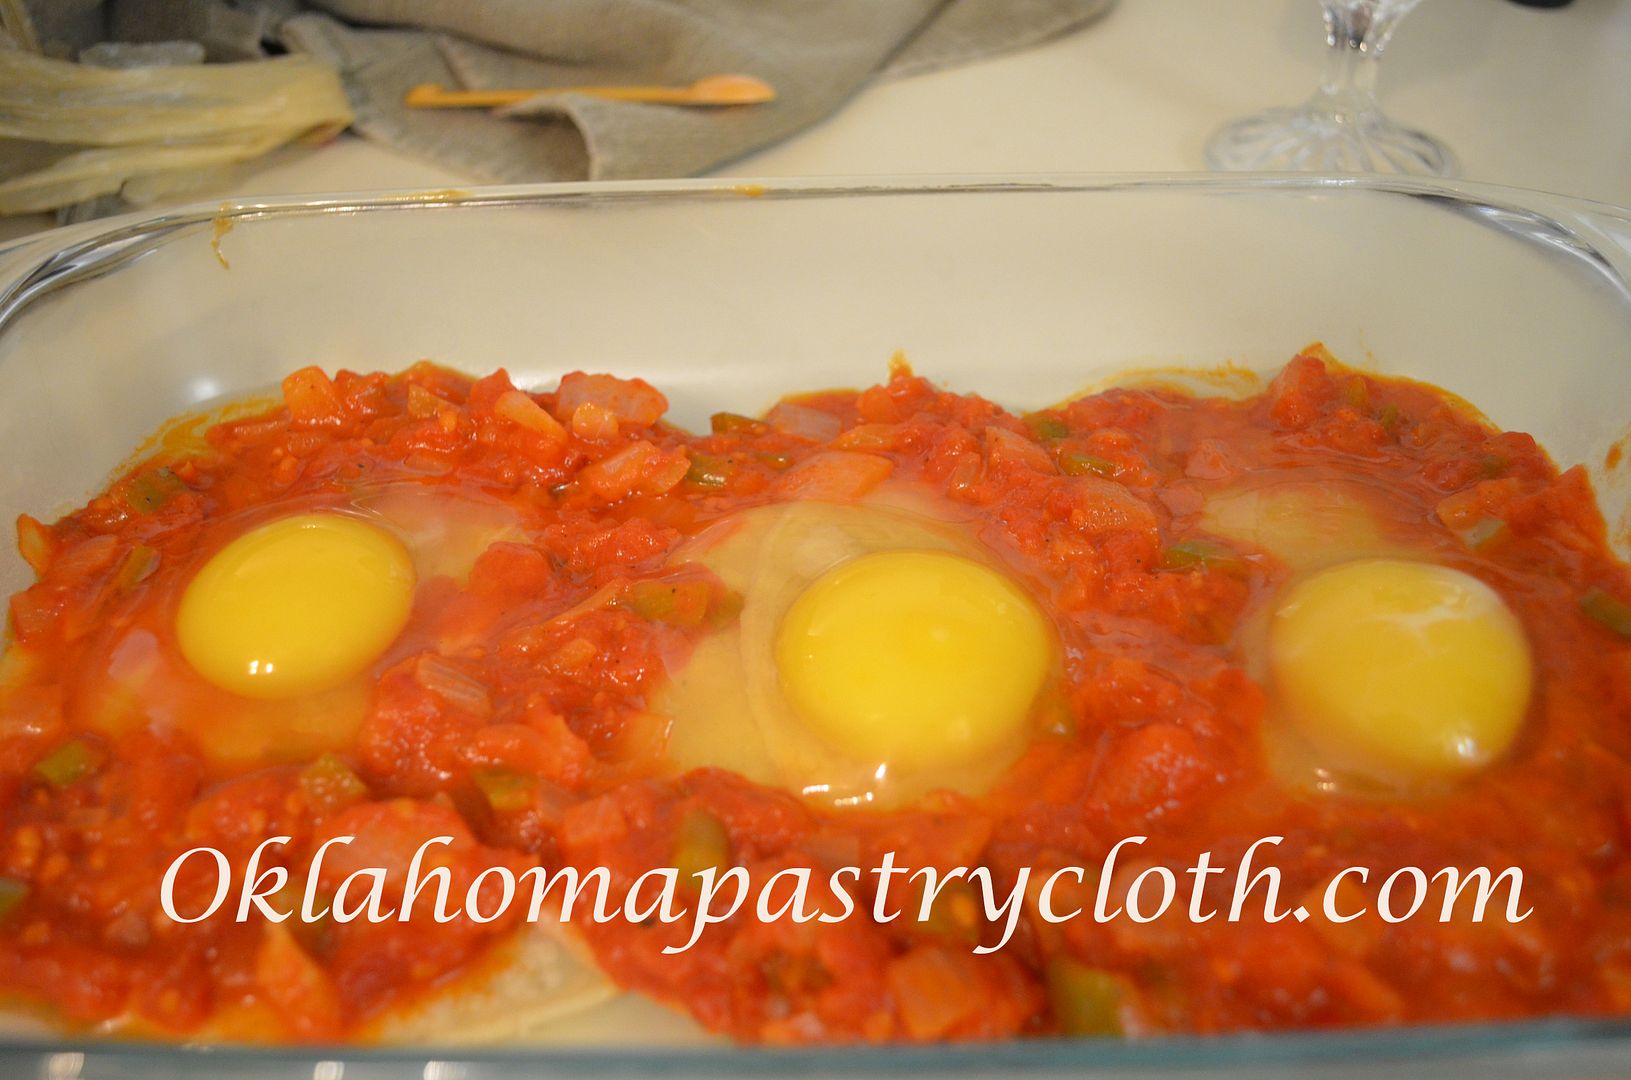
Break eggs, one at a time and gently into the center of each tomato well.
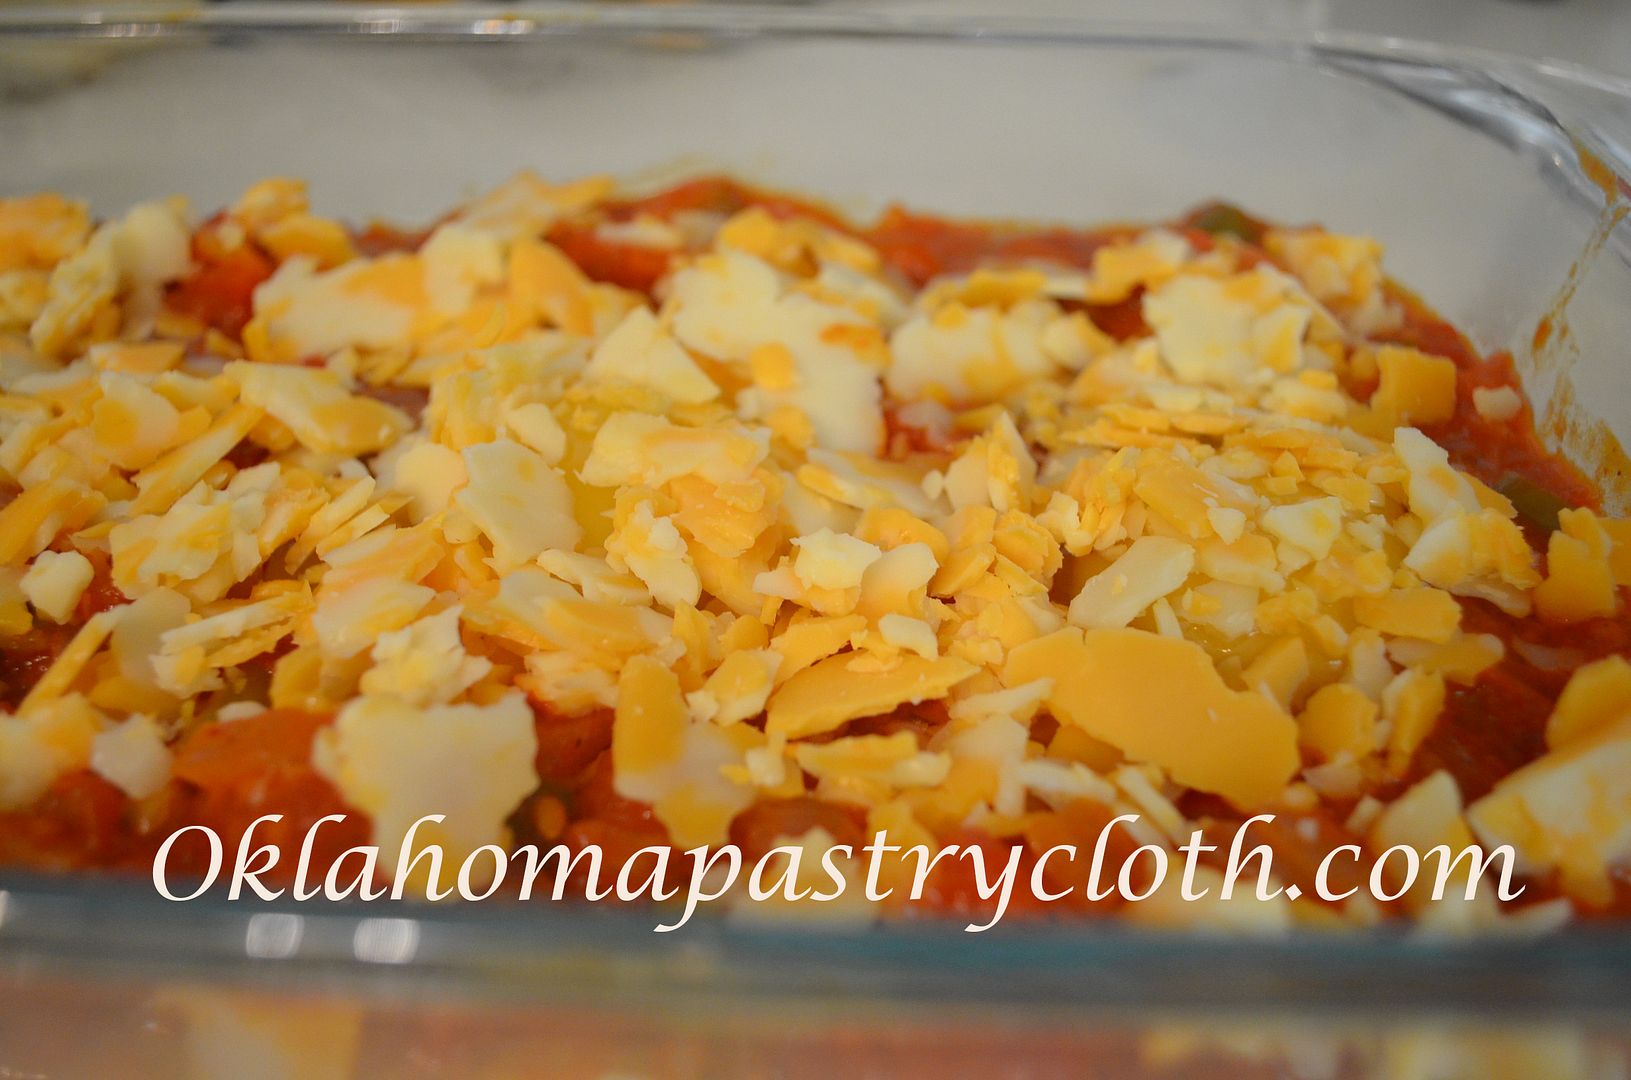
Cover the eggs and tomatoes with cheese. I am using crumbled cheese here, but you can use sliced or shredded cheese as well. Bake in a 400º oven for 10 to 20 minutes, depending on how firm you like your eggs.

Serve hot with sausage, bacon or ham.
Happy Cooking!

MB
|
|
|
Please join us on FaceBook!!
|

|
Tags: Baked Eggs, cheese, Corn Tortilla, Eggs, Huevos Rancheros, Ranch Eggs, tomatoes
Posted in Breakfast, Let's Cook! | 2 Comments »
Thursday, October 10th, 2013


Waxing Poetic

You know I can’t resist a sale,
And so begins this shopping tale.
I found a bargain sure to please,
A dollar for a block of cheese!
I purchased 12 and paid my dough.
I hurried home to a problem, though.
What would I do with 12 blocks of cheese?
‘Cause they’re not great if them you freeze.
I’ve showed you how your cheese may can,
But something new seemed like a plan.
And so I researched what to do
And saw, myself, if it was true.
I followed directions to a ‘T’
Which t’ain’t a normal thing for me.
Voila! Now a new way to stow ‘em!
And I waxed that cheese as I wrote this poem.
And so you see (you’ve got to get it!)
It’s obvious I waxed, poetic!!
No groans from the peanut gallery out there!! I can’t resist a little verse…a very little verse! I thought that I would show you, step-by-step how to preserve cheese that you find on sale. Mine has been sitting at room temperature for four months now and we are using it regularly. Mr. Fix-It likes this cheese on crackers and sandwiches because as it sits, it ages. Now it tastes like expensive, aged, sharp cheese. But first, I’d like to remind you about the giveaway going on.

Just be sure to leave a comment below in the comment section and you’ll be entered to win our fry bread mix and a package of our blueberry scones (complete with a can of real, Maine wild blueberries). The drawing will be October 18th.


OK. Back to cheese. Any brand of cheese will work, but I happened to find the REALLY cheap kind. I grabbed mild cheddar, provolone and longhorn. All are relatively mind flavored cheeses so that when they age, they don’t become too sharp.
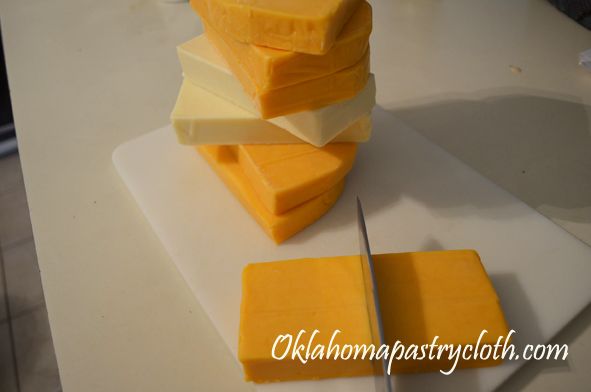
I cut the blocks in half to make 4 oz blocks for easier waxing.
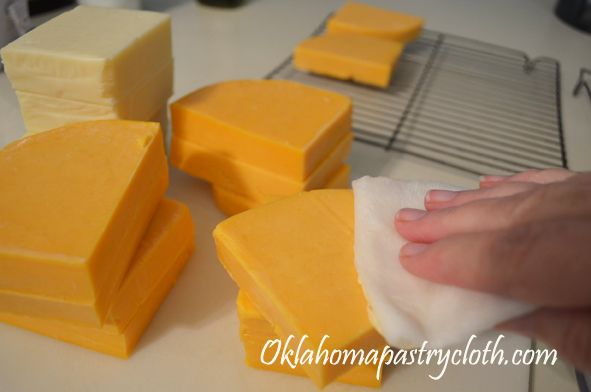
Carefully wipe each block with white vinegar to clean. If you do not have vinegar, you can use a brine mixture of 1 tsp salt to 1 cup of water.
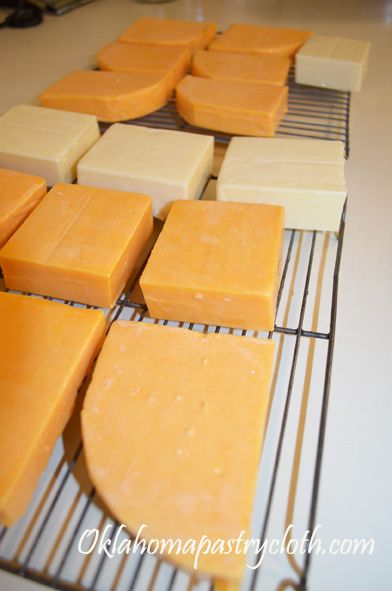
Place the cheese blocks onto cookie sheets, wax paper or paper towels and allow to dry for 48 hours. You can turn the cheese if it is not on racks. I am using metal cookie racks here, but I think that plastic racks would be better. The metal can rust or oxidize and leave lines on the cheese. I am purchasing some plastic racks for future use.
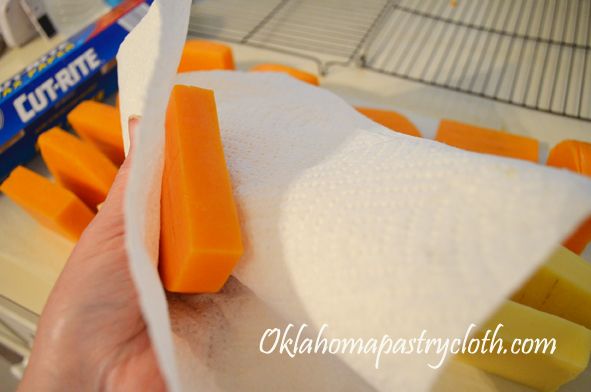
After the cheese has dried, using paper towels or cheese cloth, wipe excess oil off of each block.
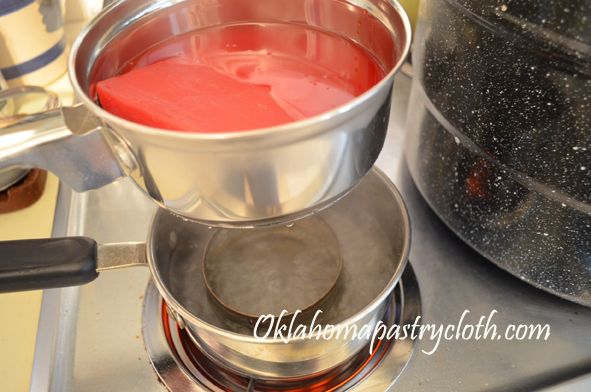
I melted the wax in a double boiler. You can purchase cheese wax online at the New England Cheese Making Supply. The wax is supposed to get as hot as possible to kill any spores and the only way to get it really hot is to put the pan directly on the stove eye on high, but that is very dangerous as the wax can catch fire or even explode. Plus, you can really get burned. So I did some research and many people are using a double boiler and getting it hot with boiling water beneath it. It is the safest way and seems to work fine. You can make a double boiler, if you don’t have one, by placing an empty tuna can in the bottom of a sauce pan, filling the pan with water and then placing a smaller pan onto the tuna can to keep it from dropping down into the first pan.
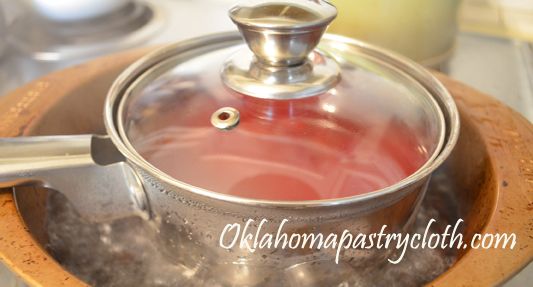
Or, you can use an old cake pan, fill it with water and set your pot into the water. By the way, I went to our local Big Lots and bought this sauce pan for $3. I just keep the wax in it and let it harden after melting to use the next time, adding more as I need. To store, I keep the lid on it so that no dirt gets inside.
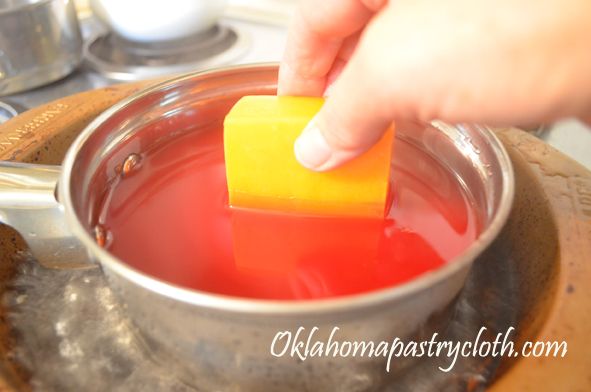
When the wax is hot to almost boiling or is boiling, dip one end of each of your cheese blocks into the wax to halfway up.
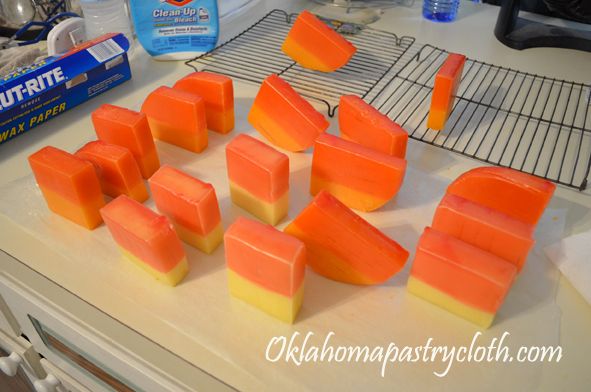
Turn the blocks to the undipped sides and let them rest to harden
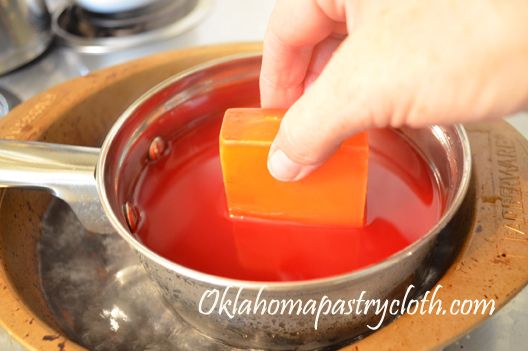
It only takes about a minute for the wax to harden where you can touch it. Pick the cheese up by the wax end and dip the unwaxed end. Place the block onto the end with the hardened wax so that the new wax can harden. Continue this process until you have waxed each end four to five times.
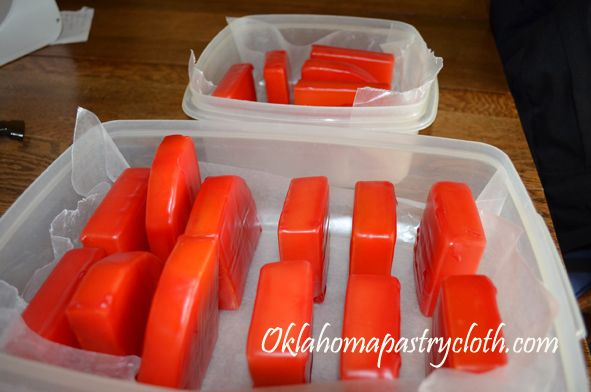
Place the waxed cheese in a container and into a room that is dark and cool or into a pantry where it can be easily accessed. Every few days, turn the cheese to a different side. Sometimes, the cheese will weep oil or water. It is still ok to use. I found that storing it on paper towels or cheese cloth helped absorb any weeping. Also, in some cases, the wax will thin and so you will need to wipe it clean and dip the block a couple of more times. If you see a dark patch under the wax, it is probably mold which is the result of a pin sized hole or other disturbance of the wax surface. You can use that cheese immediately, washing it and cutting off the molded part.
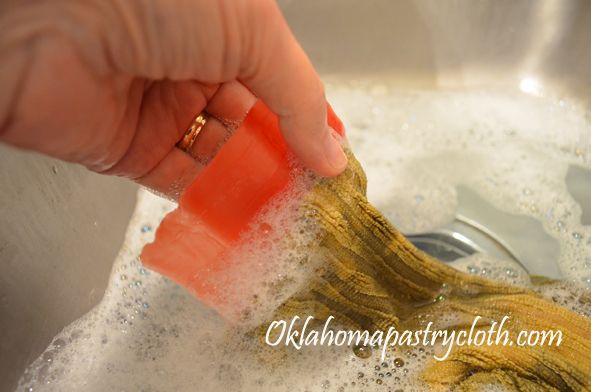
When you decide to use a block, use a knife to pry one end of wax off of the cheese. The rest just lifts off. Wash the wax in hot, soapy water and be sure that any pieces of cheese and oil are removed. Put the wax into your wax pan to reuse on your next batch.
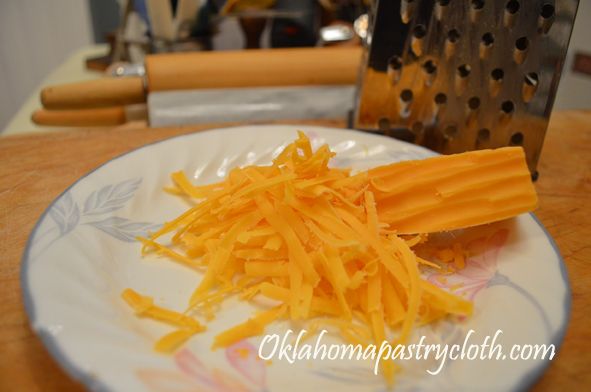
The cheese can be grated
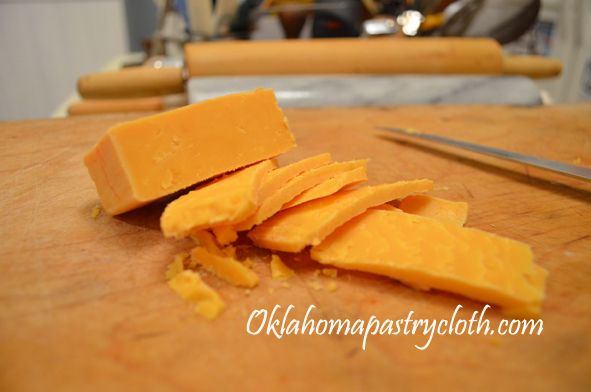
It can also be sliced or cut into cubes. Because it is sharper, it is also drier. So there you go!! Now you can wax poetic too….and if you want to send me your poems, I put them up at the blog! 🙂
Don’t forget to leave a comment to enter the giveaway!

Happy Waxing!

MB
|
|
|
Please join us on FaceBook!!
|

|
THUMBTACK.COM
for the Oklahoma Pastry Cloth™ Company

|
Tags: cheese, cheese wax, food preservation, room temperature cheese, storing cheese, waxing cheese
Posted in Canning and Food Processing, Let's Cook!, So You Have To Make It Educational!! | 26 Comments »
Friday, August 26th, 2011
One of Those
Comfort Foods!!
We all know why they call it comfort food. It’s because once you’ve eaten it, you have to unbutton your pants to get comfortable!! We southerners seem to think we’ve cornered the market on that kind of vittles and southern cooking has become synonymous with comfort. Southern comfort is more than just the name on a bottle of alcoholic spirits!
Unfortunately, as Paula Deen has documented, southern cooking can be a little heavy on the fat and sugar and gargantuan on the portions. I have learned to cook with the same flavors, just not quite so much fat, and my portions are drastically cut. “Moderation in all things!”I say. Having to unbutton those pants is not necessarily a good thing.
One of my favorite things for breakfast or as a side, is hasbrowns. Cheesy hashbrown casserole is even better than plain ‘taters. But so many of the casseroles have as much as a stick of butter and then pure cream – you know – the works. In order to satisfy my craving for these spuds laced with cheese, I’ve developed my own way to get the flavor without all the calories. Now, I will say, there IS a difference. You can’t cut out that much butter and cream and still have the same thing. However, this recipe makes me happy and that’s all that counts. Right? It’s all about me -and you too – because you’ll like, I’m sure.
Cheesy Hashbrown Bake
2 pounds or 5-6 cups of hashbrowns either fresh or frozen
1/3 cup chopped sweet onion
1 cup chicken broth
3 tablespoons butter (the real stuff)
1 teaspoon salt
1/4 teaspoon garlic powder
1/3 cup milk
1 1/2 cup to 2 cups (depends on how cheesy you want it) shredded cheddar cheese (sharp is ok too)
Pepper to taste
Printable Recipe

I use new potatoes from the garden and shred them in my food processor. Regular Idaho potatoes are fine too, or you can use frozen hash browns.

If you are shredding your own, put the hashbrowns in a bowl and wash them in cold water until the water runs clear. Pat them dry with a towel and either weigh or measure them.

In a large bowl, place potatoes, cheese and onions and toss until well mixed

In a separate bowl pour chicken broth…

add two tablespoons of the butter, melted

Whisk in the garlic powder

And the salt

And the milk and pepper to taste.

Pour the liquid mixture into the bowl of potatoes, onions and cheese. Toss until all of the dry ingredients are coated.

In a 2 quart cast iron skillet or casserole dish, melt the remaining tablespoon of butter. spread evenly over the bottom surface of the pan.

Pour the potato mixture into the pan…

and lightly pat down the surface.

Bake at 350º covered for 20 minutes. Remove cover and bake 25 to 35 minutes until potatoes are tender.

Serve hot for breakfast or dinner!
Happy ‘Taters!
MB
|
Please join us on FaceBook!!
|
Join in the conversation by leaving a comment below!

|
|
|
Tags: bake, Breakfast, cheese, comfort food, dinner, hashbrowns
Posted in Breakfast, Let's Cook!, Vegetables and Side Dishes | 5 Comments »
Wednesday, February 9th, 2011
Say, “Cheese!”

I’ve always heard that “necessity is the mother of invention” but I also think that it is “the mother of learning something new”. Such was the case recently after a productive trip to our local grocery which is owned and operated by the Absentee-Shawnee Indian Tribe. On this particular day I discovered that the store had block cheese on sale; 1 8oz block for $1. Never one to pass up a good deal, I decided that if one block of cheddar was good, 20 blocks of a variety of cheese was phenomenal! I tossed mild cheddar, mozzarella, sharp cheddar, pepper jack and cojack into my cart and trotted on down the isle. To my surprise, I found that Velveeta was on sale too. Oh joy.
Now, I must digress here for a sec in defense of Velveeta cheese PRODUCT. Although I realize that Velveeta is the plasticized version of cheese, it is a must for any kitchen simply because it melts sooooo smoothly. It is wonderful for cream soups. It is true that nobody REALLY knows where Velveeta comes from. And while we are told that it is made from milk, it could be guinea pig milk for all we know. However, while we ponder how one milks a guinea pig, the rest of America is enjoying its queso made with Velveeta, picante sauce and maybe some ground beef flavored with taco seasoning. Velveeta is to the cheese world what Spam is to the ham world. Each has its purpose.
And so, I got my Velveeta and checked out. On my way home, it occurred to me that all of this cheese had to have a place to go to stay fresh. I usually grate my hard cheese, put it into bags that I can vacuum on my FoodSaver sealer and then freeze it, but this was going to be an enormous amount of grated cheese. What if I wanted sliced cheese? My experience with freezing blocks of cheese for slicing had been less than successful. I had been totally unhappy with frozen Velveeta, so what to do? What to do?
Thank goodness for the Internet. Enola Gay at Paratus Familia had the solution. Can it! Can cheese? Really? She showed how to can hard cheeses and that got me to thinking about canning the Velveeta too. I researched and researched and found several ways to do that as well. I wound up with what I think worked best for me. So first, I’ll show you how I canned the hard cheeses and then the Velveeta. Talk about handy. You can’t believe how wonderful it is to have canned cheeses. You can shred and slice the hard cheese and the Velveeta is just as good as if it were in the box. I suppose at this point I should throw in the disclaimer that I haven’t found anything that indicates the government watchdogs have given their seal of approval to this, but then, they don’t like us canning apple pie filling either. From everything I have read, these canned cheeses last up to two years.
 It is important that you sterilize your jars. Here, I am using the 8 oz size because there are just two of us and that is perfect for two people. First I wash them in hot, soapy water and then place in a large pot to bring to a boil. Then I remove them to place upside down on a dry towel. It is important to use wide mouthed jars for easy removal of the cheese.
Canning Hard Cheeses
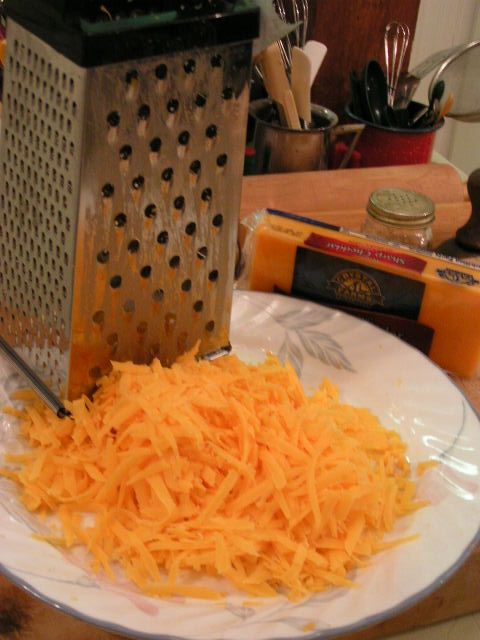 Shred the cheeses. You can use a food processor here, but by hand isn’t all that more time consuming.
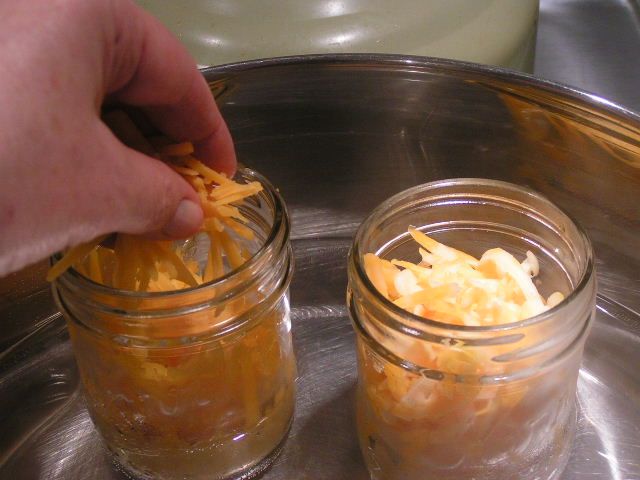 Place some of the shredded cheese into the warm jars and place the jars in warm water that you slowly bring to good and hot. Keep adding more cheese as the cheese melts.
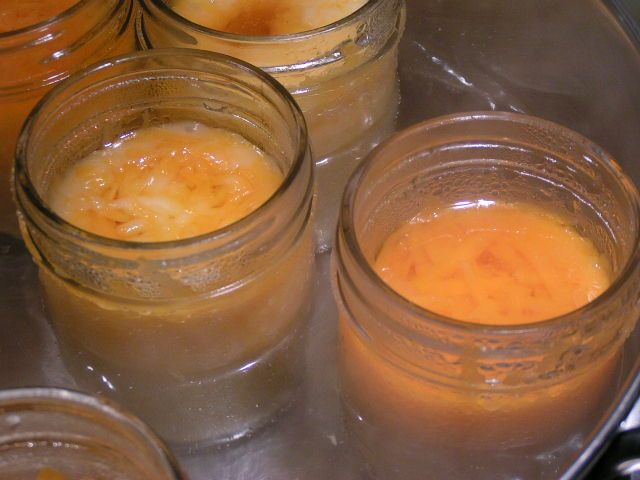 Continue adding and melting the cheese until it reaches a 1” headspace. This requires a deeper headspace because of the oils.
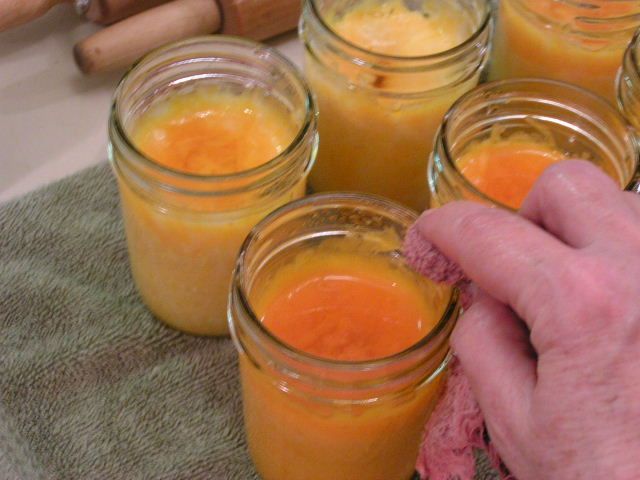 Carefully wipe the tops of the jars with a damp, soaped washcloth to remove all oils.
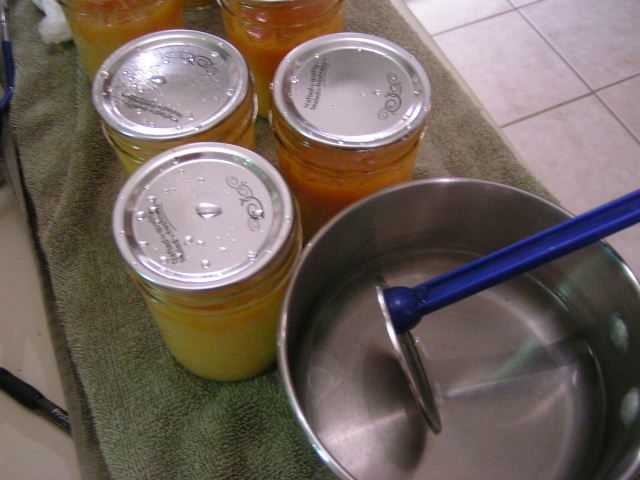 Place lids that have been warmed in nearly boiling water, onto the jars
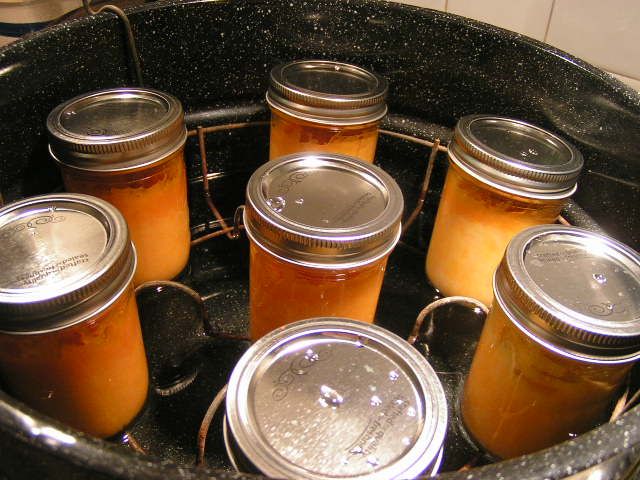 Put the rings onto the jars, not too tight and place into the rack of a waterbath canner
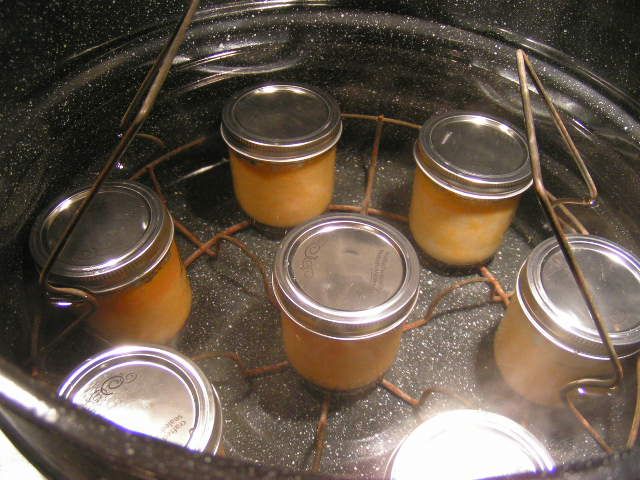 Lower the jars into water that has already been heated. Putting them into cool water will crack the jars. Bring to a boil and at the point of boiling, set your timer for 40 minutes. Process for 40 minutes.
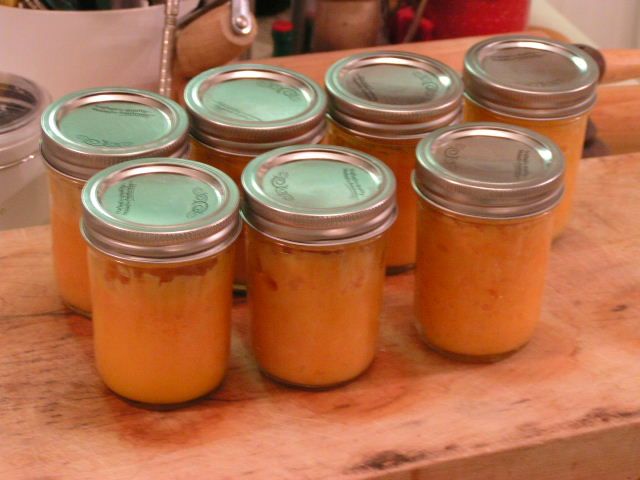 Now here is the important part!! I didn’t figure this out until I pulled the first jar out of the water. DO NOT REMOVE THE JARS FROM THE WATER UNTIL THEY HAVE COOLED DOWN. If you take them out of the boiling water, the oil from the cheese boils out of the jars and they won’t seal. Just leave the jars of cheese under water and allow to cool slowly. THEN take them out of the water. When they have cooled all the way down, I remove the rings and wash jars and rings in hot, soapy water to remove any oils. After drying, I reapply the rings and store the jars of cheese.
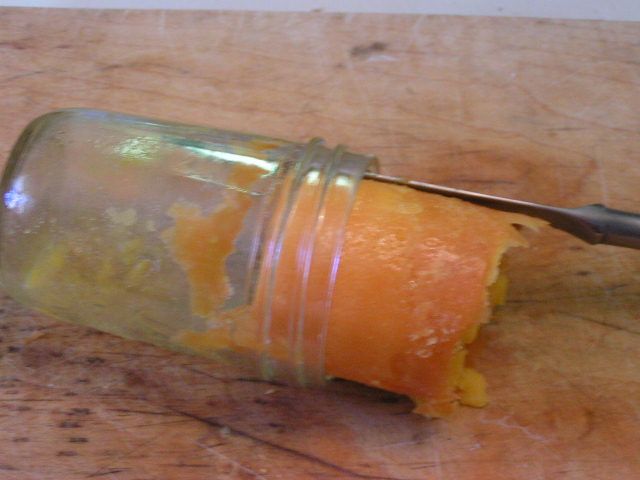
To remove the cheese, open the jar and slide a knife inside the jar and around the cheese. The cheese will just slide out. You can then grate it. At first it is a little oily, but that is just because it is at room temp and some of the oils have separated.
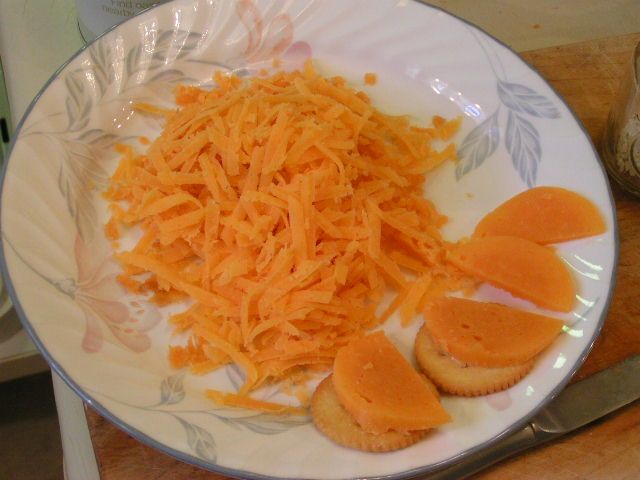 Or slice it! It’s perfect for crackers and cheese.
Canning Soft Velveeta or Soft Cheese
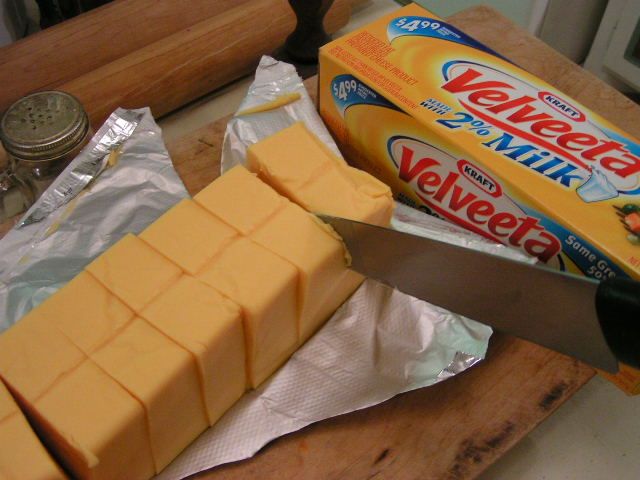 Cube a box of Velveeta
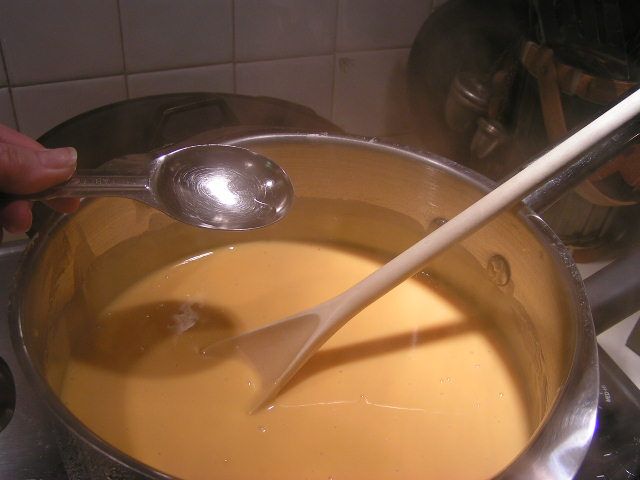
Place in a double boiler with 3 oz canned milk and slowly melt. When melted, add 1 tablespoon of vinegar and stir in
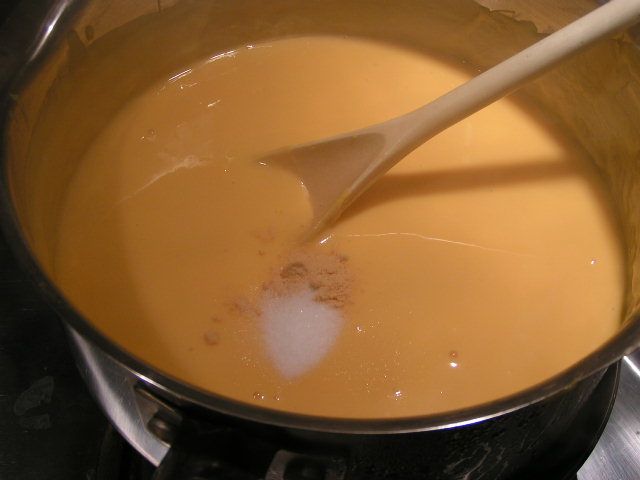 Add 1/2 teaspoon of dry mustard and 1/2 tsp salt and stir well until totally smooth and melted
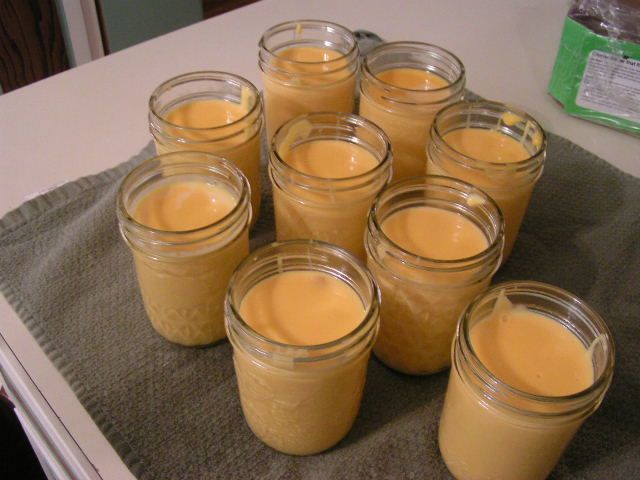 Pour the cheese into jars leaving a 1/2 inch headspace. I use 8 oz jars. I can always open two 8oz jars if I need a pint.
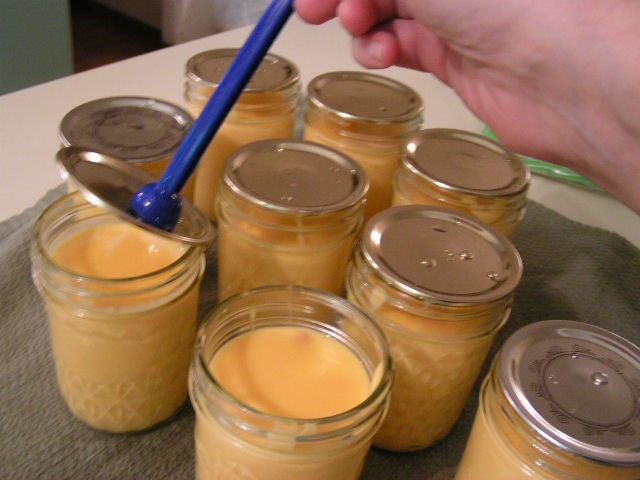 Carefully wipe the rims of the jars to remove any wayward cheese and place lids that have been heated in nearly boiling water on top of jars
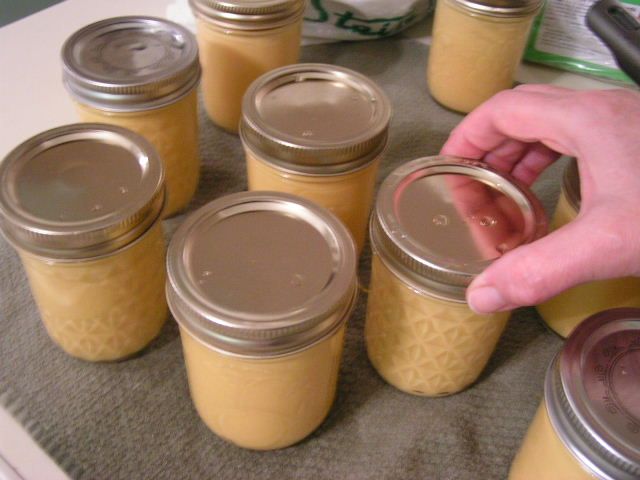
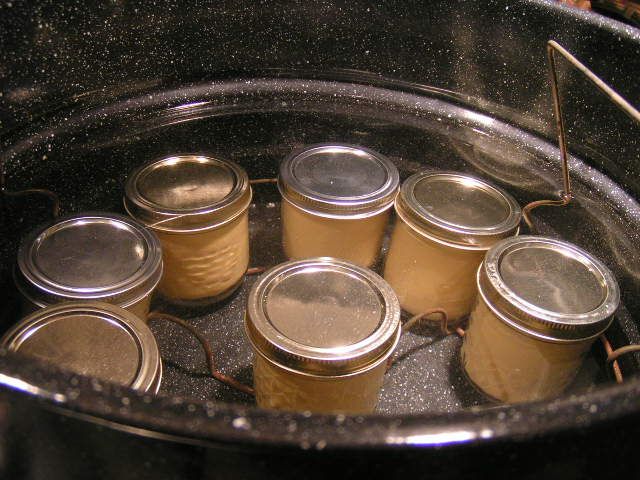
Put rings onto the jars and tighten down slightly. Place jars in waterbath canner rack and lower into water that has already been heated so not to crack the hot jars of cheese. Bring the water to a boil and at the point of boiling, set your timer for 10 minutes and continue to boil.
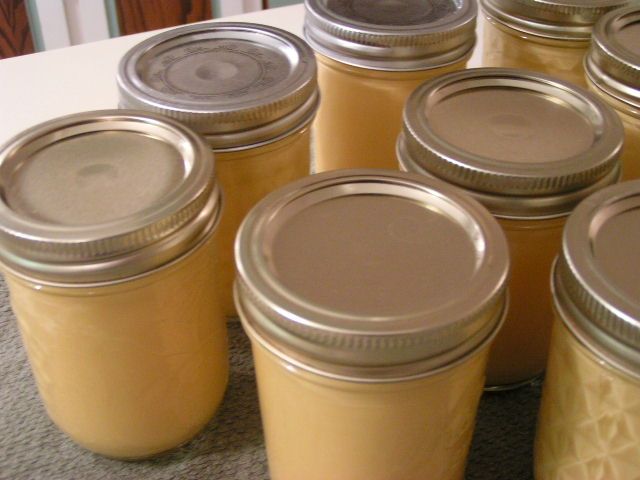 Remove jars from water and allow to cool on a dry towel. You will hear the lids pop as they seal.
And so, I’ve learned something new out of necessity. I LOVE having cheese in the can. It is so easy and I don’t have to worry about refrigeration. The cheddar gets a little sharper as it ages and tastes wonderful when opened. So cut the cheese and call me “Happy”!!
Happy Cooking!
MB
Please leave your comments at the comment link that follows!
|
Tags: canning, cheese, Cojack, education, preparedness, Sharp, Velveeta, vinegar, waterbath
Posted in Canning and Food Processing, So You Have To Make It Educational!! | 40 Comments »
Monday, January 24th, 2011
Part I
Part II
Part III
Dehydrating Part IV
Or
Soup’s On!!
I’m sitting here listening to my sweet hubby laugh his head off as he is pulling up YouTube videos of “Carl” (Billy Bob Thorton) from the movie Slingblade making prank calls to restaurants and asking the clerks for “French fried pertaters and biscuits and I like some mustard with those biscuits, uh-huh”. The clerks are attempting to take this order with as much grace as possible. I have to admit that I’m laughing too. I guess I’m remembering the phone calls I used to make, from our church phone on Wednesday service nights no less, to Weigel’s Dairy Store in Knoxville, Tennessee to tell the clerk, in high pitched squeals, “Your cows are out!” immediately hanging up the phone. Real smooth, huh? Kinda like the phone calls my grandparents used to receive in the ’30’s, at their grocery store, where a voice asked if they carried Prince Albert in a can and with the answer in the affirmative, young voices would yell, “Then let him out!!” We are so brilliant when we are young. However, it seems that Mr. Thorton is still brilliant – he’s entertaining my husband, anyway!
I’ve noticed that in the blog world, bloggers of the feminine persuasion have dubbed their loving husbands with honorary names that reflect everything from their appearance to their personality. The Pioneer Woman refers to her life partner as her Marlboro Man while another at the Rural Revolution refers to hers simply as Husband of The Boss. I’ve been musing for the past few days about what I should title the perfect man in my life – the one who can fix literally anything, including a sad day. He can take a car apart and put it back together, as well as a computer and its software, a refrigerator, an antique telephone and my hair dryer and have them all working as a result. He fixes up Christmas for our adult kids, fixes boo-boos on the animals and is currently fixing a whole new room addition on the house complete with a wood stove. He says he’s suffered through the last ice storm without heat!! He even has a tool belt like Tool Time Tim of Home Improvements. So yep, that’s what the love of my life’s moniker shall be from now on; Mr. Fix-It. And as an aside, just to let you know, he says that he married me because I came with power tools!!

There is nothing I enjoy more than putting a piping hot meal before Mr. Fix-It after a long day’s work. I especially love him because he loves soup and that is one of my favorite things in the whole world on these cold days. But I’m weird. I love it on warm days too – homemade that is. When I go to Olive Garden, I’m the “Never Ending Soup and Salad” kinda gal. Therefore, it is really pleasant to have all of the ingredients for soup right at my fingertips, dried and ready to reconstitute for any quick, hot meal. In this fourth and final in my series on dehydrating, I’ve got a recipe for broccoli cheese soup that will leave you craving more. Let’s go!
Broccoli Cheese Soup
1 Tbsp Olive Oil
1 Tbsp dried celery (1 stalk fresh chopped)
1 tsp dried bell pepper (tbsp fresh)
1 Tbsp dried onion (2 Tbsp diced fresh onion)
1/4 tsp dried garlic (1 tsp fresh, chopped garlic)
1/3 cup dried potatoes (1 cup cubed fresh potatoes)
1/2 cup dried broccoli (1 1/2 cup chopped fresh broccoli)
4 chicken bouillon cubes
4 1/2 cups water
1 can milk or 3/4 cups half and half
1/4 lb Velveeta Cheese + or –
1 Tbsp corn starch + 2 Tbsp water

Put 1 tbsp Olive Oil in a 3 qt sauce pan and add onion and dried garlic. Sauté. If using dried onions, just stir around a little to get the flavors going. That was the only thing I was out of. Gotta dry some more!

Add dried celery and dried bell pepper. For the purposes of less typing, I’ve included fresh equivilents in the recipe above but not in the directions, but you CAN make this with all fresh veggies

Add dried potatoes and continue stirring in the oil

Add dried broccoli

Add three cups of water and stir.

Add 4 chicken bouillon cubes. Bring to a boil and turn heat down to medium for a slow boil and cook for 30 minutes uncovered.
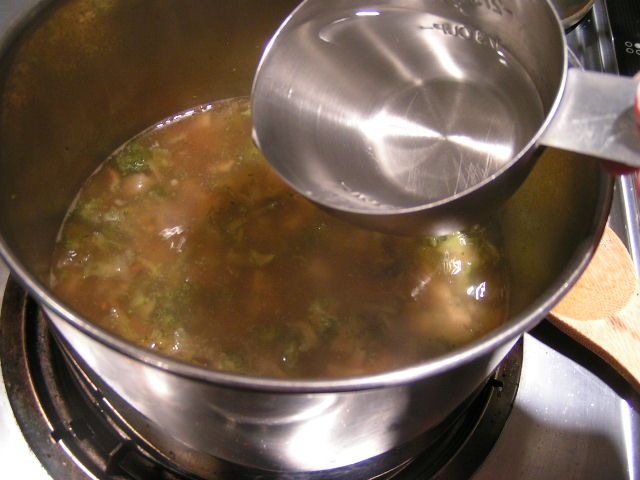
Add 1 1/2 cups additional water
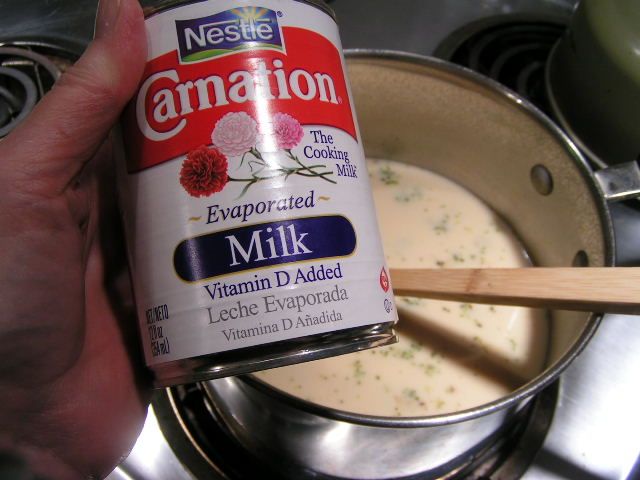
Add one can of milk. The canned 2% and Fat Free is fine too. If you want a richer soup, you can use half and half

I canned Velveeta Cheese that was on sale (I’ll blog about that at a later date) and put it into 8 oz jars. Here, I have heated the jar to soften the cheese and am using 1/2 jar or not quite a 1/4 of a pound of Velveeta. You can add more or less according to your taste.
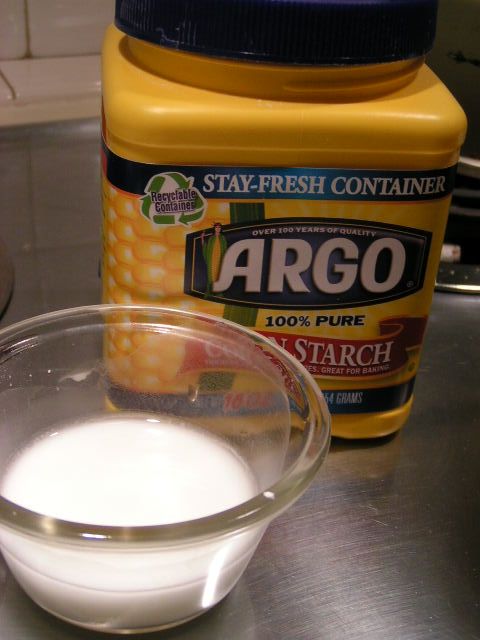
Mix one tablespoon cornstarch with 2 tablespoons COLD water until cornstarch is totally dissolved

As soup is boiling slightly, stir in cornstarch mixture and continue stirring to avoid lumps
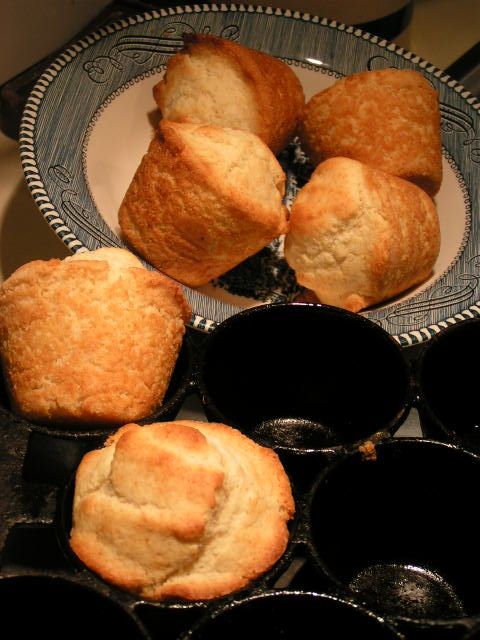
You can make some corn muffins with my cornbread recipe and make everybody happy! I used my cast iron muffin pan. I love cast iron!

And there you have it. Soup that, if you dehydrate and can everything, can be made with no need for refrigeration and would be easy to make over a fire if the electricity goes out! In this state, that is no unusual circumstance!!
Happy Cooking!
MB
|
Please join us on FaceBook!!
|
Join in the conversation by leaving a comment below and enter our January Giveaway!
|
Tags: bouillon, broccoli, celery, cheese, dehydrating, dehydrator, drying, Fix-it, garlic, milk, onions, recipe, soup
Posted in Canning and Food Processing, Let's Cook!, Soups | 2 Comments »
Saturday, January 15th, 2011
Hoover Ain’t Got Nothin’
On This
Little Bit Of Technology!
I have had a number of readers ask me how a vacuum sealer works with jars, since posting the two articles on dehydrating veggies. I thought that I would break into the middle of that series and answer those questions in pictures. Just as background info, I have a FoodSaver V2440 which is quite ancient in the world of technology. I am thinking that I got it somewhere around 2000 or 2001. I am sure that you can find that particular model on Ebay but I highly doubt anyone is selling it new. Target , Walmart and Amazon all carry FoodSaver products or you can order from the company directly at FoodSaver.com. Just make sure that whatever model you choose has the “accessory port” which is the little raised button that you will see in my pictures. Some of the models do not have this feature. I looked on the website and found one particular model that seemed reasonably priced and with the port feature. Just click above if you’d like to view it. The canning accessories must be purchased separately unless the website happens to be having a combined special. You can find the jar sealing items here. There is one for wide mouthed jars and for jars with regular openings. The following are pictures of how I use my vacuum sealer for both bags and jars.
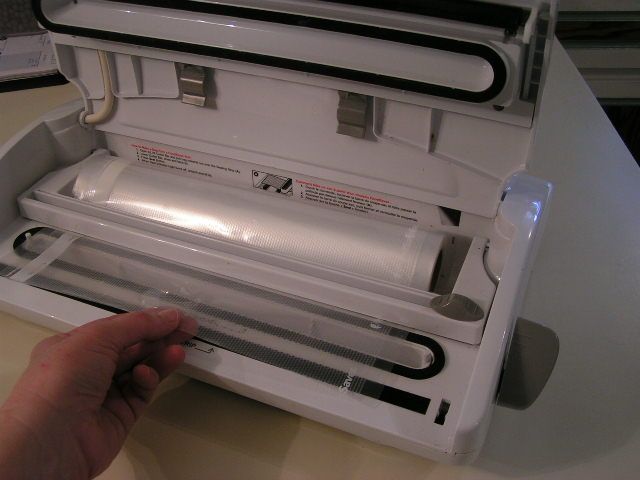
My vacuum sealer is equipped to do both bag vacuuming and container vacuuming. To bag items, first pull the plastic sheeting from the roll to cover the sealing plate.
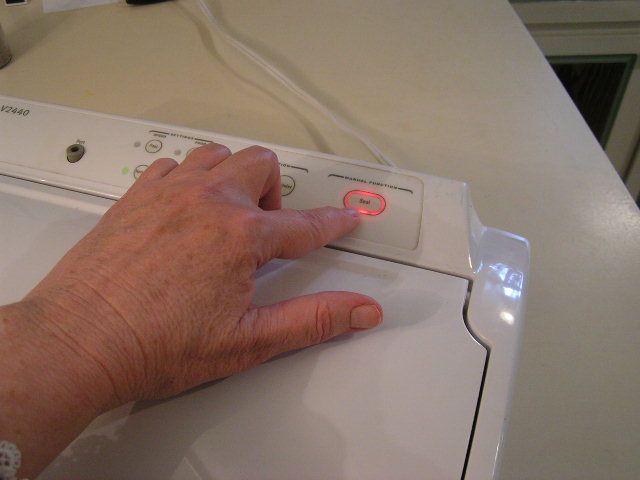
Secure the lid and press the ‘seal’ button and allow to seal what will become the bottom end until the light goes off or until the time you have determined is enough. If you predetermine a time, you have to manually stop the sealing feature by repressing the ‘seal’ button. Pull the plastic out to make a bag long enough to hold your food. The sealed portion acts as the bottom. Cut with the cutting feature.
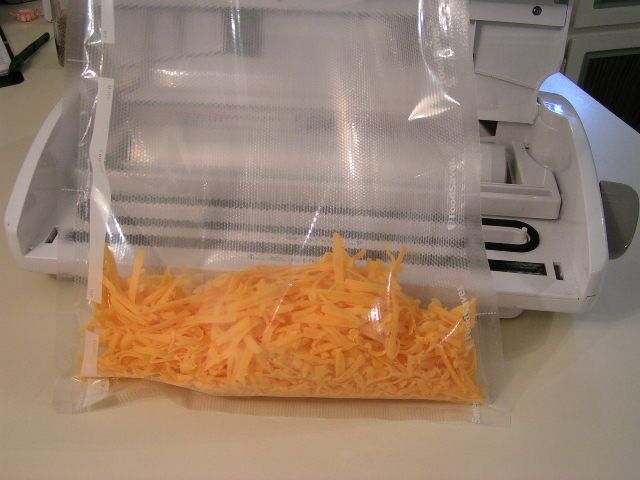
I bought a boatload of cheese on sale (1 block for $1.00!) and so since we like grated cheese, and I have found that you can freeze grated cheese really well, here I have grated a block of cheddar. You can also use a food processor. Cheese may also be canned!! But that’s for another post. Pour in the cheese or whatever you are sealing
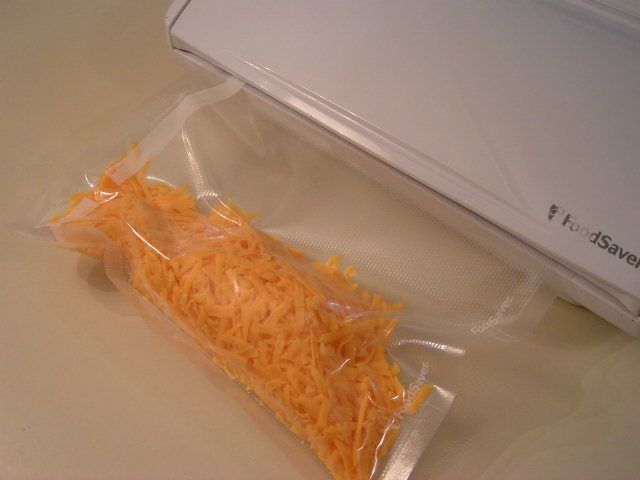
Place the open end of the bag down into the chamber that attaches to the suction holes and close the lid and fasten Press the “vacuum and seal” button and watch it work!
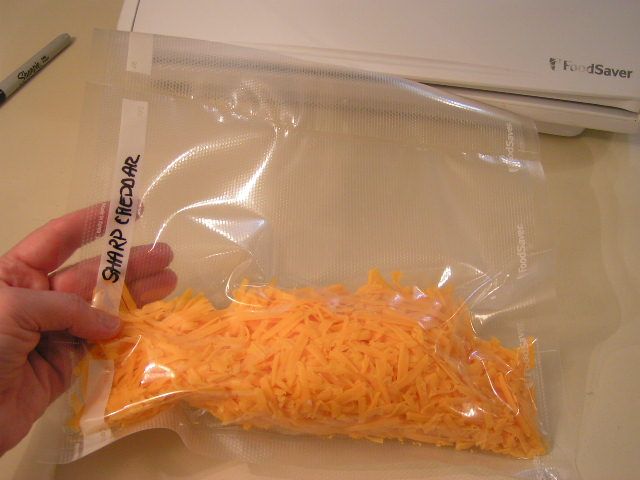
You can stop it at any time, which is what I am doing here in order to keep the cheese from being too tightly pressed.
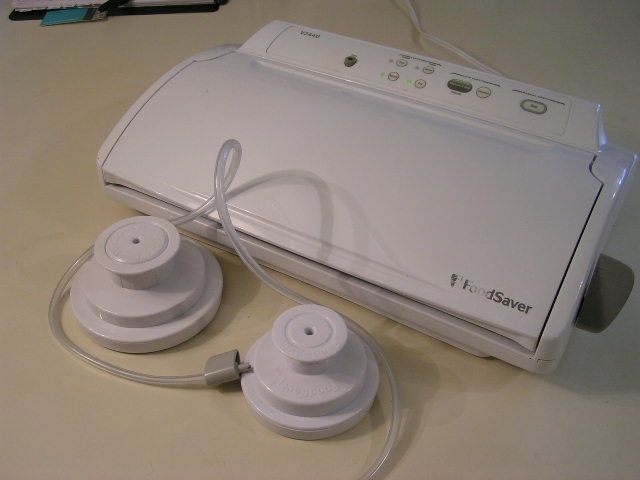
To vacuum jars, you must have the jar sealers and hoses that can be purchased separately. They run anywhere from $8 – $10
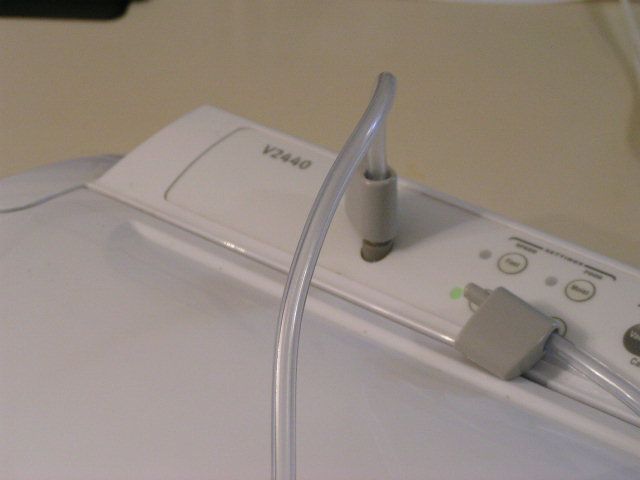
First, attach the hose to the accessory port
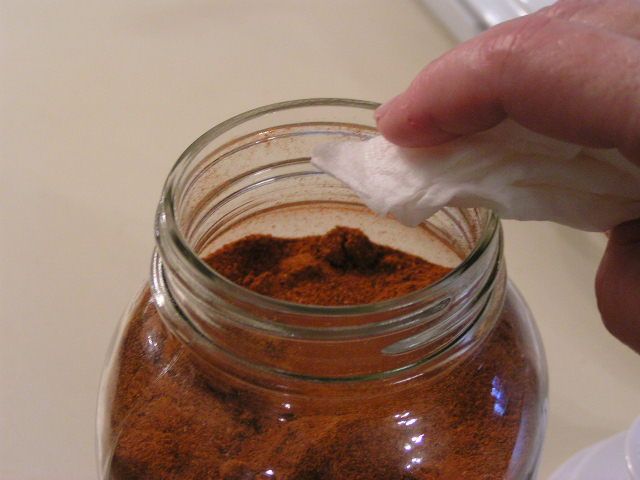
Wipe the edges of the jar with a damp cloth or paper towel to remove any residue or oil
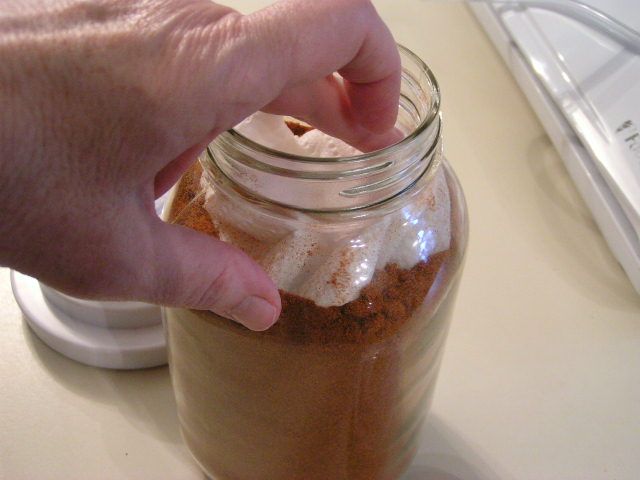
Place a dry, folded paper towel over powdery substances in the jar. Not needed for fruits and vegetables, etc.
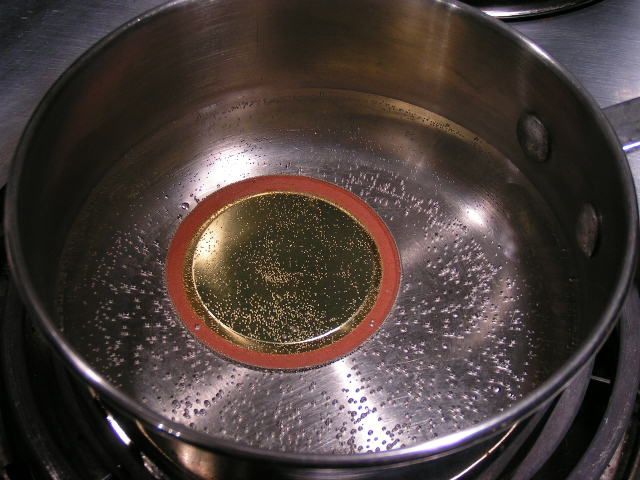
A new lid should be softened in a pan of nearly boiling water
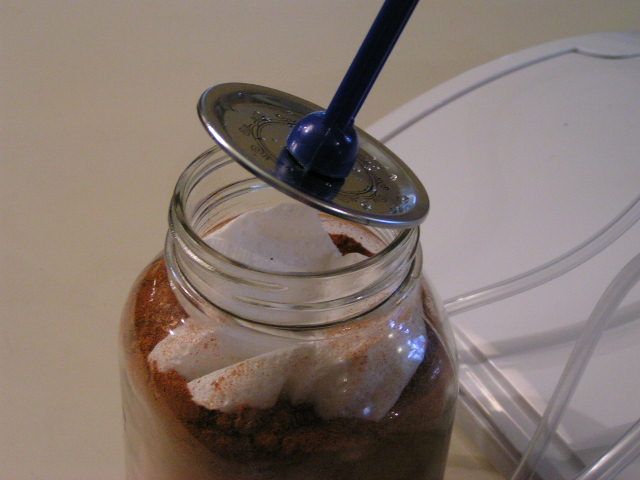
Place lid on top of jar
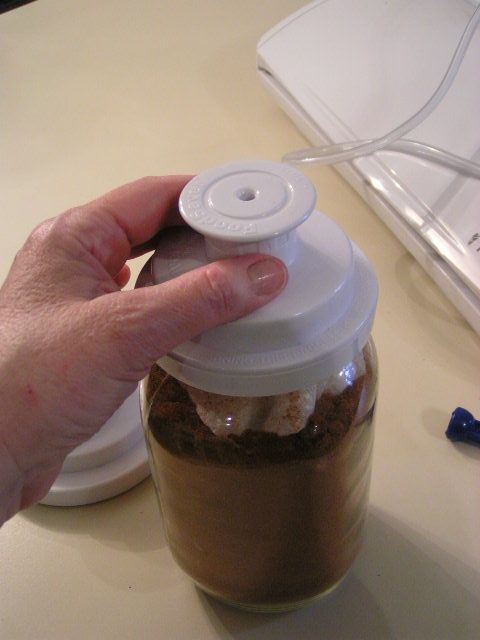
Place appropriate width jar sealer over the lid. This is the sealer for a regular mouthed jar. I find that sometimes it helps to wet your finger and run it around the inside edge of the sealer before putting it on the jar to create an even tighter vacuum.
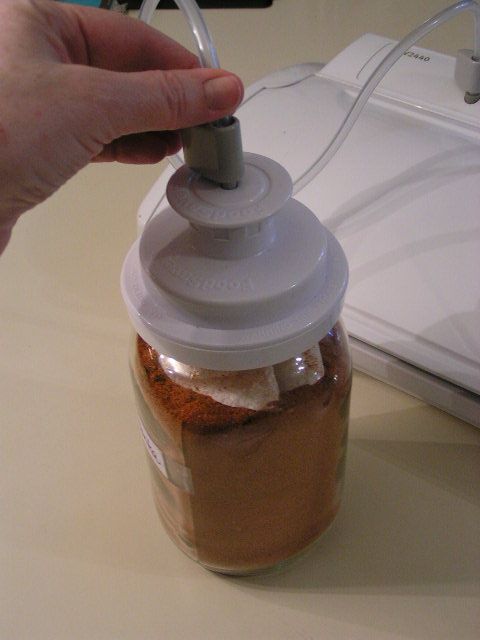
Attach hose to jar sealer
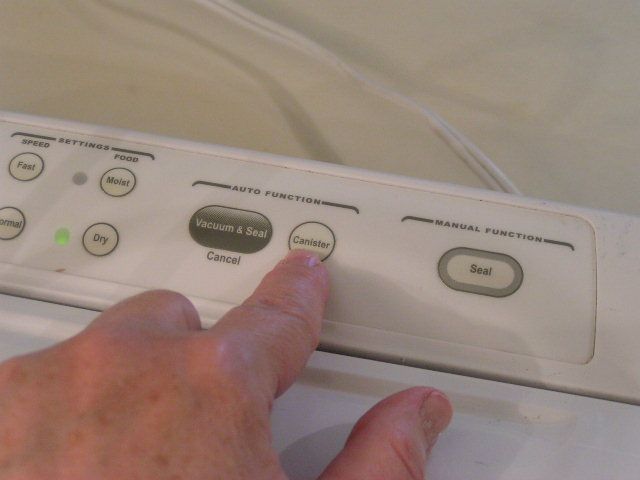
Press the canister button. If you get a newer model sealer, then the button may be different
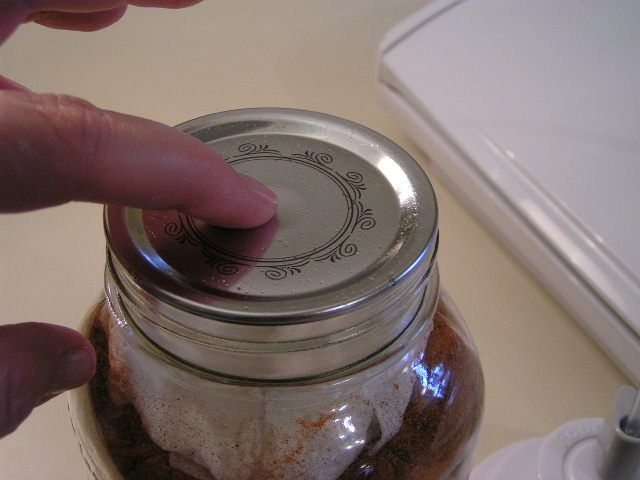
After removing the jar sealer, the “button” on the center of the jar lid should be concave and will not pop when you push the center of the jar lid.
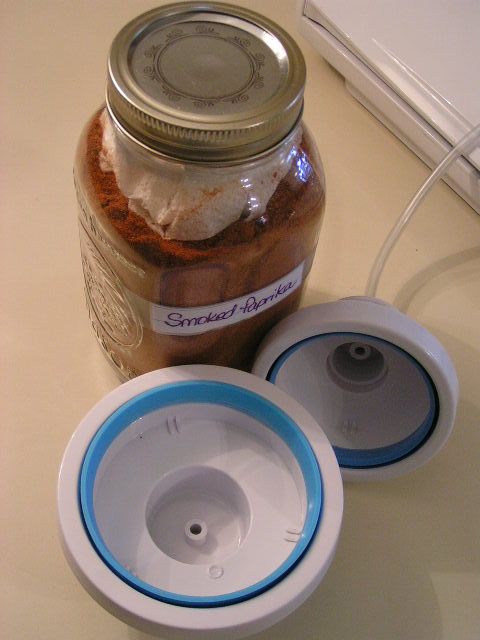
So there you have it. My darling daughter refers to this wonderful piece of equipment as “the sucker thing” and asked for one for Christmas. Did I mention that she is 29?!
Happy Cooking!
MB
|
Please join us on FaceBook!!
|
Join in the conversation by leaving a comment below and enter our January Giveaway!
|
Tags: cheese, FoodSaver, jar sealer, preparedness, preservation, vacuuming
Posted in A Day In the Life Of An Okie, Canning and Food Processing, Let's Cook!, So You Have To Make It Educational!! | 4 Comments »


 Homestead Revival
 Paratus Familia
 Rural Revolution