 Mr. Fix-It and I just got back from our favorite place in the whole world. It’s simple. It’s lovely. It’s laid back. And it’s cheap!! (That’s the best part) We love to visit the Bull Shoals, Arkansas area which includes Cotter, Flippin, Mountain Home, Fairview and Lakeview. We stay in various places whenever we go but our favorite place to stay is in a tent at the Bull Shoals State Park campground. What a gorgeous place to be!! The deer are so numerous that you can nearly walk up to pet them and the White River is cool, quiet and serene as fly fishermen silently cast their lines to snag hungry trout. It’s just God’s Creation at its best. We only spent a few days in the area and actually stayed at an historic and popular resort called Gastons White River Resort since our stay was so short. We plan on going back in the Fall to camp for a longer time. But I thought that I would post some photos of the area just for you to enjoy. 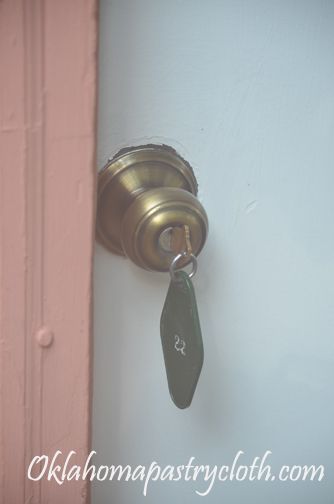 First of all, I bet it’s been a long time since you’ve seen one of these at a motel! Gastons is still using keys for the doors to their cabins. Kinda quaint – and Psycho-like. 🙂 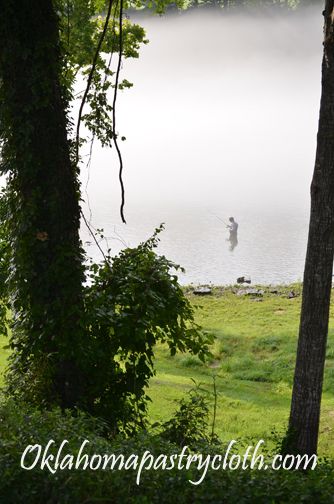 We woke up to this scene out of our window. It just did my heart good.  We skipped over to Cotter for a few hours. The spring there and the park are just so pleasant. This is the Cotter Bridge which was built in the 1930’s.  The dam at Bull Shoals was built in the 1940’s and harnesses the White River for electricity, as well as for Bull Shoals lake, a huge recreational lake that spans Arkansas and Missouri.  On one side of the dam is Bull Shoals Lake  And on the other side of the dam is the White River. I’ll give you three guesses why they call it the White River! 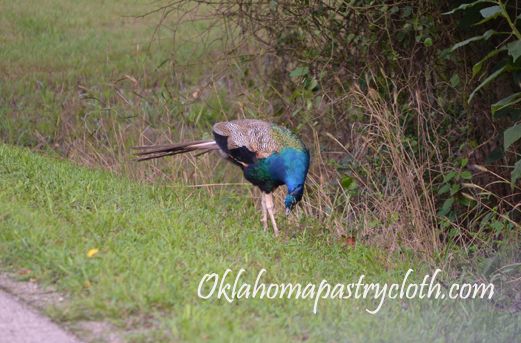 On our exploration, we had to stop the car in the road to allow this aimless wanderer time to mosey across without a care in the world. 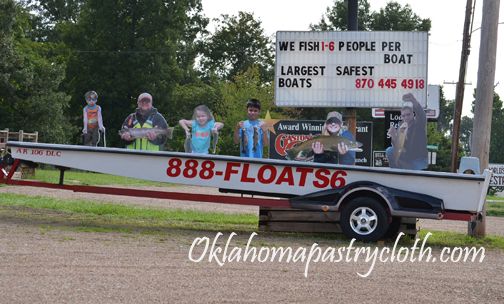 In the town of Bull Shoals, I caught this advertisement and thought it was a hoot. Pretty creative!! 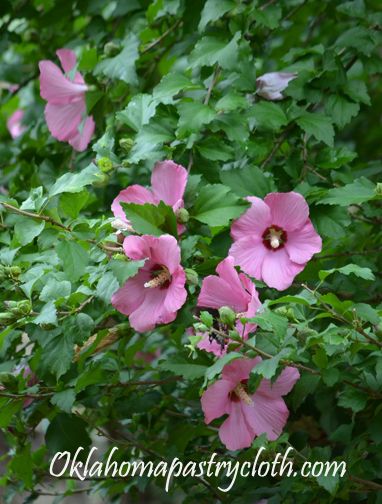 There has been so much rain in Arkansas that the flowers are gorgeous. The drought seems to be over in that part of the state, anyway. This hibiscus was spectacular. If you get a chance to head down Bull Shoals’ way, you should! And bring a tent for camping at the state park! (who needs a big, expensive camper!?) You might even get a raccoon or two to join you for dinner!  |
|
| |
|
Oklahoma Pastry Cloth™ Company on Facebook
|
|
 |
|

|
Posts Tagged ‘camping’
Bull Shoals – A Little Place Of Heaven
Friday, August 23rd, 2013
Making A Reflector Oven
Monday, July 25th, 2011
|
I’m probably gonna step on some toes. I have a funny way of doing that occassionally. But I see something ridiculous in our culture and I just have to poke fun. I can’t resist. It’s a disease. When I see something dumb, I just can’t keep my mouth shut. Invariably, I wind up offending SOMEBODY. C’est la vie. So as a disclaimer, loving the following appliances is just fine and dandy. But you have to admit that the name is rather humorous. I ran across a website for a brand of appliance that has quite a catchy brand name: Back To Basics. Now I ask you, when you think of back to basics, what do you think of? I picture washboards, rolling pins, clotheslines, grain mills, the Oklahoma Pastry Cloth™, and canning apple butter. In fact, being the campers that we are, a campfire, a chicken on a spit and marshmallows on a stick are REALLY back to basics in my book. Think, “Latrine”. And so, when I saw that there was a brand of kitchen item called, “Back To Basics”, I thought that I’d be finding some pretty neat retro stuff. Ha! Did you know that in today’s culture, Back To Basics, basically means, “Not eating at McDonald’s” and not going to the neighborhood sno-cone stand. For under $100 you can have your own Back To Basics sno-cone stand in your home and invite all of the neighborhood children for free cones, thereby teaching them the principles of capitalism; ie; giving away freebies undercuts your competitor until he goes out of business and then you can start charging out the wazoo. It all depends on how much you are willing to shell out to the neighborhood kids!  But the one that just had me giggling was the Egg and Muffin Toaster. Boy, I’m sure those 1889 Oklahoma Sooners couldn’t have made it in their sod huts without their egg and muffin toasters. Sure, they didn’t have any electricity but you know that toaster was a basic! And I’m sure my mom has memories of my grandmother getting up early to pop muffins and eggs into her toaster to create those sandwiches that hadn’t been invented yet by Ray Kroc of McDonald’s. Shoot, that isn’t even the way he made those egg and muffin sandwiches! OK, so now that I’ve poked fun at the marketing department of an appliance company, I’ll go back to that camping discussion and really getting back to basics. Having been a Girl Scout all the way through Seniors, I learned alot about living with the basics. We camped regularly and had to learn survival skills for various badges. One of those skills was how to make and cook in a ‘reflector oven’. We baked biscuits, brownies, cookies and my favorite, gingerbread, in many a cardboard box lined with aluminum foil. We were so proud of ourselves when we successfully presented a hot treat.  I continued to use these contraptions through parenthood as we hauled children, tents, cooking equipment and fishing poles to our favorite spots. The kids thought that using the reflector oven was the best part of a camping trip. My favorite story about one of those trips happened not too awfully many years ago. We had all four kids, at that time teenagers, with us and had set up two tents at a beautiful park in Arkansas. Our camping spot was next to the biggest, shiniest, most expensive motor home any of us had ever seen. We looked like slum dwellers living next to the Taj Mahal. The next morning, I got up early and started a fire in the fire pit, got some bacon frying in a cast iron skillet, scrambled eggs, shredded hashbrowns and mixed up some biscuits. I had made my reflector oven the night before and it was ready and waiting for hot coals to bake my biscuits. I loaded the oven with the coals and the biscuits, closed it and covered it with a towel to bake for 20 minutes. The family chowed down on the meal that would ready them for a day of fishing and swimming. After breakfast, I had heated up water in my two waterbath canners to wash dishes and was doing so when the man from the big, fancy motor home timidly approached the table on which I was working. He introduced himself and then said, “Um. We couldn’t help but notice that you had a mighty fine breakfast there this morning.” I said, “It was pretty good.” He continued, “Well, we saw that you was eatin’ some biscuits. We was just wonderin’ where you made those biscuits.” I showed him my reflector oven and he turned to yell at his wife whose face was pressed against the screen of their motor home. “She baked ’em in a box, hon!!! She baked ’em in a box!!” Yes siree. I shore did. And so, here are the directions for a reflector oven that may come in handy for you one day. They are just dandy for when the electricity goes out. Note: This is an outdoor project!! Do not attempt to use this oven inside because the coals give off dangerous carbon monoxide.  Line the inside of a medium sized cardboard box (I’m using an 18 x 18 here) with heavy duty aluminum foil. This includes the top flaps. If you can find a box that has had the entire top cut like a lid, rather than flaps, it’s even easier.  Start coals as for grilling or you can use coals from a wood stove or campfire. Today, I will be using pretend coals because in Oklahoma we are under a burn ban and can’t even grill a steak!!  While the coals are heating up, place an old pan or foil pan in the bottom of the box and stand a brick upright on each side of the pan. This pan will be used to hold the coals. You can also make a metal rack to use instead of the bricks  Pour the hot coals into the pan that has been placed at the bottom of the box.  Place your pan of biscuits, brownies, cookies or cake mix on top of the bricks or rack  Fold the lid or the flaps of the box down to close and cover with a heavy bath towel. Bake for recommended time.  You will have baked goods in a jif! I promise. Now THAT’S back to basics! |
|
|
Oklahoma Pastry Cloth™ Company on Facebook
|
|
 |
|
|

 Homestead Revival
 Paratus Familia
 Rural Revolution