 I know. I know. I’m behind. I can’t seem to catch myself coming or going. But I did manage to catch a car!! And it didn’t involve one of those icky salesmen either. We got a normal, honest one.  For those of you who follow the blog, you know that I have been on a frustrating search for a hunk of metal with four wheels that doesn’t take $100 to fill the gas tank and that uses what IS put in its tank, sparingly. I have driven one model after another, enamored with the outsides, only to find doors that felt like aluminum foil and innards like a bumper car. And then I discovered the Nissan Versa Hatchback and fell in love. It is heavy for a car its size, is very roomy inside (seats 5 people), actually has pep and gets 33 mpg highway miles (Mr. Fix-It and I checked it). I splurged and got fancy alloy wheels today and so now I really look Up-Town…well, as Up-Town as a platinum haired (we don’t say ‘gray’ around here) woman can look. I love the back end space where there is plenty of room to haul Oklahoma Pastry Cloth™ gift baskets for delivery. Yep. I’m a happy camper. Oh yes, and I found out today, that it actually stays on the highway when we have our 40 mph winds sweeping down the plains!! And so, between finding a car, filling orders and playing with my grandbaby, time has slipped away and I all of a sudden realized that this is Thursday. Oh no!! I’ve been seriously blogless this week. Of course, the March Bread Pans Giveaway is still ongoing, so be sure to leave comments to enter. And it appears that quite a number of people tried the new bread recipe posted last week and found it as delightful as Mr. Fix-It and I did. Therefore, I thought I’d show you one of the ways that I use the French bread from my last post which just tickles Mr. Fix-It to death. I make my own French Onion Soup recipe and top it with a toasted piece of this yummy bread, melted Swiss Cheese over that and serve it piping hot. Here is my recipe for French Onion soup. (And you must remember that I am a dump cook so I measured what I was dumping for you. You can increase amounts according to the size of your family) 2 tbsp real, honest to goodness (not the margarine or yogurt stuff) butter 2 tbsp flour 1/2 cup cool water 1 medium onion sliced into thin rings 1 clove garlic finely minced or pressed 4 cups beef broth or 4 cups water and 4 beef bouillon cubes 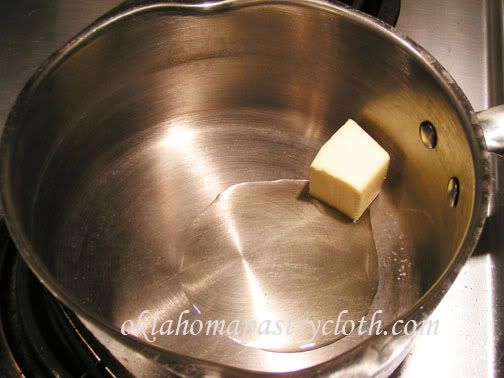 Melt butter in a 2 quart sauce pan over medium high heat 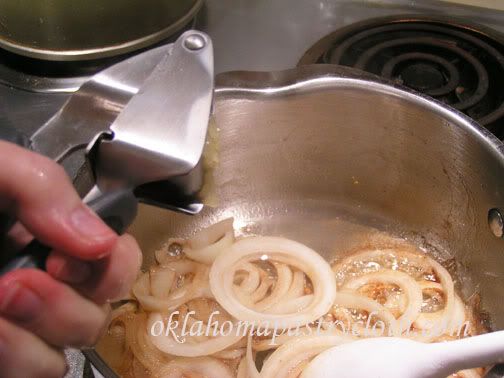 Add onions and garlic and sauté until onions are tender 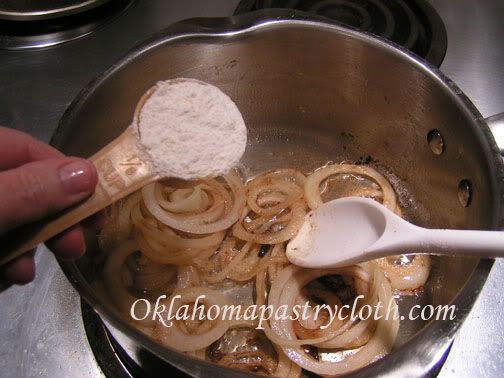 Add two tbsp flour and stir to make a roue  Add 1/2 cup cool water, stirring quickly to form a thick gravy  Add beef broth and stir until thoroughly mixed.  Stir soup occassionally as it simmers at a low boil for 30 minutes, adding water or broth if liquid reduces 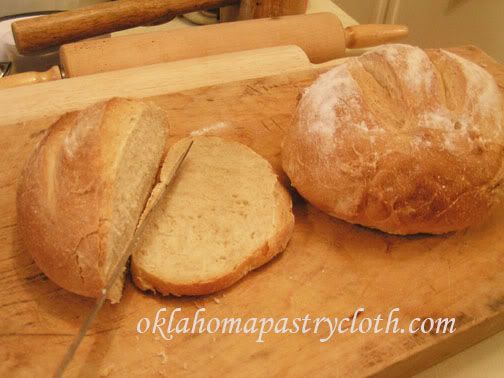 Take 4 slices of crusty french bread and toast lightly. May butter if you wish.  Pour soup into bowls that have been placed on a cookie sheet.  Place bread slices on top of the soup and top with slices of Swiss cheese. Place the cookie sheet and bowls into the oven on broil. Broil until cheese is bubbly.  Garnish with parsley and serve hot with a salad or fruit. Yum!!  |
|
|
Oklahoma Pastry Cloth™ Company on Facebook
|
|
 |
|
|
Posts Tagged ‘bread’
C’est La Vie – C’est La Soup
Friday, March 9th, 2012
A Bread For Everything
Friday, March 2nd, 2012
  Don’t forget to comment below to enter the drawing for these wonderful and unique bread pans!! Quick and easy is good, right?! Well, I guess taste has to come in there somewhere! Reader and FB fan, Penny, shared a wonderful recipe that’s quick AND tastes good, located at the lovely blog The Italian Dish. It looked so interesting that I had to try it. Since there is a giveaway going on right now for bread pans that require a good, crusty recipe, I figured this was a great time to post one. Though this recipe works best on a baking stone, I can see it working equally as well in the bread pans for the drawing. I’m going to digress a bit first. You know me and my memories…well, I’m going back there again. And I’m going wayyyy back! I’m remembering my childhood when, I believe, I was in the fourth grade. I thought I was a big dog back then and because I was the oldest child, I guess I was! My family was in Quebec’s Gaspé, at Bonaventure Island, staying in a tiny cabin warmed with a potbelly wood stove. My mom had put a pot of beans on the stove, to cook, and we kids had ventured out to watch the sea smash against the rocks below the cliff on which we stood. Oh yes, and I had this hat. It was one of those tourist hats that looked like a sailor cap, but that had embroidered across the front, turned-up rim, “Bonaventure Island”. I thought I looked cool, but what does a fourth grader know? Earlier that day, while driving the countryside, we had been amazed to see women in front of their homes, taking hot bread out of large, brick ovens that had been built alongside the road. These French-speaking ladies offered their breads for sale and we had stopped at one such oven to purchase a large, hot and crusty loaf. I can still remember the smell enveloping us inside our trusty Rambler station wagon as we headed toward the cabin. The day was finally made even more special for me because my mother gave me money and let me walk, all by myself, down to the little town to purchase a pound chunk of butter to slather on the bread. I don’t think beans and French bread have ever tasted so good since. And so, it was as I was baking the round loaf that is the result of the recipe following, and then tasted the first slice with its chewy, crusty exterior and soft, yummy center that those memories came flooding back. It tasted just like that bread so many years ago! So I have found a new favorite bread that is as good with a turkey sandwich, bistro style, as it is with a huge plate of ravioli. And talk about easy. It just doesn’t get any easier than this! So give it a try! And by the way, I showed you how to make Sourdough Bread in a past post. This bread takes on the same qualities without all the work.
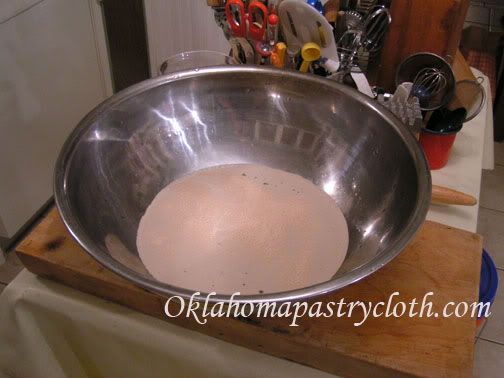 Your water should be around 100º. In a large bowl (this one is 8 quarts and a 4 or 5 quart one would be easier to handle) or a large plastic container with a lid, add the salt to the water and sprinkle the yeast over the surface. 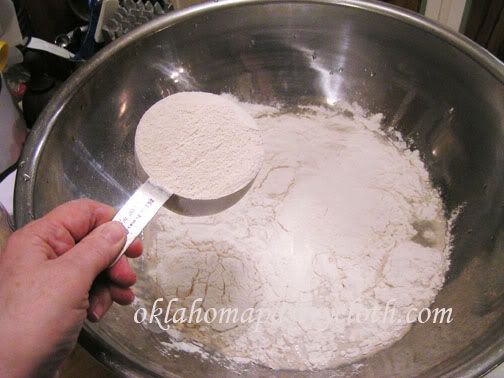 Add the flour. You don’t even have to proof the yeast. Of course, as I thought about this, you are in a world of hurt (and out some flour) if your yeast is no good, so I may go ahead and proof the yeast from now on. 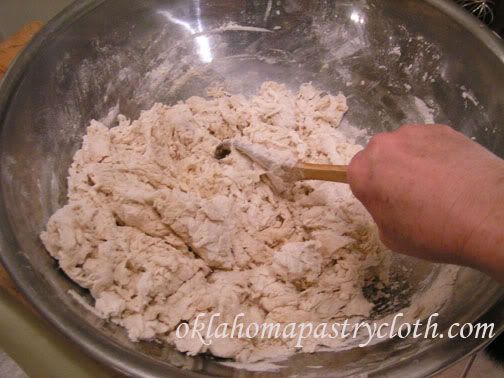 Stir the dough with a wooden spoon until everything is evenly moistened. The original baker noted that she went ahead and used her Kitchenaid mixer to do this step. I will too, next time! Note: You do not knead the dough 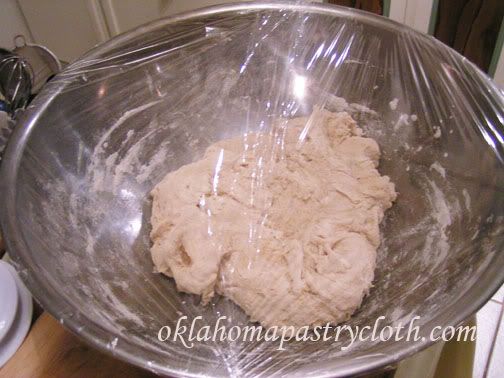 If the dough is in a plastic tub, cover with the lid, but do not snap down all the way around to allow the gasses to escape. I put plastic wrap loosely around the top of my bowl. Allow to rise in a nice warm place for at least 2 hours. 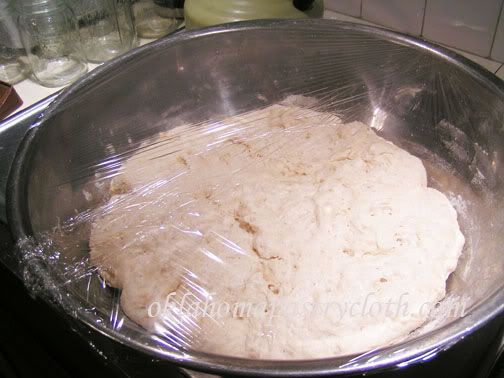 The dough should be nice and bubbly and starting to smooth on the top. You can use the dough anytime after this step, but refrigerating the dough until it is cooled down makes it less sticky and easier to work with. I refrigerated mine overnight and even waited until the next afternoon to make the bread. And any dough not used remains refrigerated. 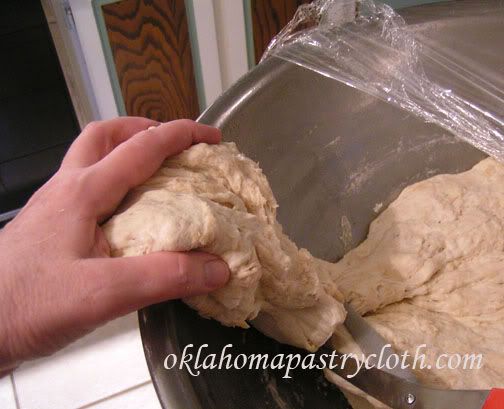 When you are ready to make the bread, pull some of the dough up and cut it off with a pair of scissors. Choose the amount you need for the type of loaf you will make. Here, I am making boules, but you can make a French loaf or baguettes too. 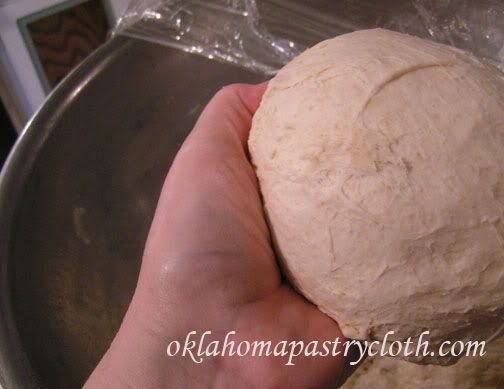 Shape the loaves by pulling the sides down and under to make the top as smooth as possible. It doesn’t matter what the underside looks like. 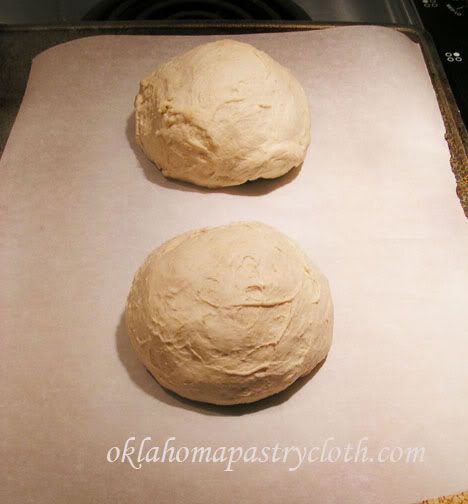 Place the loaves on parchment paper, either on a cookie sheet that has no sides or turn a cookie sheet upside down and place the parchment paper and the loaves on the bottom. The purpose of this is so you can slide the parchment paper and loaves onto a baking stone later. Allow the loaves to rise for 40 minutes. It said that there is no need to cover them with a damp cloth, but here in Oklahoma, we are so dry that I felt a damp cloth was a must. It worked great. 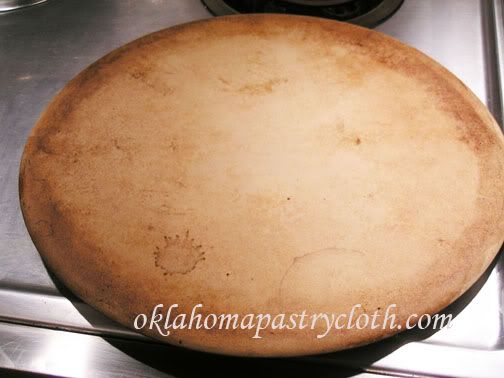 About 20 minutes into the rising, turn your oven on to 450º and place a baking stone on the middle rack to heat for 20 minutes. As you can tell, my baking stone is well-used!! The bottom rack will be used to hold a pan with a cup of water in it to steam the bread loaves. If you don’t have two racks, use a pan that can sit in the bottom of the oven without disturbing the heating elements. 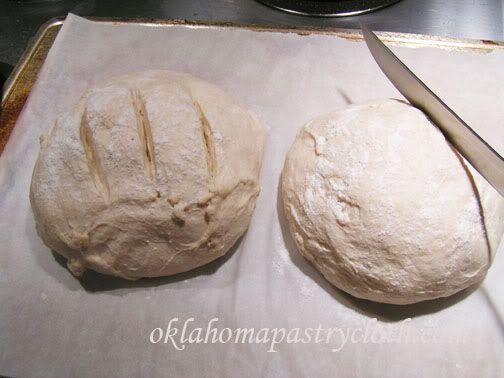 When the bread has risen, sprinkle flour on the top surface of the risen loaves and score the tops to release some of the trapped gas so the loaves will hold their shape. You can do parallel slashes, cross-cuts or whatever you like to make the bread loaves look pretty. Now here is where I did it a little different from the instructions. I opened the oven door and placed the pan of water on the bottom rack of the oven and closed the door to let the oven heat back up to 450º. At that point, I opened the oven again and slid the parchment paper with the loaves of bread, gently onto the baking stone. Closing the door, quickly, the bread bakes for 30-35 minutes depending on the size of the loaf. 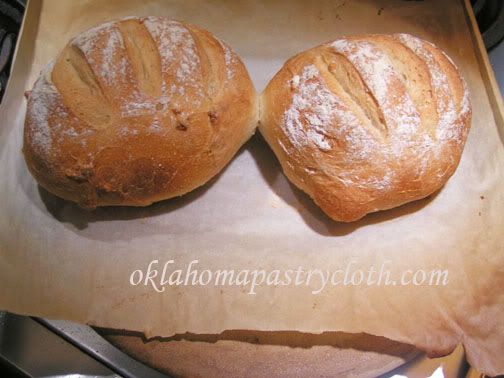 Remove the loaves and let them cool before slicing. They really are better after they have cooled, but I couldn’t wait and got a slice anyway. Oh yes. It’s good hot too! 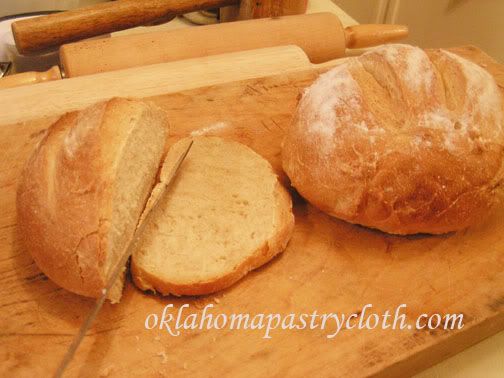 After the loaves have cooled slice and serve. You can store your leftover dough up to 14 days and as it sits, the flavor will improve like sourdough. When you use up your dough, don’t clean out the container, but just mix right in with the leftover pieces to add to the flavor. I have decided to use one of my gallon crocks with a loose plastic lid over it to store my dough. It should get really tasty in there!  |
|
|
Oklahoma Pastry Cloth™ Company on Facebook
|
|
 |
|
|
For follow button place this after Click Here To Comment and above the
:

Buttermilk Whole Wheat Rolls
Monday, October 24th, 2011
|
Apple Time Giveaway  I guess I’m on a bread baking marathon because I’m trying recipe after recipe!! With OU football and Rangers baseball, Mr. Fix-It is reveling in home made soups, chili and bread. Never let it be said that I don’t know the way to a man’s stomach – I mean – heart. Friday, at Deborah Jean’s Dandelion House Friday Blog Hop, I saw that Candy at Lazy J Bar C Farm had been busy in the kitchen making the most beautiful rolls you ever saw. She sells them at her local Farmers’ Market and they evidently go like hotcakes – no hot rolls. Candy is a reader here and I follow her blog, so she graciously gave me permission to post the recipe here for you. Of course, I had to try the recipe first and take pictures! The rolls are so easy. And with a ribeye steak and baked potato last night, Mr. Fix-It put away several of these whole wheat delights, happily cheering on the Texas Rangers and watching Nolan Ryan drop the first pitch by former president George Bush. So here you go. I think you will love the presentation of the rolls and the taste as well! 1/2 cup buttermilk 1/2 cup warm milk 1/3 cup butter 1/3 cup granulated sugar 2 eggs 1 1/2 teaspoons salt 2 1/2 cups bread flour (I use King Arthur Bread Flour) 2 cups whole wheat flour 2 teaspoons bread machine yeast OR 1 packet active dry yeast (1 tbsp loose) If using active dry yeast, dissolve it in the warm milk before combining with the remaining ingredients.  In the bowl of a mixer with dough hooks, add buttermilk and then yeast that has been proofed in the warm milk (if using packaged or loose yeast).  Add butter that has been cut into slices  Add sugar (I added honey for Mr. Fix-It)  Then, add the eggs, salt and bread flour. Lightly mix all ingredients.  Add whole wheat flour one cup at a time. I added a total of 1 1/2 cups and reserved 1/2 cup for flouring my pastry cloth. The dough pulls away from the side of the bowl and is stiff and may not require all of the flour. Do not add too much flour.  Scrape the dough out onto your floured Oklahoma Pastry Cloth™  Lightly knead into a smooth ball  Pour about a tablespoon of olive oil into the bottom of a bowl and place the dough ball in top side down. Turn the dough ball so that the oiled top is up. Cover with a warm, wet towel and allow to rise until double.  Divide the dough out into 16 equal sections. I used a scale to weigh the dough to make sure each piece was the same.  Form each section into a ball and place 8 each into 9″ round cake pans, seam side down.  Cover each pan with a warm, wet towel and allow to rise until doubled again.  Bake at 375º for 12 – 15 minutes. It helps to rotate the pans from front to back to brown the rolls evenly. Remove to cooling racks immediately.  My contribution to the project was a glaze that I put on as soon as they came out of the oven and went onto the racks. I melted 2 tbsp. butter and 1 tbsp honey. Oh yeah. That was brushed over the tops of the rolls.  And yes….they are scrumptious. Thanks so much, Candy, for giving me a new, family roll recipe!!  |
|
|
Oklahoma Pastry Cloth™ Company on Facebook
|
|
 |
|
|
A 9-Grain Bread!
Friday, October 21st, 2011
|
Apple Time Giveaway  Today, I am just glad for the sunshine and the cool air. Oh my. It feels so good. I looked back over old posts and saw that we had triple digit temps in Okieland for somewhere around 60 days this summer. Really? My brain doesn’t embrace bad memories. All it is accepting right now is chilly temps and crisp air. Love it!! Of course you know that it is a proven fact that with the cooler days, there is a certain isotope that wafts in with the wind and settles on unsuspecting homemakers, rendering them slaves to a desire to bake and make soups. It is just difficult to avoid. It’s been happening since the beginning of time. I do know some individuals who have managed to resist the bombardment of these atoms by living at Panera Bread with their laptops, purchasing breakfast, lunch and dinner there, but even they have to admit that the first thing they crave is soup and hot bread!! So there you have it! In the realization of this natural phenomenom, I continue sharing bread recipes sent in by readers. This bread, sent in by reader Mrs. B, is very versatile and though it will make a large loaf of bread, I used it to make bagettes and sandwich rolls. Very good with a nutty flavor. I grind my own 9-grain flour from a combination of grain berries including hard wheat, soft white wheat, barley, spelt, millet, oats, triticale, rye and flax seed, but you can find the flour at your local health food store and in some grocery stores. 7-grain works fine too. And if anybody out there wants to share a favorite recipe, please email it and we will test it and post it! 1 1/2 cups warm water  Place brown sugar into mixing bowl. A mixer with dough hooks is great, but this can be stirred and kneaded by hand too.  In 1/2 cup warm water with 1 tsp sugar, sprinkle yeast and proof. When yeast is bubbly, add the yeast water to the brown sugar and add 1 cup more warm water.  Melt butter and add to water and brown sugar mixture. Stir slightly.  Add 9-Grain flour and stir.  Add salt  Stir and continue adding bread flour one cup at a time until dough pulls away from the bowl. You may not use all the flour. Knead with the dough hooks for 8 minutes on medium speed. Or knead by hand, on your Oklahoma Pastry Cloth™ for 10 minutes. On the pastry cloth, form the dough into a uniform ball.  Add one to two tablespoons of olive oil in the bottom of a large bowl.  Place the dough ball top down into the oil and turn so that the dough top is oiled.  Cover with a warm, wet towel and place in a warm place to rise until double.  When the dough has doubled, roll it back out onto your pastry cloth and form into rolls or long bread rolls to be placed in bagette pans.  With kitchen scissors, make diagonal cuts into the rolls.  Cover again with a warm, wet towel and place into a warm place to rise to double again. When risen, for added flavor, sprinkle with cheddar or asiago cheese. Bake in 350º oven for 20 – 30 minutes or until golden brown.  These make wonderful submarine sandwich rolls! I’m thinking soup for next week?  |
|
|
Oklahoma Pastry Cloth™ Company on Facebook
|
|
 |
|
|
Monday, October 17th, 2011
 Well, it’s a fun journey on to another bread recipe sent in by a reader and this one is from reader, Ken. I made it and oh my, is it yummy and rich! The dough is much softer than a traditional bread dough. This is no ordinary sandwich bread. This is a soft and slightly sweet bread that goes way beyond mayo and ham! I used it to make a loaf and cinnamon rolls and then used part of the loaf to make French Toast for breakfast. Ken said that he uses it to make pizza dough too, so this recipe is very versatile. 6 cups all purpose or bread flour 1/2 cup sugar 2 tsp. salt 2 packages of yeast or 2 tbsps loose yeast 2 eggs 1 stick butter or margarine that has been slightly softened 1 cup hot water 1 cup cold water 1/2 cup lukewarm water 1 tablespoon dough enhancer (optional)  Proof yeast in 1/2 cup warm water mixed with a tsp of sugar. Allow to stand about 4 minutes until yeast starts bubbling to the top  In the bowl of a mixer that has dough hooks (or in a large bowl if stirring by hand) place 2 cups flour (I used King Arthur Bread Flour), 1/2 cup sugar (I used honey for Mr. Fix-It), yeast mixture, the cold and hot water and mix briefly.  Cube softened butter and add. Mix slightly  Add eggs and salt and mix again.  Add tbsp of dough enhancer and add the rest of the flour, one cup at a time. Reserve 1/2 cup of flour for working. Note: Depending on the humidity, you may find that you need more or less flour. It was a very humid day when I made this and added almost 1 cup more flour than the recipe called for. The flour I used was a very fine bread flour and that probably added to the necessity for more to make a good dough. The dough should pull away from the walls of the mixer, but it is still a very soft and sticky dough. Knead in the mixer with the dough hooks about 8 minutes on medium to low.  Pour the dough out onto your Oklahoma Pastry Cloth™ and knead slightly with the leftover flour to form a ball.  Pour 1 tbsp olive oil into the bottom of a large bowl and place dough ball top side down into the oil. Turn the dough ball so that the oiled top side is up. Cover with warm, wet towel and allow to rise. I turn my oven to 150º and then turn it off when heated, open the door for 30 seconds and then place the bread into the warmed oven and shut the door. Hint: If the dough sticks to the towel while rising any dough, before removing the towel, use a spray bottle and spray the surface of the towel with water. It will lift right off of the risen dough.   The bread rises until doubled. Pour it back onto your pastry cloth and cut in half. At this point, you will be forming two loaves or forming one loaf while using the other dough for rolls, cinnamon rolls or pizza crust. For a loaf, grease and flour loaf pan and place dough into pan to rise. The dough is VERY soft and goes into the loaf pan very soft. But it rises to a beautiful height. When the bread has risen, bake at 350º for 25 – 30 minutes until golden brown. Turn out immediately onto a wire rack to cool.  For cinnamon rolls, I rolled the dough into a large oval about 1/2″ thick and sprinkled powdered sugar over the surface.  Then LOTS of cinnamon covered the surface. It is up to you how much you use, but I covered the whole surface. We like cinnamon.  Chopped pecans topped off the whole surface of the dough  I rolled the dough up like a jelly roll and sliced with a good, sharp knife that was floured between cuts.  The slices were placed about 1/2″ apart on a deep cookie sheet. Cover with a warm, wet towel and allow to rise until double in a warm place. After doubled, bake in a 350º oven for 20 – 25 minutes or until golden brown.  After baking, ice with a mixture of 2 tbsp melted butter and 1 1/2 – 2 cups powdered sugar with 1/2 tsp vanilla and enough milk (added 1 tbsp at a time) to make an icing of spreadable consistency. These cinnamon rolls are to die for!! And yes, one is missing! I couldn’t wait.  And here is the beautiful loaf of bread…  …which was used to make French Toast for breakfast! Lots of butter and syrup. Yummy.  |
|
|
Oklahoma Pastry Cloth™ Company on Facebook
|
|
 |
|
|

 Homestead Revival
 Paratus Familia
 Rural Revolution