 I sure hope that everyone’s Christmas was beautiful, meaningful and filled with love. Our home was a little quieter this year, as much of the family was unable to make it due to weather, but those of us who were together had a lot of fun. The grandbaby was here and so all was well. Can’t go wrong with a one year old and her first real Christmas!!  The tree was bare underneath until presents magically appeared Christmas morning! They must have come by train. I can’t resist waxing philosophical after this past holiday season. Shopping was a truly different experience this year. I don’t know if I have just become more observant or if my patience isn’t what it used to be or if I just naturally see the absurd in my surroundings, but I picked up on a phenomenom at the department stores that I just hadn’t noticed before. People don’t read signs. The best way to get an individual to do exactly what you don’t want them to do is to put up a sign and watch them do the exact opposite – like the lady who was trying to force a baby stroller, full of baby, onto an escalator beside the sign that stated, unequivically, “Absolutely no strollers on the escalator!!!”. It’s like people’s minds go into reading in a foreign language because they obviously don’t understand the English before them. “Je ne comprend pas.” “No comprende.” “Me no speaka de English.” Now, I try very hard to be a patient line-stander. The reality of today’s society is that we stand in lines. We stand in lines at checkout stands. We stand in line for concert tickets. And we even purposely CHOOSE to stand in lines on Black Friday at 3:00 in the morning just to be first to make a dive for a Doggy Doo game where the child who gets three piles of dog poop on his shovel first, wins the game. I’m not sure if this teaches a child environmental responsibility or the best way to get worms, but it was certainly popular at Toys R Us. But I digress. I really do try to be a very patient line-stander. I use the time in line to pray for those people in front of me or for the checkout personnel. I browse over the titles of the magazines and make mental notes of Jennifer Aniston’s latest flame and what Vladimir Putin’s alien baby looks like. But on Christmas Eve afternoon, I’m ashamed to say, I kind of lost my patience – and I tapped my foot in frustration. I needed one, measly item that I had forgotten in all of my weeks and weeks of careful planning and lists (yeah, right). A run into Walmart gave me that item – and cheaply I might add – and I decided to go through the express ‘self-checkout’ line because it said “express”. Now, express to me means “faster” or “quicker” or at least “moderately speedier than nonexpress”. It means that the normal person would recognize the word and take it to dictate the necessity to have just a few items. Oh no. People on Christmas Eve can’t read. I think that they read the word “express” and think that it gives them permission to express themselves about every, single item of the 300 in their basket as they swipe them across the barcode reader. In the particular line in which I was standing, one such woman was at the stand with a buggy piled so high with purchases that she had to get a second buggy in which to place her finished bags because there was no room in the first buggy. There were 6 more people between me and her and these six people each had a maximum of 5 items. The first woman did not know how to use the scanner and contemplated each item, of her pile of approximately 400 things, to determine where in the world she was supposed to swipe for a price. She announced the price as there was final success and carefully moved to the next of her 600 items. The man in front of me held tightly to an ice scraper of which he must have been sorely in need because he tenaciously stood in this line with the optimism of Eeyore. He turned to me, rolled his eyes and said, “You would think that they would put ’10 Items or Less’ on the sign.” I thought to myself that if the word “Express” hadn’t been interpreted correctly, what made him think that this woman could count (with her basket heaping with 700 items)?! Out of the corner of my eye, I saw that the self-checkout to my left and in front of me was miraculously void of all but one customer. I hated to do it to the young man in front of me, but I made a beeline for that stand, careful not to knock him to the ground in my escape. I was also careful not to look smug at my stroke of luck. The woman, who was checking out at that moment, pulled out her card and pressed, “Finish and Pay”, right under the sign that stated, “Credit card, Debit card or Cash Only”. She ran the red card through the reader and promptly got a “Read Error” flashing light. She contemplated the card and tried again. Same response. She turned to her daughter and said, “I guess it wants me to pay the balance first and then use the gift card.” Gift card? The sign didn’t say anything about a gift card. But then, it didn’t say anything about a check either which didn’t stop her from writing one and trying to force it into the cash recepticle of the machine. The check was spit back out and a voice screeched, “Please wait for assistance!!” 15 minutes later, the store clerk, after working on the machine with no resolution, and continually reprimanding the customer for attempting to use a gift card on the machine, flatly stated, “Just go to my stand and I’ll have to check you out there.” She promptly wiped out the entire order and left the lane open for me and my one item. I quickly paid, turned to look at the line of people which had formed behind me and then, as I headed toward the exit, I noticed the young man with his ice scraper still standing in line behind the same lady with the two baskets who was evidently working on item number 800. I have a recipe for which my family stands in line. It is our traditional “New Year’s Day We Have To Have It To Watch Football Games” recipe. I always wind up making two batches – one before Christmas to give as gifts to neighbors and then one for munching. I have been making this for as long as I can remember and it is one of the recipes that you will find in my family cookbook at the shopping page. I really think that you will enjoy it if you like toffee popcorn and nuts crossed with Cracker Jacks. It is truly yummy. Oh, and my favorite popcorn to use in this is the Act II Butter Lovers brand. It takes 3 – 4 bags of popped corn to make a recipe. I pop it and then make sure to remove any unpopped kernels. This brand has no trans fats and quite a bit of the good fats. Candied Popcorn and Nuts Ingredients: 5 Quarts freshly popped corn 1 cup salted cocktail peanuts 1 cup butter (you have to use the real thing!) 2 cups packed light brown sugar 1/2 cup traditional pancake syrup like Karo 1/2 tsp baking soda 1/2 tsp vanilla 1/8 tsp butter flavoring (optional) Variation: Use pecans or roasted almonds instead of peanuts Preheat oven to 250º  In a very large bowl, place popcorn and nuts and toss  In a medium sauce pan, melt butter with brown sugar and syrup and bring to a boil. 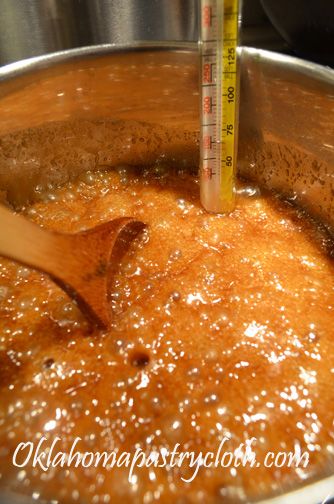 Boil until the mixture reaches the soft ball stage. You can check this with a candy thermometer or by dropping a little of the syrup into a bowl of ice and water. Feel to see if the syrup forms a soft ball in the cold water.  When the soft ball stage is reached, remove the syrup from heat and stir in vanilla  And add the soda, stirring quickly. The soda will make the mixture start to bubble and turn to a foamy light tan color  Pour the mixture over the popcorn and nuts and then begin turning and mixing the popcorn and peanuts to coat  When all of the popcorn and nuts are coated, spread the mixture onto a large, buttered cookie sheet and bake in 250º oven for about an hour, stirring and turning about every 15 minutes to keep it from burning. When done, remove from oven and quickly transfer the hot popcorn by spatula to an airtight container. The popcorn will be a little sticky, but it will come off of the cookie sheet easily. It gets harder to remove as the popcorn candy begins to harden. Once the toffee coating has hardened, shake the popcorn to break it into individual pieces.  This is all that is left of the batch that I just made. Oh wait. No. I’m sorry. I just ate it!!  |
|
| |
|
Oklahoma Pastry Cloth™ Company on Facebook
|
|
 |
|
|
|
Posts Tagged ‘recipe’
You’ll Eat It Like Popcorn!!
Monday, December 31st, 2012
The “Toity” Without The “Hoity”!
Friday, December 14th, 2012
  Just 5 days to go!! Don’t forget to comment to enter this month’s giveaway for the treats pictured above. Just in time for Christmas: Shortbread cookie mix and a set of cookie cutters to make a cookie Christmas tree!! I told you in my last post that I would put up some “finger food” ideas for the holiday entertaining season and this is the next in that list. Hope you can use it!! A long time ago, an employer took me and friends to a restaurant in Knoxville, Tennessee. It was quite an experience for a younger person who didn’t have two pennies to rub together. There were no prices on the menu and so I have no idea how much the meal cost. However, I’ll bet that the bill would be considered astronomical even today! Appetizers were ordered first and I chowed down on the Crab Louis on crackers. I had never had caviar and made a pig of myself. As has always been my habit, I took mental notes of the tastes and the ingredients as the flavors slid over my taste buds. I have no clue what I had for dinner and dessert. I just remember the appetizers! And of course, when I went back to the real world of the lowly, young wife of a farmer, I experimented until I created that appetizer to use for my own entertainment occassions. It may seem like a bit of work, but the neat thing is that you can make the sauce days ahead of time and just keep it in the frig where the longer it sits, the more the flavors combine. You can cook the crab ahead of time or you can use frozen claw meat or lump crab meat. Assembling the treat just takes a matter of minutes so it’s all in the planning! You will impress your guests and they will think that you are really posh. Do we use that word anymore??? For a lighter version, you can use light mayonnaise and the low-fat half and half. And if you think that I spent a bunch of money on caviar, think again! Shhhhhhhh. It was on the top shelf at Walmart with the canned oysters, canned shrimp and canned tuna!! That means that anyone can serve the “Toity” without it being so “Hoity”!! Ingredients: Louis Sauce: 1/2 cup mayonnaise 2 Tbsp heavy cream (or half and half) 2 Tbsp Heinz Chili Sauce 1 tsp Worcestershire sauce 1/4 tsp shredded, fresh horseradish 2 Tbsp finely chopped green pepper 2 Tbsp finely chopped green onion 1 Tbsp freshly squeezed lemon juice Other Ingredients:  In a small mixing bowl, add mayonnaise 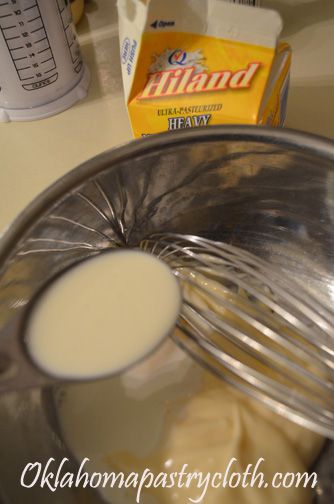 Add cream  And chili sauce, worcestershire sauce and horseradish  Add chopped green pepper and green onions  Pour in 1 Tbsp lemon juice  Mix all ingredients together until sauce is smooth. Place in the refrigerator to cool. May be made several days ahead of time. This sauce is very good as a substitute for tartar sauce with fried or baked fish or shrimp.  Steam enough crab to make one cup of meat when cracked. For a quicker preparation, frozen lump or claw meat is acceptable too. 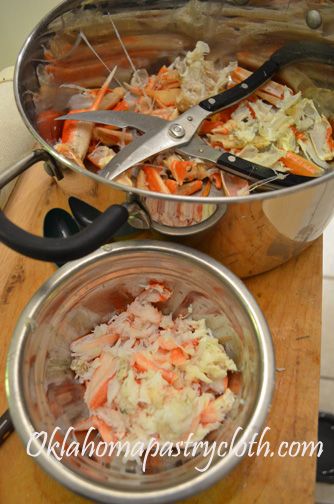 Shell the crab using kitchen shears and a nut pick.  Place crackers on a plate and put a small dollop of sauce in the center of each cracker.  Toss one tablespoon melted butter with the crab  Put a mound of crab onto the cracker and into the sauce.  Place another small dollop of sauce on top of the mound of crab  Add a small mound of caviar onto the sauce.  And there you have it. Tasty appetizers!!  |
|
| |
|
Oklahoma Pastry Cloth™ Company on Facebook
|
|
 |
|
|
|
A New Meaning To Pot Pie
Tuesday, November 20th, 2012
 I know. I know. Where have I been? Did I fall off of the earth? Did I get swallowed by a giant batch of soap? Did I get discovered by Food Network? (I wish!) While none of these scenarios is probable, the fact is that I had a variety of much less exciting happenstances occur at once. First, as I left you last time, I had a house full of teenage young men who stayed with us for 7 nights as they campaigned for our state representative. It was rather hectic here. But on top of that, my eye disease decided to rear its ugly head and I was having a hard time reading or typing for very long. It’s just no fun when you see two of everything!! And then – more company and more cooking. And then – two canning classes and a case of hives and more double vision. All in all, with excuses aside, it all boiled down to one main culprit: Writer’s block!!!! Yep. My brain has been fried. I have not had one single thing to write about. I’d start, but the words wouldn’t come and when they did, there were two of each. Soooo, I gave up. I have now chilled, rested and used not just a few ice packs and I am back in business. And speaking of business, we had a winner for our Fall Giveaway, reader and FaceBook fan, Sue Feely won two packages of our Frontier Fixin’s bread mix. Next week, right after Thanksgiving, a new giveaway will be introduced just in time for Christmas! So be watching. With this being Thanksgiving week, a time for family, memories, gratitude and turkey, I thought that I would give you a way that I like to use my leftover turkey that is pretty tasty. The recipe originated from a cookbook that I’ve had for years and is evidently no longer in print, titled “Favorite Brandname Cookbook”. I tweaked the recipe for leftover turkey but use chicken as well and home canned chicken or turkey is really great in it. If you want to can your turkey after Thanksgiving and then use it later, this is a good way to use that, but straight off the bone is fine too. I like white meat in my recipes but both white and dark work well too. It’s all a matter of preference. In this tutorial, I am using chicken, but will be making it with turkey on Friday!! And just as a note, I use dehydrated celery, mushrooms and onions and they work great. Ingredients: 1 cup sliced carrots 3/4 cup chopped onion 1/2 cup diced celery 1/2 cup chicken or turkey broth 1 can cream of chicken soup 1 pkg turkey gravy mix (if using turkey for the meat) mixed with 1 cup cold water 1 cup sour cream 3 cups cubed or shredded chicken or turkey 1/2 cup sliced mushrooms 1 teaspoon worcestershire sauce 1 teaspoon salt 1/8 teaspoon pepper Topping: 1 cup flour 2 teaspoons baking powder 1/2 teaspoon salt 2 eggs beaten 1/2 cup milk 1 Tbsp. chopped green pepper 1 Tbsp. chopped pimento 1 1/4 cups shredded cheddar cheese (sharp is good) 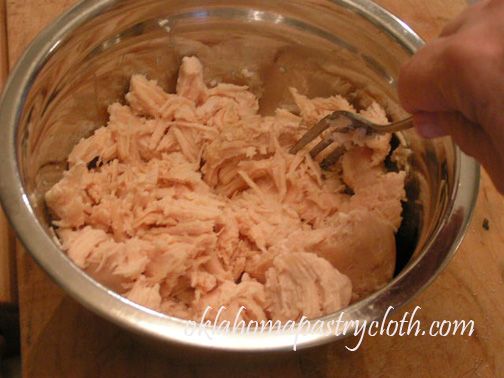 In a bowl, place the meat, either shredded or cubed. If using canned meat, it will shred.  Place veggies, minus the peppers and pimentos, into a saucepan with 1/4 cup chicken broth, cover and simmer for 20 minutes. Add a little water if needed to keep from cooking dry. 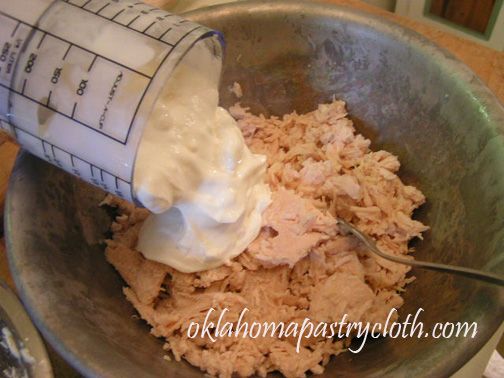 Add sour cream to the meat  Add cream of chicken soup and turkey gravy mixed with 1 cup water to the meat and sour cream  Add Worcestershire sauce, salt and pepper  Add vegetables  Add remaining 1/4 cup chicken broth and mix all ingredients well  Pour the meat mixture into a casserole dish. I am using a Pampered Chef stoneware deep dish baker here. Set dish aside. 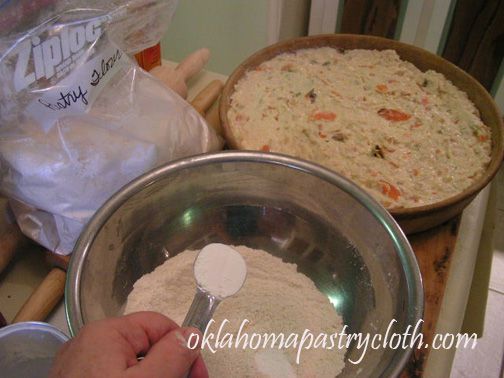 In a bowl, add flour, salt and baking powder and stir.  In a separate bowl, lightly beat eggs and milk together  Add cheese and peppers to the flour mixture and toss until the cheese is totally incorporated with the flour  Pour egg mixture in with the flour mixture and stir well  By spoonfuls, place the batter mixture in a ring around the outside top of the meat mixture in the casserole dish. Bake for 40 – 45 minutes at 350º until golden brown.  It’s pretty and it’s good! Serve hot with a salad and you have a meal!  |
|
| |
|
Oklahoma Pastry Cloth™ Company on Facebook
|
|
 |
|
|
|
Buttermilk Pie
Tuesday, August 21st, 2012
  (Don’t forget to comment to enter our newest giveaway for this heavy, heavy, marble and wooden rolling pin and package of a Made In Oklahoma mix to roll out! Winner will be announced Labor Day weekend.) Those of you who have been reading this blog over the past four years – yes, y’all! Four years! – know that I am a little crazy. Well, not certifiable, just nutty. Sometimes, I wonder if God wired my brain differently from other people so that it operates just a tad off-the-wall. It just seems that I look at my situations, circumstances and just plain life with the oddest revelations. I can’t just say, “Oh! Look! Fresh corn is on sale!” No. I have to ponder the price, calculate how many ears it will take to fill 50 wide-mouthed pint jars, and, though it’s June, immediately plan who I will be inviting to Thanksgiving dinner in order to determine if 50 wide-mouthed jars of corn can meet the yellow vegetable requirement on the menu! And a simple act of compassion in nature of taking in an orphaned raccoon to bottle feed until it is old enough to make it in the wild on its own, turns into an emergency room visit with a leg broken in five places and a doctor who doesn’t believe I wasn’t up in a tree with the raccoon. OK. So who does that anyway? So, this past weekend, I made Mr. Fix-It a pretty, darned good buttermilk pie, if I do say so myself. And the kitchen smelled heavenly. If you haven’t ever had a Buttermilk Pie, you HAVE to try it! According to Wikipedia, it was originally a British desert that became a standard here in the deep south. Evidently, it offered a sweet alternative to fruit pies when fruit was out of season. However, Wikipedia also said that you just don’t hear about these pies anymore. I don’t know what they are talking about, because Buttermilk Pie is served in restaurants around here, and Texans claim that, of course, their’s is the best there is! There is a drastic difference between a Buttermilk Pie and a Chess Pie as there is no corn syrup or corn meal in a Buttermilk Pie, and individual cooks like to add their own touches of extra nutmeg and cinnamon, or cloves, lemon extract and rind, or other various flavorings to this versatile custard pie. Anyway, I’m guessing you won’t be surprised that as I made my pie, rolling out the pastry, beating the eggs and such, even though I had no clue that this was a British confection, my brain had a 1960’s British Invasion, and I couldn’t stop singing the Beatles’ Uncle Albert song. You know – “so I had a cup of tea and a butter pie (you have to pronounce it ‘buttah’); the butter wouldn’t melt so I put it in the pie”. And I’m STILL singing it. ~Sigh~ Parts of the tune are hauntingly beautiful and the lyrics are harmless enough, although those boys must have had way too much pie as they came up with that song – or maybe something else. Here, you can click on the song so that it will rattle around in YOUR head for a week. Here is my recipe for Buttermilk Pie. It’s a pretty ancient one. I sure hope you enjoy it as much as Mr. Fix-It. And as you munch on it, just contemplate what a special man he is to patiently endure my crazier side!! Ingredients: 2 cups sugar 1/2 cup butter, softened (1 stick) 3 tablespoons all-purpose flour 3 eggs beaten 1 cup buttermilk 1 teaspoon vanilla extract 1/8 teaspoon nutmeg 1 9″ pie unbaked pie shell variations: Add 1 tsp cinnamon and 1/4 tsp ground cloves or Add 1 tablespoon lemon extract and 1 tsp lemon zest  You can use any pie crust recipe. Of course, I use my recipe! I like my recipe because it has butter in it instead of just shortening. Flaky and buttery! Roll out your crust and place it in a 9″ pie tin. Of course, you CAN use a store bought pie crust..cough..cough.  Cream the butter and sugar until light and fluffy. Add the flour and mix further.  In a separate bowl, lightly beat the eggs.  Add the beaten eggs to the creamed butter and sugar mixture  Add the buttermilk and vanilla  Add the nutmeg. If you want to add cinnamon, cloves, more nutmeg or any other flavorings, you would do that here. Mix until well incorporated and creamy.  Pour the creamy custard into the pie shell. Dust the top of the custard with cinnamon. Bake in a 425º oven for 15 minutes and turn down to 350º to continue baking for 30-40 more minutes or until top is golden brown and center is firm, not liquid. It will jiggle a bit but won’t be sloshy. The center will solidify as it cools. Chill and serve cold, but some people like it at room temperature.  Serve with whipped cream and unhook your belt!! Singing!  |
|
| |
|
Oklahoma Pastry Cloth™ Company on Facebook
|
|
 |
|
|
|
Warm Spiced Parsley Ginger Marinade!Yummy!!
Tuesday, August 14th, 2012
  (Don’t forget to comment to enter our newest giveaway for this heavy, heavy, marble and wooden rolling pin and package of a Made In Oklahoma mix to roll out! Winner will be announced Labor Day weekend.) I’ve been sitting here, patiently twiddling my thumbs, having dutifully turned off all computers and the water heater due to a power outage this afternoon, that occurred without warning. I called the power company to alert them that we are without electricity and the woman laughed at me! She did. I asked if she had any idea how long this outage would last, and again, she laughed. Did I sound that funny? Or maybe she heard the terror in my voice as I assumed that she was hinting to me that we would never have electricity again? Mr. Fix-It isn’t here this afternoon and so I am totally on my own. I am like Mrs. Ingles on the prairie, only with two dogs and two cats instead of children. And you can’t eat your dogs and cats any more than you can eat your children!!! How will we survive? I have already assessed my stock of deydrated food stuffs, mentally preparing what could be on the menu for the evening meal. I still have two quart jars of my homemade beef jerky that I have managed to hide from Mr. Fix-It and lots of veggies. I have water in the Berkey to boil and pour in with the veggies and meat to make soup and figure that could last us a few weeks. But it just dawned on me that we are under a burn ban so there will be no fire to boil the water. And it is getting stuffy in here. Never mind that the 115 degree days have broken. It has been 88º outside and who can live in 88º without air conditioning? I mean, really? Well, that’s all there is to it. We are all going to die. I remember the nice man who came to talk to us about a generator. We had all chuckled that if we invested that much money into something, we would end up never needing it. That is how Murphy’s Law works, you know. We didn’t buy one. Now it is payback. No generator – no electricity. I can’t even get the car out of the garage because the door is electric and HEAVY and I haven’t competed with Olympic heavy-weight lifters in some time now. And I have no water! Ack. The well pump is not working. All I have is what is in the Berkey. I have to conserve and I feel like it’s been weeks since I had a drink of water. My tongue is sticking to the roof of my mouth. This is rough. Oh wait. Never mind. The lights just came on. Yep! And water is coming out of the faucets. I’m tellin’ you. That was the longest ordeal! The electricity was off, like…let’s see…hmm…an hour and a half? Really? Huh. I thought it was weeks. You know, you just lose all track of time when you are having to rough it. OK. So I’m being silly. The fact of the matter is that Mr. Fix-It is looking into a generator and I’m thinking this episode will give him a little extra boost toward that purchase! We lose electricity a lot in Oklahoma. And this has given more pause for thought on our water situation, as well. A hand pump would be a handy addition to our well system or a windmill with a tank. We’ll have to think about that too. We all need to be thinking about ways that we can live more sustainably without depending so much on outside forces. And trust me, two quarts of beef jerky won’t cut it!! This kind of thinking always sends my tastebuds to grilling out. Unfortunately, we can’t do that right now. Too dangerous with a chance of a grass fire. But it hasn’t been that long ago that we weren’t under a burn ban and I tried a meat marinade that Mr. Fix-It found online that is just to die for. He said that he found it at American’s Test Kitchen. It is wonderful and unique and doesn’t take much time. Try this out. I promise that you that you will be hugging yourself and saying, “Who needs a Steak House??!” So, here’s hoping that you have electricity all the days of your life…and that you will be well-prepared just in case you don’t!! Warm-Spiced Parsley Marinade with Ginger 1/2 cup (packed) fresh parsley leaves 1 jalapeno chile pepper, seeded and chopped course 1 (2-inch) piece fresh ginger, peeled and chopped course 3 medium cloves garlic, peeled 1 tsp ground cumin 1 tsp ground cardamom 1 tsp ground cinnamon 1/s cup olive oil 1 tsp salt 1/8 tsp ground black pepper 3 or 4 one inch to one and a half inch thick steaks, preferably New York Strip, Ribeye, Filets or Sirloin  Place first 10 ingredients into a food processor or blender  Process until all ingredients are well-blended and fine  For Kabobs, trim all fat from steaks and cut into 1″ cubes. Sprinkle with tenderizer. Or, leave steaks whole and sprinkle with tenderizer. 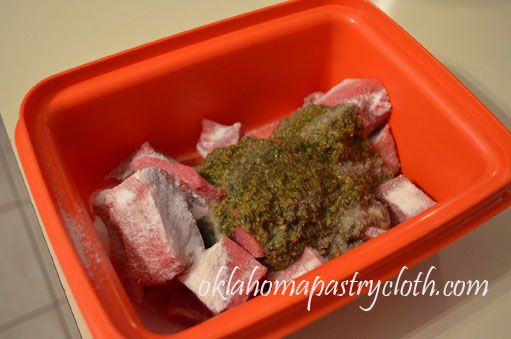 Place steaks or cubes into a container that has a tight lid and add marinade from the food processor. Seal with lid. 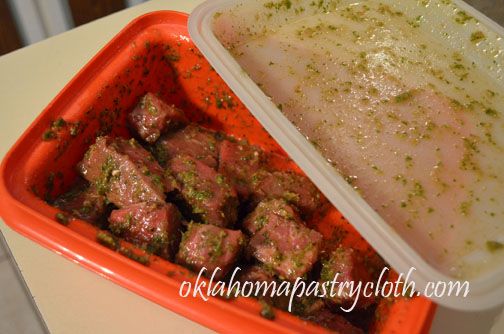 Toss until all cubes or steaks are coated with the marinade. Place in the refrigerator, covered, from 4 up to 24 hours. I did mine overnight and until the next evening – probably 18 hours.  For kabobs, on skewers, alternate meat with pineapple, sweet onions, green pepper or you can also add mushrooms and parboiled new potatoes.  Place steaks or kabobs on a hot fire. Coals should be gray, glowing red. And these are now my instructions about how we cook a steak. Sear one side of the meat until browned and quickly turn to the other side. Immediately cover the grill with lid and allow steaks or kabobs to cook, undisturbed for 7 minutes for medium-well, 6 minutes for medium and 5 minutes for medium rare. 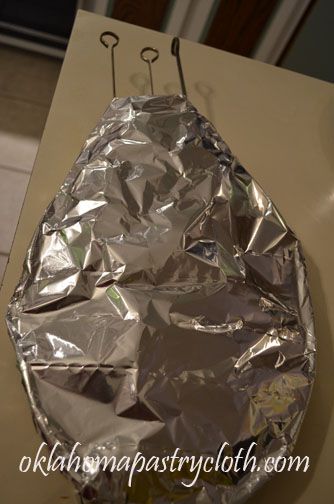 Immediately remove steaks or kabobs to a platter and cover with aluminum foil. Allow to rest for 10 minutes.  Serve immediately  |
|
| |
|
Oklahoma Pastry Cloth™ Company on Facebook
|
|
 |
|
|
|
C’est La Vie – C’est La Soup
Friday, March 9th, 2012
 I know. I know. I’m behind. I can’t seem to catch myself coming or going. But I did manage to catch a car!! And it didn’t involve one of those icky salesmen either. We got a normal, honest one.  For those of you who follow the blog, you know that I have been on a frustrating search for a hunk of metal with four wheels that doesn’t take $100 to fill the gas tank and that uses what IS put in its tank, sparingly. I have driven one model after another, enamored with the outsides, only to find doors that felt like aluminum foil and innards like a bumper car. And then I discovered the Nissan Versa Hatchback and fell in love. It is heavy for a car its size, is very roomy inside (seats 5 people), actually has pep and gets 33 mpg highway miles (Mr. Fix-It and I checked it). I splurged and got fancy alloy wheels today and so now I really look Up-Town…well, as Up-Town as a platinum haired (we don’t say ‘gray’ around here) woman can look. I love the back end space where there is plenty of room to haul Oklahoma Pastry Cloth™ gift baskets for delivery. Yep. I’m a happy camper. Oh yes, and I found out today, that it actually stays on the highway when we have our 40 mph winds sweeping down the plains!! And so, between finding a car, filling orders and playing with my grandbaby, time has slipped away and I all of a sudden realized that this is Thursday. Oh no!! I’ve been seriously blogless this week. Of course, the March Bread Pans Giveaway is still ongoing, so be sure to leave comments to enter. And it appears that quite a number of people tried the new bread recipe posted last week and found it as delightful as Mr. Fix-It and I did. Therefore, I thought I’d show you one of the ways that I use the French bread from my last post which just tickles Mr. Fix-It to death. I make my own French Onion Soup recipe and top it with a toasted piece of this yummy bread, melted Swiss Cheese over that and serve it piping hot. Here is my recipe for French Onion soup. (And you must remember that I am a dump cook so I measured what I was dumping for you. You can increase amounts according to the size of your family) 2 tbsp real, honest to goodness (not the margarine or yogurt stuff) butter 2 tbsp flour 1/2 cup cool water 1 medium onion sliced into thin rings 1 clove garlic finely minced or pressed 4 cups beef broth or 4 cups water and 4 beef bouillon cubes  Melt butter in a 2 quart sauce pan over medium high heat  Add onions and garlic and sauté until onions are tender  Add two tbsp flour and stir to make a roue  Add 1/2 cup cool water, stirring quickly to form a thick gravy  Add beef broth and stir until thoroughly mixed.  Stir soup occassionally as it simmers at a low boil for 30 minutes, adding water or broth if liquid reduces  Take 4 slices of crusty french bread and toast lightly. May butter if you wish.  Pour soup into bowls that have been placed on a cookie sheet.  Place bread slices on top of the soup and top with slices of Swiss cheese. Place the cookie sheet and bowls into the oven on broil. Broil until cheese is bubbly.  Garnish with parsley and serve hot with a salad or fruit. Yum!!  |
|
|
Oklahoma Pastry Cloth™ Company on Facebook
|
|
 |
|
|
A Bread For Everything
Friday, March 2nd, 2012
  Don’t forget to comment below to enter the drawing for these wonderful and unique bread pans!! Quick and easy is good, right?! Well, I guess taste has to come in there somewhere! Reader and FB fan, Penny, shared a wonderful recipe that’s quick AND tastes good, located at the lovely blog The Italian Dish. It looked so interesting that I had to try it. Since there is a giveaway going on right now for bread pans that require a good, crusty recipe, I figured this was a great time to post one. Though this recipe works best on a baking stone, I can see it working equally as well in the bread pans for the drawing. I’m going to digress a bit first. You know me and my memories…well, I’m going back there again. And I’m going wayyyy back! I’m remembering my childhood when, I believe, I was in the fourth grade. I thought I was a big dog back then and because I was the oldest child, I guess I was! My family was in Quebec’s Gaspé, at Bonaventure Island, staying in a tiny cabin warmed with a potbelly wood stove. My mom had put a pot of beans on the stove, to cook, and we kids had ventured out to watch the sea smash against the rocks below the cliff on which we stood. Oh yes, and I had this hat. It was one of those tourist hats that looked like a sailor cap, but that had embroidered across the front, turned-up rim, “Bonaventure Island”. I thought I looked cool, but what does a fourth grader know? Earlier that day, while driving the countryside, we had been amazed to see women in front of their homes, taking hot bread out of large, brick ovens that had been built alongside the road. These French-speaking ladies offered their breads for sale and we had stopped at one such oven to purchase a large, hot and crusty loaf. I can still remember the smell enveloping us inside our trusty Rambler station wagon as we headed toward the cabin. The day was finally made even more special for me because my mother gave me money and let me walk, all by myself, down to the little town to purchase a pound chunk of butter to slather on the bread. I don’t think beans and French bread have ever tasted so good since. And so, it was as I was baking the round loaf that is the result of the recipe following, and then tasted the first slice with its chewy, crusty exterior and soft, yummy center that those memories came flooding back. It tasted just like that bread so many years ago! So I have found a new favorite bread that is as good with a turkey sandwich, bistro style, as it is with a huge plate of ravioli. And talk about easy. It just doesn’t get any easier than this! So give it a try! And by the way, I showed you how to make Sourdough Bread in a past post. This bread takes on the same qualities without all the work.
 Your water should be around 100º. In a large bowl (this one is 8 quarts and a 4 or 5 quart one would be easier to handle) or a large plastic container with a lid, add the salt to the water and sprinkle the yeast over the surface.  Add the flour. You don’t even have to proof the yeast. Of course, as I thought about this, you are in a world of hurt (and out some flour) if your yeast is no good, so I may go ahead and proof the yeast from now on.  Stir the dough with a wooden spoon until everything is evenly moistened. The original baker noted that she went ahead and used her Kitchenaid mixer to do this step. I will too, next time! Note: You do not knead the dough  If the dough is in a plastic tub, cover with the lid, but do not snap down all the way around to allow the gasses to escape. I put plastic wrap loosely around the top of my bowl. Allow to rise in a nice warm place for at least 2 hours. 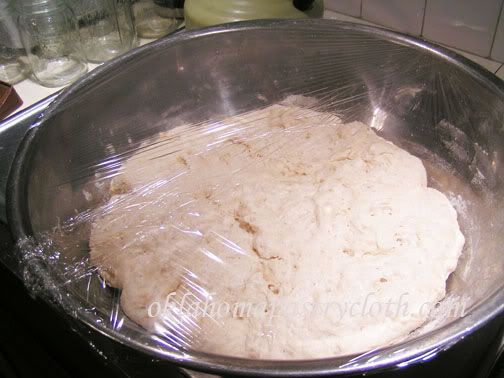 The dough should be nice and bubbly and starting to smooth on the top. You can use the dough anytime after this step, but refrigerating the dough until it is cooled down makes it less sticky and easier to work with. I refrigerated mine overnight and even waited until the next afternoon to make the bread. And any dough not used remains refrigerated.  When you are ready to make the bread, pull some of the dough up and cut it off with a pair of scissors. Choose the amount you need for the type of loaf you will make. Here, I am making boules, but you can make a French loaf or baguettes too.  Shape the loaves by pulling the sides down and under to make the top as smooth as possible. It doesn’t matter what the underside looks like.  Place the loaves on parchment paper, either on a cookie sheet that has no sides or turn a cookie sheet upside down and place the parchment paper and the loaves on the bottom. The purpose of this is so you can slide the parchment paper and loaves onto a baking stone later. Allow the loaves to rise for 40 minutes. It said that there is no need to cover them with a damp cloth, but here in Oklahoma, we are so dry that I felt a damp cloth was a must. It worked great.  About 20 minutes into the rising, turn your oven on to 450º and place a baking stone on the middle rack to heat for 20 minutes. As you can tell, my baking stone is well-used!! The bottom rack will be used to hold a pan with a cup of water in it to steam the bread loaves. If you don’t have two racks, use a pan that can sit in the bottom of the oven without disturbing the heating elements.  When the bread has risen, sprinkle flour on the top surface of the risen loaves and score the tops to release some of the trapped gas so the loaves will hold their shape. You can do parallel slashes, cross-cuts or whatever you like to make the bread loaves look pretty. Now here is where I did it a little different from the instructions. I opened the oven door and placed the pan of water on the bottom rack of the oven and closed the door to let the oven heat back up to 450º. At that point, I opened the oven again and slid the parchment paper with the loaves of bread, gently onto the baking stone. Closing the door, quickly, the bread bakes for 30-35 minutes depending on the size of the loaf.  Remove the loaves and let them cool before slicing. They really are better after they have cooled, but I couldn’t wait and got a slice anyway. Oh yes. It’s good hot too!  After the loaves have cooled slice and serve. You can store your leftover dough up to 14 days and as it sits, the flavor will improve like sourdough. When you use up your dough, don’t clean out the container, but just mix right in with the leftover pieces to add to the flavor. I have decided to use one of my gallon crocks with a loose plastic lid over it to store my dough. It should get really tasty in there!  |
|
|
Oklahoma Pastry Cloth™ Company on Facebook
|
|
 |
|
|
For follow button place this after Click Here To Comment and above the
:

A Tasty Bisque
Thursday, February 9th, 2012
 Remember!! Comment at the end (below the blog box where it says in little blue letters, “comments” click on that and it takes you to comments and a comment box) in order to enter our giveaway. Drawing is Feb 13th. This time TWO people win one of the two identical packages – Pie tin set and First Out Pie Spatula. So comment early and comment often because every single time you comment, your name goes into the pot!!  In my last post, I was waxing a bit philosophical and I discussed my understanding about finding joy in the mundane stuff even when things don’t seem all that great. I told you that I had discovered that joy is an attitude of choice. And as I have been contemplating that state of being for the past few months, I have also discovered another attitude of choice: Contentment. Now, I looked up that word and there are a number of definitions with lots of educated descriptions, but as I have been thinking about it, I’ve come up with my own explanation of the state of “contentment”. As I see it, a life of contentment is a life without resentment. Heh..that kinda rhymes, doesn’t it?! It means gracefully allowing the stupid driver who cuts in front of you to be wrong or the store manager trying to stiff you out of a return to be dumb or a lady with a fur and fancy car to be rich or a long-haired youth, marching with a sign to be vocal. In other words, it means, “being satisfied with one’s self and one’s situation, not comparing one’s self to anyone else or expecting others to live up to one’s perception of fairness.” It hasn’t been that long ago that I was in a state of poverty according to that government definition. That’s a whole ‘nother story in itself, but the gist of it is that we had very, very little money. The strange thing is that I never felt poor. I honestly felt blessed and it could have been that I was in a very small town with other people in the same boat, but some of my friends were very wealthy too and so I should have felt like maybe life was lacking something. But I didn’t. And I think that it is because I had discovered the verse in Phillipians 4:12 that says, “I have learned the secret of being content in any and every situation, whether well fed or hungry, whether living in plenty or in want. I can do everything through him who gives me strength.” I had lived in abundance and then I was poor but that state only dealt with money and contentment deals with the heart. Now, today, I am not rich by any stretch of the imagination, according to those government definitions, either, but I am richer than I was in those days now past. And I have found that more money does not give more contentment. There is always more money than one has at any given time. And it isn’t because the world or the people around me are all behaving themselves and living right lives. That just doesn’t happen. There are people who cheat and steal and even kill, but those people can’t steal my contentment. We are told in Psalm 37:1, “Do not fret because of evil men or be envious of those who do wrong;…Delight yourself in the Lord and he will give you the desires of your heart.” The greatest desire of our heart is to be content in God. No need to be angry that others have made more money or that others have more skills or that others say things hurtful. Contentment means to just relax in that with which God has blessed us and to remember that each of us is so special that we are not like nobody else! And of course, one way I relax in what God has blessed me with is to cook it! There is one way toward a contented tummy and that is with a comforting soup on a cold day like today. This recipe is one that a friend and I made up from top to bottom and has been a secret since the late 70’s (except that the original is in the cookbook at the shopping page!), but I have decided to share it today and I hope you find it to be a blessing! The story behind it is that this friend and I used to treat ourselves on special grocery days in the big city (from the country) by going to a particular restaurant. That was in the days before children. This restaurant was very expensive and since neither of us, being farmer’s wives, had much money, we would order the only thing we could afford – soup and salad. But that was all we wanted because that soup was incredible. Finally, she and I decided to try to figure out how to make the soup. We would eat there and discuss the flavors that we were getting in each bite. We went home and started experimenting and the base of this soup was developed. Then, in later years, I added more ingredients that I thought were missing and the following recipe is the end result. I usually make it with fresh crab, but the canned baby clams work just as well and in the off-season are best used anyway. If you want to use crab, just get some snowcrab, steam it and remove from the shells and chop. I sure hope you enjoy it!! 4 Tbsp butter 1 Tbsp onion, grated 3 Tbsp flour 3/4 tsp salt 1/8 tsp mace 1/8 tsp nutmeg dash of pepper 1/2 tsp. fresh chopped parsley 1 cup canned milk 1 chicken bouillon cube or 1 tsp granulated bouillon 2 cups shredded crab meat or 1 10oz can of baby clams 1 1/4 cup half and half 1/4 cup sherry (if you are using cooking sherry, cut back on the salt) 1/2 tsp lemon zest 1/2 cup finely diced tomatoes  In a large sauce pan on medium heat, melt butter  Add onions and saute for 30 seconds 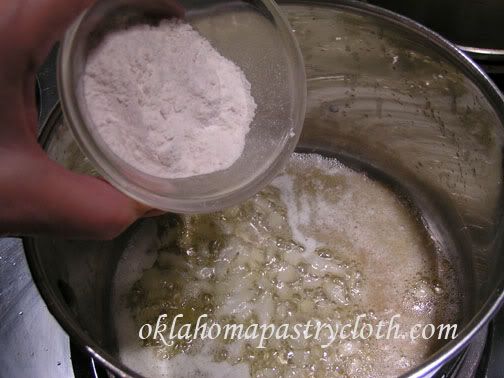 Add flour  Stir to blend and make a bubbling roue 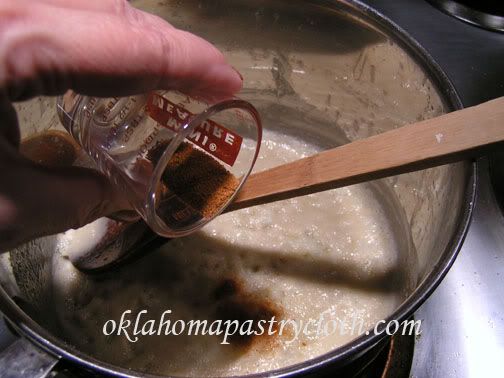 Add nutmeg and mace together and stir 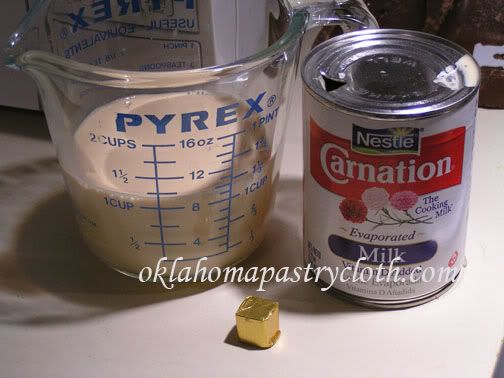 Add canned milk and bouillon. Stir until bouillon is dissolved  Add half and half and continue stirring on medium heat. Do not bring to a boil. Lower heat if the soup is getting too hot.  And crab, or in this case a can of baby clams with the juice.  Add sherry and stir to mix well  Put in lemon zest 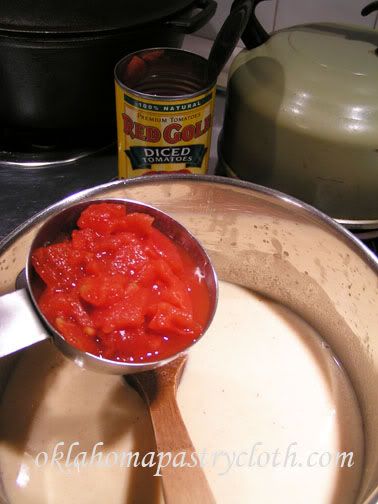 And add tomatoes and stir. Simmer for about 30 minutes, stirring occassionally.  Serve hot and garnished with parsley and black pepper. Yuuuuuummmmmy!! This post is linked at Deborah Jean’s Dandelion House Friday Blog Hop  |
|
|
Oklahoma Pastry Cloth™ Company on Facebook
|
|
 |
|
|
German Cooking
Monday, February 6th, 2012
 Remember!! Comment at the end (below the blog box where it says in little blue letters, “comments” click on that and it takes you to comments and a comment box) in order to enter our giveaway. Drawing is Feb 13th. This time TWO people win one of the two identical packages – Pie tin set and First Out Pie Spatula. So comment early and comment often because every single time you comment, your name goes into the pot!!  Have you ever had one of those days where washing the dishes is such a chore you just want to walk away and pretend they don’t exist?! Today started out as one of those days for me. I was tired when I got up today. Have no clue why – just tired. However, this morning, as I walked into the bedroom and contemplated the as yet unmade bed, a thought swept over me and I had to smile. “Consider it pure joy, whenever you face trials of many kinds, because you know that the testing of your faith develops perseverance. Perseverance must finish its work so that you may be mature and complete, not lacking anything.” James 1:2-4 4 boneless pork chops or 1 lb boneless pork roast sliced to 1/2″ slices or pork cutlets that have been tenderized at the store 1/4 cup flour 1/2 tsp garlic powder 1/8 tsp thyme 1/4 tsp freshly ground black pepper 1 egg, beaten 2 Tbsp milk 3/4 cup fine dry bread crumbs – make your own with a couple of slices of bread toasted and ground in the blender 1 teaspoon ground paprika 2 Tbsp canola oil or olive oil + 1 Tbsp butter 3/4 cup chicken stock 1/2 teaspoon dried dill or 1 Tbsp fresh chopped dill 1/2 tsp salt 2 tsp corn starch 1/2 cup sour cream or 1/4 cup sour cream + 1/4 cup yogurt 1/4 tsp onion powder 1/2 cup sliced mushrooms (optional)  Trim fat from chops. Using a meat hammer, pound the pork chops to about 1/4″ thickness. Make sure edges are hammered nice and flat. 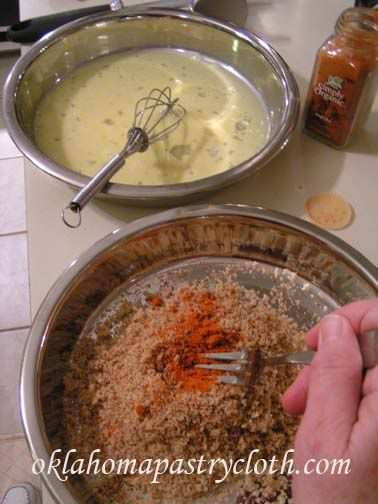 Mix egg and milk in a shallow dish and beat. In a separate shallow dish, mix bread crumbs and paprika and stir to blend.  In a third shallow dish (I use pie and cake pans), add garlic to flour  Add salt 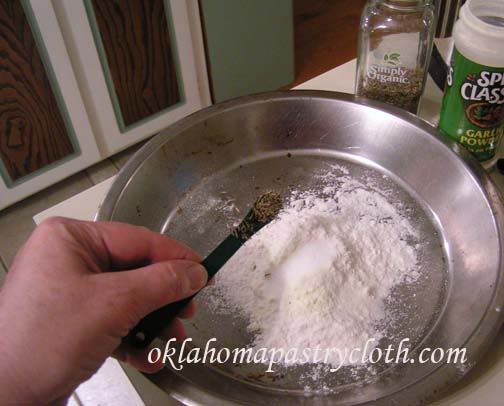 And thyme..mix to blend  Meanwhile, in a sauce pan or skillet, mix chicken stock and cornstarch and bring to a slow simmer. Add sour cream and onion powder and whisk until creamy. Add mushrooms and stir (if using) Continue simmering.  Add dill  Stir until mixture is thickened to a gravy. Cover and leave on warm 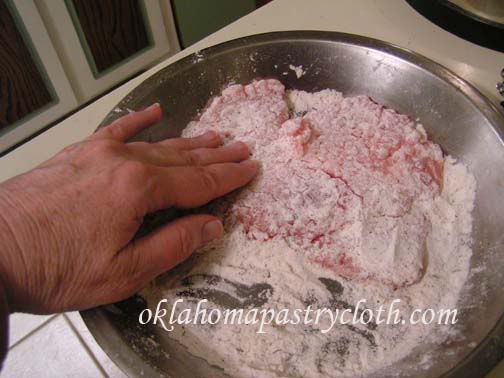 Working with one piece of meat at a time, dredge cutlets in the flour mixture to coat both sides. 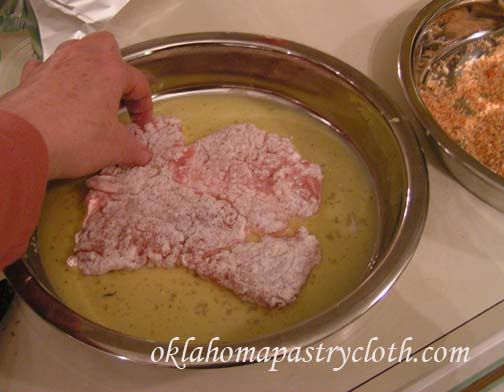 Dip into the egg mixture on both sides 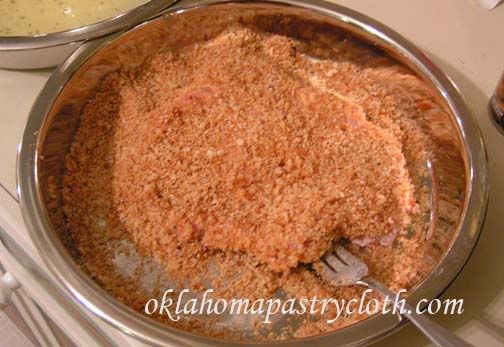 And coat with the bread crumbs to cover  In a skillet, melt the butter with the olive oil or canola oil and heat on medium high heat. When oil is nice and hot, add cutlets. Brown and allow to cook about 3-4 minutes.  Turn cutlets and brown on the other side and cook for another 3 to 4 minutes.  Place Schnitzel onto plates and drizzle gravy down the center. Add a lemon wedge for squeezing juice over the schnitzel. Serve with German potato salad and warm kraut. Of course, a homemade roll on the side isn’t anything to sneeze at!!  |
|
|
Oklahoma Pastry Cloth™ Company on Facebook
|
|
 |
|
|
Dilled Salmon
Thursday, June 23rd, 2011
 I love wild Alaskan salmon. I understand that it is supposed to be really good for you with all those Omega fatty acids (why not Alpha fatty acids??) that are supposed to coat your heart and grease your brain, but I just like it because it tastes good. When I was a kid, my dad would go fishing with his buddies up in Maine for fresh water salmon and it was a treat indeed to watch my mom stuff one of the big fishes with dressing, truss it up like a corset and place it on the grill to slowly cook over charcoal. Oh my. Talk about heavenly. Topped with a cucumber sour cream sauce, that fish melted in your mouth like butter. So, I’ve had a love affair with salmon for a long time. It included lying on the floor, chin cupped in hands while riveted to the black and white tv, watching the Walt Disney hour explain how these trout-on-steroids swim upstream and jump over dams in a quest for a mate that would put E-Harmony to shame. I was always fascinated when the grizzly bear caught a wayward fish and carried it to shore flipping and flopping in the bear’s mouth. And so, speaking of putting salmon into the mouth, the following is my own recipe for baking salmon filets for a quick and pretty dinner. It doesn’t heat up your kitchen in summer because it doesn’t take long to bake the fish and it’s a hearty, warm meal in winter when Ol’ Man Winter is knocking at the door.   Mix mayo, thyme, garlic powder, salt, onion and dill in a bowl until well incorporated. I am using the Frontier Simply Organic spices at the website here. They are potent!!  When thoroughly mixed, take 1/3 cup of the mixture and place into another bowl and set aside.  Add 1/4 cup of white wine to the remaining mixture and cream well  Lightly pepper fillets. Place fillets on a greased or nonstick cookie sheet or into a greased glass baking dishand spoon wine mixture over cuts until all of it is used up. Bake in 350º oven for 20 – 25 minutes until the meat flake when lifted with a fork.  Serve with your favorite side dishes and top fillets with a dollop of the leftover mayo mixture. Yum! |
|
Oklahoma Pastry Cloth™ Company on Facebook
|
 |

 Homestead Revival
 Paratus Familia
 Rural Revolution