|
I love onions. Such a mundane little vegetable – but it has such a pleasant shape and flavor, especially the Vidalia variety. Georgia has a right to be proud of that little onion. There is no onion sweeter and you can eat it like an apple – if you like onion flavored apples, I guess! Personally, I think the onion is a necessity in cooking because it makes all the difference in the world…well…second only to tons of garlic. I bet you’d love to have an up close and personal conversation with us at the OPC™ digs, eh? Onions are one of the simplest veggies to put in a garden. Cheap too! A bundle of onions costs around $1.50 to $4 and offers you anywhere from 50 to 100 sets. I usually put out two or three bundles. Row furrows are dug, fertilizer is sprinkled down the center of the furrows and then chopped in and covered to make a raised row. I plant my onions using a stick in one hand to make a hole and then dropping an onion set with the other hand. I then go back and pull the dirt up around each set using both hands (yes, I wear gardening gloves) which also straightens the onions to standing. In my neck of the woods, I have to plant them deeper than usual because our soil is a sandy loam and dries out really fast in our stiff winds. Once the onions are established, I pull the dirt away from them to expose the top of the bulb. Turning the soil between rows can be done by using a hoe, a mantis or a tiller or mulch can be used as well. This year, we had a dickens of a time keeping a really weird grass in check. Hand weeding around each bulb was a not fun necessity, but this has been an unusual year. The only other maintenance that we perform on our growing onions is pinching off any seed heads if they form and a side dress of 10/20/10 fertilizer every three weeks if there has been much rain. Otherwse, a series of soaker hoses does the trick. The nice thing about onions is that you can pick them at any stage of the game. Small onions are great for salads and garnish as ‘green onions’. Medium sized onions are wonderful to throw in with green beans or pintos or they can be left to expand to slicing size.  At the later stage of growth, onions have the soil pulled away from the bulb to allow the bulb free room to grow.  Eventually, the green tops start to fall over.  After the tops fall over, the onions are left for about two weeks before pulling.  Onions are easy to pull out of the ground.  We use 5 gallon buckets to gather our onions. Makes for easy carrying.  I wash my onions a few at a time in a big stainless tub/bowl or in another large bucket. After cutting off green tops no closer than 1 1/2″ from the bulb, I submerge the bulbs in water and use my hand to wash them back and forth.  I separate out sizes of bulbs and freeze the smallest ones for seasoning beans, etc. or cut them up for dehydrating. These I prepare, after washing, by removing the roots, the stem and the outer skin.  The medium to large ones are left whole to cure on racks for use as fresh onions. The roots and the stem will dry up and will be clipped. These onions will stay fresh until as long as November or December, stored in a cool dark place.  The largest are sliced and frozen on cookie sheets covered with wax paper and will be put into freezer bags. These will be used for homemade onion rings, for cooking on the grill and for use in casseroles.  Onions for dehydrating are chopped by hand because the food processor makes the pieces too small. The chopped onion is spead out on dehydrator racks. I start the process outside because the smell is overpowering and keeps you from crying. 🙂 After about 6 hours, I move the dehydrator inside.  After drying about 15 to 18 hours, depending on the moisture content, these onions are packaged into jars. Here, I have dried some of both our yellow and white onions. Storage for these dried onions is years. They are wonderful for using in soups and stews but you can also use them in chicken or tuna salad or for seasoning a cooking hamburger by putting a tablespoon or two into a bowl, covering with water and then placing into the frig overnight. You will have rehydrated onions to use like fresh! That is actually what some restaurants do. |
|
Oklahoma Pastry Cloth™ Company on Facebook
|
 |
Processing Onions for Long-term Storage
June 13th, 2011
And He Said It Was Good
June 9th, 2011
 Way back when I was in college – back when those guys with the triangle hats were signing our country’s documents – I was part of the ‘art scene’ on campus. Though I started out in mini-skirts and knee socks with clunky shoes topped with shiny buckles (ok – so it was the ’70’s; we just thought it was 1776), I quickly understood that there was a reason why art students ‘grunged out’. Good clothes didn’t last too long in a welding bay, a bronze and aluminum foundry, a painting or ceramic studio or a woodworking shop. Overalls and t-shirts became my wardrobe of choice and if I had donned a headband, beads and sandles, I would have fit the part perfectly. As it was, lowly overalls was as grunge as I was willing to stoop. My major was painting and my minor was sculpture and everywhere around me was color. I memorized color wheels, color schemes, color theory and color mixing and learned to use color in everything from a brush stroke to convincing the public to buy a soft drink, through commercial art. The study of light and color was fascinating. I honestly do not know how anyone who has studied the world around them, through the discipline of the visual arts, can doubt that there is an artist who is so much greater than they. To attempt to put something on canvas, one must take it down to its tiniest attribute and then build up to the whole. The sheer complexity of a blade of grass is incredible. It isn’t just a streak of green – it is a series of hundreds of greens, yellows, browns and even reds and blues, creeping through lights and darks and crevices and shadows. If a painter can reproduce that image onto a canvas, imagine the sculptor who created it for real! I’ve been playing with my camera and taking photos of some of those creations that show off God’s great palette of color, found in the fields and in our flower gardens. He understands the idea of complimentary color and monochromatic color because…oh yes…He made those too! And He created this land we call Oklahoma that is a mixture of hills and prairie that most Okies call “God’s Country”, where so many colorful florals can be found. I hope you enjoy the photos and that they give you a moment to just smile and relax.               |
|
Oklahoma Pastry Cloth™ Company on Facebook
|
 |
Blueberry Season In Full Swing
June 5th, 2011
 The blueberries are coming in with a bang this year. They are so big and juicy! Oklahoma’s gonna compete with Maine, I’d say!! When I was a girl, my family would go to Cadillac Mountain in Maine and pick wild blueberries to our heart’s content. Wild raspberries and strawberries could be found as well. There was just nothing like standing on that high mound of granite that was covered in short blueberry bushes, loaded with small, ripe berries. The book Blueberries For Sal was a favorite of ours. Now, I harvest Oklahoma blueberries – large, plump and sweet. The bushes are much larger than those of the Maine wild blueberries. The berries are wonderful for jelly, muffins, scones and coffee cake and today, I thought I’d share a yummy coffee cake recipe that we like. Canned blueberries work fine in this recipe too. Enjoy! For Cake:
 Cream butter, sugar and eggs together  Add vanilla and either lemon or orange zest and mix  Add sour cream and mix in  Add flour that has been mixed with soda, salt and baking powder. Stir  Add fresh blueberries that have been tossed with sugar or use canned blueberries  Grease a 9” round or square pan with Crisco or other shortening. I use a paper towel to do this. I find that it covers more surface than a brush.  Flour the pan by shaking flour around the surface of the pan until all areas are covered. Shake out excess flour. In cookbooks, this is what is meant by “greasing and flouring “ your pan.  Meanwhile, melt stick of butter over medium heat and remove from heat  Add white and brown sugars and stir  Add cinnamon and stir until completely blended  Stir nuts into the batter  Add flour and stir until everything is totally incorporated. It will be crumbly and sticky.  Pour batter into baking pan and crumble topping over the surface of the batter  Crumble the topping all the way to the edge of the pan. Place in a 350º preheated oven and bake for 40 – 55 minutes. Test for doneness with a knife or a toothpick. It should come out clean.  Allow to cool for 10 – 15 minutes and sprinkle with Confectioners sugar. Serve warm. Leftovers can be cut up and frozen. |
|
Oklahoma Pastry Cloth™ Company on Facebook
|
 |
Murphy’s Law
June 2nd, 2011

|
|
Oklahoma Pastry Cloth™ Company on Facebook
|
 |
Summer Sandwich
June 1st, 2011
|
It’s been really hot today. A wet blanket over a sweat lodge couldn’t be any heavier than this afternoon’s humidity. I really didn’t want to heat up the kitchen too much and when it gets hot, we kinda lose our appetite. Sandwiches sounded good to me, but Mr. Fix-It likes something a little more substantial. So, I put my brain in gear and started assessing my alternatives.  I got four chicken tenders out of the freezer and let them thaw just until I was able to cut them. Then I placed each tender on its side and sliced it almost in half, butterflying it.  I sprinkled evenly over both sides of the butterflies, thyme, garlic powder, paprika, salt and pepper  Finally, I sprinkled a total of a teaspoon of sugar over the four tenders  In a skillet, I browned the chicken in 1/2 tablespoon of butter and 1/2 tablespoon of olive oil  I turned the pieces and browned them on the other side  Four slices of homemade whole wheat sandwich bread would be my sandwich base  I sprayed one side of each slice with olive oil  I got this grill at WalMart several years ago on clearance. It’s a pretty good sized grill. It isn’t the George Foreman brand but works just as well. I melted a tablespoon of butter on the bottom grill and then used a brush to brush it over both surfaces.  First, I put two slices of bread, olive oil side down, onto the grill and put two of the butterflied chicken tenders on each slice. I used provolone cheese here, but asiago is good, as is swiss or sharp cheddar.  Then I put our favorite spreads on the other slice of bread (olive oil side out). Here, Mr. Fix-It reqested my hot sauce which is 1 part Chinese Chili sauce to 2 parts mayo. I mixed my own spread using 1 tablespoon of mayo with 1 tablespoon of Marzetti Italian with Blue Cheese Crumbles. Yum! The spreads went onto the slices of bread which were then placed on top of the rest of the sandwich. The grill was closed tightly and the sandwiches were cooked until they were nice and crispy on the outside. I took them off the grill and added fresh lettuce out of the garden and fresh onions out of the garden. We haven’t got tomatoes yet, so we had to do without (can’t stomach the store bought ones) and with homemade pickles added, it was super!!  |
|
Oklahoma Pastry Cloth™ Company on Facebook
|
|
leaving a comment below!  |
Lemon Curd
May 30th, 2011
  A number of posts ago, I put up my own, special scones recipe and intended to post my favorite lemon curd recipe shortly thereafter. As good intentions usually go, mine disappeared into the oblivion of a ‘To Do List’. Does anyone ever really do what’s on their ‘To Do List”? I mean, my list grows to at least three pages and then I see something on page three that should have gone onto page one and the next thing I know, the list is in the trash and I’m digging around for something to eat. I know. You’re supposed to just list the most pressing items in the manner of “How do you eat an elephant? One bite at a time.” However, I’ve never even thought about eating an elephant and I’m not all that good at determining which is pressing, which is nagging and which is “get it done now or the IRS is coming to put you under a bright light for interrogation!!” And so my list grows exponentially and I get sidetracked. I’m easily diverted. Take for example, today, while working in the garden. I had a mental “To Do List” that was at least five pages long and I decided to tackle #2 on page four – weed the onions. We’ve had some good rain and a really strange grass has grown up for the first time ever in my onion rows. My onions have been coughing and gasping for help and so I felt that this might be a “pressing” matter. I began weeding and had that wonderful sensation of accomplishing something as foot after foot of dark, rich dirt became exposed and completely clean around my Texas 1015’s. I had finished row two when a bright red color caught my eye. Two beds over, more raspberries were ripe! Oh! And blueberries too. I had to go get a bag to pick them and left my other rows of onions helplessly begging me to please continue the weeding. Ignoring them, I picked berries, sneaking a lucious bite on occassion, and finally headed in to wash them and get them laid out onto cookie sheets for freezing. As I patted the raspberries and blueberries dry, they made me think of making jam, which made me think of things on which to put jam, which made me think of scones, which made me think of lemon curd which reminded me that I had not posted my favorite recipe. Add to that, a gentle reminder from one of my readers to post it or else (actually, it was my sister-in-law but she’s a reader), and lemon curd went to the top of my ‘To Do List’ that really doesn’t exist. And so, the onions have been left for another day. Hopefully, you are more disciplined than I, but I have to say, it’s not so bad. Mr. Fix-It says that I wake up each day to a whole new world. That’s good, right? VARIATIONS: Substitute Lime juice and lime zest or raspberry juice and 1 tbsp crushed raspberries or concentrated orange juice and orange zest  I have a double-boiler and you can use one if you like, but I like to use a shallow stainless steel bowl over a pan of boiling water in which to make my curd. It makes it easier to whisk the entire area of curd without having to deal with the side crevices of a pan. This gives me a much smoother curd that does not have to be strained for lumps.  Place three large eggs into the bowl or double boiler  Add 3/4 cup of sugar 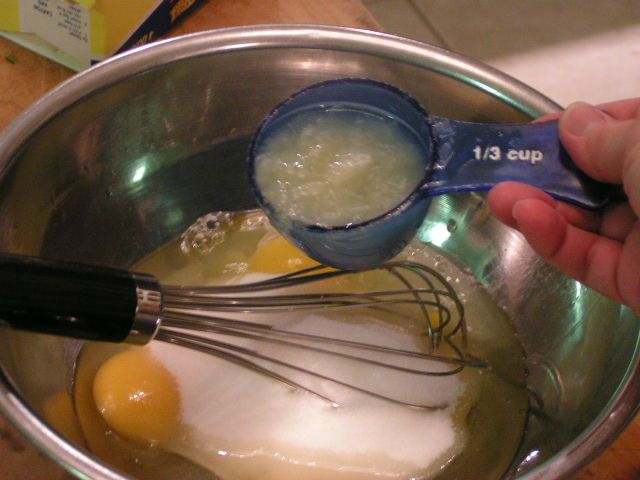 And 1/3 cup of lemon juice 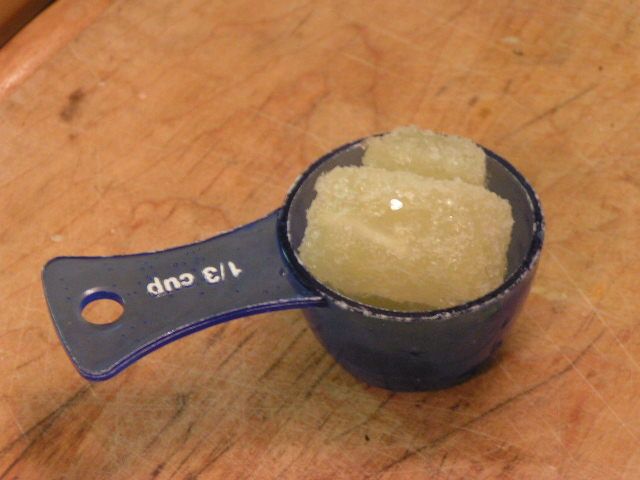 Just as a hint, I buy my lemons in bulk when on sale and juice them all, freezing the juice in ice cube trays. I pop them out and store them in the freezer in bags. I freeze the leftover rinds for easier zesting. This is one recipe where my dehydrated lemon zest is just not as good. I melt the frozen juice in the microwave 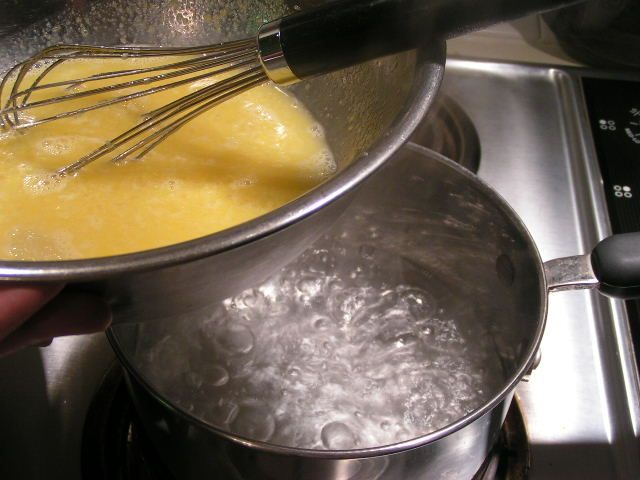 Place bowl over boiling water and immediately begin whisking 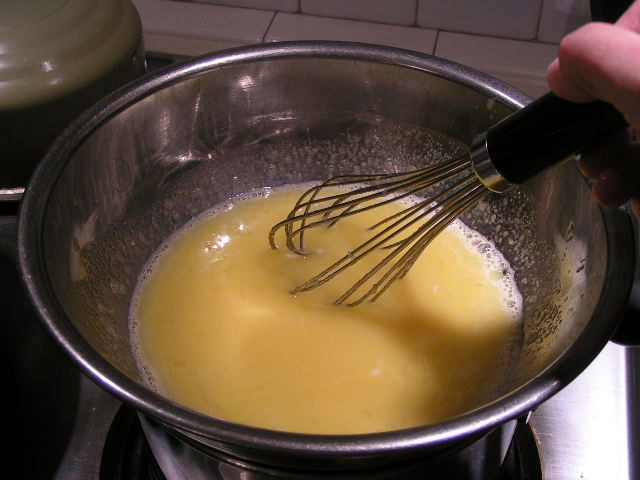 Continually stir with the whisk and do not let the curd stand idle at all in order to keep from getting lumpy 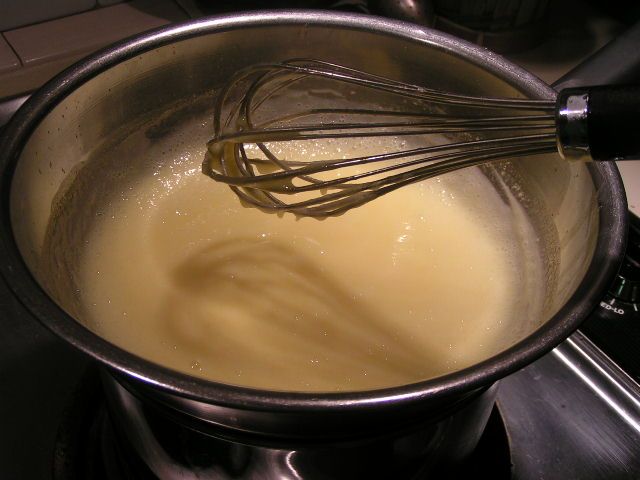 The curd will begin to thicken to the consistency of thin pudding. This takes about 7 -10 minutes. If your curd gets lumpy, you can strain it through a strainer. 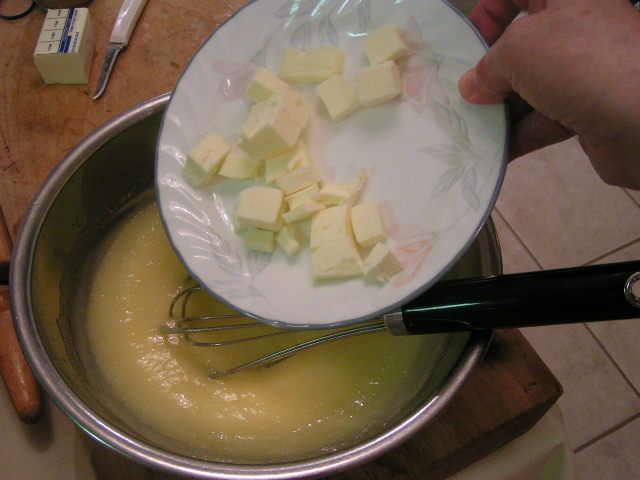 Remove from heat and immediately add butter 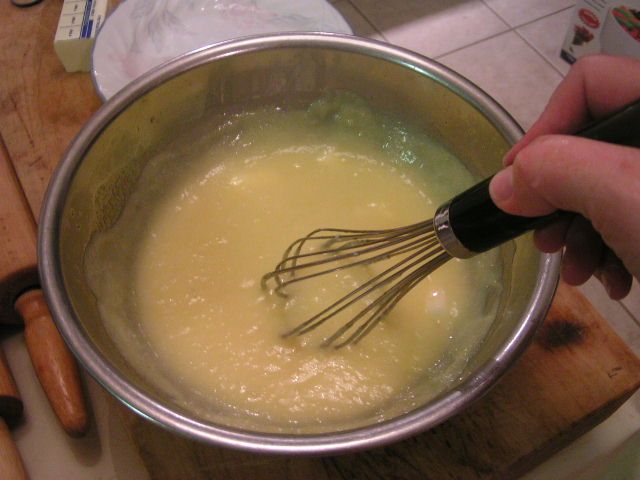 Stir until melted 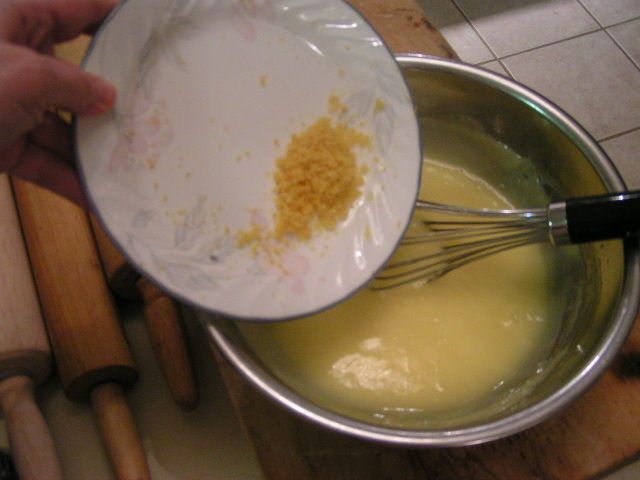 Add lemon zest and stir in 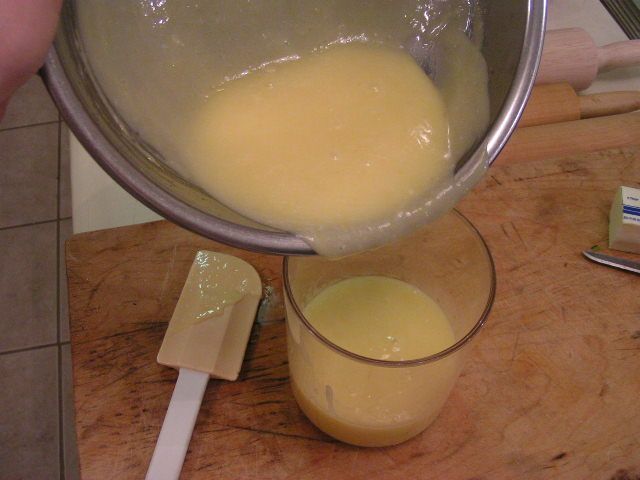 Pour into a container and allow to cool. Place in frig. If you do not plan on eating all of the curd right away, you can pour it into ice cube trays or small refrigerator dishes to be frozen. Remove from freezer and allow to thaw about 20 minutes before serving. 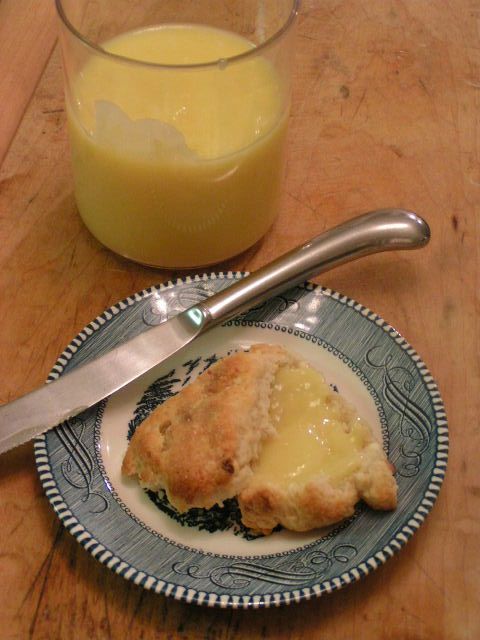  There is just nothing like lemon curd on scones. Here, I am serving our Victorian House Scones made with 1/2 cup white chocolate chips and 1/2 cup Craisins added. The Victorian House scones are wonderful to keep on hand when you don’t have time to make them from scratch. One package makes 16 large scones. Check them out at the shopping page. |
|
Oklahoma Pastry Cloth™ Company on Facebook
|
 |
Facebook Memorial Day Giveaway
May 30th, 2011
 The Oklahoma Pastry Cloth™ Company can be found at Facebook and one of the perks of following us on Facebook is that every so often we have a giveaway just for Facebook members. Today, we randomly drew a name from the members who entered this month’s really special Memorial Day drawing and the winner is….drum roll……Kay Butler! Kay wins a Tea Party gift basket complete with a tea pot for two, one of our signature loose teas, a tea infuser, scones mix and an Oklahoma Pastry Cloth™ on which to roll out her scones. Congratulations Kay!! |
|
Oklahoma Pastry Cloth™ Company on Facebook
|
 |
Fighting My Dragon
May 26th, 2011
 I know. Everyone says, “I hate going to the dentist.” But not everyone says it in the screaming, overemphasized, “I HATE GOING TO THE DENTIST!!!!” way that I say it. Most people, though they are uncomfortable with instruments, drills and hands in their mouths, suck it up, grit those teeth on their good side and stoically march to the dental chair with the air of one heading to an execution. I, however, hold each side of the doorway moulding with fingers of steel, while wedging my feet at each corner of the bottom of the door frame and dare anyone to push or pull me through. There is no screaming. There is no crying. There is just a resolute, “uh-uh – not gonna do it.”  I believe the beginning of this abnormal relationship with dentistry began when I was six years old. It was at that time I determined, with what little deductive reasoning a first grader may possess, that [parents = gift after dentist = pain → parents = good such that dentists = mean]. My first journey into this equation involved the fact that my baby teeth were falling out in God’s time and not Man’s time. Because Man’s time is the guage most depended upon by the medical community, it was decided that a few of my teeth had to go, in order to make room for those adult teeth which God’s time had not even produced yet. That encounter gleaned me a small, shiny, red bike with training wheels. A few years later, my final “dental trip-equals-gift” experience also included removing baby teeth but I had progressed to the fourth grade and wasn’t so easy to bribe. I had graduated to a full meal at my favorite McDonald’s Hamburger restaurant and the movie, FLIPPER, on the big screen. It was later that I realized that my parents and my dentist were in cahoots and I no longer cut my parents any slack.  In the summer after eighth grade – at that awkward age of 14 – my parents took me to a dentist who then sent me to an orthodontist. I had no clue what that was, but because the dentist didn’t do anything to me except clean my teeth, I figured this new kind of doctor couldn’t be all bad. The orthodontist ‘ummed’ and ‘ohhhed’ as he pulled my cheeks back, pushed my gums and tapped different teeth. My parents tried to squash the tendency to lean over to look at what he was observing. Finally, the awful verdict was issued and my parents checked me into a hospital to have MORE teeth extracted and wires put under my gums around hidden canines with a prognosis of 5 years in braces. My parents let me start high school, the angst of every budding teen, with stitches in my gums, unable to smile and with lips the size of a cartoon character. Several weeks later came the inevitable ‘railroad tracks’ which then became my nickname. And to make matters worse, there was no prize, no gift, no bribe to lift my self-esteem. Evidently, I had “grown up”. To add to my misery, I had to stretch tiny little rubber bands from a metal hook attached to the wire under my gum on each side of my upper mouth to a metal hook on a band around a bottom molar on each side of my lower jaw. These rubber bands were no bigger around than the end of a large pencil and so the pressure on them was enormous. Teachers and friends alike had to pay attention where they were standing in proximity to my face because when I spoke, it was not unusual for my mouth to shoot a rubber band with the accuracy of a slingshot. “Humiliation” became a new variable in dentistry for me. I wore those braces through my first year in college and today, as a result of all that effort and humiliation and thousands of dollars, I can smile with a mouthful of fewer teeth, visible canines and pearly-not-so-whites that look like a row of dominoes after a minor earthquake.  Then came the extraction of four wisdom teeth which also had to be done in the hospital because it was in the stone-age, also known as the ‘70’s. The young man who was next in line for surgery, lying on his gurney outside the surgery room door, could hear the surgeon grunting and yelling because my mouth was so small and my teeth were so big. That evening, this same young man came to my room to see how I was doing (and to brag that he was getting a steak from Steak and Ale), only to find me with a swollen face, bruised cheeks, mouth split at each corner and begging for morphine. Two dry sockets later, I vowed that dentistry was akin to torture. My disgust for all things dentist was established for life. Fast forward to last week. I had broken a tooth – I’m talkin’ 2/3 of that sucker was gone. I wasn’t crazy about our family dentist office and I figured it was time for a change. So, I found a new dentist, in the Yellow Pages, whose sole attraction was the words, “Comfortable and Stress-Free.” Comfortable and Stress-Free is good! And they really are gentle at OKC Smiles in Oklahoma City. I loved the office workers. Those people were so nice and they made great effort to make me feel comfortable and welcome. I got my teeth cleaned without the usual bleeding gums, swollen cheeks and uncomfortable throb throughout the next day. I was not the least bit perturbed about this dentist working on my teeth because the atmosphere was so relaxing. That is, until I was informed that the broken tooth would involve a root canal. A root canal? I had heard of those things and nothing about them had been good. In fact, I had heard horror stories about them and so, when my new dentist friend informed me that he does “sedation dentistry” my answer to his question of , “Do you want to be sedated?” was, “How stupid do I look? Ok, don’t answer that question. Yes.” I was given a little blue pill and sent home with directions to take it one hour prior to my next appointment. Oh yes, and Mr. Fix-It was to be my designated driver. On the day of my major surgery – ok, so when it comes to dental work, I like to exaggerate – Mr. Fix-It and I headed out the door to drive the nearly hour it takes to get to my new dentist. I had taken the pill and was happily waiting for it to kick in. Halfway to the office, Mr. Fix-It realized that he didn’t know where he was going and turned to ask me directions. My chin was slumped against my chest. I was snoring. He managed to wake me to get spotty information and attempted to find the dental clinic. He was smart – or just lucky, but he found it and helped me out of the car. I did not hold to the door frame or refuse to enter, but obediently shuffled into the plush waiting room to sit down with Mr. Fix-It at my side. From that point on, all I have is Mr. Fix-It’s version of the story. According to him, my head lolled downward and to the side when, all of a sudden, I hiccupped. I didn’t just do a little hiccup. I let loose with a high-pitched, body-wrenching, air-gulping hiccup and my head flew backwards. My chin then dropped back down onto my chest and I hiccupped again, going through the same motions of head pitching backward and then slumping forward. This continued as my dear husband, who is supposed to be my advocate and protector, could not contain himself and exploded into gales of laughter. Another patient, a man, entered the waiting area and sat down across from us just as I let loose with another jarring hiccup. He looked embarrassed for me and Mr. Fix-It said, “She’s sedated. She gets these hiccups sometimes.” I let loose with a big one. Mr. Fix-It giggled loudly. Thankfully, the nurse ushered me to the dental chair and got the hiccups stopped. My kindly dentist did his work, determining that I did not need a root canal after all. Tooth temporarily capped, I was carefully monitored for blood pressure and heart rate and the hiccups commenced again. Mr. Fix-It assured me that they reverberated throughout the entire building. I am wondering what the office personnel are saying about that day. Do they have conversations that begin with, “Did you hear that lady….?” or “Was that hilarious or what?!” I have to go back to have the permanent cap affixed. I am not sure I can show my face.  All I know is that dentists and I have a very strained relationship. However, I think that if this new one will still have me, I will stay in his care because I have to admit that my experience there has been the most pleasant of any. I will say, though, I don’t think I’ll be taking any of those little blue pills again. As I told Mr. Fix-It, while still in an inebriated state, I think, next time, I’ll take some of that “Noxious Oxide” instead. Somehow, I have a feeling that my inserting “noxious” for “nitrous” is a harbinger of things to come. |
|
Oklahoma Pastry Cloth™ Company on Facebook
|
 |
Tornado Alley
May 25th, 2011
 I had planned on doing a funny post today, but somehow it doesn’t seem like today is a good day to laugh. Many people in Oklahoma are hurting after a day of tragedy and devastation yesterday. Lives and property were lost and people have been left with nothing but the clothes on their backs. My cousin in Joplin, Missouri is in that very situation as well. Oklahoma and Missouri are certainly stunned over the past few days of tornadic events.  Be sure and go online to find the various organizations which are gathering up items and money for the victims of the tornadoes of late. Two organizations that are already on site are the American Red Cross and The Salvation Army If you feel led, please give what you can to help out. And pray. These are our neighbors and fellow Americans. We help each other. That’s what America is about. I’ll save the humor for tomorrow. |
|
Oklahoma Pastry Cloth™ Company on Facebook
|
 |
Strawberry Muffins II
May 21st, 2011
|
As in the previous post, at the request of OPC Facebook Fan, Melissa, and because the strawberries are rolling in, I’m posting two separate recipes for strawberry muffins. The first one is Mr. Fix-It’s favorite and is pretty basic while this one is more along the lines of a soda banana bread. They are larger than the previous muffins with a different flavor. They are quite light for muffins.
 Preheat oven to 375º. Place strawberries in a bowl and use 2 tablespoons of the sugar to toss with the berries. Set aside  In a batter bowl or large mixing bowl, place butter and shortening  Add flour and cut butter and shortening into flour until it resembles course crumbs  Add soda and salt  In a separate bowl, whisk together eggs, buttermilk and sour cream  Whisk until smooth  Add strawberries to flour mixture  Stir until strawberries are coated with flour  Add strawberry extract flavoring to the egg mixture  Stir egg mixture into dry ingredients.  Continue stirring until all ingredients are incorporated. Do not over stir.  Mix Turbinado sugar and cinnamon in a small container  Evenly distribute muffin batter between muffin tins. Sprinkle tops of muffins with sugar mixture. Bake at 375º for 25 – 35 minutes on the center rack. Depending on your oven, 25 minutes is usually long enough, but test with a toothpick or knife for doneness.  As you can tell, these muffins are larger. They have a unique taste and are very flaky. They also may be frozen and reheated. |
|
Oklahoma Pastry Cloth™ Company on Facebook
|
 |

 Homestead Revival
 Paratus Familia
 Rural Revolution