 Good grief. A good Okie can’t go barefooted around these parts anymore!! In all the years I’ve lived in the OKC area, I’ve never seen a poisonous snake on our acreage until last year. Now, we have this creepy pigmy rattler show up at the front door and he was trying to come in without so much as an invitation!! Last year, Mr. Fix-It almost stepped on one, if you will remember. Tonight, he was coming to the door and saw this one trying to slither in. Well, as you can see, the varmint didn’t make it very far. Let that be a lesson to anybody who tries to come in without askin’! 🙂 |
|
Oklahoma Pastry Cloth™ Company on Facebook
|
 |
Varmints
July 9th, 2011
Ham Spread From Your Canned Ham
July 8th, 2011
|
In the previous cannng post, I showed you how I can leftover ham from a fully cooked shank, butt or whole ham. I thought that I would show you a couple of things that I do with that cooked ham. Today, I’ll demonstrate how I use a jar of canned ham to make ham spread – or as we in the south call it: Potted Meat. I always kid Mr. Fix-It, who loves ham spread, that it looks like it is pre-chewed. I guess that you can chop it as chunky as you like, but Mr. Fix-It likes it totally pre-chewed!  First, I open a pint jar of canned ham, drain it of all liquid and put the meat into my food processor. You can also do this with a hand chopper, a knife or carefully in your blender if you like.  I add 1/4 cup of chopped celery  Add 3 to 4 tablespoons of mayonnaise (Depending on how moist you want it and I use light) with 2 teaspoons of regular mustard  Next I add two tablespoons of sweet pickle relish  I process all these ingredients together until I have a spread. You do not have to chop yours up as fine. In fact, if you would prefer larger chunks of ham, process the other ingredients first and then add the ham to pulse just until chopped. BTW, sometimes, instead of canning the ham, I process it as the deviled ham spread here and can that in 8 oz jars for 1 hour and 15 minutes at 10 lbs pressure. It’s pretty nifty to have on hand to open in a pinch.  Mr. Fix-It likes it one of two ways: Either on Ritz crackers or spread on whole wheat bread, with lettuce and tomato. All you have to chew is the crackers or the bread and trimmings!! 🙂 |
|
Oklahoma Pastry Cloth™ Company on Facebook
|
 |
Making New Friends
July 7th, 2011
 Today, I did something out of the ordinary and it really made life fun and interesting! I met someone with whom I had only spoken online!! On the Mary Jane Butters’ forums, women from across the world talk Farmgirl talk and share ideas, recipes, sorrows and joys. It is a wonderful community of wonderful women.  And so, another Oklahoma Farmgirl, through the forums, connected with me and we finally decided to meet. The Inspirations Tea Room, in Edmond, Oklahoma, seemed the perfect place to do that. It is a step back into the quieter and more genteel days of the Victorian age where one is pampered to the max. Fresh strawberry/banana scones, drizzled in a glaze icing alongside creamy, lemon curd started the meal, followed by our choices of hot tea and a meal fit for a queen. We learned so much about each other and found that we have tons in common. And we are both still old Girl Scouts at heart! All in all, it was a wonderful lunch and time spent together. I now have a new friend and look forward to more time spent in Farmgirl pursuits! Thanks for a neat day, Marsha! I’m humming that old Girl Scout song: But keep the old – One is silver and the other gold ♪♪ |
|
Oklahoma Pastry Cloth™ Company on Facebook
|
 |
Canning Ham
July 4th, 2011
|
When I was a child, I remember going to my grandmother’s and granddad’s house and it just seems like everytime we visited, one meal always consisted of a very large baked ham. I hated that dinner (sorry Grandmother) because the gargantuan ham had rings of pineapple stuck strategically all over the skin, along with whole cloves that dotted the entire ham. Bleahh. And of course, it was accompanied by canned peas. Oh my. How I hated canned peas. To this day, I will not eat a pea if it is from a can. Give me fresh or frozen or even in a soup, but not on my plate as a mushy, squishy, round, green thing. You know what’s even ten million times worse? Creamed peas made with a white sauce and canned peas. They are the very picture of the pun of Miss America’s desire for “Whirled Peas”. My memory still nurtures a picture of a 14 year old me, sitting all by myself, at my grandparents’ dinner table with an all but empty plate – empty except for a pile of peas. My grandfather watched until I choked down the last pea, and then allowed me to leave the table. I wonder to this day where my parents were. Maybe they were secretly in on the plan to force me to like this canned excuse for a legume. Well, I showed them. I still hate ’em!! But back to the ham. I have never understood why anyone would want to mess with the simple and delectable flavor of a smoked, fully cooked ham – the kind that comes in that thick, plastic package, surrounded by a cloudy brine and sold as whole, shank or butt. I know, some people pour Coca Cola over theirs, and others use pineapple juice with brown sugar or some such syrup, but I am a purist. I want my ham as ham. If I want a sweet sauce, I’ll dip the ham in it as I eat. Just give me plain ol’ baked ham. The beauty of leaving a ham in the buff is that after serving it for a meal, you can process the rest in jars to have later on. I try to can ham twice a year – once for winter and once for summer. It is wonderful for ham salad, for omelettes, for eggs benedict, for casseroles and just as a side for eggs and biscuits or for dinner. I buy ham on sale and freeze it until I am ready to bake it, serve it and then can it. Tonight I did just that. I baked a 10 1/2 lb shank ham, served it with green beans and a wonderful hash brown casserole that I will post later. I bake my hams in brown-in bags which makes the cooking go faster. Baked at 325º, I usually average about 20 minutes per pound. Below, you’ll find how I then can the leftovers.  When using a brown-in bag to bake a ham, shake about 2 tbsps of flour inside the bag, place the ham ino the bag and then cut a 1″ slice into the plastic to allow steam to escape,  After 3 1/2 hours at 325º, this ham is succulent served with green beans and cheesy hashbrowns.  Once we’ve eaten, I take all of the meat off of the bone. When cooked in the brown-in bag, the meat just literally falls into your hand. Not much cutting required. And the beauty of it is that the fat falls off as well, so that you get very lean pieces.  The ham is placed into pint jars to about 3/4″ head space and the ham bone is frozen in a freezer bag for later use in a huge pot of pinto or navy beans. The juices can be evenly divided between the jars of meat or left out completely. The juices will darken the ham a little bit. Notice that in the bowl, all that is left is some fat, some skin and the plastic bag.   Boiling water fills the jars to within 1″ of the top of the jar rim  Using a knife or canning spatula, release air bubbles by forcing the utensil around the sides of the jars  Wipe the rims of the jars with a warm, wet, soapy dishcloth. This is very important because the grease from the ham can splash onto the rim and keep the lids from sealing in processing.  Have the lids ready in water that has been brought to a near boil. I like to place my lids alternating rubber ring up – rubber ring down, so that the lids do not stick to each other.  Using a canning wand or tongs, place lids onto jars and add rings. Tighten and then just barely back off the ring (loosen) You want the ring on tight, but not too tight.  Different canners require different numbers of quarts of water, but I use the rule of thumb of 2″ of warm water in the bottom of the canner.  Place the jars into the canner base making sure that there is space between them. Put lid in place. Process on 10 lbs for and hour and 15 minutes (75 minutes) for pints and and an hour and a half (90 minutes) for quarts.  Once the jars have cooled, wash the rings and jars in hot, soapy water to remove any oils. Dry and then replace rings when they are totally dry.  The jar on the left has been canned with the juices and boiling water and is still warm. When it cools, the fat will separate to the top as in the jar to the right. The jar to the right has been canned with just boiling water. I’ll be posting some recipes for you to use with your canned ham. |
|
Oklahoma Pastry Cloth™ Company on Facebook
|
 |
Dealing With Vandals
June 29th, 2011
|
I can just imagine…….Four burly young men crowded into the shiny, extended cab pickup – a gift from Mom and Dad to the driver. Across the lap of the young man closest to the open window stretches a three foot long metal bar. It is round and solid and heavy. All four men wrap fingers around tall, cold cans of beer nursing the drinks during conversation. Each has already put away a couple of cans prior to entering their joy wagon. A little tipsy, their idea of fun becomes more reckless by the minute. The engine roars and the driver puts the big truck into gear, backs onto the main road and heads to a thoroughfare picked at random. Laughing and joking, these scoundrels size up the row of mailboxes dotting the long road and rev the engine. Mr. Window Seater pokes the metal pole out of the window and yells, “Charge!!!” The driver spins the tires of his truck and peels out in a burst of gasoline energy. “Clang!” goes the first mailbox as the side caves in from the force of the metal iron. “Ka-thud” goes the second as it is totally torn off its post, hitting the ground and rolling into the ditch. “Ka-Whap” goes the third mailbox as it is mashed flat and the door is torn off its hinges.  And then they see the Oklahoma Pastry Cloth™ Company mail recepticle. It’s a little bit larger than the ones previously creamed – a perfectly shaped, white, metal object that appears to have never been touched by previous marauders and will surely ring with a glorious sound when smashed with a three foot metal rod. The mailbox’s pristine color and smooth shape is just begging to be attacked. Mr. Driver stops to drink in the picture and savor the moment. Foot on the gas pedal, he presses it all the way to the floor. Mr. Window Seater extends his body out of the window and aims for the mailbox. The metal pole makes contact at 60 mph. But something is wrong. A shudder reverberates up the pole, into the hands and arms of the bearer and all the way down to his feet. His teeth rattle. His brain shakes. And he lets out a howl of pain. The metal instrument of destruction flies out of his hands and bounces across the landscape. All of the inhabitants of the truck look back in astonishment as their weapon disappears and the mailbox still stands, unscathed. Suddenly, their alcohol befuddled minds take on a slight sense of reality and they speed off into the distance, headed for home and an ice pack/aspirin for Mr. Window Seater. 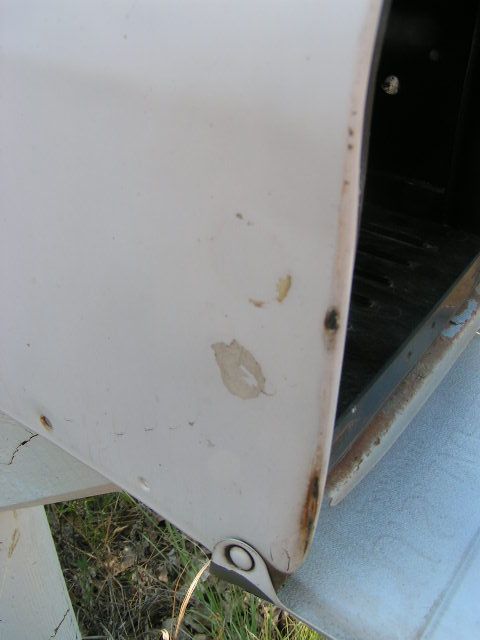 And the large, white mailbox stands resolute and firm, a tiny, imperceptible dent beside previous imperceptible dents, near the door, and a small chip and crack in the solid CONCRETE within. Mr. Window Seater is no match for Mr. Fix-It. 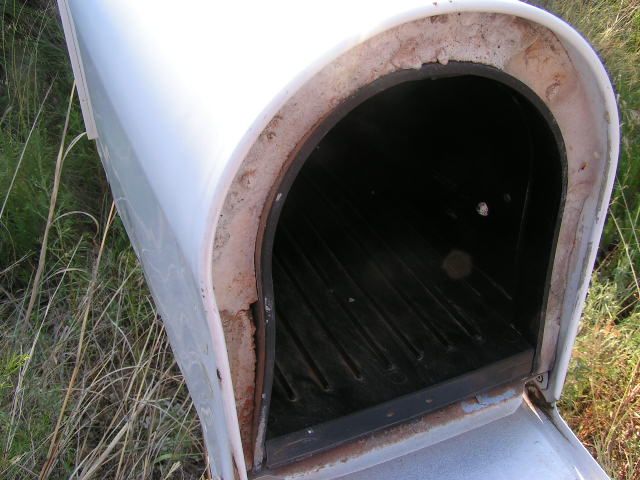 You see, Mr. Fix-It took a larger metal mail box and put a smaller rubber mailbox inside, floating the smaller box on small blocks of wood to leave an equal amount of space around the rubber mailbox. He then mixed concrete and poured that around the perimeter of the rubber box, leaving almost a 1″ ring of concrete between the two boxes. When dried, he bolted his new concoction onto a braced wooden post that he had sunk into concrete as well. It’s heavy, but it’s tough!! |
|
Oklahoma Pastry Cloth™ Company on Facebook
|
 |
Canning Peach Pie Filling
June 28th, 2011
 There is just something about the smell and taste of peaches. The smell is great in potpourri. The smell and taste are awesome in iced tea and are especially good in our Peach Cordial and Peach Berry teas. Peaches just have a heady fragrance that even draws you to the grocery bins with an invisible wave that says, “You HAVE to have some peaches!” We only have one peach tree. But more are going to be planted this fall. It is best to have at least two different kinds of trees – and we did – but one died. Oklahoma has many peach orchards, but the heat is brutal and it got our other tree. Actually, one tree is plenty for one family, but as I said, two make for better fruit. I was very excited to see all the fruit on our tree this year. It got bigger and bigger and then one day we noticed little, clear sappy things oozing from tiny holes. Arrggghhh. Oriental Fruit Moths had had their way with my peaches!!! How depressing. These beautiful fruits look so pretty, but when sliced, brown tunnels weave through the ripe and juicy meat. So, next year, pheromone traps will be hanging from the tree like Christmas ornaments! What fruit we did get has been incredible. It’s like eating peach candy and so I have been diligent at getting these precious peaches stashed away for future use. One thing I love to do is make pie filling. I use the same method as my Apple Pie Filling, but I adjust the syrup for peaches – a litle thinner. The following is the recipe that I use for peaches. To see how to make the syrup just click on the link for the Apple Pie Filling and directions and pictures are there. Mix dry ingredients together in a large pot and slowly add water, stirring with a whisk until well blended. Bring to a boil while continually stirring and allow to boil until mixture thickens and becomes more transparent. Remove from heat and add lemon juice. Stir.  Wash 6 – 8 pounds of peaches. In this case, I used more because I had to cut so much off of each peach due to those nasty Oriental Fruit Moths.  Peel peaches  I find the easiest way to slice peaches is to make cuts about 1/2″ apart, cutting at an angle toward the pit so that there is very little meat being pulled away from the pit. In the case of most of my peaches, I ended up cutting out chunks around the worm holes so this batch isn’t very pretty!! I slice my peaches into a bowl that has a cup of water mixed with a tsp of FruitFresh in it. I continually toss the peach slices as I cut to keep them coated with the citric acid mixture.  Pack the peaches into jars leaving a 1″ head space from the top of the jar. I’ll be rearranging peaches from the jar on the front right to distribute among other jars because it is too full. Add 1/2 tsp apple cider vinegar to each jar of peaches.  Ladle syrup into jars leaving a 1″ head space of syrup. This prevents any from boiling out in the processing. I usually have around a quart of syrup left over and just use it for my next run or I can it and use it for fresh peaches in a pie.  Using a knife or canning spatula, run around the inside perimeter of the jars to release any air bubbles.  Wipe the rims of the jars with a wet cloth to remove any juices, oils or syrup which will keep a jar from sealing.  I like to place my lids in the water in a pan by alternating them rubber side up, rubber side down which helps to keep them from sticking together. The water is brought to just before a boil and then turned on low to keep the lids warm.  Using a canning wand or tongs, remove the lids from the water and place onto jars. Screw on the rings and adjust by tightening and then backing off just a smidge. Place in a water bath canner and fill with warm water to 1″ over the top of the jars. Bring to a full boil and boil for 20 minutes. Remove jars from canner and allow to cool. Listen for the “ping” pop that lets you know the jars are sealing.  These jars are ready to store. I will use one quart and one pint to make a pie, so this batch made enough for four pies! Just pour into your crust, top and bake at 400 degrees. Easy as…umm…peach pie!! |
|
Oklahoma Pastry Cloth™ Company on Facebook
|
 |
WEEDS!!!
June 25th, 2011
|
I say this every year. I vow that I will go nowhere during gardening season. And then…invariably something comes up that requires travel and I come back to a garden disaster. Such was the case with this last business/pleasure trip of two weeks. Two weeks! Would you like to know what weeds do to a garden in two weeks when the gardeners are away?! They say, “Yay!!” and promptly make themselves at home. Mr. Fix-It and I have spent two nights in the strawberry bed trying to find our plants. The picture is of what we have accomplished so far and of what is left to do. See if you can find any strawberry plants in that jungle of grass! Mr. Fix-It very wisely soaks the ground and then we pull while wading in the mud. Makes for easier pulling. A mud pie fight may commence tonight!!  |
|
Oklahoma Pastry Cloth™ Company on Facebook
|
 |
Dilled Salmon
June 23rd, 2011
 I love wild Alaskan salmon. I understand that it is supposed to be really good for you with all those Omega fatty acids (why not Alpha fatty acids??) that are supposed to coat your heart and grease your brain, but I just like it because it tastes good. When I was a kid, my dad would go fishing with his buddies up in Maine for fresh water salmon and it was a treat indeed to watch my mom stuff one of the big fishes with dressing, truss it up like a corset and place it on the grill to slowly cook over charcoal. Oh my. Talk about heavenly. Topped with a cucumber sour cream sauce, that fish melted in your mouth like butter. So, I’ve had a love affair with salmon for a long time. It included lying on the floor, chin cupped in hands while riveted to the black and white tv, watching the Walt Disney hour explain how these trout-on-steroids swim upstream and jump over dams in a quest for a mate that would put E-Harmony to shame. I was always fascinated when the grizzly bear caught a wayward fish and carried it to shore flipping and flopping in the bear’s mouth. And so, speaking of putting salmon into the mouth, the following is my own recipe for baking salmon filets for a quick and pretty dinner. It doesn’t heat up your kitchen in summer because it doesn’t take long to bake the fish and it’s a hearty, warm meal in winter when Ol’ Man Winter is knocking at the door.   Mix mayo, thyme, garlic powder, salt, onion and dill in a bowl until well incorporated. I am using the Frontier Simply Organic spices at the website here. They are potent!!  When thoroughly mixed, take 1/3 cup of the mixture and place into another bowl and set aside.  Add 1/4 cup of white wine to the remaining mixture and cream well  Lightly pepper fillets. Place fillets on a greased or nonstick cookie sheet or into a greased glass baking dishand spoon wine mixture over cuts until all of it is used up. Bake in 350º oven for 20 – 25 minutes until the meat flake when lifted with a fork.  Serve with your favorite side dishes and top fillets with a dollop of the leftover mayo mixture. Yum! |
|
Oklahoma Pastry Cloth™ Company on Facebook
|
 |
Summer Treat
June 20th, 2011
 Continuing on my journey, I’ve moved from the red clay of Georgia to the Smoky Mountains of Tennessee. Oh my. How beautiful they are. It kinda gives the ol’ gut a wrench when I take in those cloud-covered peaks, old and worn, green and inviting. These are my old stomping grounds, but now I’m a ‘flatlander’. It’s ok, though. I don’t have to deal with this traffic out in the plains of Okie land!!!  I am staying in the mountain guest home of a wonderful family neighbor who has been so gracious to open their doors. I’ll be heading back to the Great Plains with pots of spearmint and pineapple sage from Brennan’s garden. I figure they will be great additions to homemade soaps. It is Father’s Day and I got to spend it with my dad (and Mom!). 850 miles is too much distance for sure, but I made it! Sunday worship at my folks’ church, a wonderful meal at a Japanese restaurant and an afternoon just sitting around and making memories completed the day. You see, my dad is all about making memories and when my family gets together we share those memories with lots of humor. My dad is an amazing cook and many of those memories have a backdrop of meals that he prepared. One of my memories is of Sunday summer nights, after “Training Union” and the Sunday night service at church, with the six of us – parents and four daughters – elbow-to-elbow around the table, munching on a fruit plate of watermelon, canaloupe, fresh cherries, oranges, peaches or nectarines, pineapple and grapes with maybe some cheeses and most definitely with orange or pineapple sherbert. That was supper! We thought it was wonderful. Dad and Mom worked side-by-side to put together a pretty arrangement of goodies for all of us. And so, tonight, when I caught my father, at 84, putting together a similar concoction for our Sunday night dinner, I decided to grab it in pictures, his hands still deftly slicing fruits in a labor of love.  Bananas, oranges, grapefruit and pineapple went into a bowl  Crunchy Red Delicious apples were added  Red grapes added more color  A dollop of smooth and creamy vanilla yogurt and a plate of Oatmeal Cranberry Walnut cookies (Mom’s version of my Georgia aunt’s ‘rock’ cookies) made for a healthy meal of fruits, whole grains, and protein. Yep. We know how to live! And memories have been made afresh. Oven: 375 degrees 10 – 15 minutes Cream shortening and brown sugar. Add eggs and beat well for 2 minutes. Combine dry ingredients. Then alternate with sour cream and add to creamed mixture. Add vanilla extract. Add raisins, oats and nuts and mix with spoon. Drop by teaspoon on cookie sheet. Bake in 375 degree oven 10 minutes for soft cookies and 12 to 15 minutes for “rocks” if you like crunchy cookies. Remove from pan to cooling racks immediately. |
|
Oklahoma Pastry Cloth™ Company on Facebook
|
 |
Shrimp Etouffée
June 16th, 2011
  When I was in high school, my family spent a glorious week in New Orleans while my father spoke at an education convention there. We stayed in a beautiful, vintage home called the Lamothe House that was the traditional French style home surrounding a courtyard of gardens. I remember that the beds were also French with the tall, mahogany headboards spanning the wall to the ceiling and topped by an ornate mahogany half canopy. We felt pampered and awed by the opulence. That was in the early ’70’s and this gorgeous home is still a thriving bed and breakfast. Seeing the Preservation Hall jazz band with Billie and Dee Dee was a treat in an old, ramshackle building with wooden floors and folding chairs. Beignets at the Café Du Monde and meals at The Court of the Two Sisters, Antoine’s and several others that are no longer in business, started me on my love affair with French cuisine and all things Cajun. My favorite is Crawfish Bisque and that recipe will come later, but just for a quick summer meal, I thought I’d show how I make shrimp etouffée. I make a cajun seasoning mix that I store in a glass jar and use as needed. How hot you like your food determines how much cayenne pepper you use. I’m a weenie and Mr. Fix-It has had to swear off of hot food as the doctor has demanded, so cayenne is limited for us but it can be Katie-Bar-The-Door for you if you are brave. Hope you enjoy the recipes. Place all ingredients into a quart jar with a lid. Shake jar until all ingredients are well mixed. Store covered and use as any commercial seasoning.
 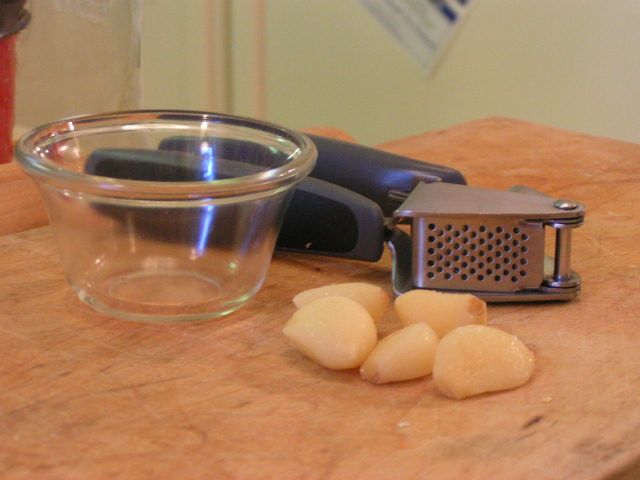 Press or chop 5 cloves of garlic and set aside 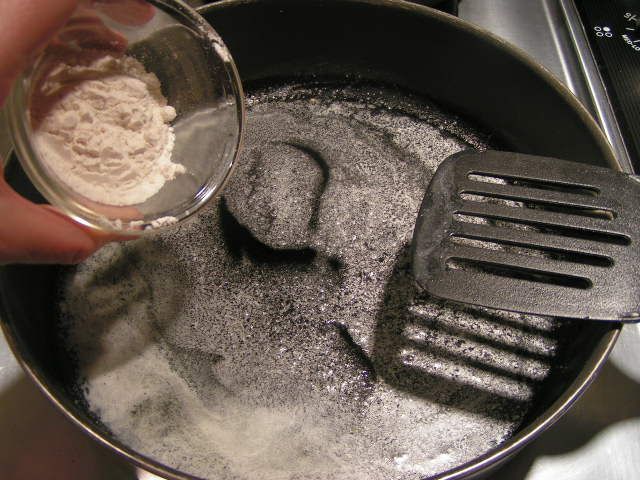 In a large, deep skillet, melt butter and add flour to make a roue 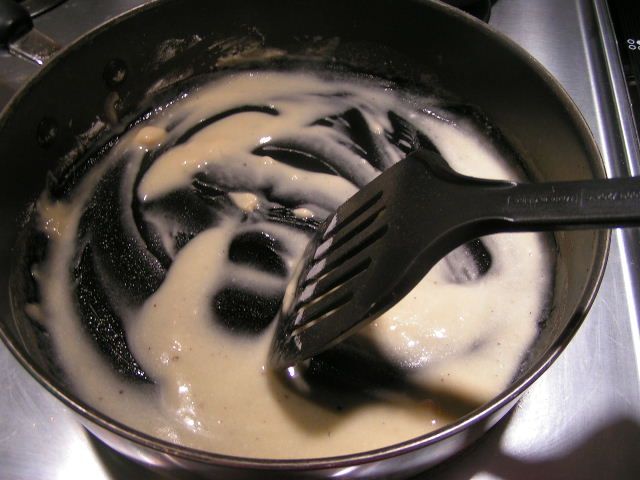 Stir flour into butter until a smooth paste is created 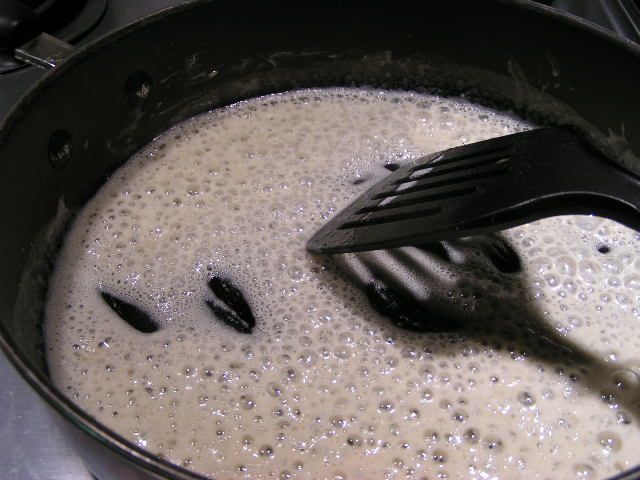 Cook on high heat, continually stirring. The roue will go from a thick paste to a thinner mixture and be very bubbly. 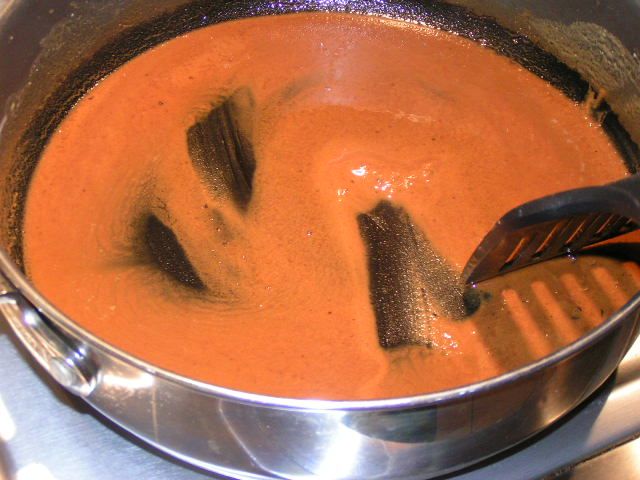 Continue stirring and cooking until the color of the roue is a deep caramel color. It will smell slightly burned. Set off of heat. 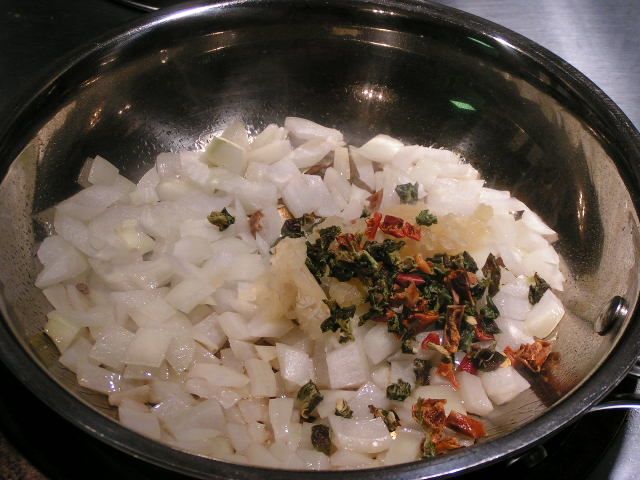 In a second skillet, sauté onions, garlic, bell pepper and celery in 1 Tblsp olive oil. I am using dried peppers and celery here, but fresh is great. 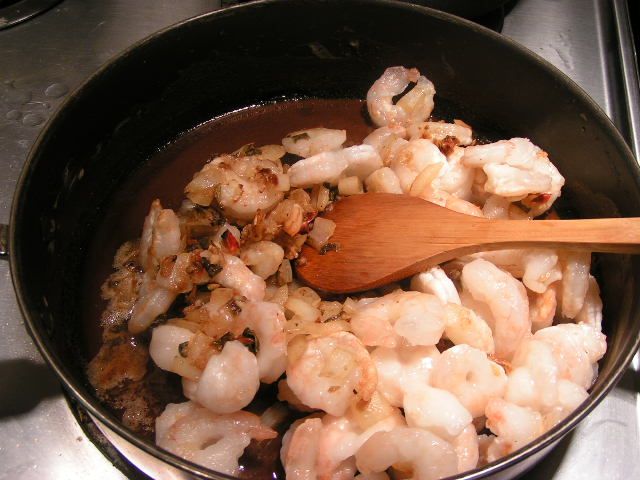 When onions are clear and tender, place skillet with roue back onto heat. Add veggies and shrimp and stir. 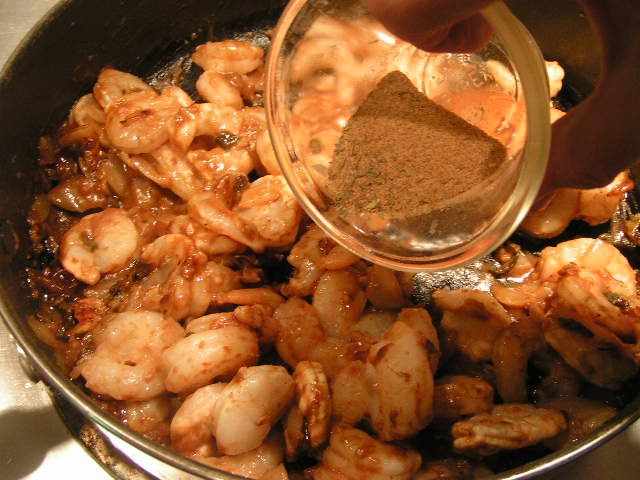 Add 1 Tblsp Cajun seasoning from mixture in recipe above. 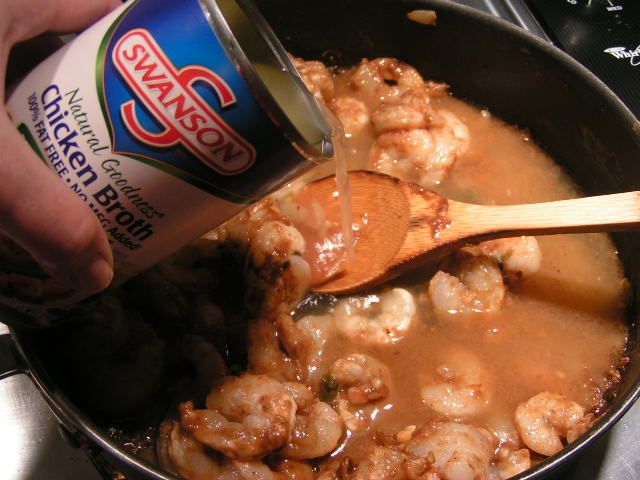 Add can of chicken broth 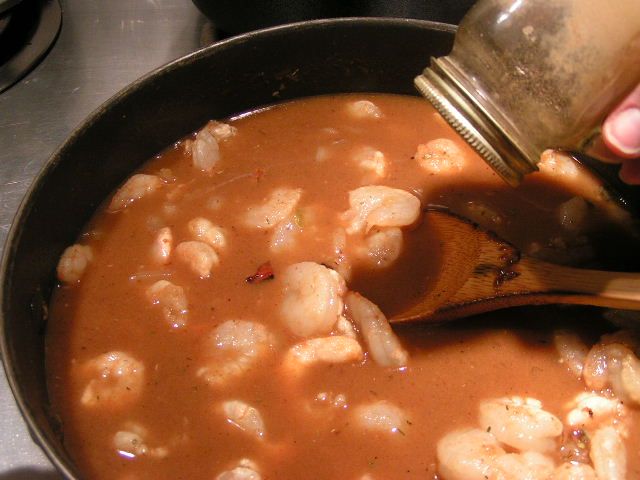 Add more black pepper to taste. We think that you can’t have too much black pepper! Simmer until liquid is reduced to a nice, thick gravy. 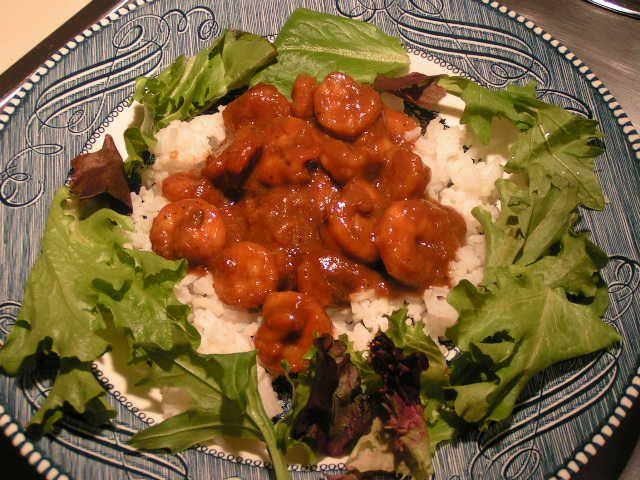  Serve Etouffée hot, over rice. Serves 4  |
|
Oklahoma Pastry Cloth™ Company on Facebook
|
 |

 Homestead Revival
 Paratus Familia
 Rural Revolution