 Mr. Fix-It’s birthday was yesterday and I was all ready to surprise him with tickets to a Thunders basketball game. I was going to go all out with a Beef Wellington complete with deuxelles! (Just had to throw that in to mess with you all!) 🙂 And then….he got called out on big job. I guess people don’t matter, but let a computer situation arise and the whole world comes to a screeching halt. So I got him the two movies, “Flywheel” and “Courageous” with one of those buckets of Orville Redenbacher’s Movie Popcorn. We’ll have a movie night this weekend! Just as good as any ol’ Thunders game, wouldn’t you say? 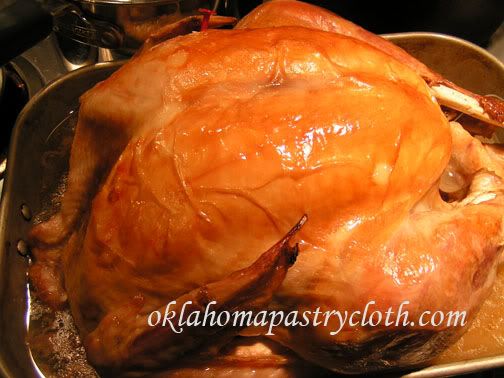 I was going through pictures and found a couple that I forgot to post awhile back and so I thought that I would take the opportunity to put them up. I don’t know about you, but we eat turkey more than just at Thanksgiving. We love Turkey, but with fewer people in the house, a big Turkey could go to waste. So, I rectify that problem by canning the leftovers. In a past post, I showed you how to can chicken by using the raw pack method. The chicken cooks in the processing. However, already cooked meat may be canned as well. The steps are the same as in this post. I bone my turkey and cut the pieces into nice chunks and place the meat into jars to about a 3/4″ head space. I then mix the juices from the cooked turkey with water and chicken bouillon to make a broth, or you can mix the drippings with canned chicken stock as well. I pour that over the meat in each jar to 1/2″ from the top of the jar, wipe the rims, add the lids that have been warming in hot water, add the rings and adjust and process in a pressure canner at 10 lbs pressure for 75 minutes. 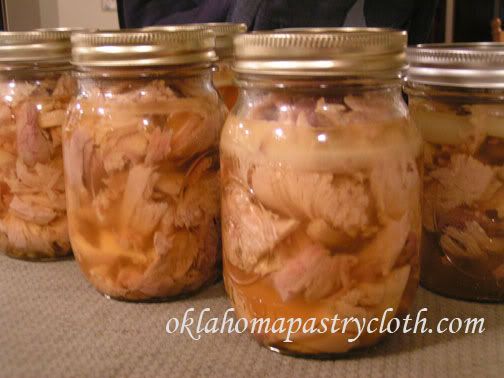 Canned turkey makes the most amazing pot pies. I just make a crust to lie a pie pan, spread the turkey on the bottom (reserve the liquid for the sauce), add some potato chunks that have been parboiled with some chopped carrots (to make sure they cook all the way through in the baking) and some frozen peas, and cover with a sauce mixture of 1 can cream of chicken soup, 1 pouch McCormick’s turkey gravy mix and two to two and a half cups of liquid combining the liquid from the jar with water. I put a pie crust over that, flute it, slice the top in a few places to let air escape and bake at 400º for one hour or until golden brown and bubbly. Yummy!!  |
|
|
Oklahoma Pastry Cloth™ Company on Facebook
|
|
 |
|
|
Canning Turkey
February 24th, 2012
The Mundane Things in Life
February 21st, 2012
 My car died. It didn’t just stop. It bled to death, a pool of oil tracing its way across the driveway and into the grass. I had just driven in from shipping orders and Mr. Fix-It asked me if I had checked the oil lately. Are you kidding? Am I my auto’s keeper? Ok, so I had to admit that I had not. The car needed to cool down after its trip and so it was forgotten for a couple of hours. It was then that Mr. Fix-It came in, rather stern-looking, and informed me that there was no oil in my car. Oh no!! How could that be?!! Like most women, I feigned horror, not really sure that having no oil in the car was all that big a deal. I followed Mr. Fix-It to my vehicle and watched as he poured 5 quarts of 10W-40, through a funnel, into the oil reservoir, while schooling me of its importance. He checked the dipstick and still there was no oil. What? But under the car, there was a bucketful!!  Mr. Fix-It declared my lovely, champagne-colored Toyota Camry a dead duck. Of course, most cars become dead ducks after they have been driven for 210,000 miles, but I had been sure that this one would live to another 100,000!! As it was, I no longer had wheels. That’s bad. Trust me. Mr. Fix-It drives a big, honkin’ Ford and I have always had the small cars in which to tootle around and save gas. But now, I was seriously short on tootlin’ machinery and didn’t need gas! I think that I have written about the Afghanistan truck before. It is a small Toyota pickup exactly like the ones used by the Taliban to bomb buildings. Ours looked like one of those trucks AFTER the bombing. We got it for $100 and Mr. Fix-It made it work like new. However, the body looked like someone had hit a tree with the front hood and then had backed into another one with the rear bumper. Two opposing ‘V’s’ would be an apt description. And somewhere in there, a bomb may have crunched the tailgate. I had driven that truck on occasion as have most of the children when they were in-between vehicles, but the Afghanistan truck was finally given to our son-in-law for him to use with his projects.  In its place, we received a little 1988 Nissan truck, with a camper on the back and only 73,000 miles on it, from my mom and dad when they moved from Tennessee to their retirement community. It has a 5-speed manual transmission and is the very basic package that includes no radio, no cup-holders and no place to hang your cell-phone. Oh wait. Did they even HAVE cell phones in 1988?? But it has the most comfortable seats and shifting is pretty smooth….that is….unless you are in downtown Oklahoma City or Edmond and you are me. Oh my. Talk about stress and a headache. Today, I was the little ol’ lady with the gray hair, holding up traffic as I attempted to pull forward at a green light, and killed the engine twice until I finally figured out I was in third gear. Traffic does that to me. My mind turns to mush. And other drivers’ hands turn to shaking fists. And so, Mr. Fix-It and I have embarked on the fun and enlightening pastime of car shopping. Yes, that is an activity that is sure to leave you with the immediate need to hit the shower and remove the slime that has been sent your way by car salesmen. We even had the made-for-tv experience of the salesman seating us in his office, disappearing and then hauling in the “manager” to see if he could “get us into the car of our dreams.” I mean, how cliché is that? One dealer asked me what I do and I tried very hard to explain my business. He is still convinced that the Oklahoma Pastry Cloth™ helps you slice onions and cucumbers. Don’t ask me why. I gave up after his fiftieth interruption to correct me about its use. Yep, cars are a necessity but car dealerships are not. It is with that realization that I have hit Craigslist. I will keep you posted on the outcome.  |
|
|
Oklahoma Pastry Cloth™ Company on Facebook
|
|
 |
|
|
Giveaway Winners
February 14th, 2012
 Boy, today started out a little iffy as our whole area was covered in a thick fog that froze onto everything it touched. The trees were beautiful displays of crystaline branches, sparkling when a tiny ray of sun would peek through the pea soup. Driving was a real adventure as bridges turned into skating rink surfaces and a two foot visability made one feel like one could run into the back of another car at any moment. The news said that we had over 100 collisions in Oklahoma City, but fortunately, the only things hurt were the bumpers, hoods and rear ends of numerous vehicles. Valentine’s Day is almost over and I figured it would be the perfect day to announce the results of our Pie Baking drawing. I hope all have had a wonderful day. Poor Mr. Fix-It was so pleased with himself for ordering me something special (I suspect chocolate-covered strawberries) that was guaranteed to be delivered on Valentine’s Day only to wind up pacing the floor all afternoon as nothing came. I think somebody must have hijacked the truck and had a feast themselves!! I think he deserves an “A” for effort and a refund, don’t you? And yes, I DID see the invoice so it’s no “gotta keep myself outta the doghouse” story!! There are always photo and comedy routine opportunities made available on this holiday, but today provided a chuckle for me. In the village-style mall at Midwest City, there was a line of men who were shivering in the 35º cold, wrapped all the way around one of the buildings at noon today. Following the end of the line to the beginning revealed anxious males waiting their turn to enter the Incredible Edibles store. I’m thinking that 12 noon on Valentine’s Day is a little late to be expecting a floral-like centerpiece of fruit for one’s lady love!! Anyway, for the last three weeks, we have been gathering names and email addresses of everyone who has commented on posts over that time, and put them into a most appropriate vessel in order to hold a drawing. We had 86 entries for the chance for two winners. 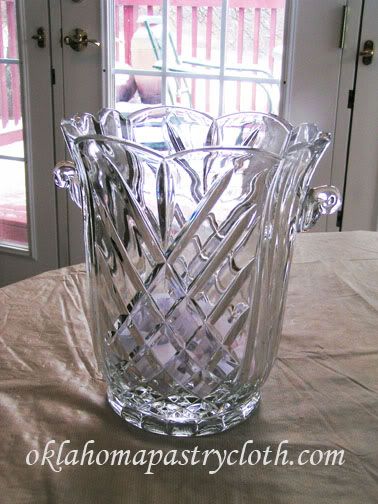 I figured that a lead crystal ice bucket would serve nicely to give us that hoity-toity, high-society, Okie prairie feel and so all names were tossed into that, to be drawn yesterday, February 13th.  Of course, it snowed for added drama and so, with wood stove burning and Jack Frost doing cartwheels outside, I manipulated the most objective and non-partisan culprit I could find – Mr. Fix-It – to choose our winners. Doesn’t Mr. Fix-It have a handsome arm? 🙂  The two winners chosen were Penny and Cindy (who signs herself as Herdog) and both have been notified. It’s kinda exciting getting to do that!! Both are very excited to receive their gift boxes and were pleasantly surprised at the last minute addition of an Oklahoma Pastry Cloth™ to go with their pie tin sets and “First Out” pie spatula.  Cindy is very excited to share her prize with her grandchildren. She sent us a photo to include. Look at those gingerbread houses!! Are they not adorable? Congratulations Cindy. And congratulations to you, Penny. Your boxes are on the way!! And to everyone else, stay tuned!! There is a new giveaway coming up in March!!  |
|
|
Oklahoma Pastry Cloth™ Company on Facebook
|
|
 |
|
|
A Tasty Bisque
February 9th, 2012
 Remember!! Comment at the end (below the blog box where it says in little blue letters, “comments” click on that and it takes you to comments and a comment box) in order to enter our giveaway. Drawing is Feb 13th. This time TWO people win one of the two identical packages – Pie tin set and First Out Pie Spatula. So comment early and comment often because every single time you comment, your name goes into the pot!! 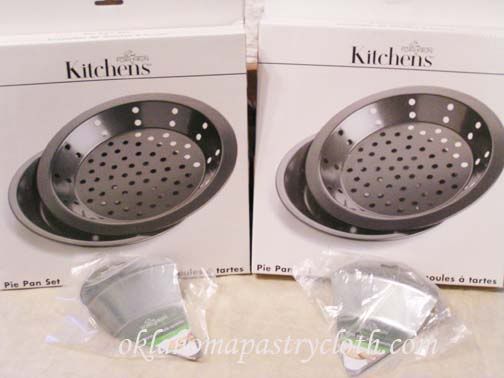 In my last post, I was waxing a bit philosophical and I discussed my understanding about finding joy in the mundane stuff even when things don’t seem all that great. I told you that I had discovered that joy is an attitude of choice. And as I have been contemplating that state of being for the past few months, I have also discovered another attitude of choice: Contentment. Now, I looked up that word and there are a number of definitions with lots of educated descriptions, but as I have been thinking about it, I’ve come up with my own explanation of the state of “contentment”. As I see it, a life of contentment is a life without resentment. Heh..that kinda rhymes, doesn’t it?! It means gracefully allowing the stupid driver who cuts in front of you to be wrong or the store manager trying to stiff you out of a return to be dumb or a lady with a fur and fancy car to be rich or a long-haired youth, marching with a sign to be vocal. In other words, it means, “being satisfied with one’s self and one’s situation, not comparing one’s self to anyone else or expecting others to live up to one’s perception of fairness.” It hasn’t been that long ago that I was in a state of poverty according to that government definition. That’s a whole ‘nother story in itself, but the gist of it is that we had very, very little money. The strange thing is that I never felt poor. I honestly felt blessed and it could have been that I was in a very small town with other people in the same boat, but some of my friends were very wealthy too and so I should have felt like maybe life was lacking something. But I didn’t. And I think that it is because I had discovered the verse in Phillipians 4:12 that says, “I have learned the secret of being content in any and every situation, whether well fed or hungry, whether living in plenty or in want. I can do everything through him who gives me strength.” I had lived in abundance and then I was poor but that state only dealt with money and contentment deals with the heart. Now, today, I am not rich by any stretch of the imagination, according to those government definitions, either, but I am richer than I was in those days now past. And I have found that more money does not give more contentment. There is always more money than one has at any given time. And it isn’t because the world or the people around me are all behaving themselves and living right lives. That just doesn’t happen. There are people who cheat and steal and even kill, but those people can’t steal my contentment. We are told in Psalm 37:1, “Do not fret because of evil men or be envious of those who do wrong;…Delight yourself in the Lord and he will give you the desires of your heart.” The greatest desire of our heart is to be content in God. No need to be angry that others have made more money or that others have more skills or that others say things hurtful. Contentment means to just relax in that with which God has blessed us and to remember that each of us is so special that we are not like nobody else! And of course, one way I relax in what God has blessed me with is to cook it! There is one way toward a contented tummy and that is with a comforting soup on a cold day like today. This recipe is one that a friend and I made up from top to bottom and has been a secret since the late 70’s (except that the original is in the cookbook at the shopping page!), but I have decided to share it today and I hope you find it to be a blessing! The story behind it is that this friend and I used to treat ourselves on special grocery days in the big city (from the country) by going to a particular restaurant. That was in the days before children. This restaurant was very expensive and since neither of us, being farmer’s wives, had much money, we would order the only thing we could afford – soup and salad. But that was all we wanted because that soup was incredible. Finally, she and I decided to try to figure out how to make the soup. We would eat there and discuss the flavors that we were getting in each bite. We went home and started experimenting and the base of this soup was developed. Then, in later years, I added more ingredients that I thought were missing and the following recipe is the end result. I usually make it with fresh crab, but the canned baby clams work just as well and in the off-season are best used anyway. If you want to use crab, just get some snowcrab, steam it and remove from the shells and chop. I sure hope you enjoy it!! 4 Tbsp butter 1 Tbsp onion, grated 3 Tbsp flour 3/4 tsp salt 1/8 tsp mace 1/8 tsp nutmeg dash of pepper 1/2 tsp. fresh chopped parsley 1 cup canned milk 1 chicken bouillon cube or 1 tsp granulated bouillon 2 cups shredded crab meat or 1 10oz can of baby clams 1 1/4 cup half and half 1/4 cup sherry (if you are using cooking sherry, cut back on the salt) 1/2 tsp lemon zest 1/2 cup finely diced tomatoes 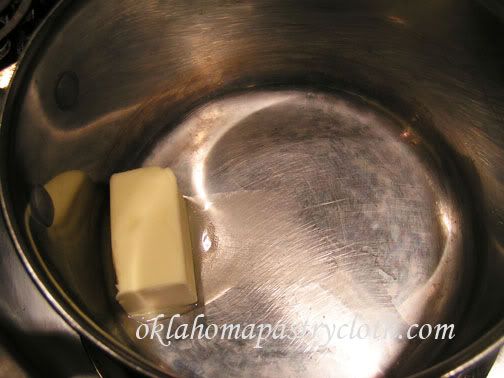 In a large sauce pan on medium heat, melt butter 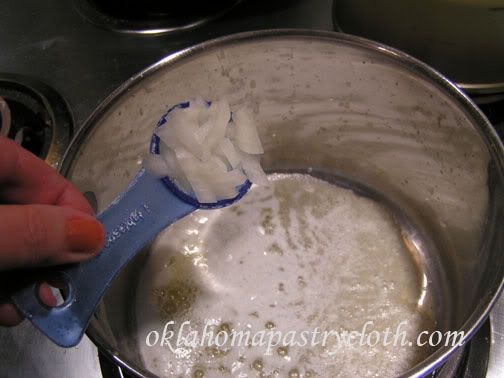 Add onions and saute for 30 seconds 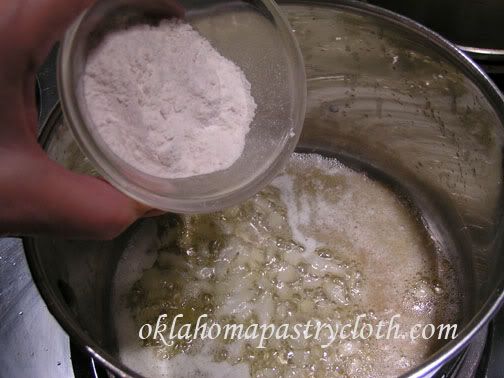 Add flour  Stir to blend and make a bubbling roue 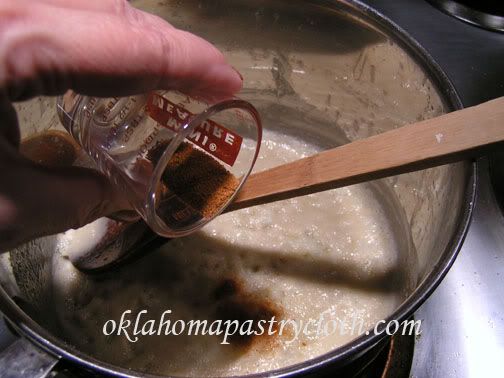 Add nutmeg and mace together and stir 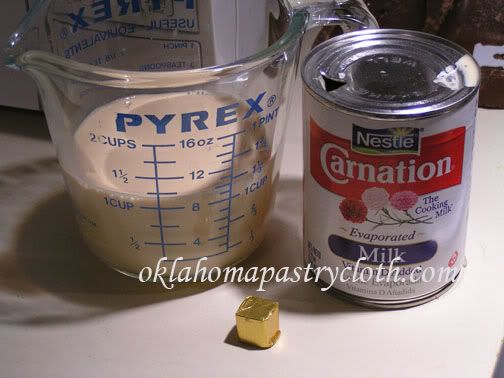 Add canned milk and bouillon. Stir until bouillon is dissolved 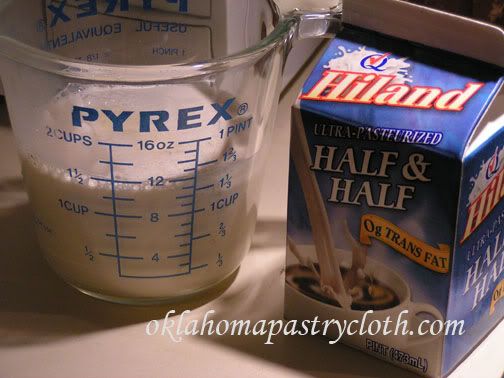 Add half and half and continue stirring on medium heat. Do not bring to a boil. Lower heat if the soup is getting too hot.  And crab, or in this case a can of baby clams with the juice. 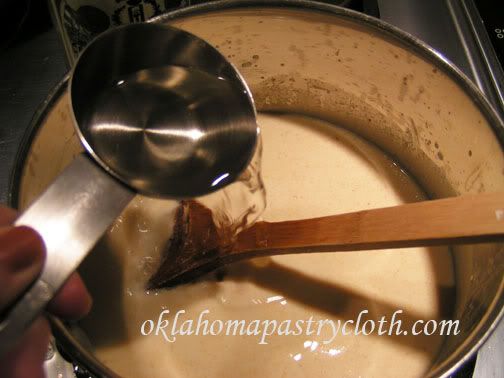 Add sherry and stir to mix well  Put in lemon zest 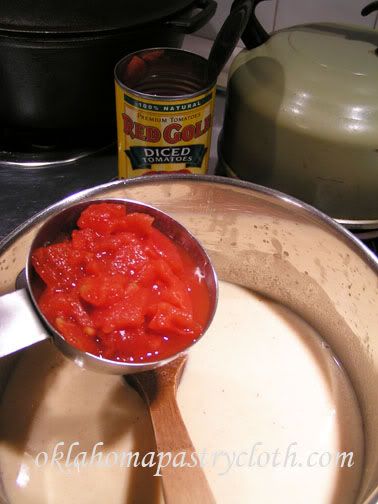 And add tomatoes and stir. Simmer for about 30 minutes, stirring occassionally.  Serve hot and garnished with parsley and black pepper. Yuuuuuummmmmy!! This post is linked at Deborah Jean’s Dandelion House Friday Blog Hop  |
|
|
Oklahoma Pastry Cloth™ Company on Facebook
|
|
 |
|
|
German Cooking
February 6th, 2012
 Remember!! Comment at the end (below the blog box where it says in little blue letters, “comments” click on that and it takes you to comments and a comment box) in order to enter our giveaway. Drawing is Feb 13th. This time TWO people win one of the two identical packages – Pie tin set and First Out Pie Spatula. So comment early and comment often because every single time you comment, your name goes into the pot!!  Have you ever had one of those days where washing the dishes is such a chore you just want to walk away and pretend they don’t exist?! Today started out as one of those days for me. I was tired when I got up today. Have no clue why – just tired. However, this morning, as I walked into the bedroom and contemplated the as yet unmade bed, a thought swept over me and I had to smile. “Consider it pure joy, whenever you face trials of many kinds, because you know that the testing of your faith develops perseverance. Perseverance must finish its work so that you may be mature and complete, not lacking anything.” James 1:2-4 4 boneless pork chops or 1 lb boneless pork roast sliced to 1/2″ slices or pork cutlets that have been tenderized at the store 1/4 cup flour 1/2 tsp garlic powder 1/8 tsp thyme 1/4 tsp freshly ground black pepper 1 egg, beaten 2 Tbsp milk 3/4 cup fine dry bread crumbs – make your own with a couple of slices of bread toasted and ground in the blender 1 teaspoon ground paprika 2 Tbsp canola oil or olive oil + 1 Tbsp butter 3/4 cup chicken stock 1/2 teaspoon dried dill or 1 Tbsp fresh chopped dill 1/2 tsp salt 2 tsp corn starch 1/2 cup sour cream or 1/4 cup sour cream + 1/4 cup yogurt 1/4 tsp onion powder 1/2 cup sliced mushrooms (optional) 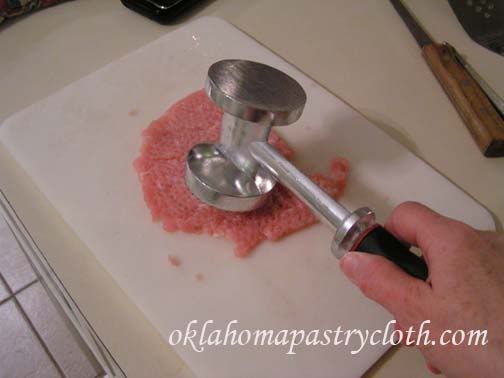 Trim fat from chops. Using a meat hammer, pound the pork chops to about 1/4″ thickness. Make sure edges are hammered nice and flat. 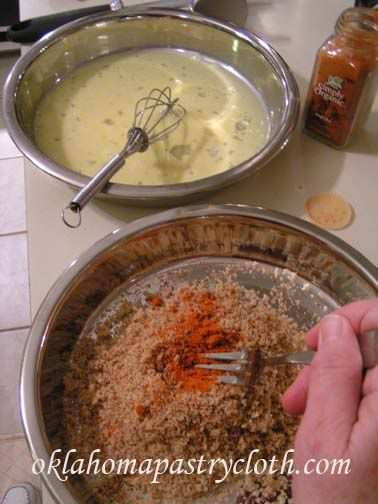 Mix egg and milk in a shallow dish and beat. In a separate shallow dish, mix bread crumbs and paprika and stir to blend. 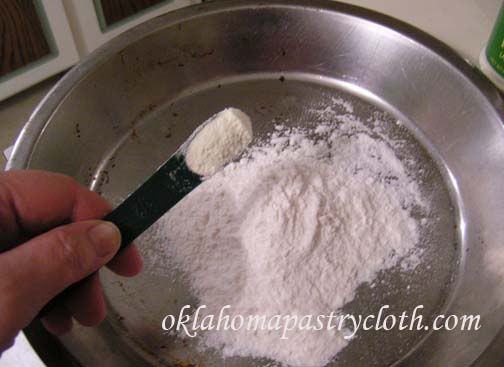 In a third shallow dish (I use pie and cake pans), add garlic to flour 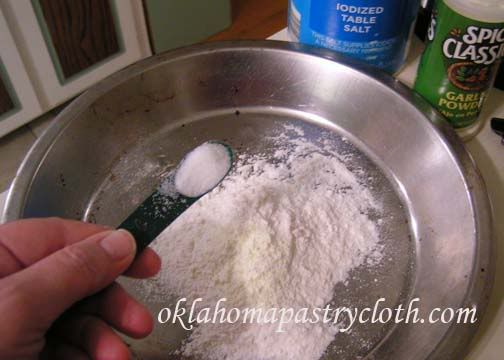 Add salt 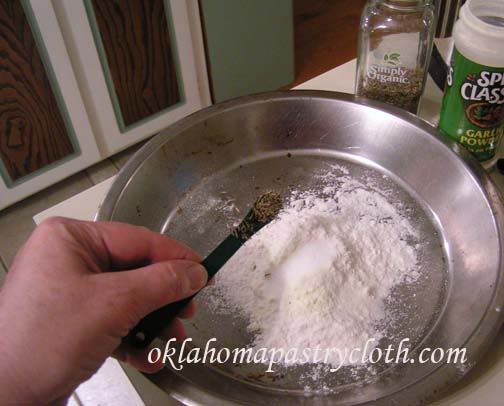 And thyme..mix to blend 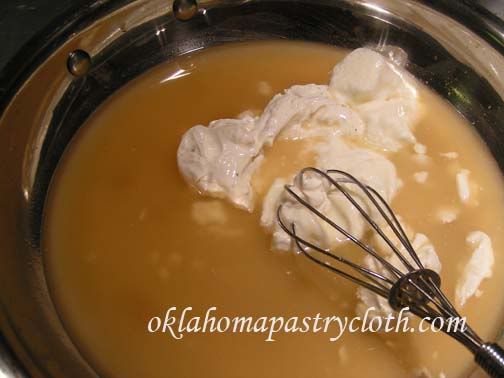 Meanwhile, in a sauce pan or skillet, mix chicken stock and cornstarch and bring to a slow simmer. Add sour cream and onion powder and whisk until creamy. Add mushrooms and stir (if using) Continue simmering. 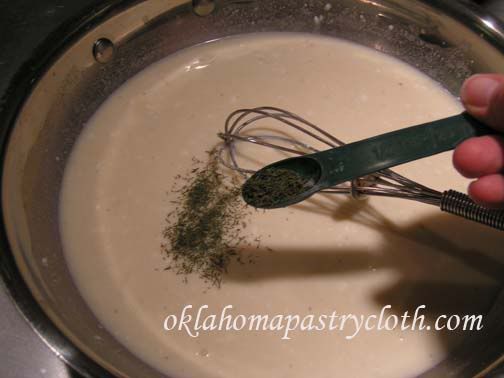 Add dill 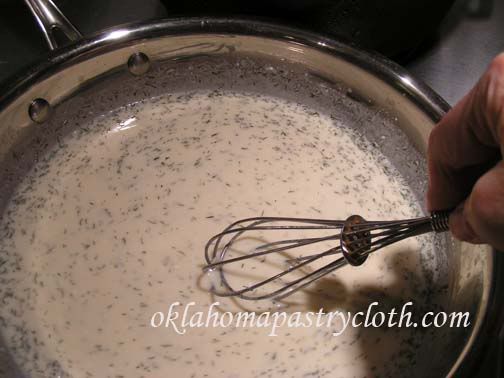 Stir until mixture is thickened to a gravy. Cover and leave on warm 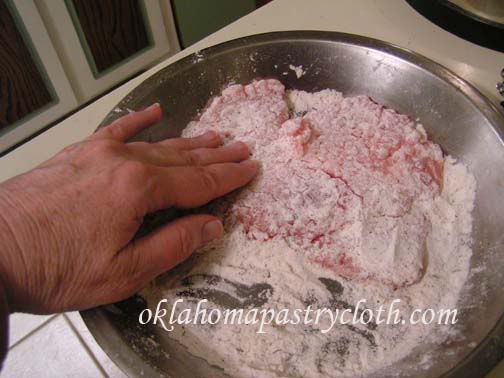 Working with one piece of meat at a time, dredge cutlets in the flour mixture to coat both sides. 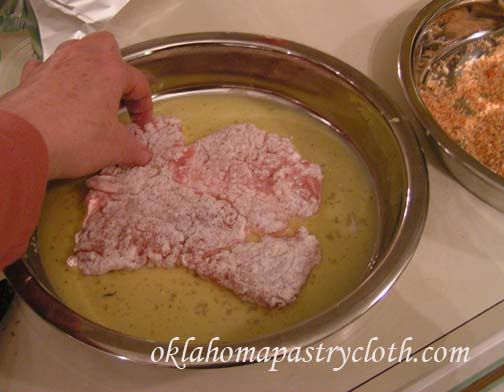 Dip into the egg mixture on both sides 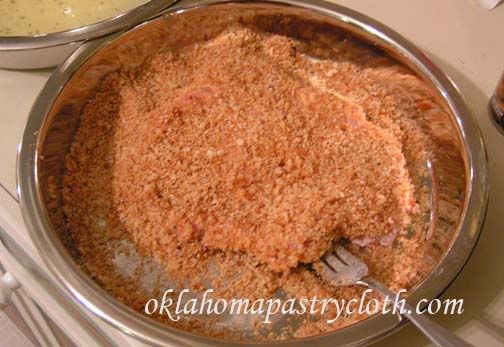 And coat with the bread crumbs to cover 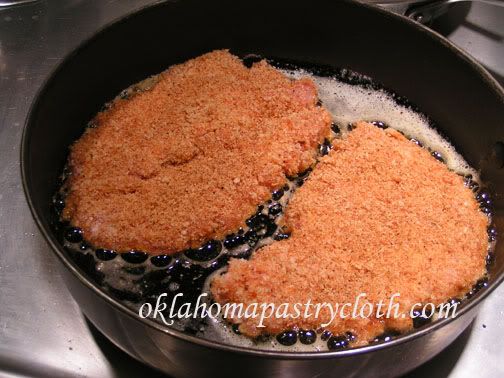 In a skillet, melt the butter with the olive oil or canola oil and heat on medium high heat. When oil is nice and hot, add cutlets. Brown and allow to cook about 3-4 minutes.  Turn cutlets and brown on the other side and cook for another 3 to 4 minutes.  Place Schnitzel onto plates and drizzle gravy down the center. Add a lemon wedge for squeezing juice over the schnitzel. Serve with German potato salad and warm kraut. Of course, a homemade roll on the side isn’t anything to sneeze at!!  |
|
|
Oklahoma Pastry Cloth™ Company on Facebook
|
|
 |
|
|
Nutrition In A Roll
February 3rd, 2012
 Remember!! Comment at the end (below the blog box where it says in little blue letters, “comments” click on that and it takes you to comments and a comment box) in order to enter our giveaway. Drawing is Feb 13th. This time TWO people win one of the two identical packages – Pie tin set and First Out Pie Spatula. So comment early and comment often because every single time you comment, your name goes into the pot!!  Growing up, my parents demonstrated to us girls about the precious gift of “hospitality”. Mom and Dad were ready and willing to open our home to anyone who needed a hot meal or a place to stay. Most of the time, that included students from other countries who were attending the university in our town, which was also my father’s place of employment as a professor. From these visits by young people from all over the world, we girls were introduced to new foods and treats that were authentically cooked or, in the case of the treats, provided from stores overseas.  I remember one of the young women, with whom we became very attached, Mitchiko Kawase, loved to tease us and presented us with a bag of little, dried squares that she encouraged us to try. The squares were dark and salty and as we took a taste, she giggled and told us that it was dried octopus. All of us squealed in horror and she laughed hilariously as she told us that it was really seaweed. I’m don’t remember that we were all that much more impressed! One Japanese food that I love is sushi. I’m not a fan of the raw fish type – more the California roll type – but I put all kinds of stuff in mine and chow down. Mr. Fix-It uses a fork and I use chopsticks. He thinks I’m pretentious! I just think I’m being disrespectful if I use a fork. I thought that in the second of these three posts on some international dishes, I thought I’d share my sushi-making. And you don’t need one of those $19.95 jobs as seen on tv! 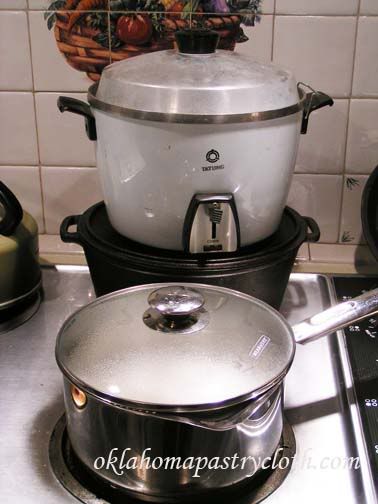 You can use a rice cooker or a pot to make your rice. For three large sushi rolls, make three cups of rice. Sushi rice is different from regular rice. It is much stickier. I use a type called Hanmi but you can go to any specialty store and many larger groceries and ask for sushi rice. 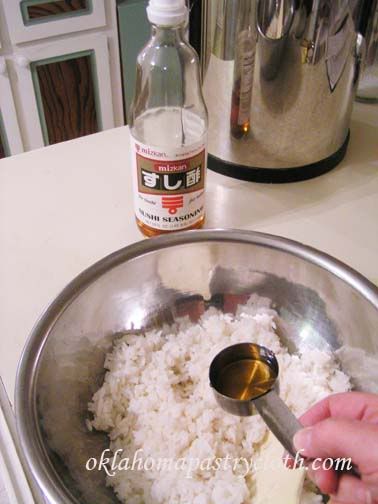 Once your rice is cooked, put it into a large bowl. A bamboo bowl is great too. Add two tablespoons of sushi vinegar to the rice. Sushi vinegar has sugar in it and is slightly sweet/sour. 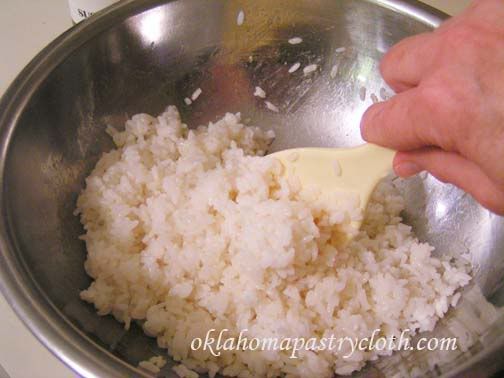 Toss the rice to evenly distribute the vinegar  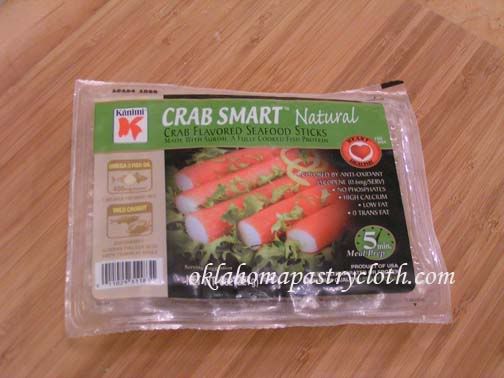 There are any number of proteins that can be used in sushi. Here, I am using a tempura shrimp and Crab Smart. You can also use scrambled egg that is sliced, fresh crab, salmon, cream cheese and the list goes on. And there is no limit to the veggies! Anything goes. 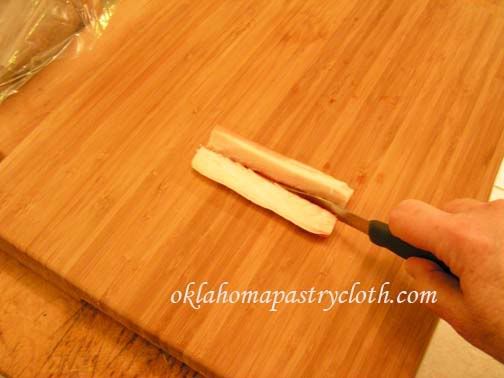 The crab sticks are too thick and so I cut them in half. 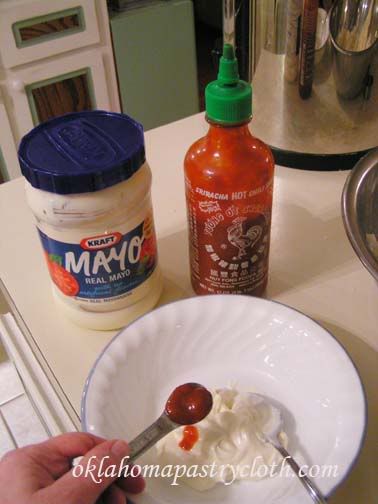 I make a sauce that I will use over the sushi by mixing 1/3 cup mayonnaise with 1 teaspoon Chinese chili sauce. 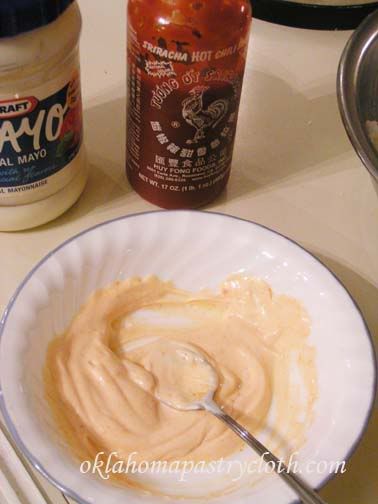 I mix until smooth and creamy 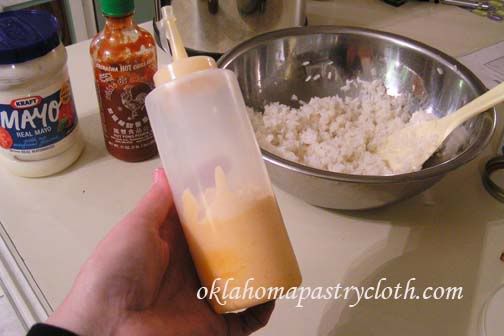 And put the sauce in a squeeze bottle like is used for mustard or ketchup. This gives me a nice little bead to design on the sushi rolls. 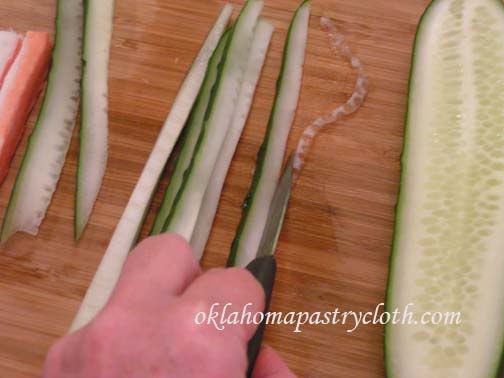 I use cucumbers and slice them into 1/4 inch thick slices and cut off the seed area 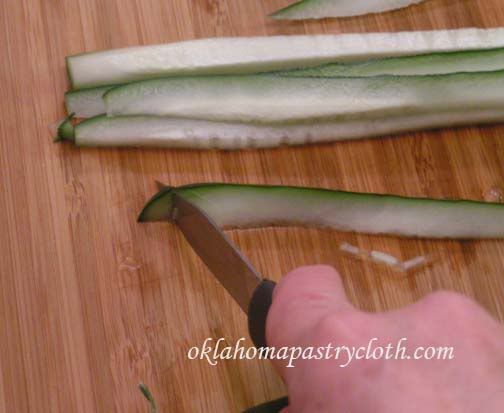 I square off the ends of each slice 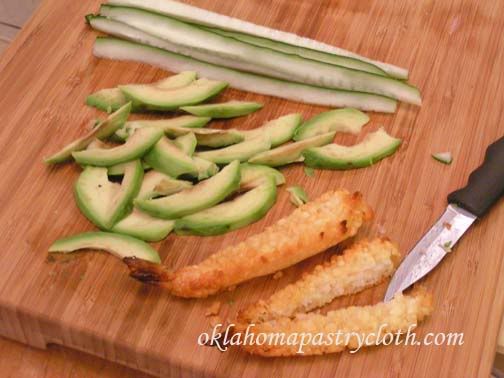 I also slice the shrimp in half after baking it and also slice up an avocado. 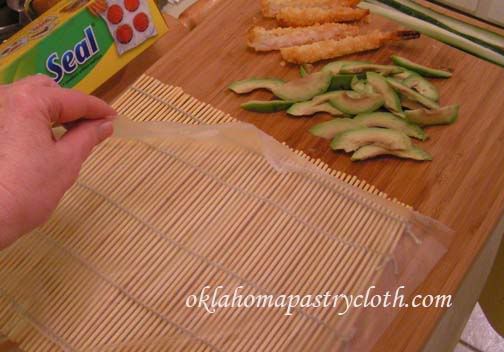 A sushi mat is made of either flat bamboo slats laced together with twine or with round sticks laced together as well. I like to use Press and Seal on my mats because it keeps them clean instead of pressing rice down between the gaps. 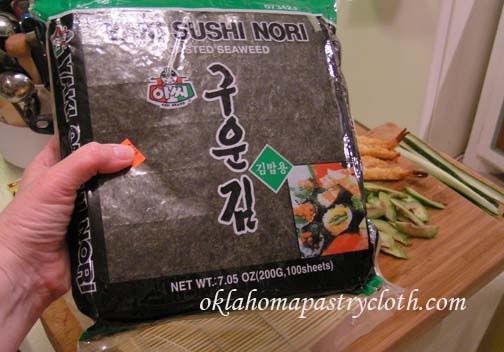 Sushi Nori is actually kelp seaweed and is full of iodine and is one of the highest plant sources for calcium. It is also chocked full of other vitamins and minerals. Some people toast their nori prior to making sushi by spraying a skillet with a light layer of oil, heating and then placing a nori sheet on the skillet for about 30 seconds and then turning. Others just use the nori straight out of the package. 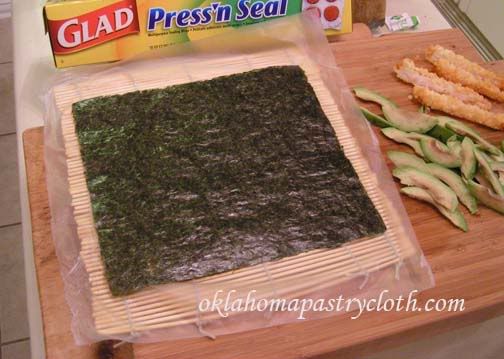 Place the nori on the mat with the narrower end parallel to the lines of the mat 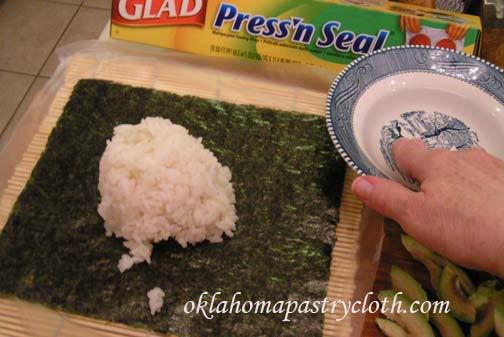 Place 3/4 to 1 cup of rice on the nori. Place a bowl of water next to your work area. You will want to keep your fingers wet to work with the rice to avoid sticking. 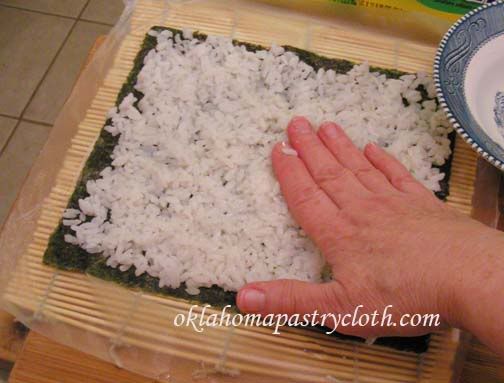 Spread the rice evenly over the nori and press down to make an even surface. 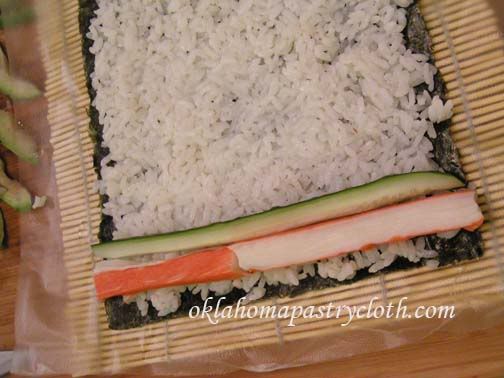 Place crab and cucumber at one narrower end of the nori running parallel to the mat, leaving about 3/4″ of nori showing at the end. 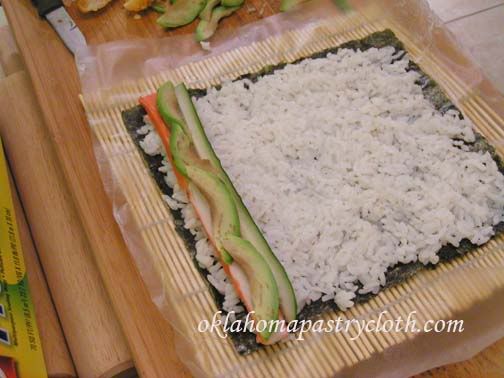 Place the avocado on top of the crab and cucumber 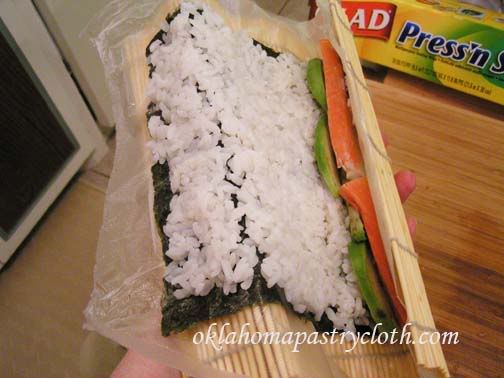 I find it easiest to pick up the roll and start rolling the mat at the end with the filling one full roll and then placing it back onto my work surface to continue 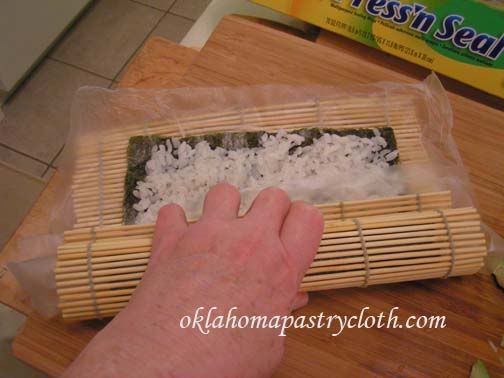 I continue to roll, lifting the top edge of the mat away from the roll so that it does not get rolled up with the sushi. I squeeze the mat with both hands as I go to keep the roll tight. 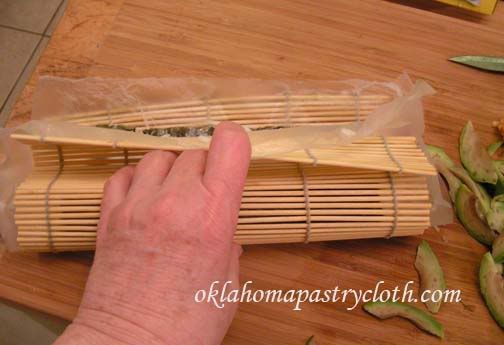 I am lifting the top side of the mat with the Press and Seal away from the roll as I continue to roll. 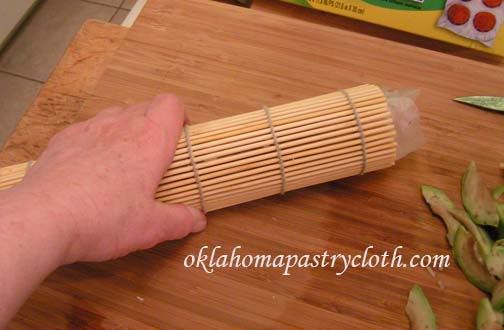 I continue to tighten the roll 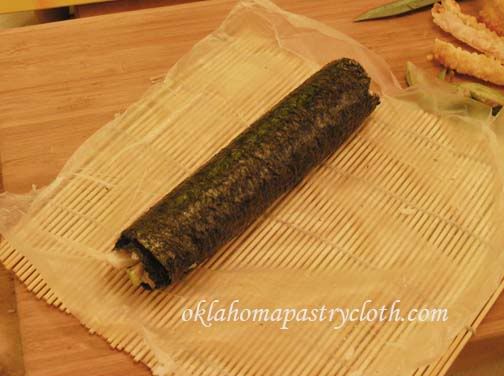 And Voila! There’s my sushi roll. 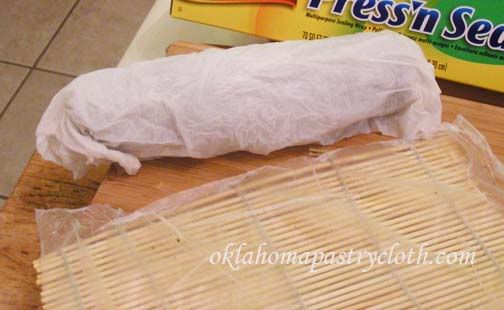 I wrap it in a wet paper towel and set aside as I continue to make more rolls. 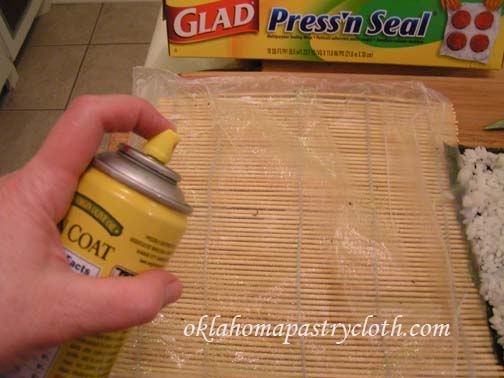 Now then, you can have the rice on the outside of the roll instead of the nori showing outside. And to do that, first I do the first steps of putting rice on the nori and patting it out and then I lift the nori and rice from the mat and set it aside. I spray the Press and Seal with a little olive oil. 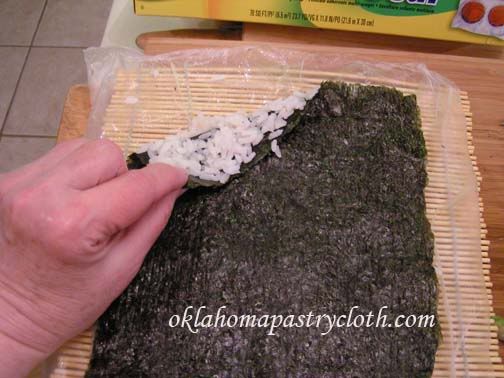 Now, I place the rice package with the rice against the press and seal and the nori on top – basically upside down from the first way I showed you. 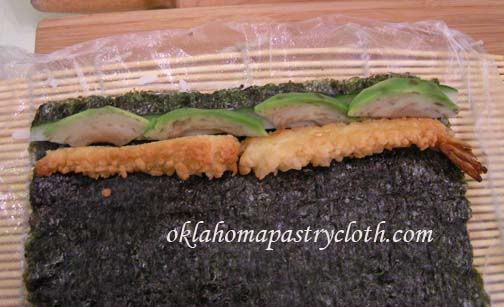 I add my center, this time using the shrimp instead of crab 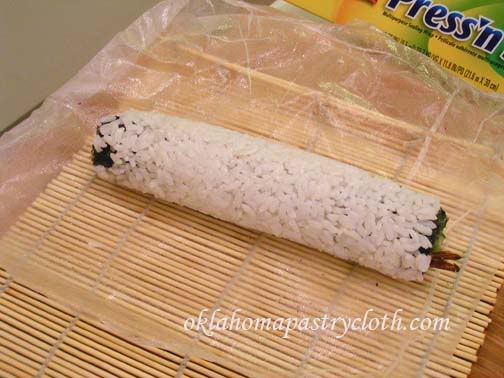 I roll exactly like I showed you above on the first sushi roll and here you have the result 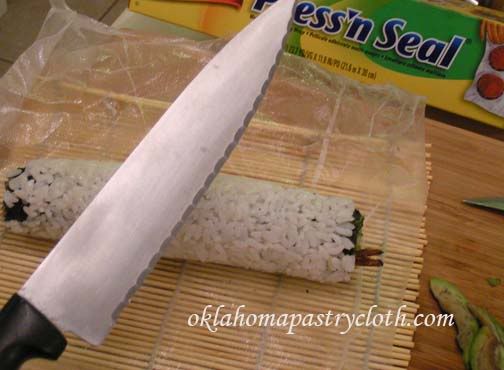 To slice these rolls to get the nice little medallions you see in restaurants, you need a sharp, finely serated knife. I keep my knife wet to cut as well. 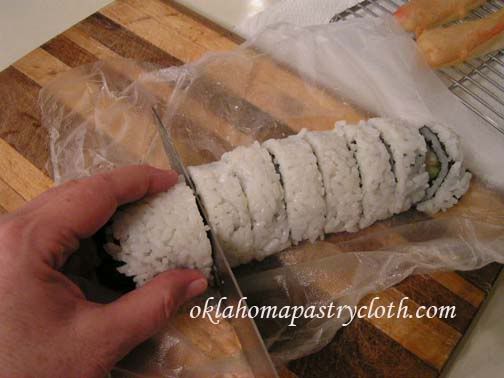 Slicing the roll with the rice outside is a little trickier than when the nori is on the outside. Also, I keep my hands wet so that the rice does not stick. 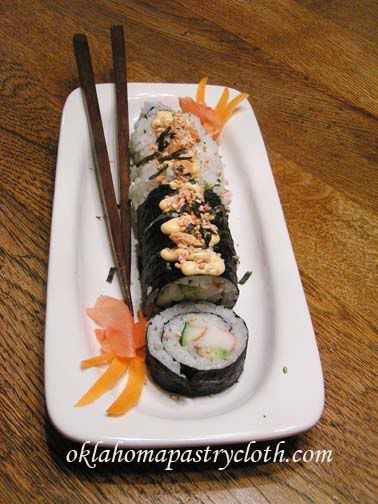 Here are a combination of the two rolls put together. You can see that I squeezed the sauce in a squiggle along the top of the roll and sprinkled with salmon rice seasoning and have carrots and pickled ginger on the side. 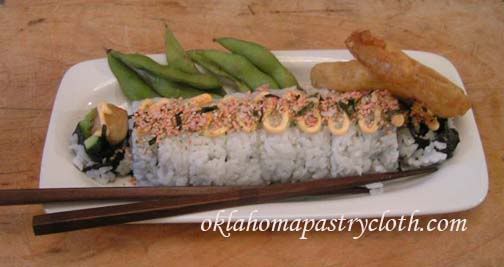 This is a roll that was made with the rice on the outside and is served with edamame and tempura onion rings  Here are a few things you can serve with your sushi – Soy Sauce, Wasabe and Rice Seasoning. I sure hope you won’t be afraid to try making this!! I know it looks complicated, but really, it goes very quickly and you sure will love the results!!  |
|
|
Oklahoma Pastry Cloth™ Company on Facebook
|
|
 |
|
|
Homemade Tamales
January 30th, 2012
 Before I get started here, I want to remind all of you to be sure and comment at the end (below the blog box where it says in little blue letters, “comments” click on that and it takes you to comments and a comment box) in order to enter our giveaway. This time TWO people win one of the two identical packages – Pie tin set and First Out Pie Spatula. So comment early and comment often because every single time you comment, your name goes into the pot!!  And now, I’ve written in the past about dumb things I’ve done to which I actually admit. I like to think of myself as a normal human being with a modicum of quirks and I am willing to admit – to an extent – what are those quirks. My children read this too and I can’t admit everything as my “perfect mother” status might fall in their estimation. Oh? I ain’t all that perfect in their eyes? Huh. What a surprise. I’m thinking that the time I went to an Atlanta church for my girlfriend’s wedding, was escorted down the aisle to be seated on the bride’s side, and was handed a ‘program’ only to discover that the couple being married WEREN’T my girlfriend and her fiance, probably tops the stupid things I’ve done. Skulking back down the isle and out the back door was humiliating enough, but then finding out that the wedding had been in Murfreesboro, TN just cemented my stupidity. Well, this weekend, I proved to Mr. Fix-It that it is possible that I’m a few gummy worms short of a bag. He was very kind about it, but I really think he was looking for those lost gummy worms. He was really hungry after my flirtation with brain freeze. You see, we had been invited to a wonderful SURPRISE party for our dear friend, Jeff, who was turning that ripe, old age of the big 5-0. The invitation was presented as a cute poem with the date and the location – the nearby church. As it so happened, my birthday was this past week as well – and I turned much older than the big 5-0 – and so, for some reason, the week just got kind of discombobulated. (like that word? – fits the week) Since I had promised to provide a snack of substance for Jeff’s party, I made plans for making a large batch of oriental sweet and sour meatballs. No party is a party without meatballs, don’t you know?! On Saturday, I spent the day putting together several batches of my homemade sweet and sour sauce, cooked meatballs, added sauce and pineapple chunks and piled those into a crockpot on low to keep them warm. I pushed Mr. Fix-It to leave the love of his life, Ellie (our mini long-haired dachshund), to get out of his jeans and into newer jeans so that we could at least appear as decent as that couple in the painting, American Gothic. I grabbed the meatballs and we headed to the church. Seeing a couple in the front entry of the church, I carried my meatballs up to the lady and inquired about which room was sponsoring Jeff’s party. She looked at me with kind of a half smile and choked back a laugh as she informed me, “Jeff’s party? That was last night, honey.” Well, great. And so, the meatballs went to Jeff and his family that night, as I crawled to their door in total humiliation. No birthday present is complete without meatballs. In order to repair my reputation, I have decided to prove that I CAN do something right and so I think I’ll do these next three posts with some international recipes that will wow your family and guests and that are not your usual fare. The first two are a family staple for us. The last one is a newer recipe for me. Today, we will start with homemade tamales – one of Mr. Fix-It’s favorites. The nice thing about tamales is that if you are willing to take a Saturday afternoon to cook, you will wind up with enough tamales for quite a few meals. The extras can be frozen or canned. So get your pork roast ready and follow the directions below: 2 lbs boneless pork roast, or boneless chicken breasts or boneless beef roast 1 tsp ground cumin 1 tablespoon chili powder salt to taste 1/2 tsp garlic powder 1/2 onion finely chopped water Masa Harina Dough 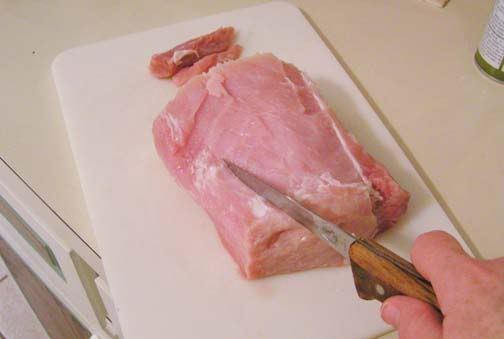 Cut roast into cubes and place into a large pan, just cover with water and bring to a boil on medium-high heat. 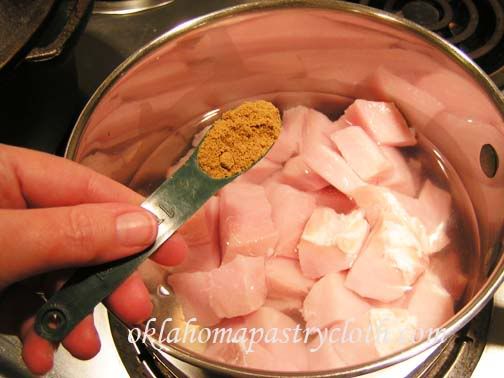 While heating, add cumin 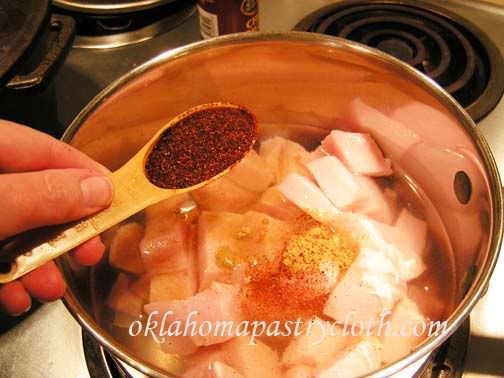 Add chili powder  Add salt according to your taste 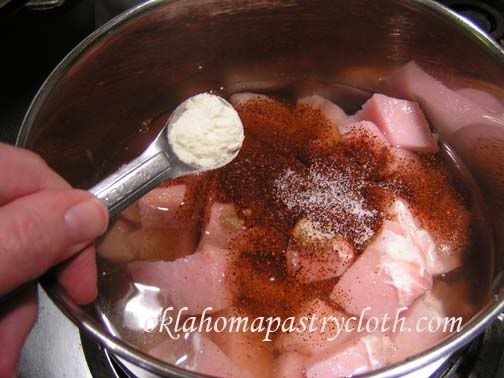 And add garlic. 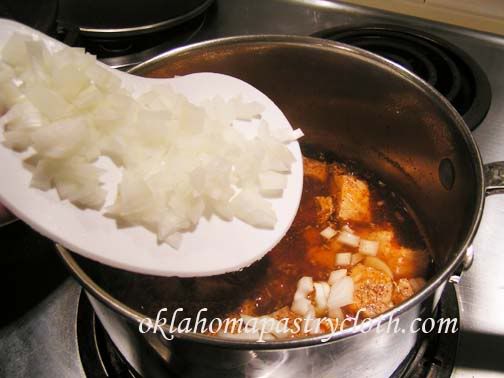 Add onions and stir. Boil for 30 minutes. 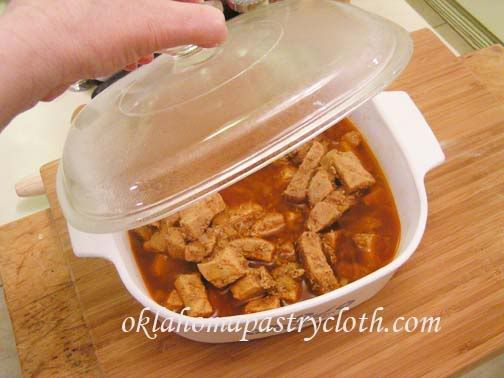 Place the meat into a covered casserole dish or dutch oven and place into a 350º oven to bake for about an hour to an hour and a half or until meat is very tender and comes apart easily. 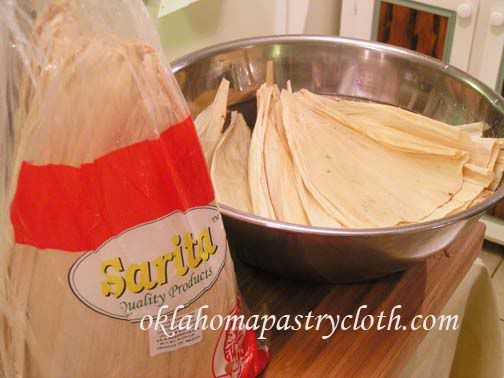 While the meat is cooking, soak corn husks in very warm water. You can find these at any grocery store in the international food section or in the produce section. Some of our stores even have them hanging on endcaps. 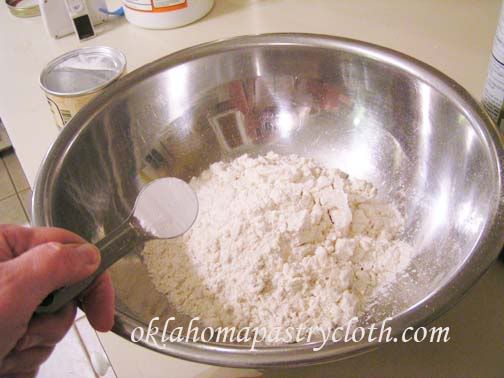 In a large bowl, mix masa flour with baking powder and salt. Set aside 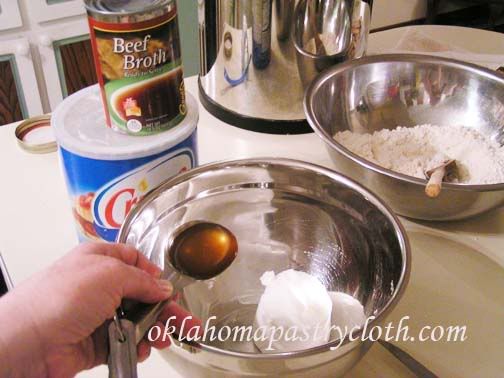 In another bowl, mix shortening with 1 tbsp of the beef broth. 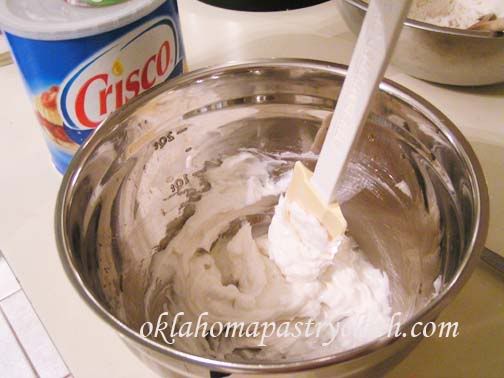 Beat broth and shortening until you have a fluffy mixture 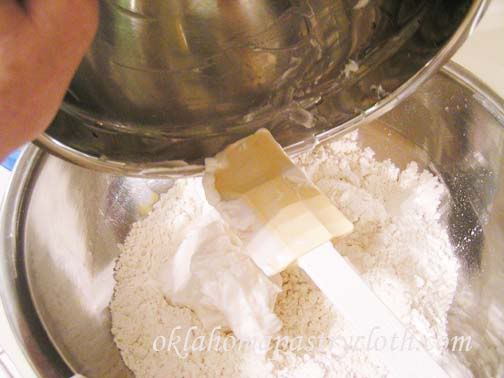 Add the shortening mix to the masa mix 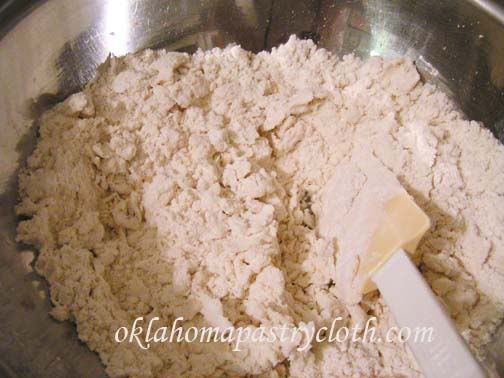 Cut in shortening mix. Add more beef broth, stirring, to form a spongy dough.  Either shred the pork with a fork or put it into a food processor for a finer shred. (Mr. Fix-It like’s it “pre-chewed” shredded. 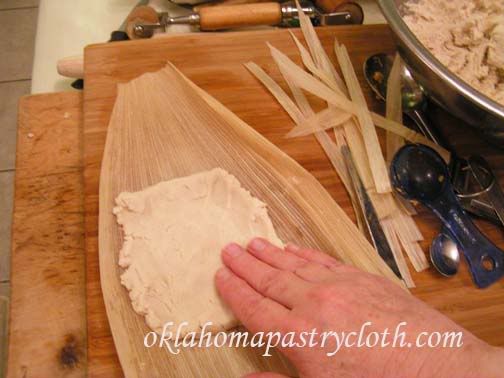 Press dough onto center left side of a corn husk, a little under 1/4″ thick. This is the way I like to roll them because it makes allowances for short or misshappen husks. However, if you want to make your tamales in the traditional rectangle, move the square of dough down to one end and to the left side. 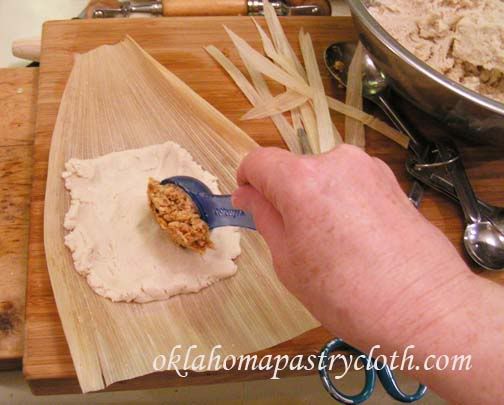 Place at least a tablespoon of meat onto the center of the dough. 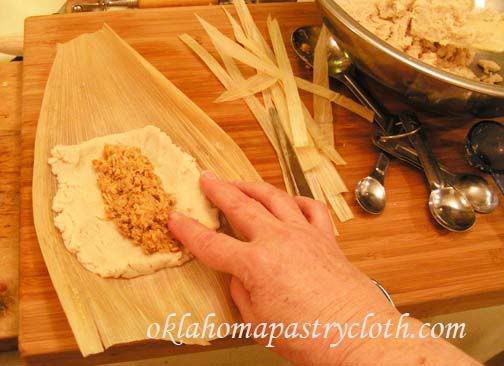 Spread the meat out into a long rectangle down the center of the dough 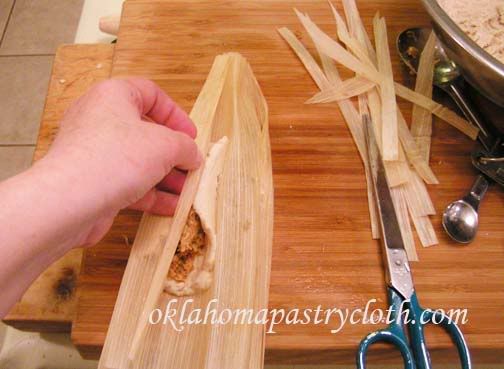 Roll tamales by moving the left side toward the right and rolling until right empty husk is covering the seam of the right side. If doing the traditional flatter tamale, you will still roll the same way. 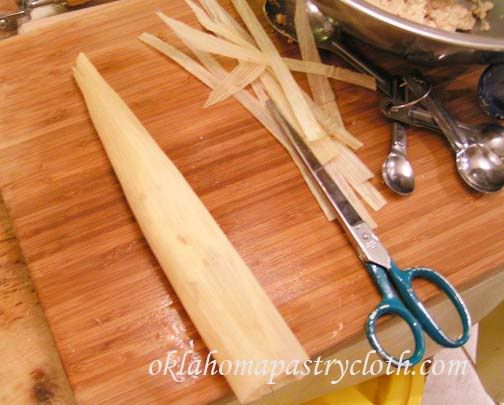 Rolled tamale 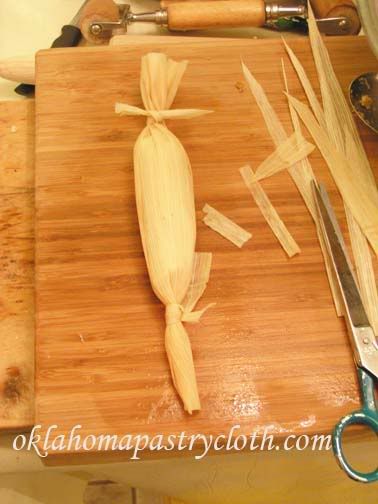 I tie the two ends with strips of corn husk, but if you are doing the flatter ones, you will fold the empty half of your corn husk over the full half of the corn husk roll and tie around the middle with a longer strip of cornhusk. 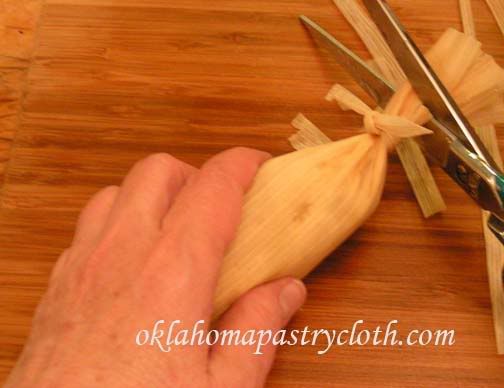 Clip the ends of the tamale to shorten.  Steam tamales for 45 minutes to an hour (depending how many you are serving). Freeze unsteamed extras in a freezer bag. I will show how to can them in another post.  I only serve 5 tamales for our meals – two for me and three for Mr. Fix-It. We love ours with my canned, homemade chili, heated and served over the tamales and topped with lots of cheese – and sour cream and guacamole if we are feeling really daring!  |
|
|
Oklahoma Pastry Cloth™ Company on Facebook
|
|
 |
|
|
New Giveaway and Canning Too!
January 26th, 2012
 Valentine’s Day is coming up and I’m just thinking it would be the good thing to do to have a giveaway with not just ONE winner, but with TWO winners! And both winners would get the same thing…so since this is a blog that centers an awfully lot on cooking (with a little humor and education thrown in) the most appropriate prize would have to do with cooking! So, on Valentine’s Day, we will be drawing the name of two winners who will receive a very special pie tin set that includes the tin and then, to prevent shrinkage, a second perforated tin that fits on top of a single crust that is being baked for cream pies. Plus, I am throwing in a “first out pie spatula” that is baked under the pie crust. When the pie is cooled, you slice along the edge of the spatula and, voila!, you lift out that first piece without having to dig. Cool, huh?  So from now until February 13, leave as many comments at the blog as you wish because each time you comment, your name goes into the pot. Just scroll down to the bottom of the post and just below the text box you’ll see in blue “comments” and a number showing how many comments there are. Click on that and it will take you to comments and a comment box. Browse the blog, read and comment and keep your fingers crossed! 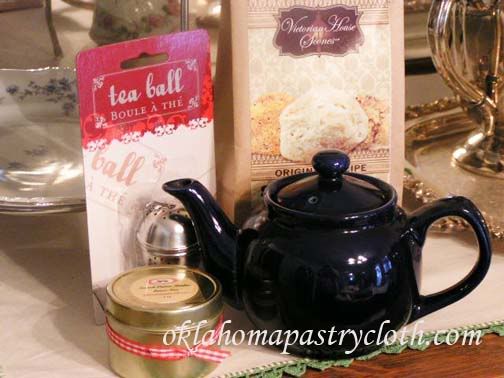 And while I am mentioning Valentine’s Day, I want to encourage you to take a look at the Tea or Tea And Treat of the Month Clubs as perfect and unusual gifts for someone you love. The first month, your loved one receives a ceramic tea pot, a tea infuser and tin of tea and treat and each following month, a new tea flavor and treat arrives. It’s that gift that keeps on giving! In the meantime, speaking of citrus fruits from the last post, I wanted to show you another wonderful citrus product that you can can – Lemond Curd. Wonderful on scones, in tiny tarts and other sweet treats, Lemond Curd makes a beautiful gift to include with dessert mixes. My recipe and directions for Lemon Curd can be found here. Just make up a couple of batches and jump in below: 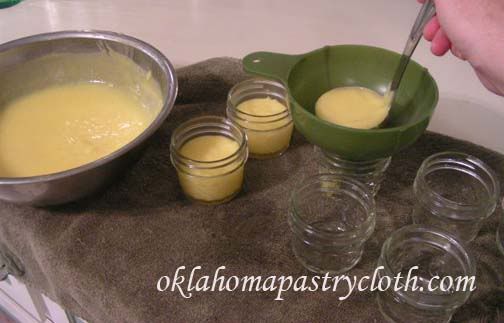 Once lemon curd is made, while still warm, fill sterilized jars to 1/2″ headspace. I use the 1/2 pint and 1/4 pint jars that make wonderful and cute gifts. But you can also use pints. 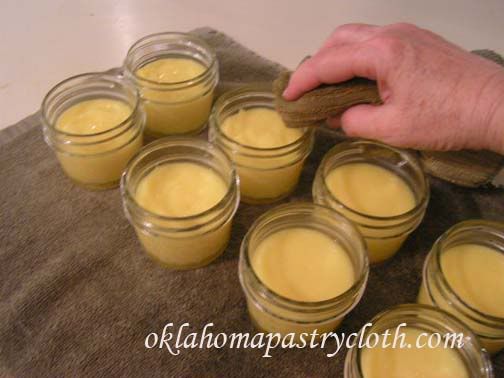 Wipe the rims of the jars with a warm, wet cloth to remove any drips and oils from your hands. 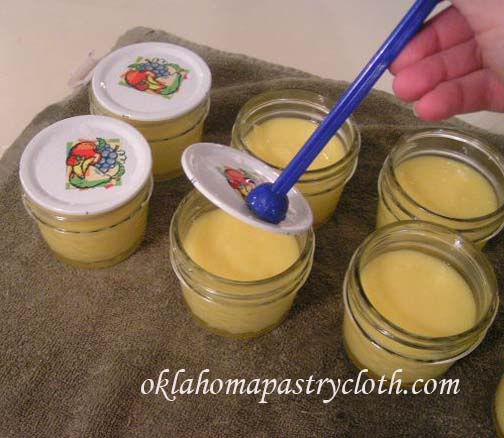 Having warmed your lids in nearly boiling water place them onto the jars. Add rings and adjust. These jars are the 1/4 pint jars great for 4 servings. 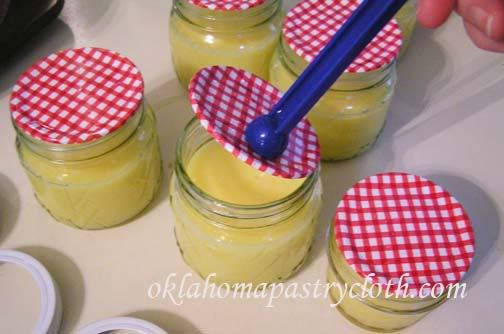 Here, lids are being added to the 1/2 pint size which offer approximately 8 servings each. 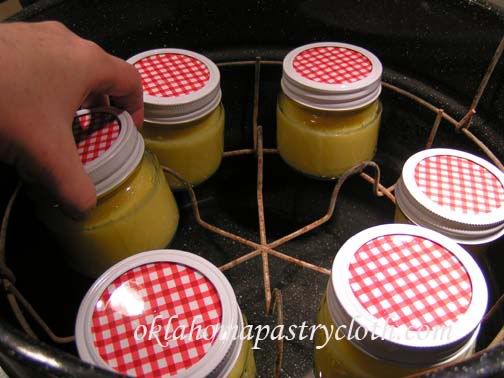 Place jars into a waterbath canner and lower into water that is barely warm to cover jars by approximately one inch of water. Turn eye on high and as soon as water starts to boil, time for 10 minutes of processing. Process for 15 minutes if using pints. 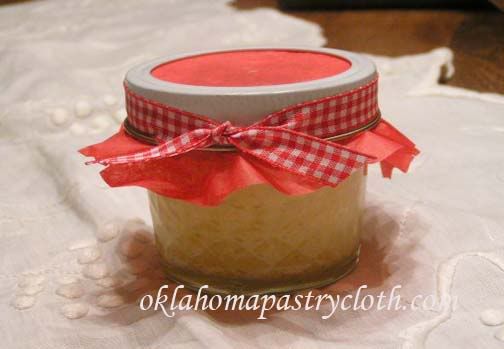 For gifts, decorate the jars with cloth or tissue paper, a label with instructions and ribbon. Add a bag of scones mix and place in a gift bag for a really cute present. Or, jars can be stored in a cool, dark pantry, for your own use. Be sure to refrigerate before opening to serve cold. After opening, the curd may need to be stirred to make it creamy before serving. It’s yummy!! And don’t forget to leave comments to enter the Valentine’s Day Giveaway!!  |
|
|
Oklahoma Pastry Cloth™ Company on Facebook
|
|
 |
|
|
Canning Citrus Fruits
January 23rd, 2012
 Boy, today has been quite appropriate for thinking about canning fruits. We are so dry in Oklahoma that I’m having to put a humidifier near my piano to keep the soundboard from cracking!! And today, nearly 50 mph winds stirred up loose dirt from drought stricken fields, sending it airborn, dimming the sun and leaving trees and a horizon with a snow flurry like appearance. It’s pretty certain that a boatload of Okies are thinking back to the days when fruits, vegetables and meats, in glass canning jars processessed when items were in season or available at the stores, were their only defense against starvation during the Dust Bowl days. A very interesting website about the kitchens of that time and of many other eras is The Historic Cooking School where Rena has kindly linked to my posts on vintage cooking. In talking with my dad about those times, he remembers his family buying grapefruit in canning jars and eating this citrus delight because it was not readily available fresh. My family has always been overly fond of oranges, tangerines and grapefruits and when I was growing up we had relatives along the Indian River in Florida which guaranteed us succulent fruit. This year, for Christmas, my parents surprised me with the most wonderful variety of white and ruby red grapefruits, navel oranges and tangerines. There were so many grapefruits that I decided that I had better do something with some of them before they spoiled. In doing research about the history of the canning process, I found this really neat site called Tasteful Inventions where I learned that nearly 250 years ago a French man named Nicolas Appert, encouraged by a 12,000 franc prize issued by the government, introduced his 14-year-in-the-making canning discovery as a way to preserve food for Napolean’s army because, “An army marches on it’s stomach.” Napolean awarded Monsieur Appert the money in 1810. So folks, canning has been around for a long time!!! C’est bon!! I have to say that when citrus fruits are canned, the taste is changed somewhat. Adding sugar or sweetened juices helps to reduce these changes and serving ice cold makes a difference too. Also, it is very important to remove all of the white pulp from any fruit prior to canning because the pulp adds a bitterness that you don’t want. When doing grapefruit, I do not peel and section, but rather slice and use a grapefruit knife to remove sections that easily leaves any pulp behind. Oranges and tangerines are much easier than grapefruits to deal with when peeled. Note: I used half pint jars for single servings, but pints and quarts are fine too. Directions: Place your jars into water to boil for sterilization or run through the dishwasher on sanitize cycle. Place lids into a saucepan and cover with water. Bring to almost a boil and then keep heated. 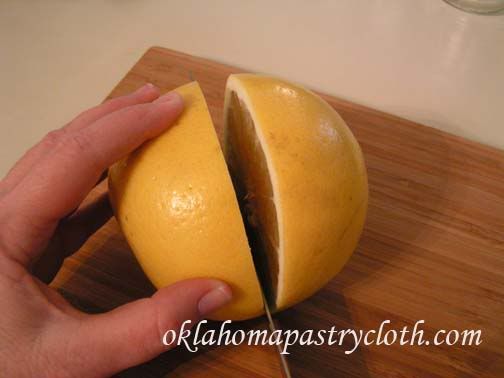 Slice the grapefruits. I used a total of 6 very large grapefruits, both white and ruby red, for this particular project and got 6 half pints.  Using a grapefruit knife, which is serrated and curved, cut around each section moving from section to section. 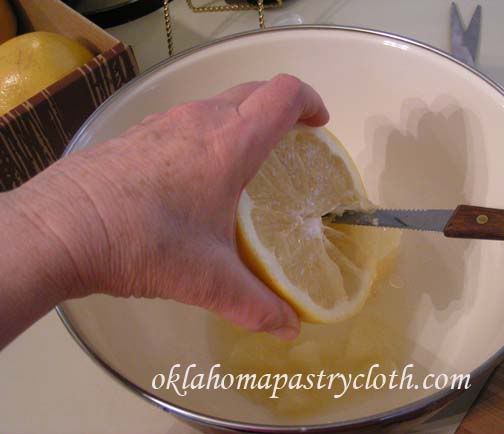 Scoop the grapefruit sections into a large bowl. 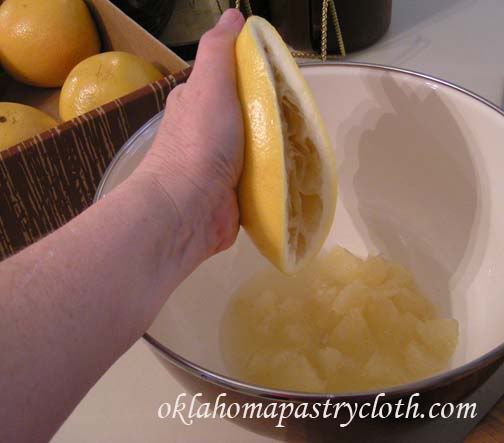 Squeeze grapefruit juice from each half into the bowl 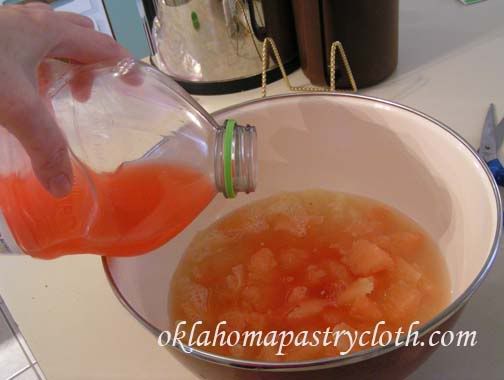 You can make a light syrup with water and sugar, but I like to add real juice that has been naturally sweetened. Any grapefruit juice sweetened with apple juice and white grape juice works great. Add enough juice to cover the fruit.  Using a canning funnel, evenly divide pulp and juice between jars, filling to a 1/2″ headspace. 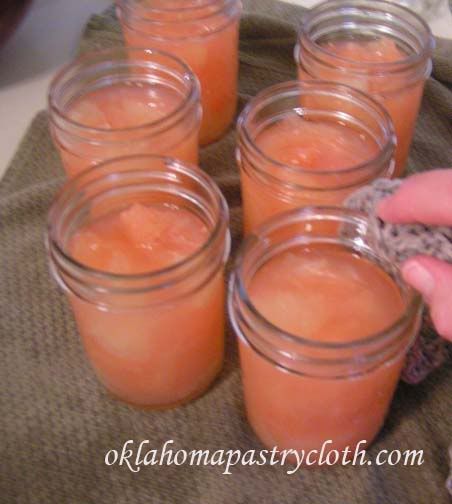 Wipe the rims with a warm, wet washcloth. 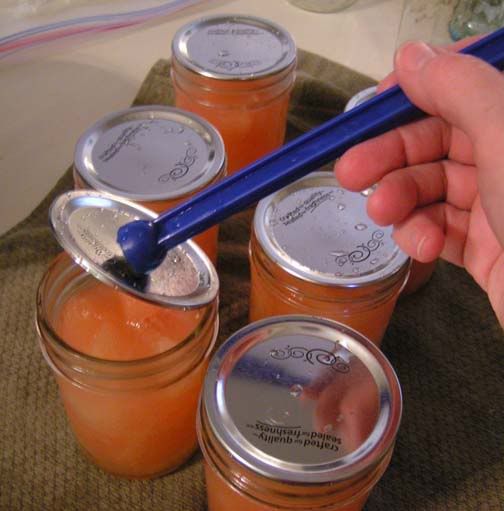 Remove lids from hot water and place onto jars. Add rings and adjust. 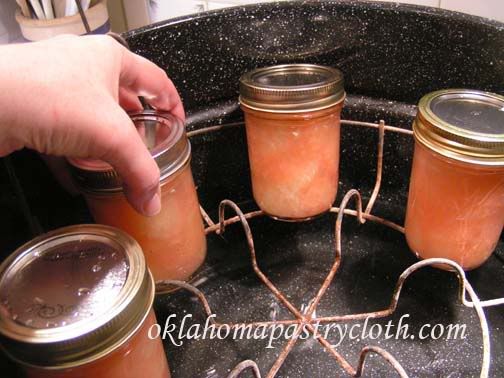 Place jars onto the rack of a waterbath canner that is sitting on a burner and has only slightly warm water in it. Do not place jars into hot water as jars can crack.  Make sure that the jars are completely submerged with about an inch of water above the lids. Turn the burner on ‘high’. Process the jars for 10 minutes at the point that the water starts boiling. 15 minutes for quarts. Store in a cool dark place and refrigerate before serving.  |
|
|
Oklahoma Pastry Cloth™ Company on Facebook
|
|
 |
|
|

 Homestead Revival
 Paratus Familia
 Rural Revolution
Wings of Champions
February 17th, 2012Here in Okie Land, there is only one thing that we Okies would rather do than eat…and that’s watch sports. Sports is the one way that we can bring our large neighbors to the south – Texas – down a notch. There is a reason that the OU Sooners vs the UT Longhorns is called the Red River Rivalry. Sports is the way that we little southwest nobodies can whoop up on some northerners like the Boston Celtics or some west coast smarty-pants like the Lakers. It looks like we have the number one pro basketball team both in the Western Conference and the nation, you know! And even here in Prairie Country where winter lasts all of a month, we have a professional hockey team with its own ice arena. Shoot, on the Oklahoma River in downtown Oklahoma City, we have boat houses where teams from all over the country suit up to compete with rowing teams on those long, skinny boats that look like something out of the Middle Ages powered by chained prisoners!
I have to say that I get pretty engaged in a good game if I have an interest in one of the teams. The Thunder’s games have become a regular show at our home and during the Fall with football weather, OU, OSU and Baylor (my niece attends Baylor) grab my attention. I am known to jump up and down and scream on occasion and Mr. Fix-It seems not to mind. He’ll let go with a shout every so often, but he is such a patient man.
One of my favorite pastimes concerning sports, however, is to write down the really stupid things that sports casters say. It’s like they have to be yammering throughout an entire game and don’t even realize that they sound really ridiculous. Here are some that I have heard in the past and also caught just recently at the Super Bowl and a few basketball games:
• “He’s not a normal human being!! Normal human beings don’t make a living of trying to get killed.” (I’ll second that)
• “He’s gonna fall off and drop back.” (Sounds like a recipe for injury to me!)
• “I wanna know what’s going on in that locker room!” (And then proceeds to tell us exactly what the coach is saying as if the sports announcer is really there!)
• “We can move the football.” (Doesn’t look like it so far, buddy!)
• “We have to move the football.” (That’s the object of the game!)
• “Look!! Look! He passed with his left hand!! He’s amphibious, you know!!” (Somebody hand him a dictionary!!)
• We’re going to get a double crack (That sounds painful)
• “It’s all about getting the ball down the court.” (Well, duh)
• “It’s about making points. If they don’t make those points, they don’t win.” (Another, “well, duh”)
Get out your pencil and pad and keep track of your own “Stupid Sports Comments” and you’ll get double the entertainment watching any particular contest! But as I said, second to sports in Oklahoma is eating, and so I thought I’d show you how I fix hot wings for Mr. Fix-It to munch on while he quietly holds in the normal male urge to jump up and scream as his OU quarterback races down the field for a touchdown. Someday, he’s just gonna let go and be just like me!!
Brine
3 cups water
1 tbsp salt
Coating
1 1/2 cups all-purpose or whole wheat flour
1 tsp paprika
1 tsp thyme
1 tsp black pepper
1/2 tsp salt
1 tsp garlic powder
1/2 tsp onion powder
Milk
2 to 3 dozen chicken wing portions
In a large container, mix salt into water to make a brine. Place the chicken wing portions into the brine and soak in the refrigerator for several hours.
Meanwhile mix flour with spices and stir until thoroughly mixed.
Drain the chicken (but do not dry) and place into flour mixture.
Toss to coat all chicken wing pieces
Fry pieces in oil that is about 1/4″ deep. You can use canola oil, olive oil or coconut oil for healthier oils.
Turn pieces and brown on the other side. Don’t worry if the chicken is not totally cooked when browned.
Place wing pieces on a rack (I am using old cookie racks) over a cookie sheet. Place in a 350º oven and bake for 35 minutes. This is a very important step. It helps to take out a lot of the grease from frying, cooks the chicken all the way through so that it just falls off the bone and seals the crust.
Remove wings from oven and allow to cool 10 minutes. Place into a large bowl.
Pour your favorite hot wing sauce over the wing pieces. Put just enough that when you toss the chicken, it will be covered but not saturated. I am using “Wing Time” brand Buffalo Wing Sauce (medium heat).
Toss the wing sections in the sauce, gently, with a large spoon or spatula
Place the coated wing sections back onto the rack and place back into the 350º oven for 15 more minutes.
Serve the chicken with blue cheese dressing and celery as a game snack. Or serve for dinner with mashed potatoes and the works!
Tags: basketball, commentators, football, hot wings, sports, tasty snack, Wing Time Sauce
Posted in A Day In the Life Of An Okie, Humorous, Meats and Main Dishes | No Comments »