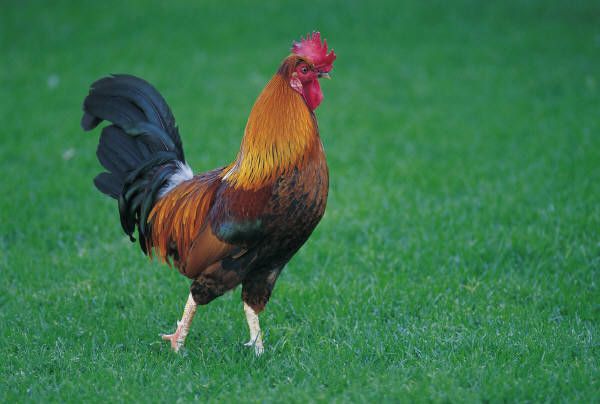
  I’ve mentioned in past posts that I worked in the meat department of a grocery store in my previous life. At night, I helped cut and wrap custom beefs, lambs, hogs and deer. During the day, I was a butcher’s assistant, helping to cut, wrap and display all of the meats that were sold in the grocery. It was a fun job, believe it or not, made especially fun because of the people with whom I worked. It was a family operation and they treated their employees like members of the family. Practical jokes and laughs were a daily routine. One time, the butcher and his cousin had me convinced that I had guzzled Hydrogen Peroxide in my tea (the tea was fizzy), put there by a coworker who didn’t know any better, such that I was certain the stomach ache that ensued was due to gastric poisoning. There is a skull and crossbones on the bottle for heaven’s sake!!! I was handed the phone to call the doctor, who had been let in on the joke, and I was only encouraged further down the fantasy road of certain demise right there in the meat department. Finally, the giggles erupted and a bottle of Dr. Pepper was produced. My face could not have gotten any redder. I returnd the prank by heavily lathering the phone earpiece with vaseline and then calling the meat department from the phone at the front of the store. My boss answered the phone. Oh yeah. 🙂 I had to learn fast and hard in this job and being the competitive person that I am, thanks to the genes inherited from my tennis-playing grandfather, I was bound and determined to master whatever I was given to do. One of my first jobs involved wrapping the cuts of custom beefs in freezer paper and labeling the packages. It is a job that I still practice today every single time I freeze our own meats. There IS a method to wrapping! But that is for a later post. In my day job, the first task I was immediately tossed into learning was the job of cutting up a chicken. My first attempt was a joke, but as time went by, I got faster and faster and could finally cut and package a chicken faster than you could say “Cocka-doodle-doo”. This is a skill that has helped me more than you can imagine! Whether raising your own chickens for meat or purchasing yours at the grocery, knowing how to cut them quickly is a blessing. Today, I buy whole chickens on sale and cut them up, dividing them into packages of separate parts. The other day, I found whole chickens for 65¢ per pound. After cutting them, I packaged breasts together, legs together, thighs together, and packaged cut-up wings for hot wings, while cooking the backs, skin and “innards” for broth. A package of breasts for 65¢ a pound? Find THAT in a store near you! So here is the way that I learned to cut up a chicken. I learned from a pro – Greg, the Butcher! Thanks Greg, for all you taught me!! 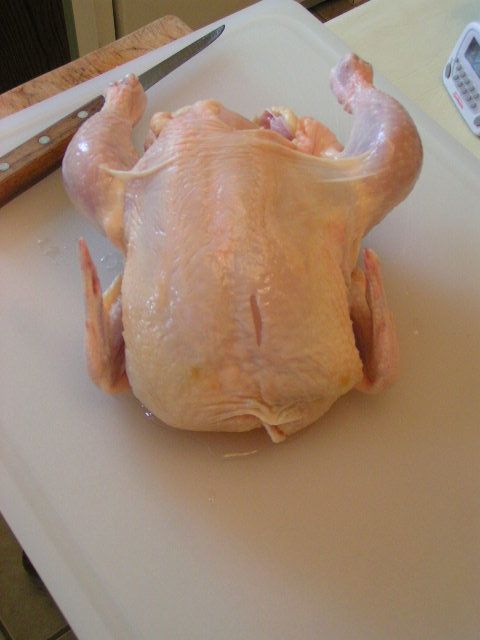 You will need a cutting board that is not wood. Wood soaks up bacteria that is found in chicken and it is very difficult to disinfect afterward. You will also need a good boning knife that is sharp. I use Forschner brand knives which are the brand that we used in the meat department. I like them because the blades are flexible and can bend slightly. Also, if you like, you can do what we used to do in the meat department and use rubber dishwashing gloves. These help you hold the chicken easier to avoid slips, and you are less likely to cut yourself if you do slip. 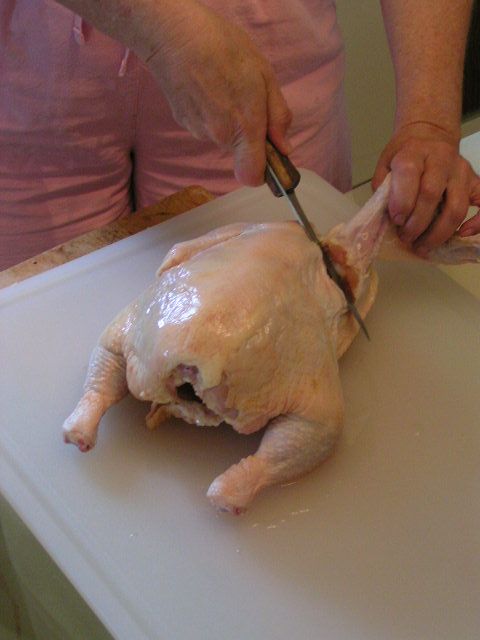 With the breast side down, pull one wing out and away from the body and feel for the main joint. Slice between the two bones of the joint. You will slice down and around the joint bone. 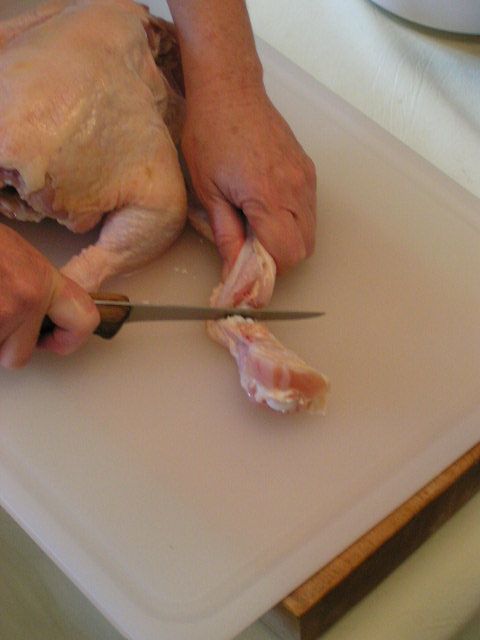 Cut at the joint between the shoulder section of the wing and the “bicep” section of the wing. 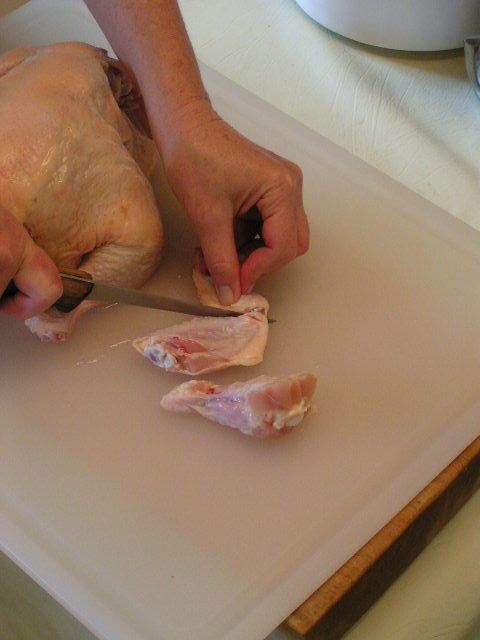 Then cut between the joints that hold the “forearm” of the wing to the “bicep” section. I throw that little front part of the wing in with the back and other excess pieces to stew for broth. The two larger sections are packed together for “hot wings”. 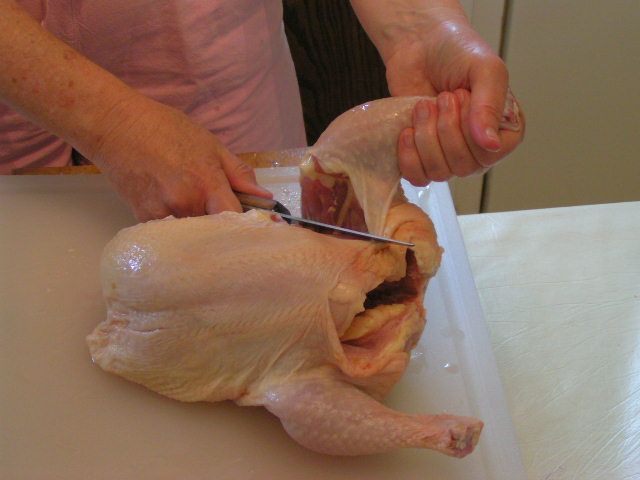 Next, turn the chicken on its side and pull a leg up so that it is pulled away from the body. Slice your knife right through the center of the skin until you hit bone. Stop. 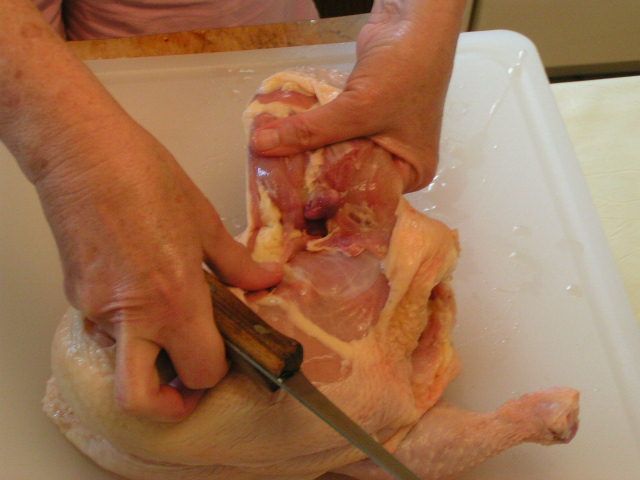 Using both hands, hold the body of the chicken and pop the thigh bone out of joint so that you see the end of it protruding. 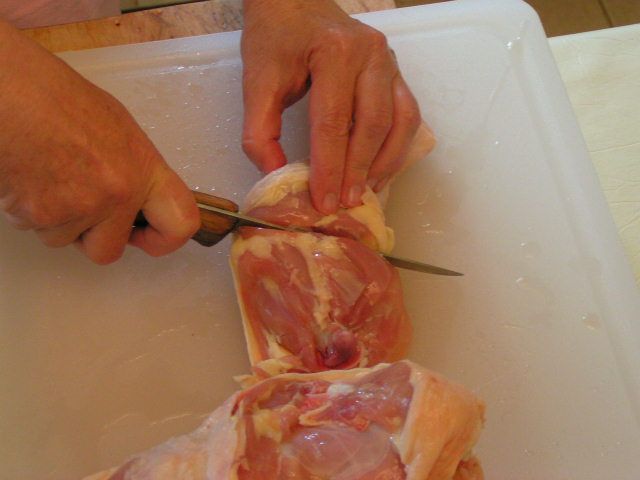 Cut between the round end of the bone and the body to remove leg and thigh section. If you want to separate the leg and the thigh, on the inside of the leg and thigh section, using your first finger, feel for the indention that indicates the joint between the leg and the thigh. Slice between the two bones and separate the leg from the thigh. 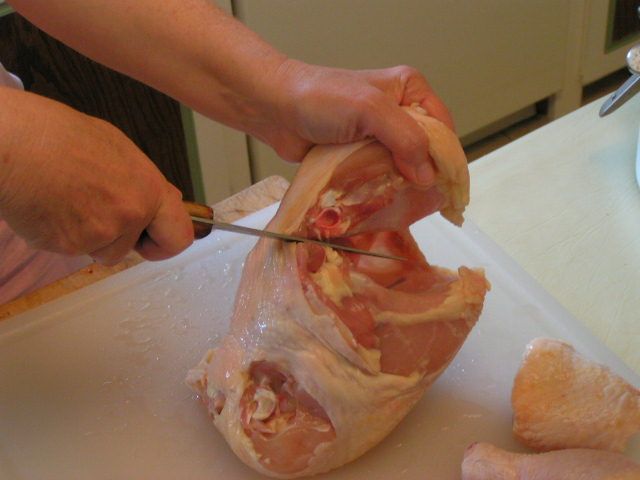 Turn the chicken up on its front end and look for the soft section of skin between the back and the breast section. It is just a flap. Put the knife at a 45º angle to the back and slice in toward the backbone. 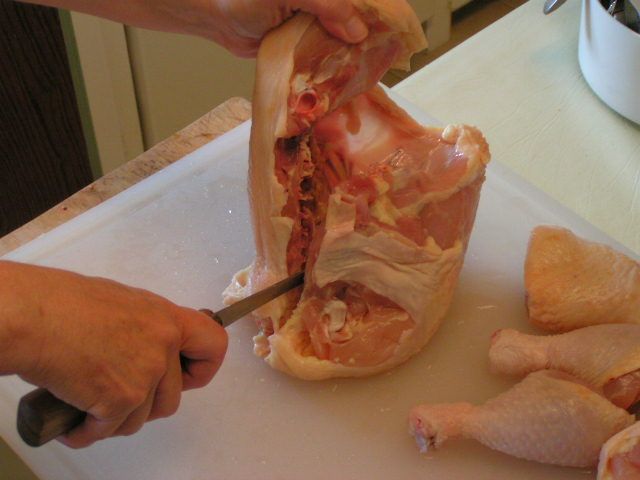 As soon as you hit bone, turn the knife blade down and slide the knife down along and between the backbone and the breast. There will be resistence because you are cutting through soft bone, but just push hard all the way to the end. 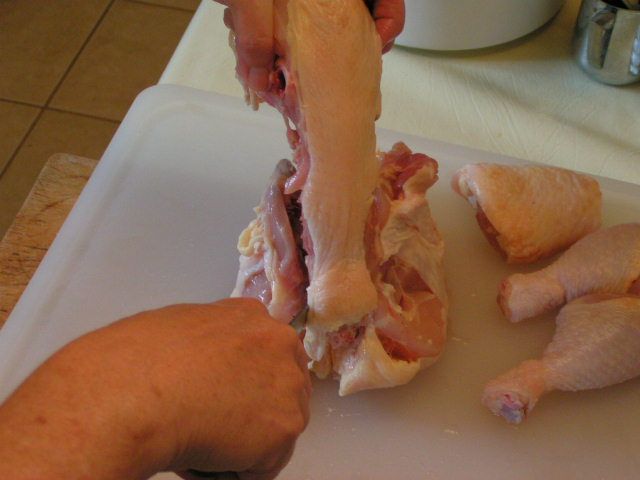 Repeat the same process on the other side of the backbone and lift the backbone out. 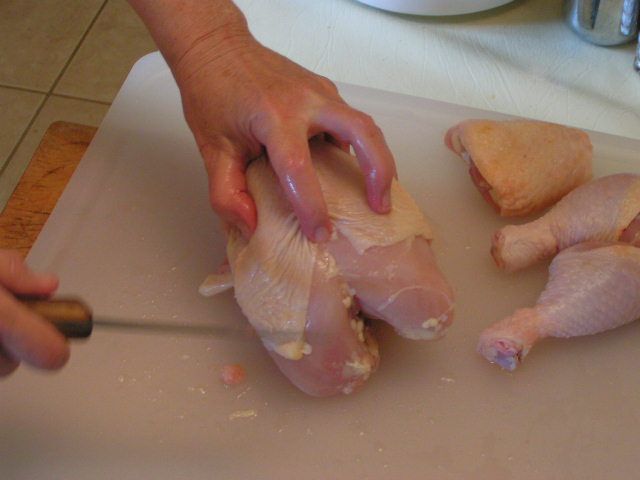 Now you are left with the breast section. If you like the ‘wishbone’ or your kids enjoy breaking it, simply turn the breast section over and slide your first finger down the center until you feel the tip end of the wishbone. 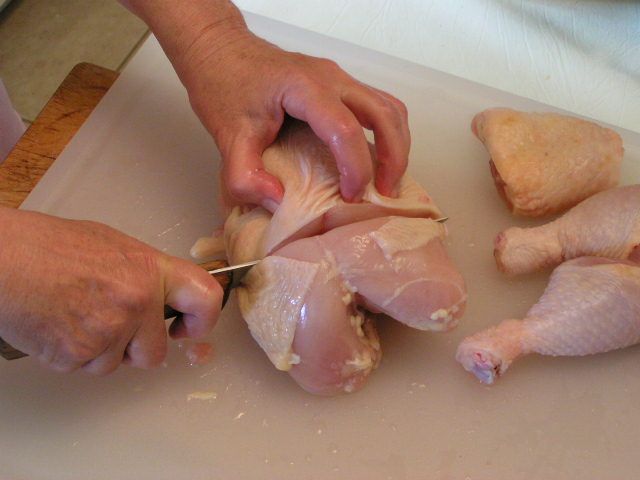 Cut straight down behind the bone tip and between the rest of the breast section and stop when you meet resistance. 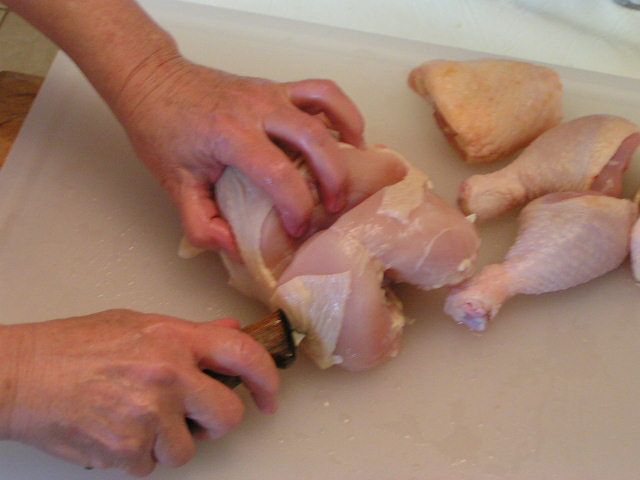 Now turn the knife blade nearly parallel to the cutting board and slice along the front of the breast bone and under the wishbone. 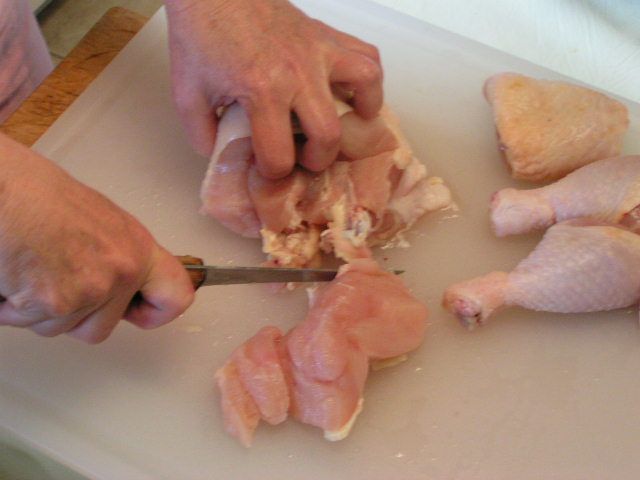 Separate the wishbone from the breast 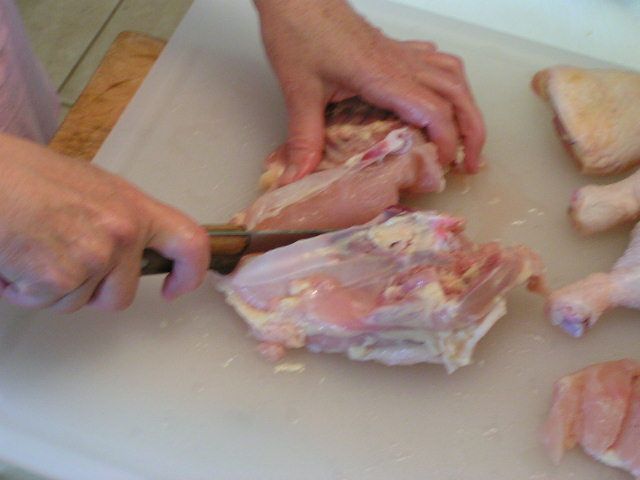 Turn the rest of the breast section on its back and cut right down the middle of the bone. This is soft bone and so with a sharp knife you can cut it. Start by putting the point of the knife down into the bone and press down. It will snap that top of the bone in two and then you can start cutting. 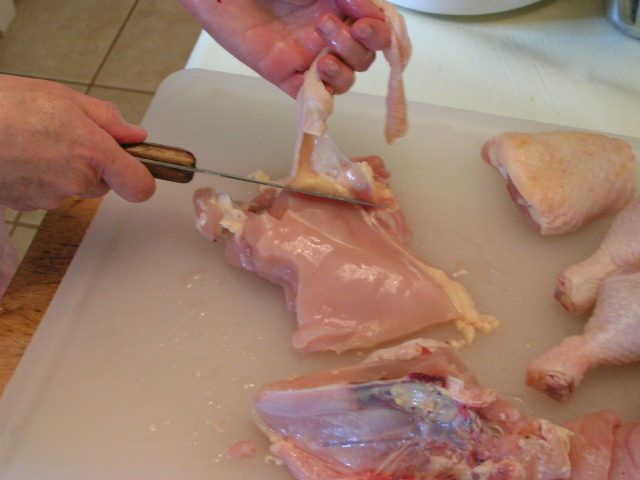 If you are like me and want to cut back on the fat and cholesterol of the skin, you can skin your pieces. This is a simple task, as the chicken skin easily separates from the meat. Just slide the point of the knife under the skin with one hand and with the other, pull the skin up to separate as you cut. And so there you have it – a totally cut-up chicken that you can now cook, can or freeze. I’ll show how I can mine in the next post and how I use it out of the jar. Once you have processed the main pieces, you can boil all of the leftovers into the stock found in this previous post.  |
|
Oklahoma Pastry Cloth™ Company on Facebook
|
Tags: chicken, cutting, forschner, processing, skinning

We recently butchered our home grown chickens. While I was able to cut it up into the pieces I wanted I really wish I had seen your tutorial first. I think it would have made things much easier 🙂
We are hoping to have some chickens of our own too, but the time isn’t right just yet. I’m going to have to get into some research to see exactly what we need in order to do that!
My mom taught me to cut up a chicken when I was just a kid, can’t tell you how many times it saved me money when the boys were young and money was tight. You could get a whole chicken for 29cents a lb. and that was cheap…and since each boy likes a different part of the chicken, it made for less fussing and fighting at mealtimes. She used the same method you did except she fried ALL the chicken since she was partial to the back piece.
Judy, my grandmother always said she was partial to the back piece too. I think that was our grandmothers’ way of making excuses for that being the only piece they’d get!! 🙂
Mary Beth! I love you! After years of “butchering” chickens, I NOW know how to cut out the pulley bone! Growing up, that was “my” piece of chicken – that and maybe a wing if I was really hungry. Mom never really like us in the kitchen, so I learned what I could by listening and observing when I could. I don’t think I ever saw her actually cut up the chicken. I learned how to take off the extremeties by process of elimination and figured out how to take out the breast, but the pulley-bone always alluded me. No more! I can’t wait to get a whole chicken and go to town! You are the best!
Thank you, Holly!! Life just ain’t the same if you can’t fight over the wishbone!! 🙂