 Before I get started here, I want to remind all of you to be sure and comment at the end (below the blog box where it says in little blue letters, “comments” click on that and it takes you to comments and a comment box) in order to enter our giveaway. This time TWO people win one of the two identical packages – Pie tin set and First Out Pie Spatula. So comment early and comment often because every single time you comment, your name goes into the pot!! 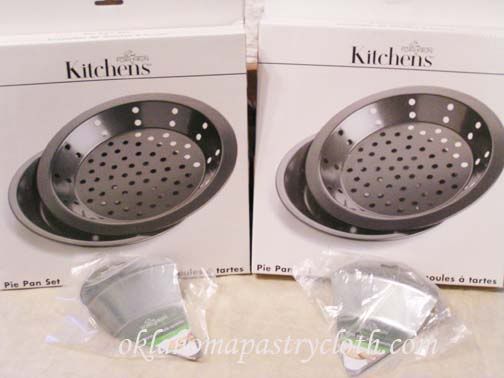 And now, I’ve written in the past about dumb things I’ve done to which I actually admit. I like to think of myself as a normal human being with a modicum of quirks and I am willing to admit – to an extent – what are those quirks. My children read this too and I can’t admit everything as my “perfect mother” status might fall in their estimation. Oh? I ain’t all that perfect in their eyes? Huh. What a surprise. I’m thinking that the time I went to an Atlanta church for my girlfriend’s wedding, was escorted down the aisle to be seated on the bride’s side, and was handed a ‘program’ only to discover that the couple being married WEREN’T my girlfriend and her fiance, probably tops the stupid things I’ve done. Skulking back down the isle and out the back door was humiliating enough, but then finding out that the wedding had been in Murfreesboro, TN just cemented my stupidity. Well, this weekend, I proved to Mr. Fix-It that it is possible that I’m a few gummy worms short of a bag. He was very kind about it, but I really think he was looking for those lost gummy worms. He was really hungry after my flirtation with brain freeze. You see, we had been invited to a wonderful SURPRISE party for our dear friend, Jeff, who was turning that ripe, old age of the big 5-0. The invitation was presented as a cute poem with the date and the location – the nearby church. As it so happened, my birthday was this past week as well – and I turned much older than the big 5-0 – and so, for some reason, the week just got kind of discombobulated. (like that word? – fits the week) Since I had promised to provide a snack of substance for Jeff’s party, I made plans for making a large batch of oriental sweet and sour meatballs. No party is a party without meatballs, don’t you know?! On Saturday, I spent the day putting together several batches of my homemade sweet and sour sauce, cooked meatballs, added sauce and pineapple chunks and piled those into a crockpot on low to keep them warm. I pushed Mr. Fix-It to leave the love of his life, Ellie (our mini long-haired dachshund), to get out of his jeans and into newer jeans so that we could at least appear as decent as that couple in the painting, American Gothic. I grabbed the meatballs and we headed to the church. Seeing a couple in the front entry of the church, I carried my meatballs up to the lady and inquired about which room was sponsoring Jeff’s party. She looked at me with kind of a half smile and choked back a laugh as she informed me, “Jeff’s party? That was last night, honey.” Well, great. And so, the meatballs went to Jeff and his family that night, as I crawled to their door in total humiliation. No birthday present is complete without meatballs. In order to repair my reputation, I have decided to prove that I CAN do something right and so I think I’ll do these next three posts with some international recipes that will wow your family and guests and that are not your usual fare. The first two are a family staple for us. The last one is a newer recipe for me. Today, we will start with homemade tamales – one of Mr. Fix-It’s favorites. The nice thing about tamales is that if you are willing to take a Saturday afternoon to cook, you will wind up with enough tamales for quite a few meals. The extras can be frozen or canned. So get your pork roast ready and follow the directions below: 2 lbs boneless pork roast, or boneless chicken breasts or boneless beef roast 1 tsp ground cumin 1 tablespoon chili powder salt to taste 1/2 tsp garlic powder 1/2 onion finely chopped water Masa Harina Dough 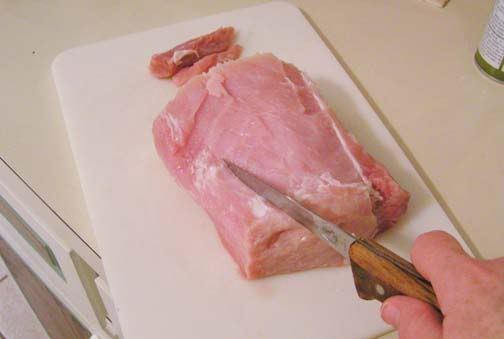 Cut roast into cubes and place into a large pan, just cover with water and bring to a boil on medium-high heat. 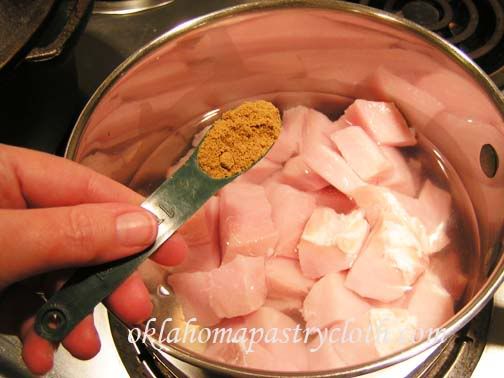 While heating, add cumin 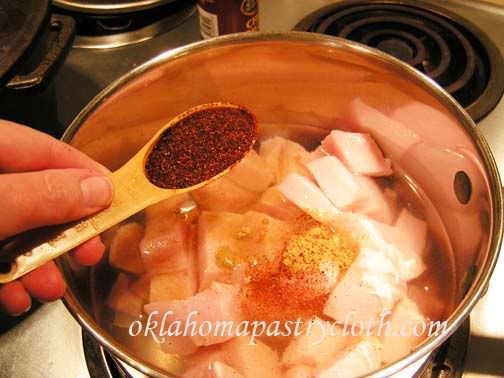 Add chili powder 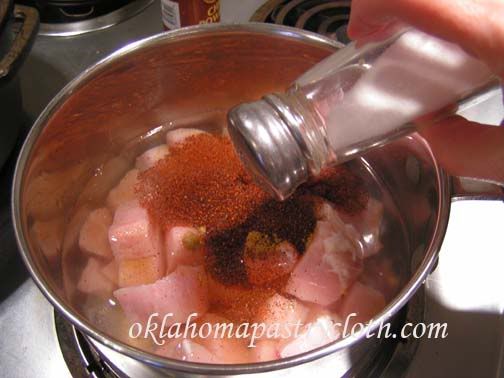 Add salt according to your taste 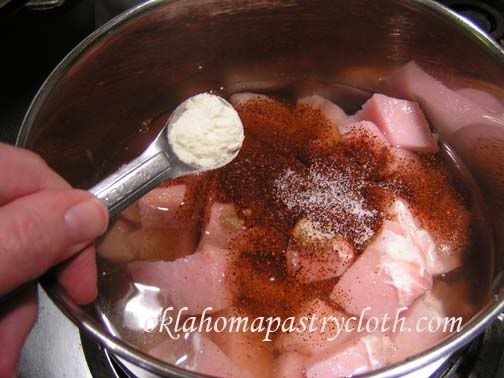 And add garlic. 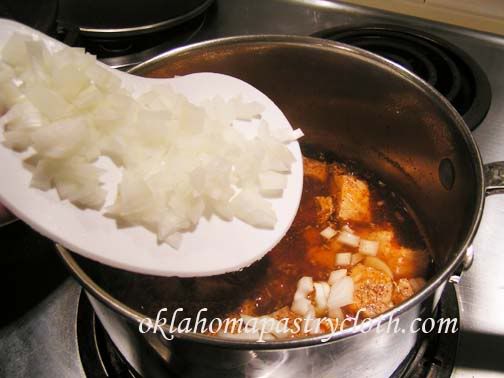 Add onions and stir. Boil for 30 minutes. 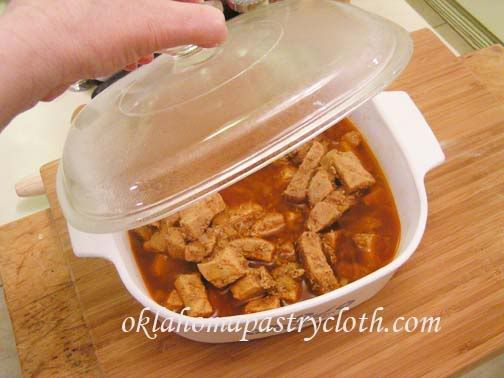 Place the meat into a covered casserole dish or dutch oven and place into a 350º oven to bake for about an hour to an hour and a half or until meat is very tender and comes apart easily. 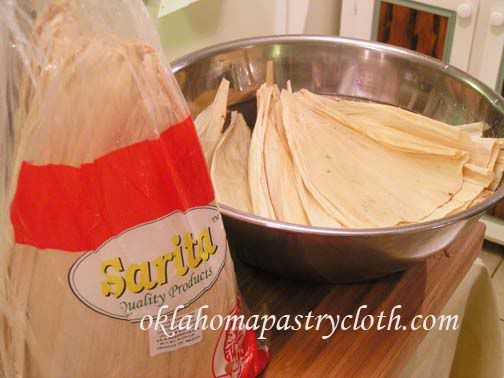 While the meat is cooking, soak corn husks in very warm water. You can find these at any grocery store in the international food section or in the produce section. Some of our stores even have them hanging on endcaps. 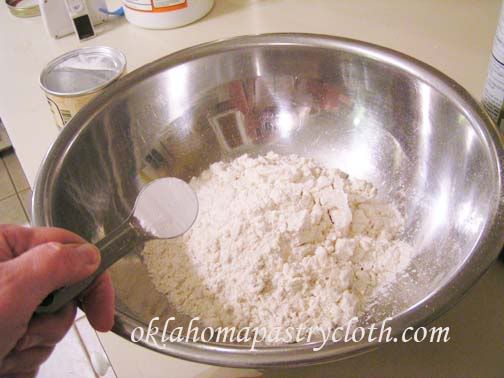 In a large bowl, mix masa flour with baking powder and salt. Set aside 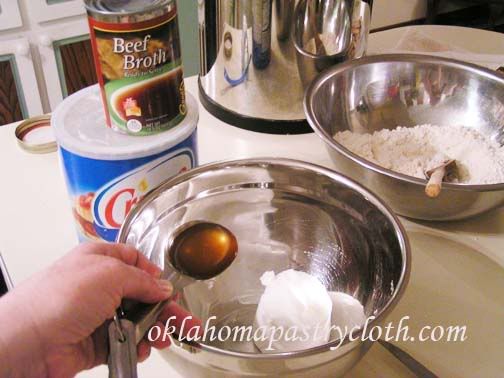 In another bowl, mix shortening with 1 tbsp of the beef broth. 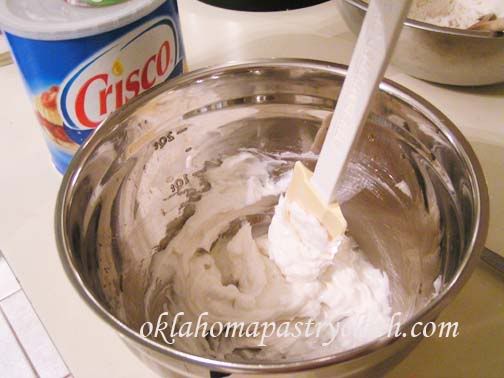 Beat broth and shortening until you have a fluffy mixture 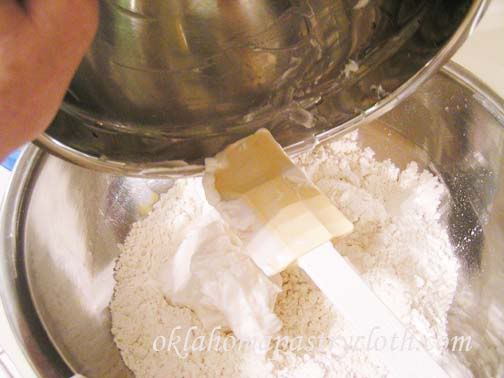 Add the shortening mix to the masa mix 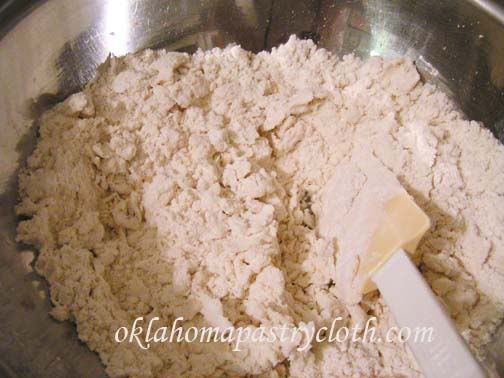 Cut in shortening mix. Add more beef broth, stirring, to form a spongy dough. 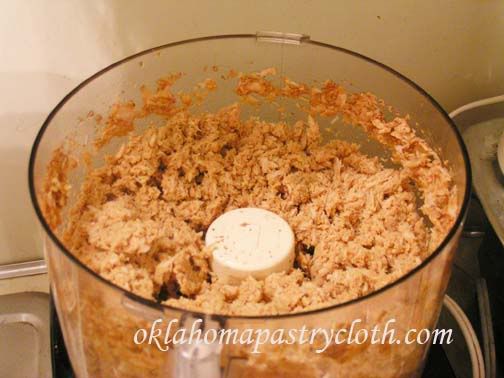 Either shred the pork with a fork or put it into a food processor for a finer shred. (Mr. Fix-It like’s it “pre-chewed” shredded. 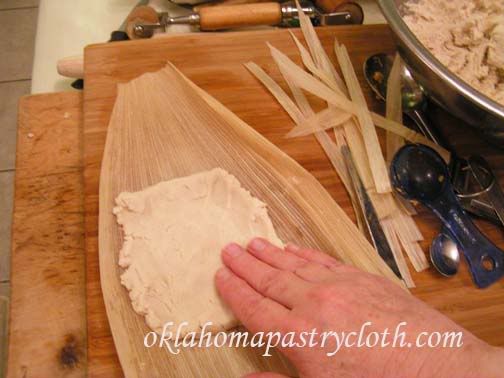 Press dough onto center left side of a corn husk, a little under 1/4″ thick. This is the way I like to roll them because it makes allowances for short or misshappen husks. However, if you want to make your tamales in the traditional rectangle, move the square of dough down to one end and to the left side. 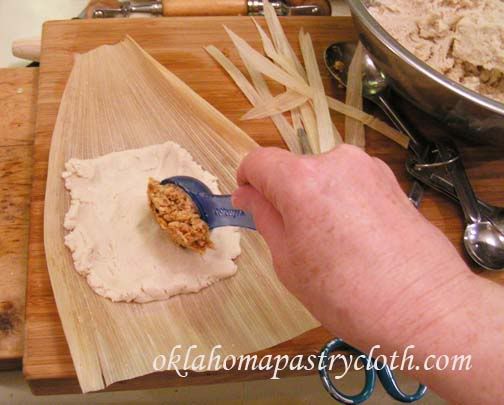 Place at least a tablespoon of meat onto the center of the dough. 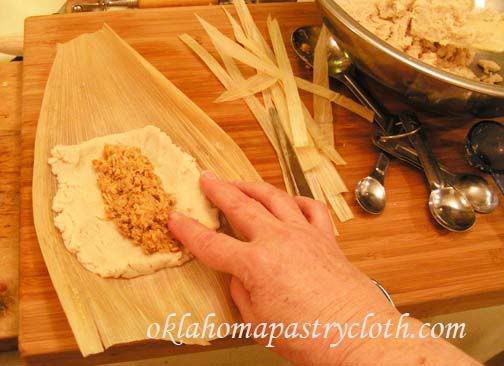 Spread the meat out into a long rectangle down the center of the dough 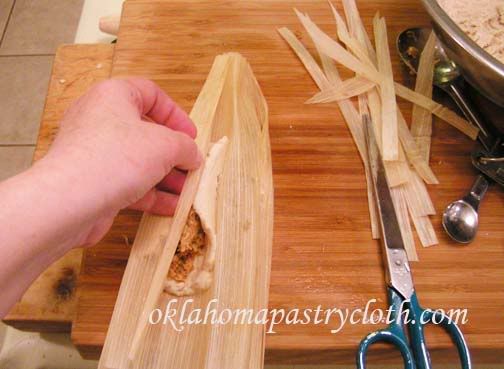 Roll tamales by moving the left side toward the right and rolling until right empty husk is covering the seam of the right side. If doing the traditional flatter tamale, you will still roll the same way. 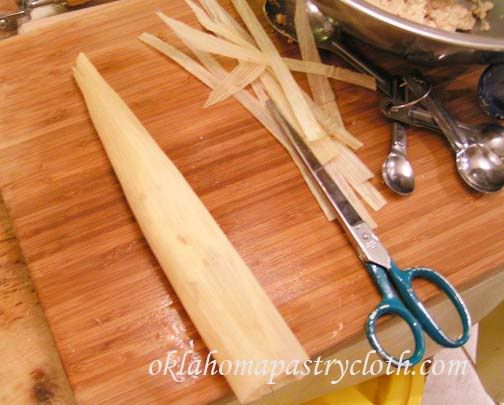 Rolled tamale 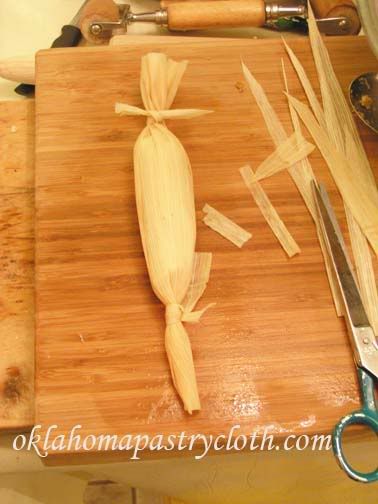 I tie the two ends with strips of corn husk, but if you are doing the flatter ones, you will fold the empty half of your corn husk over the full half of the corn husk roll and tie around the middle with a longer strip of cornhusk. 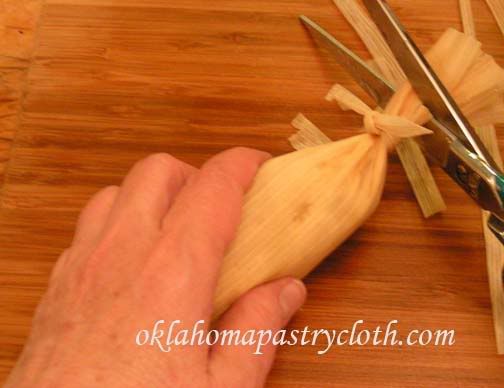 Clip the ends of the tamale to shorten.  Steam tamales for 45 minutes to an hour (depending how many you are serving). Freeze unsteamed extras in a freezer bag. I will show how to can them in another post.  I only serve 5 tamales for our meals – two for me and three for Mr. Fix-It. We love ours with my canned, homemade chili, heated and served over the tamales and topped with lots of cheese – and sour cream and guacamole if we are feeling really daring!  |
|
|
Oklahoma Pastry Cloth™ Company on Facebook
|
|
 |
|
|
Archive for January, 2012
Homemade Tamales
Monday, January 30th, 2012
New Giveaway and Canning Too!
Thursday, January 26th, 2012
 Valentine’s Day is coming up and I’m just thinking it would be the good thing to do to have a giveaway with not just ONE winner, but with TWO winners! And both winners would get the same thing…so since this is a blog that centers an awfully lot on cooking (with a little humor and education thrown in) the most appropriate prize would have to do with cooking! So, on Valentine’s Day, we will be drawing the name of two winners who will receive a very special pie tin set that includes the tin and then, to prevent shrinkage, a second perforated tin that fits on top of a single crust that is being baked for cream pies. Plus, I am throwing in a “first out pie spatula” that is baked under the pie crust. When the pie is cooled, you slice along the edge of the spatula and, voila!, you lift out that first piece without having to dig. Cool, huh?  So from now until February 13, leave as many comments at the blog as you wish because each time you comment, your name goes into the pot. Just scroll down to the bottom of the post and just below the text box you’ll see in blue “comments” and a number showing how many comments there are. Click on that and it will take you to comments and a comment box. Browse the blog, read and comment and keep your fingers crossed! 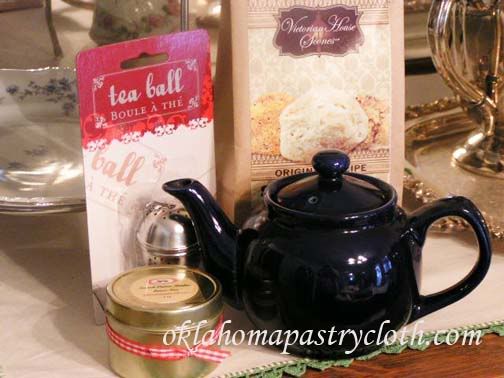 And while I am mentioning Valentine’s Day, I want to encourage you to take a look at the Tea or Tea And Treat of the Month Clubs as perfect and unusual gifts for someone you love. The first month, your loved one receives a ceramic tea pot, a tea infuser and tin of tea and treat and each following month, a new tea flavor and treat arrives. It’s that gift that keeps on giving! In the meantime, speaking of citrus fruits from the last post, I wanted to show you another wonderful citrus product that you can can – Lemond Curd. Wonderful on scones, in tiny tarts and other sweet treats, Lemond Curd makes a beautiful gift to include with dessert mixes. My recipe and directions for Lemon Curd can be found here. Just make up a couple of batches and jump in below: 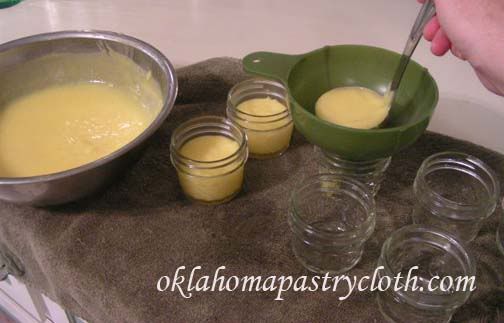 Once lemon curd is made, while still warm, fill sterilized jars to 1/2″ headspace. I use the 1/2 pint and 1/4 pint jars that make wonderful and cute gifts. But you can also use pints. 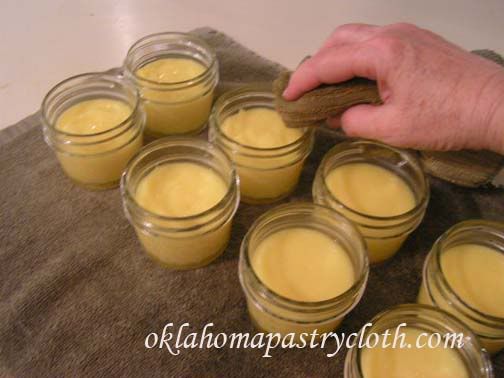 Wipe the rims of the jars with a warm, wet cloth to remove any drips and oils from your hands. 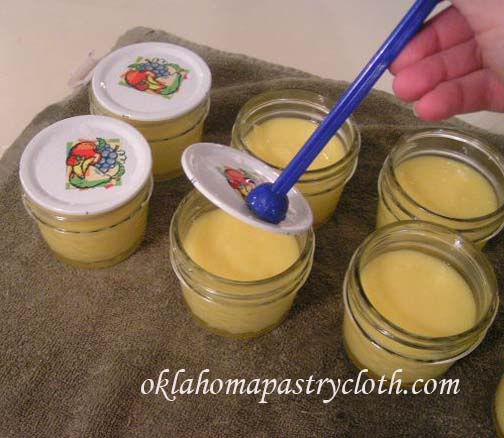 Having warmed your lids in nearly boiling water place them onto the jars. Add rings and adjust. These jars are the 1/4 pint jars great for 4 servings. 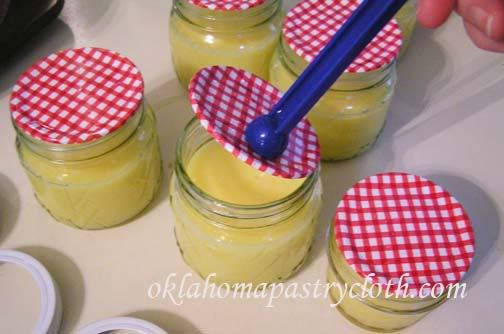 Here, lids are being added to the 1/2 pint size which offer approximately 8 servings each. 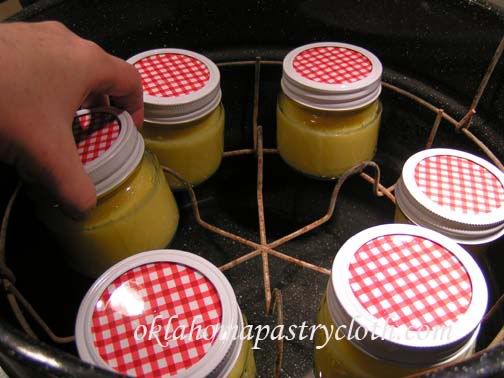 Place jars into a waterbath canner and lower into water that is barely warm to cover jars by approximately one inch of water. Turn eye on high and as soon as water starts to boil, time for 10 minutes of processing. Process for 15 minutes if using pints. 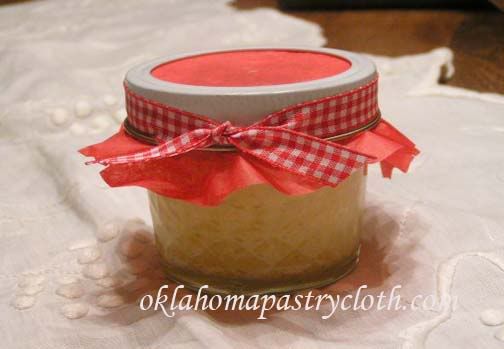 For gifts, decorate the jars with cloth or tissue paper, a label with instructions and ribbon. Add a bag of scones mix and place in a gift bag for a really cute present. Or, jars can be stored in a cool, dark pantry, for your own use. Be sure to refrigerate before opening to serve cold. After opening, the curd may need to be stirred to make it creamy before serving. It’s yummy!! And don’t forget to leave comments to enter the Valentine’s Day Giveaway!!  |
|
|
Oklahoma Pastry Cloth™ Company on Facebook
|
|
 |
|
|
Canning Citrus Fruits
Monday, January 23rd, 2012
 Boy, today has been quite appropriate for thinking about canning fruits. We are so dry in Oklahoma that I’m having to put a humidifier near my piano to keep the soundboard from cracking!! And today, nearly 50 mph winds stirred up loose dirt from drought stricken fields, sending it airborn, dimming the sun and leaving trees and a horizon with a snow flurry like appearance. It’s pretty certain that a boatload of Okies are thinking back to the days when fruits, vegetables and meats, in glass canning jars processessed when items were in season or available at the stores, were their only defense against starvation during the Dust Bowl days. A very interesting website about the kitchens of that time and of many other eras is The Historic Cooking School where Rena has kindly linked to my posts on vintage cooking. In talking with my dad about those times, he remembers his family buying grapefruit in canning jars and eating this citrus delight because it was not readily available fresh. My family has always been overly fond of oranges, tangerines and grapefruits and when I was growing up we had relatives along the Indian River in Florida which guaranteed us succulent fruit. This year, for Christmas, my parents surprised me with the most wonderful variety of white and ruby red grapefruits, navel oranges and tangerines. There were so many grapefruits that I decided that I had better do something with some of them before they spoiled. In doing research about the history of the canning process, I found this really neat site called Tasteful Inventions where I learned that nearly 250 years ago a French man named Nicolas Appert, encouraged by a 12,000 franc prize issued by the government, introduced his 14-year-in-the-making canning discovery as a way to preserve food for Napolean’s army because, “An army marches on it’s stomach.” Napolean awarded Monsieur Appert the money in 1810. So folks, canning has been around for a long time!!! C’est bon!! I have to say that when citrus fruits are canned, the taste is changed somewhat. Adding sugar or sweetened juices helps to reduce these changes and serving ice cold makes a difference too. Also, it is very important to remove all of the white pulp from any fruit prior to canning because the pulp adds a bitterness that you don’t want. When doing grapefruit, I do not peel and section, but rather slice and use a grapefruit knife to remove sections that easily leaves any pulp behind. Oranges and tangerines are much easier than grapefruits to deal with when peeled. Note: I used half pint jars for single servings, but pints and quarts are fine too. Directions: Place your jars into water to boil for sterilization or run through the dishwasher on sanitize cycle. Place lids into a saucepan and cover with water. Bring to almost a boil and then keep heated. 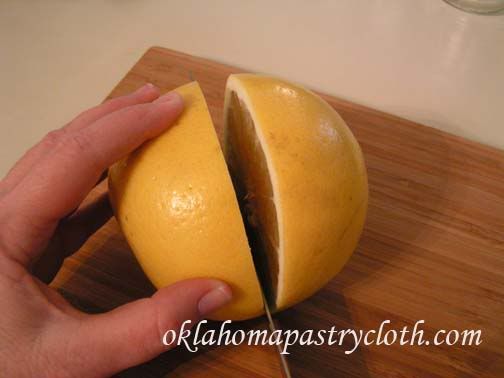 Slice the grapefruits. I used a total of 6 very large grapefruits, both white and ruby red, for this particular project and got 6 half pints. 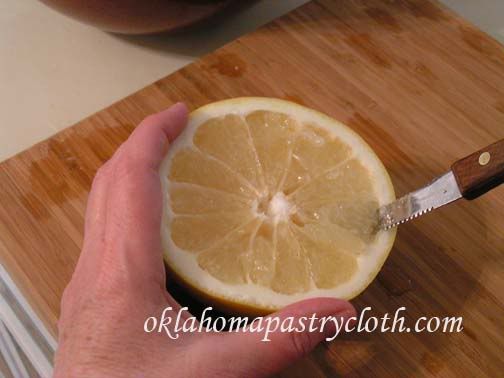 Using a grapefruit knife, which is serrated and curved, cut around each section moving from section to section. 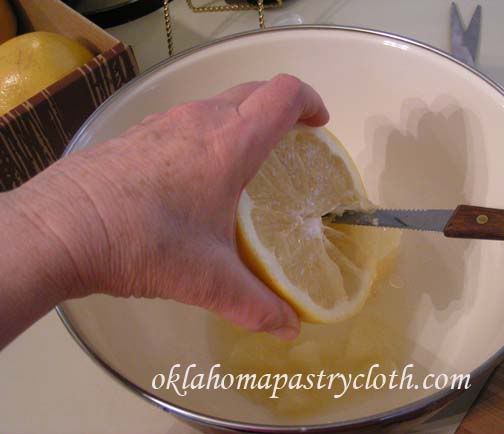 Scoop the grapefruit sections into a large bowl. 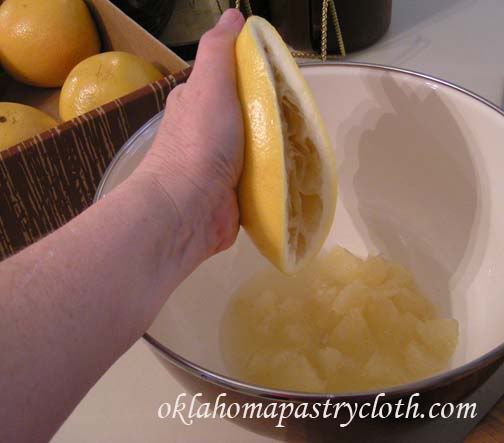 Squeeze grapefruit juice from each half into the bowl 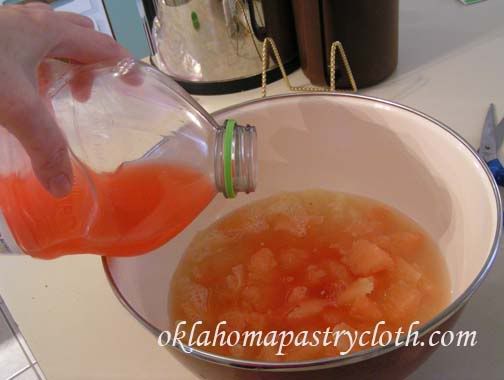 You can make a light syrup with water and sugar, but I like to add real juice that has been naturally sweetened. Any grapefruit juice sweetened with apple juice and white grape juice works great. Add enough juice to cover the fruit.  Using a canning funnel, evenly divide pulp and juice between jars, filling to a 1/2″ headspace. 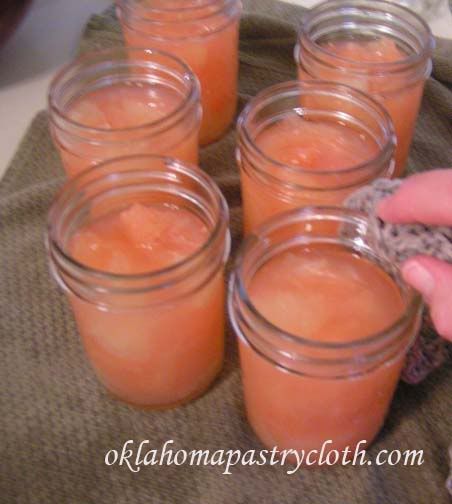 Wipe the rims with a warm, wet washcloth. 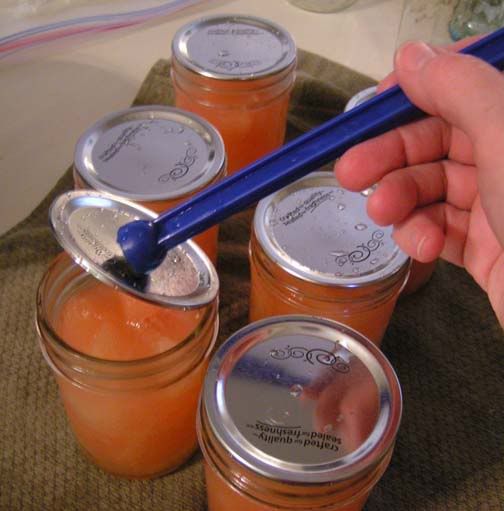 Remove lids from hot water and place onto jars. Add rings and adjust. 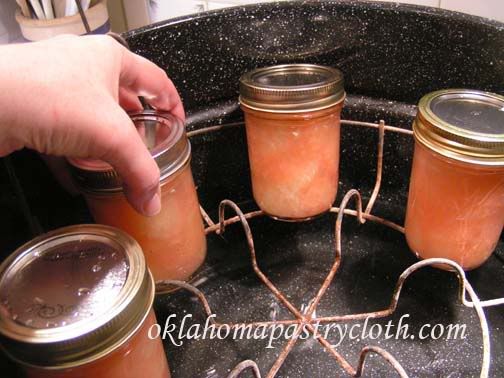 Place jars onto the rack of a waterbath canner that is sitting on a burner and has only slightly warm water in it. Do not place jars into hot water as jars can crack. 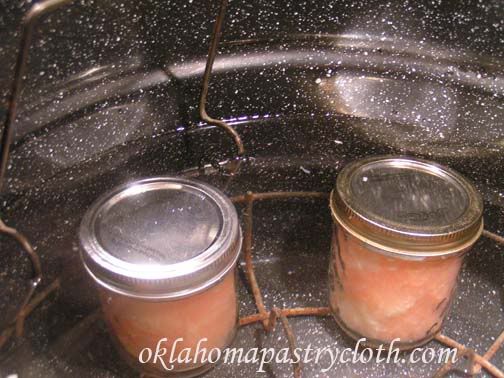 Make sure that the jars are completely submerged with about an inch of water above the lids. Turn the burner on ‘high’. Process the jars for 10 minutes at the point that the water starts boiling. 15 minutes for quarts. Store in a cool dark place and refrigerate before serving.  |
|
|
Oklahoma Pastry Cloth™ Company on Facebook
|
|
 |
|
|
Vintage Cooking Pt IV
Thursday, January 19th, 2012
 That is the title of the last section of recipes, regarding meats, in Austin’s Domestic Science Books 1 & 2, my grandmother’s 1914 home economics book. I thought that, as the last installment in this line of posts, it would be fun to share some of this information from the past and give you a little bit of history. 2 cups flour 4 tsp baking powder 1/2 tsp salt 2 – 3 tbsp shortening 3/4 cup milk a quantity of cold roast beef or beefsteak (I used a quart of home canned rump roast) 1/2 onion 1 cup sliced potatoes water to cover potatoes beef stock 2 tsp corn starch salt and pepper to taste If using fresh beef, cut into cubes and cover with beef stock to boil until tender. Slice potatoes and cover with water in a second pot. Parboil for 8 minutes. Drain potatoes 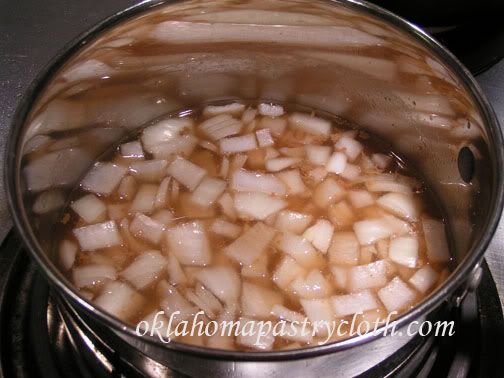 When beef is cooked, strain from stock and add onions to boil. 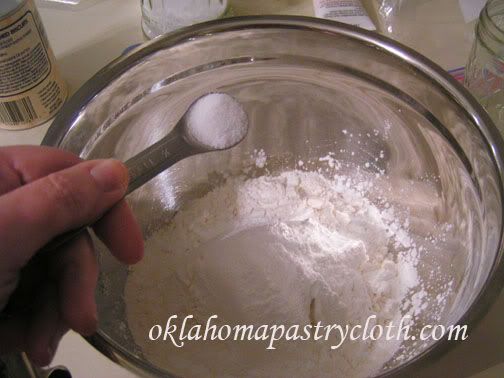 While onions are boiling, put flour, salt and baking powder into a bowl. 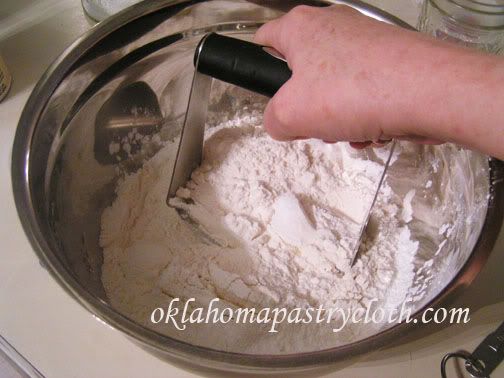 Cut in shortening until it looks like small granules 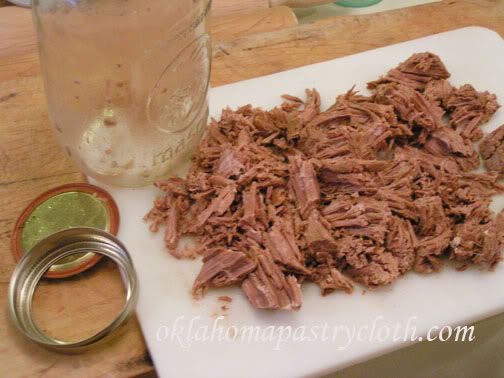 I used my canned rump roast for the beef. Beef should be tender and shredable. 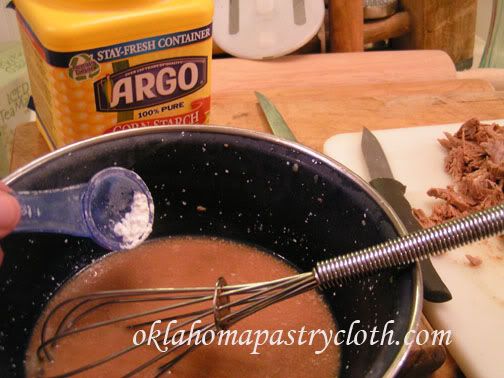 Take out a little beef stock to cool. Add some water to cool faster. Add cornstarch and blend. You can also add a tbsp of brown gravy mix if you would like for a richer flavor. 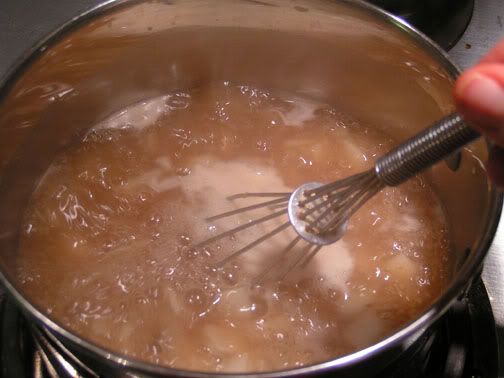 While stirring the simmering broth, add corn starch and broth mixture and stir to thicken slightly. 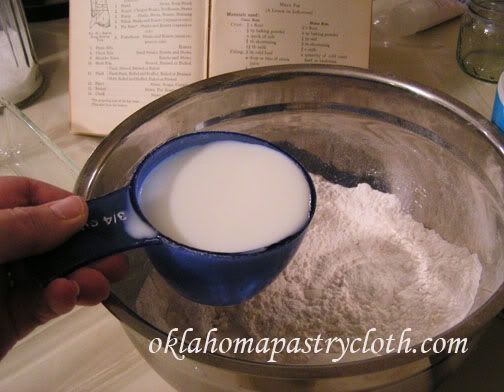 Add milk to the flour mixture and stir to form a dough ball. Add more milk if the dough is too dry. 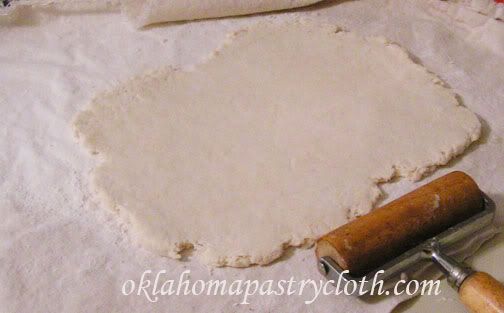 Roll the dough out into a rectangle and cut for sides leaving enough to use as a top crust. 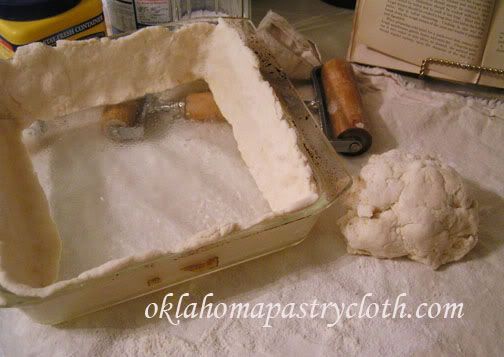 Place dough around the edges of a greased baking dish. Do not put any on the bottom 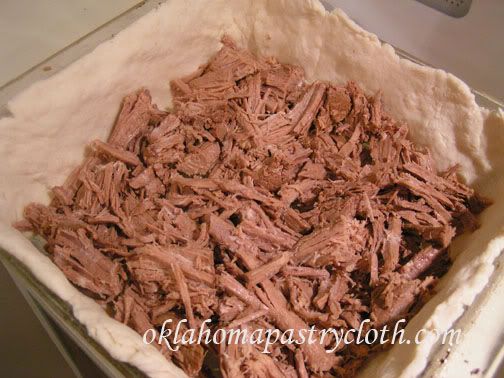 Fill the baking dish with meat 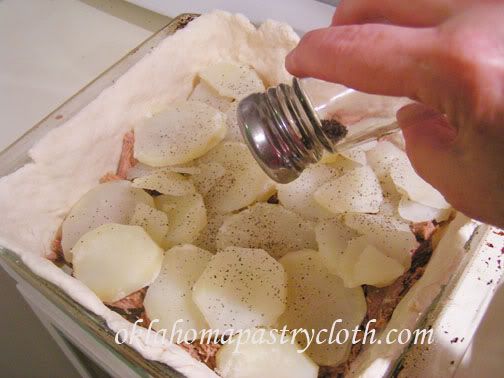 Add potatoes and salt and pepper 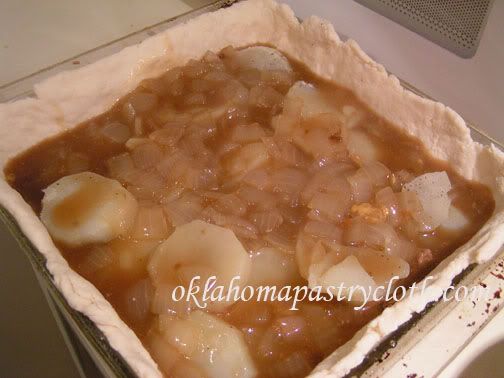 Pour the thickened broth with onions over the meat and potatoes 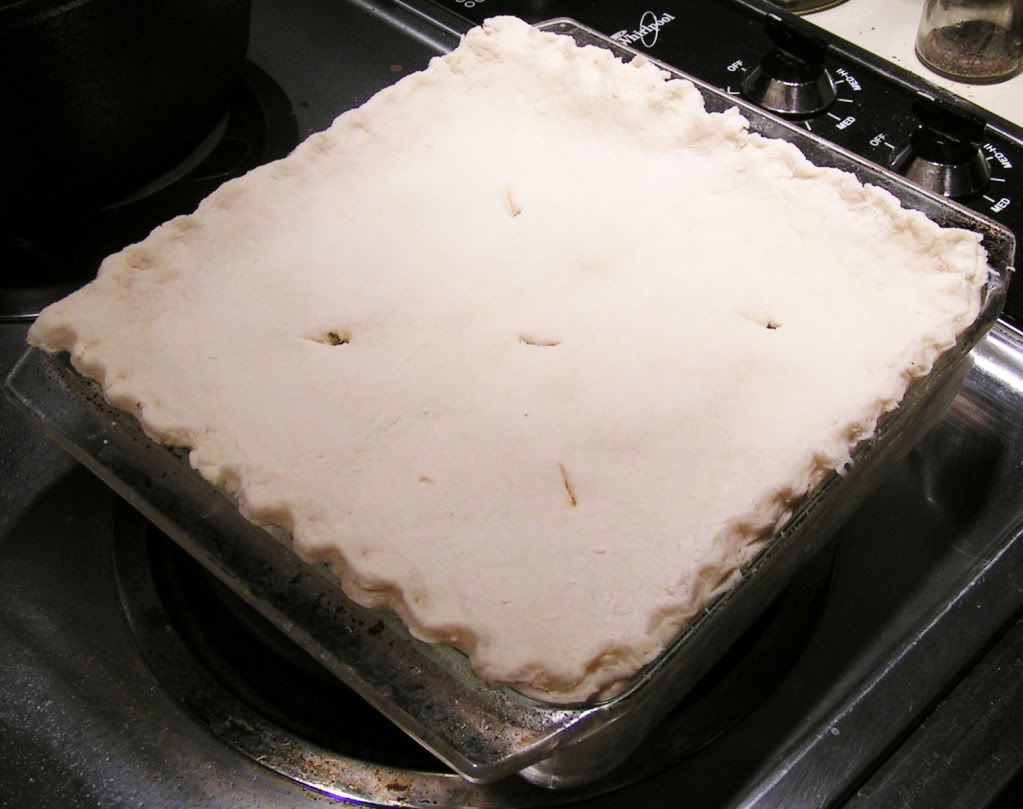 Place dough on top and crimp for appearance if you like. Make a few slits through the top of the crust. Bake at 425º for 30 – 35 minutes or until browned 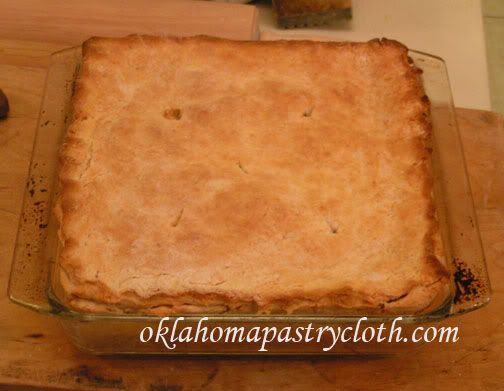 The crust browns nicely for an appetizing pie 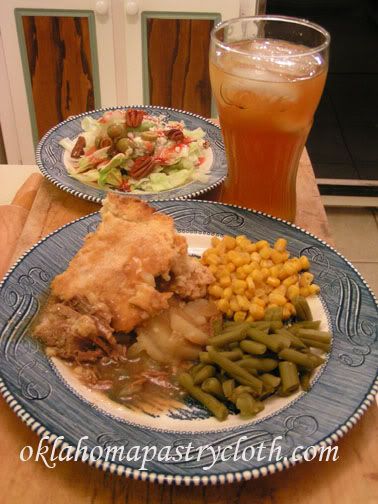 Serve with salad and veggies and you’re right back into the early 1900’s!!  |
|
|
Oklahoma Pastry Cloth™ Company on Facebook
|
|
 |
|
|
Vintage Cooking Pt. III
Monday, January 16th, 2012
 I have been doing a series of posts from my grandmother’s high school, 1914 edition of “Domestic Science” and visualizing working in a vintage kitchen with wood cook stove and Seller’s or Boone kitchen cabinet complete with sifter and flour drawers. Included in each lesson have been etiquette rules that follow each recipe in the book. Many of these rules have been passed on to the children of today, (I hope!!) but there is one issue of etiquette that I know they did not consider back then. That rule concerns the public use of cell phones.  Friday, I was sitting in the waiting room of a certain preventative testing clinic for women, minding my own business and not really caring about anybody else’s, when the woman sitting across from me accepted a call on a cell phone that was playing some really annoying jingle. She was on oxygen and so her conversation was a series of loud words stilted by the short gasps of her oxygen machine. In a voice equal to what we used to call an “outdoor voice” she carried on a conversation with the person on the other end and gave all of us in the room the inside scoop of what she was planning for the day. Meanwhile, the cellphone of the women to my left and right simultaneously whined different songs and both women loudly answered, “Hello?” Then the woman to my left said, “You’re going on a cruise?! When are you leaving? Alrighty! They kind of keep everything in and she’s the one asking about the birds and she’s just going to snap. I’m at the place to get a mammogram.” Oh my. That word and the picture it paints. Is nothing secret anymore? All three women continued to converse in mucho decibels when the Latino man across the room, waiting on his wife, made a call and in Spanish yelled over the other voices to explain something. I caught “Mañana” and “ocho” but that was the extent of my eavesdropping since the only other language I know is French. The other bored husband in the room accepted a call, about that time, and made an order for decking and something else in frustrated tones. But it was when the lady to my right took it up a notch and put her phone comrade on speaker phone that I almost lost it in gails of laughter at how ridiculous this situation was. I couldn’t hear myself think and it amazed me that these people could concentrate on what they were saying with all of the other conversations going on. I stifled a giggle as this woman said, “Oh, you know. She told us that her father kicked her out, but I found out that was a lie. I think she must be drinking.” (we REALLY needed to know that!) And the lady on the other end squawked out a reply. But I guess the fact that I was taking notes by that time, thinking, “Blog material!!”, that I got noticed because the speaker phone got cut off quickly. My name was called at that point and I sauntered into the tiny dressing room, still snickering at the sitcom into which I had just been dumped. I sat to wait my turn because I was in that place to get a you-know-what (I still have Victorian limits). A muffled voice came through from the dressing room next door, “Oh I know!! You should have seen what she made. She didn’t do it the way she was supposed to, but it turned out cute. Looks like snowflakes. I’ll show it to you tomorrow.” I had to smile at that one. Obviously a young mother or a grandmother proud of her little daughter or granddaughter. And so, before I move on to the next vintage recipe, which is to die for, by the way, I will insert a modern code of manners into the mix by reminding all that while we like to stay connected, there is a limit to that connection when it comes to public places. Those around us really don’t care about our personal lives – unless they are robbers who are taking down your plans. There is a reason for texting!! Mr. Fix-It insisted that I try this recipe next. Oh my gosh. Incredible doesn’t even come close. As I looked at the amount of chocolate used, I thought that it couldn’t be enough. I realize that back then, chocolate was really, really special and expensive and so I upped the amount a tad. Also, while I am including the original hard sauce recipe, I decided to use MY hard sauce recipe that’s a bit – harder – shall we say? Yes, it has rum in it, but it’s cooked and it made an already wonderful dessert, something to brag about. Here you go: 2 cups dried bread crumbs or 4 slices 3/4″ thick bread, dried and sliced 4 tblsp butter (1/2 stick) 3 cups scalded milk 2/3 cup sugar 1/4 cup melted chocolate (I used 1/3 cup chocolate chips) 2 eggs 1/2 tsp salt 1 tsp vanilla dash of cinnamon Hard Sauce 1/3 cup butter 1 c powdered sugar 2/3 tsp vanilla Sauce Directions: 1. Melt and cream the butter thoroughly. 2. Very gradually add the sugar, creaming constantly. Add the flavoring and set aside to cool. My Hard Sauce 1 stick butter 1 cup sugar 1 egg beaten 1/8 tsp vanilla 1/2 to 1 jigger of rum according to taste Directions and photos to follow.. 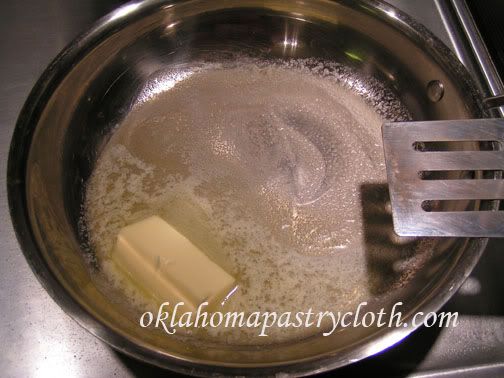 Melt butter in a skillet. 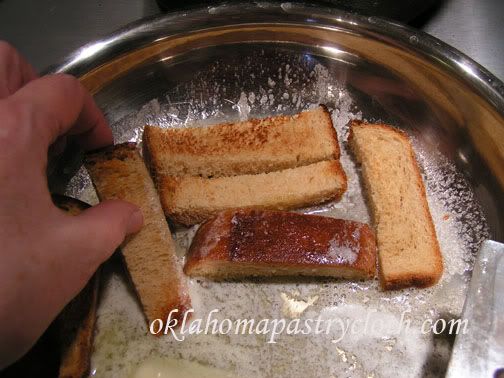 Dredge bread crumbs or sides of bread stips in the butter until all butter is gone. Note: I am using homemade whole wheat bread here. I toasted 4 thick pieces, sliced and then put in the oven on 200º for about 30 minutes to dry it out. This really made a good pudding because the bread has such body. And you can convince yourself that this is healthy because there is fiber?! 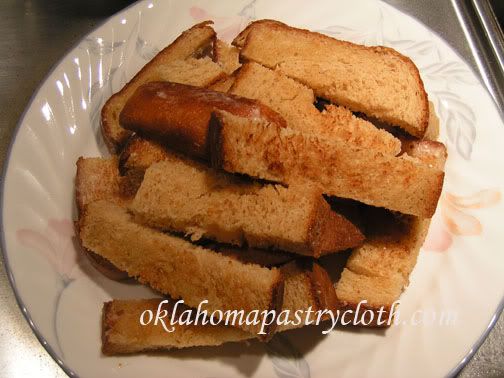 Place the bread on a plate and set aside 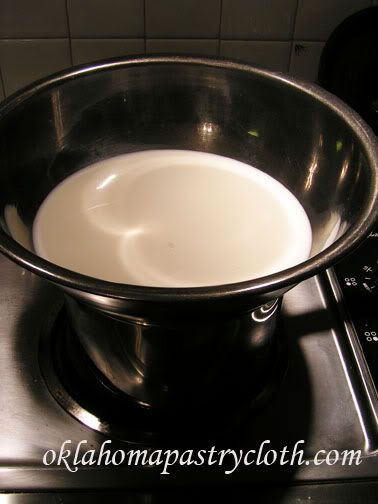 In a large double boiler (mine is too small so a stainless steel bowl over a pan of boiling water works great) pour the milk and scald to just under boiling.  Pour bread into milk and allow to soak until bread is soft. 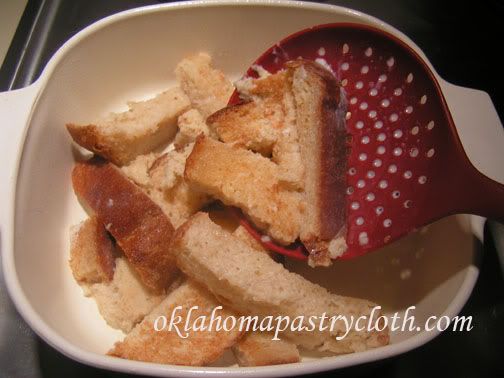 The directions say to spoon the bread into a buttered or greased ‘pudding dish’, but I looked up what that would be and I do not have one. It is made of ceramic or pottery and can be either oval or round and has a design on the bottom. So, I used the tried and true Corningware casserole dish! I sprayed my dish with spray olive oil. 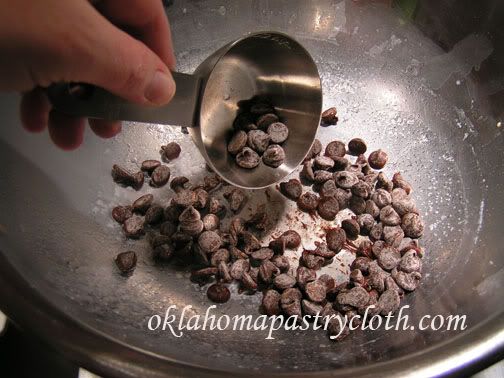 Pour leftover milk into a bowl and set aside. Place chocolate into the bowl. 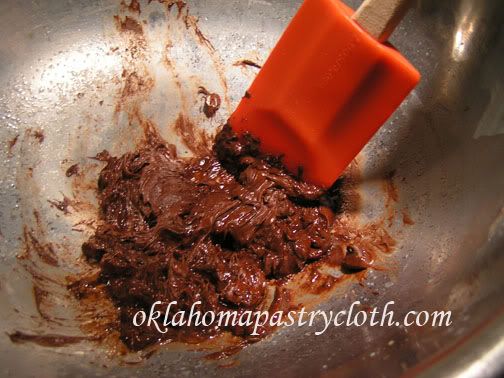 Melt chocolate or chocolate chips in the bowl over boiling water. 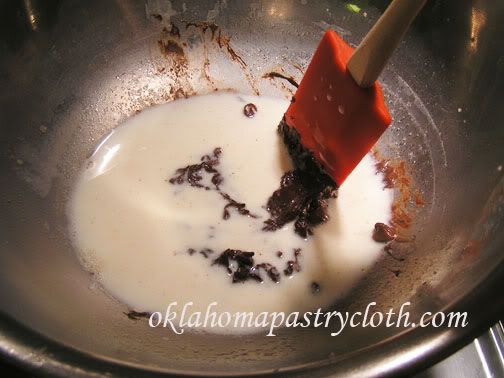 Add just enough of the scalded milk to the melted chocolate to blend into a smooth mixture. 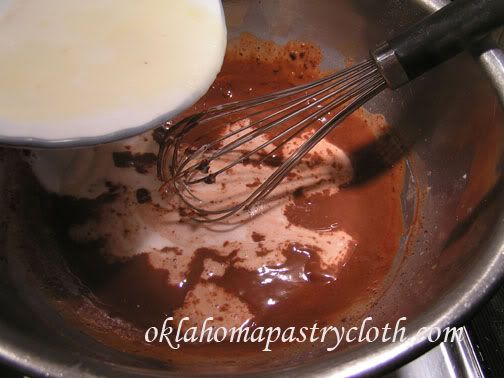 Add rest of the milk and blend. Add dash of cinnamon. 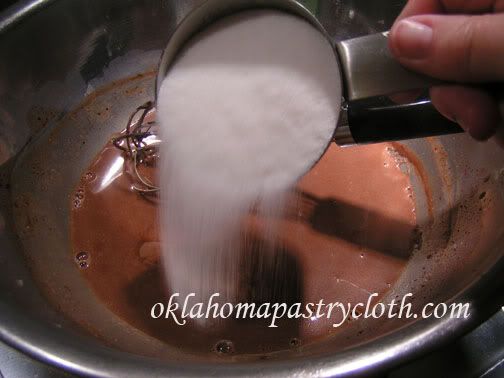 Add half the sugar and blend 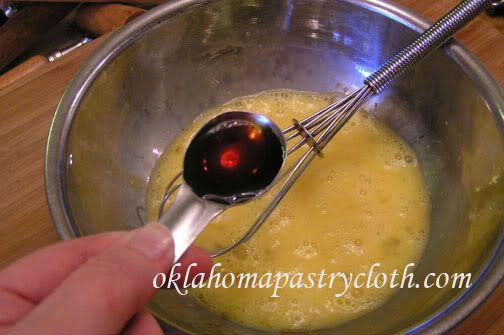 In another bowl, beat two eggs and add salt, sugar and the rest of the sugar and beat until creamy 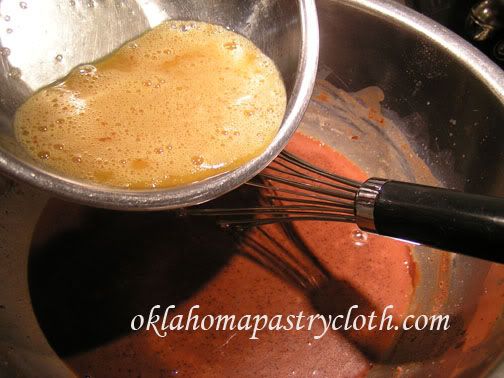 Gently pour, little by little, the egg mixture into the chocolate mixture whisking continually to keep the eggs from curdling. Stir until the mixture is smooth. 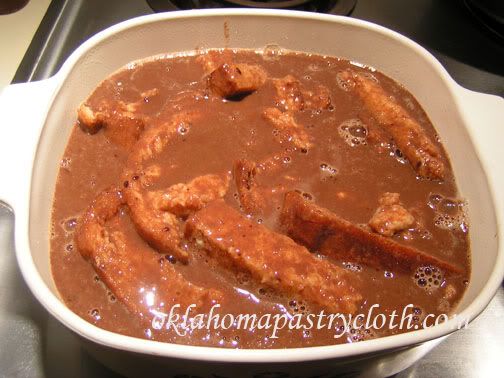 Pour chocolate mixture over bread pieces in the baking dish. Now this is where I had to do some guessing because it said, “Bake in a moderate oven until done.” I figured 350º for 45 minutes. That worked great. I have to remember with these recipes that the old stoves were more of a guess than a thermostat! 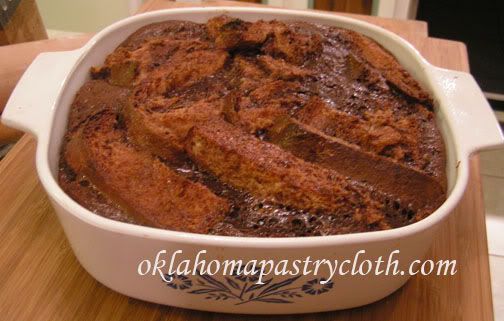 Test with a sharp knife or toothpick to come out clean. Allow to stand for a few minutes. The sides of the pudding will pull away from the sides of the dish. Serve warm with warm hard sauce that follows. 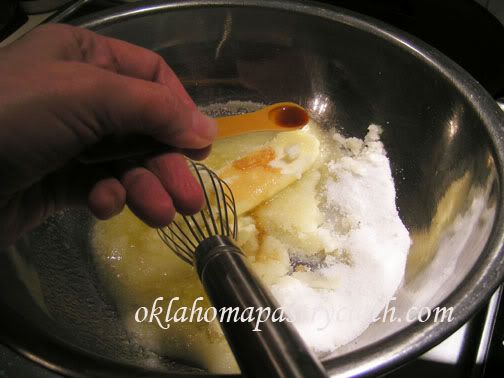 In a clean bowl over boiling water, or in a small double boiler, melt butter and add sugar and vanilla. 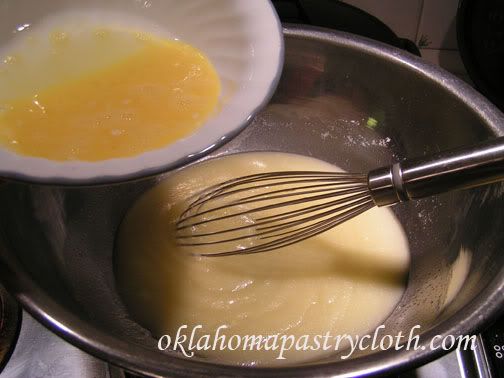 Stir until mixture is smooth and then gently add beaten egg, whisking continually to keep the egg from curdling. 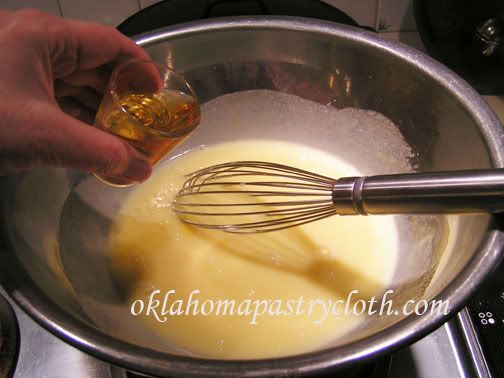 Add rum and stir.  Cook for about 10 minutes until sugar is completely dissolved and sauce is thick and smooth 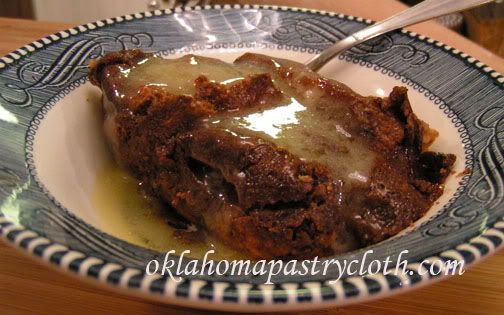 Spoon each serving of warm chocolate bread pudding in a bowl and ladle sauce over it. I promise, you will sit there and just sigh with joy. Leftovers of both sauce and pudding may be reheated. Table Manners:
 |
|
|
Oklahoma Pastry Cloth™ Company on Facebook
|
|
 |
|
|
Vintage Cooking Pt 2
Thursday, January 12th, 2012
 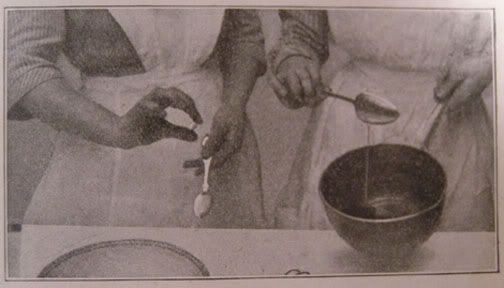 I’m really having fun going through my grandmother’s “Domestic Science Books I and II” book. Having been published in 1914, you can imagine the photos of women in their sleeved, long dresses and taylored, floor-length, white aprons, primly tied at tiny waists. I feel very happy to see that my short, work-worn fingernails look exactly like theirs. Evidently, women, back then, didn’t worry about French tips or painted designs on their fingernails, either. At the beginning of book II of this wonderful home living manual, I came across the following poem, by Owen Meredith. It is so ridiculous, I have to post it. Obviously, this Owen guy would have benefitted from today’s Overeater’s Anonymous. He seems to have been so focused on eating that all else was trivial to him! You be the judge: O hour of all hours, the most bless’d upon earth, Blessed hour of our dinners! * We may live without poetry, music, and art, We may live without conscience, and live without heart; We may live without friends; we may live without books; But civilized man cannot live without cooks. He may live without books – what is knowledge but grieving? He may live without hope – what is hope but deceiving? He may live without love – what is passion but pining? But where is the man that can live without dining? – Owen Meredith Makes you hungry, huh? Well, I’ll solve that problem and share another lesson in recipe from days gone by, which would be easy to cook on your wood cook stove! You can pretend! I will be giving the recipe for their dumplings, which are the type that are fluffy and soft. We southerners like flat dumplings or oval ones that are more like noodle dough. And so, while I’ll give you the recipe the book suggests, I’ll show you the pictures and recipe for the dumplings that I make. And of course, at the end, just as in the book, I’ll post those rules for table manners ala 1914. So stoke up the fire…. 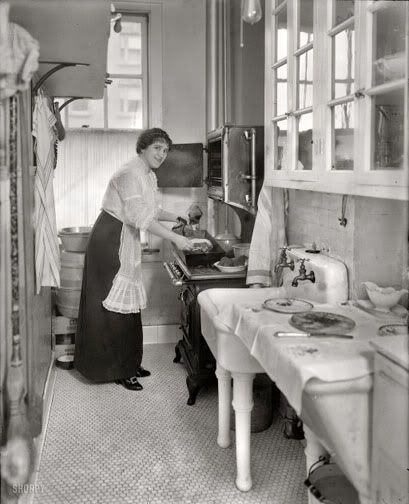 3 lbs beef – preferably round roast 1 tblsp butter 2 tblsp flour 2 onions sliced 1 carrot 4 potatoes water or beef stock salt and pepper 1 turnip (optional) Dumplings 2 cups flour 4 tsp baking powder 1 tsp salt 3/4 cup water or milk Sift the dry ingredients together; add the liquid gradually. Drop by the spoonful upon the stew and cook until done. 1 cup all-purpose flour 1 egg 1 tsp baking powder 1/4 cup water or milk 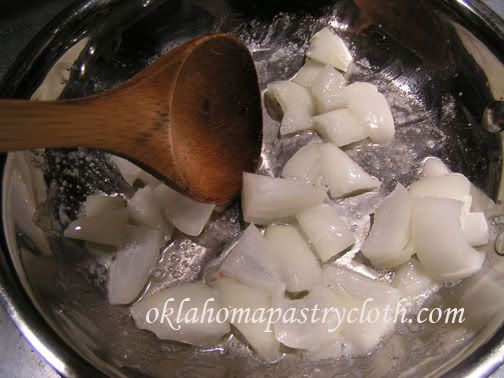 Cut the roast into 1″ cubes and toss meat in flour. I used my canned rump roast (what can I say? Rump roast was on sale, cheap!) and cubed that. Sauté onions in butter and add beef to brown.  Add water or beef stock (I used stock) and simmer for at least an hour to an hour and a half until meat is tender. Add chopped carrots, potatoes and chopped turnip (optional) and cook 45 minutes longer. 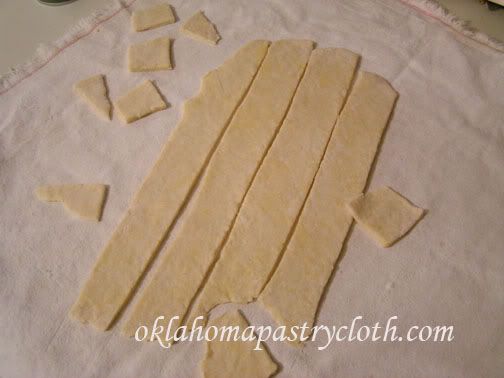 Mix ingredients together for dumplings, using just enough water to form a dough ball. Roll out onto your Oklahoma Pastry Cloth™ and slice in 1″ strips. Slice strips across to form 1″ squares. 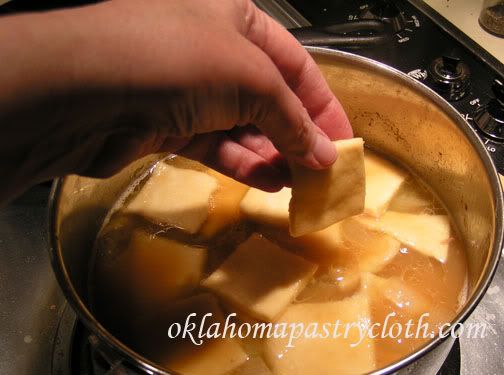 Bring stew to a boil and place dumplings on top of broth.  With spoon, gently press dumplings into broth to cover. Simmer for 20 minutes until tender. 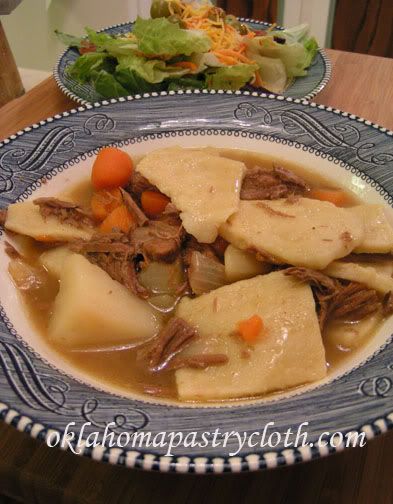 Serve with salad and cornbread or fresh bread and dig in. It’s simple! Table manners: Do not hold the knife and fork upright on the table. The knife and fork when used for cutting should be held with the fork, tines down, in the left hand and the knife in the right hand, the handles in the hollows of the hands. Do not open the mouth to receive food until the food reaches the mouth. Always eat or sip from the side of the spoon. The napkin should never be tucked in the collar.  |
|
|
Oklahoma Pastry Cloth™ Company on Facebook
|
|
 |
|
|
Vintage Cooking Pt 1
Monday, January 9th, 2012
 Some call it “pretending” but I like to call it “supposin’ ” when, every so often, I whisk myself back (in my mind of course) to the late 1800’s and early 1900’s wondering what it would be like to do back then, what I am doing at that moment. For example, in 1992 I broke my leg and ankle in five places and as I lay on the couch with leg encased in plaster of Paris, elevated and throbbing, I immersed myself in a book entitled ‘And Ladies of the Club’. Transported back into the time of the Civil War and then the Victorian age, I read that my situation would have been quite dire indeed. Instead of a cast, I would have had my leg cut off and could have died of gangrene. Lovely. Made me appreciate 1992 all the more! But I do see the good of those eras with the slower way of life and simpler way of doing things. It is an encouragement for us to slow down and simplify as well.  Awhile back, I posted an account about my parents’ life-changing move to a retirement community. The process was emotional for all of us because of the sale of their home and their move to another state. But going through all of the boxes holding their nearly 62 years of marriage, passed on to each of us four girls and our children, was bittersweet indeed. One of my boxes held a number of very old cookbooks. My parents know me well! Some of these books are just amazing and precious. The oldest one and truly my most precious of cookbooks, is the 1914 first edition, high school textbook for Austin’s Domestic Science (we called it Home Ec) inscribed with the perfect penmanship of my Grandmother Johnson, then Margaret Allen, Class IC – my mother’s mother. Recipes recorded by her with an inkwell and pen, obviously lessons from class, cover pages nestled between tiny print of early 1900’s etiquette, rules, ingredients and recipe lessons. The book is a treasure, as are some of the others, and I thought that I would do a series of posts using a few of the vintage recipes, instructions and lessons in etiquette. Skimming the book, my eyes fell on the title, “Hamburg Steak”, and immediately, I decided to make that my first endeavor. I’ll give you three guesses what is Hamburg Steak! The recipe was brought to America by German immigrants where Hamburg Steak was a meal of the poorer classes. It wasn’t until 1916, two years after this textbook was published, that the Hamburger Bun was introduced by a fry cook named Walter Anderson, who co-founded White Castle in 1921. I have to tell you that I did not think this recipe was going to be all that great, but Mr. Fix-It loved it and asked for the leftovers the next day!  I had to consider the fact that most people did not buy freshly ground meat in 1914 and so the instructions in the recipe to purchase round steak, to remove the bone and gristle and to cube and grind in the hand grinder should be no surprise. I, however, DO buy ground meat today and so I skipped that process even though I have a hand grinder, have capable shoulders and used to grind meat as a butcher’s assistant! There is only so much “supposin’ ” I’m willing to initiate these days. Anyway, I wonder if they called it Ground Round back then. I was struck that most of the beef recipes in the book called for either round steak, ground, or round roast, sliced or whole. Evidently, that was the cut of meat most popular. It totally explains to me why mother, when first married and with very little money, stunned my father when she brought home the expensive ground round from the store. She says that her mother only served ground round, and never any of the cheaper ground meats, so she did not know there were any other types of ground meat. Obviously, Grandmother had learned well about her meats in Class IC of Domestic Science! So fire up your 1914 wood stoves (or if you were rich, the newly introduced fancy gas stove) and get out your cast iron skillet. The recipe is simple and really yummy. Be sure and note the etiquette rule about your after dinner coffee or tea at the end. 1 tablespoon finely chopped onion 1/2 teaspoon salt 1 egg dash of pepper 1 lb round steak, boned, cut into cubes and run through a meat grinder (1 lb ground round y’all) Gravy: 2 tbsp butter 2 tbsp flour 1 cup beef broth 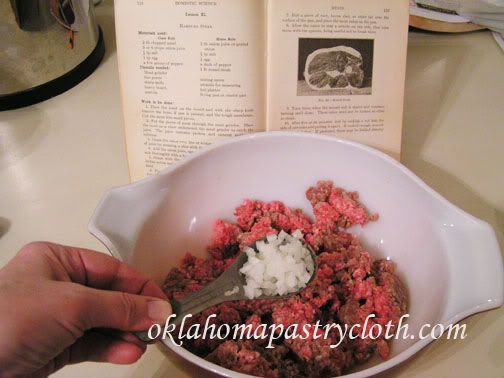 Add finely chopped onions to ground meat 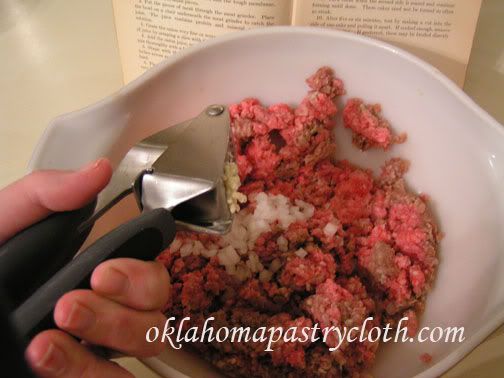 The recipe did not call for garlic, but I have to have my garlic and I think that it made a huge addition. Either chop or press your galic clove. 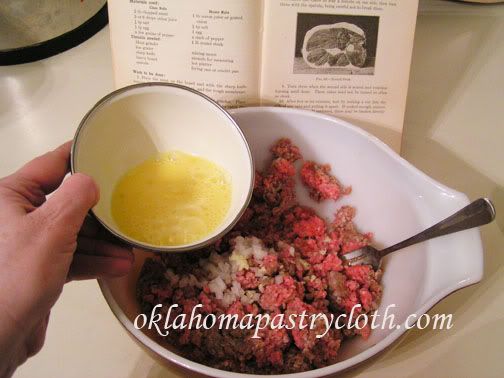 Add beaten egg 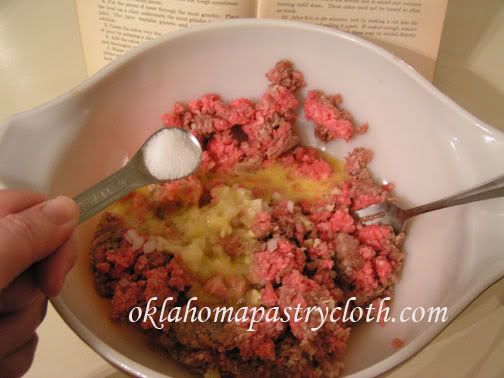 Add salt 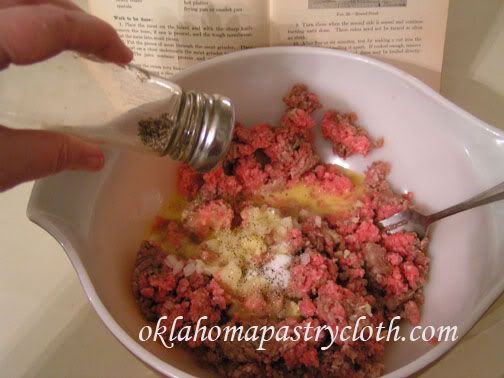 And pepper 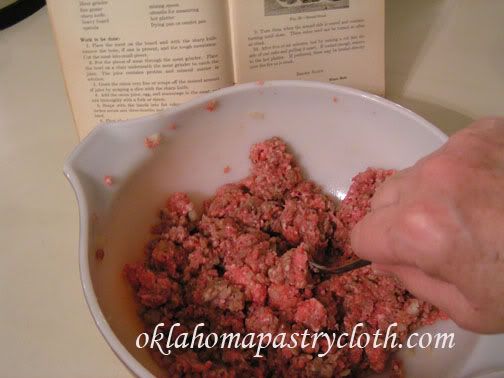 Mix ingredients until well incorporated 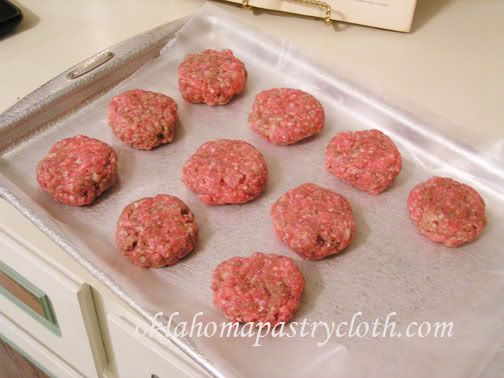 The recipe called to form into patties 1 1/2″ in diameter and 3/4″ thick, but I think mine were more 2 1/2″ diameter and 3/4″ thick.  Add tblsp of butter to a heavy skillet on high heat and spread across the surface to oil. Place patties into the skillet to sear for about 30 seconds. Turn and sear on the other side and reduce heat to medium. Continue to turn patties until cooked all the way through. Do not press them or pierce them because the juices are trapped inside and make the patties tender and tasty. 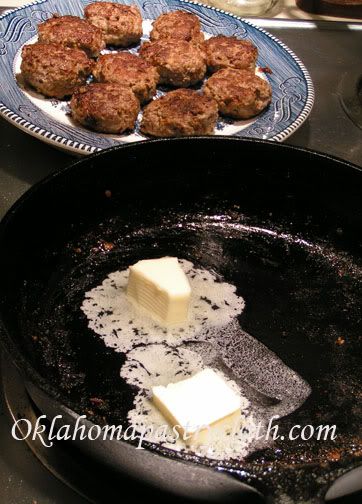 Remove patties to a warming plate to keep warm. Wipe skillet lightly to remove beef fat and add two tblsps butter to melt on medium heat. 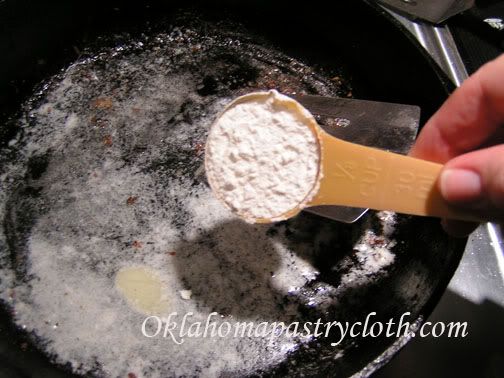 Add flour 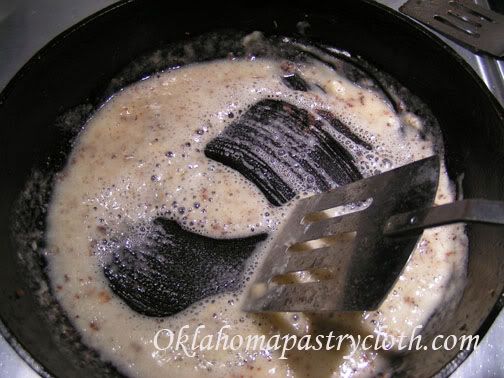 and stir quickly to form a ‘roue’   Pour in beef stock and stir to form a gravy.  Served with au gratin potatoes, green beans and fresh bread, this meal made Mr. Fix-It very happy! The following is an etiquette lesson from the book that all should know for sure!! 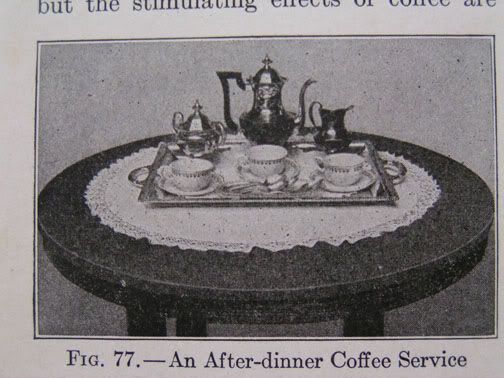 Austin’s Domestic Science Book One and Two, page 170: “At a formal dinner, very strong coffee is made and served without cream, but with or without sugar as the individual prefers. Such coffee is called café noir, or black coffee. It is served in very small coffee cups, or after-dinner coffee cups. When cream and sugar are served with coffee, many think the flavor of the coffee is improved if they are placed in the cup before the coffee is poured in. TABLE MANNERS: Coffee, tea and cocoa should be drunk from the cup. The spoon is used to stir coffee or tea and sip it in order to ascertain if the flavor is right, but should not be otherwise used with coffee or tea. It seems unnecessary to state that these beverages are never to be drunk from the saucer.”  |
|
|
Oklahoma Pastry Cloth™ Company on Facebook
|
|
 |
|
|
Blackened Tilapia with Creamy Lemon-Butter Sauce
Wednesday, January 4th, 2012
 Well, the New Year has arrived and we are back to work after a lovely week and a half sort of vacation. Christmas was a blast with a houseful so packed that the noise and bodies got a little claustraphobic, but isn’t that what family is all about?! Of course, part of the noise was coming from that new little grandbaby who is just the cutest baby on the earth. You know she is!!  After Christmas, I had the pleasure of starting my canning and dehydrating classes at Red Dawn in Midwest City. If you are in the area, the classes run from 6 pm until 9 pm. You can call the store at 405-732-0717 for information. Sure would love to see you there!! And then, New Years Eve rolled around and Mr. Fix-It and I had a really wild party. He, I and Ellie (our miniature, long-haired dachshund) watched The Help, since Mr. Fix-It had not seen it, and then ushered in midnight with the 1956 movie, The Solid Gold Cadillac, with Judy Holliday and Paul Douglas. We toasted the New Year with lead crystal flutes of Miers Sparkling Chablis (nonalcoholic white grape juice because we are so wild and crazy) and stood on the front lawn to watch the fireworks displays of nutty neighbors who evidently haven’t figured out that we are so dry, a minute spark could start an inferno!! Yes, it was an exciting night of revelry. The one thing I DID do to celebrate the evening was to make a very special dinner for my Mr. Fix-It. There is nothing that does his tummy more good than to serve up something blackened, ala Cajun cooking. I don’t care if you serve him liver – if it’s blackened – he’ll chow down. And so, I had fun with the recipe that follows. It is really very quick and easy and if you serve it to guests, they’ll think you are a chef extraordinaire. However, be warned. You’ll have to open windows and get the exhaust fan going because when you blacken something there IS smoke involved! I hope you’ll try it! The dinner was topped off with a homemade pecan pie (and I’ll put that up later) and we made ourselves sick. Gonna be a good year!! Serves 4 4 Tilapia filets (Salmon or Flounder will work too) 12 large shrimp 2 tbsps butter 2 tbsps Cajun Seasoning (my homemade is found by clicking on the link) Lemon Butter Sauce 1 – 14.5 oz can chicken broth 1/2 tablespoon finely chopped onion 1 tblsp butter 1 tblsp flour 1/2 cup heavy cream 4 tblsp butter Juice from one lemon 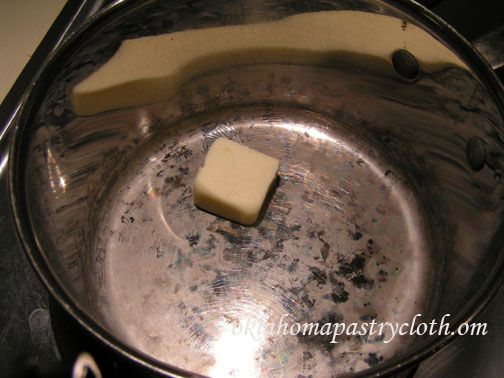 Melt the butter in a medium saucepan over medium heat 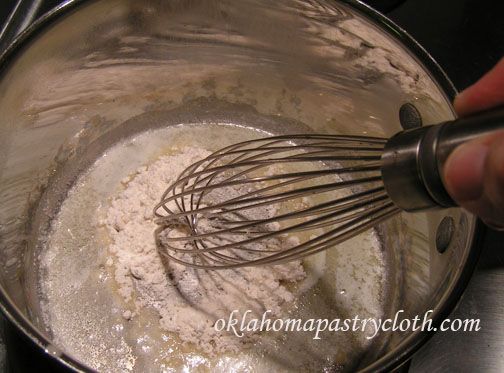 Stir in flour until a creamy roue is achieved 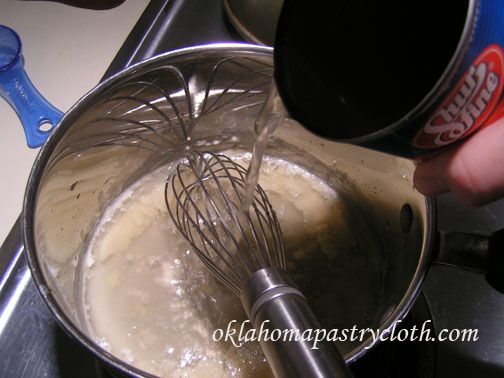 Slowly pour in chicken broth while whisking to incorporated roue with no lumps. Boil until sauce is reduced by about a fourth. 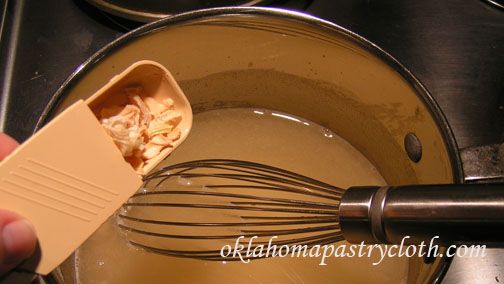 While the broth is cooking, add onions. I am using dehydrated here (of course) but fresh onions are fine. 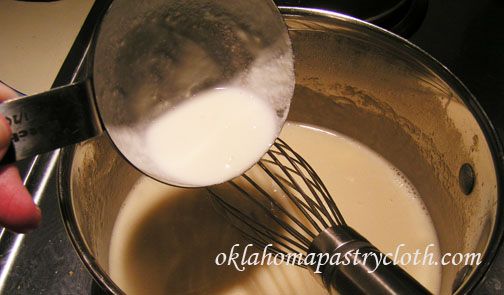 When the sauce has reduced, add cream while stirring 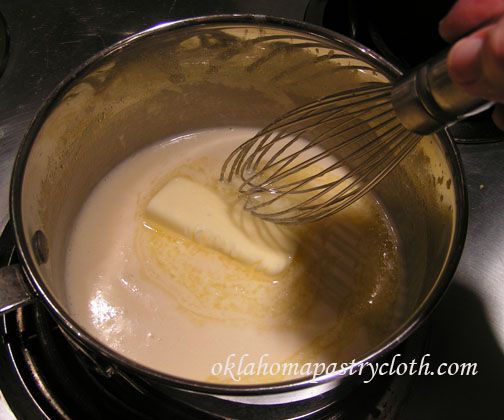 Add butter and stir in until melted and mixed 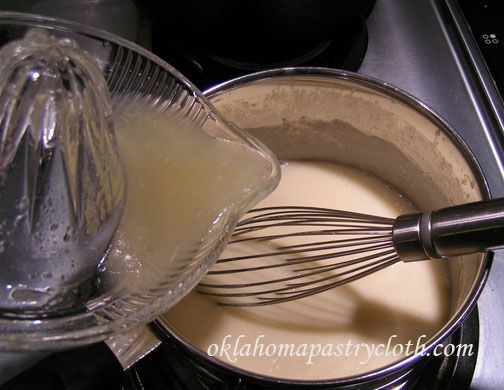 Remove from heat and stir in lemon juice. Add salt and pepper to taste. 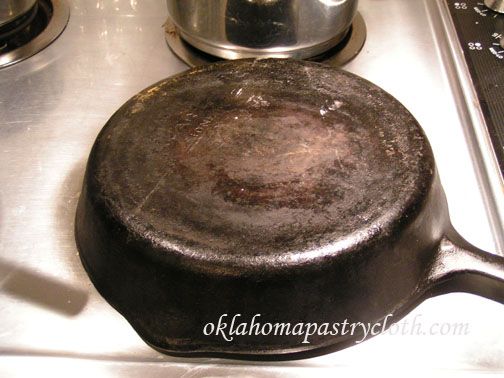 Now comes the fun part. Take a cast iron skillet and place it upside down over the large eye of your stove. Turn the eye on High. Watch carefully and as the bottom of the skillet starts to smoke, quickly turn it over and drop in 2 tbsps of butter, which will melt really fast and start to blacken, and then sprinkle 2 tbsps of cajun seasoning across the surface. 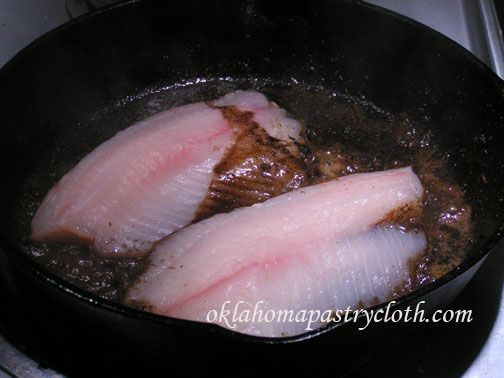 Place filets into skillet. I only made two on New Year’s Eve, but if you are doing all four, use a larger skillet that will accommodate that many. Turn the heat down to medium-high and cook the tilapia for about 2 minutes on that side. 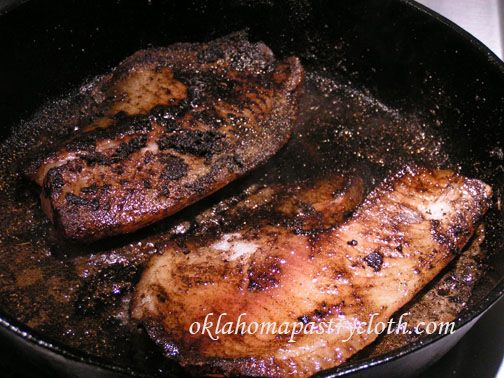 Turn fish and cook for about three minutes. Cover and turn heat down to medium to finish cooking until flaky. If using salmon, this will take longer. 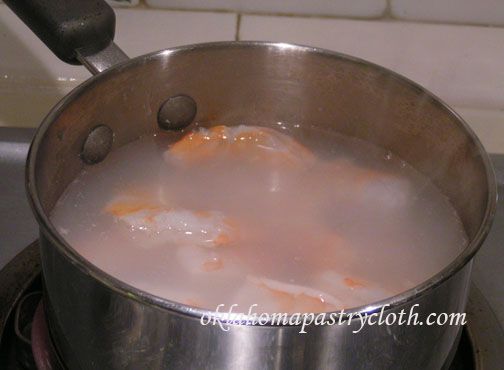 In the meantime, have a pot of water boiling and drop shrimp into the water. Immediately remove from heat and let stand until shrimp are white all the way through. This does not take but just a few minutes for large shrimp.  Place a filet on each plate, top with shrimp and then pour sauce over both. Serve with rice and veggie. Here, I am using Zatarain’s Dirty Rice. So Happy New Year to you all. I hope to post some different kinds of recipes that aren’t normal Okie cooking in the next year, along with that regular stuff! Nothing like trying something new!  |
|
|
Oklahoma Pastry Cloth™ Company on Facebook
|
|
 |
|
|

 Homestead Revival
 Paratus Familia
 Rural Revolution