Archive for January, 2011


That Crazy Government!

Thursday, January 27th, 2011


Nature’s Most Perfect

Food

Ain’t Perfect Anymore!


 photo funny_cow_zps50f78d32.jpg


Cow Incognito


And speaking of all things country, a friend just sent me this article from the Wall Street Journal that had me laughing until I realized how sad it is!!! We have dairies in Oklahoma too and I’m wondering what our citizenry will do if WE have a milk spill. Imagine the disaster: In Western Oklahoma, our wheat farms would turn into giant bowls of cereal. In Southwestern Oklahoma, the windmill farms would churn it into massive quantities of butter that would clog all of the life-sustaining highway arteries between towns!! In Southern Oklahoma, a fisherman’s catch would come already dipped in milk and ready for breading! Here in Central Oklahoma, where our flour mill thrives and produces multiple mixes, people might be overtaken by huge masses of biscuit dough oozing through the streets like some whole wheat wall of lava. The visons are frightening! So get a load of what is being done in order to save us from these unimaginable ends:


“President Obama says he wants to purge regulations that are “just plain dumb,” like his humorous State of the Union bit about salmon. So perhaps he should review a new rule that is supposed to prevent oil spills akin to the Gulf Coast disaster—at the nation’s dairy farms.


Two weeks ago, the Environmental Protection Agency finalized a rule that subjects dairy producers to the Spill Prevention, Control and Countermeasure program, which was created in 1970 to prevent oil discharges in navigable waters or near shorelines. Naturally, it usually applies to oil and natural gas outfits. But the EPA has discovered that milk contains “a percentage of animal fat, which is a non-petroleum oil,” as the agency put it in the Federal Register.


In other words, the EPA thinks the next blowout may happen in rural Vermont or Wisconsin. Other dangerous pollution risks that somehow haven’t made it onto the EPA docket include leaks from maple sugar taps and the vapors at Badger State breweries.


Cow Sign Pictures, Images and Photos


New signs will indicate a milk truck instead of the car


The EPA rule requires farms—as well as places that make cheese, butter, yogurt, ice cream and the like—to prepare and implement an emergency management plan in the event of a milk catastrophe. Among dozens of requirements, farmers must train first responders in cleanup protocol and build “containment facilities” such as dikes or berms to mitigate offshore dairy slicks.


funny cow:] Pictures, Images and Photos


Say WHAT??


These plans must be in place by November, and the U.S. Department of Agriculture is even running a $3 million program “to help farmers and ranchers comply with on-farm oil spill regulations.” You cannot make this stuff up.


The final rule is actually more lenient than the one the EPA originally proposed. The agency tried to claim jurisdiction over the design specifications of “milk containers and associated piping and appurtenances,” until the industry pointed out that such equipment was already overseen by the Food and Drug Administration, the USDA and state inspectors. The EPA conceded, “While these measures are not specifically intended for oil spill prevention, we believe they may prevent discharges of oil in quantities that are harmful.”


We appreciate Mr. Obama’s call for more regulatory reason, but it would be more credible if one of his key agencies wasn’t literally crying over unspilled milk.”


By the way, if you make a cow laugh, does milk come out of her nose?


 photo MM900285249_zpsc0408247.gif


Got Milk?


MB
Please join us on FaceBook!!


Join in the conversation by leaving a comment below and enter our January Giveaway!


Two Dangerous Women

Tuesday, January 25th, 2011


Jeff Foxworthy Would Be

Proud


 photo HomeandGardenShow_zps278fad3f.jpg


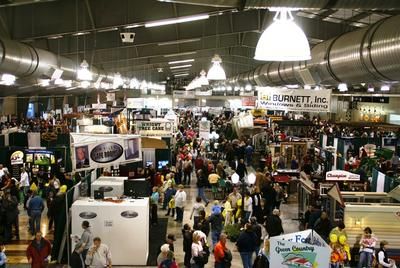
I am sure that you have heard of the Home and Garden Show that stations itself at every fairground in the US to encourage gardeners to grow pumpkins the size of a Smart Cars and to coerce nongardeners to envelope their homes in copper guttering which, at the price of copper today, will be removed within a week by some industrious n’er-do-well needing cash for a big screen tv.


Well, my darling daughter had two exhibitors’ passes for this past weekend and she asked if I would like to go with her to this show of shows. Now, it’s a great thing to get to go to this yearly event, but for a daughter to actually be caught with her mother in public and on PURPOSE is a cause for celebration indeed! Of course, my answer to her invite was a definitive, “Do pigs fly?” which is a much more genteel response than the one asking what bears do in the woods even though it makes absolutely no sense at all. She knew what I meant.


 photo knockout3_zps20fa5a4e.jpg


And so we did what any two red-blooded, southern women do and bundled up against what we considered a life-threatening 32 degrees. We drove across town to the beautiful OKC Fairgrounds, parked the car and walked to the building that we decided was obviously the first of 5 total exhibition buildings. I thought it odd that the steps were full of men in camouflage, smoking cigarettes and huddling to discuss who-knows-what, but I attributed it to true southern gentlemen who had brought their wives to the show even though it would have taken one of the John Deere Zero Radius mowers, displayed at the show, to physically drag them into the actual building to look at the latest fiberglass hot tubs.


 photo GUN-SHOW_zps98fe80cf.jpg


Now, I have to tell you here that there is a certain sense of power that goes with having “exhibitor” badges. One need only flash these jewels at the TSA wannabes manning the doors and you are waved through with an “Oh! Go on in!” as the poor slubs with tickets must stand there and watch you waltz through while they have their wrists stamped to prove that they are NOT exhibitors. Only, at that particular moment, our passes didn’t mean much. As we waved our badges, I instantly noted that it was almost all men in the building – men in camouflage – and there were tables and tables of every kind of weapon of mass destruction that any self-respecting varmint hunter would be proud to call his own. It was at that moment that I and the attendant announced at the same time, “Gun Show!” My daughter and I backed out and headed to the next group of buildings where we would find weapons equally as deadly to our pocketbooks and our health – waterless cookware, full goldfish ponds with 8 ft manmade waterfalls and German Cream Cheese Strudel. And you know what? When we finally found that first Home and Garden Show building, I thought it odd that standing on the steps to the entrance were huddled groups of men in camouflage, smoking cigarettes and discussing who-knows-what. Yep. This is good ol’ Oklahoma!!


Flying Pig Pictures, Images and Photos


Have A Happy Week!


MB
Please join us on FaceBook!!


Join in the conversation by leaving a comment below and enter our January Giveaway!


Dehydrating Series Pt IV

Monday, January 24th, 2011


Part I
Part II
Part III

Dehydrating Part IV

Or

Soup’s On!!


I’m sitting here listening to my sweet hubby laugh his head off as he is pulling up YouTube videos of “Carl” (Billy Bob Thorton) from the movie Slingblade making prank calls to restaurants and asking the clerks for “French fried pertaters and biscuits and I like some mustard with those biscuits, uh-huh”. The clerks are attempting to take this order with as much grace as possible. I have to admit that I’m laughing too. I guess I’m remembering the phone calls I used to make, from our church phone on Wednesday service nights no less, to Weigel’s Dairy Store in Knoxville, Tennessee to tell the clerk, in high pitched squeals, “Your cows are out!” immediately hanging up the phone. Real smooth, huh? Kinda like the phone calls my grandparents used to receive in the ’30’s, at their grocery store, where a voice asked if they carried Prince Albert in a can and with the answer in the affirmative, young voices would yell, “Then let him out!!” We are so brilliant when we are young. However, it seems that Mr. Thorton is still brilliant – he’s entertaining my husband, anyway!


I’ve noticed that in the blog world, bloggers of the feminine persuasion have dubbed their loving husbands with honorary names that reflect everything from their appearance to their personality. The Pioneer Woman refers to her life partner as her Marlboro Man while another at the Rural Revolution refers to hers simply as Husband of The Boss. I’ve been musing for the past few days about what I should title the perfect man in my life – the one who can fix literally anything, including a sad day. He can take a car apart and put it back together, as well as a computer and its software, a refrigerator, an antique telephone and my hair dryer and have them all working as a result. He fixes up Christmas for our adult kids, fixes boo-boos on the animals and is currently fixing a whole new room addition on the house complete with a wood stove. He says he’s suffered through the last ice storm without heat!! He even has a tool belt like Tool Time Tim of Home Improvements. So yep, that’s what the love of my life’s moniker shall be from now on; Mr. Fix-It. And as an aside, just to let you know, he says that he married me because I came with power tools!!


Image and video hosting by TinyPic


There is nothing I enjoy more than putting a piping hot meal before Mr. Fix-It after a long day’s work. I especially love him because he loves soup and that is one of my favorite things in the whole world on these cold days. But I’m weird. I love it on warm days too – homemade that is. When I go to Olive Garden, I’m the “Never Ending Soup and Salad” kinda gal. Therefore, it is really pleasant to have all of the ingredients for soup right at my fingertips, dried and ready to reconstitute for any quick, hot meal. In this fourth and final in my series on dehydrating, I’ve got a recipe for broccoli cheese soup that will leave you craving more. Let’s go!

Broccoli Cheese Soup


1 Tbsp Olive Oil
1 Tbsp dried celery (1 stalk fresh chopped)
1 tsp dried bell pepper (tbsp fresh)
1 Tbsp dried onion (2 Tbsp diced fresh onion)
1/4 tsp dried garlic (1 tsp fresh, chopped garlic)
1/3 cup dried potatoes (1 cup cubed fresh potatoes)
1/2 cup dried broccoli (1 1/2 cup chopped fresh broccoli)
4 chicken bouillon cubes
4 1/2 cups water
1 can milk or 3/4 cups half and half
1/4 lb Velveeta Cheese + or –
1 Tbsp corn starch + 2 Tbsp water


Image and video hosting by TinyPic


Put 1 tbsp Olive Oil in a 3 qt sauce pan and add onion and dried garlic. Sauté. If using dried onions, just stir around a little to get the flavors going. That was the only thing I was out of. Gotta dry some more!


Image and video hosting by TinyPic


Add dried celery and dried bell pepper. For the purposes of less typing, I’ve included fresh equivilents in the recipe above but not in the directions, but you CAN make this with all fresh veggies


Image and video hosting by TinyPic


Add dried potatoes and continue stirring in the oil


Image and video hosting by TinyPic


Add dried broccoli


Image and video hosting by TinyPic


Add three cups of water and stir.


Image and video hosting by TinyPic


Add 4 chicken bouillon cubes. Bring to a boil and turn heat down to medium for a slow boil and cook for 30 minutes uncovered.


 photo PICT0838_zps7vl8xuhz.jpg


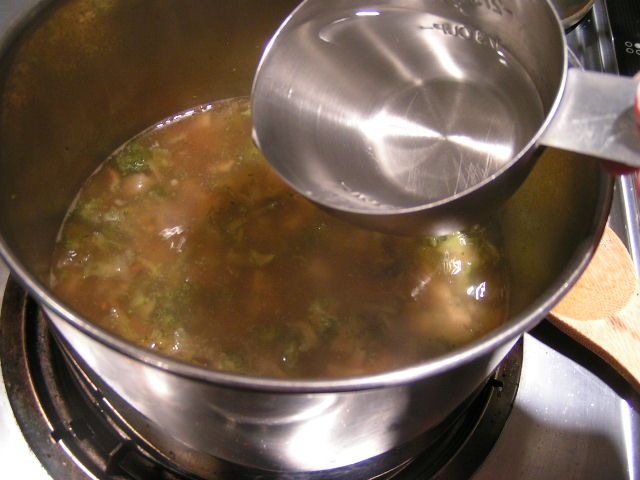
Add 1 1/2 cups additional water


 photo PICT0840_zpso9ddhyp9.jpg


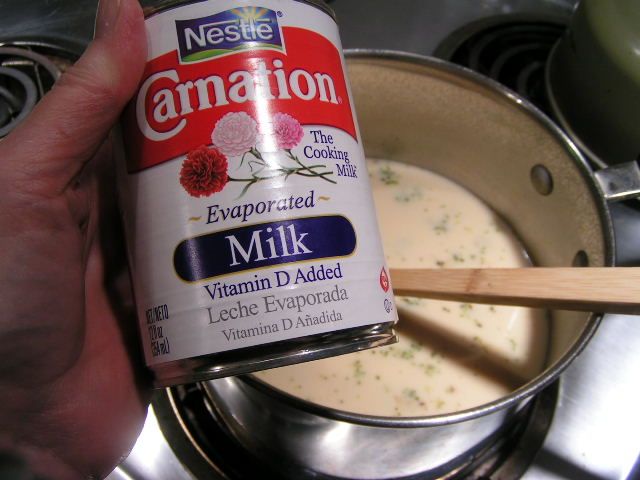
Add one can of milk. The canned 2% and Fat Free is fine too. If you want a richer soup, you can use half and half


Image and video hosting by TinyPic


I canned Velveeta Cheese that was on sale (I’ll blog about that at a later date) and put it into 8 oz jars. Here, I have heated the jar to soften the cheese and am using 1/2 jar or not quite a 1/4 of a pound of Velveeta. You can add more or less according to your taste.


 photo PICT0845_zpsgf49emkz.jpg


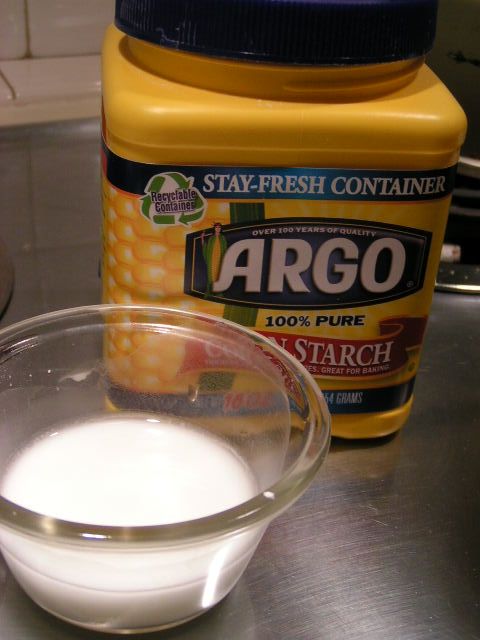
Mix one tablespoon cornstarch with 2 tablespoons COLD water until cornstarch is totally dissolved


Image and video hosting by TinyPic


As soup is boiling slightly, stir in cornstarch mixture and continue stirring to avoid lumps


 photo PICT0849_zpsxh2b0pgr.jpg


You can make some corn muffins with my cornbread recipe and make everybody happy! I used my cast iron muffin pan. I love cast iron!


Image and video hosting by TinyPic


And there you have it. Soup that, if you dehydrate and can everything, can be made with no need for refrigeration and would be easy to make over a fire if the electricity goes out! In this state, that is no unusual circumstance!!


Happy Cooking!


MB
Please join us on FaceBook!!


Join in the conversation by leaving a comment below and enter our January Giveaway!


Dehydrating Series Pt III Peppers

Wednesday, January 19th, 2011

Part I
Part II


Dehydrating Part III

OR

The Incredibly Shrinking

Pepper


ImageHost.org


Another vegetable that is fast and easy to dry is the bell pepper. All peppers can be dried, including jalopenos, but that is one pepper you will want to process in the garage or outside. Your eyes and nose won’t be able to stand the fumes while drying!! Here’s a fast rundown on drying peppers.


ImageHost.org


Wash peppers. I will be using green, red and yellow bell peppers


ImageHost.org


Slice peppers


ImageHost.org


Chop peppers and spread onto racks of your dehydrator


ImageHost.org


I have trays of green peppers on the bottom, then yellow and then red because I like to have a few of the red and yellow fall through to the greens for a pretty mix and then have a mixture of yellow and red as well.


ImageHost.org


Dry overnight or for 12-15 hours and the peppers pieces will be shrunken and hard


ImageHost.org


Dried peppers make a pretty gift for the cooks in the family. They can be used in any recipe that calls for peppers! You can either reconstitute by letting them soak in warm water or just put them into a recipe to reconstitute as it cooks.

Happy Cooking!

MB


Please leave your comments at the comment link that follows! You will be automatically entered in our January Giveaway! And join us for updates on Facebook by clicking on the FaceBook icon below.


Vacuum Sealing Jars

Saturday, January 15th, 2011


Hoover Ain’t Got Nothin’

On This

Little Bit Of Technology!


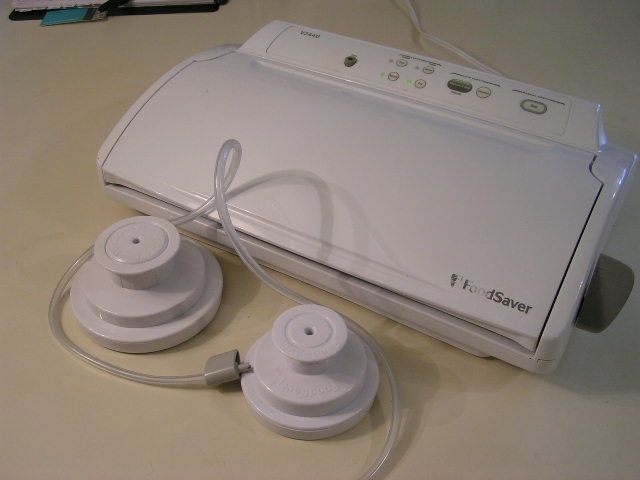
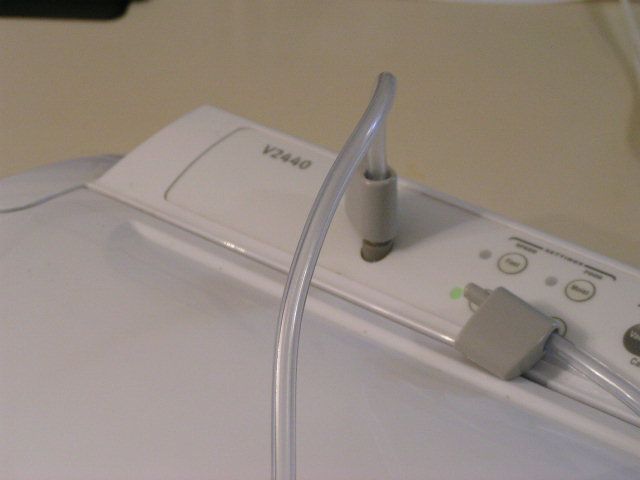
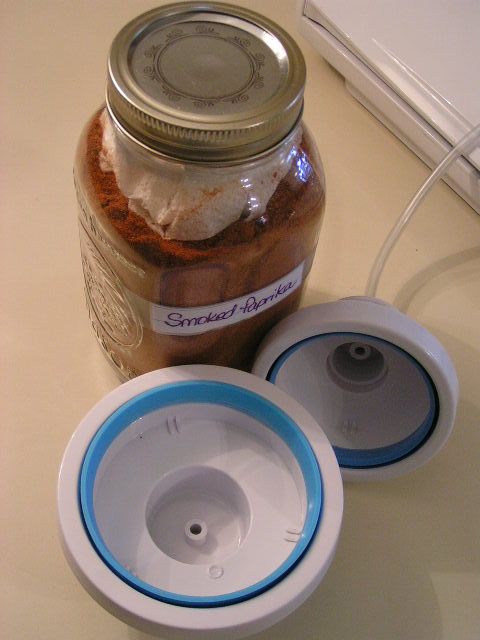
I have had a number of readers ask me how a vacuum sealer works with jars, since posting the two articles on dehydrating veggies. I thought that I would break into the middle of that series and answer those questions in pictures. Just as background info, I have a FoodSaver V2440 which is quite ancient in the world of technology. I am thinking that I got it somewhere around 2000 or 2001. I am sure that you can find that particular model on Ebay but I highly doubt anyone is selling it new. Target , Walmart and Amazon all carry FoodSaver products or you can order from the company directly at FoodSaver.com. Just make sure that whatever model you choose has the “accessory port” which is the little raised button that you will see in my pictures. Some of the models do not have this feature. I looked on the website and found one particular model that seemed reasonably priced and with the port feature. Just click above if you’d like to view it. The canning accessories must be purchased separately unless the website happens to be having a combined special. You can find the jar sealing items here. There is one for wide mouthed jars and for jars with regular openings. The following are pictures of how I use my vacuum sealer for both bags and jars.


 photo PICT1022_zps8f11677f.jpg


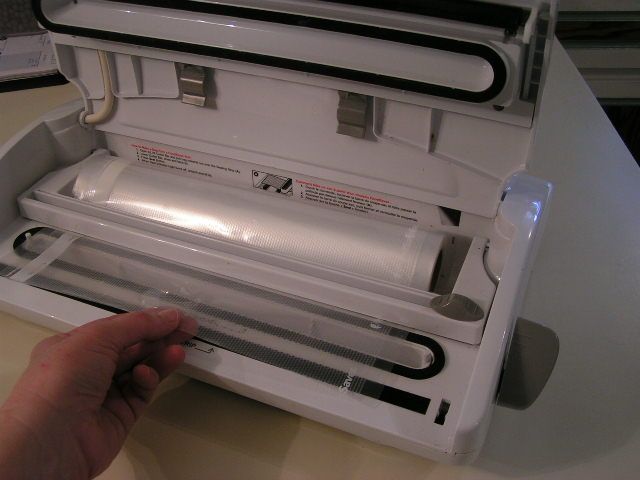
My vacuum sealer is equipped to do both bag vacuuming and container vacuuming. To bag items, first pull the plastic sheeting from the roll to cover the sealing plate.


 photo PICT1025_zps7ffac889.jpg


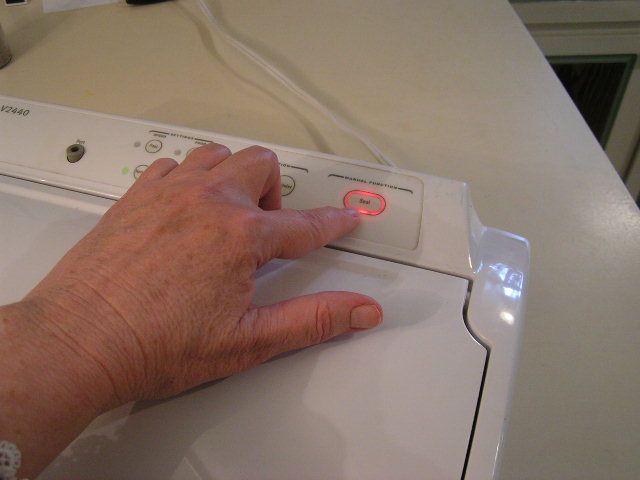
Secure the lid and press the ‘seal’ button and allow to seal what will become the bottom end until the light goes off or until the time you have determined is enough. If you predetermine a time, you have to manually stop the sealing feature by repressing the ‘seal’ button. Pull the plastic out to make a bag long enough to hold your food. The sealed portion acts as the bottom. Cut with the cutting feature.


 photo PICT1035_zpsc0349a2e.jpg


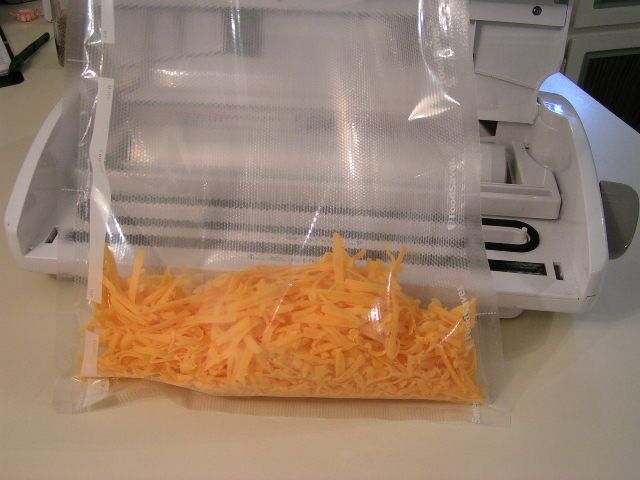
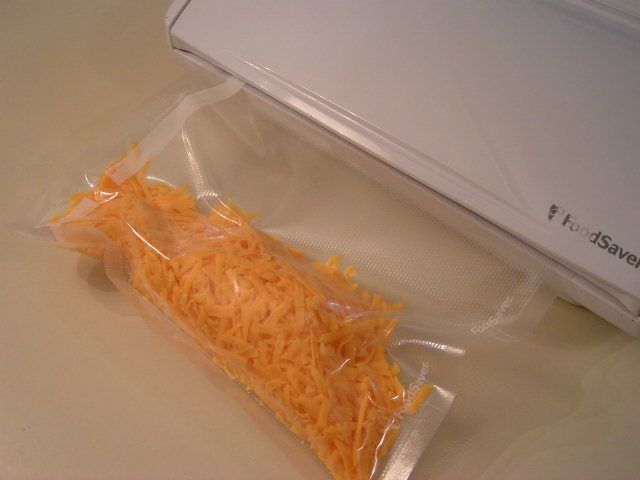
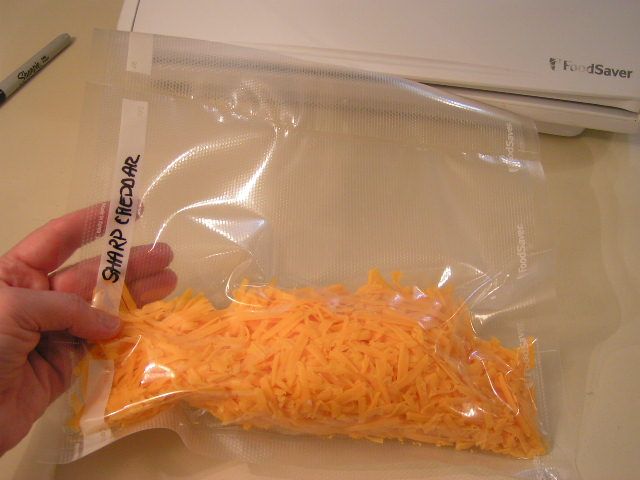
I bought a boatload of cheese on sale (1 block for $1.00!) and so since we like grated cheese, and I have found that you can freeze grated cheese really well, here I have grated a block of cheddar. You can also use a food processor. Cheese may also be canned!! But that’s for another post. Pour in the cheese or whatever you are sealing


 photo PICT1040_zps0a538f03.jpg


Place the open end of the bag down into the chamber that attaches to the suction holes and close the lid and fasten Press the “vacuum and seal” button and watch it work!


 photo PICT1042_zps5d85111e.jpg


You can stop it at any time, which is what I am doing here in order to keep the cheese from being too tightly pressed.


 photo PICT1044_zps4d606b05.jpg


To vacuum jars, you must have the jar sealers and hoses that can be purchased separately. They run anywhere from $8 – $10


 photo PICT1045_zps20db3898.jpg


First, attach the hose to the accessory port


 photo PICT1047_zpsd64099f3.jpg


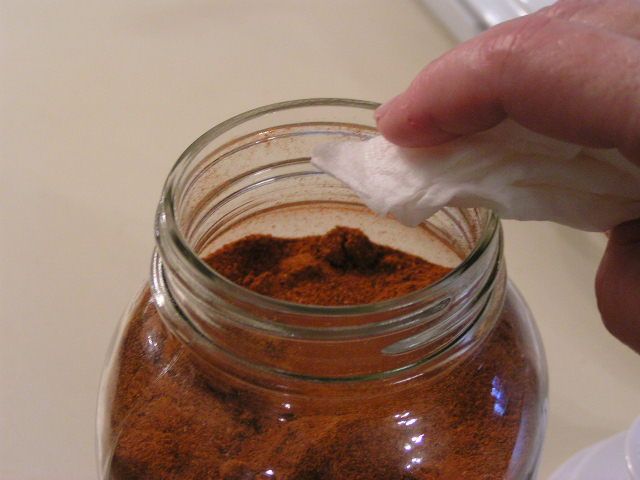
Wipe the edges of the jar with a damp cloth or paper towel to remove any residue or oil


 photo PICT1049_zpsd7b9f7e6.jpg


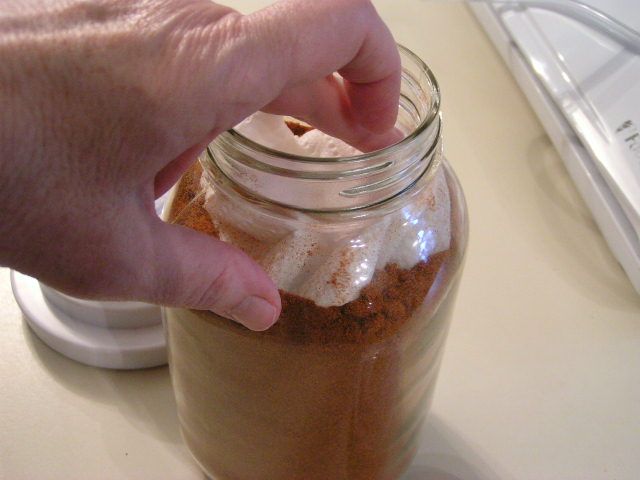
Place a dry, folded paper towel over powdery substances in the jar. Not needed for fruits and vegetables, etc.


 photo PICT1021_zpsb5d63e55.jpg


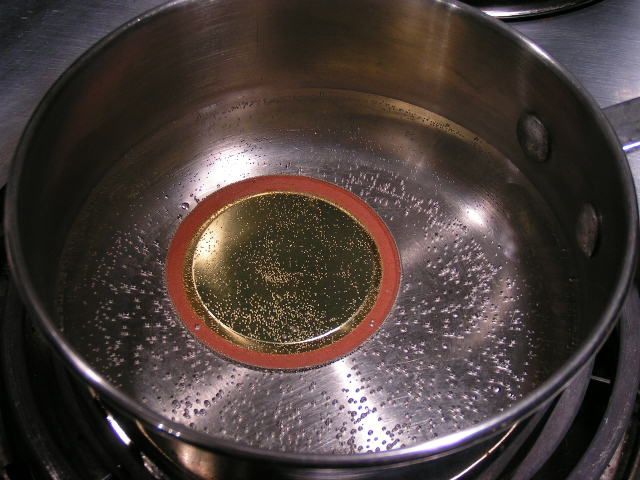
A new lid should be softened in a pan of nearly boiling water


 photo PICT1063_zpse47e1466.jpg


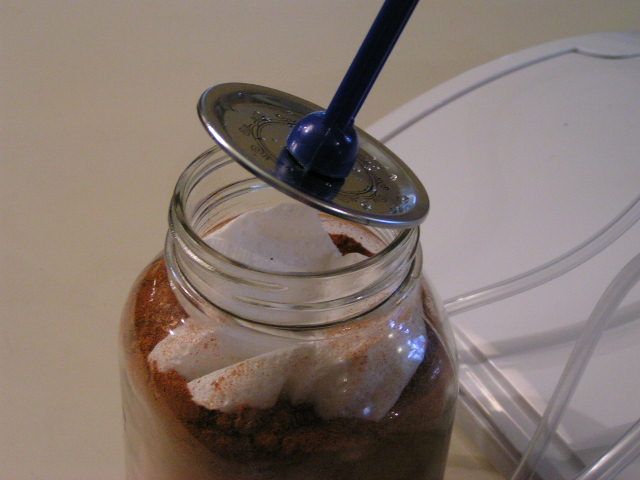
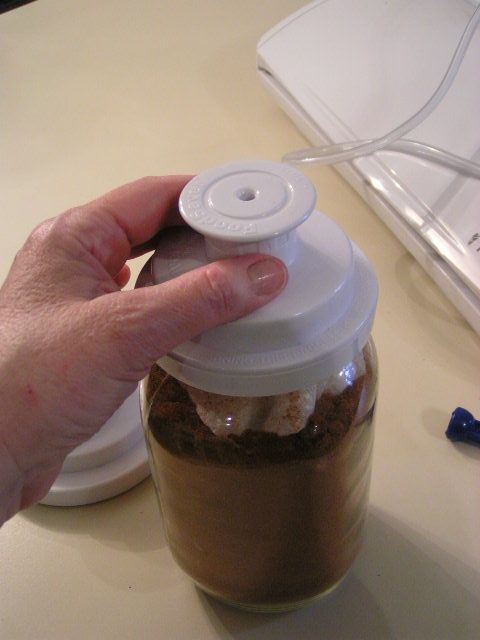
Place lid on top of jar


 photo PICT1053_zps7a8c2da0.jpg


Place appropriate width jar sealer over the lid. This is the sealer for a regular mouthed jar. I find that sometimes it helps to wet your finger and run it around the inside edge of the sealer before putting it on the jar to create an even tighter vacuum.


 photo PICT1055_zps306df411.jpg


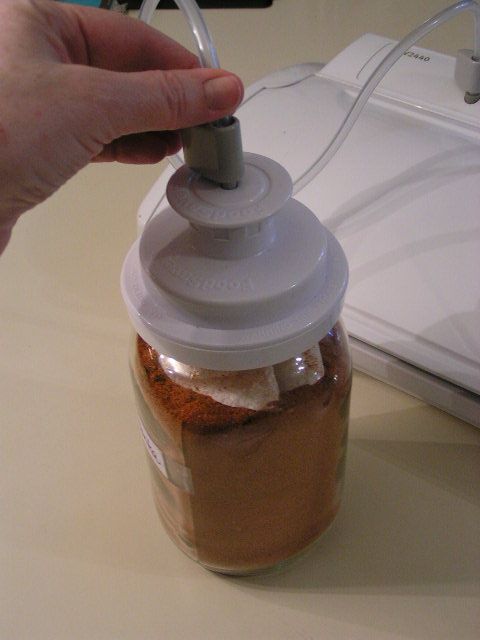
Attach hose to jar sealer


 photo PICT1060_zps3181eea4.jpg


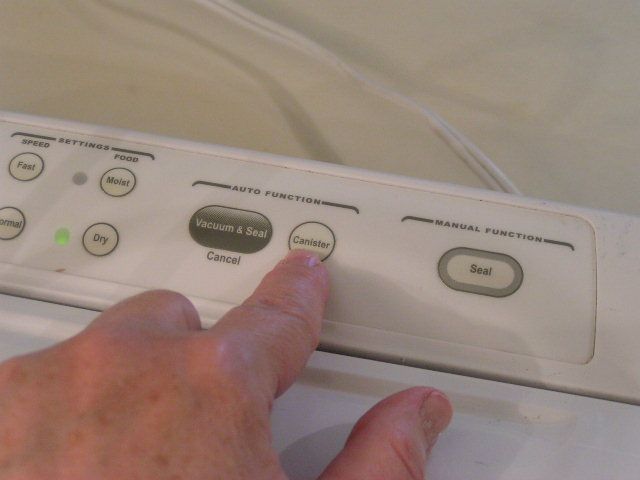
Press the canister button. If you get a newer model sealer, then the button may be different


 photo PICT1067_zps6bc0e18f.jpg


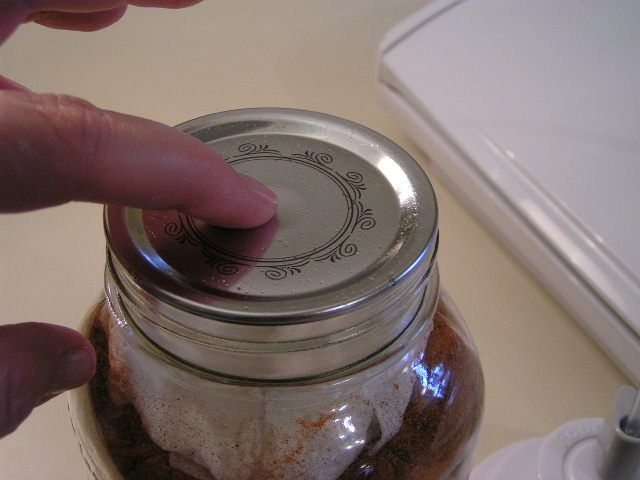
After removing the jar sealer, the “button” on the center of the jar lid should be concave and will not pop when you push the center of the jar lid.


 photo PICT1069_zpsf2cb2bca.jpg


So there you have it. My darling daughter refers to this wonderful piece of equipment as “the sucker thing” and asked for one for Christmas. Did I mention that she is 29?!


Happy Cooking!


MB
Please join us on FaceBook!!


Join in the conversation by leaving a comment below and enter our January Giveaway!


Dehydrating Series Pt II – Potatoes

Thursday, January 13th, 2011


Part I

Dehydrating Series Pt II

Or

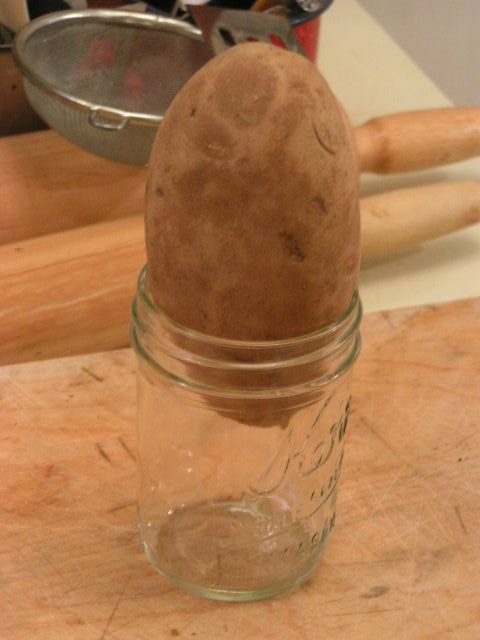
A Big Spud in a Little Jar


 photo PICT0823_zpsaa829959.jpg


I’m going to get right to the point today as a continuation of Part I with photos of how to dry potatoes. Potatoes are one of my favorite garden items and I devote an entire bed to both red and Yukon Gold spuds. These “new” potatoes take a little longer to dry than the traditional Russetts which I am demonstrating here. Also, at the end is a recipe in which to use the sliced and dried potatoes. My next post will be about drying peppers and then you’ll get a recipe for broccoli cheese soup made from all of your dried veggies that will have your family licking the pot. So keep following!
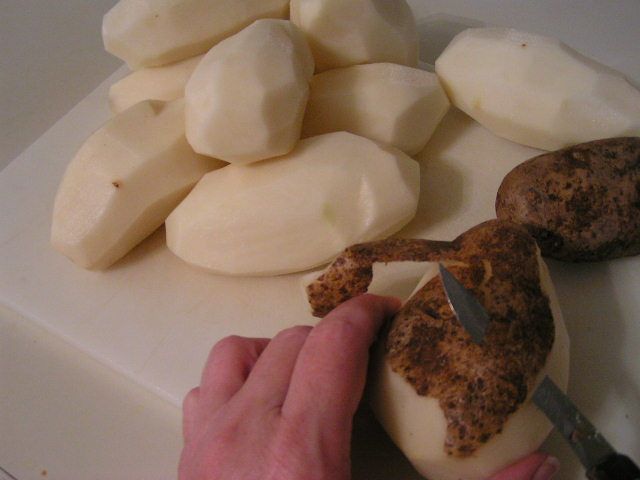


 photo PICT0798_zps93e2069c.jpg


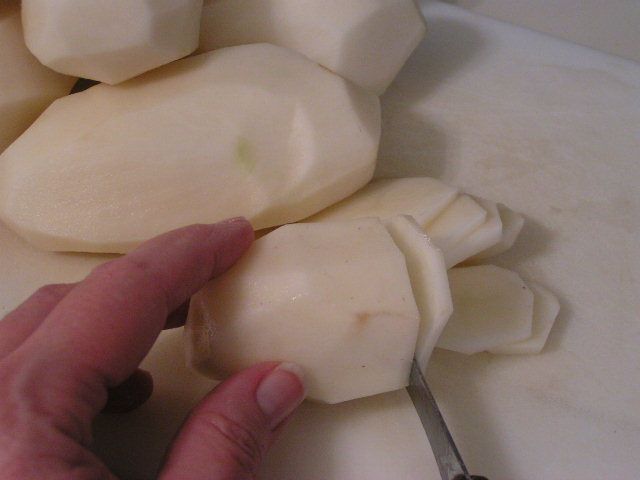
Peel potatoes


 photo PICT0801_zpsd93848fc.jpg


Thinly slice potatoes


 photo PICT0804_zpse3cec2c3.jpg


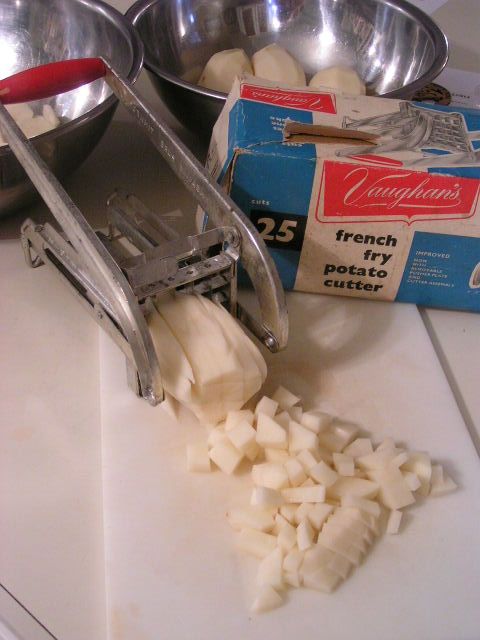
Or you can dice the potatoes. Here, I am using my grandmother’s old french fry cutter – it even has a wooden red handle…and dice by cutting across the potato strips


 photo PICT0808_zpsb0680277.jpg


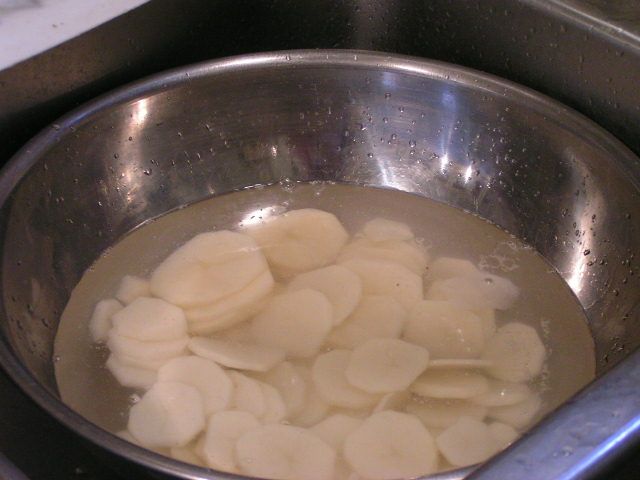
In a large bowl, rinse potato slices under water, strain and rinse again until water runs clear and all of the starch is washed off.


 photo PICT0819_zps02f3a2a0.jpg


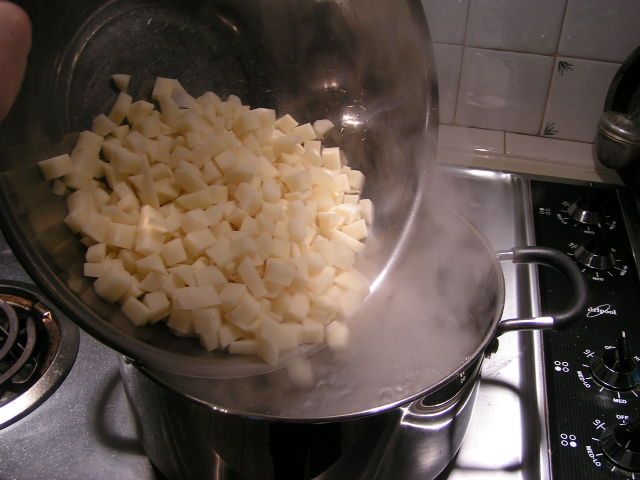
Bring water to a boil in a large stock pot. Pour potato slices or cubes into the boiling water. Allow to parboil for 2 minutes. Drain and put parboiled potatoes into ice water in a large bowl until totally cooled.


 photo PICT0816_zps077bda80.jpg


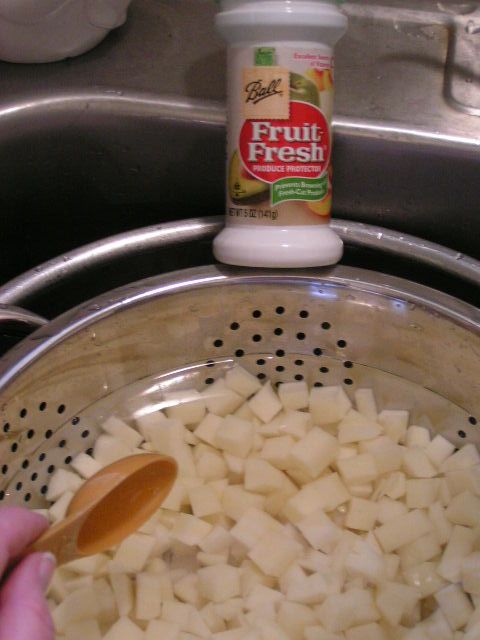
You can add a tablespoon of Fruit Fresh or other citric acid product to the water for added protection against discoloration, according to directions.


 photo PICT0817_zps98eb9285.jpg


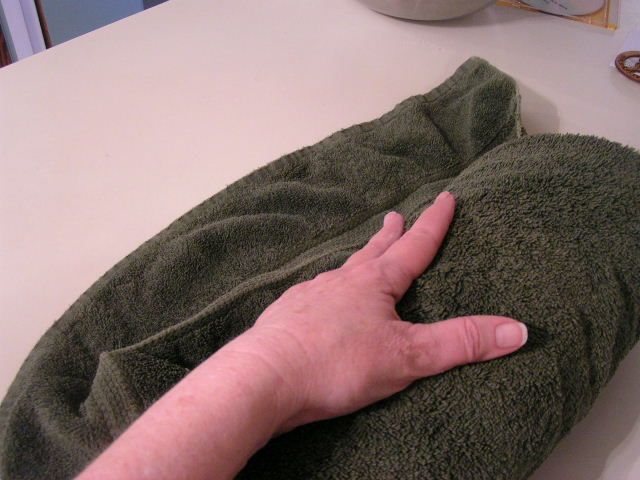
Spread the potato slices or diced pieces onto a large towel to dry. Roll the towel up to squeeze as much water out as possible


 photo PICT0827_zps60a73265.jpg


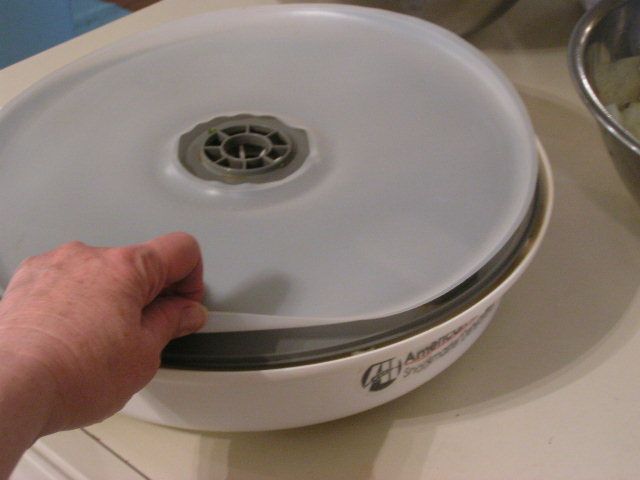
My dehydrator came with a plastic tray to place inside of the larger trays to make fruit rollups. However, I have found that it is also a wonderful edition when drying veggies or fruits that can fall through the cracks when dried all the way. So, I put the tray over the main motor housing of my dehydrator and stack the larger trays on top of that. If anything falls through the cracks it is caught in the fruit rollup tray and easily transferred to a bowl when the drying is finished.


 photo PICT0828_zps36c821b8.jpg


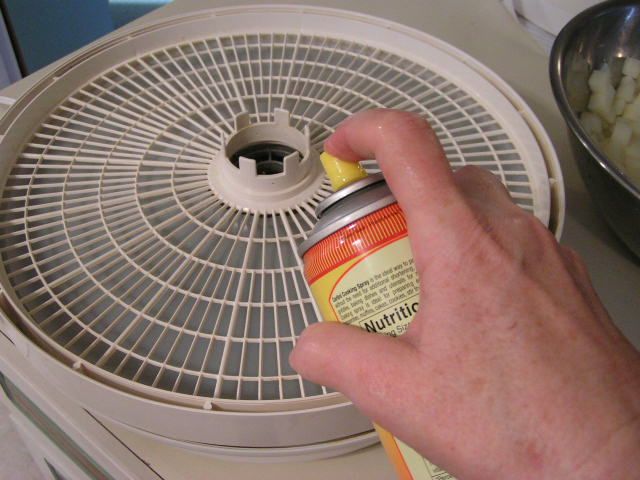
You can lightly spray your racks with oil if you are worried about easy removal of your dried fruits or veggies.


 photo PICT0830_zps70422a28.jpg


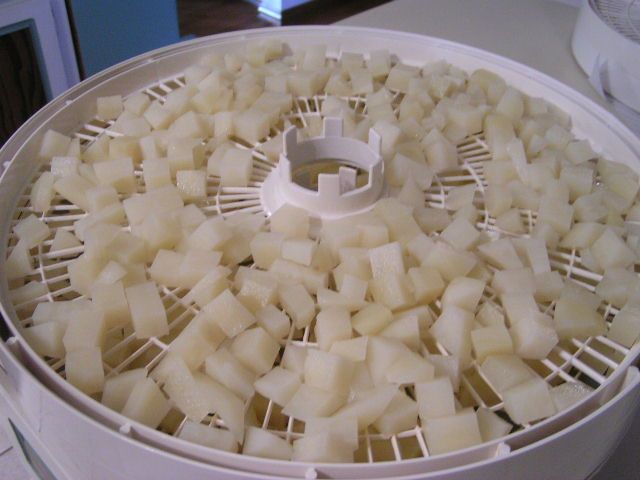
Evenly spread diced potatoes on the racks and stack racks


 photo PICT0833_zps1143eaf8.jpg


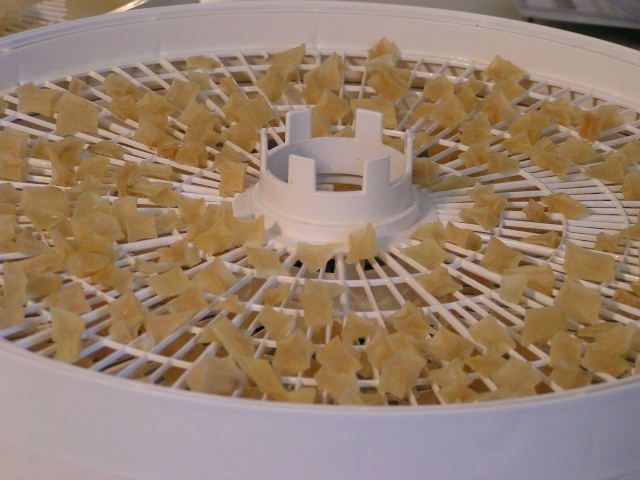
Dry overnight or for 12 – 15 hours. Potatoes should be hard


 photo PICT0832_zps688de371.jpg


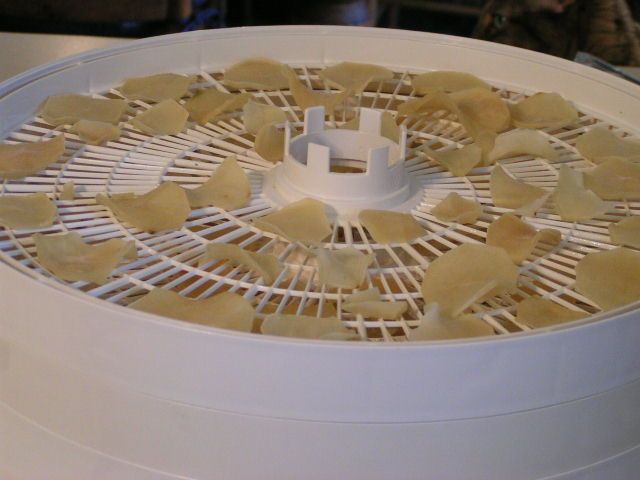
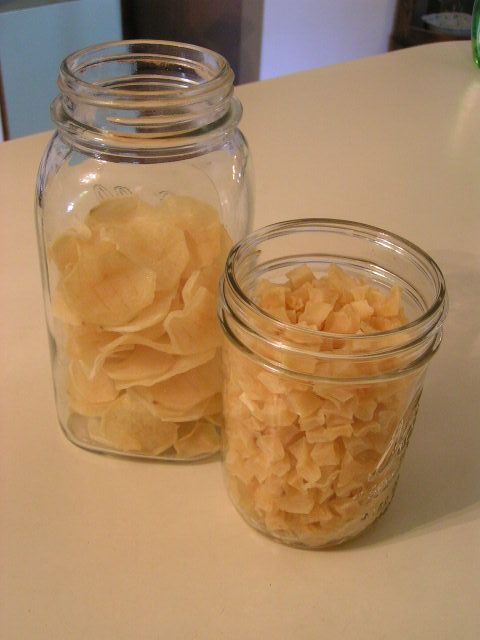
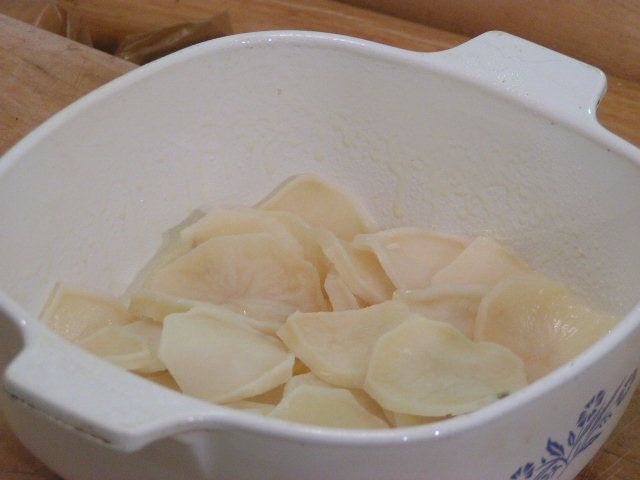
Dried potato slices should look like potato chips


 photo PICT0835_zpsca21ecb8.jpg


Store the dried potatoes into jars and seal with a vacuum sealer or just place a lid and ring in place and fasten tightly. Heavy weight plastic freezer bags work well too


Au Gratin Potatoes


(Or as my friend Janis calls them, “Old Rotten Potatoes”)


1 pkg Shawnee Mills Country Gravy Mix
2 1/4 cups water
OR make 2 cups of your own white sauce from your favorite recipe
1 cup dried sliced potatoes
1/2 medium onion
1/2 cup shredded cheddar cheese
2 tbsp Hormel Real Bacon Bits or 3 slices bacon chopped into pieces
French’s French Fried Onions
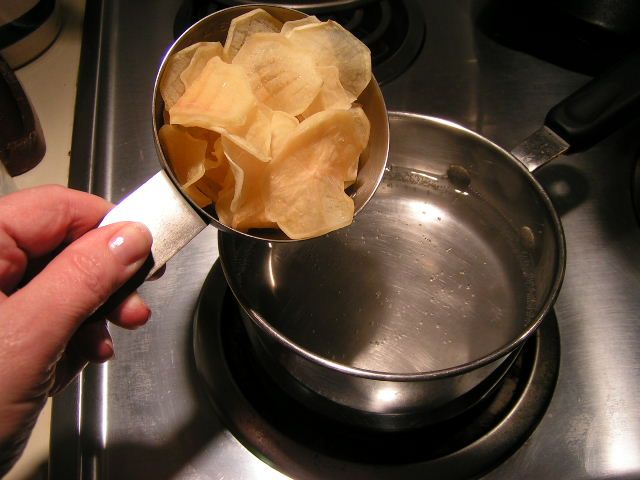

 photo PICT0847_zps4996893e.jpg


Pour potatoes into boiling water and cook for 15 minutes


 photo PICT0843_zps13a4a0eb.jpg


 photo PICT0850_zps15c9761f.jpg


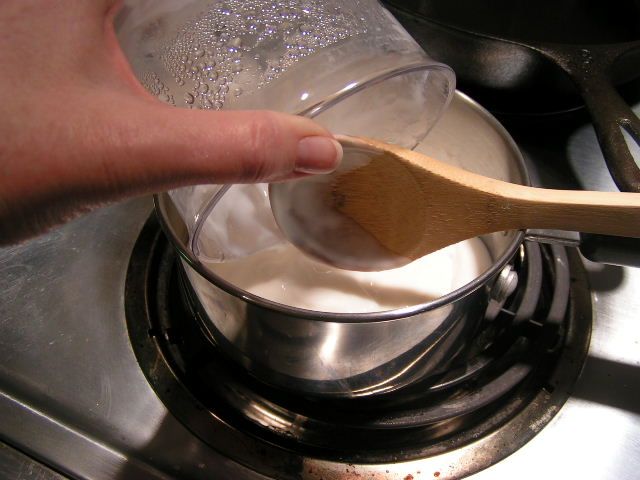
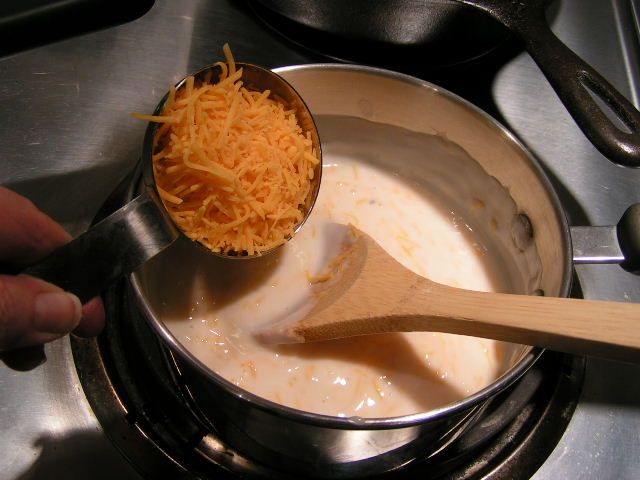
Make gravy according to directions, adding 1/4 cup more water – or make your own white sauce. I like to use the gravy mix because (1) it is fast and (2) it is low fat and low calorie. Add shredded cheese to the sauce and stir until totally incorporated into the sauce.


 photo PICT0856_zpsba0fc650.jpg


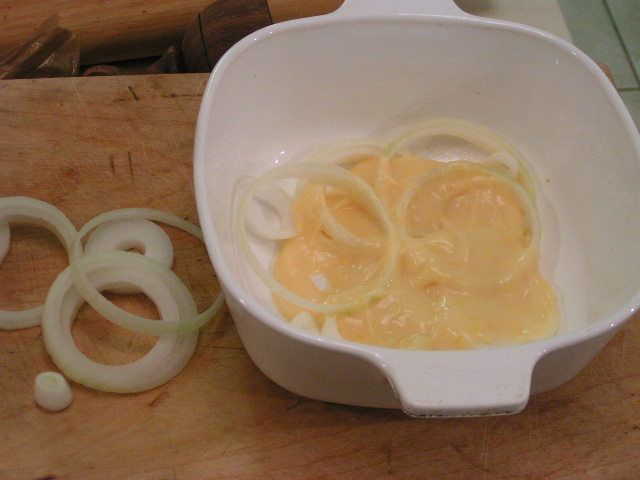
Slice 1/2 onion into rings and place half of them into the bottom of a small baking dish. This is a 1 quart dish. Pour 1/4 of the cheese sauce over the top of the onions.


 photo PICT0860_zps73d5f166.jpg


Drain potatoes and layer them in baking dish over onions


 photo PICT0861_zpsfe892d1c.jpg


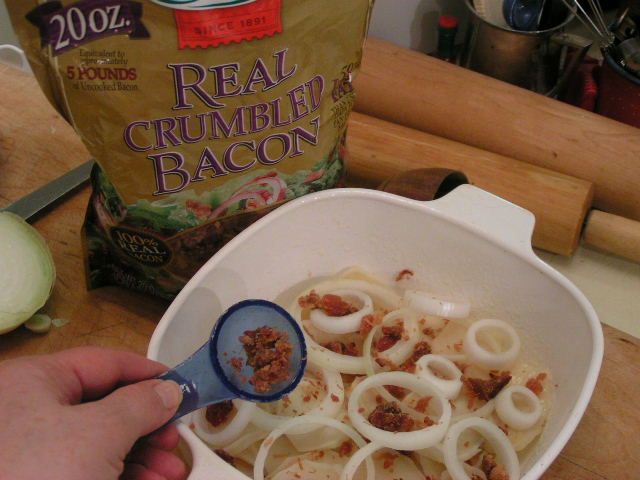
Layer rest of the onions over the potatoes and sprinkle the Hormel Bacon pieces or fresh bacon pieces over the onions and potatoes.


 photo PICT0862_zps10368a75.jpg


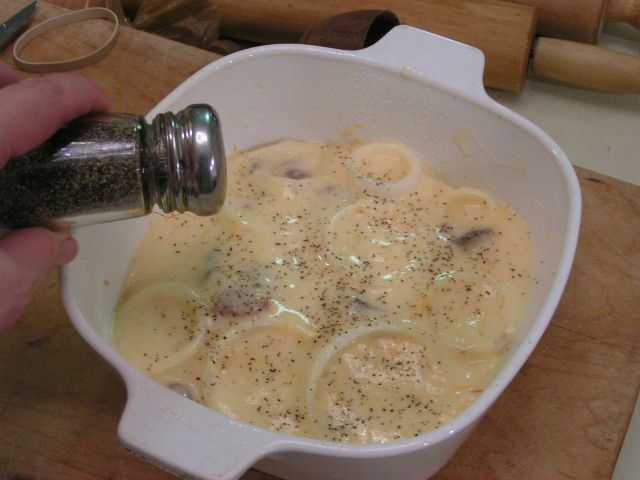
Pour remaining cheese sauce over the potatoes and sprinkle with pepper to taste.


 photo PICT0863_zps82b90c4c.jpg


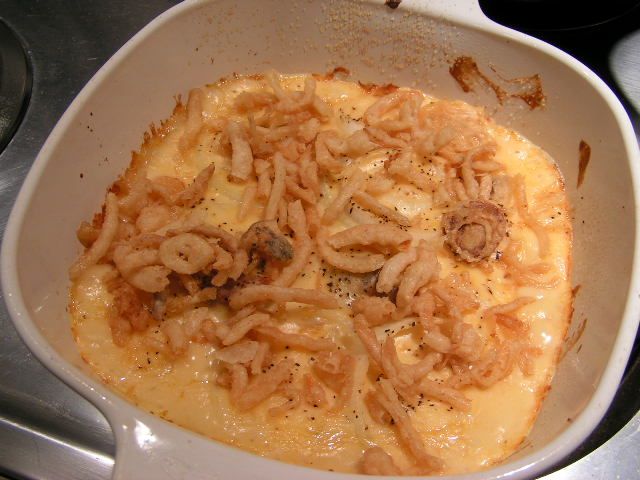
Bake for 30 minutes and remove from oven. Sprinkle with French’s onions and return to oven to cook 10 minutes more


 photo PICT0864_zps12a2c9f5.jpg


Can we say “Yuuuuummmm”?


Happy Cooking!


MB
Please join us on FaceBook!!


Join in the conversation by leaving a comment below and enter our January Giveaway!


Dehydrating Series Pt I – Celery

Monday, January 10th, 2011


Part II

Dehydrating Series Part I

Or

How To Pack 8 Bags of Celery Into

A One Quart Jar


Here in Oklahoma, most of us are tough old birds. We’ve learned the only thing predictable is that there is nothing much predictable in this state. One minute you can bake a chicken in your car and the next minute you’re trying to figure out how to get that car out of a snow drift. Of course, the car can get cooked in one of our prairie fires as well. Ice storms can paralyze daily life for a week and tornadoes can change lives forever. And then of course, there are the hail storms.


So, we Okies have pretty much figured out that you don’t need a government commission on emergency preparedness to tell us to be prepared. We’ve been prepared since the days of the Land Run when barrels of beans, flour and sugar and a crock of sourdough starter meant protection from starvation when the WalMart shelves were empty. Unfortunately, there ARE some city dwellers here who have either forgotten these facts or who moved here from some foreign country, like Los Angeles, who get caught with their rations down. But for the most part, we’re a pretty prepared and flexible lot. I got tickled the other day when a 30 minute program was aired to remind us that we have the likes of tornadoes and such here in Oklahoma. Ya think? A body would have to be living in a cave 24/7 to miss that little bit of reality. Anyway, the Oklahoma preparedness program has been called “Red Dirt Ready” and the name symbolizes the fact the Okies immediately jump in to help after a disaster, getting all covered in Oklahoma’s famous red dirt. That’s true. We do. It’s what makes this state great.


 photo IceStorm1-27-09003_zps64602f77.jpg


 photo PICT0032_zps15eac0a6.jpg


Imagine this on the power lines. That tree totally disentegrated. So do our electric lines!!


Electricity can be a problem around here. It is not unusual for us to be without for a couple of days and in many areas that can run into a number of weeks. That wreaks havoc on one’s frozen vittles if one hasn’t a generator and so it is nice to have plenty of stock that requires no refrigeration. That would seem impossible for such things as fruits and veggies, but not so! The age old art of dehydrating comes in really handy to offer up a pantry full of wonderful and healthy treats that will last a looooong time.


Having a garden each year, I dehydrate stuff yearly, but lately, I’ve been a dehydrating fool. I have been challenging myself to see what I can dry next and how best to use it. I’ve decided to do a series on using a dehydrator with recipes. Today I’m demonstrating celery and broccoli drying. I was inspired to do the celery because our local store, Firelake Grocery, had celery on sale, 3 large bags for $1. The broccoli was on sale as well – two good sized heads for $1. I use a lot of both.


Now, I need to sidetrack here for a sec because I realize that these are not organic items coming from a local grocer. However, with food prices soaring, many people can’t afford the more expensive organic foods and I want to let them know that it’s ok. This is where my faith comes into play. I see 3 large bags of celery for $1 as a blessing and I see God as my provider of blessings. Therefore, I just trust that all I can do is the best that I can and trust God to take care of me. In other words, I eat as healthily as I can and leave the rest up to the Lord. Shoot, I used to break thermometers when I was young and chase the little balls of mercury around on the table for hours with my friends! I promise, I don’t glow in the dark – although I do have very white hair. Do you suppose – – – ?


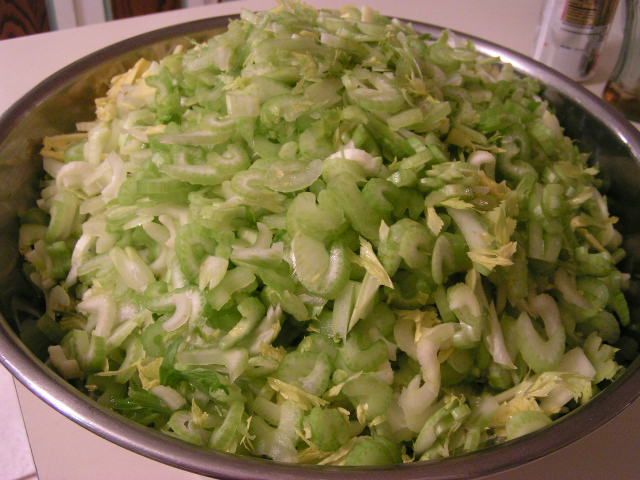
Back to the celery and broccoli. The long and the short of it is that I bought 16 bags of celery and a lot of broccoli. Neither of these items is anything you can keep for any amount of time unless you dry them or freeze them. I like to freeze celery by chopping it, leaves and all, and spreading it onto a cookie sheet, freezing it hard and then taking it off of the sheet to place it into freezer bags. That way the pieces stay separate and don’t clump up. Frozen celery is a quick addition for sautéing and putting into chicken salad. However, as I said, frozen is useless when there is no electricity. Plus, I don’t have that much freezer space! I froze one bag of this celery and all of the rest I dried.


 photo PICT0689_zps26a77d51.jpg


I used electricity on those suckers with a food processor! Beat having to cut them all up by hand. But I could have done it – Really.


 photo PICT0695_zps4c5bc851.jpg


 photo PICT0694_zps5f6dd73b.jpg


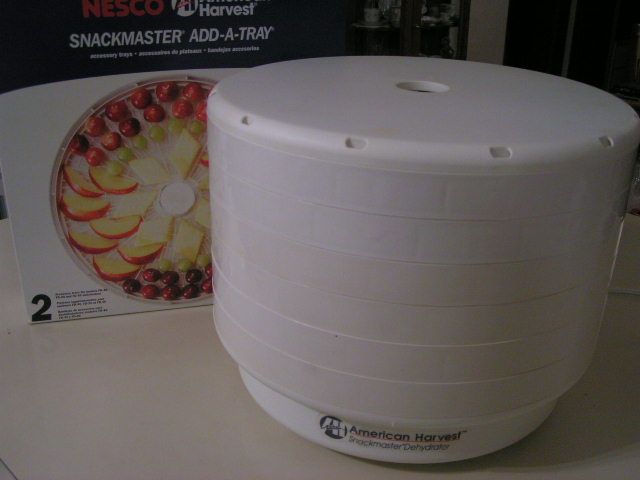
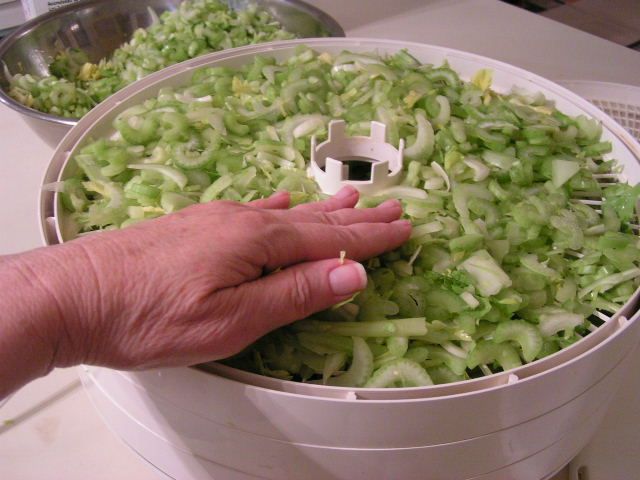
I use an American Harvest dehydrator that I have had for years. Got it at Walmart. They still carry them as far as I know, in season, but they are offered elsewhere as well. I also ordered extra racks from the company. Sprinkle the celery evenly on the dehydrator racks. It doesn’t matter if the celery is several layers thick. Continue adding celery to racks and layer one rack on top of the other. Dry overnight for 12 – 13 hours.


 photo PICT0708_zps8195570a.jpg


The celery should be totally dry and crisp in thin areas.


 photo PICT0709_zpsded1406f.jpg


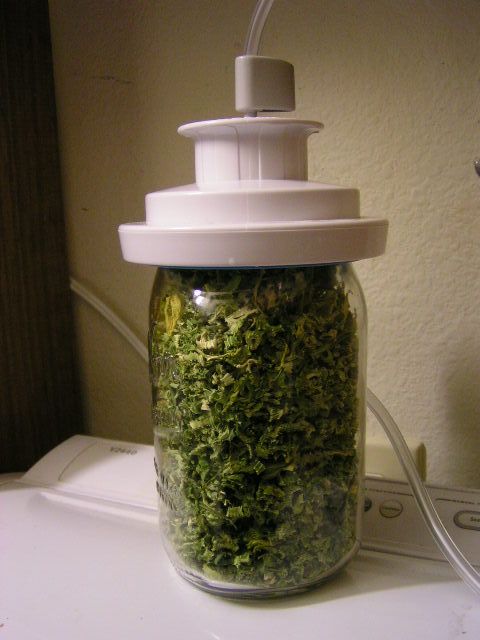
To make it easier to put the celery into jars with less mess, I have a very large bowl into which I shake the pieces. Then, using a canning funnel, I scoop the dried celery into jars. I like to use jars because I can vacuum seal them on my FoodSaver sealer. That takes out all air for good preservation. The nice thing is that you can unseal and reseal these jars with the vacuum sealer.


 photo PICT0714_zps4a691c61.jpg


15 bags of celery!! 1 tbsp = 1 stalk of celery


 photo PICT0713_zps26052810.jpg


 photo PICT0771adj_zps04704d9e.jpg


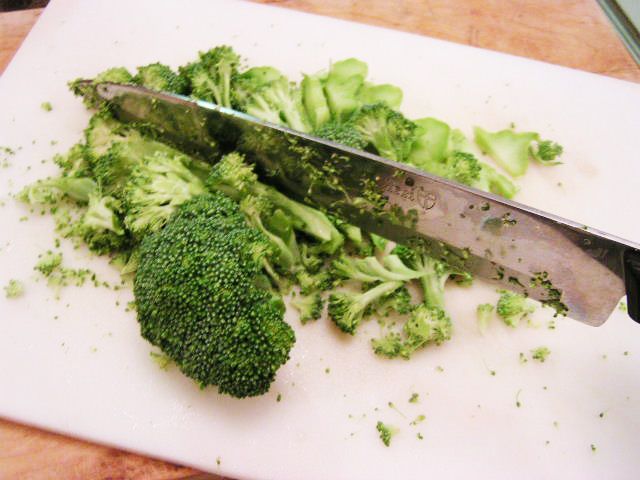
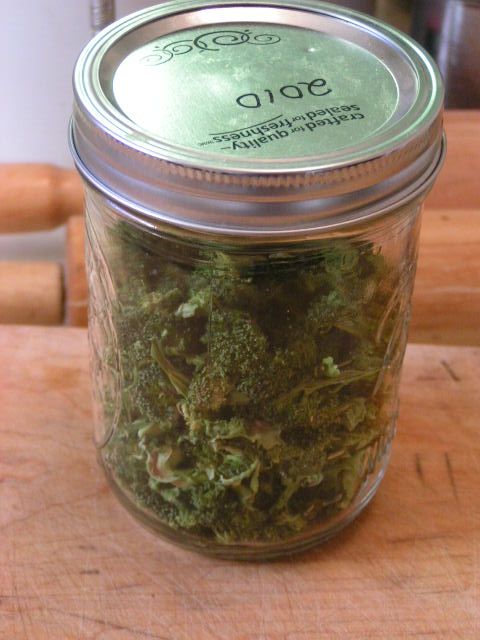
The same can be done with broccoli. You have a choice – if the brocolli is fresh from the garden and tender, I just cut it right up. If it is older or from the grocery store, I blanch in boiling water for 2 minutes, dump into ice water and then dry before cutting it up.


 photo PICT0778_zps0699519b.jpg


Dried Broccoli


 photo PICT1180_zps4453900d.jpg


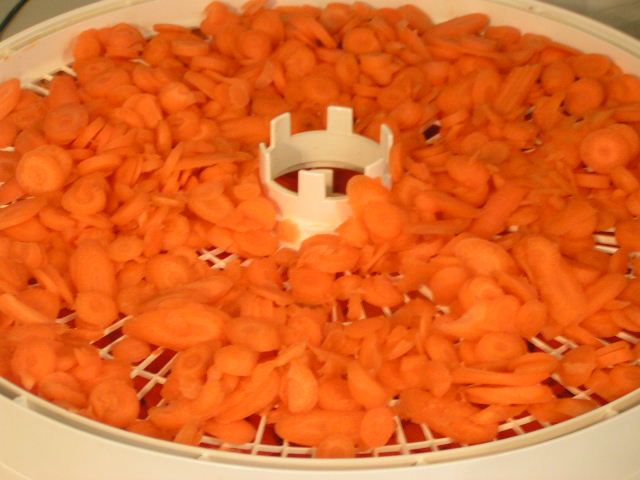
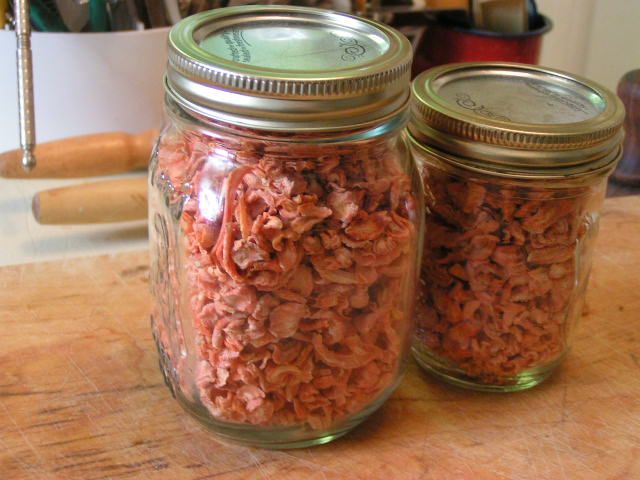
You can dry sliced carrots too


 photo PICT1182_zpsfbe9e539.jpg


They look pretty in the jar. The one thing about carrots is that they need to be soaked with FruitFresh because they will lose their color over time, if kept for long.


 photo PICT0661_zps1ada8f9c.jpg


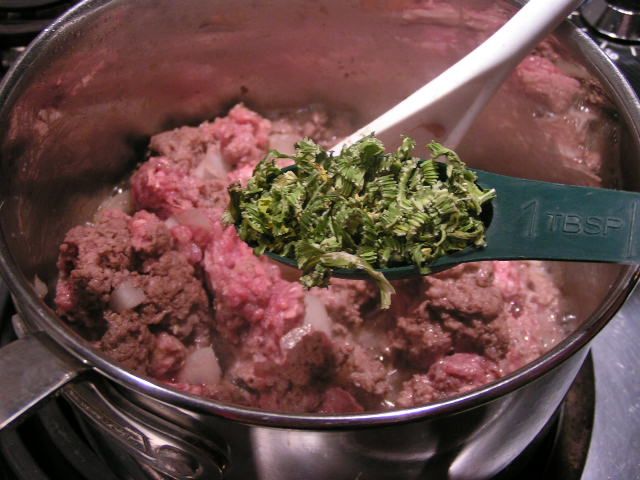
The dried veggies are wonderful for cooking. Add dried celery to browning hamburger for homemade spaghetti sauce or to the tomatoes for meatless sauce.


 photo PICT0666_zpsea3d6a74.jpg


It reconstitutes beautifully! Or, for chicken salad or other times you want crispy celery, place dried celery into a bowl and cover with cold water to an inch over the top of the dried celery. Place in the frig overnight. Drain the next day and you have celery like fresh!!


So there you have it. That will keep you busy for a couple of days and by Thursday, you’ll be ready for a recipe. I’ve made a New Year’s Resolution – I’m going to do my dead level best to post twice a week, hopefully Mondays and Thursdays. Just remember what happens to New Year’s Resolutions – they’re kinda all dried up too.


Happy Cooking!


MB
Please join us on FaceBook!!


Join in the conversation by leaving a comment below and enter our January Giveaway!


Egg and Muffin Sandwiches

Monday, January 3rd, 2011


“Deserve” Leads to


“De-Serve”


(A Recipe To Serve!)


OK, so that was kind of a crazy thing to write, but I was thinking about that place with the golden arches and their old slogan. Remember? It was that catchy song about what you deserve – you know – like a break today? However, as I grow older and older I am finding that what I think I deserve ain’t all it’s cracked up to be! I bet you can’t get that song out of your head now, can you?
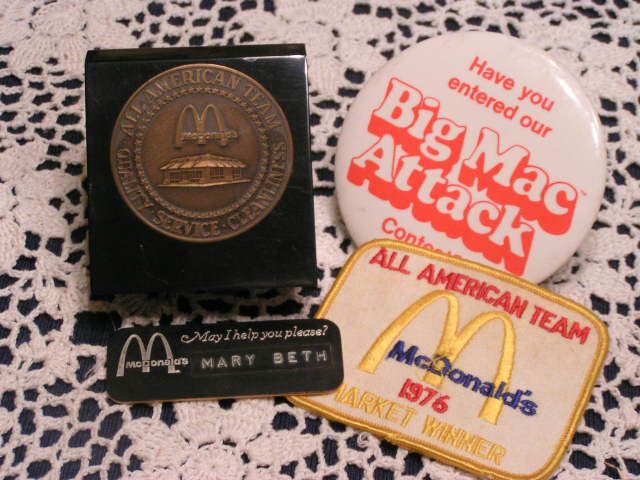

 photo PICT0855_zps3ba02d25.jpg


In my youth, I had the “prestigious” honor of being a “crew member” of the McDonald’s Restaurant team – aka, a “hamburger flipper”. I lived, breathed and literally ate McDonald’s. I don’t know how it is now, but back then, McDonald’s was run like the army and there was a real pride in the job and a sense of ownership in the company. Each year there was a competition for all crew members in order to become part of the “All American Team”. The more All American Team members at a store, the more prestigious the store in the eyes of the corporation. Competition was fierce and hard and not just a little scary. It was like participating in the Olympics, only instead of swimming you were waiting on and serving customers in under a minute, or in place of throwing the shot put, you were assembling, wrapping and tossing cheeseburgers onto a warming tray to a stop watch. The competition went on during the day while customers were actually being served and “The Suits” were there watching your every move. The one year that I decided to take the plunge, I competed at the cash register and outside the restaurant in grounds cleanliness. I won. I have proof. But I’m still waiting for the endorsement offers.


 photo cashregister_zps1cc15936.jpg


Now, I need to remind you that cash registers at the time were not the electronic wonders they are today. Computers were something only ‘brainiacs’ even considered and, as far as we were concerned, still occupied an entire room with magnetic wheel thingys (my hubby tells me they were called column tape units and he would know) whirling synchronistically . If that isn’t a real word, it sounds good – can’t you just see it?? Yep, the cash box on which I registered counter sales was an upright mechanical monster with round, brown keys in rows all down the front of the unit. The first vertical row was for the cents, the second, tens of cents, the third, ones, the fourth, tens and so on. The number totals showed up in white on black placards, side-by-side, in a window above the buttons. In order to put in a monetary amount, one had to punch each row of places matching the numbers of the entry. I remember starting out punching one button at a time with one finger as the customer stood there looking at me like, “You moron, can’t you work any faster than this? My Big Mac is gonna mold before I get it.” However, I eventually mastered the beast and could use multiple fingers to put in a total all at once – three fingers for “$1.99” and the thumb and first finger to “enter”. I thought I was hot stuff. And, oh yes, I was there when the Big Mac was first introduced. I had a “Mac Attack” on a regular basis.


 photo Youdeserveabreaktoday_zps8d07c29f.jpg


I learned to count back change. Those cash registers only told you what the total due was, not the total cash back. A $20 bill for that $1.99 order? A penny – two dollars, three dollar bills – three dollars, four dollars, five dollars, a five dollar bill – ten dollars, and a ten dollar bill – twenty dollars. Give a clerk today, if there is no computerized cash register, a ten dollar bill and a nickle for a $1.95 purchase and watch him slowly come unglued trying to figure out how much money you should be getting back!!!


Crew members were required to be “versatile” and one’s pay scale and evaluation was based on just how many things one could do in the restaurant. That meant that I didn’t just work the front, but I cooked too and I loved it. It was a fascinating process and I am here to tell you that a McDonald’s hamburger or French fries are no more unhealthy for you than a hamburger or French fries that are fried at home. Food is food and frying is frying. Back then, however, there was one breakfast ingredient that seems to be missing these days and that was butter. But I’m getting sidetracked – back to versatility. Another job that was a requirement back then was being a morning host or hostess. That has gone by the wayside too, apparently, but it was a fun job that involved making sure tables were clean, visiting with the customers, refilling coffee and bringing extra food items requested. It is a job that taught me the value of a servant attitude. I found that the more gracious I was and the more willing I was to do for the customers, the kinder they were and the more appreciative they were. Even when I would get a real grouch, I found that if I didn’t take offense and just treated them kindly, their grouchiness didn’t bother me and they seemed to leave a little less grouchy. It’s a lesson to practice every day.


 photo mcdonalds-arches_zps4f482024.jpg


I never would have picked McDonald’s as my career of choice at that time. I was fresh out of college with a degree in Fine Arts, but there weren’t any jobs out there in “Art” even if one did think that one’s art was “Fine”. McDonald’s was the only job I could land. I found out however, that even though I was not getting what I thought I “deserved”, I was learning an enormous amount of information and wonderful skills that would serve me the rest of my life. I’ve found that to be true in everything I’ve done that hasn’t jived with what I thought I had to have. I have figured out that I really don’t know what is always best for me and that I just have to chill and let God do the leading to whatever “best” is. It has led to a much more peaceful life, believe me!! We are at the beginning of a new year and stress is pretty heavy in the country and in the lives of many individuals. Seeking to serve rather than to be served is a heck of a way to deal with stress. When we seek to serve, rather than focusing on what we think we “deserve”, there is a change in attitude and actions for everyone involved.


Anyway, because with any life’s lesson there really has to be food involved, it is time for a recipe. The following is my way of using the homemade English Muffins, from the last post, for egg and muffin breakfast sandwiches. Your kids will love you for them!


Egg And English Muffin Breakfast

Sandwiches


Per Sandwich:
1 egg or two egg whites
1 English Muffin
1 slice American Cheese
1 slice Canadian Bacon or 2 slices thin-sliced Smoked Ham
Melted butter or olive oil
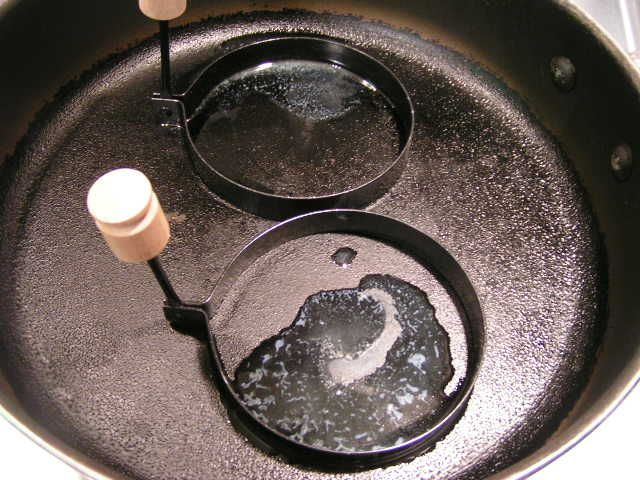

 photo PICT0487_zps27497e1c.jpg


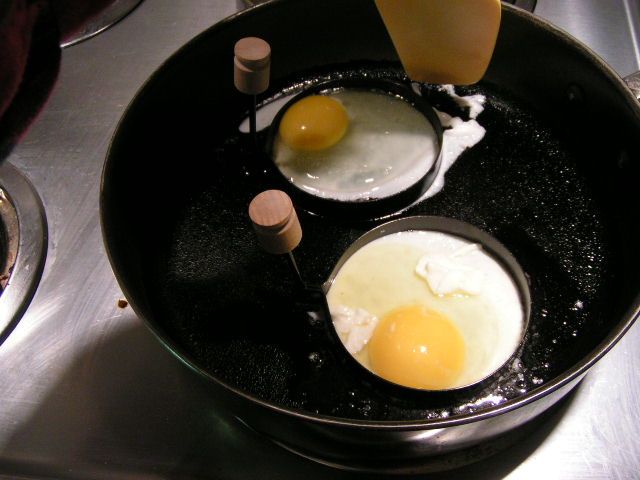
In a skillet, melt a tsp of butter or olive oil until bubbly into oiled egg rings or tuna cans that have had the top and bottom removed. Make sure griddle is hot before adding eggs.


 photo PICT0489_zpseaf92eff.jpg


Break eggs into single cups and pour each egg into the egg rings or tuna cans. If you are concerned about cholesterol, use two egg whites instead of the whole egg. Using a spatula, catch any wayward egg and put it back into the ring.


 photo PICT0490_zpsd30e7b4d.jpg


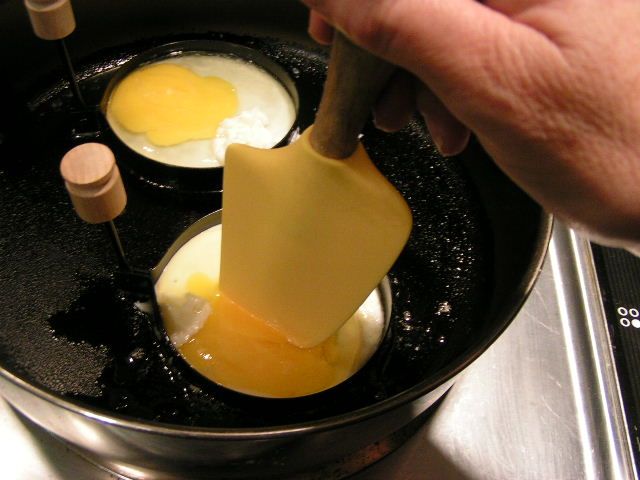
With a spatula, break the yolks


 photo PICT0499_zpseecaac24.jpg


When eggs are very firm, gently remove the egg rings by sliding spatula around the inside of the ring and flip the eggs to cook on the other side. Remove eggs and place on a plate in a warmed oven to keep warm.


 photo PICT0493_zpsf1fcebb0.jpg


Brush the tops of your split English Muffins
with either melted butter or olive oil. Place them face down in the hot skillet.


 photo PICT0496_zpsddbdb74c.jpg


 photo toastmuffins2_zps81f5a7df.jpg


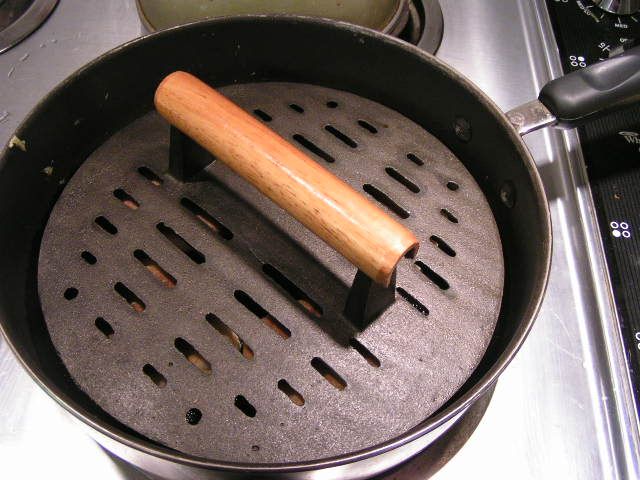
Use a kitchen press or heavy pan to weight the muffins, providing an even cooked surface that is warm and crunchy. These muffins have been turned over. See how pretty and browned they are?


 photo PICT0503_zps3c03b5b2.jpg


Remove muffin halves to plates and immediately place a slice of American cheese on one half


 photo PICT0505_zps17a39015.jpg


Place egg on top of cheese


 photo searham_zps9d1d14b5.jpg


Return to your still-heated skillet and quickly heat Canadian bacon or thick slices of smoked ham for each sandwich . Fry meat on one side for just 15 seconds, turn and then cook the other side for 15 seconds.


 photo PICT0507_zps25305041.jpg


Immediately put ham on top of egg


 photo PICT0508_zps3f2c71c8.jpg


Add salt and pepper and cover with the other half of the English Muffin to make a sandwich.


 photo PICT0801_zps96296424.jpg


I promise, it will melt in your mouth when you take that first bite!!


Happy Cooking!


MB

Please join in the conversation by leaving a comment below. And join us on FaceBook