
 The unique feature of country ham is the layer of mold that forms on the wrapping paper and ham surface as it hangs and ages. Newbies who receive a Tennessee Country Ham for a gift usually freak when they unbag their present and then unwrap the paper that has shrouded the meat all during the curing process. A nice, moldy carpet coats portions of the rind and paper. This is simply removed by scrubbing the ham with a mixture of vinegar and water or with plain water and a stiff bristle brush. The meat is sliced with a saw just 1/4″ thick. Having worked in a meat department that was constantly visited by local farmers toting their treasured cured hams to be sliced, I learned that it was ‘bragging rights’ when it came to how long one of these hams were hung. Three years was the limit, but it seemed that the more mold and the longer aged the better these ‘specialists’ viewed their product. Hog killing commenced around Thanksgiving, hams, bacon and shoulders were cured and smokehouses were loaded with the goodies to be smoked or to be used without smoking. I remember one farmer’s story about a most disastrous year. He had corn fed and slaughtered his pigs to put up meat for the year. After a gruelling day of salting down, wrapping and hanging portions, cutting up roasts, chops, ribs and other cuts for the freezer, grinding sausage and rendering lard, this industrious man and his family went to bed and slept the sleep of hard workers. The family went about the rest of the year and on into winter with the happy knowledge that come Fall, there would be good eatin’s from the smokehouse for sure. Sometime during the summer, the farmer went to the smokehouse and opened the door. To his horror, all that he found hanging from the rafters were bones tied with rope and picked totally clean of any shred of meat. Rats had crawled along the rafters, shinnied down the ropes and feasted on the cured meats without so much as asking! In the meat department, we cured hams all year long. We purchased fresh hams from our local packing plant, which you can do as well. We let them warm at room temperature for a couple of hours and then coated with our cure, hanging them in the cooler for the first 12 weeks. As meat begins to cure, it must be kept cool. This is why the farmers always waited until Thanksgiving or later to kill their hogs. With a walk-in cooler or refrigerator, however, the curing process can take place any time of the year.  I thought that I would give you a step-by-step lesson on how to create these wonderful hams with the help of some great kids. A group of home schooled students got to mix an anatomy and physiology class with learning to cure meat at the Oklahoma Pastry Cloth™ digs. We had purchased a hog that was taken to our local packing house and then we picked up the quarters to process ourselves, including curing the hams. As you will see, curing meat is a pretty simple process and is a wonderful way to preserve meats for a long time. One note, however, once these hams are sliced, the meat must be wrapped in freezer paper and frozen or, if eaten soon after slicing, kept in the refrigerator for a short time.
           So there you have it!! |
|
Oklahoma Pastry Cloth™ Company on Facebook
|
 |
Archive for the ‘Meats and Main Dishes’ Category
Home-Cured Ham
Friday, May 20th, 2011
Chicken and Broccoli Bake
Thursday, March 31st, 2011
 Once in awhile I get a wild hair and just start experimenting. Like splashing paint randomly on a canvas, I’ll play a game of “pull out what you have, throw it together and pretend it’s good!!” Most of the time, the result is pretty successful, but once in awhile I’ll end up with a disaster like my ‘seafood casserole’ which has been the subject of really bad jokes for the past 10 years. Or at least I think they are bad. For some reason, at family get togethers, that meal always finds its way into the conversation. That casserole was big enough to feed our family of six and all the neighbors up the road and across the road. Unfortunately, the kids took one bite and asked when I had started combining WWII MREs for dinner. Actually, WWII MREs would have tasted better. Mr. Fix-It, always the gentleman, smiled through gritted teeth and pretended to chew. I gave the casserole to our Labrador, Toby, who is the canine equivalent of “He likes it! Heh, Mikey!” (The Life commercial, silly!) Toby sniffed the casserole and looked at me with those big, brown, soulful eyes that silently queried, “When did you start combining WWII MREs for dinner?” He didn’t eat it either. Mr. Fix-It is my restaurant critic. No thumbs up from him or five stars. It’s number of helpings that determines the quality of my concoctions. One helping that is barely touched is a signal that failure is the operative word while two helpings is the, “Old gal, you did it!!” Well, this was a ‘Mr. Fix-It Two Helping Recipe” and so I thought that I would share it with you. And please, if you don’t like it, don’t tell me. Just go buy a Labrador! 
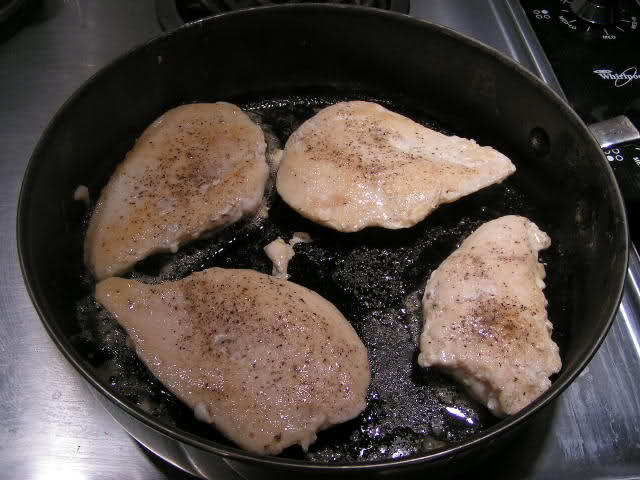 Salt and pepper chicken breasts and brown in 2 tbsp olive oil 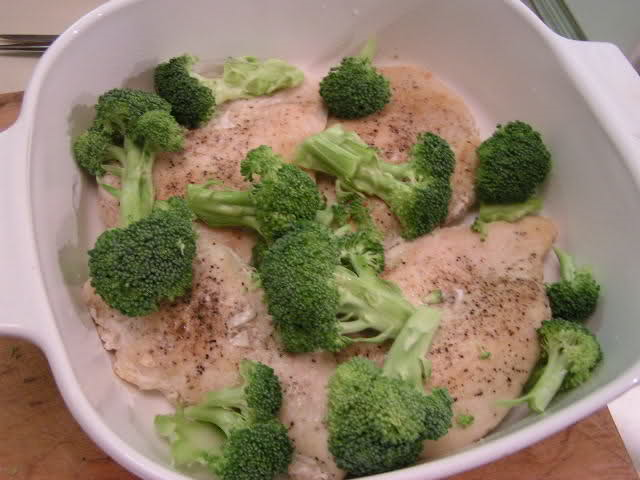 Place chicken in a baking dish. Lay broccoli around and on top of the chicken breasts 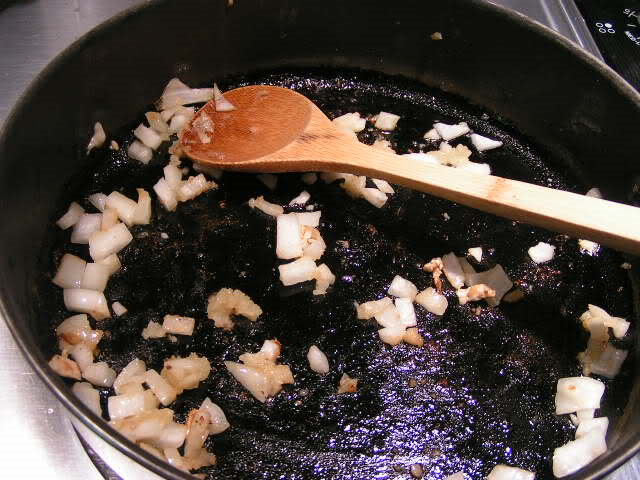 In the same skillet of drippings, sauté onions and garlic until just clear. 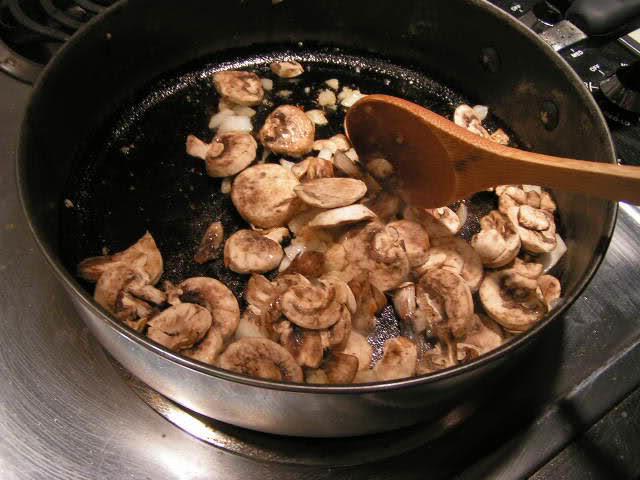 Add mushrooms and cook until tender and browned 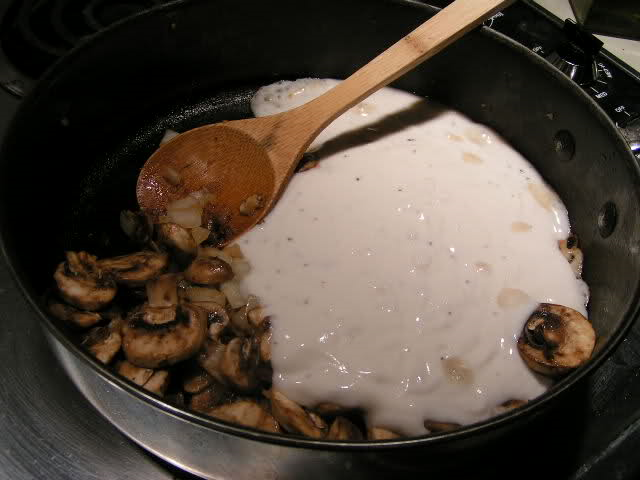 Add prepared gravy mix. I like using the mix because it is lower in calories and fat, but you can make a white gravy mix from scratch, in a saucepan, using equal amounts of melted butter (or other fat) and flour, adding milk a little at a time and stirring until gravy is thickened. Add salt and pepper to taste. 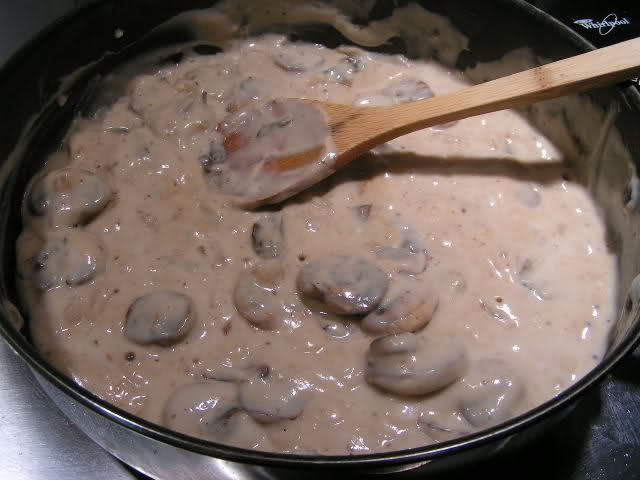 And stir until everything is incorporated 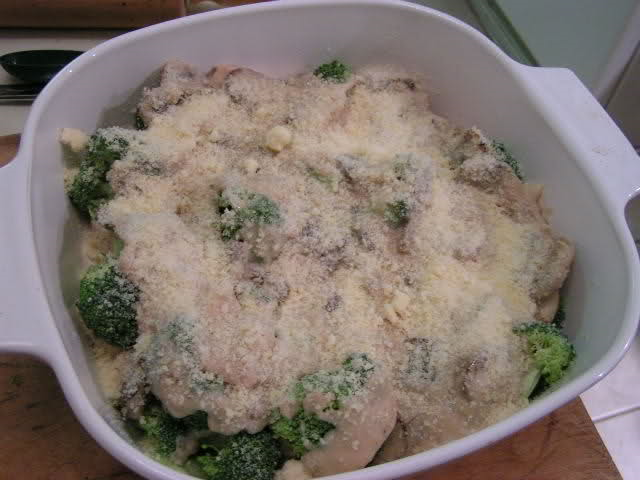 Pour mushroom sauce over the chicken and broccoli and spread to cover and sprinkle parmesan cheese over the sauce 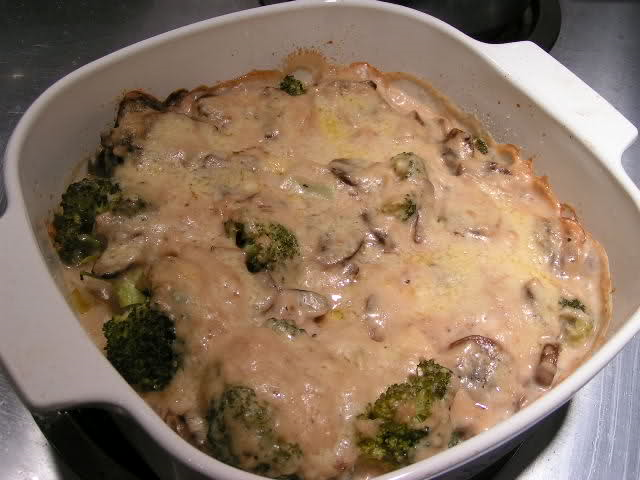 Cover and bake in 350º oven for 30 – 45 minutes until brown and bubbly
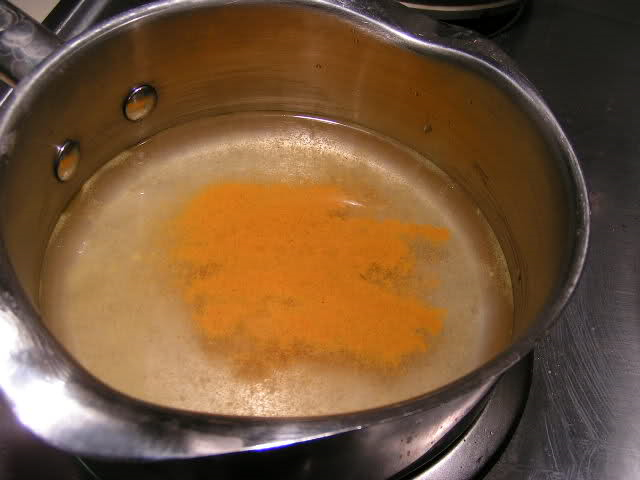 In a large saucepan add bouillon to water and add turmeric 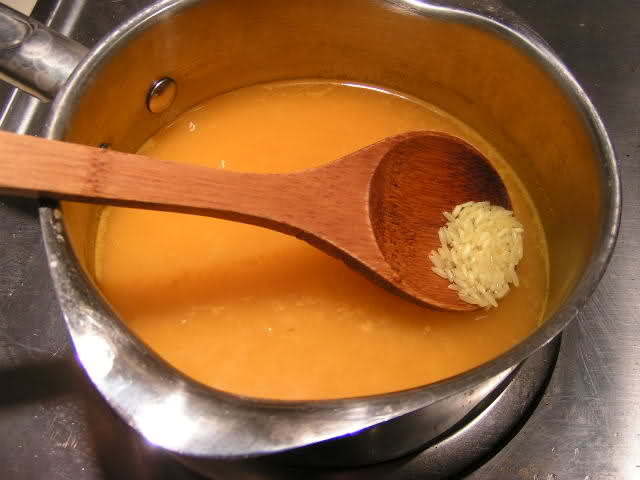 Bring water to a boil and add rice. Cover, reduce heat to simmer for 20 minutes 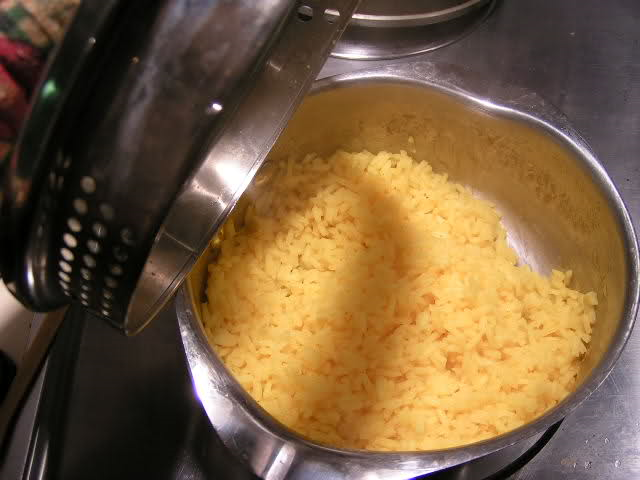 Toss rice and cover to let stand for 5 minutes. 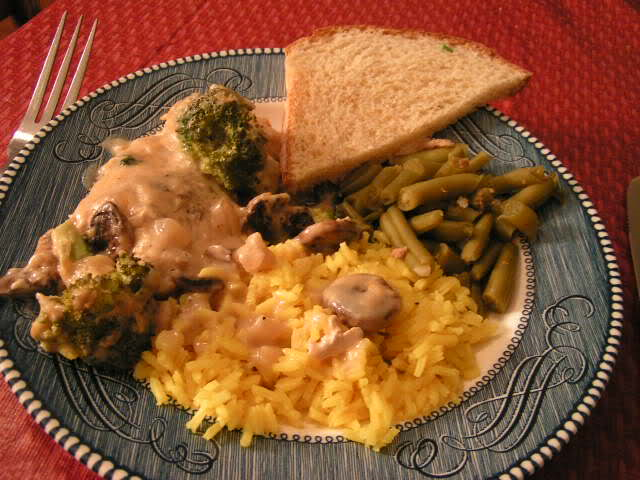 Serve one breast and broccoli with sauce per person. And of course, you’ve gotta have that homemade whole wheat bread! 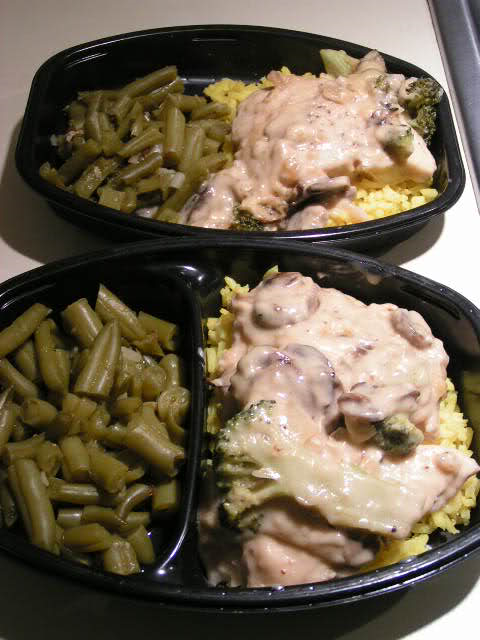 If you have leftovers, pop them into plastic trays, wrap with foil, label and freeze and you have your own ‘TV Dinners’. This is one chicken breast split into two dinners! Can we say, “Lunch?”  |
|
Oklahoma Pastry Cloth™ Company on Facebook
|
 |
Canning Chicken and A Recipe
Thursday, March 10th, 2011
  Buying chicken on sale is a wonderful thing if you have the room to freeze it, but what do you do when chicken is on sale for a matter of cents per pound and you want to stock up for a good, long time? Freezer longevity for chickens is just a few months and so unless you eat chicken every night, it would be hard to make use of a large number of frozen birds. Canning is your option! Shoot, canning is ALWAYS an option because there’s just very little that can’t be canned! 🙂 And so, here are the steps to canning a whole bird followed by a rather surprising recipe – I thought it was surprising, anyway! The method that I am using here is called the “raw pack” method and does not involve cooking the chicken first. 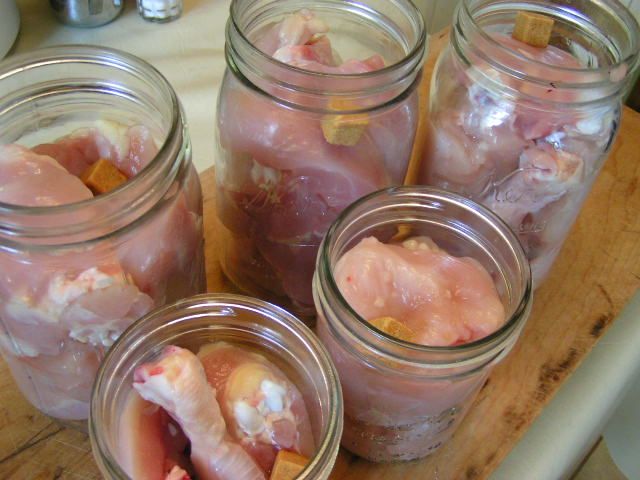 After cutting up the chicken, place it into warm, wide-mouth jars that have been washed and sterilized in the dishwasher or boiled in a large pot. It is important that they are widemouth in order to get the chicken out without tearing it apart. I can get one half of a chicken into a quart jar (minus the back which I use for stock). I also place just the wishbones together sometimes, in a widemouth pint jar, to use for recipes like enchiladas that call for just white meat chicken. I also skin all of my chicken to cut down on fat. I place one cube of chicken bouillon per jar. 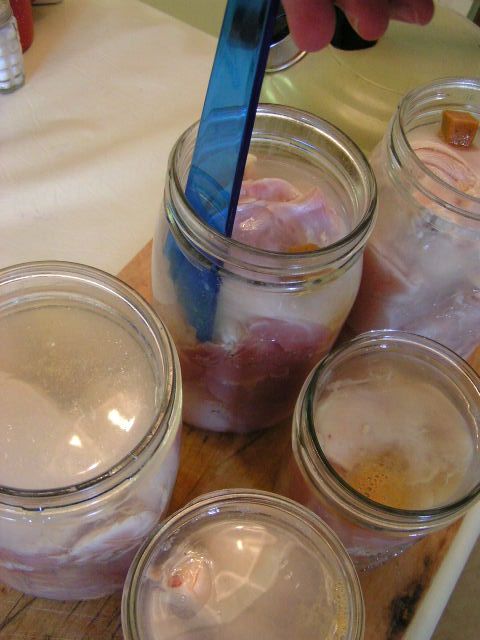 Meanwhile, I have a kettle of water boiling on the stove and slowly pour the hot water over the chicken to leave a 1/2″ headspace. Using a canning spatula or knife, move around the inside perimeter of each jar to release any airbubbles. 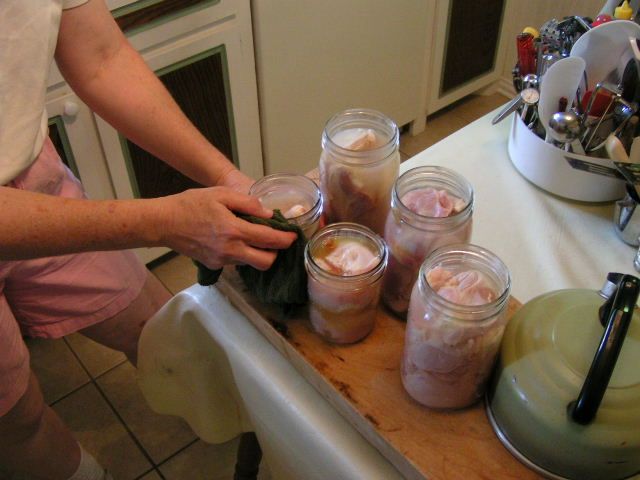 Wipe the top edges of the jars with a wet cloth to remove any chicken juice or oils. 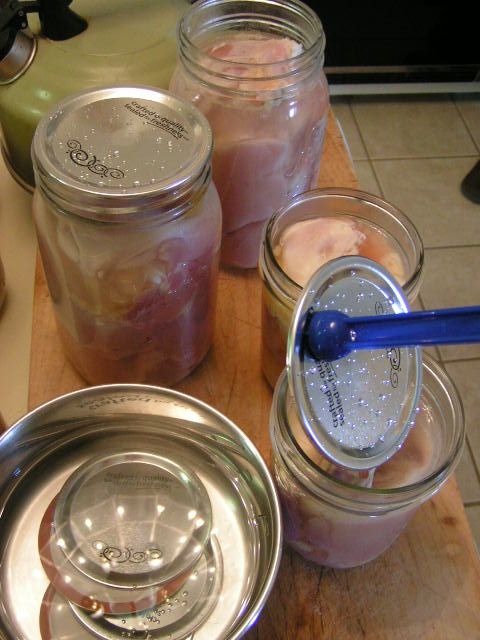 Place lids that have been warmed in a pot of nearly boiling water onto the jars and add rings. Tighten slightly. Place in a pressure canner just like I demonstrated in the post on canning chicken broth. Process for 75 minutes for pints and 90 minutes for quarts once your canner has pressurized. 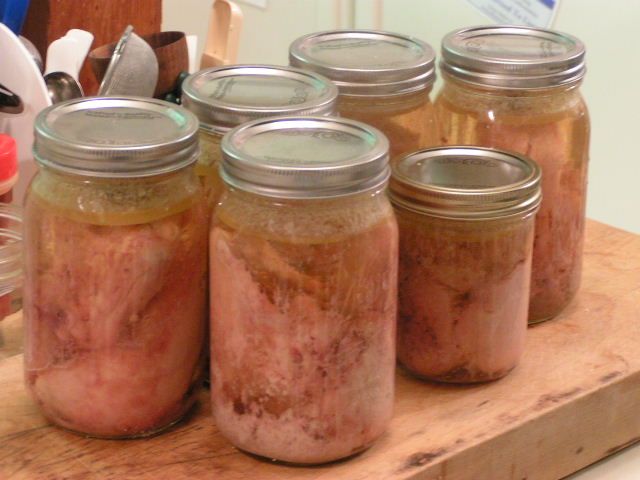 I have to admit that of all the things one may can, chickens make the UGLIEST presentation. The jars just aren’t pretty. There’s no getting around it. Once they come out of the canner and cool, it is a good idea to remove the rings and wash the jars (with the chicken in them) in warm, soapy water and then wash the rings to get any oil off that may have escaped in processing. Let the rings dry and then you can replace them or leave them off, whichever you prefer. Once your chicken is canned, it will last for at least a year. And it is so great for fast meals. Dump a couple of jars into a pot with some onions and broth and bring to a boil and then add dumplings. But that is just normal. How about different? 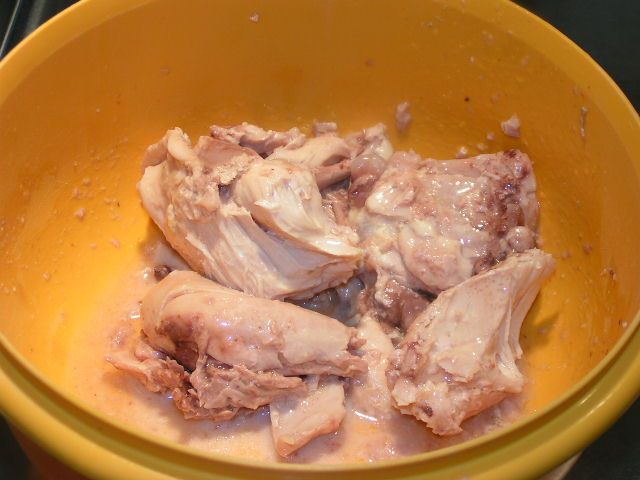 Last night, I opened one quart jar of chicken, drained the broth and carefully slid the chicken pieces into a large bowl. I sprinkled milk over the pieces. 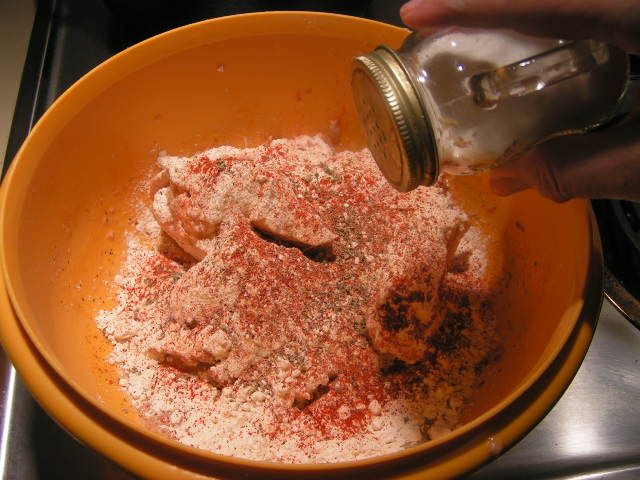 I added a cup of flour, about 1/2 tsp paprika, 1/4 tsp garlic powder, 1/4 tsp thyme, 1/2 tsp sage, 1/2 tsp black pepper and carefully rolled the pieces in this mixture. I salted the pieces at that point. Again, you have to handle the pieces gently or they will fall apart on you. If they do, it’s ok. Just dredge the parts in flour too.  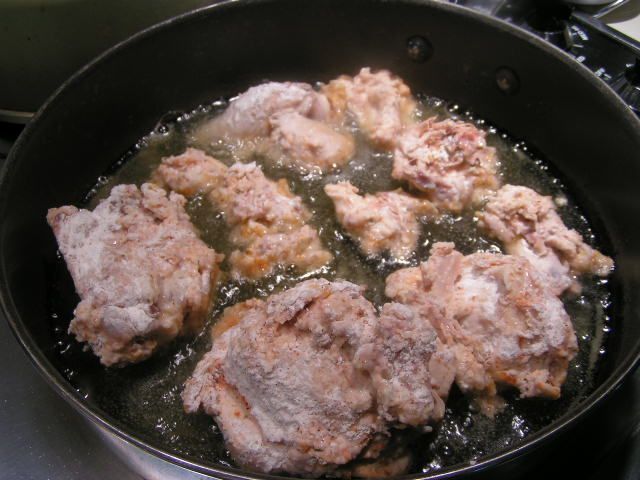 Next, I put just enough canola oil in a skillet to cover the bottom well and heated on medium high. Light olive oil would be fine too. Anything to get those good fats, people! When the oil was hot, I gently placed the floured pieces of chicken in the oil to “fry”. 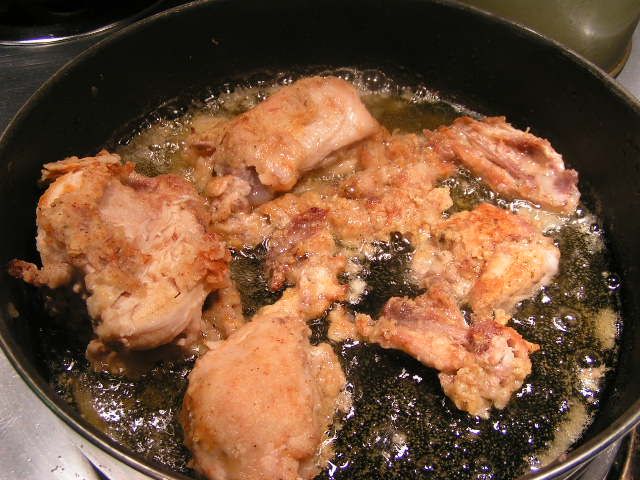 I carefully turned the pieces to brown on the other side. When browned, I transferred the pieces to a cookie rack placed over a cookie sheet and placed in the oven at 250º while I cooked the rest of the meal. This keeps the meat warm, but also lets excess oil drip off of the chicken so that it isn’t too greasy. 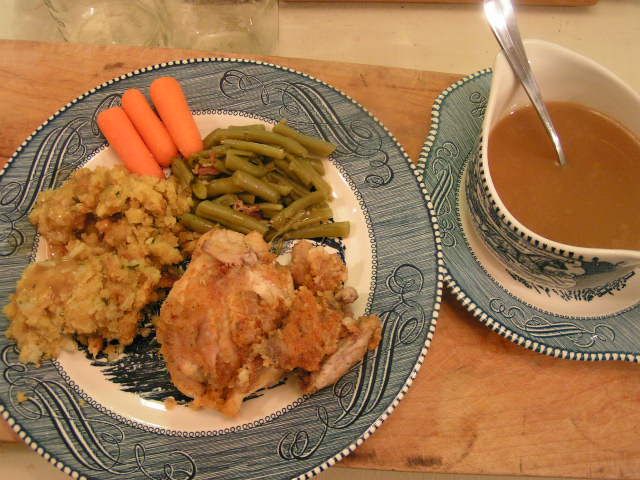  You can make gravy with the broth out of the jar and cornstarch or use a packaged mix. And I added stuffing to this plateful. Since the chicken has been pressure cooked in the canning process, it is tender and falling off the bone even before frying, so frying just gives these tender morsels a crispy covering. Mr. Fix-It was licking his chops and said that the chicken was superb! He’s my most honest critic. So see? You can use canned chicken in all kinds of ways! |
|
Oklahoma Pastry Cloth™ Company on Facebook
|
How To Cut Up A Chicken, Butcher Style
Monday, March 7th, 2011
  I’ve mentioned in past posts that I worked in the meat department of a grocery store in my previous life. At night, I helped cut and wrap custom beefs, lambs, hogs and deer. During the day, I was a butcher’s assistant, helping to cut, wrap and display all of the meats that were sold in the grocery. It was a fun job, believe it or not, made especially fun because of the people with whom I worked. It was a family operation and they treated their employees like members of the family. Practical jokes and laughs were a daily routine. One time, the butcher and his cousin had me convinced that I had guzzled Hydrogen Peroxide in my tea (the tea was fizzy), put there by a coworker who didn’t know any better, such that I was certain the stomach ache that ensued was due to gastric poisoning. There is a skull and crossbones on the bottle for heaven’s sake!!! I was handed the phone to call the doctor, who had been let in on the joke, and I was only encouraged further down the fantasy road of certain demise right there in the meat department. Finally, the giggles erupted and a bottle of Dr. Pepper was produced. My face could not have gotten any redder. I returnd the prank by heavily lathering the phone earpiece with vaseline and then calling the meat department from the phone at the front of the store. My boss answered the phone. Oh yeah. 🙂 I had to learn fast and hard in this job and being the competitive person that I am, thanks to the genes inherited from my tennis-playing grandfather, I was bound and determined to master whatever I was given to do. One of my first jobs involved wrapping the cuts of custom beefs in freezer paper and labeling the packages. It is a job that I still practice today every single time I freeze our own meats. There IS a method to wrapping! But that is for a later post. In my day job, the first task I was immediately tossed into learning was the job of cutting up a chicken. My first attempt was a joke, but as time went by, I got faster and faster and could finally cut and package a chicken faster than you could say “Cocka-doodle-doo”. This is a skill that has helped me more than you can imagine! Whether raising your own chickens for meat or purchasing yours at the grocery, knowing how to cut them quickly is a blessing. Today, I buy whole chickens on sale and cut them up, dividing them into packages of separate parts. The other day, I found whole chickens for 65¢ per pound. After cutting them, I packaged breasts together, legs together, thighs together, and packaged cut-up wings for hot wings, while cooking the backs, skin and “innards” for broth. A package of breasts for 65¢ a pound? Find THAT in a store near you! So here is the way that I learned to cut up a chicken. I learned from a pro – Greg, the Butcher! Thanks Greg, for all you taught me!! 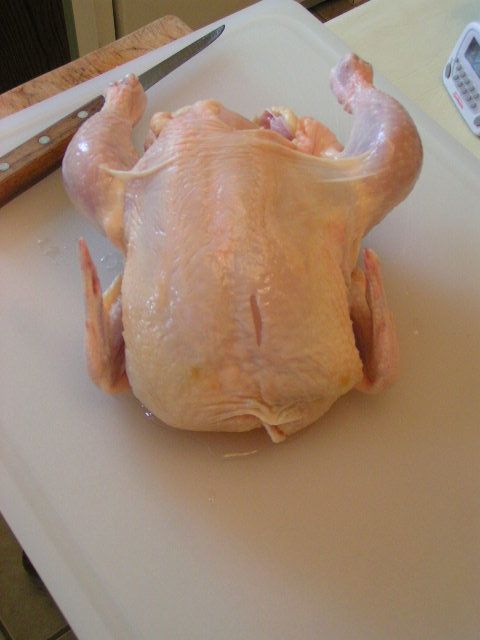 You will need a cutting board that is not wood. Wood soaks up bacteria that is found in chicken and it is very difficult to disinfect afterward. You will also need a good boning knife that is sharp. I use Forschner brand knives which are the brand that we used in the meat department. I like them because the blades are flexible and can bend slightly. Also, if you like, you can do what we used to do in the meat department and use rubber dishwashing gloves. These help you hold the chicken easier to avoid slips, and you are less likely to cut yourself if you do slip. 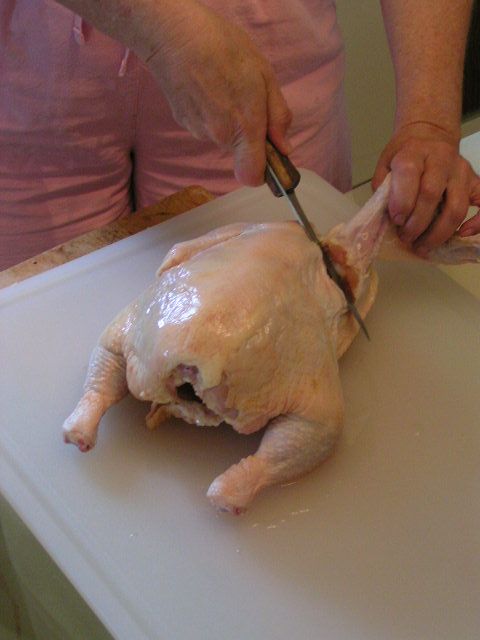 With the breast side down, pull one wing out and away from the body and feel for the main joint. Slice between the two bones of the joint. You will slice down and around the joint bone. 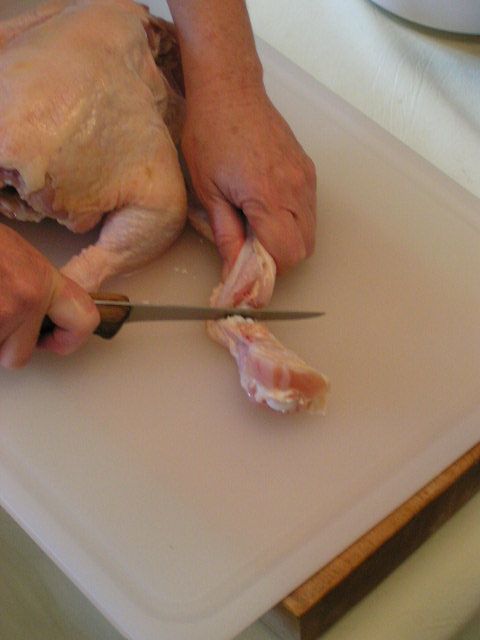 Cut at the joint between the shoulder section of the wing and the “bicep” section of the wing. 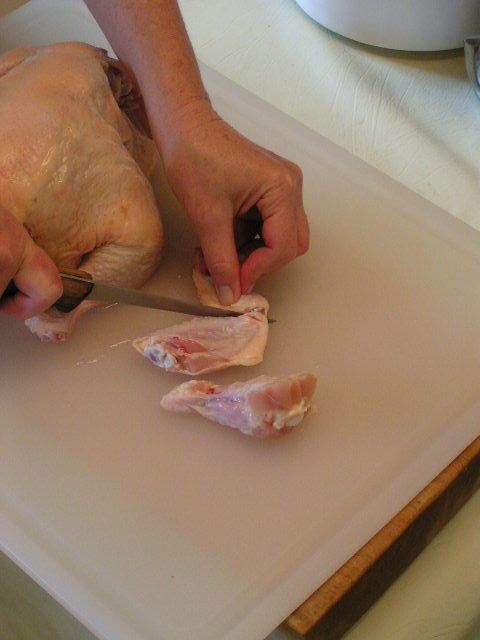 Then cut between the joints that hold the “forearm” of the wing to the “bicep” section. I throw that little front part of the wing in with the back and other excess pieces to stew for broth. The two larger sections are packed together for “hot wings”. 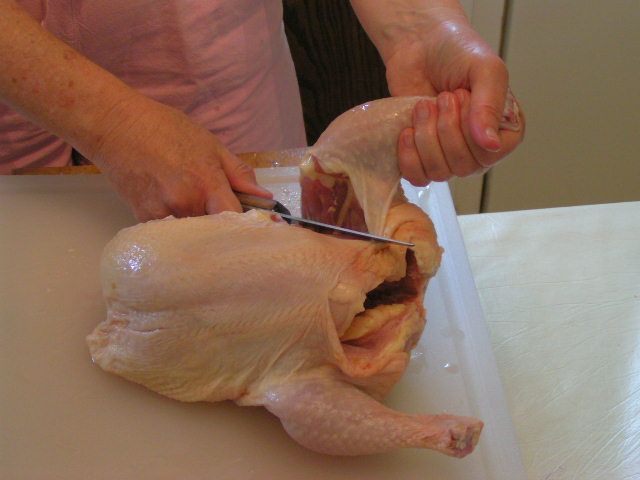 Next, turn the chicken on its side and pull a leg up so that it is pulled away from the body. Slice your knife right through the center of the skin until you hit bone. Stop. 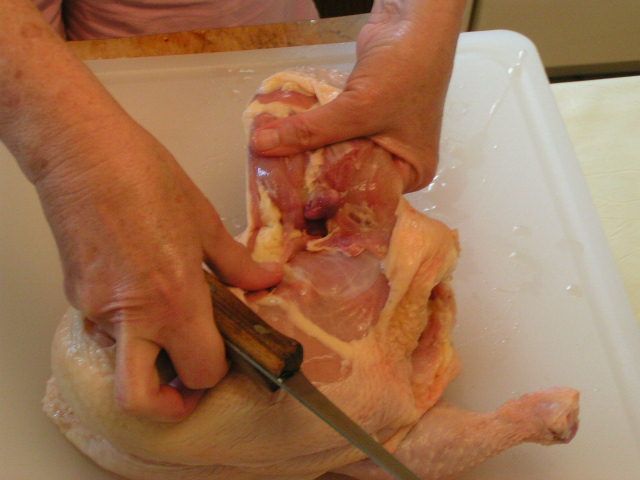 Using both hands, hold the body of the chicken and pop the thigh bone out of joint so that you see the end of it protruding. 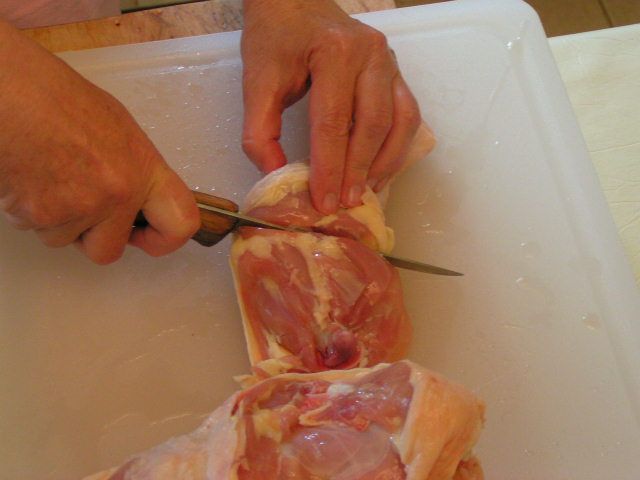 Cut between the round end of the bone and the body to remove leg and thigh section. If you want to separate the leg and the thigh, on the inside of the leg and thigh section, using your first finger, feel for the indention that indicates the joint between the leg and the thigh. Slice between the two bones and separate the leg from the thigh. 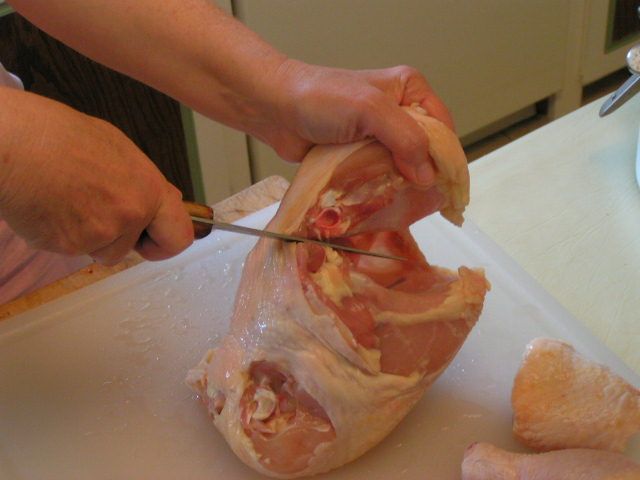 Turn the chicken up on its front end and look for the soft section of skin between the back and the breast section. It is just a flap. Put the knife at a 45º angle to the back and slice in toward the backbone. 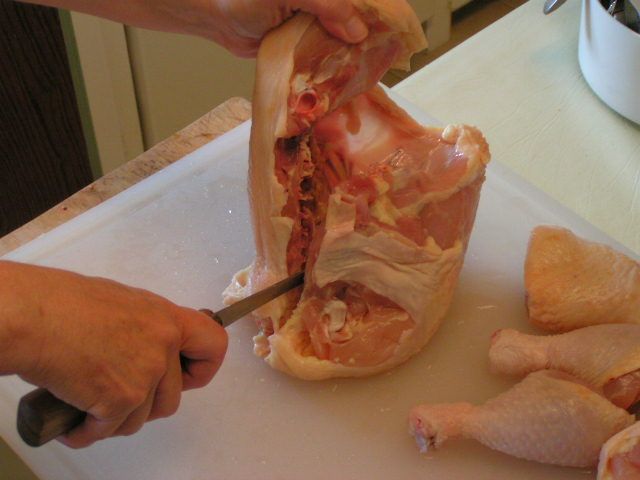 As soon as you hit bone, turn the knife blade down and slide the knife down along and between the backbone and the breast. There will be resistence because you are cutting through soft bone, but just push hard all the way to the end. 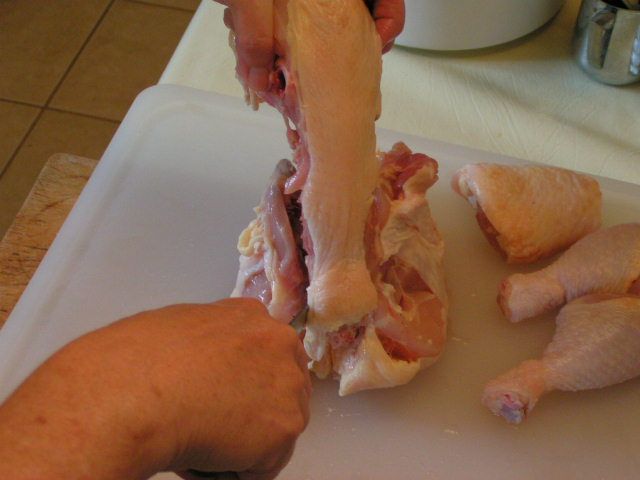 Repeat the same process on the other side of the backbone and lift the backbone out. 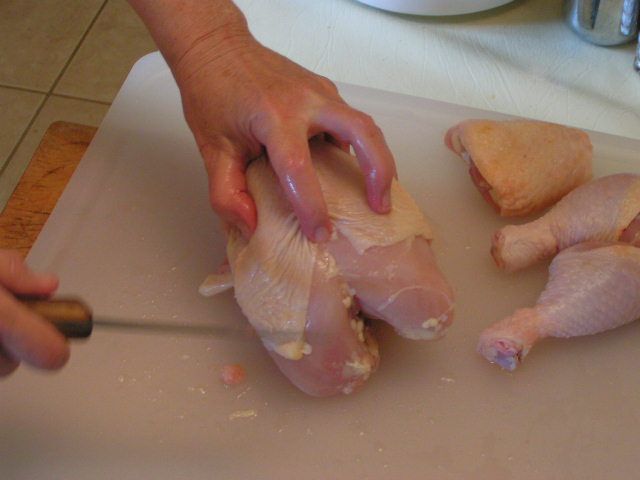 Now you are left with the breast section. If you like the ‘wishbone’ or your kids enjoy breaking it, simply turn the breast section over and slide your first finger down the center until you feel the tip end of the wishbone. 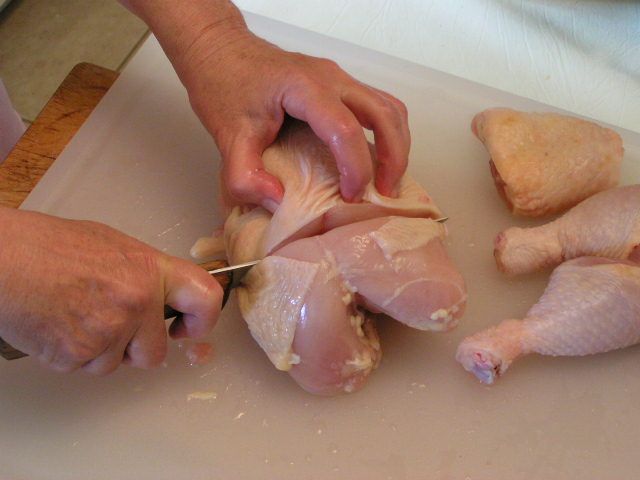 Cut straight down behind the bone tip and between the rest of the breast section and stop when you meet resistance. 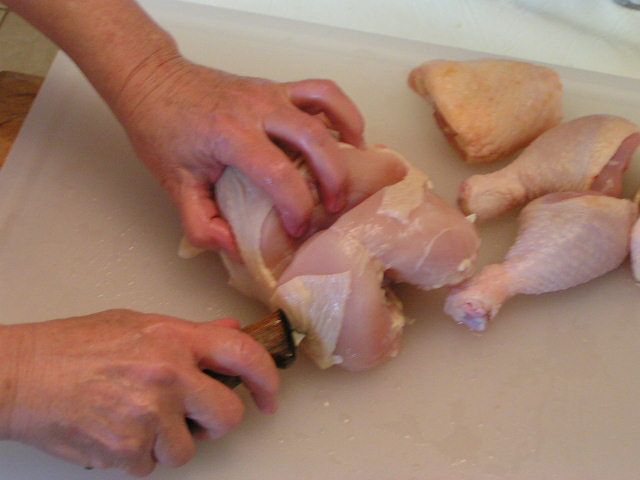 Now turn the knife blade nearly parallel to the cutting board and slice along the front of the breast bone and under the wishbone. 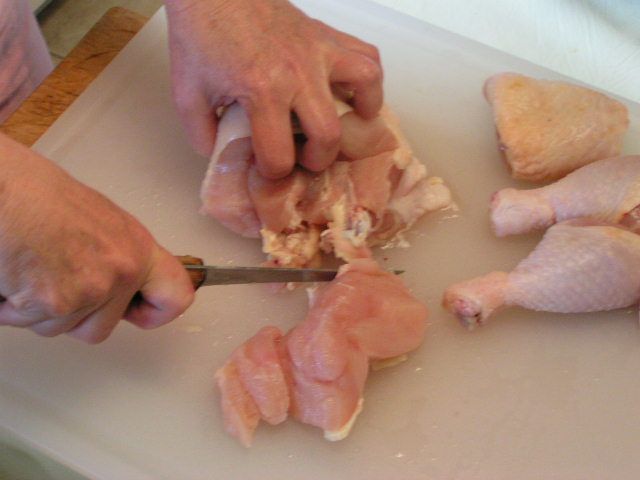 Separate the wishbone from the breast 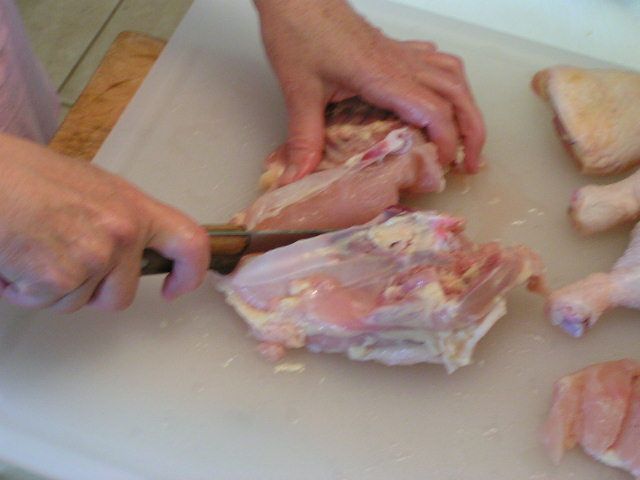 Turn the rest of the breast section on its back and cut right down the middle of the bone. This is soft bone and so with a sharp knife you can cut it. Start by putting the point of the knife down into the bone and press down. It will snap that top of the bone in two and then you can start cutting. 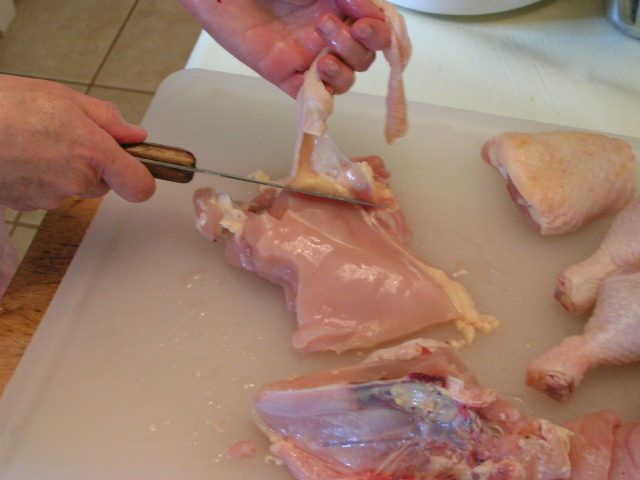 If you are like me and want to cut back on the fat and cholesterol of the skin, you can skin your pieces. This is a simple task, as the chicken skin easily separates from the meat. Just slide the point of the knife under the skin with one hand and with the other, pull the skin up to separate as you cut. And so there you have it – a totally cut-up chicken that you can now cook, can or freeze. I’ll show how I can mine in the next post and how I use it out of the jar. Once you have processed the main pieces, you can boil all of the leftovers into the stock found in this previous post.  |
|
Oklahoma Pastry Cloth™ Company on Facebook
|
Salmon En Croûte
Friday, March 5th, 2010
 Though I was originally born in Oklahoma, I have lived in a number of different parts of the country, whether full time or just for summers, and have enjoyed the particular regional foods that always stand out. In Maine, it was lobster and clams, in Maryland it was crab and crabcakes, in Kansas it was Prairie Chicken and Pheasant, in Texas it was bar-b-que shredded from half a steer baked in a pit, and in Tennessee it was grits, greens, country ham, spoonbread and fried okra. I also had the privilege of growing up with students from other countries in my home and so that really broadened my epicurean horizons. Japanese, Italian, Jordanian, Moroccan – if they made it, we tried it. I remember one dish in particular, created for us by a young, Jordanian man, that fascinated my sixth grade, just emerging, artistic appreciation. It was a molded pile of rice, shaped like a volcano that had blown its top, and sided with sauteed slices of eggplant strategically pressed into the mount to produce decorative, purple-ringed circles. I have no memory of how it tasted, but it sure looked neat to me! The one thing that I have found to be true, no matter where I’ve been, is that in every part of the country, the people love to eat! Put a steak in front of a Texan and “whoa doggie.” Shoot, in Amarillo you can get a 72 oz slab of steer and, if you can eat it all, you get to attempt to choke down another one! It’s free don’t you know? Right here in Oklahoma, not to be outdone by our neighbors south of the Red River, we boast of the steakhouse of historical steakhouses, Cattlemen’s Steakhouse. And so, yes, we Oklahomans are no different from the rest of the country. We like our food. Unfortunately, there are those outside of this state who actually think that steak and potatoes are the only things that we do eat in Oklahoma. Well…that and Bubba’s 6 point buck, shot in the Fall for when the beef runs out. The truth is, however, that we Okies are pretty high-fallootin’ when it comes to our vittles. In Oklahoma City, Ingrid’s Kitchen is one of our many incredible and authentic German restaurants that also tantalizes its patrons with pastries that can only be classified as “an experience”. Then there’s Nonna’s fine European dining where the salads are served sprinkled with flowers grown by Nonna herself – flowers that you can eat right along with the arugula! Of course, I suppose one might argue that this could bring the conversation away from fine dining and back around to the subject of steaks from the lowly steer who also eats flowers. But I digress. The Skirvin Hilton Hotel has a spread fit for oil barons and presidents and has actually served oil barons and presidents. Better yet, it is also supposed to be haunted!! Just ask the New York Knicks. They swear that they lost their game to the Oklahoma City Thunder because they were so scared of the ghosts that they couldn’t sleep. Sounds plausible to me. I’d say that an Okie ghost would have a great time scaring the daylights out of a New Yorker! Therefore, at the prodding of my doctor who wants the recipe ( did you know that Alaskan Salmon has less mercury than Atlantic salmon?) I decided to bypass the usual “homey” fare of downhome cookin’ to post one of my more hoity-toity recipes. I came up with this one after having tried something kind of similar at a lovely restaurant that is no longer in business – I promise they didn’t go out of business because of the food – and on a day when I had an unlikely combination of ingredients that needed using. It is really good, if I do say so myself, and no matter where you live, it’s good for you too! My Okie doctor says so! Hope you enjoy! |
Salmon En Croûte
6 sheets Phyllo dough (also spelled Fillo and Fyllo on packages)
2 (4oz) Alaskan salmon filets
6 small, fresh mushrooms
1 tbsp finely chopped onion
4 cloves garlic, finely chopped or pressed
1 tbsp olive oil or butter
Fresh baby spinach leaves
Remoulade Sauce
2 Tbsp mayonnaise (can use fat-free)
1/8 tsp paprika
1/2 tsp Worcestershire Sauce
Pinch of celery seed
1 tsp finely chopped onion
1/8 tsp lemon juice
2 tsp ketchup
1 tsp Grey Poupon mustard
1/2 tsp horseradish
Mix ingredients together with a spoon and set aside
 |
 |
Press or chop garlic

|
 |

|
 |
 |
 |
 |

|
 |
022, 026
 |
Place spinach leaves as a bed on serving plate and top with piping hot salmon pocket. Serve immediately with a dollop of Remoulade Sauce on top of the flower. The spinach leaves will wilt to warm and crunchy. Here, I’ve added a slice of fresh pineapple with a strawberry and steamed asparagus.
This serves two people and can be increased for any number. It’s a great dish for a dinner party because you can make the salmon pockets ahead of time and cover with plastic wrap and refrigerate until ready to bake. Your guests will think that you spent the whole day in the kitchen!! This is one of my hubby’s favorites.

 Homestead Revival
 Paratus Familia
 Rural Revolution