 First order of business….I forgot to announce that we had a winner on the 17th of the month. We drew a name out of the hat for the Red Gold Tomato apron and Jalapeno Ketchup and reader, Jonni from Kentucky is our winner. She has been notified and responded with surprise and her address. Congratulations, Jonni!! Now, I have an admission to make. I’m on a diet. Yep, I am. I’ve been on one since March but when one has thyroid disease, a diet feels pretty much pointless. Your metabolism ceases to exist and a stalk of celery adds 10 pounds to the waistline!! Actually, LOOKING at a stalk of celery adds 10 pounds to the waistline. It’s just a little depressing. Having been one who has always loved to cook and to eat what I cook, it’s been a difficult journey over this past year and a half, but there IS a tunnel and I’m seeing a light at the end of it!! I’ve lost 17 pounds! I still have a ways to go, but that’s a real achievement for me!! And in that tunnel, there has actually been food – really good food! I have discovered that no matter what fad diet is out there – eating blue or red foods, Atkins, South Beach, HCG, low carb, high carb, low protein, high protein, juicing, you name it – the reality is that the secret to losing weight is this formula: Calories In minus Calories Out. That’s it. So the way that I track that is by a free website called SparkPeople.com. It is wonderful. It even gives me a pie chart to try to match my perfect amounts of fat, carbs and proteins per day. And I get to eat whatever I want. It is the Dave Ramsey course in calorie budgeting! I have my 1200-1300 calories to spend and it is my choice how I spend them. If I make up a recipe, I can enter the exact recipe and how many servings I get out of it. The site then figures up all of the nutritional info plus calories per serving. Then, I can put a serving into my daily budget easy as pie. Well, sorry, didn’t mean to be thinking about pie. So today, was my baking day. I always keep something sweet in the freezer for me and Mr. Fix-It to enjoy in the evening with a cup of one of our tasty teas. I usually bake some type of scone or cookie to be heated in the toaster oven. I leave 200 calories open for that possibility. This afternoon, I made my usual round of cranberry scones and still had 1/2 cup of heavy cream left. I thought, “Hmmm. I wonder what would happen if I added cocoa and chocolate chips to the basic scones recipe?” I guess you know that I had to try. I did. Yummy!! Chocolate scones. I have a feeling that High Tea in England does not include chocolate scones, but here in America, we believe in chocolate in everything!! So here is the recipe that I concocted. They are a true English scone – heavy and flaky – but have a little bit of the flavor of an American brownie. And they are 186 calories each! I stayed under my 200 calories and so I am one happy camper. So here you go. If you want detailed instructions on making scones, you can hop over to that post at English Scones. 
Ingredients: Glaze 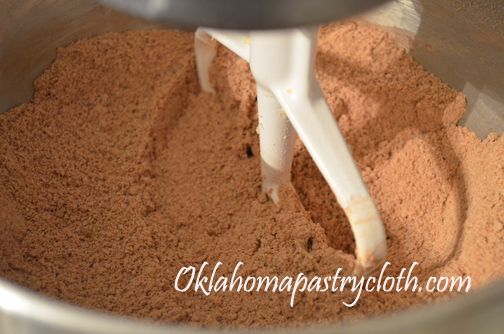 Preheat oven to 400º. In a mixing bowl, add flour, cocoa and butter that has been cut into cubes. Either by hand with a pastry cutter, or with a mixer, cut butter into the flour mixture, until the mixture is like tiny crumbs. Add sugars, salt and baking powder. Mix. Add the chocolate chips and mix. 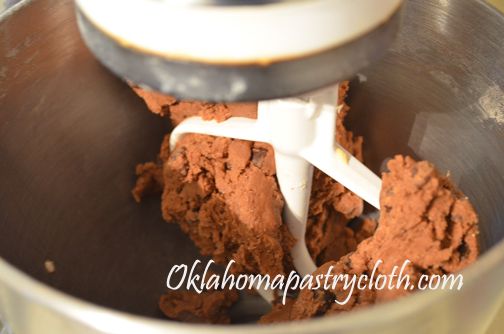 Add the cream, vanilla and egg white and mix until a very stiff dough pulls away from the sides of the bowl. Divide dough in half and put onto a floured surface – you need an Oklahoma Pastry Cloth™ here!! Pat out first half to about a 4″ circle. Cut into 8 triangles. Repeat with the second half. Place scones onto a baking sheet that has been lined with parchment paper. Mix leftover egg yolk with 2 tbsps. half and half and brush the tops of the scones with the mixture. Bake at 400º for 13 minutes or until done. While scones are baking, mix melted butter, powdered sugar and milk to make a glaze. Dip tops of scones into the glaze and place onto a cookie rack. 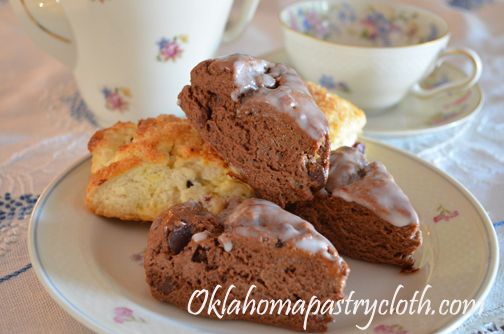  Serve the scones warm. I bet raspberry jam would be great with these!! This picture is of the two different scones that I made this afternoon. Oh! And the china is my grandmother’s Thomas Ivory Bavarian china, made by the Rosenthal company, that my grandfather bought in Germany during WWII – paid for with cigarettes!!  |
|
| |
|
Oklahoma Pastry Cloth™ Company on Facebook
|
|
 |
|

|
Archive for the ‘Breads’ Category
Chocolate Scones
Tuesday, August 27th, 2013
Yogurt: The Answer To Everything!
Tuesday, March 5th, 2013
  Anybody remember Precious Pup? He’d eat something and then wrap his arms around himself, let out an “mmmmmm” and float up up into the air in gastronomical bliss. Well, let me tell you: That was Mr. Fix-It the other day as he munched on my accidental biscuits. I say ‘accidental’ because I had to improvise on my usual biscuit recipe in the hopes that I would still come out with the semblance of those southern treats. Mr. Fix-It was in the mood for biscuits and I, always wanting to please my man, dashed to the kitchen to whip out a batch of my own recipe. I had posted that recipe here a number of years ago, with step-by-step photos, but I’ll let you in on the secret of what I did differently. It all started with the absence of buttermilk. Now, everybody knows that the enterprising cook can substitute a cup of milk that has been poured over a tbsp of vinegar and then warmed to room temperature, for a cup of buttermilk. And that makes pretty good “buttermilk” biscuits – but I didn’t want “pretty good”. I wanted “big grin, lip smackin’, darn great” buttermilk biscuits. As you know, I’ve been on a yogurt kick and have been throwing the stuff into anything for which I can safely find an excuse. I decided that biscuits might be my next great experiment. I was right. Oh my gosh. Those were absolutely the best, most awesome, pastrymagical (my own word) things you ever put in your mouth. With homemade grape jelly or apple butter – they were proverbially ‘to die for’. So here you go. See what you think. I use my homemade yogurt, but if you use ‘store bought’n’ I recommend StoneyField plain if you can get it. 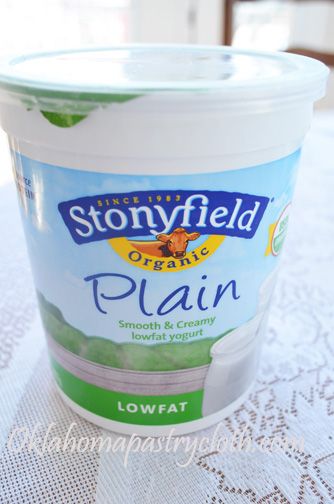 Ingredients: 2 cups all purpose flour 1 Tbsp + 1 tsp baking powder 1/2 tsp baking soda 1 tsp salt 6 tablespoons shortening 1 cup plain yogurt 2-3 Tbsp milk Directions: Preheat oven to 450º. Add all dry ingredients together and cut shortening in with a pastry cutter/blender, two butter knives or a fork until the mixture resembles crumbs. Add yogurt and stir until totally incorporated. Add enough of the milk to form a soft, sticky dough. Place onto floured Oklahoma Pastry Cloth™ and drop lightly and pick up a number of times to form a soft ball. Roll out to 1 inch thick circle and cut biscuits. On a baking sheet, pour either olive oil, coconut oil, sunflower oil or peanut oil to lightly coat the surface. Place biscuits side-by-side, not quite touching, putting the tops into the oil and then turning to place biscuits with oily tops up. Bake for 13-15 minutes until golden brown. Brush tops with melted butter and serve hot. 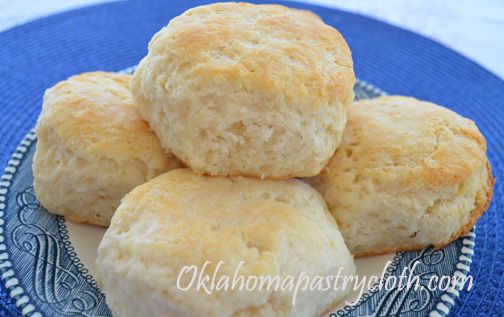 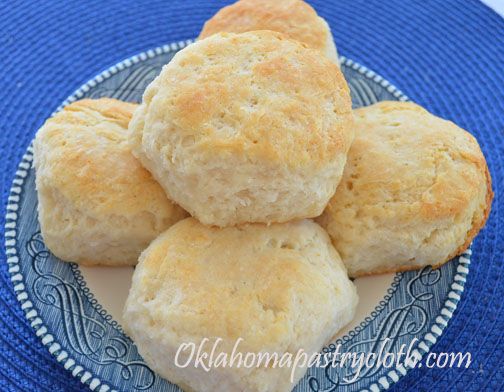   |
|
| |
|
Oklahoma Pastry Cloth™ Company on Facebook
|
|
 |
|
|
|
Fair Food At Home!!
Thursday, September 20th, 2012
 Well, it’s that time of year. Fair time…and in Oklahoma, as the song states over the radio, ♪♪ It’s a great state of a-fair! ♪♪ Okies look forward to the Oklahoma State Fair. Even in this hoity-toity, modern world, the exhibit buildings are still full of canning and garden entries, photography contests and the tasty baked goods from home cooks itching for a ribbon and winner cash. The barns overflow with show cattle, sheep, pigs and horses and the drone of announcers instructing showmen in the rings permeates the agriculture part of the fairgrounds. And of course, every tornado shelter company, shop building firm and hot tub emporium has a display of their particular pride and joy features, not to mention the thousands of home product hawkers housed in the fairgound’s numerous, spacious expanses of concrete and skylights. This year, Mr. Fix-It and I got to spend a day at the fair with the daughter, son-in-law and 9 month old granddaughter. Now THAT was a trip!! Watching my little grandbaby taking in all of the sights was pretty funny. And sights there were. Oh my goodness. I crawled out of my cave and noticed today’s fashions, evidently for the first time. I’ve decided that the fair is the excuse for any human being to leave home without ever looking in a mirror or even opening their eyes to judge their clothing before walking out the door. Older men and women in jeans obviously from a time when they were in high school and 200 lbs lighter, thought nothing of leaning over to expose bare buttocks and rotund waists. Lace shirts over brightly colored underwear and shorts with holes so big that I wanted to run to the rescue with a safety pin to help them avoid any humiliation – which they obviously felt none. We giggled at men with the dumbest hats, won at various arcades, and they wore them proudly to the chagrin of their wives or girlfriends. Of course, the callers at the arcades wore the same, dumb hats.  The strangest piece of clothing we saw came in the form of boots worn by a boatload of men. I’ve never seen them before. Back in “the day” here in the midwest, we used to have pointy-toed cowboy boats called, “Roach Killers” because one could trap a roach in a corner and squash it with the very pointed toe of the boot. But these new boots defy explanation, as the toes are so long that the longer worn, the more they curl back toward the ankle. We saw one pair of candy apple red and cream boots that curled so much, they looked like jester’s shoes. And I thought our 70’s fashions were weird!  The dirty little secret about going to the fair, though, is that inside every fair-goer’s heart is this lame excuse to go berserk over foods that no ordinary individual would consider logical, let alone healthy! And my daughter is the fair-goer food officianado. She enters the front gate, brushing past the ticket taker with a wave of her receipt and a single-minded purpose in her eyes – heading toward the various food shrines like a teenager preparing to pay homage to Lady GaGa. My daughter walks the entire length of kiosks that stretch for a 100 miles (it felt that way to my feet anyway), to assess what kind of damage can be done to one body in the form of calories, grease and salmonella. Then, she maticulously makes a list in her mind ordering which confection will be first and which will be last. Sweet always comes first and protein comes last.  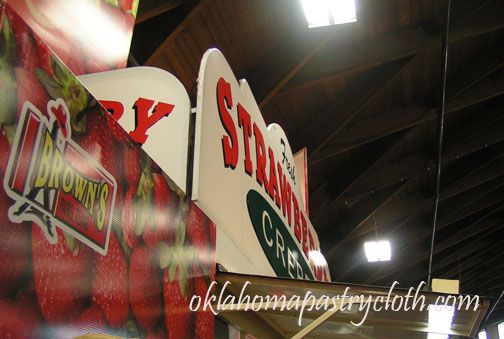   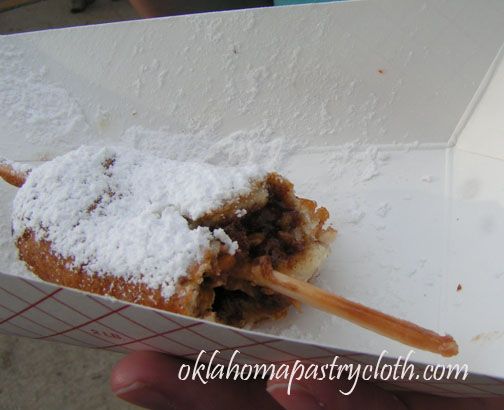  One of the fair treats that is of lesser offense to the health conscious psyche is the funnel cake. The batter is very basic and if cooked in a healthy fat and dusted with just a little powdered sugar, one can share a fair-sized cake with nine or ten people and really feel smug over the idiot eating the chocolate bacon! 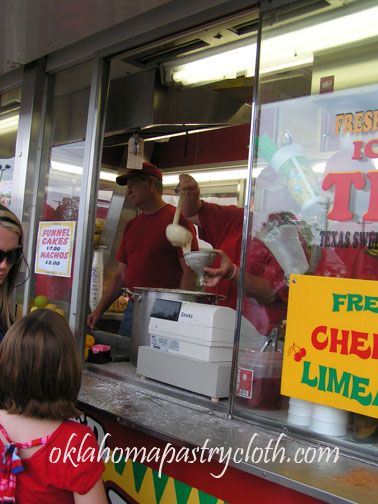 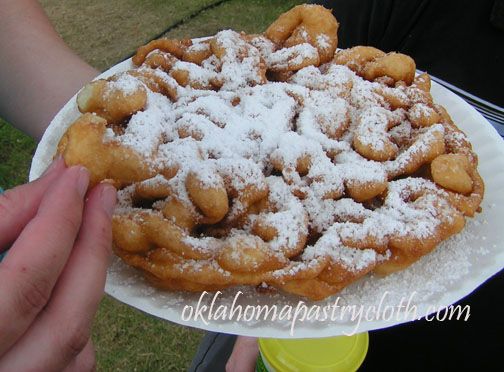 The batter is poured into a funnel and then evenly distributed in concentric rings into a deep vat of hot peanut oil to achieve the characteristic pile of crisp and tender bread dusted with powdered sugar. For extra money, the cooks will add fresh strawberries topped with whipped cream to make this confection so much more healthy. I said that it’s fruit, right?!! Well, funnel cakes are something that this cook has been making at home for years. The kids loved them and it was a treat that I could give them on occassion without having to fork over $100 for tickets to go have someone else make them at the fair. I thought that I’d share my recipe with you and that way, you can have your own fair experience at home, just in case you don’t make it to the real thing!! Ingredients: 2 cups milk 2 eggs 1 tsp baking powder 1 tsp salt 1/2 tsp vanilla 1 tbsp melted butter 2 to 2 1/2 cups sifted flour Directions: 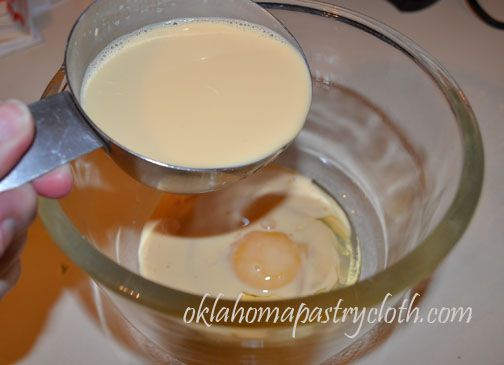 Add milk to eggs and beat until frothy. I use my small, electric hand mixer. 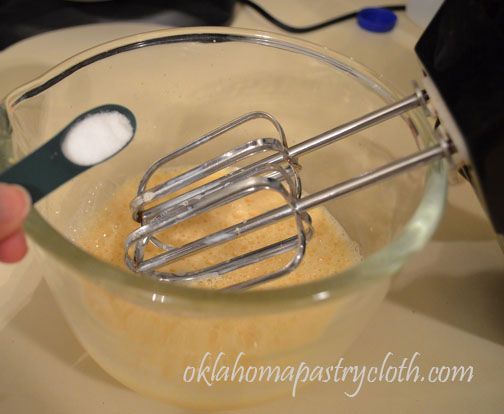 Add salt 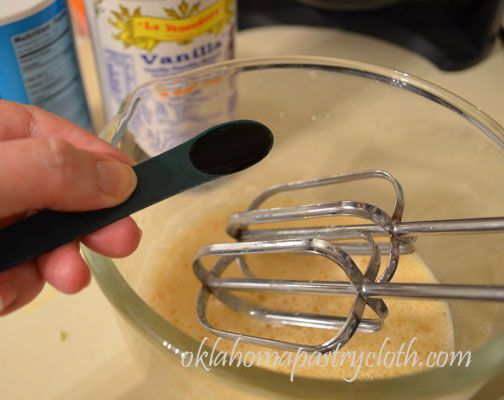 And vanilla 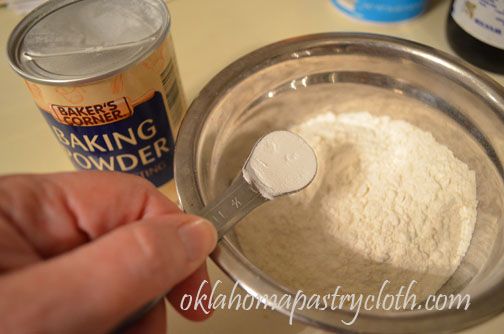 In a separate bowl, mix 1 cup of flour with baking powder. 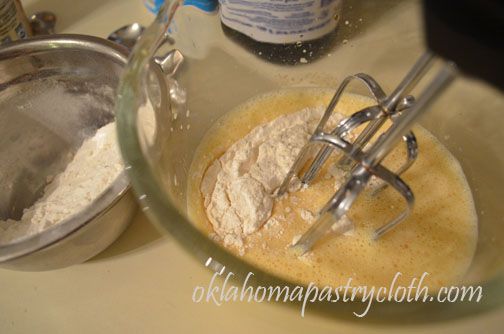 Add the one cup of flour and baking powder, a little at a time, to the egg mixture and continue to beat. 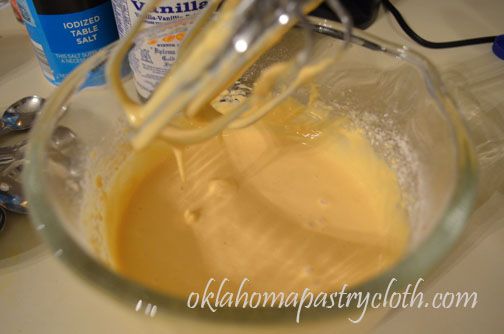 Continue to add second cup of flour, slowly, until batter has the consistency of a thin pancake batter or pudding. Add more if needed, but do so slowly so as to not add too much. 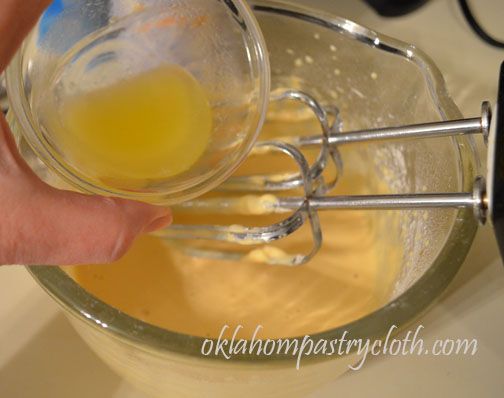 Beat in melted butter 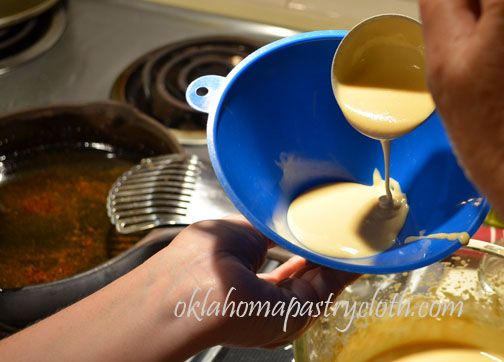 Pour batter into a medium sized funnel, keeping the tip of your finger over the funnel end to prevent any batter from running through. 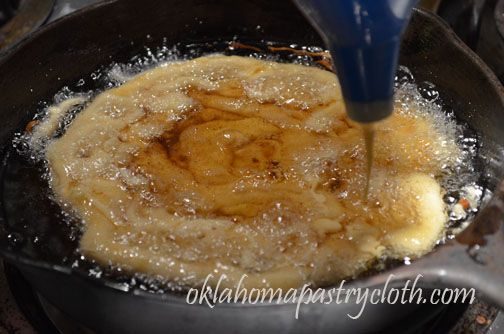 Over a skillet of 1/2″ to 1″ oil – peanut or coconut oil is good – heated to 350º, remove finger from the end of the funnel and move the funnel around to create concentric circles in the hot oil. After getting the size cake you want, bring the batter back over the cake to add more circles. 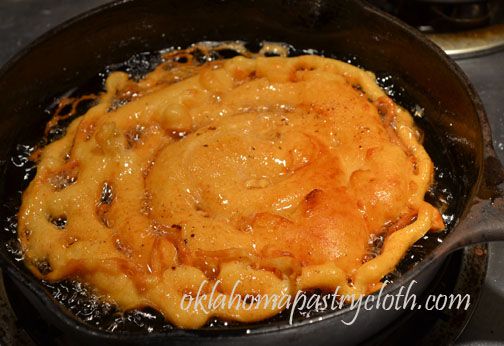 Turn the funnel cake when browned and cook the other side. 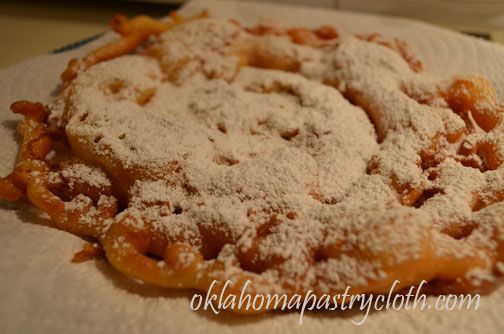 Remove and drain on a paper towel. Sprinkle with powdered sugar, using a shaker or sifter. Serve hot. For an added tasty treat, put fresh, sliced and sweetened strawberries on top and a dollop of whipped cream. I hope the fair is coming near you!!  |
|
| |
|
Oklahoma Pastry Cloth™ Company on Facebook
|
|
 |
|
|
|
A Bread For Everything
Friday, March 2nd, 2012
  Don’t forget to comment below to enter the drawing for these wonderful and unique bread pans!! Quick and easy is good, right?! Well, I guess taste has to come in there somewhere! Reader and FB fan, Penny, shared a wonderful recipe that’s quick AND tastes good, located at the lovely blog The Italian Dish. It looked so interesting that I had to try it. Since there is a giveaway going on right now for bread pans that require a good, crusty recipe, I figured this was a great time to post one. Though this recipe works best on a baking stone, I can see it working equally as well in the bread pans for the drawing. I’m going to digress a bit first. You know me and my memories…well, I’m going back there again. And I’m going wayyyy back! I’m remembering my childhood when, I believe, I was in the fourth grade. I thought I was a big dog back then and because I was the oldest child, I guess I was! My family was in Quebec’s Gaspé, at Bonaventure Island, staying in a tiny cabin warmed with a potbelly wood stove. My mom had put a pot of beans on the stove, to cook, and we kids had ventured out to watch the sea smash against the rocks below the cliff on which we stood. Oh yes, and I had this hat. It was one of those tourist hats that looked like a sailor cap, but that had embroidered across the front, turned-up rim, “Bonaventure Island”. I thought I looked cool, but what does a fourth grader know? Earlier that day, while driving the countryside, we had been amazed to see women in front of their homes, taking hot bread out of large, brick ovens that had been built alongside the road. These French-speaking ladies offered their breads for sale and we had stopped at one such oven to purchase a large, hot and crusty loaf. I can still remember the smell enveloping us inside our trusty Rambler station wagon as we headed toward the cabin. The day was finally made even more special for me because my mother gave me money and let me walk, all by myself, down to the little town to purchase a pound chunk of butter to slather on the bread. I don’t think beans and French bread have ever tasted so good since. And so, it was as I was baking the round loaf that is the result of the recipe following, and then tasted the first slice with its chewy, crusty exterior and soft, yummy center that those memories came flooding back. It tasted just like that bread so many years ago! So I have found a new favorite bread that is as good with a turkey sandwich, bistro style, as it is with a huge plate of ravioli. And talk about easy. It just doesn’t get any easier than this! So give it a try! And by the way, I showed you how to make Sourdough Bread in a past post. This bread takes on the same qualities without all the work.
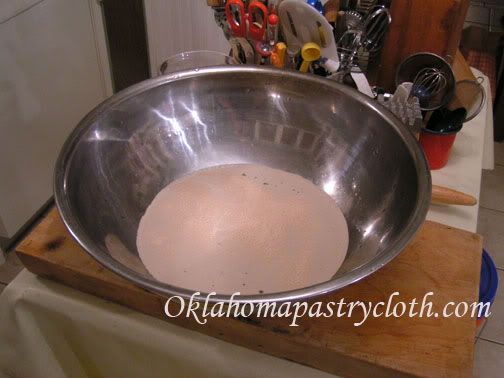 Your water should be around 100º. In a large bowl (this one is 8 quarts and a 4 or 5 quart one would be easier to handle) or a large plastic container with a lid, add the salt to the water and sprinkle the yeast over the surface. 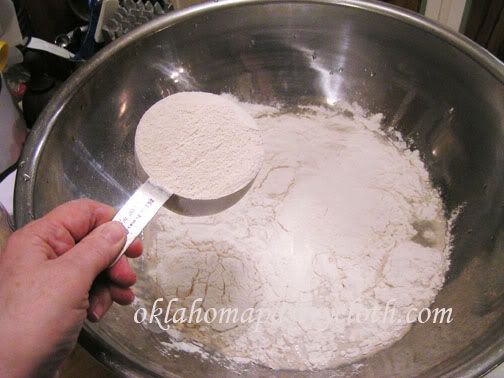 Add the flour. You don’t even have to proof the yeast. Of course, as I thought about this, you are in a world of hurt (and out some flour) if your yeast is no good, so I may go ahead and proof the yeast from now on. 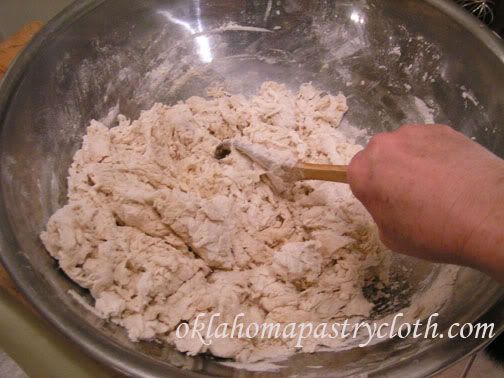 Stir the dough with a wooden spoon until everything is evenly moistened. The original baker noted that she went ahead and used her Kitchenaid mixer to do this step. I will too, next time! Note: You do not knead the dough 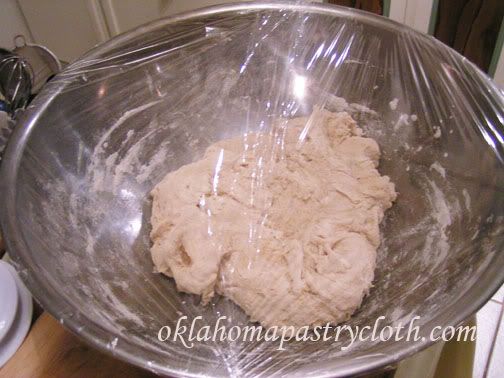 If the dough is in a plastic tub, cover with the lid, but do not snap down all the way around to allow the gasses to escape. I put plastic wrap loosely around the top of my bowl. Allow to rise in a nice warm place for at least 2 hours. 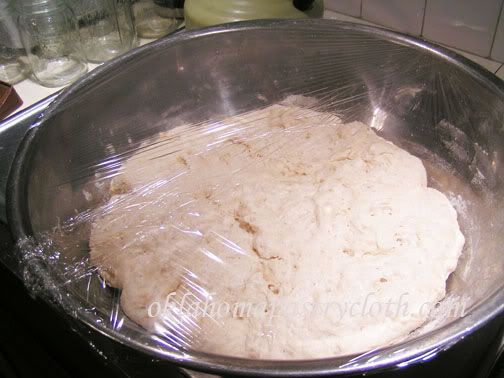 The dough should be nice and bubbly and starting to smooth on the top. You can use the dough anytime after this step, but refrigerating the dough until it is cooled down makes it less sticky and easier to work with. I refrigerated mine overnight and even waited until the next afternoon to make the bread. And any dough not used remains refrigerated. 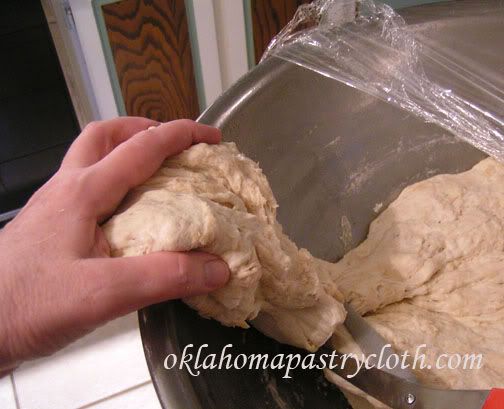 When you are ready to make the bread, pull some of the dough up and cut it off with a pair of scissors. Choose the amount you need for the type of loaf you will make. Here, I am making boules, but you can make a French loaf or baguettes too. 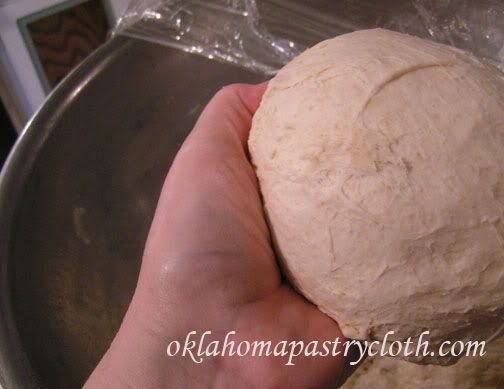 Shape the loaves by pulling the sides down and under to make the top as smooth as possible. It doesn’t matter what the underside looks like. 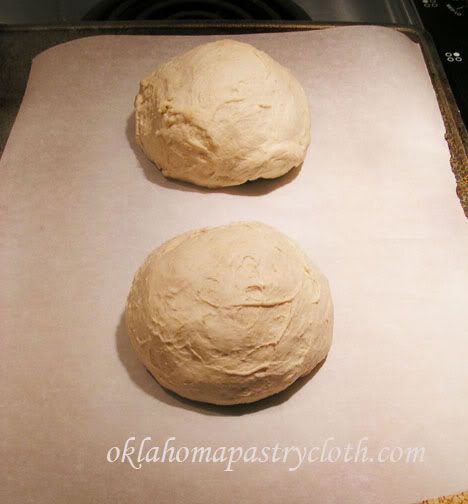 Place the loaves on parchment paper, either on a cookie sheet that has no sides or turn a cookie sheet upside down and place the parchment paper and the loaves on the bottom. The purpose of this is so you can slide the parchment paper and loaves onto a baking stone later. Allow the loaves to rise for 40 minutes. It said that there is no need to cover them with a damp cloth, but here in Oklahoma, we are so dry that I felt a damp cloth was a must. It worked great. 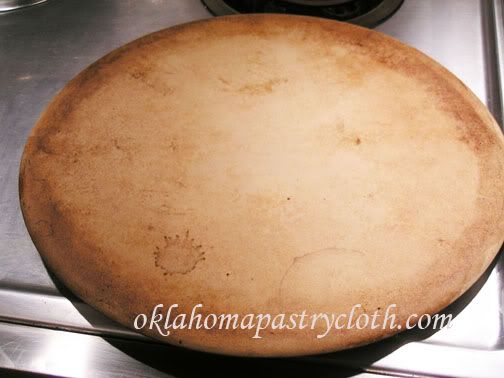 About 20 minutes into the rising, turn your oven on to 450º and place a baking stone on the middle rack to heat for 20 minutes. As you can tell, my baking stone is well-used!! The bottom rack will be used to hold a pan with a cup of water in it to steam the bread loaves. If you don’t have two racks, use a pan that can sit in the bottom of the oven without disturbing the heating elements. 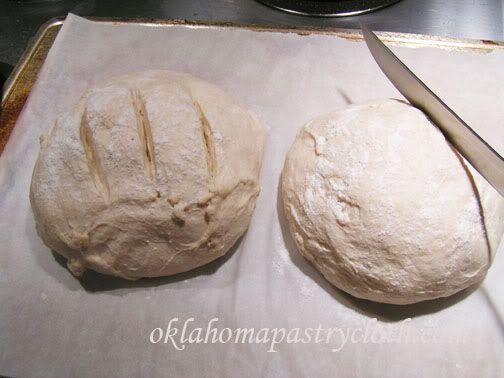 When the bread has risen, sprinkle flour on the top surface of the risen loaves and score the tops to release some of the trapped gas so the loaves will hold their shape. You can do parallel slashes, cross-cuts or whatever you like to make the bread loaves look pretty. Now here is where I did it a little different from the instructions. I opened the oven door and placed the pan of water on the bottom rack of the oven and closed the door to let the oven heat back up to 450º. At that point, I opened the oven again and slid the parchment paper with the loaves of bread, gently onto the baking stone. Closing the door, quickly, the bread bakes for 30-35 minutes depending on the size of the loaf. 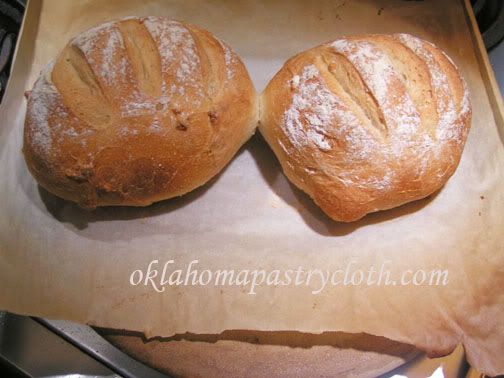 Remove the loaves and let them cool before slicing. They really are better after they have cooled, but I couldn’t wait and got a slice anyway. Oh yes. It’s good hot too! 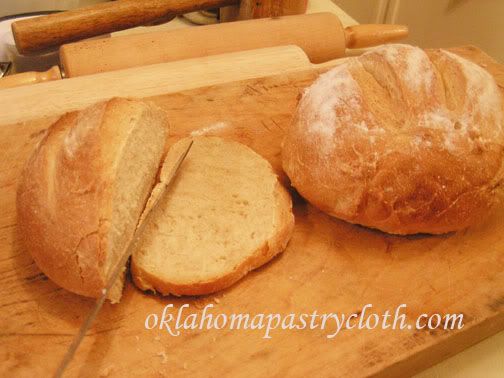 After the loaves have cooled slice and serve. You can store your leftover dough up to 14 days and as it sits, the flavor will improve like sourdough. When you use up your dough, don’t clean out the container, but just mix right in with the leftover pieces to add to the flavor. I have decided to use one of my gallon crocks with a loose plastic lid over it to store my dough. It should get really tasty in there!  |
|
|
Oklahoma Pastry Cloth™ Company on Facebook
|
|
 |
|
|
For follow button place this after Click Here To Comment and above the
:

Povitica
Tuesday, December 20th, 2011
 Continuing with the theme of what customers are doing with their Oklahoma Pasty Cloths™, we have some great pictures to share. Facebook fan, Kathleen Szewc, ordered one of our very large Oklahoma Pastry Cloths™, sized 48″ x 48″ and my curiosity got the best of me. I had to know what in the world she was making that required such a large pastry cloth. She cheerfully informed me that she and a group of ladies would be making Povitica, a traditional bread of Croation and Polish origin. Families have their recipes that have been handed down for generations and understandingly, Kathleen’s recipe is top secret! She was very kind to send pictures and so I found a recipe to go with the pictures, posted by Roberta and Krystal Dent of Salina, KS, which won second place at the Kansas State Fair! I am itching to try my hand at this bread because it looks and sounds absolutely scrumptious – and sinfully good!!! Sweet Dough: •1-1/2 cup lukewarm milk •1/2 cup sugar •2 teaspoons salt •2 eggs •1/4 cup soft butter •2 packages Fleischmann’s Active Dry Yeast •1/2 cup warm water •7-1/2 to 8 cups flour Filling Directions:  The dough was kneaded and divided. It appears the ladies used a counter top, but the pastry cloth can be great for this part of the process too. I noticed in the recipes that the less flour used in the dough the better, especially during kneading and rolling, because the dough must be light. The pastry cloth makes that easy.  They rolled the dough on the Oklahoma Pastry Cloth™ and then stretched the dough using their fists to make a really thin dough.  Rolling the dough really thin is easy on the Oklahoma Pastry Cloth™ because it doesn’t stick. Kathleen said that they stretched the dough and then laid it back onto the pastry cloth, added the filling and then, by lifting the edge of the cloth easily rolled the dough onto itself like a jelly roll. See? No sticking!!   The long “jelly roll” is snaked into a loaf pan to rise. Isn’t that cool? Then it is baked  Aren’t those spectacular? I want to dive right in. Thank you so much, Kathleen, for sharing this unique experience and for giving me a new challenge!  |
|
|
Oklahoma Pastry Cloth™ Company on Facebook
|
|
 |
|
|
Buttermilk Whole Wheat Rolls
Monday, October 24th, 2011
|
Apple Time Giveaway  I guess I’m on a bread baking marathon because I’m trying recipe after recipe!! With OU football and Rangers baseball, Mr. Fix-It is reveling in home made soups, chili and bread. Never let it be said that I don’t know the way to a man’s stomach – I mean – heart. Friday, at Deborah Jean’s Dandelion House Friday Blog Hop, I saw that Candy at Lazy J Bar C Farm had been busy in the kitchen making the most beautiful rolls you ever saw. She sells them at her local Farmers’ Market and they evidently go like hotcakes – no hot rolls. Candy is a reader here and I follow her blog, so she graciously gave me permission to post the recipe here for you. Of course, I had to try the recipe first and take pictures! The rolls are so easy. And with a ribeye steak and baked potato last night, Mr. Fix-It put away several of these whole wheat delights, happily cheering on the Texas Rangers and watching Nolan Ryan drop the first pitch by former president George Bush. So here you go. I think you will love the presentation of the rolls and the taste as well! 1/2 cup buttermilk 1/2 cup warm milk 1/3 cup butter 1/3 cup granulated sugar 2 eggs 1 1/2 teaspoons salt 2 1/2 cups bread flour (I use King Arthur Bread Flour) 2 cups whole wheat flour 2 teaspoons bread machine yeast OR 1 packet active dry yeast (1 tbsp loose) If using active dry yeast, dissolve it in the warm milk before combining with the remaining ingredients.  In the bowl of a mixer with dough hooks, add buttermilk and then yeast that has been proofed in the warm milk (if using packaged or loose yeast).  Add butter that has been cut into slices  Add sugar (I added honey for Mr. Fix-It)  Then, add the eggs, salt and bread flour. Lightly mix all ingredients.  Add whole wheat flour one cup at a time. I added a total of 1 1/2 cups and reserved 1/2 cup for flouring my pastry cloth. The dough pulls away from the side of the bowl and is stiff and may not require all of the flour. Do not add too much flour.  Scrape the dough out onto your floured Oklahoma Pastry Cloth™  Lightly knead into a smooth ball  Pour about a tablespoon of olive oil into the bottom of a bowl and place the dough ball in top side down. Turn the dough ball so that the oiled top is up. Cover with a warm, wet towel and allow to rise until double.  Divide the dough out into 16 equal sections. I used a scale to weigh the dough to make sure each piece was the same.  Form each section into a ball and place 8 each into 9″ round cake pans, seam side down.  Cover each pan with a warm, wet towel and allow to rise until doubled again.  Bake at 375º for 12 – 15 minutes. It helps to rotate the pans from front to back to brown the rolls evenly. Remove to cooling racks immediately.  My contribution to the project was a glaze that I put on as soon as they came out of the oven and went onto the racks. I melted 2 tbsp. butter and 1 tbsp honey. Oh yeah. That was brushed over the tops of the rolls.  And yes….they are scrumptious. Thanks so much, Candy, for giving me a new, family roll recipe!!  |
|
|
Oklahoma Pastry Cloth™ Company on Facebook
|
|
 |
|
|
A 9-Grain Bread!
Friday, October 21st, 2011
|
Apple Time Giveaway  Today, I am just glad for the sunshine and the cool air. Oh my. It feels so good. I looked back over old posts and saw that we had triple digit temps in Okieland for somewhere around 60 days this summer. Really? My brain doesn’t embrace bad memories. All it is accepting right now is chilly temps and crisp air. Love it!! Of course you know that it is a proven fact that with the cooler days, there is a certain isotope that wafts in with the wind and settles on unsuspecting homemakers, rendering them slaves to a desire to bake and make soups. It is just difficult to avoid. It’s been happening since the beginning of time. I do know some individuals who have managed to resist the bombardment of these atoms by living at Panera Bread with their laptops, purchasing breakfast, lunch and dinner there, but even they have to admit that the first thing they crave is soup and hot bread!! So there you have it! In the realization of this natural phenomenom, I continue sharing bread recipes sent in by readers. This bread, sent in by reader Mrs. B, is very versatile and though it will make a large loaf of bread, I used it to make bagettes and sandwich rolls. Very good with a nutty flavor. I grind my own 9-grain flour from a combination of grain berries including hard wheat, soft white wheat, barley, spelt, millet, oats, triticale, rye and flax seed, but you can find the flour at your local health food store and in some grocery stores. 7-grain works fine too. And if anybody out there wants to share a favorite recipe, please email it and we will test it and post it! 1 1/2 cups warm water  Place brown sugar into mixing bowl. A mixer with dough hooks is great, but this can be stirred and kneaded by hand too.  In 1/2 cup warm water with 1 tsp sugar, sprinkle yeast and proof. When yeast is bubbly, add the yeast water to the brown sugar and add 1 cup more warm water.  Melt butter and add to water and brown sugar mixture. Stir slightly.  Add 9-Grain flour and stir.  Add salt  Stir and continue adding bread flour one cup at a time until dough pulls away from the bowl. You may not use all the flour. Knead with the dough hooks for 8 minutes on medium speed. Or knead by hand, on your Oklahoma Pastry Cloth™ for 10 minutes. On the pastry cloth, form the dough into a uniform ball.  Add one to two tablespoons of olive oil in the bottom of a large bowl.  Place the dough ball top down into the oil and turn so that the dough top is oiled.  Cover with a warm, wet towel and place in a warm place to rise until double.  When the dough has doubled, roll it back out onto your pastry cloth and form into rolls or long bread rolls to be placed in bagette pans.  With kitchen scissors, make diagonal cuts into the rolls.  Cover again with a warm, wet towel and place into a warm place to rise to double again. When risen, for added flavor, sprinkle with cheddar or asiago cheese. Bake in 350º oven for 20 – 30 minutes or until golden brown.  These make wonderful submarine sandwich rolls! I’m thinking soup for next week?  |
|
|
Oklahoma Pastry Cloth™ Company on Facebook
|
|
 |
|
|
Monday, October 17th, 2011
 Well, it’s a fun journey on to another bread recipe sent in by a reader and this one is from reader, Ken. I made it and oh my, is it yummy and rich! The dough is much softer than a traditional bread dough. This is no ordinary sandwich bread. This is a soft and slightly sweet bread that goes way beyond mayo and ham! I used it to make a loaf and cinnamon rolls and then used part of the loaf to make French Toast for breakfast. Ken said that he uses it to make pizza dough too, so this recipe is very versatile. 6 cups all purpose or bread flour 1/2 cup sugar 2 tsp. salt 2 packages of yeast or 2 tbsps loose yeast 2 eggs 1 stick butter or margarine that has been slightly softened 1 cup hot water 1 cup cold water 1/2 cup lukewarm water 1 tablespoon dough enhancer (optional)  Proof yeast in 1/2 cup warm water mixed with a tsp of sugar. Allow to stand about 4 minutes until yeast starts bubbling to the top  In the bowl of a mixer that has dough hooks (or in a large bowl if stirring by hand) place 2 cups flour (I used King Arthur Bread Flour), 1/2 cup sugar (I used honey for Mr. Fix-It), yeast mixture, the cold and hot water and mix briefly.  Cube softened butter and add. Mix slightly  Add eggs and salt and mix again.  Add tbsp of dough enhancer and add the rest of the flour, one cup at a time. Reserve 1/2 cup of flour for working. Note: Depending on the humidity, you may find that you need more or less flour. It was a very humid day when I made this and added almost 1 cup more flour than the recipe called for. The flour I used was a very fine bread flour and that probably added to the necessity for more to make a good dough. The dough should pull away from the walls of the mixer, but it is still a very soft and sticky dough. Knead in the mixer with the dough hooks about 8 minutes on medium to low.  Pour the dough out onto your Oklahoma Pastry Cloth™ and knead slightly with the leftover flour to form a ball.  Pour 1 tbsp olive oil into the bottom of a large bowl and place dough ball top side down into the oil. Turn the dough ball so that the oiled top side is up. Cover with warm, wet towel and allow to rise. I turn my oven to 150º and then turn it off when heated, open the door for 30 seconds and then place the bread into the warmed oven and shut the door. Hint: If the dough sticks to the towel while rising any dough, before removing the towel, use a spray bottle and spray the surface of the towel with water. It will lift right off of the risen dough.   The bread rises until doubled. Pour it back onto your pastry cloth and cut in half. At this point, you will be forming two loaves or forming one loaf while using the other dough for rolls, cinnamon rolls or pizza crust. For a loaf, grease and flour loaf pan and place dough into pan to rise. The dough is VERY soft and goes into the loaf pan very soft. But it rises to a beautiful height. When the bread has risen, bake at 350º for 25 – 30 minutes until golden brown. Turn out immediately onto a wire rack to cool.  For cinnamon rolls, I rolled the dough into a large oval about 1/2″ thick and sprinkled powdered sugar over the surface.  Then LOTS of cinnamon covered the surface. It is up to you how much you use, but I covered the whole surface. We like cinnamon.  Chopped pecans topped off the whole surface of the dough  I rolled the dough up like a jelly roll and sliced with a good, sharp knife that was floured between cuts.  The slices were placed about 1/2″ apart on a deep cookie sheet. Cover with a warm, wet towel and allow to rise until double in a warm place. After doubled, bake in a 350º oven for 20 – 25 minutes or until golden brown.  After baking, ice with a mixture of 2 tbsp melted butter and 1 1/2 – 2 cups powdered sugar with 1/2 tsp vanilla and enough milk (added 1 tbsp at a time) to make an icing of spreadable consistency. These cinnamon rolls are to die for!! And yes, one is missing! I couldn’t wait.  And here is the beautiful loaf of bread…  …which was used to make French Toast for breakfast! Lots of butter and syrup. Yummy.  |
|
|
Oklahoma Pastry Cloth™ Company on Facebook
|
|
 |
|
|
Simple White Bread
Thursday, October 6th, 2011
 I thought that over the next several weeks, I’d post a number of different bread recipes that readers have sent me to try. I love it when you send me recipes because you broaden everybody’s cook books! I will always try what you send and if Mr. Fix-It gives me a thumbs up, I’ll post the results with a “kudos” to you. There may be a few other things thrown in between recipes, but I have four or five I’d like to share. This first bread is really, really, really, really (is that enough for emphasis?) easy and would be a great bread for anyone who has never made bread and wants to practice. It is awesome for sandwiches becasuse the crust is more firm and the slices hold together perfectly when sliced with a serrated bread knife. This recipe is from reader, Shari, and I think you’ll enjoy it. So get out your Oklahoma Pastry Cloth™…oh? You don’t have one? Well, first, pop over to the shopping page and order one and then start your bread baking with ease and no cleanup! 1 cup warm water 3 tbsp butter 1 egg 2 tbsp sugar or honey 1 1/2 tsp salt 3 1/2 cups bread or all-purpose flour (I used King Arthur Bread Flour) 1/3 cup nonfat dry milk 2 tsp yeast  Pour water + 1 tsp sugar into mixing bowl. Add yeast. Allow to sit until yeast is bubbly. (proofed)  When yeast is proofed, add egg  And butter  Mix slightly until egg is fully incorporated and add honey or sugar  Add dough enhancer if you like to use it. You can order dough enhancer from Sonrise Whole Grains right here in Oklahoma City.  Add powdered milk  Add salt  Add one cup of flour and mix until smooth. Continue slowly adding flour until you have a sticky batter. (Reserve some flour for shaping the dough) Either knead by hand or, in the mixer with a dough hook, knead for about 8 minutes on medium speed. This is the easiest way because you are not adding flour in the kneading process which keeps the dough light.  After kneading in the mixer, scoop the dough onto a floured surface, preferably on your Oklahoma Pastry Cloth™!  Knead slightly to form a ball  Put a tablespoon of olive oil in the bottom of a large bowl and place ball of dough top down into oil. Turn dough so that oiled top is then on top. Cover with warm, damp towel and allow to rise to double in size in a warm place. I turn my oven to 150º for 10 minutes, turn off the oven, open the door to allow to cool a second and then place the bread dough into the warm oven to rise. (close the door during rising to trap the warmth)  When the dough has doubled, put it back onto your floured surface and shape into a bread loaf. Place into loaf pan and allow to rise to double again. Bake at 350º for 25 – 30 minutes until evenly browned on top.  As soon as you remove the bread from the oven, spray it with water and cover with a towel to steam for about 10 minutes.  Remove bread from pan and finish cooling, covered with a towel, on a rack. This recipe makes a very pretty loaf of bread.  Using a finely serrated knife to cut bread is a must, but it makes especially pretty slices with this bread. I made a grilled cheese sandwich with it today and yummy!! So thank you, Shari, for sharing this recipe with us. It is one that is going into our recipe holder for frequent use!!  |
|
|
Oklahoma Pastry Cloth™ Company on Facebook
|
|
 |
|
|
Cinnamon Crunch Bagels
Tuesday, August 16th, 2011
 I made a discovery today and you have to try it!! I am a cinnamon nut and I especially love those bagels at Panera Bread with the cinnamon crunch topping on them. So today, in my usual activity of making bagels for the week, I decided to try an experiment. I took 1/4 cup sugar, 1/4 cup brown sugar and 3 teaspoons of cinnamon and mixed those together to a fine mixture in a shallow bowl. Then I melted two tablespoons of butter in a small dish. Using my basic bagel recipe, I placed the boiled bagels on a rack to dry slightly. With a pastry brush, I gently brushed each bagel with butter, one at a time. I placed each bagel butter side down into the sugar and cinnamon mixture and placed on a greased cookie sheet. After I had gotten all of the bagels dipped, I carefully sprinkled leftover sugar mixture in a pile on each bagel. Those were baked at 425º for 20 minutes without turning them during the baking. Oh my gosh. They are incredible, if I do say so myself! Toast them and add butter and cream cheese and mmm yourself to death! 🙂  |
|
|
Oklahoma Pastry Cloth™ Company on Facebook
|
|
 |
|
|

 Homestead Revival
 Paratus Familia
 Rural Revolution