Archive for the ‘A Day In the Life Of An Okie’ Category


Oklahoma Winter

Wednesday, February 2nd, 2011


You’d Think It Was


Winter


 photo PICT1166_zps222d76d5.jpg


What it looked like right before the snow started.


 photo 824am_zps11a29086.jpg


Middle of the day February 1, 2011


In Oklahoma, we’re pretty used to weather extremes. It’s not unusual to have a three inch rain pop up with consequential flooding or a tornado rip through 20 miles of farmland and homes. You’ve see the pictures of the ice storms that I’ve posted and the results of extraordinarily violent twisters. As I’ve pointed out, we’re a resilient group of people and many of us plan way ahead of time for all kinds of possibilities. The ability of our people to keep things running with “a piece of baling wire or twine” isn’t unique but keeps us ‘keepin’ on’. But even with our low-keyed responses to impending doom, it doesn’t stop our local weathermen from shooting epinephrine and revving their engines to morph into maniacal harbingers of catastrophe and certain death.


Such was the case this past weekend as the top meteorologists at our three local stations went into overdrive and excitedly announced that the storm of all storms was going to bring the entire state to a screeching – er – sliding halt. Almost suppressing giggles of glee, they attempted a serious demeanor to express the certain destruction that was ahead, but it was obvious they considered this event to be what made life worth living and their jobs finally legitimate.
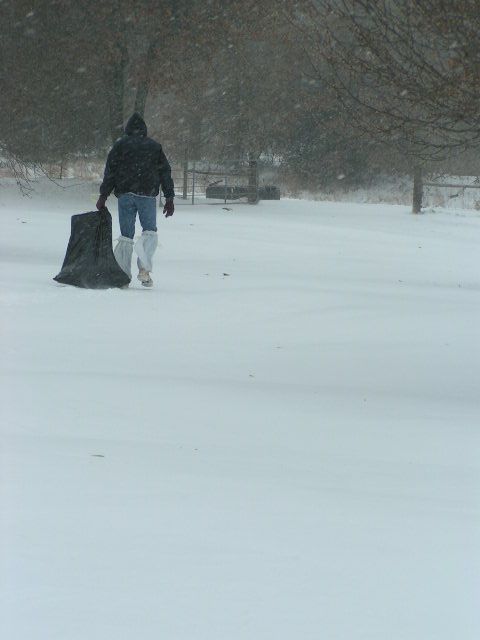

 photo PICT1171_zps0fdbb438.jpg

Blizzard or no, Mr. Fix-It still takes out the trash and is not ashamed to wear trashbags to protect his jeans from the wet snow. He is comfortable in his own frozen skin!


As soon as the blizzard hit on Monday night, the stations sounded their continual little warning tones throughout the evening and by Tuesday morning, all those in the tv weather rooms and on the roads, with cameras and microphones, were keeping a steady conversation that only needed a, “How bad is it?” “It’s sooooo bad that…..” joke. Embarrassed fools who attempted to travel in over a foot of blowing snow and ice and subsequently slid into 4 foot drifts, discovered microphones in their faces and the question, “So. What happened here? What is your name?” I loved one man’s answer, “My name really doesn’t matter now does it? And I slid into a snowdrift. Duh.” The reporter was kind enough not to remind the man that he was pretty stupid for trying to navigate the roads, except that the reporter was out there right beside him, having attempted to navigate the roads!
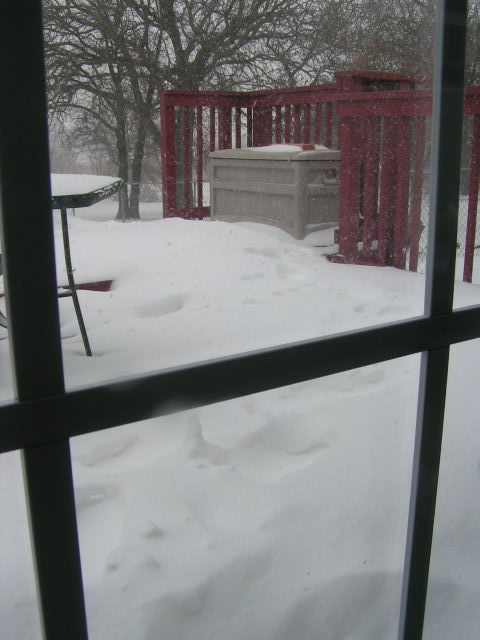

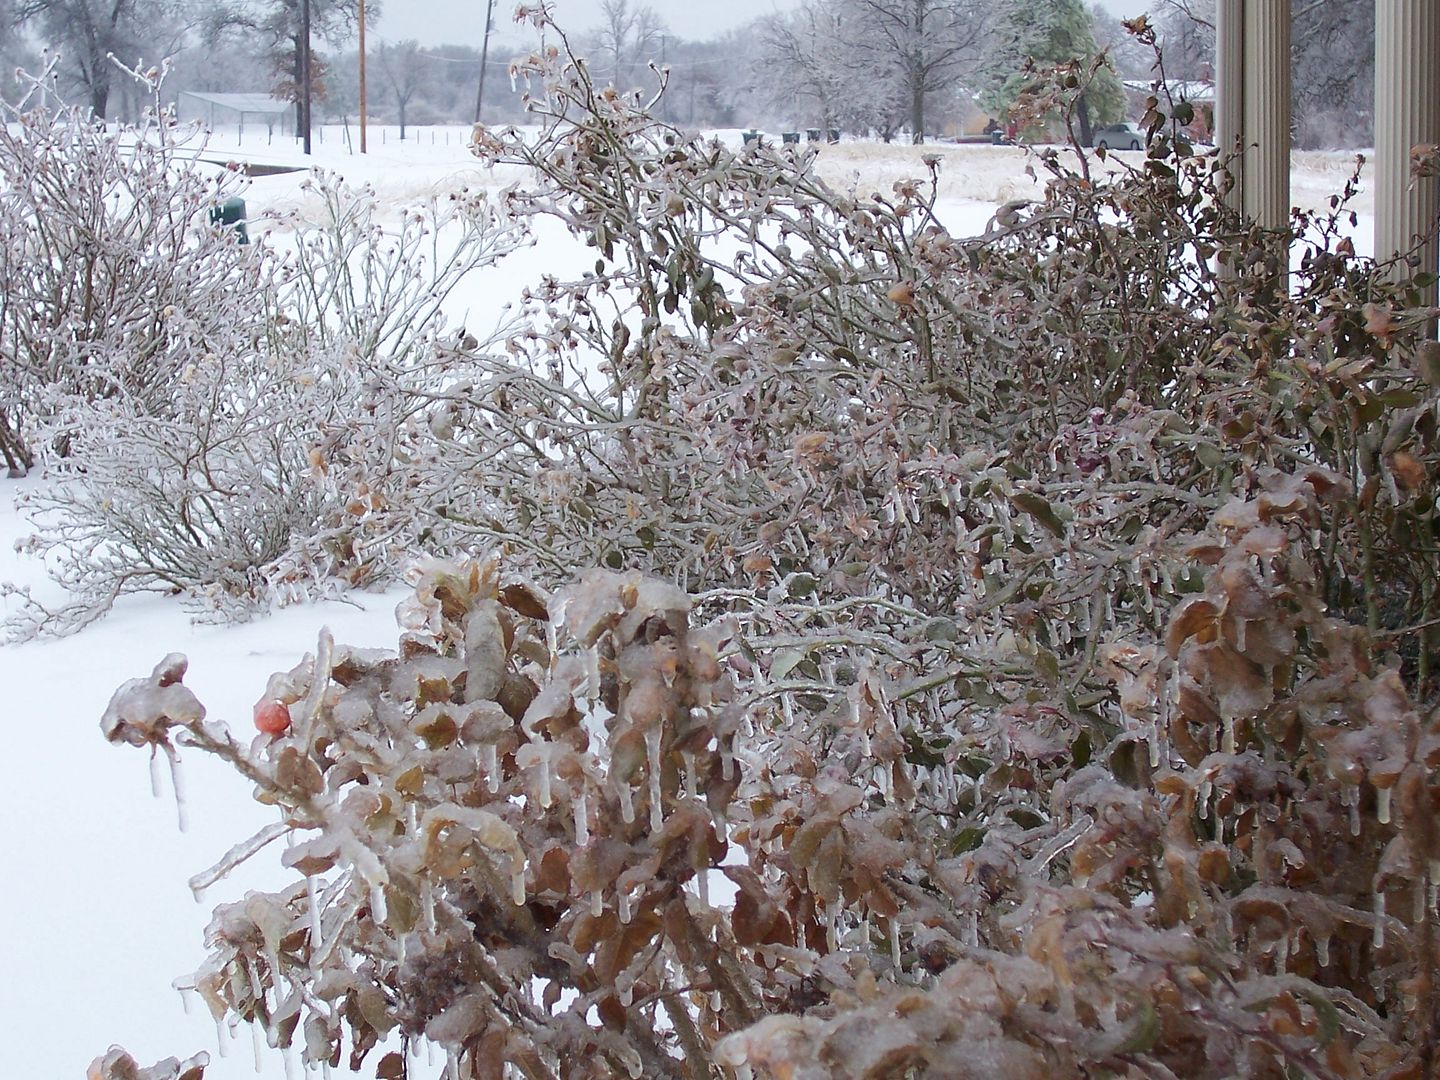
 photo 823am_zps0ea4c593.jpg

February 1, 2011


And so, winter is again in Okieland, however, this particular storm HAS outdone itself. Blizzards are not a common occurrence here, but MOST Oklahomans were ready for this one and are snug in their homes in front of their woodstoves, fireplaces or gas heaters, drinking hot chocolate, playing Rummy and cooking some darned good dishes. So far, no reports of hypothermia or other weather related deaths. The groceries have been shut down as have the government offices, but no worries because most were prepared. I guess we can thank the weathermen!
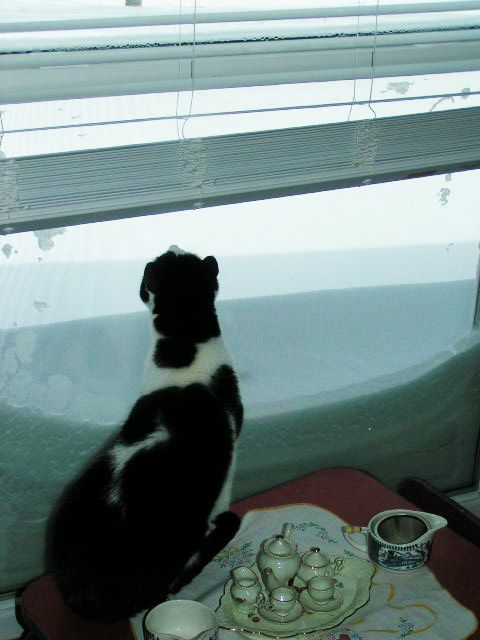

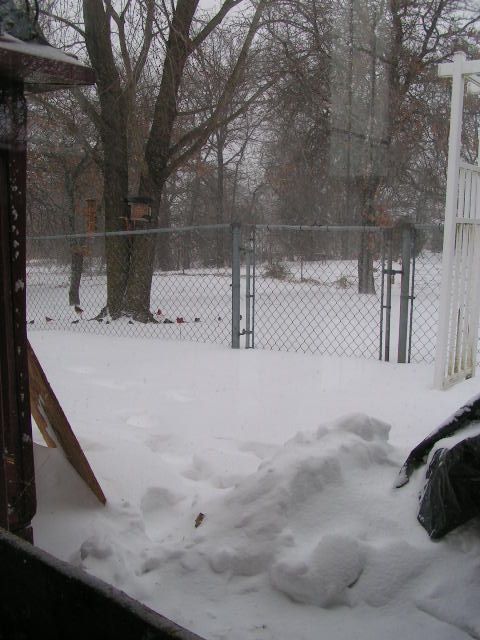
 photo PICT1185adj_zps1ea78e9c.jpg

Sway kitty can’t figure out why he can’t see the birds at the feeder. Yep, that’s snow against the window. It’s really that high!


Stay Warm!


MB
Please join us on FaceBook!!


Join in the conversation by leaving a comment below!


That Crazy Government!

Thursday, January 27th, 2011


Nature’s Most Perfect

Food

Ain’t Perfect Anymore!


 photo funny_cow_zps50f78d32.jpg


Cow Incognito


And speaking of all things country, a friend just sent me this article from the Wall Street Journal that had me laughing until I realized how sad it is!!! We have dairies in Oklahoma too and I’m wondering what our citizenry will do if WE have a milk spill. Imagine the disaster: In Western Oklahoma, our wheat farms would turn into giant bowls of cereal. In Southwestern Oklahoma, the windmill farms would churn it into massive quantities of butter that would clog all of the life-sustaining highway arteries between towns!! In Southern Oklahoma, a fisherman’s catch would come already dipped in milk and ready for breading! Here in Central Oklahoma, where our flour mill thrives and produces multiple mixes, people might be overtaken by huge masses of biscuit dough oozing through the streets like some whole wheat wall of lava. The visons are frightening! So get a load of what is being done in order to save us from these unimaginable ends:


“President Obama says he wants to purge regulations that are “just plain dumb,” like his humorous State of the Union bit about salmon. So perhaps he should review a new rule that is supposed to prevent oil spills akin to the Gulf Coast disaster—at the nation’s dairy farms.


Two weeks ago, the Environmental Protection Agency finalized a rule that subjects dairy producers to the Spill Prevention, Control and Countermeasure program, which was created in 1970 to prevent oil discharges in navigable waters or near shorelines. Naturally, it usually applies to oil and natural gas outfits. But the EPA has discovered that milk contains “a percentage of animal fat, which is a non-petroleum oil,” as the agency put it in the Federal Register.


In other words, the EPA thinks the next blowout may happen in rural Vermont or Wisconsin. Other dangerous pollution risks that somehow haven’t made it onto the EPA docket include leaks from maple sugar taps and the vapors at Badger State breweries.


Cow Sign Pictures, Images and Photos


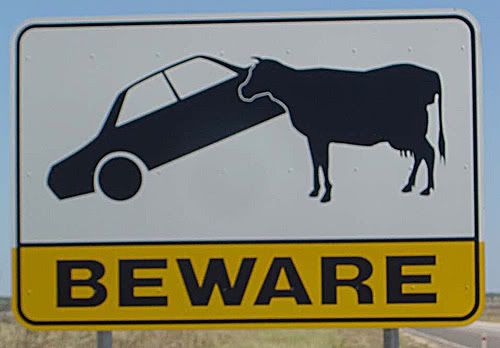
New signs will indicate a milk truck instead of the car


The EPA rule requires farms—as well as places that make cheese, butter, yogurt, ice cream and the like—to prepare and implement an emergency management plan in the event of a milk catastrophe. Among dozens of requirements, farmers must train first responders in cleanup protocol and build “containment facilities” such as dikes or berms to mitigate offshore dairy slicks.


funny cow:] Pictures, Images and Photos


Say WHAT??


These plans must be in place by November, and the U.S. Department of Agriculture is even running a $3 million program “to help farmers and ranchers comply with on-farm oil spill regulations.” You cannot make this stuff up.


The final rule is actually more lenient than the one the EPA originally proposed. The agency tried to claim jurisdiction over the design specifications of “milk containers and associated piping and appurtenances,” until the industry pointed out that such equipment was already overseen by the Food and Drug Administration, the USDA and state inspectors. The EPA conceded, “While these measures are not specifically intended for oil spill prevention, we believe they may prevent discharges of oil in quantities that are harmful.”


We appreciate Mr. Obama’s call for more regulatory reason, but it would be more credible if one of his key agencies wasn’t literally crying over unspilled milk.”


By the way, if you make a cow laugh, does milk come out of her nose?


 photo MM900285249_zpsc0408247.gif


Got Milk?


MB
Please join us on FaceBook!!


Join in the conversation by leaving a comment below and enter our January Giveaway!


Two Dangerous Women

Tuesday, January 25th, 2011


Jeff Foxworthy Would Be

Proud


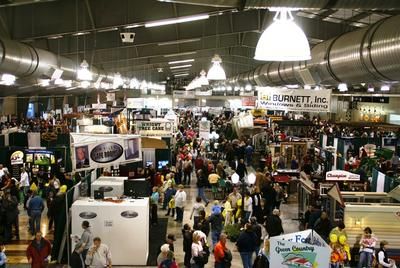
 photo HomeandGardenShow_zps278fad3f.jpg


I am sure that you have heard of the Home and Garden Show that stations itself at every fairground in the US to encourage gardeners to grow pumpkins the size of a Smart Cars and to coerce nongardeners to envelope their homes in copper guttering which, at the price of copper today, will be removed within a week by some industrious n’er-do-well needing cash for a big screen tv.


Well, my darling daughter had two exhibitors’ passes for this past weekend and she asked if I would like to go with her to this show of shows. Now, it’s a great thing to get to go to this yearly event, but for a daughter to actually be caught with her mother in public and on PURPOSE is a cause for celebration indeed! Of course, my answer to her invite was a definitive, “Do pigs fly?” which is a much more genteel response than the one asking what bears do in the woods even though it makes absolutely no sense at all. She knew what I meant.


 photo knockout3_zps20fa5a4e.jpg


And so we did what any two red-blooded, southern women do and bundled up against what we considered a life-threatening 32 degrees. We drove across town to the beautiful OKC Fairgrounds, parked the car and walked to the building that we decided was obviously the first of 5 total exhibition buildings. I thought it odd that the steps were full of men in camouflage, smoking cigarettes and huddling to discuss who-knows-what, but I attributed it to true southern gentlemen who had brought their wives to the show even though it would have taken one of the John Deere Zero Radius mowers, displayed at the show, to physically drag them into the actual building to look at the latest fiberglass hot tubs.


 photo GUN-SHOW_zps98fe80cf.jpg


Now, I have to tell you here that there is a certain sense of power that goes with having “exhibitor” badges. One need only flash these jewels at the TSA wannabes manning the doors and you are waved through with an “Oh! Go on in!” as the poor slubs with tickets must stand there and watch you waltz through while they have their wrists stamped to prove that they are NOT exhibitors. Only, at that particular moment, our passes didn’t mean much. As we waved our badges, I instantly noted that it was almost all men in the building – men in camouflage – and there were tables and tables of every kind of weapon of mass destruction that any self-respecting varmint hunter would be proud to call his own. It was at that moment that I and the attendant announced at the same time, “Gun Show!” My daughter and I backed out and headed to the next group of buildings where we would find weapons equally as deadly to our pocketbooks and our health – waterless cookware, full goldfish ponds with 8 ft manmade waterfalls and German Cream Cheese Strudel. And you know what? When we finally found that first Home and Garden Show building, I thought it odd that standing on the steps to the entrance were huddled groups of men in camouflage, smoking cigarettes and discussing who-knows-what. Yep. This is good ol’ Oklahoma!!


Flying Pig Pictures, Images and Photos


Have A Happy Week!


MB
Please join us on FaceBook!!


Join in the conversation by leaving a comment below and enter our January Giveaway!


Vacuum Sealing Jars

Saturday, January 15th, 2011


Hoover Ain’t Got Nothin’

On This

Little Bit Of Technology!


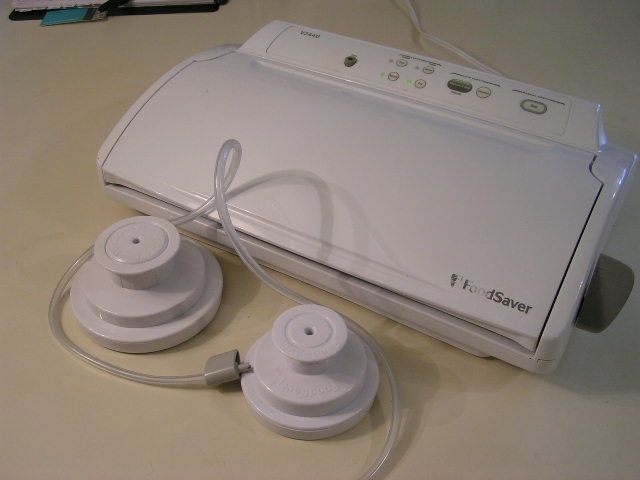
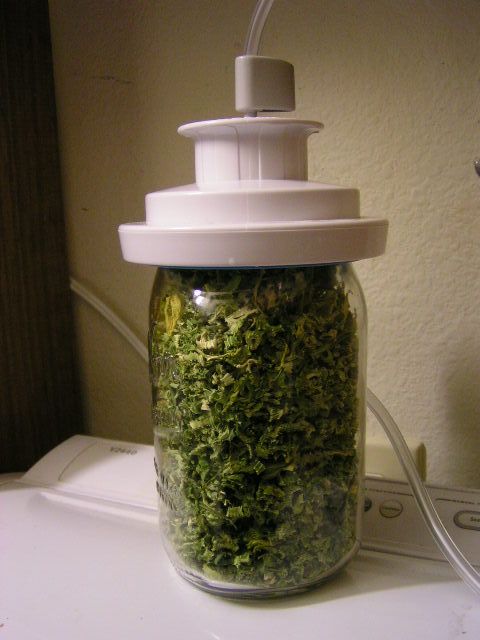
I have had a number of readers ask me how a vacuum sealer works with jars, since posting the two articles on dehydrating veggies. I thought that I would break into the middle of that series and answer those questions in pictures. Just as background info, I have a FoodSaver V2440 which is quite ancient in the world of technology. I am thinking that I got it somewhere around 2000 or 2001. I am sure that you can find that particular model on Ebay but I highly doubt anyone is selling it new. Target , Walmart and Amazon all carry FoodSaver products or you can order from the company directly at FoodSaver.com. Just make sure that whatever model you choose has the “accessory port” which is the little raised button that you will see in my pictures. Some of the models do not have this feature. I looked on the website and found one particular model that seemed reasonably priced and with the port feature. Just click above if you’d like to view it. The canning accessories must be purchased separately unless the website happens to be having a combined special. You can find the jar sealing items here. There is one for wide mouthed jars and for jars with regular openings. The following are pictures of how I use my vacuum sealer for both bags and jars.


 photo PICT1022_zps8f11677f.jpg


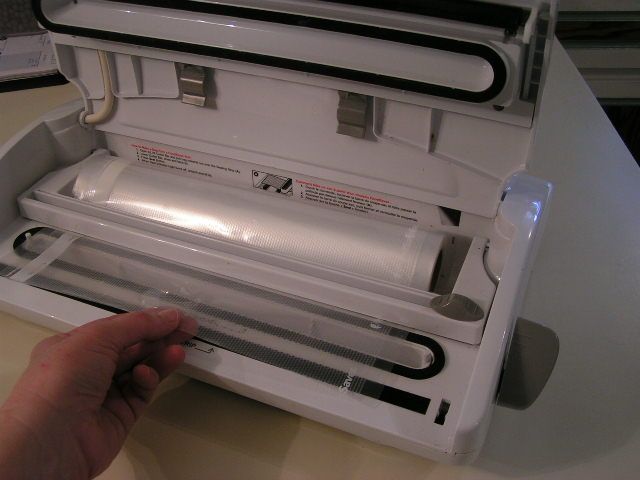
My vacuum sealer is equipped to do both bag vacuuming and container vacuuming. To bag items, first pull the plastic sheeting from the roll to cover the sealing plate.


 photo PICT1025_zps7ffac889.jpg


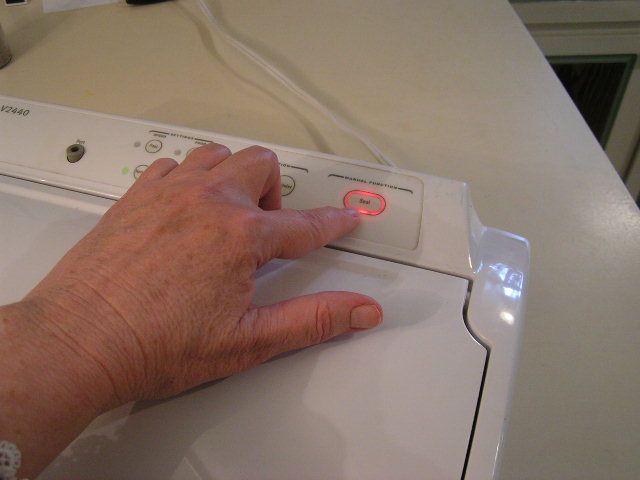
Secure the lid and press the ‘seal’ button and allow to seal what will become the bottom end until the light goes off or until the time you have determined is enough. If you predetermine a time, you have to manually stop the sealing feature by repressing the ‘seal’ button. Pull the plastic out to make a bag long enough to hold your food. The sealed portion acts as the bottom. Cut with the cutting feature.


 photo PICT1035_zpsc0349a2e.jpg


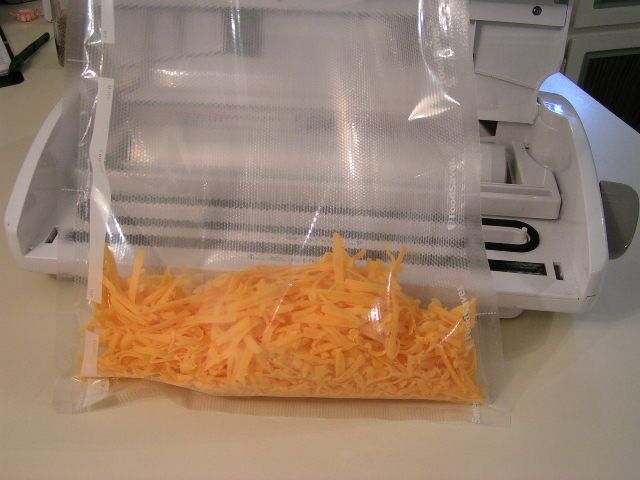
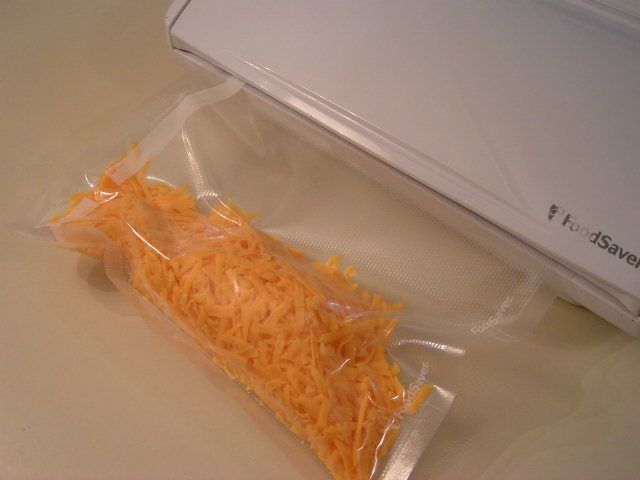
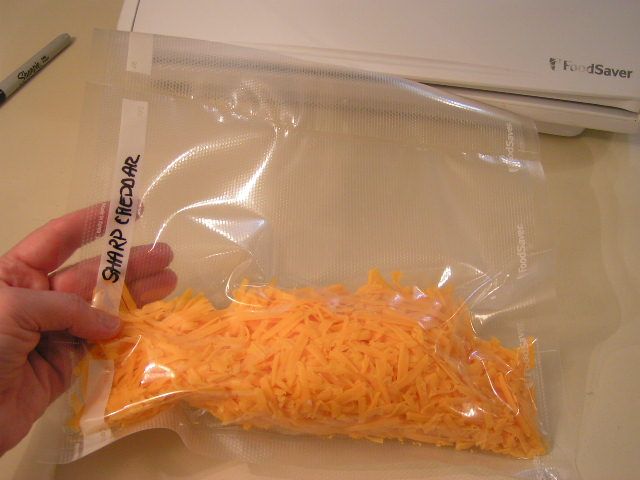
I bought a boatload of cheese on sale (1 block for $1.00!) and so since we like grated cheese, and I have found that you can freeze grated cheese really well, here I have grated a block of cheddar. You can also use a food processor. Cheese may also be canned!! But that’s for another post. Pour in the cheese or whatever you are sealing


 photo PICT1040_zps0a538f03.jpg


Place the open end of the bag down into the chamber that attaches to the suction holes and close the lid and fasten Press the “vacuum and seal” button and watch it work!


 photo PICT1042_zps5d85111e.jpg


You can stop it at any time, which is what I am doing here in order to keep the cheese from being too tightly pressed.


 photo PICT1044_zps4d606b05.jpg


To vacuum jars, you must have the jar sealers and hoses that can be purchased separately. They run anywhere from $8 – $10


 photo PICT1045_zps20db3898.jpg


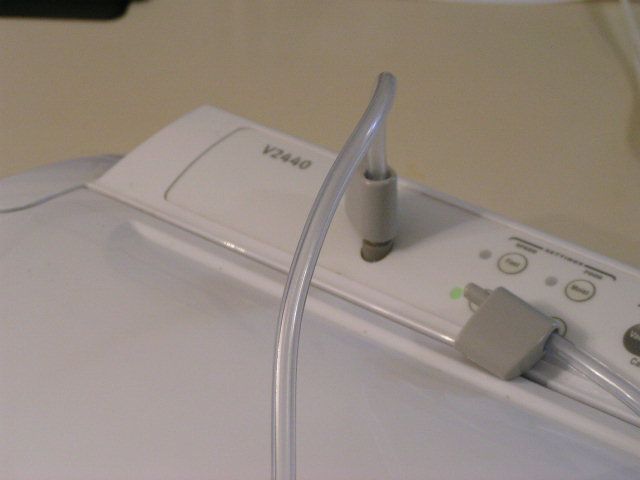
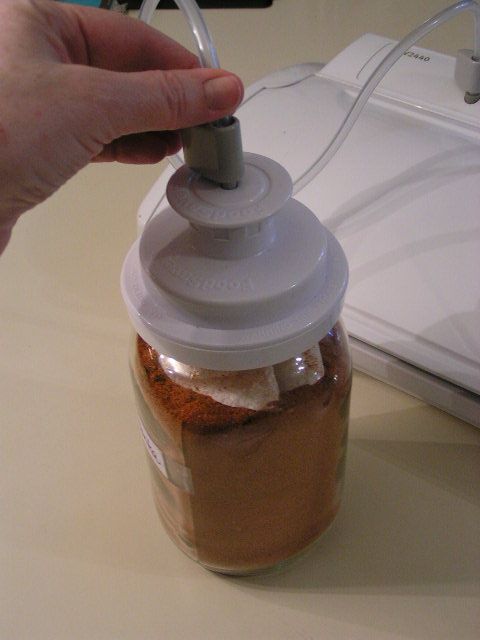
First, attach the hose to the accessory port


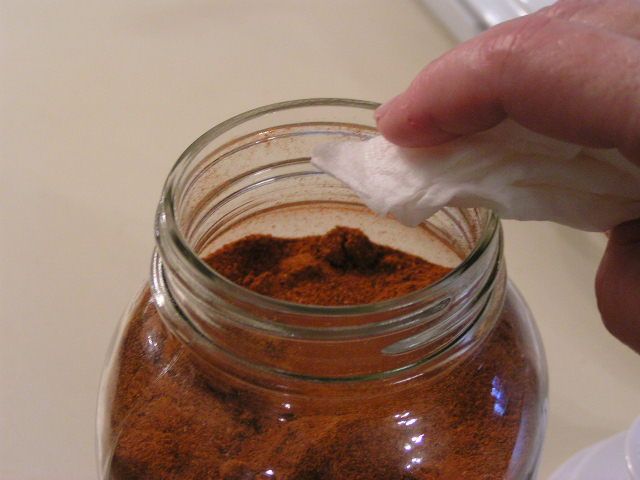
 photo PICT1047_zpsd64099f3.jpg


Wipe the edges of the jar with a damp cloth or paper towel to remove any residue or oil


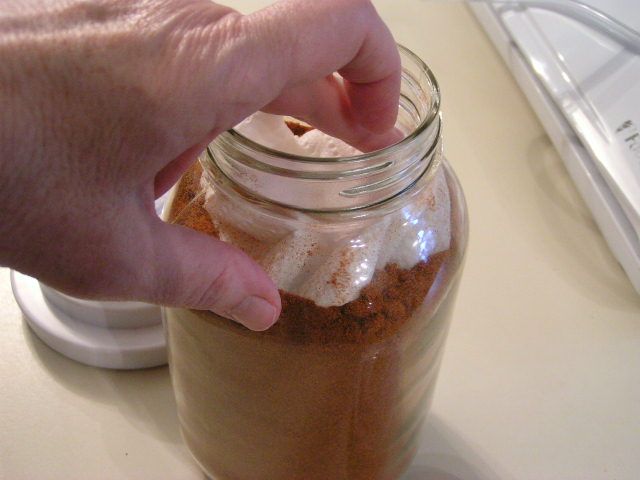
 photo PICT1049_zpsd7b9f7e6.jpg


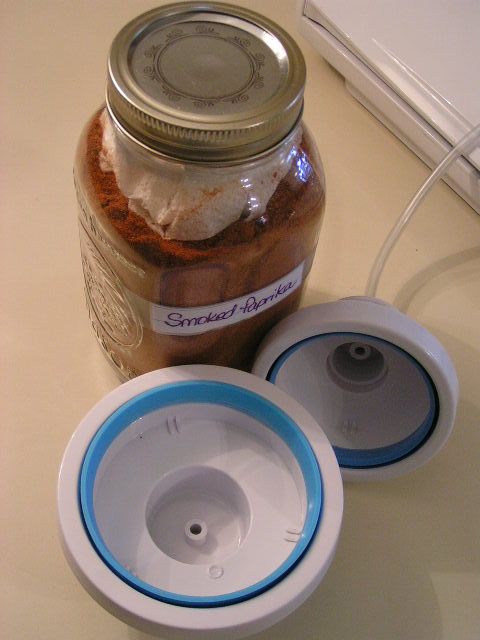
Place a dry, folded paper towel over powdery substances in the jar. Not needed for fruits and vegetables, etc.


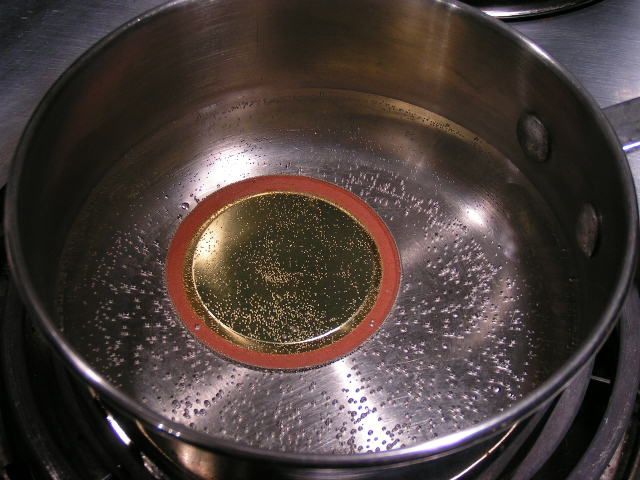
 photo PICT1021_zpsb5d63e55.jpg


A new lid should be softened in a pan of nearly boiling water


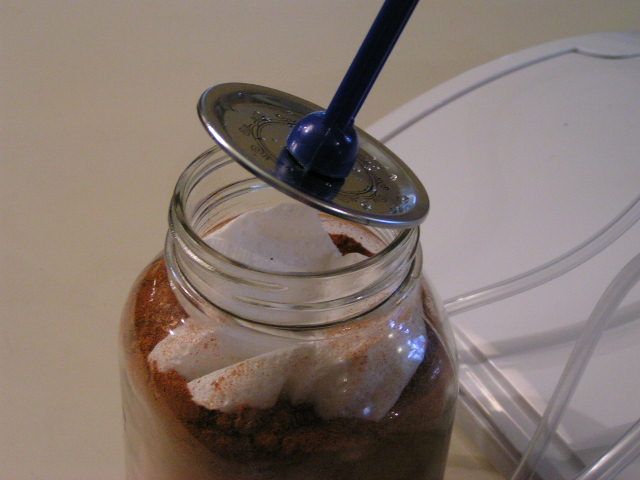
 photo PICT1063_zpse47e1466.jpg


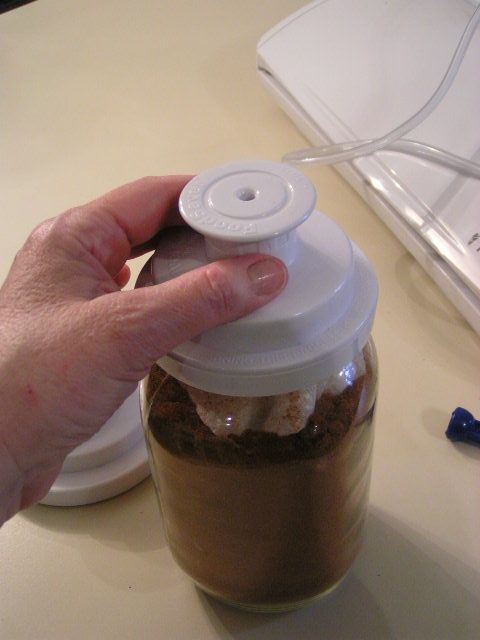
Place lid on top of jar


 photo PICT1053_zps7a8c2da0.jpg


Place appropriate width jar sealer over the lid. This is the sealer for a regular mouthed jar. I find that sometimes it helps to wet your finger and run it around the inside edge of the sealer before putting it on the jar to create an even tighter vacuum.


 photo PICT1055_zps306df411.jpg


Attach hose to jar sealer


 photo PICT1060_zps3181eea4.jpg


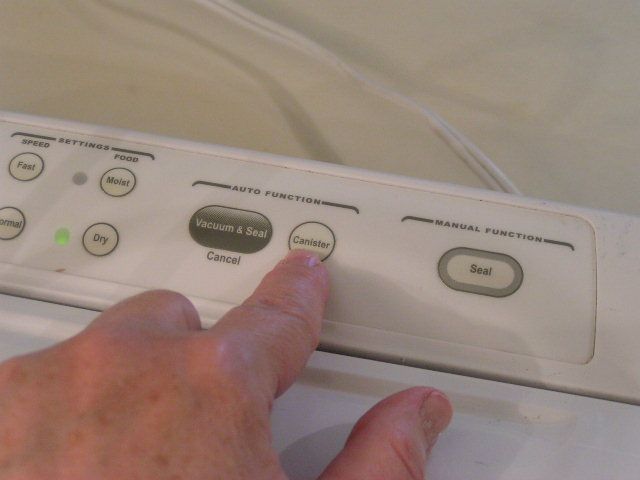
Press the canister button. If you get a newer model sealer, then the button may be different


 photo PICT1067_zps6bc0e18f.jpg


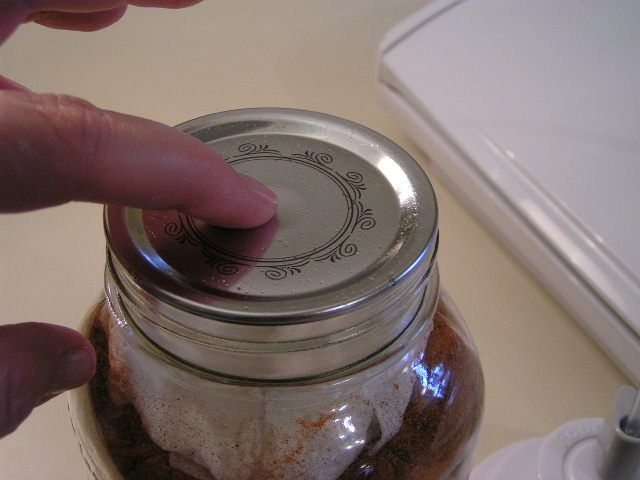
After removing the jar sealer, the “button” on the center of the jar lid should be concave and will not pop when you push the center of the jar lid.


 photo PICT1069_zpsf2cb2bca.jpg


So there you have it. My darling daughter refers to this wonderful piece of equipment as “the sucker thing” and asked for one for Christmas. Did I mention that she is 29?!


Happy Cooking!


MB
Please join us on FaceBook!!


Join in the conversation by leaving a comment below and enter our January Giveaway!


Dehydrating Series Pt I – Celery

Monday, January 10th, 2011


Part II

Dehydrating Series Part I

Or

How To Pack 8 Bags of Celery Into

A One Quart Jar


Here in Oklahoma, most of us are tough old birds. We’ve learned the only thing predictable is that there is nothing much predictable in this state. One minute you can bake a chicken in your car and the next minute you’re trying to figure out how to get that car out of a snow drift. Of course, the car can get cooked in one of our prairie fires as well. Ice storms can paralyze daily life for a week and tornadoes can change lives forever. And then of course, there are the hail storms.


So, we Okies have pretty much figured out that you don’t need a government commission on emergency preparedness to tell us to be prepared. We’ve been prepared since the days of the Land Run when barrels of beans, flour and sugar and a crock of sourdough starter meant protection from starvation when the WalMart shelves were empty. Unfortunately, there ARE some city dwellers here who have either forgotten these facts or who moved here from some foreign country, like Los Angeles, who get caught with their rations down. But for the most part, we’re a pretty prepared and flexible lot. I got tickled the other day when a 30 minute program was aired to remind us that we have the likes of tornadoes and such here in Oklahoma. Ya think? A body would have to be living in a cave 24/7 to miss that little bit of reality. Anyway, the Oklahoma preparedness program has been called “Red Dirt Ready” and the name symbolizes the fact the Okies immediately jump in to help after a disaster, getting all covered in Oklahoma’s famous red dirt. That’s true. We do. It’s what makes this state great.


 photo IceStorm1-27-09003_zps64602f77.jpg


 photo PICT0032_zps15eac0a6.jpg


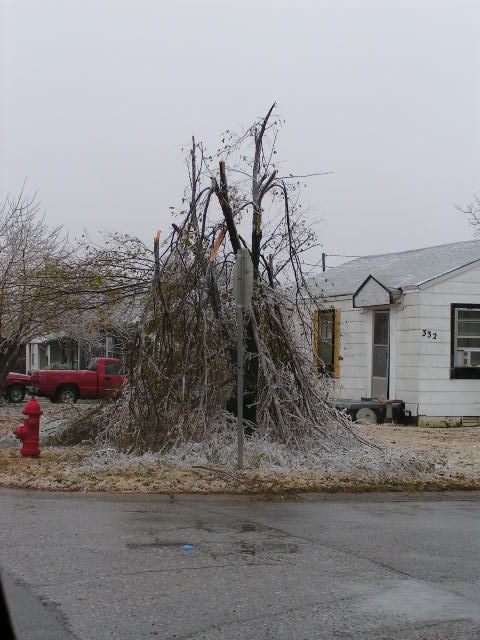
Imagine this on the power lines. That tree totally disentegrated. So do our electric lines!!


Electricity can be a problem around here. It is not unusual for us to be without for a couple of days and in many areas that can run into a number of weeks. That wreaks havoc on one’s frozen vittles if one hasn’t a generator and so it is nice to have plenty of stock that requires no refrigeration. That would seem impossible for such things as fruits and veggies, but not so! The age old art of dehydrating comes in really handy to offer up a pantry full of wonderful and healthy treats that will last a looooong time.


Having a garden each year, I dehydrate stuff yearly, but lately, I’ve been a dehydrating fool. I have been challenging myself to see what I can dry next and how best to use it. I’ve decided to do a series on using a dehydrator with recipes. Today I’m demonstrating celery and broccoli drying. I was inspired to do the celery because our local store, Firelake Grocery, had celery on sale, 3 large bags for $1. The broccoli was on sale as well – two good sized heads for $1. I use a lot of both.


Now, I need to sidetrack here for a sec because I realize that these are not organic items coming from a local grocer. However, with food prices soaring, many people can’t afford the more expensive organic foods and I want to let them know that it’s ok. This is where my faith comes into play. I see 3 large bags of celery for $1 as a blessing and I see God as my provider of blessings. Therefore, I just trust that all I can do is the best that I can and trust God to take care of me. In other words, I eat as healthily as I can and leave the rest up to the Lord. Shoot, I used to break thermometers when I was young and chase the little balls of mercury around on the table for hours with my friends! I promise, I don’t glow in the dark – although I do have very white hair. Do you suppose – – – ?


Back to the celery and broccoli. The long and the short of it is that I bought 16 bags of celery and a lot of broccoli. Neither of these items is anything you can keep for any amount of time unless you dry them or freeze them. I like to freeze celery by chopping it, leaves and all, and spreading it onto a cookie sheet, freezing it hard and then taking it off of the sheet to place it into freezer bags. That way the pieces stay separate and don’t clump up. Frozen celery is a quick addition for sautéing and putting into chicken salad. However, as I said, frozen is useless when there is no electricity. Plus, I don’t have that much freezer space! I froze one bag of this celery and all of the rest I dried.


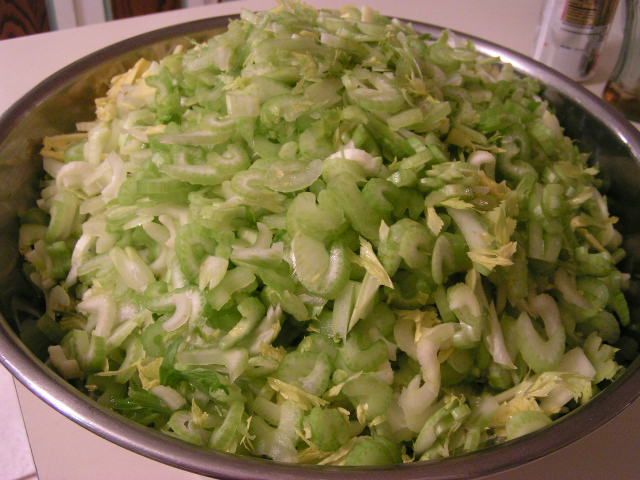
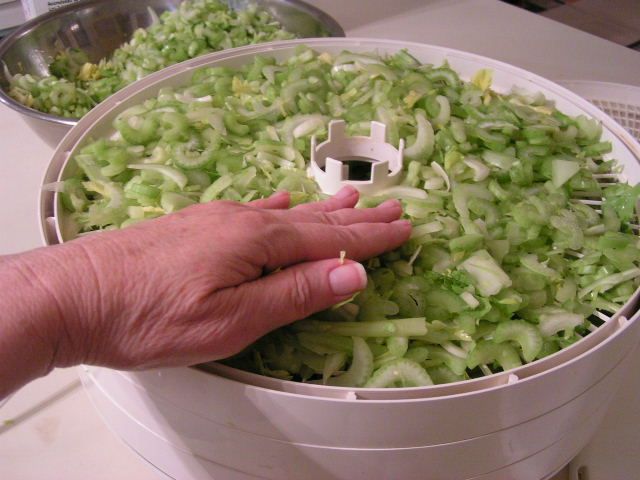
 photo PICT0689_zps26a77d51.jpg


I used electricity on those suckers with a food processor! Beat having to cut them all up by hand. But I could have done it – Really.


 photo PICT0695_zps4c5bc851.jpg


 photo PICT0694_zps5f6dd73b.jpg


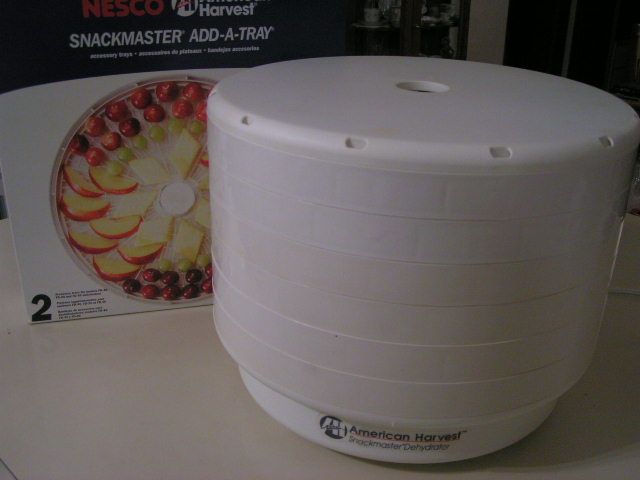
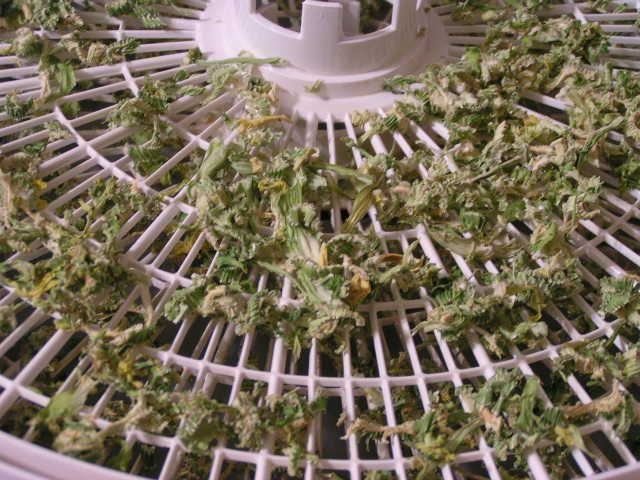
I use an American Harvest dehydrator that I have had for years. Got it at Walmart. They still carry them as far as I know, in season, but they are offered elsewhere as well. I also ordered extra racks from the company. Sprinkle the celery evenly on the dehydrator racks. It doesn’t matter if the celery is several layers thick. Continue adding celery to racks and layer one rack on top of the other. Dry overnight for 12 – 13 hours.


 photo PICT0708_zps8195570a.jpg


The celery should be totally dry and crisp in thin areas.


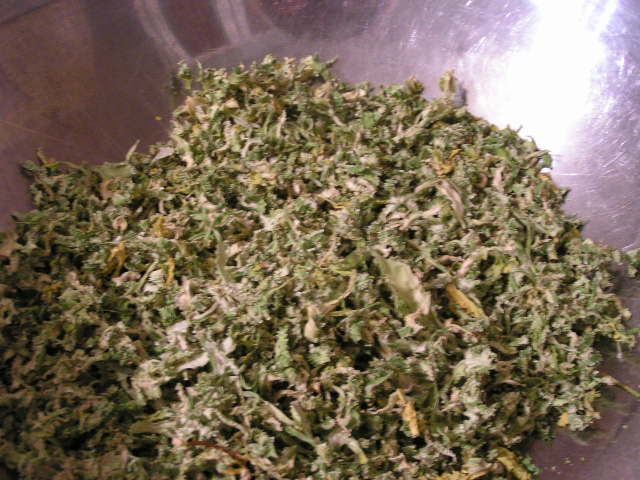
 photo PICT0709_zpsded1406f.jpg


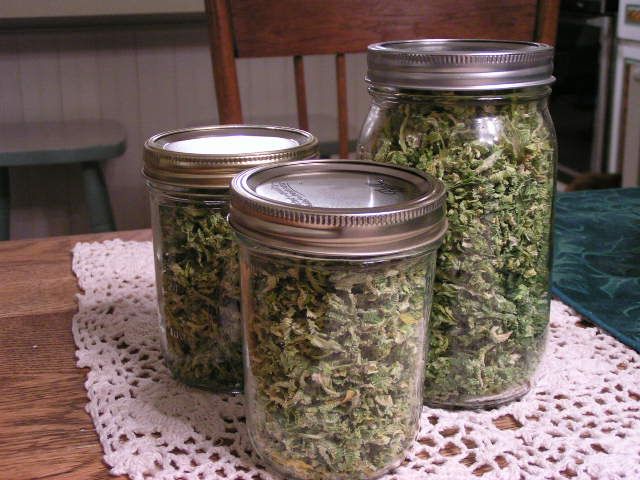
To make it easier to put the celery into jars with less mess, I have a very large bowl into which I shake the pieces. Then, using a canning funnel, I scoop the dried celery into jars. I like to use jars because I can vacuum seal them on my FoodSaver sealer. That takes out all air for good preservation. The nice thing is that you can unseal and reseal these jars with the vacuum sealer.


 photo PICT0714_zps4a691c61.jpg


15 bags of celery!! 1 tbsp = 1 stalk of celery


 photo PICT0713_zps26052810.jpg


 photo PICT0771adj_zps04704d9e.jpg


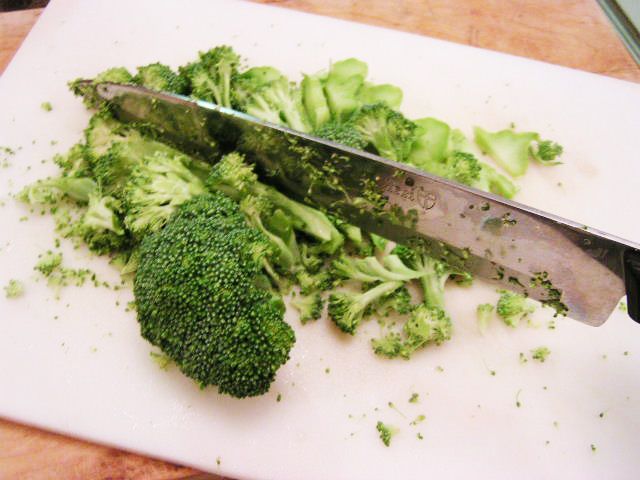
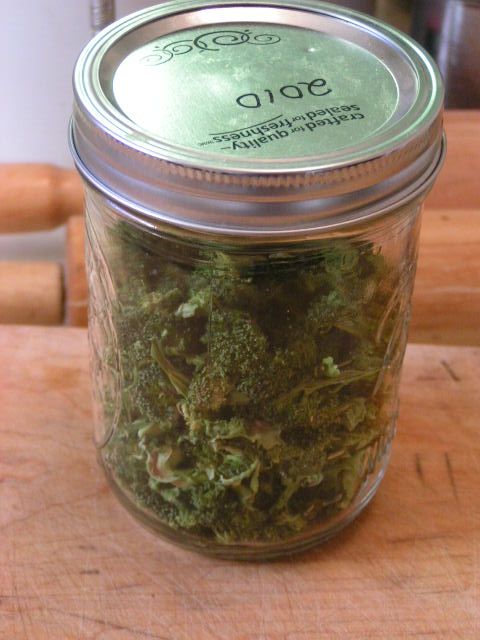
The same can be done with broccoli. You have a choice – if the brocolli is fresh from the garden and tender, I just cut it right up. If it is older or from the grocery store, I blanch in boiling water for 2 minutes, dump into ice water and then dry before cutting it up.


 photo PICT0778_zps0699519b.jpg


Dried Broccoli


 photo PICT1180_zps4453900d.jpg


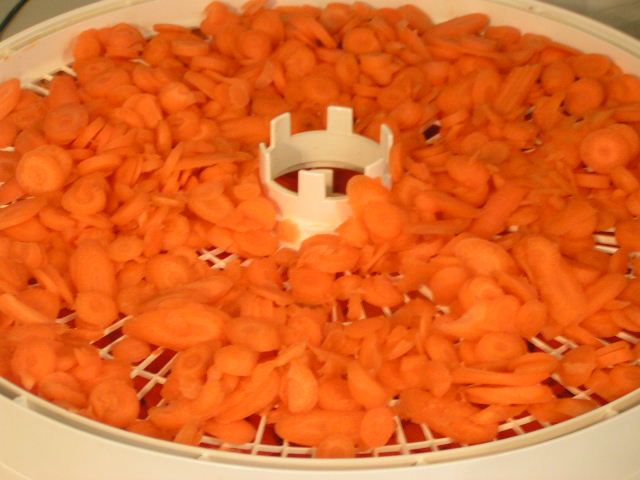
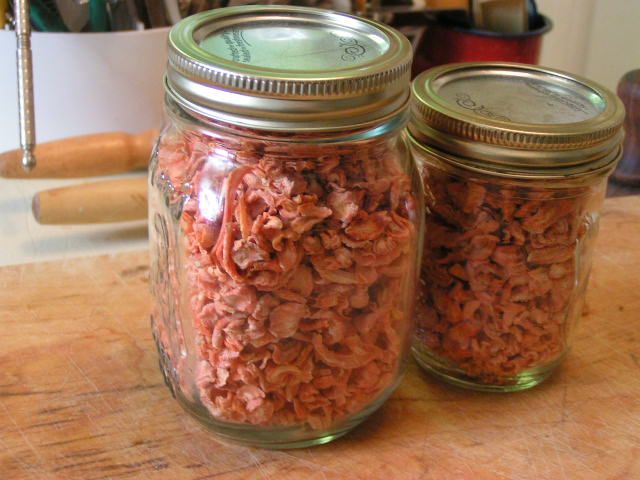
You can dry sliced carrots too


 photo PICT1182_zpsfbe9e539.jpg


They look pretty in the jar. The one thing about carrots is that they need to be soaked with FruitFresh because they will lose their color over time, if kept for long.


 photo PICT0661_zps1ada8f9c.jpg


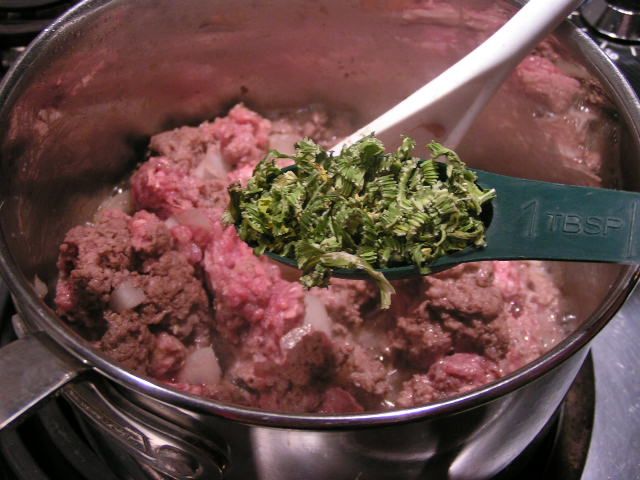
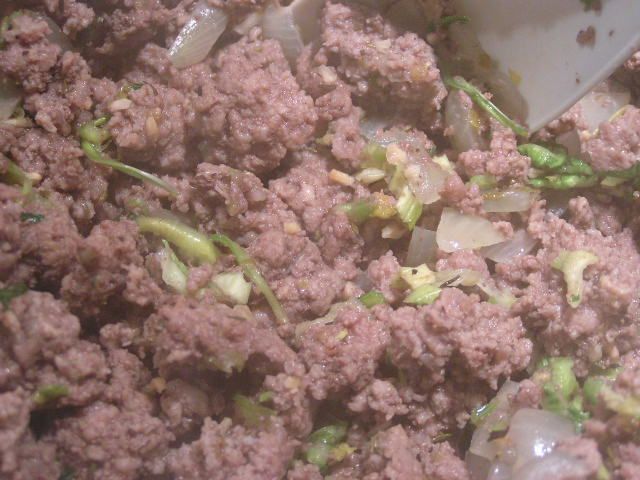
The dried veggies are wonderful for cooking. Add dried celery to browning hamburger for homemade spaghetti sauce or to the tomatoes for meatless sauce.


 photo PICT0666_zpsea3d6a74.jpg


It reconstitutes beautifully! Or, for chicken salad or other times you want crispy celery, place dried celery into a bowl and cover with cold water to an inch over the top of the dried celery. Place in the frig overnight. Drain the next day and you have celery like fresh!!


So there you have it. That will keep you busy for a couple of days and by Thursday, you’ll be ready for a recipe. I’ve made a New Year’s Resolution – I’m going to do my dead level best to post twice a week, hopefully Mondays and Thursdays. Just remember what happens to New Year’s Resolutions – they’re kinda all dried up too.


Happy Cooking!


MB
Please join us on FaceBook!!


Join in the conversation by leaving a comment below and enter our January Giveaway!


Egg and Muffin Sandwiches

Monday, January 3rd, 2011


“Deserve” Leads to


“De-Serve”


(A Recipe To Serve!)


OK, so that was kind of a crazy thing to write, but I was thinking about that place with the golden arches and their old slogan. Remember? It was that catchy song about what you deserve – you know – like a break today? However, as I grow older and older I am finding that what I think I deserve ain’t all it’s cracked up to be! I bet you can’t get that song out of your head now, can you?
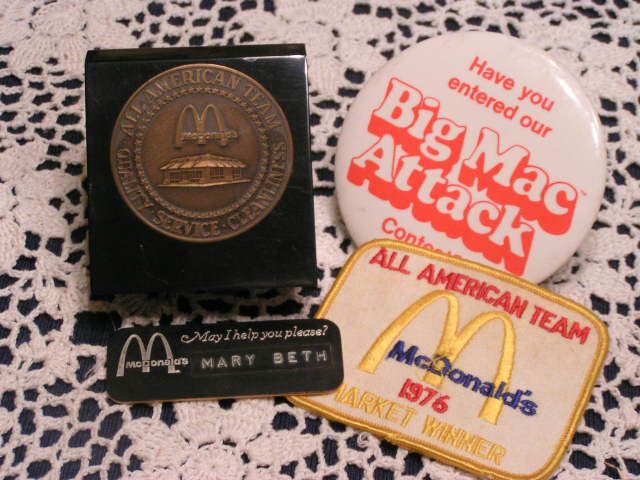

 photo PICT0855_zps3ba02d25.jpg


In my youth, I had the “prestigious” honor of being a “crew member” of the McDonald’s Restaurant team – aka, a “hamburger flipper”. I lived, breathed and literally ate McDonald’s. I don’t know how it is now, but back then, McDonald’s was run like the army and there was a real pride in the job and a sense of ownership in the company. Each year there was a competition for all crew members in order to become part of the “All American Team”. The more All American Team members at a store, the more prestigious the store in the eyes of the corporation. Competition was fierce and hard and not just a little scary. It was like participating in the Olympics, only instead of swimming you were waiting on and serving customers in under a minute, or in place of throwing the shot put, you were assembling, wrapping and tossing cheeseburgers onto a warming tray to a stop watch. The competition went on during the day while customers were actually being served and “The Suits” were there watching your every move. The one year that I decided to take the plunge, I competed at the cash register and outside the restaurant in grounds cleanliness. I won. I have proof. But I’m still waiting for the endorsement offers.


 photo cashregister_zps1cc15936.jpg


Now, I need to remind you that cash registers at the time were not the electronic wonders they are today. Computers were something only ‘brainiacs’ even considered and, as far as we were concerned, still occupied an entire room with magnetic wheel thingys (my hubby tells me they were called column tape units and he would know) whirling synchronistically . If that isn’t a real word, it sounds good – can’t you just see it?? Yep, the cash box on which I registered counter sales was an upright mechanical monster with round, brown keys in rows all down the front of the unit. The first vertical row was for the cents, the second, tens of cents, the third, ones, the fourth, tens and so on. The number totals showed up in white on black placards, side-by-side, in a window above the buttons. In order to put in a monetary amount, one had to punch each row of places matching the numbers of the entry. I remember starting out punching one button at a time with one finger as the customer stood there looking at me like, “You moron, can’t you work any faster than this? My Big Mac is gonna mold before I get it.” However, I eventually mastered the beast and could use multiple fingers to put in a total all at once – three fingers for “$1.99” and the thumb and first finger to “enter”. I thought I was hot stuff. And, oh yes, I was there when the Big Mac was first introduced. I had a “Mac Attack” on a regular basis.


 photo Youdeserveabreaktoday_zps8d07c29f.jpg


I learned to count back change. Those cash registers only told you what the total due was, not the total cash back. A $20 bill for that $1.99 order? A penny – two dollars, three dollar bills – three dollars, four dollars, five dollars, a five dollar bill – ten dollars, and a ten dollar bill – twenty dollars. Give a clerk today, if there is no computerized cash register, a ten dollar bill and a nickle for a $1.95 purchase and watch him slowly come unglued trying to figure out how much money you should be getting back!!!


Crew members were required to be “versatile” and one’s pay scale and evaluation was based on just how many things one could do in the restaurant. That meant that I didn’t just work the front, but I cooked too and I loved it. It was a fascinating process and I am here to tell you that a McDonald’s hamburger or French fries are no more unhealthy for you than a hamburger or French fries that are fried at home. Food is food and frying is frying. Back then, however, there was one breakfast ingredient that seems to be missing these days and that was butter. But I’m getting sidetracked – back to versatility. Another job that was a requirement back then was being a morning host or hostess. That has gone by the wayside too, apparently, but it was a fun job that involved making sure tables were clean, visiting with the customers, refilling coffee and bringing extra food items requested. It is a job that taught me the value of a servant attitude. I found that the more gracious I was and the more willing I was to do for the customers, the kinder they were and the more appreciative they were. Even when I would get a real grouch, I found that if I didn’t take offense and just treated them kindly, their grouchiness didn’t bother me and they seemed to leave a little less grouchy. It’s a lesson to practice every day.


 photo mcdonalds-arches_zps4f482024.jpg


I never would have picked McDonald’s as my career of choice at that time. I was fresh out of college with a degree in Fine Arts, but there weren’t any jobs out there in “Art” even if one did think that one’s art was “Fine”. McDonald’s was the only job I could land. I found out however, that even though I was not getting what I thought I “deserved”, I was learning an enormous amount of information and wonderful skills that would serve me the rest of my life. I’ve found that to be true in everything I’ve done that hasn’t jived with what I thought I had to have. I have figured out that I really don’t know what is always best for me and that I just have to chill and let God do the leading to whatever “best” is. It has led to a much more peaceful life, believe me!! We are at the beginning of a new year and stress is pretty heavy in the country and in the lives of many individuals. Seeking to serve rather than to be served is a heck of a way to deal with stress. When we seek to serve, rather than focusing on what we think we “deserve”, there is a change in attitude and actions for everyone involved.


Anyway, because with any life’s lesson there really has to be food involved, it is time for a recipe. The following is my way of using the homemade English Muffins, from the last post, for egg and muffin breakfast sandwiches. Your kids will love you for them!


Egg And English Muffin Breakfast

Sandwiches


Per Sandwich:
1 egg or two egg whites
1 English Muffin
1 slice American Cheese
1 slice Canadian Bacon or 2 slices thin-sliced Smoked Ham
Melted butter or olive oil
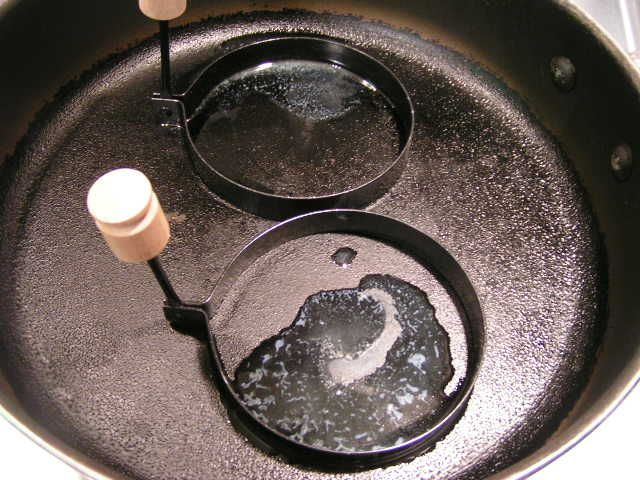

 photo PICT0487_zps27497e1c.jpg


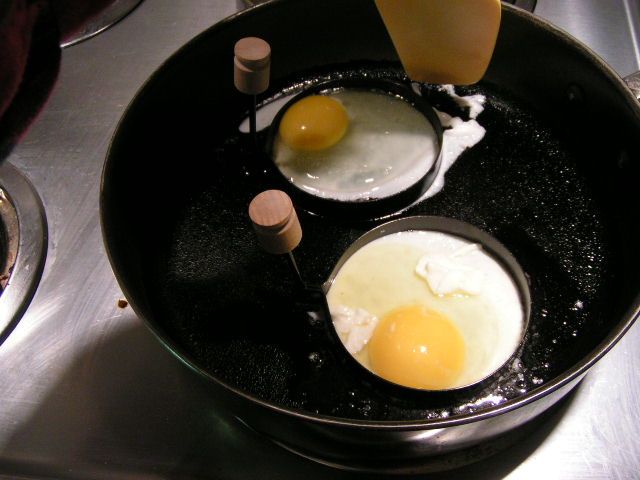
In a skillet, melt a tsp of butter or olive oil until bubbly into oiled egg rings or tuna cans that have had the top and bottom removed. Make sure griddle is hot before adding eggs.


 photo PICT0489_zpseaf92eff.jpg


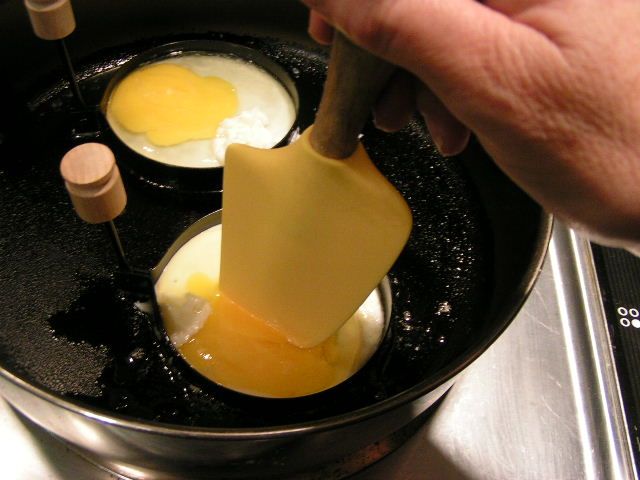
Break eggs into single cups and pour each egg into the egg rings or tuna cans. If you are concerned about cholesterol, use two egg whites instead of the whole egg. Using a spatula, catch any wayward egg and put it back into the ring.


 photo PICT0490_zpsd30e7b4d.jpg


With a spatula, break the yolks


 photo PICT0499_zpseecaac24.jpg


When eggs are very firm, gently remove the egg rings by sliding spatula around the inside of the ring and flip the eggs to cook on the other side. Remove eggs and place on a plate in a warmed oven to keep warm.


 photo PICT0493_zpsf1fcebb0.jpg


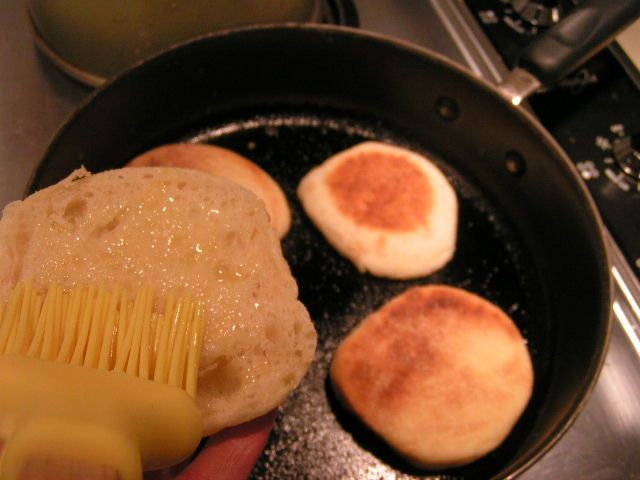
Brush the tops of your split English Muffins
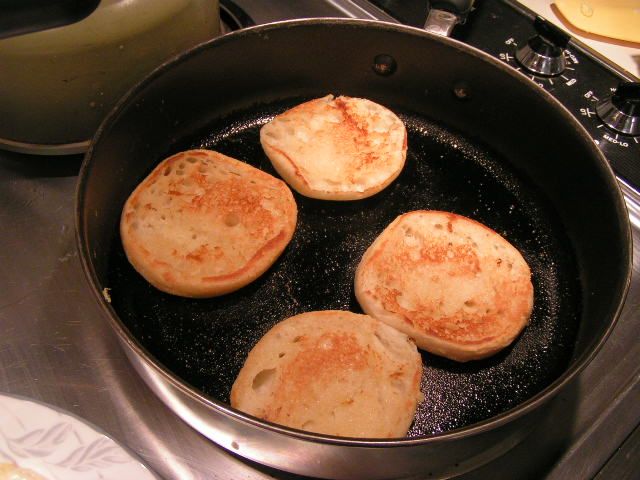
with either melted butter or olive oil. Place them face down in the hot skillet.


 photo PICT0496_zpsddbdb74c.jpg


 photo toastmuffins2_zps81f5a7df.jpg


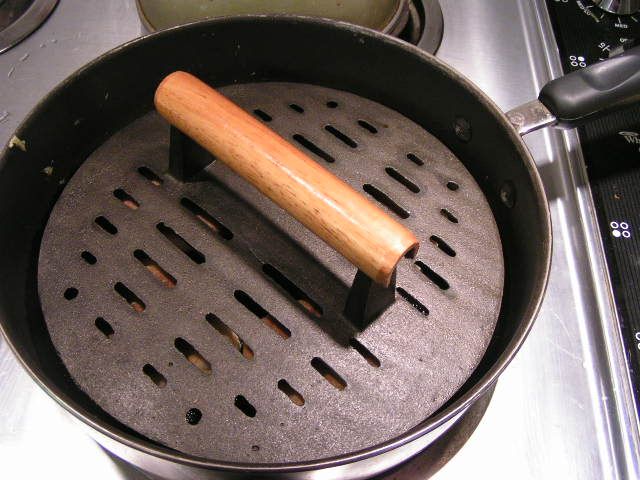
Use a kitchen press or heavy pan to weight the muffins, providing an even cooked surface that is warm and crunchy. These muffins have been turned over. See how pretty and browned they are?


 photo PICT0503_zps3c03b5b2.jpg


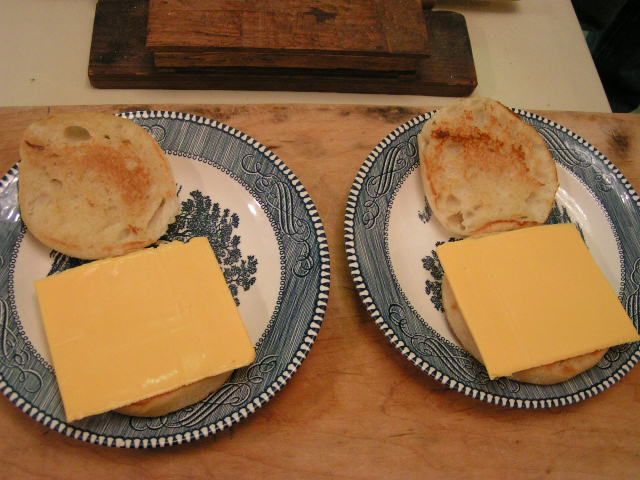
Remove muffin halves to plates and immediately place a slice of American cheese on one half


 photo PICT0505_zps17a39015.jpg


Place egg on top of cheese


 photo searham_zps9d1d14b5.jpg


Return to your still-heated skillet and quickly heat Canadian bacon or thick slices of smoked ham for each sandwich . Fry meat on one side for just 15 seconds, turn and then cook the other side for 15 seconds.


 photo PICT0507_zps25305041.jpg


Immediately put ham on top of egg


 photo PICT0508_zps3f2c71c8.jpg


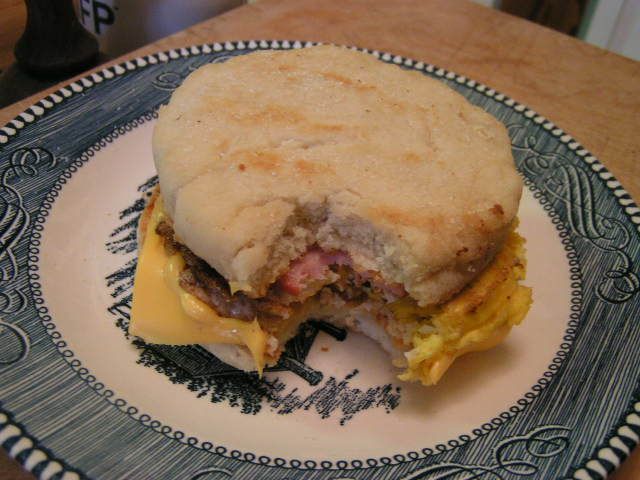
Add salt and pepper and cover with the other half of the English Muffin to make a sandwich.


 photo PICT0801_zps96296424.jpg


I promise, it will melt in your mouth when you take that first bite!!


Happy Cooking!


MB

Please join in the conversation by leaving a comment below. And join us on FaceBook


Sweet Taste of Success

Wednesday, December 22nd, 2010


Sweet Taste of Success!


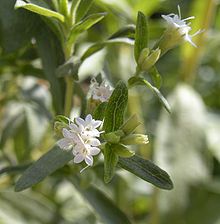
 photo 220px-Stevia_rebaudiana_flowers_zpsabf4ec95.jpg


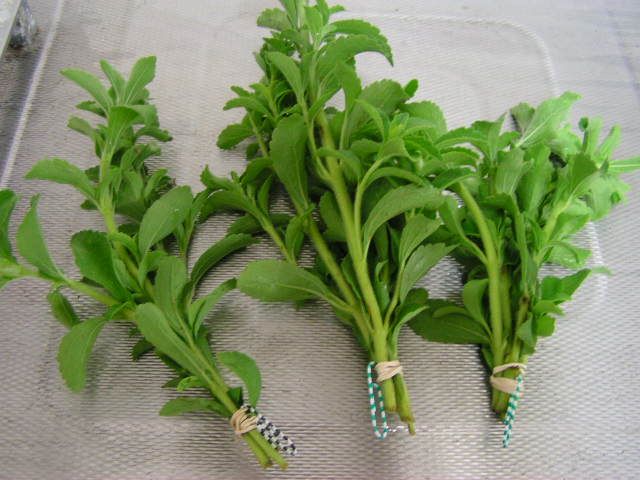
A dear friend surprised me with a freezer bag stuffed with clippings covered with the prettiest green leaves. She informed me that the clippings were from her Stevia plant and that she hoped I could use them.


I like Stevia. My dear hubby doesn’t care much for it but I have decided that just as God creates us with different eye colors and different finger lengths, He also gives us different taste bud lengths. If you have short taste buds, then you’ll eat anything since the food doesn’t really touch much taste bud surface at all. There isn’t enough total taste taken in to determine, “Yuck. I don’t like that” before the item is whisked to your tummy. I also think that this is the reason why people who have ulcers still eat hot and spicy foods. Their taste buds are too short to tell them, “Whoa there, Bucko! That’s gonna kill your stomach.”


People with the longest taste buds are the pickiest eaters – kinda like my friend – the one with the stevia plant – who insists that “Cheetos are the other yellow vegetable.” She won’t eat cooked squash (yellow) or sauerkraut (sorta yellow), but she will eat corn (mostly yellow) which is the main ingredient of Cheetos minus the artificial colors (including Yellow #6) and therefore a larger cousin of the Cheeto family. I’m not sure which genus.


I am pretty sure the height of my taste buds is medium to low because I will eat almost anything except meat of any type that has the potential to move if it hasn’t been cooked, or canned peas. My taste buds are tall enough to tell me that canned peas consist of those legumes which didn’t make the cut, so were pressure canned to hide the fact. But MY tastebuds know the truth!


So what was I saying? Oh yes. I like Stevia. You have to be careful about this sweetener because a little goes a REALLY long way. The processed type can be found in just about any grocery these days, as well as local health food stores. There is even a mixture of sugar and Stevia that is pretty good, however my hubby’s long taste buds can pick the Stevia out everytime.


 photo PICT0002_zps54df57bf.jpg


So I took the clippings, given to me by my dear friend, and tied them in little bunches. I put a paper clip through the rubber bands holding them together.


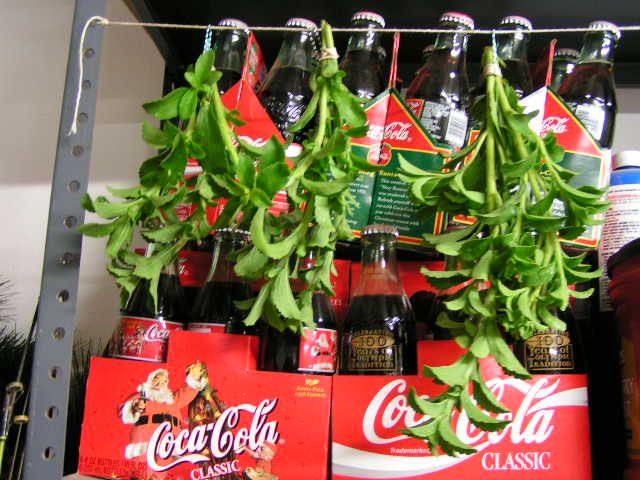
 photo PICT0003_zps1fe35208.jpg


I hung the bunches in the garage to let them dry. As you notice, my dear hubby not only has long tastebuds, but also collects Coca Cola memorabelia.


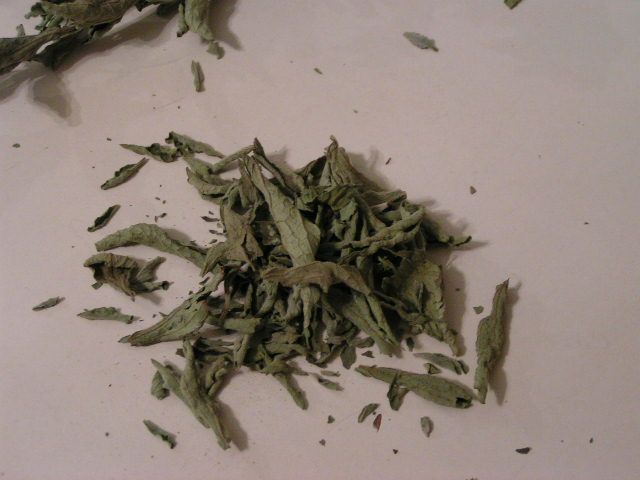
 photo PICT0724_zps06aa12d0.jpg


After drying the clippings for about 5 weeks, I took them down the other day. They were brittle.


 photo PICT0726_zps6e9fa838.jpg


I picked all of the leaves off of the stems which really wasn’t very hard. They broke off easily.


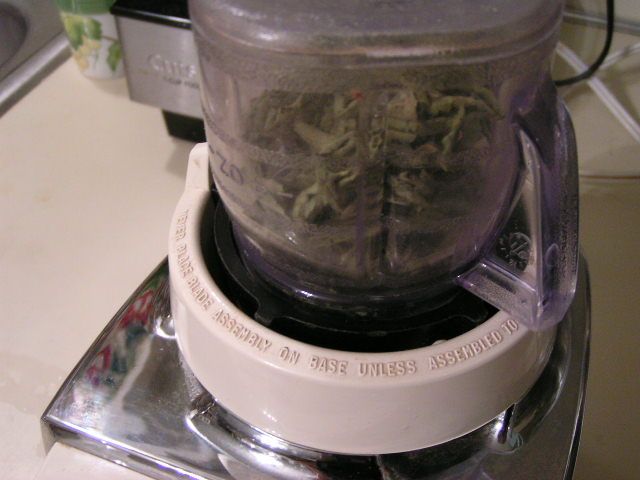
 photo PICT0727_zpsf30673f6.jpg


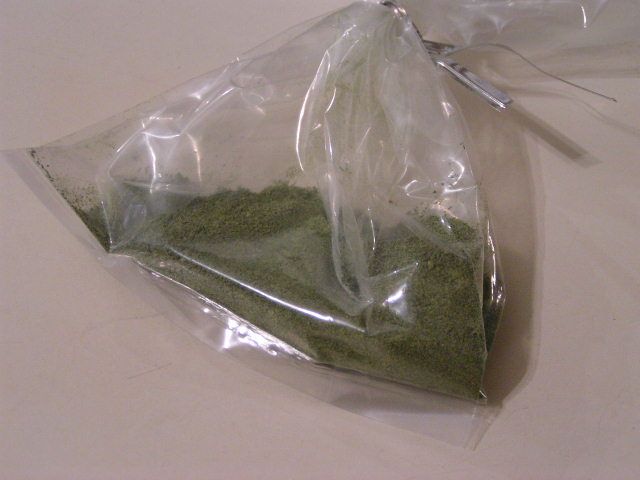
I figured that the next best thing to an herb grinder was the trusty old blender and so I pulverized those leaves until they were dust.


 photo PICT0731_zpse3e03591.jpg


I stored it in a plastic bag for fresh keeping.


 photo PICT0739_zpsb71998a5.jpg


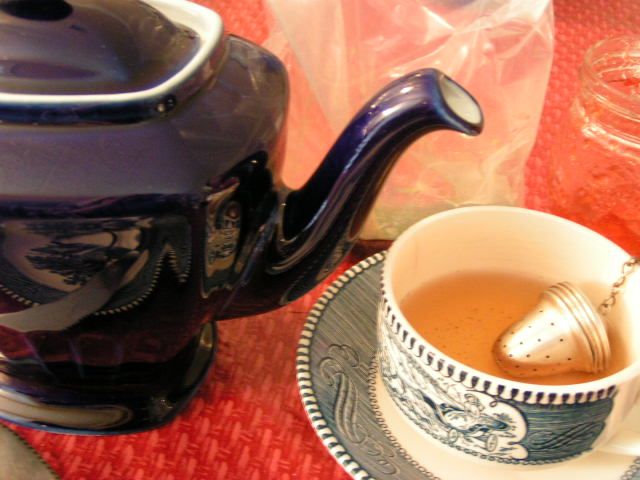
And so, today, I decided to brew some Oklahoma Prairie Blend tea. I put the Stevia powder in a small tea infuser in hopes of keeping the powder out of the tea since I knew it wouldn’t dissolve. No luck. It was still in there and it was still green, but green never killed anybody. It really tasted good and it was kinda cool drinking tea with a no calorie, no side effects sweetener that I had ground myself. Another new thing tried! Check!


Fresh Stevia leaves make a wonderful edition to a salad, adding just a hint of sweetness. It is healthy and, evidently, really easy to raise. I will be putting a plant here in the Spring. I understand that it is important to check packages of commercial Stevia for location of processing. In the US it is processed using water filtration but Stevia is also imported from China where dangerous chemicals are used to filter it. I’ll bet you people with long taste buds can tell the difference!!! 🙂


Happy Experimenting!


MB


Please join in the conversation by leaving a comment below. And join us on FaceBook


Merry Christmas

Thursday, December 16th, 2010


Merry Christmas!


 photo PICT0679_zpsba9831eb.jpg


Christmas for all things Oklahoma Pastry Cloth™ is up and running and I absolutely love the time of year! I would just like to take this time to wish all of you a Merry Christmas and to thank everyone for making this year so successful and exciting.


 photo PICT0670_zps814291f1.jpg


Sorry that this photo is so fuzzy. After fifty million pictures of the tree that were blurry and because all of a sudden everything in the screen appeared in Japanese, I realized that my camera was dying a low battery death.

~~~

Our days of cutting down a tree and bringing it to the house are over. We have to be satisfied with a fake. Poor hubby’s allergies can’t handle the real thing.


 photo PICT0673_zpsa3808e93.jpg


Our kitty, Callie, thinks it’s a real tree and that tree skirt she’s lying on is really a forest bed of pine needles. The star ornament is from my childhood trees. It’s plastic!!!


 photo PICT0675_zps093e8112.jpg


This year’s theme is ‘silver and pearls’. Silver bows, silver pine cones, silver balls are all mixed in with our traditional ornaments. “Turn your ear to wisdom and apply your heart to understanding, and if you call out for insight and cry aloud for understanding and if you look for it as for SILVER and search for it as for hidden treasure, then you will understand the fear of the Lord.” Proverbs 2:2-5 and “Again, the kingdom of heaven is like a merchant looking for fine PEARLS. when he found one of great value, he went away and sold everything he had and bought it.” Mathew 13:45-46


 photo PICT0684_zpse5988151.jpg


We have a choo-choo train, that really blows smoke, chugging around the tree. I love the sound of the whistle. The cat hates it and the dog doesn’t really know what to think. Notice all of the plastic ornaments on the bottom row? They are also from my childhood. I put them on the bottom just in case the cat decides that they are acrobat rats hanging by their tales! I have a feeling that’s why my parents had plastic ornaments too. Four kids and glass Christmas ornaments make for a sure disaster.


 photo PICT0676_zpsb3a58723.jpg


The nutcrackers stand guard over the front entrance. I watched the Nutcracker Suite last night and I’m waiting for one of these little guys to salute me!


 photo PICT0687_zps26a31fd9.jpg


The garlands and poinsettas are placed in strategic locations.


 photo PICT0680_zps44c5bf47.jpg


My favorite part of decorating for Chistmas is setting out the Nativity scenes. I just feel a certain connection as if I am holding a photograph of a moment in time.


 photo PICT0674_zps9d9aa525.jpg


I have been very disheartened at what I have discovered in our stores. Most are not stocking Nativity Scenes anymore. I was trying to find one to replace a relative’s broken one and asked at the usual places. Not one place had a single set and the clerks really didn’t seem too worried about it.

Christmas is about the Nativity, but it is so much more than that. For Christians, it is a time of celebration and amazement because God came down and dwelt among men and showed His authority and His ability to provide for us. This nation has honored that belief for a long time. Please, let’s not take the Christ out of Christmas.


Have A Very, Merry Christmas!


MB


Please join in the conversation by leaving a comment below. And join us on FaceBook


December In Oklahoma

Friday, December 10th, 2010


December

In Oklahoma


 photo PICT1239_zps34eb783d.jpg

I just thought that I would remind you of what Oklahoma looks like in the Spring before you see the following photos!


I have decided that every place on earth has its own beauty and every place on earth in any season of the year displays that beauty in many different ways.


Oklahoma is no different. From the “mountains” (hills to you Colorado folk) of the eastern and southwestern part of the state, the rivers and forests of the southeastern and southcentral part, to the wide open prairie and sand dunes of the western part of the state, nature shows herself in glorious splendor each and every season.

Yesterday, my dear husband and I made a day of it heading out to Altus, OK, home of Altus Air Force Base. From our starting point, the route winds through Chickasha, Lawton and Fort Sill, Cache and Snyder (home of General Tommy Franks) past ranches that spread as far as the eye can see.
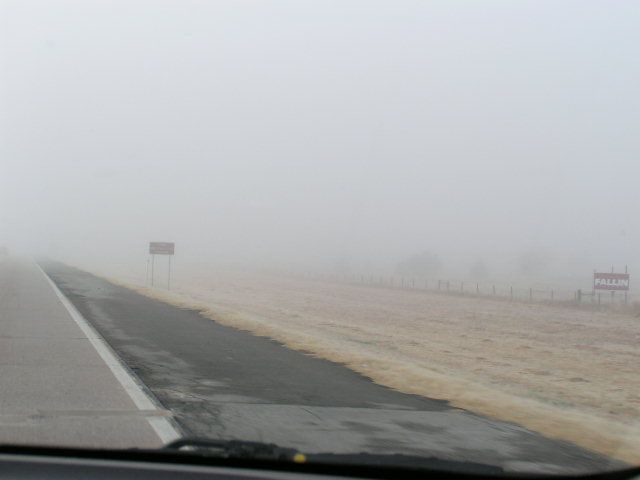
 photo PICT0658_zps8be2531f.jpg


We started out in cold, brisk temperatures hanging around 32º with a dusting of snow on the ground. As we moved south, the cold air had hit warmer air and we were driving in the proverbial “pea soup”.
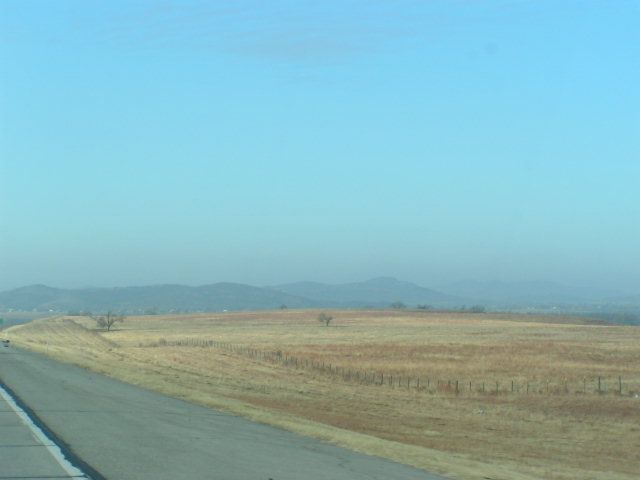

 photo PICT0660_zps0a2edd00.jpg


I thought that you might like to see what our state looks like in the late Fall/early Winter before the heavy snows move in. I took these from the car as we were sailing along at a 70mph clip!


 photo PICT0669_zpse91a86f2.jpg


 photo PICT0675_zpsb42b0189.jpg


These are the mountains that are evidently keeping Trader Joe’s from coming to Oklahoma. It seems their trucks can’t make it over our “mountains”? Yes, clerks at two different Trader Joe’s stores in two different states shared that secret with me. I’m wondering how they made it all the way to Tennessee from California!! Some of our “mountains” are leftovers from the Dust Bowl days. Large dunes of sand give testimony to those hare and terrible days. I think the view is spectacular.
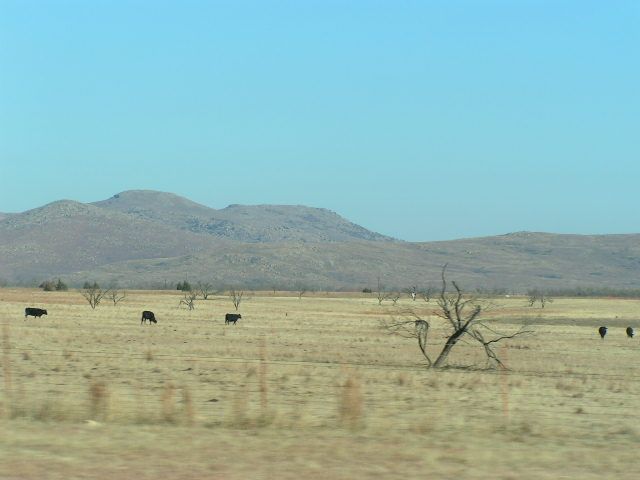

 photo PICT0665_zpsda230f3c.jpg


Every breed of cow you can imagine dots the countryside. I bet these Angus could make it over the “mountains”!!!


 photo PICT0672_zps33b1aaf9.jpg


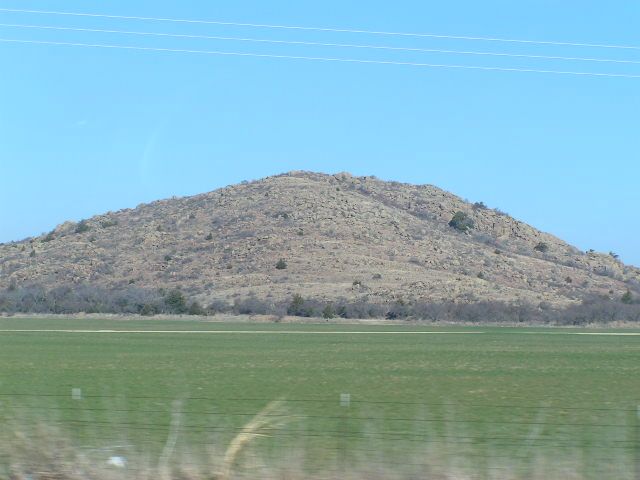
Around Snyder, there are these strange outcroppings of rock that just rise right out of the ground.


 photo PICT0674_zps1e542c3b.jpg


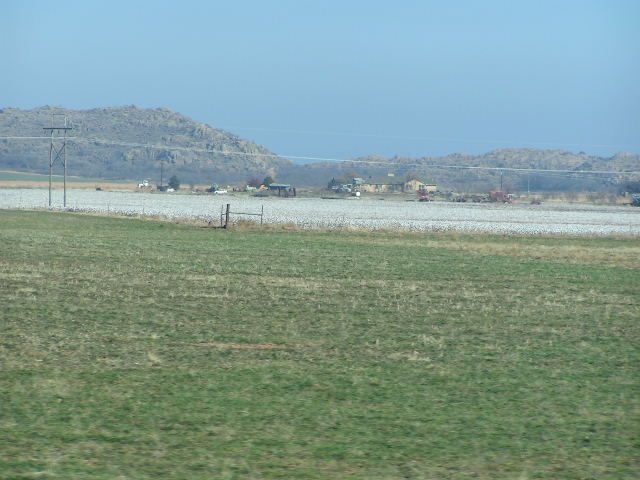
That isn’t snow! That’s cotton. I never saw so much cotton as I did on our drive.


 photo PICT0676_zps2caa4df7.jpg


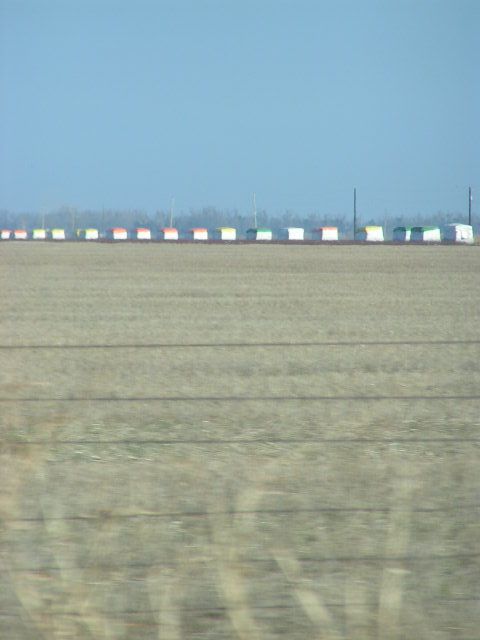
Those are bales of cotton and they were everywhere. With cotton prices soaring, that looked like gold bars in them thar fields!!


 photo PICT0684_zps806a84c9.jpg

 photo PICT0683_zpsc41fc063.jpg


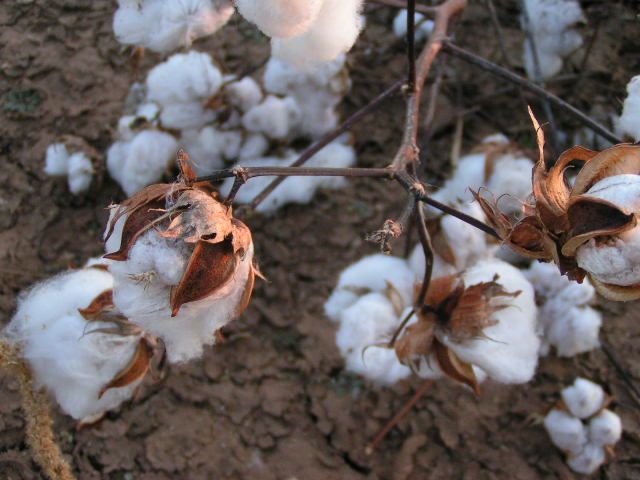
The cotton bolls are sharp. It is hard to imagine how painful it must have been when hand-picking was the only way to pull the soft cotton off of the plants.


 photo PICT0682_zps68b026a9.jpg


We finally made it to Altus to sun and warmer temperatures. We went by the Air Force Base and it was humming with activity. The monstrous C5 Galaxy planes looked like battleships trying to stay in the air. They are so big that it is just hard to fathom how in the world they fly!!!


So there’s a little view into one part of our world on the southwest side of the state. Hope you didn’t get carsick!!


MB

Please join in the conversation by leaving a comment below. And join us on FaceBook


Making Sauerkraut

Sunday, November 14th, 2010


Der Kraut is Sauer!


Photobucket


Well, I think that I will venture into the world of German Cuisine and explain the exciting experiment that was performed in the Oklahoma Pastry Cloth™ laboratory.
We made Sauerkraut!! That may not sound exciting to most people, but to me it was a journey into my ancestral past. My grandmother made Sauerkraut in crocks and I have two of those crocks. I’ve been told that they had the additional use of being her knife sharpener. She would turn the crocks over and sharpen her knives on the bottom like on a stone, but I digress.


I never got to watch my grandmother make her Sauerkraut, but I have heard the stories and so, as much as I love the stuff, I decided to see if maybe making it is in my genes! This experiment was prompted by a sale on cabbage at the Firelake Grocery owned by the Absentee Shawnee tribe nearby. 10 lbs for $1! Now THAT’S a sale. I knew that I had to have that cabbage. So what if I had no idea what to do with it? I had to buy it because it is such a steal and it’s wrong to pass up a steal. As I loaded my buggy, I remembered my grandmother’s crocks and my adventure was set.

According to Wikipedia, Sauerkraut probably originated in the north of China among the Mongols. That would make sense because one of my favorite Korean dishes is Kimshe which is simply Korean Sauerkraut. Anyway, Sauerkraut was brought to Europe by migrating tribes. Eastern Europeans, eat a LOT of sauerkraut. In Europe, the Jews adopted sauerkraut as part of their cuisine and are thought to have introduced it in the northern countries of Western Europe and then to the United States. Sauerkraut is a staple of the winter diet in Germany and the Netherlands. While sauerkraut is usually prepared with pork, the Jewish people customarily use goose or duck meat.

Now came the part in the research that kinda got me. When we had our sheep farm, we raised Sudan Grass and cut it and chopped it and put it into a silo to ferment for the sheep and cows to eat. According to Wikipedia, it’s the same process that is used for Sauerkraut. We’re eating silage!! No wonder those sheep and cows burp so much.


Anyway, when making Silage – I mean – Sauerkraut, you have to be very careful to monitor the temperature of the area where it is fermenting. The USDA says to use more salt than is traditional, but that makes it way too salty. So, in order to avoid food poisoning if using traditional amounts of salt, you must keep the temperature at the correct level. Depending on who you talk to, this should be anywhere between 40 and 70 degrees.


~~~~

Homemade Sauerkraut For One Gallon Crock

5 lbs cabbage

3 1/2 tbsps sea salt or canning salt

1/2 tbsp. carroway seeds (optional)


Photobucket


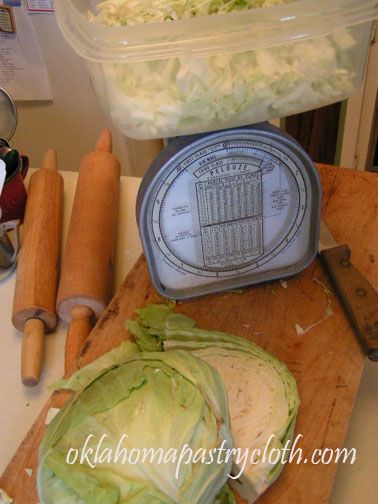
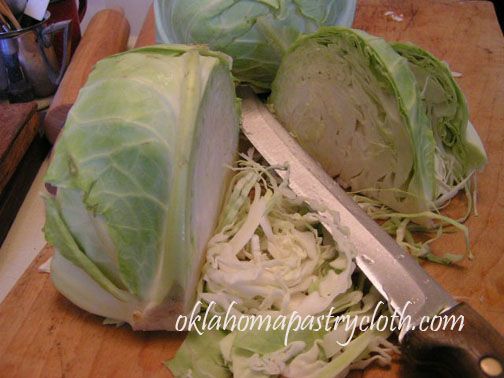
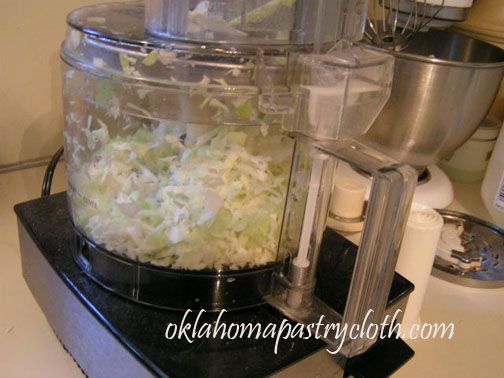
Wash heads of cabbage well and slice thinly with a knife, or if you make no apologies for enjoying the fact that you live in the 21st century, use your food processer with the thin slicing blade.


Photobucket

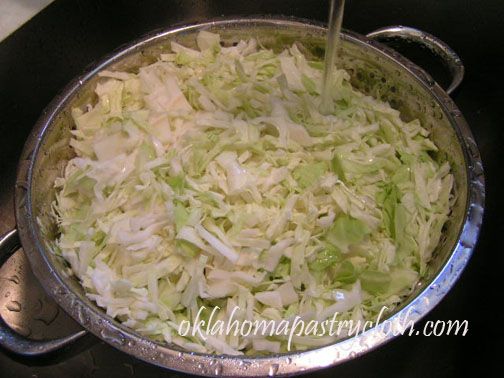
Place in a colandar and rinse to make sure it is very clean.


Photobucket

Carefully measure the cabbage to make sure that you have exactly 5 lbs. This is important because the ratio of salt to cabbage has to be very accurate.


Photobucket


Photobucket


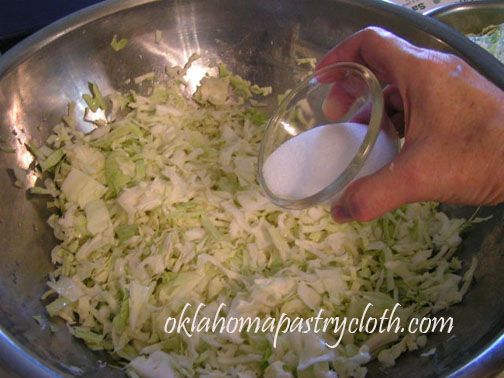
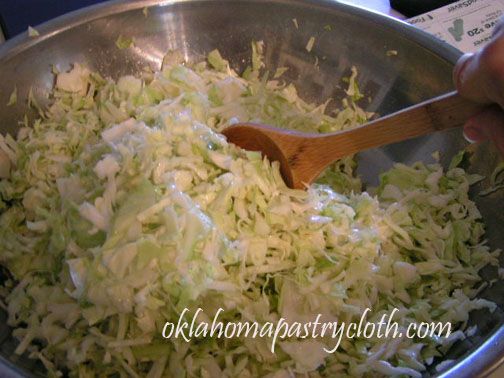
Put approximately 1/3 of the cabbage in a very large bowl and sprinkle approximately 1/3 of the salt. Stir. Add a second layer with another third of cabbage and add more salt. Stir. Add final amount of cabbage and salt and stir well to coat all cabbage with some salt. You can use your hands to mix.


Photobucket


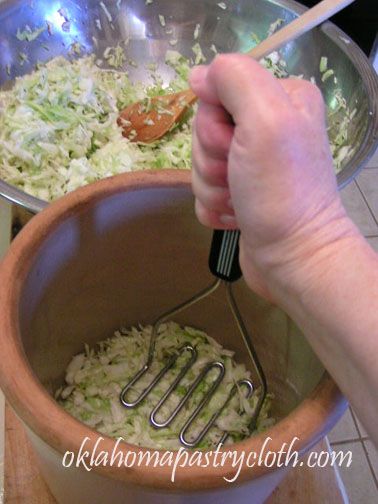
Place about an inch of cabbage in the bottom of a crock and pack down with a potato masher.


Photobucket


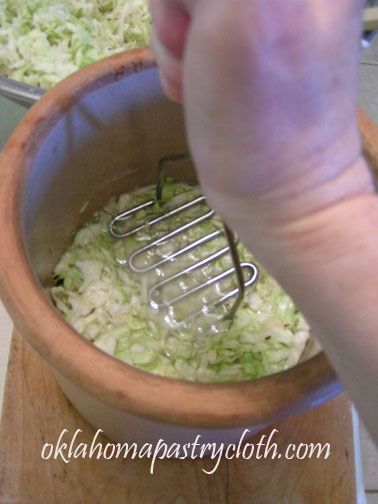
Continue adding cabbage in layers a little at a time, packing down with potato masher each time. As the cabbage is packed tighter and tighter and pressed down, liquid will start forming.


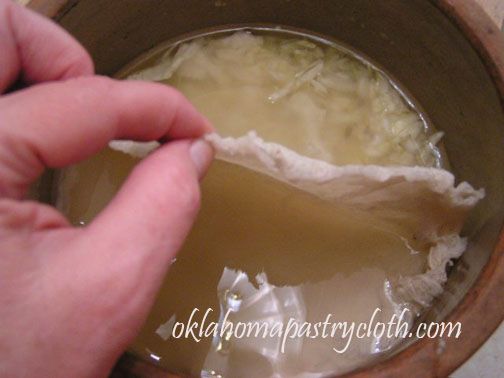
Photobucket


When 5 lbs of cabbage has been packed into the crock, place a piece of cotton cloth on top of the cabbage and pat into the fluid to absorb it while resting on top of the vegetables. The liquid does not rise to the top unless pressure is put on the cabbage.


Photobucket


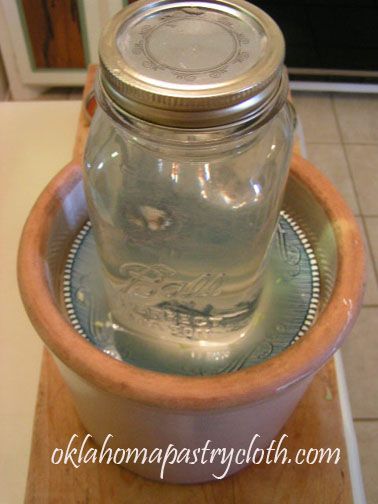
Place a saucer on top of the cloth. Fill a quart jar with water and attach the lid. Place the jar into the center of the saucer. This acts as a weight that keeps the sliced cabbage under the fluid.


Photobucket

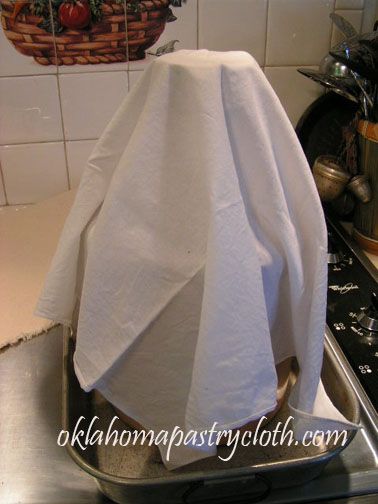
Place into a pan and cover with a clean, white cloth. Place in a cool, dry place, where you can monitor the temperature, for 4 to 6 weeks.

This crock was placed in a good ol’ Oklahoma storm shelter with a thermometer on the chair to keep a check on the temps which average between 50 – 70 degrees in the Fall. Every other day, check the crocks for any scum (mold that is harmless) and remove with a plastic spoon by just skimming the surface and scraping the sides of the crock. There should not be much of this mold, but just little dots here and there that can be removed easlily. Check frequently. I check about every other day. During the fermenting process, if evaporation occurs and the fluid level drops, add a cup of water that has been boiled mixed with 1 tsp salt. After the third week, taste the kraut to see how strong it is. Some people begin scooping out a little to eat at this point, but be sure to pack the kraut back down and under the fluid. It is a good idea, for cleanliness, to change the cloth that is directly on the cabbage and wash the plate every few days. I keep a second set of cloths clean and just alternate.


Photobucket


Photobucket


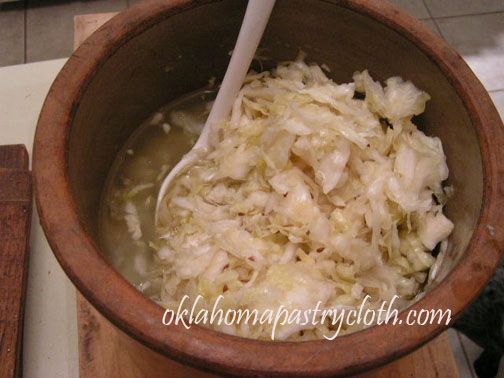
When the kraut has reached the level of tartness that you like, remove the jar and plate and carefully pull up the cloth covering the Sauerkraut. Stir the kraut from bottom up to mix.


Photobucket

You can serve it fresh and it is yummy! To preserve your kraut divide it into freezer bags and freeze it or you can also can it. The following are canning instructions:


Photobucket

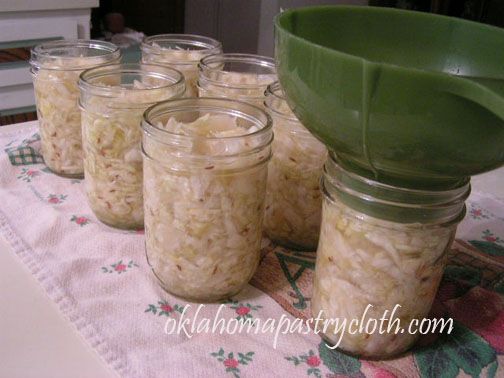
Sterilize canning jars and line up to fill with Sauerkraut, using a slotted spoon to 1/2 inch head space. Pack kraut into jars a little at a time. Add juice over the kraut to fill the gaps.


Photobucket


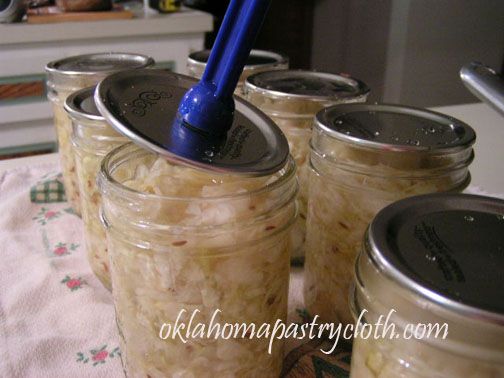
Keep lids in nearly boiling water. Wipe the top edges of the jars to remove any juices and place lid on jar. Here I am using a canning wand with a magnet to hold the lids.


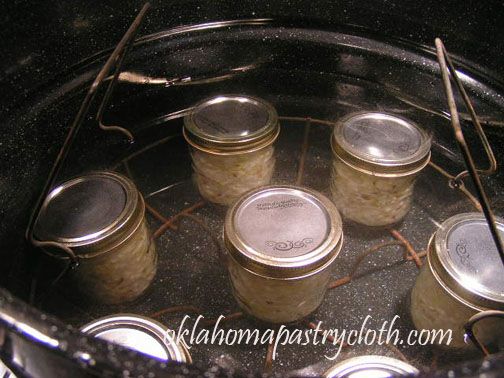
Submerge jars in water in waterbath canner and bring water to a boil. At point of boiling, set timer for 15 minutes. After 15 minutes, lift rack and remove jars to a dry towel to cool. Lids will ping or pop as they seal.


Photobucket


Photobucket


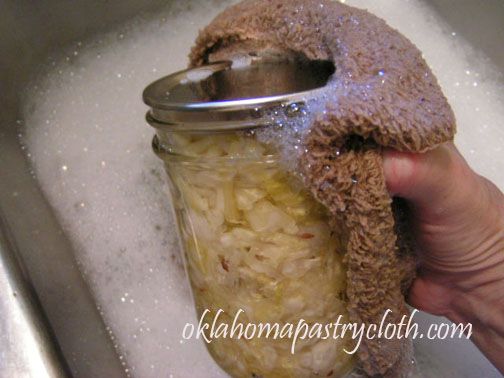
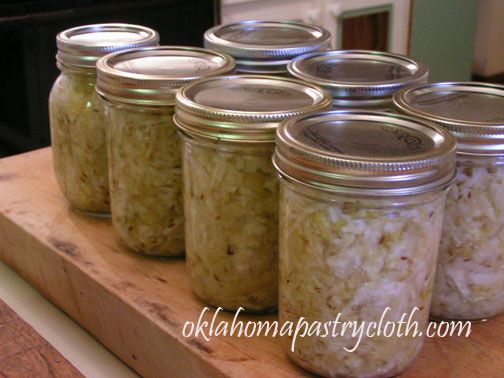
To make your rings last longer and to make your jars nice and clean, when jars are cooled, remove rings and wash in warm, soapy water. Allow to dry totally and return rings to jars or you can store jars without the rings.


Photobucket


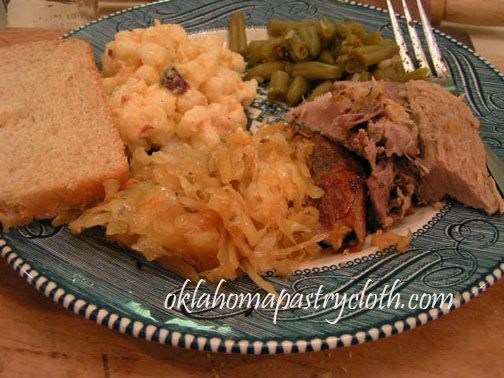
We love pork roast and Sauerkraut. I take any roast, boneless or bone-in and season with salt, pepper, garlic and rosemary and wrap in foil and place it in a baking pan, baking at 350 degrees for about 30 minutes per pound. Length of time varies, but I like the pork to be very, very tender. I remove the roast from the pan and leave about a cup of drippings. I put about an inch layer of Sauerkraut and then slice the pork over the top, and cover with foil. I put that back into the oven for a final 30 minutes and serve with hominy and green beans! Big Smile!!!

And Grandmother’s crocks are still goin’ strong!


Happy Cooking!

MB


Please join in the conversation by leaving a comment below. And join us on FaceBook


Image and video hosting by TinyPic