 You know me by now. I can’t leave anything alone. I have to tweak it, experiment with it and see how many ways I can change it before I can be still. And “IT” can be a recipe, a sewing project, a painting, dehydrating/canning or the directions to a new movie theatre in Oklahoma City. My motto is, “Waste Not, Want Not” and though some might try to convince that this statement comes from the Bible, (Like “God helps those who help themselves,” right?) I’m pretty sure it came from my dad – or Benjamin Franklin – or that Wesley guy. Whomever coined it, it is ingrained in my chromosomes. Therefore, when I made my most recent batch of bread for the week, using a combination of 3 parts Prairie Gold Hard White Wheat flour to 1 part barley flour, I wound up with my usual 1/2 cup of wheat germ sifted out of 5-6 cups of the flour after a round of four siftings and did not want to waste it. Yes, I sift the fire out of my freshly ground flour to add air and lightness and to take out some of the heavier germ/hull which makes bread heavy. Mr. Fix-It likes his bread to carry him off like a magic carpet of the mouth. He says, “Open Sesame” and it floats right in! Anyway, I had all of this germ and I didn’t want to throw it away. I continue to toss that 1/2 cup of germ in with the other 1/2 cups of germ in a freezer bag to store in the freezer. I have always known that I will use it for something like on salads, in peanut butter or to sprinkle on top of risen bread loaves for crunch and appearance, but that won’t use up as much as I have! It was then, with my Okie Pioneer spirit, that I hit on an idea. Here it is in pictures. Oh, and by the way, it worked!!  I brought 1 cup of water to a boil and added a pinch of salt and 4 tbsp of the wheat germ, and stirred then until everything was smooth.  I boiled the mixture for 6 minutes until it was nice and thick, uncovered, stirring occasionally.  You got it!! Cream of Wheat!! And it was good too, especially with butter and brown sugar. I now have a new breakfast favorite with 4 grams of fiber to boot! See, I could have survived in those pioneer days!! |
|
Oklahoma Pastry Cloth™ Company on Facebook
|
 |
Archive for the ‘A Day In the Life Of An Okie’ Category
Wheat Germ!
Thursday, May 12th, 2011
Days of Strawberry Jam
Wednesday, May 11th, 2011
 Despite the drought-like conditions that Oklahoma has experienced this year, and in spite of the bitterly cold and snowy winter that attacked the state, the strawberries are showing how truly resilient they really are. We did lose some plants, but the ones that survived have rallied with a gumption. The plants and the berries are really large this year and drippy sweet. The varieties are Cardinal and Ozark . I’ve spent several days making jam and just thought I’d show the process for those who have never done it. I always go straight by the recipe for cooked jams in the Ball fruit pectin box. I like Ball fruit pectin better than SureJell but that’s just my personal preference. Be sure to have your waterbath canner ready, jars washed, sterilized and warm and lids sitting in warm water before you start. The jam goes pretty fast.               |
|
Oklahoma Pastry Cloth™ Company on Facebook
|
 |
Creamy Chicken Veggie/Noodle Soup
Monday, May 2nd, 2011
 I don’t know about where you are, but here in Okie Land, it’s just downright cold. Last night, we had a low in the 30’s and it appears to be making a repeat performance tonight. A wonderful rain has continued the entire day, totally breaking the drought for sure. We even had a little pea-sized hail for good measure. The ground is soaked and that’s a good way to be!! A neighbor even burned trash this weekend – something that has been forbidden in these here parts. And so, though this is the first of May, and though we normally have warm weather by this time, I decided to “soup” up my basic chicken soup recipe and make a meal into which Mr. Fix-It could sink his teeth. By his third bowl, I figured that he liked the results. There’s leftovers for tomorrow too! Here is my new concoction! Soup Note: You can substitute dried veggies, canned chicken and canned milk if you want to try your hand at ‘sustainable’ cooking.  Pour one to two tbsp olive oil into a large stock pan or pot.  Add 1 tbsp flour and on medium heat, stir until flour is fully incorporated to make a light roue.  Add 2 quarts chicken broth and 1 bouillon cube and stir. Simmer on medium heat  In a skillet, add one tbsp olive oil and sauté 1/2 cup chopped onions until soft   Chop three large button mushrooms  Add chopped veggies to sautéd onions and toss  Pour vegetables into simmering broth  Add 1/8 tsp thyme  And 1/8 tsp sesame oil  Add chopped raw chicken breast  Add a fresh orange peel. We love this. It makes all the difference, but it is optional  Stir and cover. Simmer for 30 minutes and then remove orange peel  Add 1/2 cup chopped cabbage and simmer, covered, for 10 more minutes  Uncover and add 1/2 cup half and half and stir well  Bring to a boil and gently sprinkle in homemade noodles while stirring to keep from clumping. We much prefer the homemade noodles to packaged and they are so simple to make. They are much more tender, but you can use the packaged. Simmer until tender. The noodles will naturally thicken the soup, but if you want it to be any thicker, just add cornstarch that has been mixed with cold water. Note: If you plan to can this soup, leave out the noodles. Just open a jar of soup later and add noodles prior to serving. Noodles get mushy when canned.  |
|
Oklahoma Pastry Cloth™ Company on Facebook
|
 |
Vinegar Tips
Tuesday, April 26th, 2011

   I love buttermilk for use in pancakes, waffles, biscuits and many other breads and cakes. However, because I use so much buttermilk, I frequently run out. Not to worry. I just put 1-2 tbsp of vinegar into the bottom of a glass measuring cup, add the equivalent of sweet milk for buttermilk, pop in the microwave for 30 seconds and ‘voila’, I have curdled milk with the same properties as buttermilk.  Mr. Fix-It has a lot of trouble with indigestion from meals and so we have found that 1/4 cup (with each meal) of the refrigerated mixture of 24 oz concord grape juice, 32 oz of apple cider with the “mother”, 1/4 cup of local honey and 1/4 cup of apple cider vinegar with the “mother” keeps him from having tummy trouble. And it tastes good too!  Want to rid yourself of an odiferous garbage disposal? Just freeze vinegar in ice cube trays and throw the ice cubes into the disposal to grind up.  How about that glass you found on your corner table in the living room, left there two weeks ago by the child who was told, “No drinks in the living room!”? Yep, there’s that telltale ring of a water stain. Just take equal amounts of olive oil and vinegar and rub into the stain to remove it.  According to the Vinegar Institute, (they have a place where you can graduate with a degree in pickling agents?) vinegar has many uses, not the least of which is as an ant repellent. Just wipe your counters with distilled white vinegar and no ant will come within a mile of your home (because of the smell, I’m sure). I daresay that might work on the busybody relative variety of aunt as well. And add 2 Tbsp of the apple cider version of vinegar to ½ quart water, 2 Tbsp. sugar and a couple of drops of dish soap and you can lure fruit flies to a certain “death by a really disgusting substance.”  Figure this one out: You can pour straight vinegar on the weeds that line your sidewalk, repeating until they die (pickled dandelions anyone?) but add a cup of vinegar to a gallon of water for a perfect solution to soak your azaleas and will have them thanking you for the acid – well not literally.  Cut flowers stay fresher longer if you add 2 Tbsp of vinegar and 2 Tbsp of sugar to a quart of water to fill the vase. If you change the water every 5 days, the flowers will stay perky.  I got a chuckle out of this vinegar application according to the Institute – tackling smelly dogs: “Wet the dog down with fresh water. Use a mixture of 1 cup white distilled vinegar and 2 gallons water. Saturate the dog’s coat with this solution. Dry the dog off without rinsing the solution. The smell will be gone!” Right. And now they will smell like vinegar. Good trade.  Vinegar will remove that bumper sticker for the candidate for whom you voted and who wound up having an affinity for bribes and women. It will soften paint brushes, clean radiator vents and leather shoes and even fix DVDs that occassionally stick on one frame. Most amazing of all is that according to the winner of the 2007 Online Vinegar Use Competition (what is amazing is that there is such a contest and that people actually entered), you can immerse your gold jewelry in one cup of apple cider vinegar for 15 minutes and it comes out sparkling like it is real!! No need for expensive jewelry cleaning!!  Vinegar has many more uses that you can find at the website of the Vinegar Institute. Yes, it is a weird and smelly liquid, but evidently, it is nature’s miracle substance! Go out and buy a couple of gallons! I’m buying stock! |
|
Oklahoma Pastry Cloth™ Company on Facebook
|
 |
Grinding Corn
Friday, March 25th, 2011
 It doesn’t take much to thrill me. I’m one of those people who appreciates the little thngs in life! For probably 12 years, I’ve been grinding wheat to make our breads and other flour products and it’s been grand. I started out with a hand grinder – a Lil Ark – that has large, stone burrs to grind the grain. You’ve heard of stone ground meal, I’m sure. Well, we don’t have a watermill, but we still have the stone ground flour! 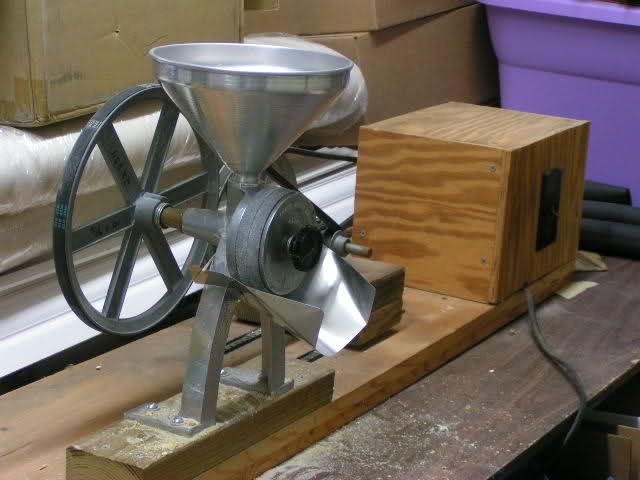 Mr. Fix-It, ever the mechanical genius, watched as I rotated ’round and ’round with the handle to the mill to get about 2 cups of flour for 20 minutes of work. Good exercise, but rather boring. He knew he could get a motor to do the work for me and so he promptly set out to do just that. Two fly-wheels, a couple of auto belts, some pine and an old trash compacter motor later and Mr. Fix-It had indeed fixed it! It isn’t much to look at, but by jove, it does an incredible job. It stays in the garage because it is huge and kinda messy. 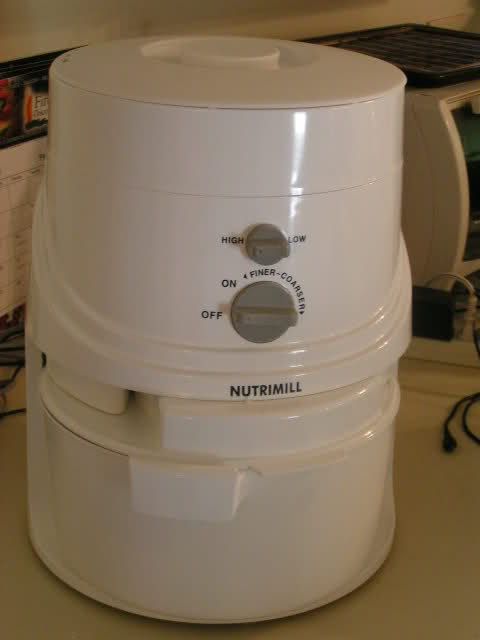 And then I graduated. I got a Nutrimill…the grinder of electric grinders. What took my Lil Ark an hour to accomplish, the Nutrimill does in 10 minutes. All the more flour to bake with, my dear! These grinders can be found at a number of places online and they are sooooo worth it. Some online sources include:
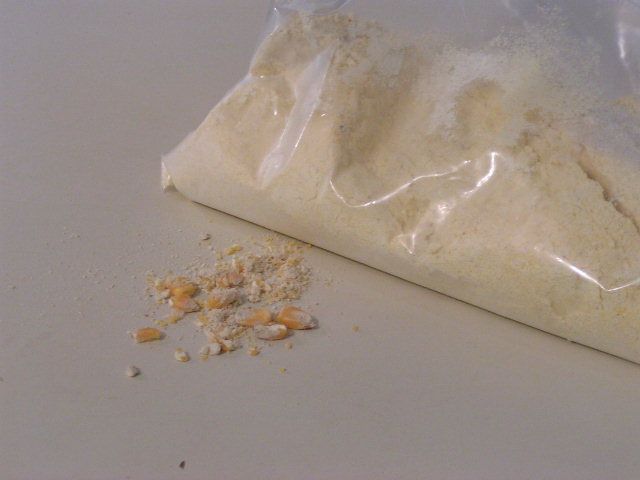 So all of this time, I’ve been making breads and such with wheat flour, but it never occurred to me to purchase corn and do my own cornmeal. Duh. Well, today ended that bit of ignorance. I purchased a sack of corn from Sonrise Whole Grains in Midwest City, and came home to experiment. I used both grinders and combined the results. The Nutrimill grinds the corn pretty fine, which is great for coating fish, while the Lil Ark makes a more grainy meal, which is good for cornbread. But together, it makes a-maize-ing cornbread.  As a result, for dinner tonight, I made cornbread by my recipe posted previously and served that with some home canned beef stew. Now THAT’S livin’! |
|
Oklahoma Pastry Cloth™ Company on Facebook
|
 |
Showers of Blessings
Monday, March 21st, 2011
  Friends are so special, but friends of like mind and understanding are that much more special! A friend of that sort, Mrs. B., gave me the nicest suprise this past weekend. You know how you just go about your day in the normal way, thinking normal thoughts and doing normal stuff when all of a sudden, out of nowhere, God uses a person to just overwhelm you with gratitude and humility? Well, He used my friend in that way and I’m still in awe. On Saturday, I got a call to meet Mrs. B at Bass Pro Shop in OKC because she had some things for me. When Mr. Fix-It and I arrived, she and her daughter opened their truck bed cover to reveal boxes and bags of canning jars, buckets of wheat, bags of flax and powdered milk, a ZojiRushi Bread Machine and wonder of wonders, a brand new Bosch Universal Plus Heavy-Duty Mixer. She informed me, because we are “Sisters of the Order of Home Baked Bread” that the mixer was mine!! Oh my gosh. Talk about a dough kneading machine, this thing is the king – queen? And she was giving it to me!! Mr. Fix-It loaded the mixer into our vehicle and the ZojiRushi that Mrs. B was giving to a wonderful woman who has taken in 6 foster children and has mucho mouths to feed. (I get to deliver this surprise to this precious lady with some of the grain, and watch her face!). My friend then gave us the buckets of wheat, some powdered milk, canning jars and flax seed and said, “Have fun!” Fun? It was Christmas in March! 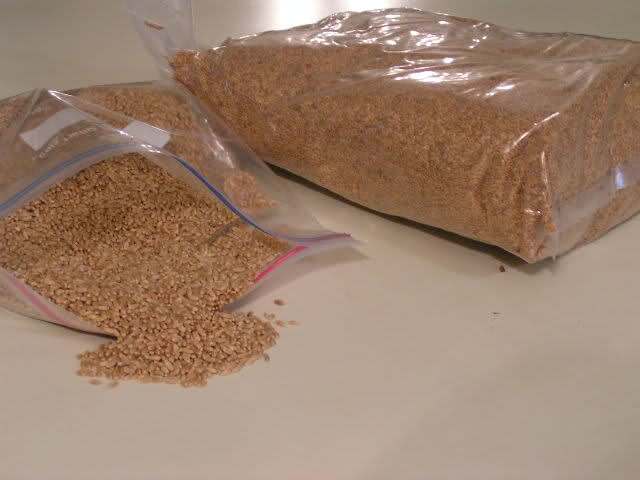 But the “fun” had only started. I got to spread the blessing on the way home by dropping off some of my gifted grain and powdered milk to another large family of many tummies, as well as some canning jars, and will be taking powdered milk to another. 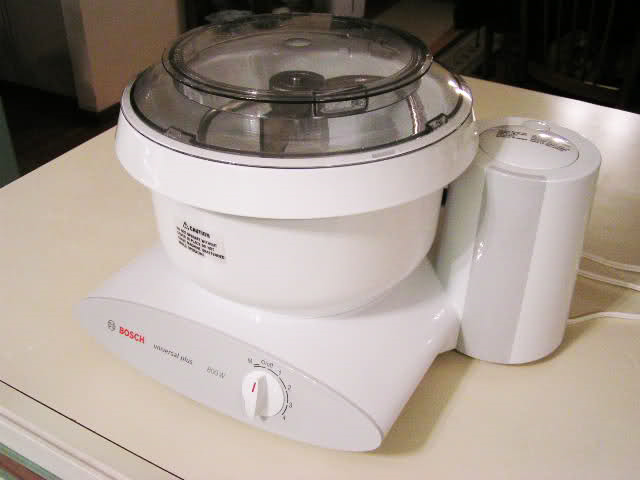 When I got home and unpackaged the mixer, I decided that it was the strangest looking thing I ever saw. If it had beeped, “R2D2” I would not have been surprised. I actually DID read the manual before trying it out, which only goes to prove I am not a man, and decided to try a couple of loaves of bread. Using my sandwich bread recipe, I decided to make one loaf of sandwich and another loaf of cinnamon/cranberry bread. And I used all whole wheat flour that I ground and then sifted and sifted and sifted, instead of half whole wheat and half all-purpose.  For the cinnamon bread, I removed half of the dough from the mixer and then added 1/2 cup sweetened Craisins and 1/4 cup sunflower seeds. You can actually let your dough rise in the bowl of the mixer, but because I had to divide it, I let each batch rise in two separate bowls, covered with damp towels and placed in the oven that had been heated to 150º and turned off. After the first rising, I formed the sandwich bread loaf and then I rolled the dough with the Craisins and sunflower seeds out about 1″ thick. I sprinkled the surface liberally with cinnamon. Then I formed it into a loaf like I demonstrate in the instructions for the sandwich bread. I put the loaves into greased and floured loaf pans, let them rise a second time and then baked at 350º for 20 minutes. 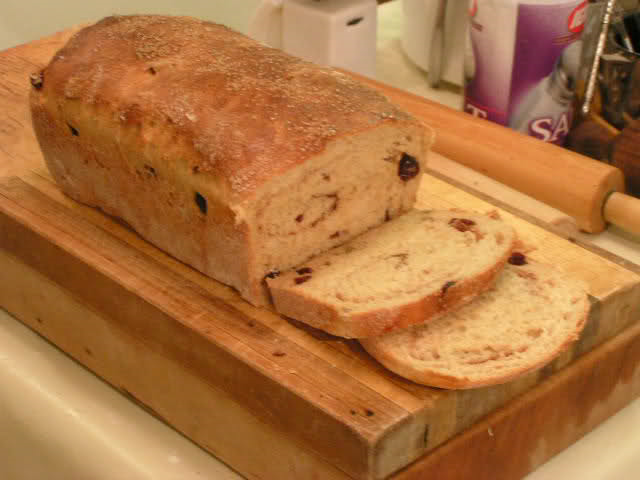 Yes, it was yummy!!! So thank you so much, to Mrs. B for generosity deluxe and for the opportunity to get to participate in spreading the blessing! And you KNOW I’ll be trying out new bread recipes, using my new Bosch Mixer, and putting them on the blog!! |
|
Oklahoma Pastry Cloth™ Company on Facebook
|
|
|
Plantin’ Taters
Friday, March 18th, 2011
  Spring has actually come to Oklahoma! The drab brown of winter is slowly turning into Spring Green! The Bradford Pears are glorious.  Dafodils are peeking out from emerald folage.  Nectarine blossoms seem to have escaped the 21º frosty morning at the first of the week and are lacing the trees as pink, cotton candy flowers.  The rows of strawberry plants proved that they could withstand one of the coldest, snowiest winters Oklahoma has seen in a very long time and are starting to grow and spread.  And the asparagus is poking through the soil like a finger testing the wind to see if it’s safe! Here at the Oklahoma Pastry Cloth™ digs – no pun intended! – gardening season has hit with a vengeance. We plant pretty early here in Oklahoma and we can plant tomatoes as early as the first of March complete with water teepees to avoid any late frosts. The plants start early and grow hardy early. We usually have two growing seasons.  This week, in our garden, potatoes, onions and lettuces were put in while the wind blew 30 mph and out-of-control wild fires raged all around us. It’s been a tough week for many folks here. Our soil is very sandy and it drains really fast. That means that when there is little rain, the bermuda grass becomes the prime fuel for a wayward flame started by some idiot who drops his cigarette butt and pretty soon trees, pastures, houses and barns go up in smoke. After all of these years of fires out here in prairieland, you would think people would learn!! Anyway, here, I’ve planted the onions a little deeper than they will be later because in the sandy loam, it is easy to establish them and then pull the soil away when they have rooted. Planting them deeper helps them stay upright. It’s all these little suckers can do to battle the Oklahoma winds. As I said, the soil is sandy, but we have added, for the past 15 years, horse manure, compost, mulch and peat moss so that it is the richest sandy loam you ever saw. It smells so good!! And it is in that soil that I planted potatoes – a total of 104 cuts or 13 rows. 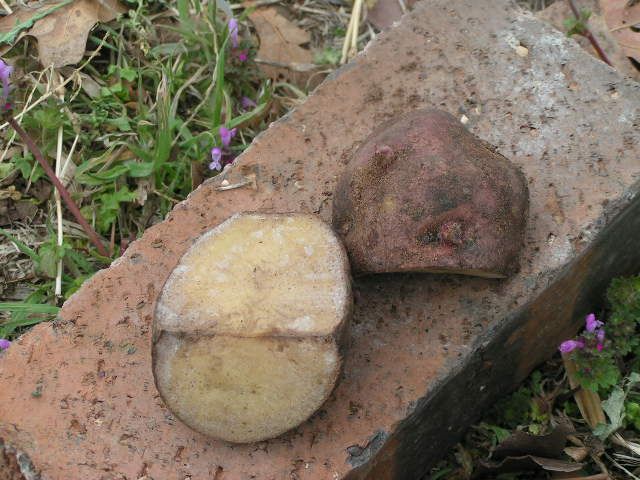 To start off preparing for spud planting, good quality seed potatoes are required. These can be found at any local garden shop and even in some grocery stores. There are all kinds of varieties – Yukon Golds, Pontiac Reds, Kennebec…these are the three that I like. My favorite is just the plain ol’ standard Pontiac Red. A couple of days before planting, I take each potato and locate the “eyes”. These are little indentions that have knobs sticking out of them. These are the buds. I try to get good sized seed potatoes so that I can cut them into pieces with two of the eyes per piece. And the pieces should weigh at least an oz. Cutting them this way, I get more plants per potato than just one.  I plant my potatoes differently here in Oklahoma than we did in Tennessee MANY years ago. There, we did mounds that would make for good drainage. Here, in this sandy soil, I have found that rows are more successful. I place each potato cut side or sides face down in the soil about 3″- 4″ deep. This keeps them from freezing if we have a wierd freeze and it keeps them from drying out in our Spring heat. Yesterday, it had already gotten to 86. I place the potatoes about 1 1/2 to 2 feet apart and place about a tbsp of 10-20-10 fertilizer on either side of each potato cut, being careful not to get it too close to the potato which will burn it.  After I get all of the rows done, I go through with a hoe and pull the dirt up to a peak over the potatoes to make an even, covered row. It’s hard to tell in this picture because of the angle, but the rows are also 1 1/2 to 2 feet apart. I’ll keep adding to this post as growing season progresses and you can see how they turn from cut pieces to wheelbarrow loads of potatoes! Stay Tuned! |
|
Oklahoma Pastry Cloth™ Company on Facebook
|
|
|
Hubby Bragging
Thursday, March 17th, 2011
 I just have to brag on the smartest member of our team, my husband, Mr. Fix-It. He never ceases to amaze me. As a side note, by way of explanation, I have a few herniated discs in my back and so I have discovered this awesome creation of technology called The TENS unit. It is the equivalent of sticking your finger into a light socket on purpose and enjoying it. This little unit comes with 9 volt batteries that send juice through lengthy wires to electrodes that you place on various and sundry parts of your body. At the turn of the dials, waves of electric shock pulse through those nerve endings that have decided to let you know you are in pain, and gently put them to sleep. Pretty soon, you’re signing up for an aerobics class and thinking about flying lessons. It’s great. 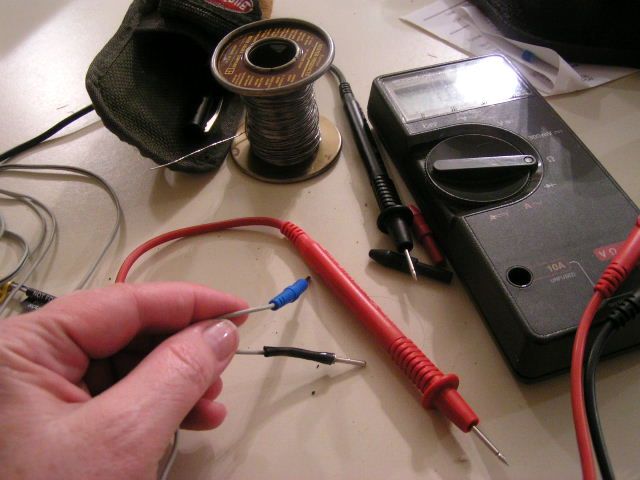 That is, unless you turn it up too high or an electrode loosens. Then, you are dancing around the room, squeaking, “Oh! Oh! Oh!” as you grab for the little battery box in an attempt to turn it off. It is worse, however, when one of the little wires begins to burn up. Such was the case with my TENS unit. One of the wires evidently had a tiny break in it and the thing finally burned up. In the interim, I didn’t realize it and so I couldn’t figure out why I got shocked at really inconvenient intervals. Nothing like carrying on a converstation and letting out a squawk while doing a poor imitation of the “Freddy”! You young ones will have to look that up! Finally, the unit died and I was not a happy camper. In comes Mr. Fix-It, in cape and leotards – ok, well, jeans and tool belt – and began major surgery on the offending wire. I watched, fascinated, as he used a meter to touch every spot along this really, really skinny wire to find the break. With an “aha!” he got his wire cutters and clipped a section right behind the piece that goes into the battery pack of the TENS unit. There it was – all burned up inside its plastic sheathing. With a soldering iron, some solder, my extra hands, and a new plastic sheath, he put it all back together good as new. Now I can go back to zapping myself with no interruptions. I am totally blessed!! What a guy. 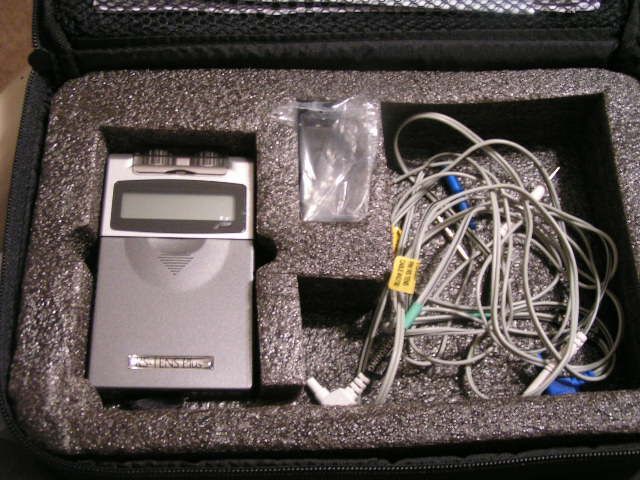
|
|
Oklahoma Pastry Cloth™ Company on Facebook
|
|
|
Canning Butter
Thursday, February 24th, 2011
|
I have a question. If milk is nature’s most perfect food, as we ALL learned in our science classes many years ago and have heard on many a dairy commercial, why isn’t butter perfect too? Why has butter gotten such a bad rap when it is simply the richest part of the milk that has been whipped to a frenzy? All I know is that butter is all-natural and has to be a whole lot better for you than the fake spreads that marketers have tried to pawn off on us as the nutritionally better alternative. We humans seem to always go down the road of trying to improve on what comes naturally and then wind up right back where we started, concluding that the original product isn’t so bad after all.  I have admitted my affinity for butter in past posts but I am in no way an addict to the stuff. Really. I can quit using it anytime. Really. I use it in moderation mixed with olive oil and am known to spread it sparingly on a slice of fresh homemade bread. Really. But there is simply no substitute for the stuff when it comes to sauces, cajun cuisine and toast.  So did you hear about the solar flares that scientists are afraid are going to destroy the earth? Well, not destroy exactly…just leave us in an electronic lurch which would pretty well destroy the majority of us who can’t live without a cell phone, computer or electric toothbrush. How in the world can I keep my precious butter from spoiling if our refrigerators aren’t running? Well, I can it, silly! I gathered all of the info I could from several sources on the internet and have started canning part of my butter when I find it on sale. The Indians in India have been canning clarified butter, called ghee, for ages and ages. I like to can my butter whole. Take a peek at what is working for me: 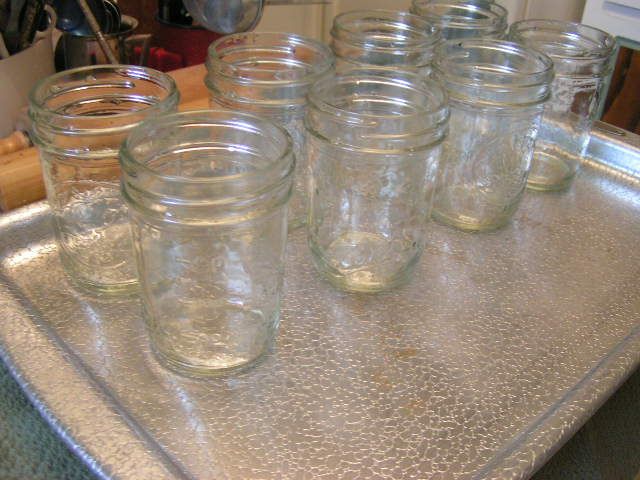 Wash jars in hot soapy water and boil in a large pot or wash on the sterilize cycle in the dishwasher. Place the jars on a cookie sheet. Here I am using 8 oz jars which hold about 1 1/3 sticks of butter. In this run, I used 9 – 8 oz jars for 12 sticks of butter or 3 lbs. Put the cookie sheet of jars into a 250º oven and heat for 20 minutes. 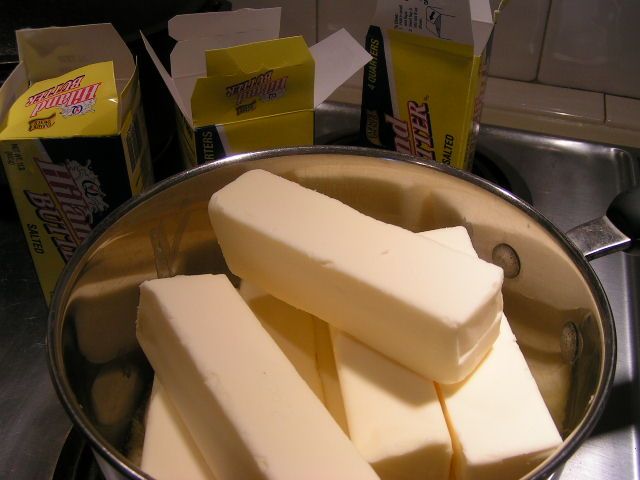 Place sticks of salted butter in a large pan. I do about three pounds at a time simply for ease. The larger pots get too heavy to manipulate and butter gets everywhere. 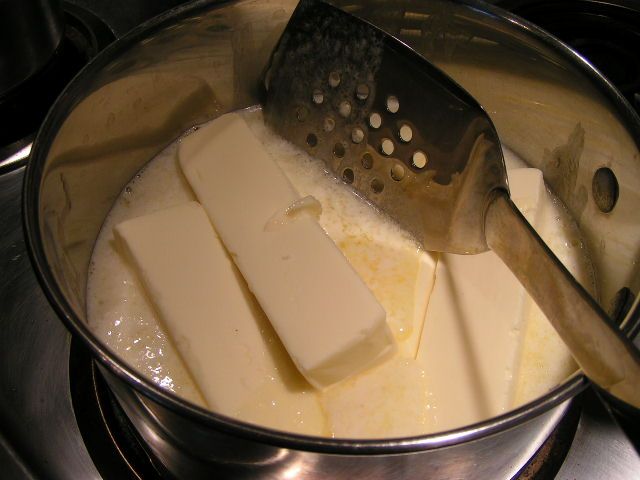 Slowly melt the butter on medium heat, stirring constantly with a metal spatula to keep from scorching on the bottom. A spatula with holes is ideal because the melted butter is pushed through the holes during stirring and helps to keep it uniform.  When the butter is totally melted but not quite boiling, continue to stir and allow to simmer for 10 minutes. A thick, white foam will appear. 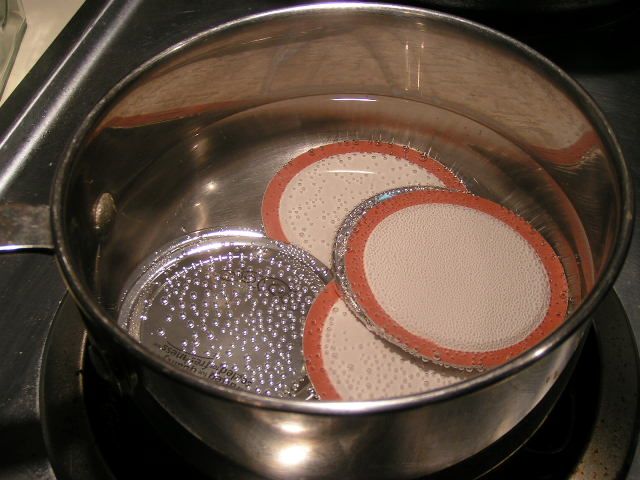 While melting the butter, place lids in a pot of water and bring to a near boil to prepare lids. Turn heat down to keep lids warm. 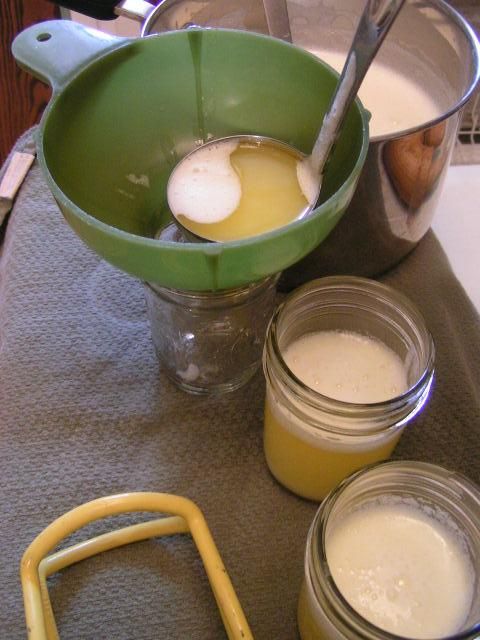 Remove jars from oven and immediately ladel butter into the jars, using a canning funnel. Be sure and stir the butter around and dip deep, pulling up, in order to keep the butter uniform, as it separates. Fill to leave a 3/4″ head space.  Carefully wipe the edges of the jars with a damp cloth to remove any butter. Butter on the rims will cause the jars not to seal. 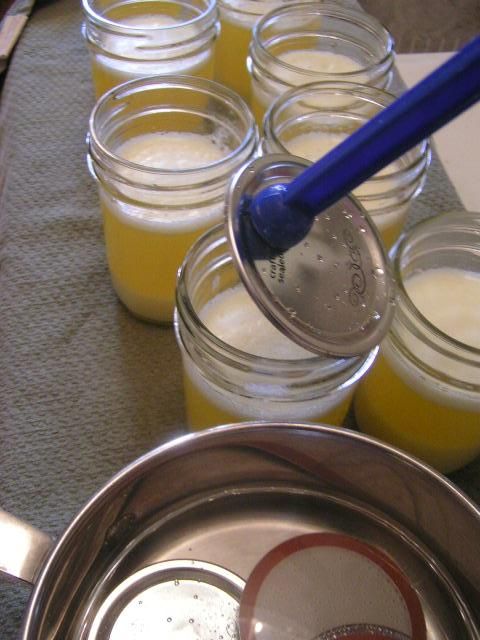 Place the lids on the jars and attach rings, tightening slightly. Place jars into a waterbath canner that has water already heated and enough to cover the jars 1″. The water needs to be heated because the jars of butter are hot and will crack in cool water. As soon as water begins to slowly boil, set timer for 15 minutes. 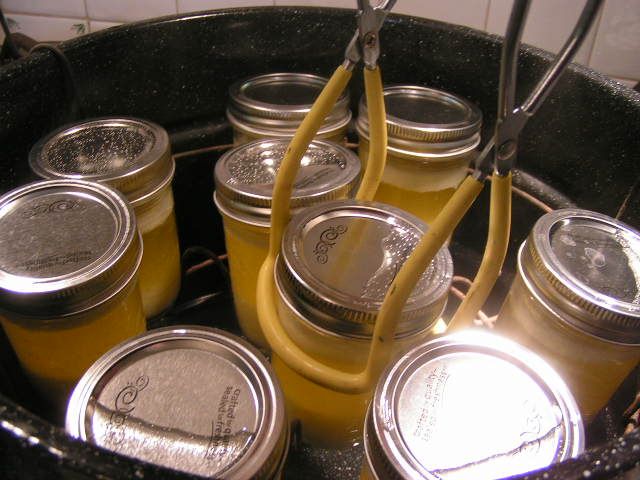 When jars have been processed for 15 minutes, turn off heat and allow to cool down in the water for another 10 minutes. Then, lift the rack to top of canner and remove jars with canning tongs. 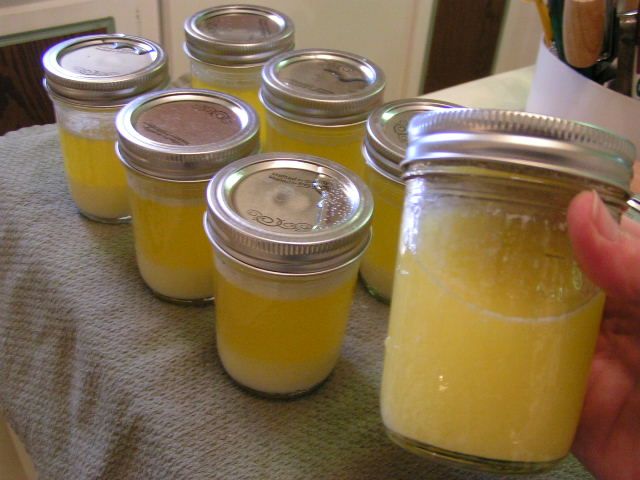 When the jars are cool enough to handle, now comes the tedious part. Every few minutes shake the jars up and down in order to make the butter uniform. If you notice in this photo, the jars to the left have sediment on the bottom and foam on the top. Shaking incorporates this into the clarified portion. Go about your business, but about every 5 minutes, stop and shake the jars. As they cool, they will stay more and more uniform. I set a timer to remind myself so that I can do clean-up. 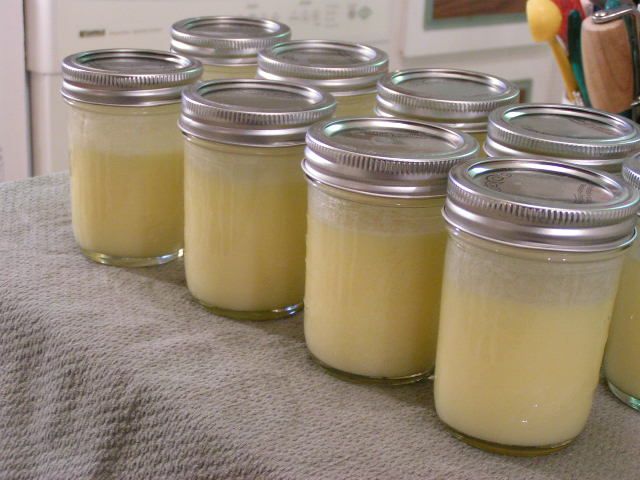 This butter is totally cooled and ready to store in the pantry. Aren’t they pretty? I read one homesteader’s take on canning butter and she said that they actually opened some from 1999 and it was still good. Don’t think I would keep it THAT long, but it wouldn’t matter because it wouldn’t last that long around here anyway!! 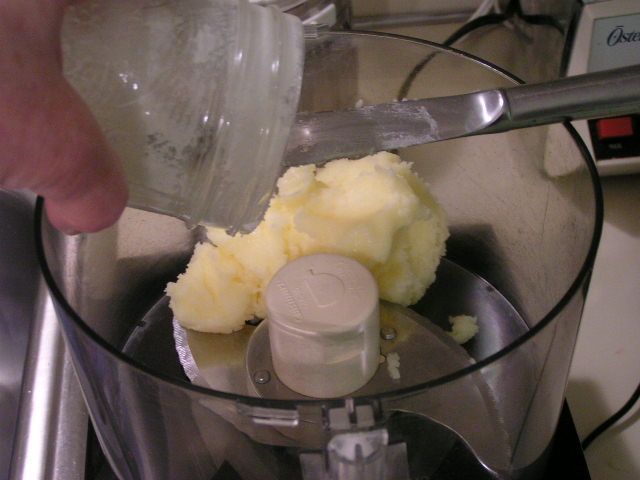 Canned butter is not quite as smooth as fresh butter, but if you are wanting a smooth, healthy spread, you can make the same recipe posted earlier with olive oil or canola oil. Just scrape butter from an 8 oz jar into the food processor or blender. 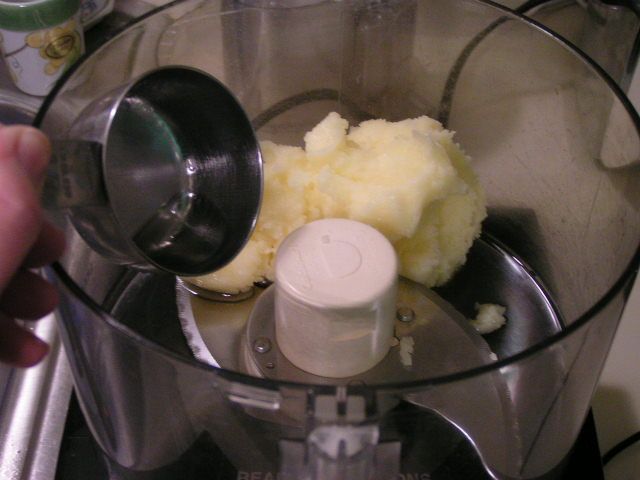 Add 1/3 cup oil. If you have canned your butter in larger jars, adjust amounts of oil. For example, a 1 pt jar of butter would require 2/3 cups of oil. 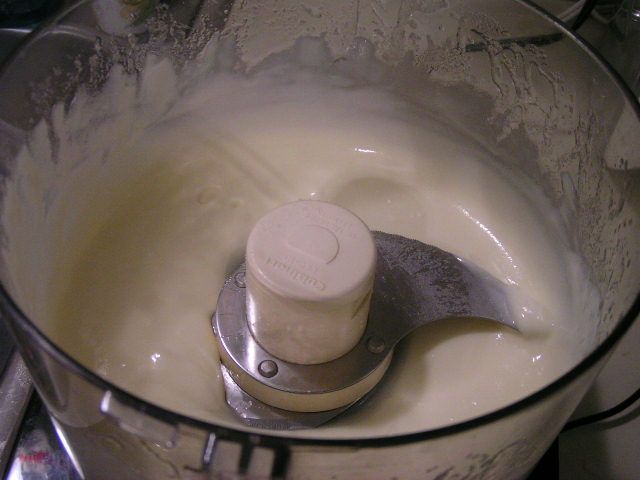 Process until smooth 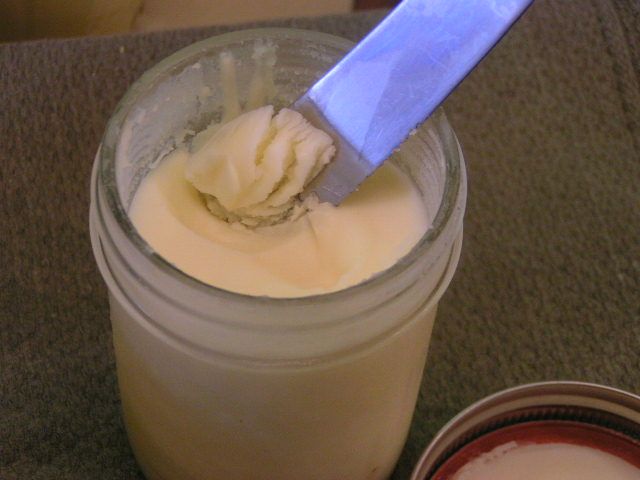 Pour back into jar and allow to harden in the frig. It will go back to the consistency of smooth, spreadable butter. Pass the Lobster, please!! |
|
Oklahoma Pastry Cloth™ Company on Facebook
|
Aging Gracefully?
Monday, February 21st, 2011
 I thought that I would take a moment away from all things cooking and maybe wax philosophical. I’m really bad about not waxing the floors, but I wax philosophical quite frequently. Just ask Mr. Fix-It.  I have the blessed joy of having had experiences in life that many people only read about in books. Some of those experiences weren’t so hot, but I always learned something in the doing. I’m not so old that I don’t remember being 18, but I’m not so young that I can bend backwards, and walk on my hands and feet like a crab. You know, we DID have to do that in high school gym class, in our younger days, and I always wondered how it was supposed to affect my outlook on life besides feeling dumb and seeing everything upside down. Well, I’ll tell you. It DID affect my life as I now have two herniated discs in my lower back and two in my neck. I am certain that walking like a crab did it. I never noticed it until a few years ago, but I KNOW the culprit. Thanks, Coach Cox. Had nothing to do with all that hay bale tossing. But my point? I’m no spring chicken.  On that note, I heard a very disturbing bit of info on the news this past week. Very disturbing. It seems, according to the headlines, that women become invisible at the age of 50. I pondered on that for awhile and I just couldn’t believe it. I mean, it’s at the age of 50 that women start getting bigger without any effort at all. It seems impossible that we could be getting bigger AND invisible at the same time, but evidently men really just can’t see us. That would explain alot. It would explain why the son, home on a visit, doesn’t answer the questions I ask him. I can now understand why Mr. Fix-It didn’t inform me that I was leaving the house in my old, ragged, backless tennis shoes (in which I informally flip-flop around), while dressed in a fancy frock for a luncheon. I was invisible!! It gives total understanding to the actions of the young bag-boy at our local grocery who asks, “Paper or plastic?” and upon my request for paper, immediately begins bagging my groceries in plastic. I think he just asks the question out of habit, because it is obvious that he can’t see or hear me.  But do you realize the advantage that we middle-aged women have now that we have found out the truth? There is no end to the possibilities this new revelation has provided!! I can sit in front of the doctor and eat a triple-decker, mayonnaise laden hamburger WITH cheese and he won’t say a word! He can’t see me!! I can buy a 1963 baby blue Impala for $15000 and bring it home and won’t have to hear about it because nobody will know where it came from since I’m invisible!! Shoot! That means I can’t get a ticket driving that 1963 baby blue Impala because the policeman can’t see me!! Oh my gosh. I can’t get my head wrapped around all of this. But wait…as I read along in the article, I now see that women only THINK that men find them invisible. That’s not very scientific. One of the ladies interviewed even shot the theory down by stating, “Even when I met the man who is now my [third] husband, I assumed he wouldn’t fancy me.” Well, he proved her wrong. He married her didn’t he?? Seems like he pretty much saw her!  More than half of the women surveyed felt that advertisements give them unrealistic expectations of how they are supposed to look beyond age 50. I can’t imagine why. The advertising world works hard to portray us women over 50 with not a gray hair on our head, shaped like Miss Universe and usually galloping across green meadows astride a sinewy steed while explaining the heartbreak of psoriasis or the inconvenience of constipation. You know that’s me! And so, I have just come in from a much more scientific inquiry of Mr. Fix-It, regarding whether he finds me invisible. He gave me a big hug and said, “How can I not see you?” I’m going to have to think on that answer, but I have a sneaky suspicion that it could hinge on that ‘getting bigger after 50″ thingy I mentioned!  |
|
Oklahoma Pastry Cloth™ Company on Facebook
|
|
|

 Homestead Revival
 Paratus Familia
 Rural Revolution