  I like to think of myself as “Low-maintenance”. It doesn’t sound all that spectacular, I know. Mr. Fix-It says that he considers me to be “pretty low maintenance”. I think he appreciates that I don’t beg him for the latest $250 shoes or a bigger house with swimming pool and hot tub.. I’m positive he was relieved when I liked a Nissan Versa rather than a Mercedes (as if we could afford a Mercedes!). And it’s been a really, really, really long time since I’ve gotten a piece of jewelry. I don’t wear it and so I don’t care about it. I’m at the age where I’ve finally figured out that “you can’t take it with you”, and so practical and useful in the here and now is more on my wish list than gorgeous and flashy. Out here in the country, the squirrels, cows and bunny rabbits could care less whether any of us has a diamond or a cubic zirconia. I guess what I’m trying to say is that I get more excited over kitchen items then I do a fur coat! So, you can understand how excited I’ve gotten over a new product introduced to me by friend and reader, Shari. As an avid canner and as a canning teacher, any new-fangled canning item is a treat for me. When I learned about the Tattler Reusable Lids, I just had to try them. These lids can be used over and over instead of tossing them as one must do with traditional lids after use. The website offers free shipping, which is awesome, and sometimes there is a sale – which is how I ordered mine! I have been waiting until my first crop – the strawberries – came in to try the lids out and so this past weekend’s pick of 8 quarts of strawberries gave me the opportunity. 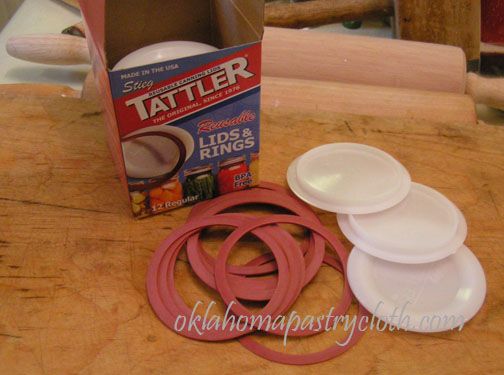 A box of 12 reusable lids includes 12 plastic lids and 12 rubber rings. These items are BPA free. 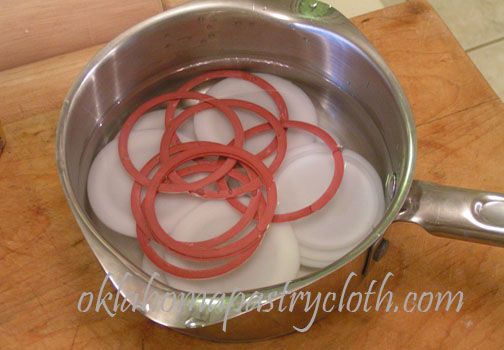 The lids and the rubber rings are prepared in hot water (do not boil) just like the traditional metal lids. 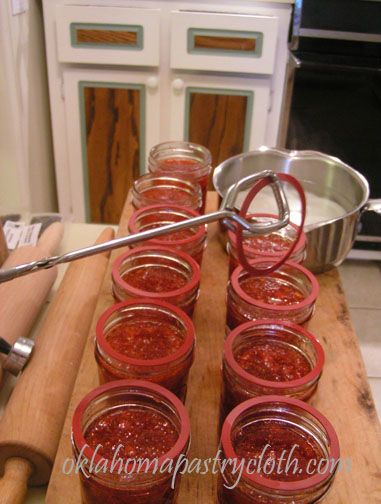 After washing the rims of filled jars, the rubber rings are placed onto the rims. 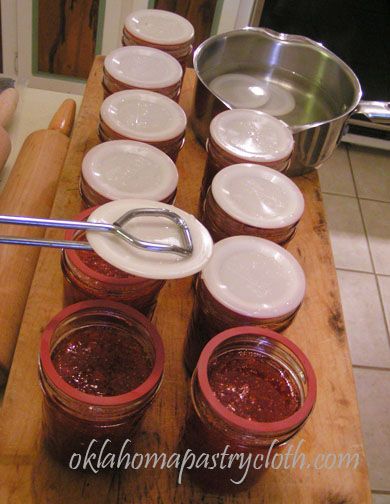 Then the lids are carefully placed over the rubber gaskets. 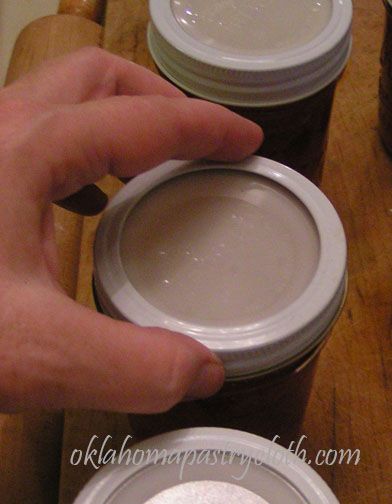 Metal rings are screwed onto the jars but not tightened. Using one finger to press onto the lid, finger tighten the ring. (I had to use one hand to take the picture so no finger on the lid!!) 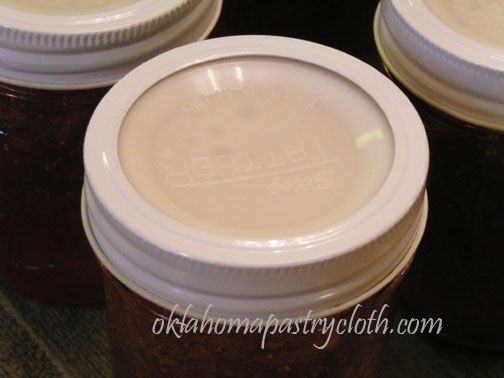 Jars are processed exactly as jars with the traditional lids. Since this is strawberry jam, I waterbathed the jars for 15 minutes. When jars are removed, the lids are immediately tightened. When the jars have cooled completely, remove the metal rings and pull gently on the lids to make sure they have sealed. You can either store with the metal ring reattached or without it. To use the food in a jar, a dull table knife is gently inserted between the rubber gasket and the glass rim to pry up the lid. Once used, just wash the lid and rubber ring in warm, soapy water and store for next time. Reusable! Cool, huh?  |
|
|
Oklahoma Pastry Cloth™ Company on Facebook
|
|
 |
|
|
Archive for the ‘Canning and Food Processing’ Category
Adventures In Canning
Tuesday, May 1st, 2012
Canning Turkey
Friday, February 24th, 2012
 Mr. Fix-It’s birthday was yesterday and I was all ready to surprise him with tickets to a Thunders basketball game. I was going to go all out with a Beef Wellington complete with deuxelles! (Just had to throw that in to mess with you all!) 🙂 And then….he got called out on big job. I guess people don’t matter, but let a computer situation arise and the whole world comes to a screeching halt. So I got him the two movies, “Flywheel” and “Courageous” with one of those buckets of Orville Redenbacher’s Movie Popcorn. We’ll have a movie night this weekend! Just as good as any ol’ Thunders game, wouldn’t you say? 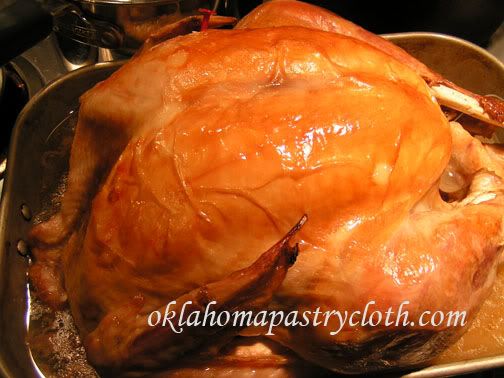 I was going through pictures and found a couple that I forgot to post awhile back and so I thought that I would take the opportunity to put them up. I don’t know about you, but we eat turkey more than just at Thanksgiving. We love Turkey, but with fewer people in the house, a big Turkey could go to waste. So, I rectify that problem by canning the leftovers. In a past post, I showed you how to can chicken by using the raw pack method. The chicken cooks in the processing. However, already cooked meat may be canned as well. The steps are the same as in this post. I bone my turkey and cut the pieces into nice chunks and place the meat into jars to about a 3/4″ head space. I then mix the juices from the cooked turkey with water and chicken bouillon to make a broth, or you can mix the drippings with canned chicken stock as well. I pour that over the meat in each jar to 1/2″ from the top of the jar, wipe the rims, add the lids that have been warming in hot water, add the rings and adjust and process in a pressure canner at 10 lbs pressure for 75 minutes. 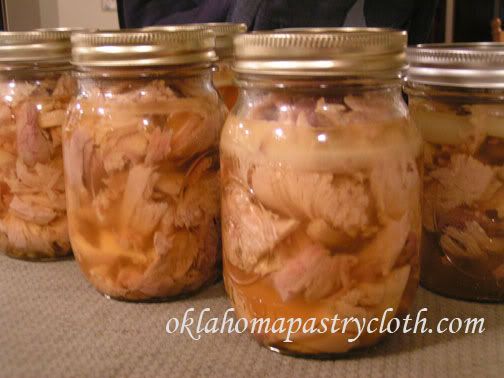 Canned turkey makes the most amazing pot pies. I just make a crust to lie a pie pan, spread the turkey on the bottom (reserve the liquid for the sauce), add some potato chunks that have been parboiled with some chopped carrots (to make sure they cook all the way through in the baking) and some frozen peas, and cover with a sauce mixture of 1 can cream of chicken soup, 1 pouch McCormick’s turkey gravy mix and two to two and a half cups of liquid combining the liquid from the jar with water. I put a pie crust over that, flute it, slice the top in a few places to let air escape and bake at 400º for one hour or until golden brown and bubbly. Yummy!!  |
|
|
Oklahoma Pastry Cloth™ Company on Facebook
|
|
 |
|
|
New Giveaway and Canning Too!
Thursday, January 26th, 2012
 Valentine’s Day is coming up and I’m just thinking it would be the good thing to do to have a giveaway with not just ONE winner, but with TWO winners! And both winners would get the same thing…so since this is a blog that centers an awfully lot on cooking (with a little humor and education thrown in) the most appropriate prize would have to do with cooking! So, on Valentine’s Day, we will be drawing the name of two winners who will receive a very special pie tin set that includes the tin and then, to prevent shrinkage, a second perforated tin that fits on top of a single crust that is being baked for cream pies. Plus, I am throwing in a “first out pie spatula” that is baked under the pie crust. When the pie is cooled, you slice along the edge of the spatula and, voila!, you lift out that first piece without having to dig. Cool, huh? 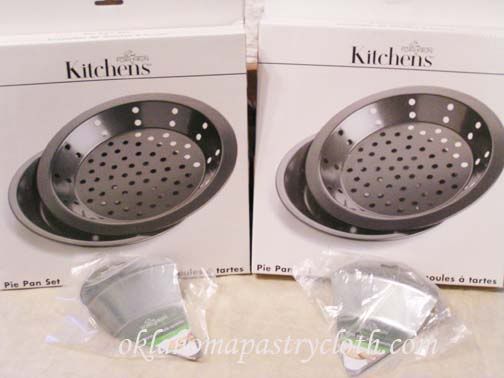 So from now until February 13, leave as many comments at the blog as you wish because each time you comment, your name goes into the pot. Just scroll down to the bottom of the post and just below the text box you’ll see in blue “comments” and a number showing how many comments there are. Click on that and it will take you to comments and a comment box. Browse the blog, read and comment and keep your fingers crossed!  And while I am mentioning Valentine’s Day, I want to encourage you to take a look at the Tea or Tea And Treat of the Month Clubs as perfect and unusual gifts for someone you love. The first month, your loved one receives a ceramic tea pot, a tea infuser and tin of tea and treat and each following month, a new tea flavor and treat arrives. It’s that gift that keeps on giving! In the meantime, speaking of citrus fruits from the last post, I wanted to show you another wonderful citrus product that you can can – Lemond Curd. Wonderful on scones, in tiny tarts and other sweet treats, Lemond Curd makes a beautiful gift to include with dessert mixes. My recipe and directions for Lemon Curd can be found here. Just make up a couple of batches and jump in below: 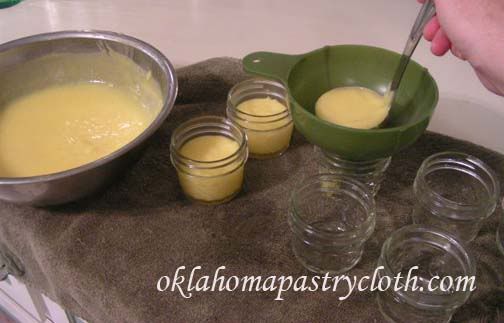 Once lemon curd is made, while still warm, fill sterilized jars to 1/2″ headspace. I use the 1/2 pint and 1/4 pint jars that make wonderful and cute gifts. But you can also use pints. 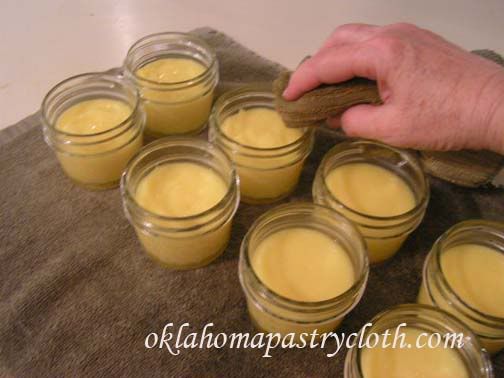 Wipe the rims of the jars with a warm, wet cloth to remove any drips and oils from your hands. 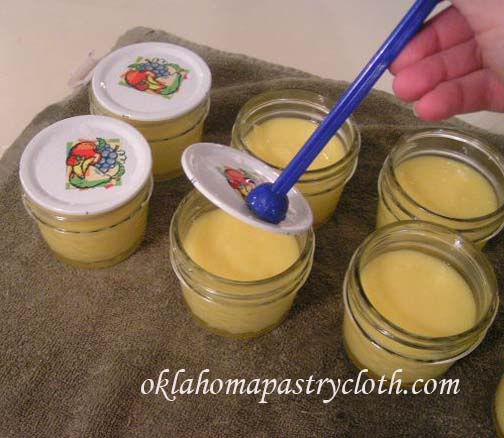 Having warmed your lids in nearly boiling water place them onto the jars. Add rings and adjust. These jars are the 1/4 pint jars great for 4 servings. 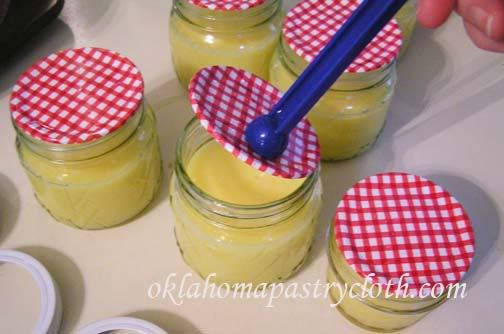 Here, lids are being added to the 1/2 pint size which offer approximately 8 servings each. 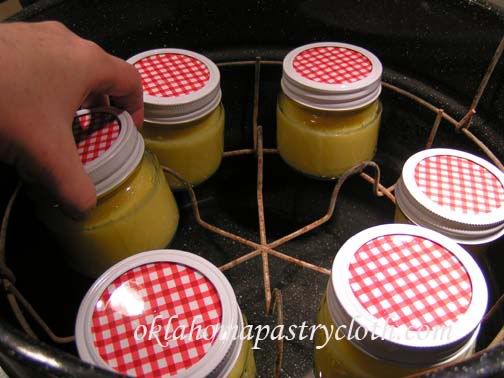 Place jars into a waterbath canner and lower into water that is barely warm to cover jars by approximately one inch of water. Turn eye on high and as soon as water starts to boil, time for 10 minutes of processing. Process for 15 minutes if using pints. 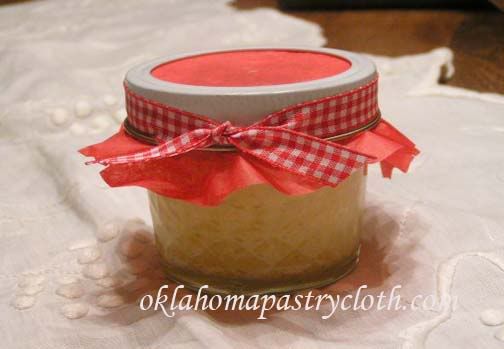 For gifts, decorate the jars with cloth or tissue paper, a label with instructions and ribbon. Add a bag of scones mix and place in a gift bag for a really cute present. Or, jars can be stored in a cool, dark pantry, for your own use. Be sure to refrigerate before opening to serve cold. After opening, the curd may need to be stirred to make it creamy before serving. It’s yummy!! And don’t forget to leave comments to enter the Valentine’s Day Giveaway!!  |
|
|
Oklahoma Pastry Cloth™ Company on Facebook
|
|
 |
|
|
Canning Citrus Fruits
Monday, January 23rd, 2012
 Boy, today has been quite appropriate for thinking about canning fruits. We are so dry in Oklahoma that I’m having to put a humidifier near my piano to keep the soundboard from cracking!! And today, nearly 50 mph winds stirred up loose dirt from drought stricken fields, sending it airborn, dimming the sun and leaving trees and a horizon with a snow flurry like appearance. It’s pretty certain that a boatload of Okies are thinking back to the days when fruits, vegetables and meats, in glass canning jars processessed when items were in season or available at the stores, were their only defense against starvation during the Dust Bowl days. A very interesting website about the kitchens of that time and of many other eras is The Historic Cooking School where Rena has kindly linked to my posts on vintage cooking. In talking with my dad about those times, he remembers his family buying grapefruit in canning jars and eating this citrus delight because it was not readily available fresh. My family has always been overly fond of oranges, tangerines and grapefruits and when I was growing up we had relatives along the Indian River in Florida which guaranteed us succulent fruit. This year, for Christmas, my parents surprised me with the most wonderful variety of white and ruby red grapefruits, navel oranges and tangerines. There were so many grapefruits that I decided that I had better do something with some of them before they spoiled. In doing research about the history of the canning process, I found this really neat site called Tasteful Inventions where I learned that nearly 250 years ago a French man named Nicolas Appert, encouraged by a 12,000 franc prize issued by the government, introduced his 14-year-in-the-making canning discovery as a way to preserve food for Napolean’s army because, “An army marches on it’s stomach.” Napolean awarded Monsieur Appert the money in 1810. So folks, canning has been around for a long time!!! C’est bon!! I have to say that when citrus fruits are canned, the taste is changed somewhat. Adding sugar or sweetened juices helps to reduce these changes and serving ice cold makes a difference too. Also, it is very important to remove all of the white pulp from any fruit prior to canning because the pulp adds a bitterness that you don’t want. When doing grapefruit, I do not peel and section, but rather slice and use a grapefruit knife to remove sections that easily leaves any pulp behind. Oranges and tangerines are much easier than grapefruits to deal with when peeled. Note: I used half pint jars for single servings, but pints and quarts are fine too. Directions: Place your jars into water to boil for sterilization or run through the dishwasher on sanitize cycle. Place lids into a saucepan and cover with water. Bring to almost a boil and then keep heated. 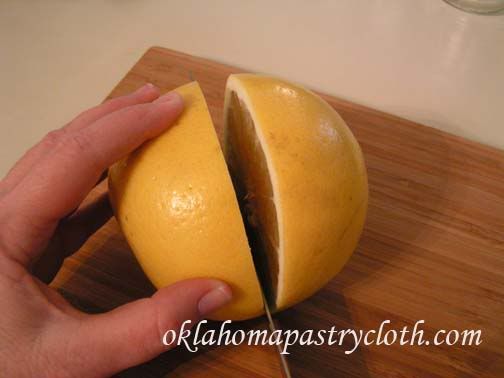 Slice the grapefruits. I used a total of 6 very large grapefruits, both white and ruby red, for this particular project and got 6 half pints. 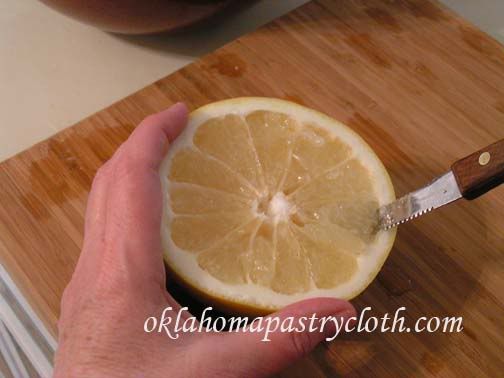 Using a grapefruit knife, which is serrated and curved, cut around each section moving from section to section. 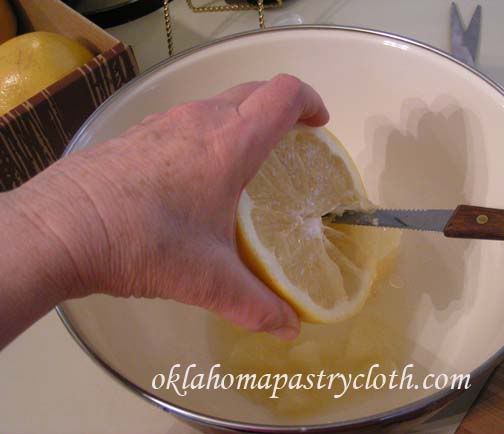 Scoop the grapefruit sections into a large bowl. 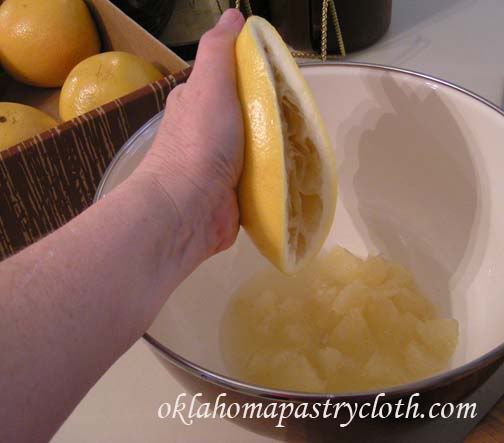 Squeeze grapefruit juice from each half into the bowl 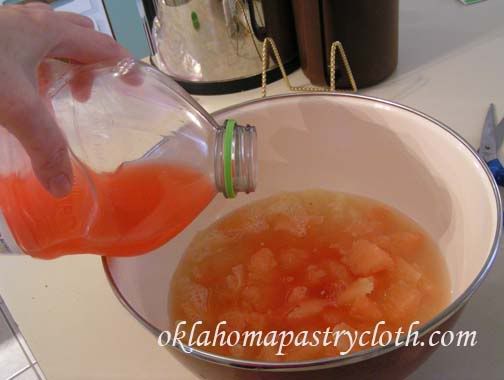 You can make a light syrup with water and sugar, but I like to add real juice that has been naturally sweetened. Any grapefruit juice sweetened with apple juice and white grape juice works great. Add enough juice to cover the fruit. 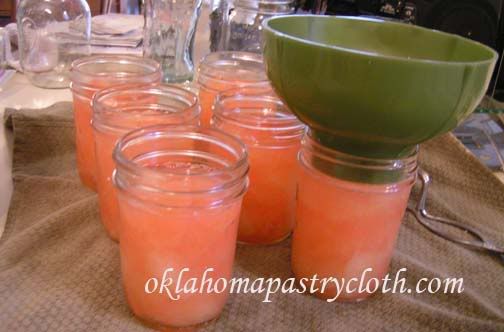 Using a canning funnel, evenly divide pulp and juice between jars, filling to a 1/2″ headspace. 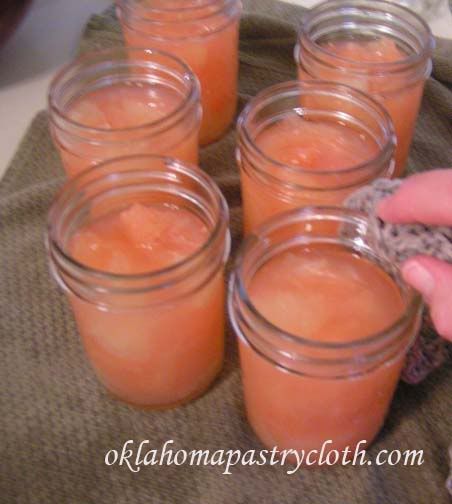 Wipe the rims with a warm, wet washcloth. 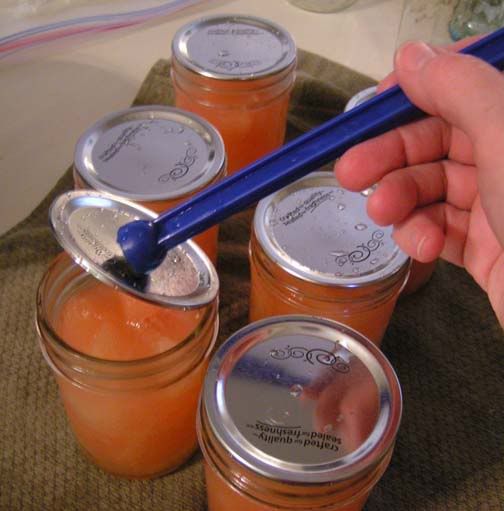 Remove lids from hot water and place onto jars. Add rings and adjust. 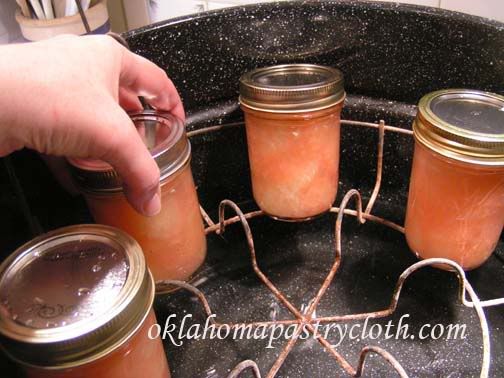 Place jars onto the rack of a waterbath canner that is sitting on a burner and has only slightly warm water in it. Do not place jars into hot water as jars can crack. 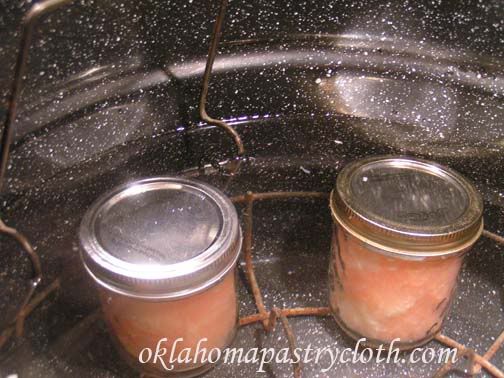 Make sure that the jars are completely submerged with about an inch of water above the lids. Turn the burner on ‘high’. Process the jars for 10 minutes at the point that the water starts boiling. 15 minutes for quarts. Store in a cool dark place and refrigerate before serving.  |
|
|
Oklahoma Pastry Cloth™ Company on Facebook
|
|
 |
|
|
Just A Reminder
Monday, November 14th, 2011
 I noticed this weekend that starting Wednesday here in Okieland that celery, sweet potatoes, turkeys, etc are all going on sale for dirt cheap prices. So now is the time to grab and can or dehydrate for the rest of the year. For example:  Celery is 3 bags for $1 here. Guess what I am going to be dehydrating. The step-by-step tutorial is here  Sweet potatoes are on sale for 3 lbs for 99¢ so I will be dehydrating those too for wonderful sweet potato casseroles and candied yams. You’ll find my step-by-step directions here. And get extra turkeys if you can. Put them in the freezer for later. After Thanksgiving, I’ll be showing you how to can the meat for wonderful pot pies, casseroles and turkey and dressing.  |
|
|
Oklahoma Pastry Cloth™ Company on Facebook
|
|
 |
|
|
Canning Bacon
Friday, September 2nd, 2011
|
I told Mr. Fix-It the other day that I have decided that my purpose in life is to be a “cup bearer” of sorts – you know, the person who drinks the king’s beverage and dies if it is poisoned. I try foods and processes and if they don’t kill me or taste like they could, I then pass them on to you! You wouldn’t believe how many recipes my poor Mr. Fix-It has had to endure only to have me scratch them with a “Well, THAT one is going in the trash!” He is such a dear and patient man. His worst response to anything I cook is, “It’s ok.” He can say it through clenched teeth and a galant effort to swallow, all the while looking for a way to spit his food out while I am not looking and still graciously offer, “It’s ok.” However, I must admit that he was very sceptical of my newest canning project. I had read about canning bacon at Patrice Lewis’ The Rural Revolution and on Enola Gay’s blog, Paratus Familia, and I have been meaning to try it myself lo these many months. But bacon didn’t go on sale until just recently and so, when it did, I snatched boatloads of it up and made my plans. Believe it or not, I got it for 99¢ a pound because it was nearing its “sell by” date. I have this vague memory of my parents receiving a can of expensive bacon from Denmark and it was rolled in white paper and tied in the middle. We thought it was amazing, so I knew it could be done.  Now, according to instructions that I found, kraft paper or paper sacks were used in the packaging and I used kraft paper on this first run. However, this is where that “cup bearer” roll comes in – I’m suggesting that you use boxed parchment paper. I found in this first run, that the kraft paper leaves a flavor of the paper in the bacon. You know how wet paper bags smell? Well, that’s the hint of flavor left in the bacon. I did not find that in a subsequent run with the parchment paper. Perhaps that is because white parchment paper is meant for cooking!! Duh. The pictures I have here, however, are from my first run and are with the kraft paper. Just pretend it’s white and do the same thing! Finally, be sure and use thick-sliced bacon. The instructions told me this, but you know me. I never follow instructions. I tried a package of regular sliced bacon. You’ll see the results. Not good. The outcome of canning the bacon was amazing. It fried up beautifully and Mr. Fix-It was duly impressed. Talk about a wonderful companion for camping!! (The bacon – not Mr. Fix-It – although he is a wonderful companion for camping.) No need to mess with wet, sloppy packages of bacon floating in melted ice in a cooler. Just open a jar and there you have it! So here are the directions for canning bacon. Just remember – PARCHMENT PAPER!  Lay strips of bacon side-by-side onto sheet of paper, leaving 1/3 of paper to be folded over the the top half of the bacon. You can put a half pound, 3/4 pound or whole pound onto one sheet. I put 1/2 pound for each jar because there are just two of us.  Fold top third of the paper over the top half of the bacon. If your parchment paper is not tall enough, then place a cut strip of parchment paper over the top half of the bacon strips.  Now fold the top over to the bottom, folding the bacon in half. There will be paper between the top and bottom halves of bacon.  Starting at one end, begin rolling “package” like a jelly roll, allowing some end paper to overlap. Cut off any extra paper.  This was my addition to the process. Because I remembered way back into my childhood that bacon we had received in a metal can was tied with a string, I did the same thing because it keeps the roll nice and tight. I did not tie the string snug, but just let it hold the roll together. I used kitchen twine also known as “butcher’s twine”.  Drop the rolls open side down into preferably wide-mouthed quart canning jars (I had to use a couple of small mouth because I was short two jars) that have been washed and sterilized in the dishwasher, in boiling water or in the oven. The wide-mouthed jars make it easier to remove large rolls.  Wipe the rims of the jars with a warm, soapy and wet dish cloth to remove any oils from the glass that would keep the jars from sealing.  Having kept lids warming in nearly boiling water, place them onto the jars and add rings.  Process in a pressure canner at 10 lbs of pressure for 90 minutes.  When jars have cooled, remove rings and wash jars and rings in hot, soapy water to remove any oils that may have escaped. Allow to dry and place rings back on. Store. Jars aren’t real pretty because the bacon fat coats the sides.  To use bacon, remove ring and lid from jar and allow the roll to slide out. Carefully unroll paper package and fold back paper off of bacon.  Carefully remove bacon from paper with a fork. This is where packaging thick bacon comes in. Thin bacon simply falls apart. See below what happens in the removing and the cooking.  The thin bacon made a mess in the removal and cooking!  Place bacon into skillet and add oil that is the bottom of the jar. Fry just like fresh bacon. It takes a little longer to crisp than raw bacon.  A great addition to a good Okie breakfast – Western omelet, grits, English muffins…and bacon. Yum!! And even if Ol’ Man Winter gives us another electricity blackout, I’ll have bacon for breakfast to cook on the wood stove! |
|
|
Oklahoma Pastry Cloth™ Company on Facebook
|
|
 |
|
|
Canning List For The Beginner
Tuesday, August 30th, 2011
|
I’m sorry about the tardiness of the post, but the web hosting servers in Georgia have been down and I have not been able to get onto the site. If you’ve been unable to reach the site too, that is why. Anyway, I’m going to break away from the recipes today at the request of new canner and reader, Judy, and do a quick pictorial run-through of items needed for the two canning processes. Some are required and some are suggested in this list that I am offering. But the whole idea is to give all of you new canners out there, pictures of items so that you will know what to look for in the stores or online! There are two kinds of canning processes: Waterbath for fruits, tomatoes, pickles, jams and cheeses, and Pressure Canning for low-acid meats, veggies and soups. You can actually buy Litumus paper at the drugstore or online to test your fruits, veggies and anything of which you are not certain. A PH measure of 4.6 (±.5) or lower is considered acidic in canning (waterbath) and anything higher is considered basic (pressure canning required). These are levels advocated by the county extension offices and are not the same as what is scientifically referred to as acidic (7 and below) and basic (above 7). Tomatoes are a little iffy these days because some of the hybrids have been bred to not be as acidic. The heritage varieties should be fine. If there is a question, add 1/2 tsp of vinegar or lemon juice to each jar of tomatoes or tomato products. And finally, invest in a good canning book. Walmart, Lowes, Home Depot, Ace Hardware – all of these carry the Ball Canning book which will answer most of your questions. But there are other books too that can be found in book stores, on Half.ebay.com, on Ebay.com and in used book stores.  These are the two books that I have on hand – The Ball Blue Book and The Farm Journal Freezing and Canning Cookbook that was my aunt’s.  A waterbath canner is usually made out of enamel ware or stainless steel. It includes a rack that can be balanced on the sides of the canner. This canner is used for high acid foods. There is also a steamer canner that is used for the same purpose, but I have never used one or even know anyone who has used one so I can’t attest to the quality or the success of the steamer canners.  There are two kinds of pressure canners. This 12 quart Mirro brand ‘weighted’ canner is very simple with just a variable weight on the pressure release to determine the amount of pressure reached inside of the canner when heated. The only maintenance required for this type of canner is to replace the rubber gasket each year and to keep the canner clean.  The removeable weight has a hole at each of 5 lb, 10 lb and 15 lbs of pressure. The weight is placed onto the pressure release valve at the appropriate pressure poundage before the canner is heated.  This All American brand pressure canner is a gauged canner. If you notice, there is a gauge with a needle that indicates the pressure achieved inside the canner. More maintenance on these canners is required because not only should the gasket be changed each year, but the gauge must be tested for accuracy at a local extension office each year. Either type of canner works well and it is purely personal preference when choosing a suitable one. Canners come in multiple sizes depending on how many jars they can hold. They can range from holding 4 quart jars to 19 quart jars and variations of the smaller jars.  You will need jars, of course. There are quite a number of sizes of jars and here are just a few.
 You will need Lids and Rings which can be bought as a set or, if you already have rings, as just lids. There are two sizes for the two mouth sizes of the jars – wide and regular.
 Important utensils to have on hand for all canning projects include:
 A candy thermometer can come in handy when making jams and fruit butters.   Some useful utensils to have on hand, depending on what you are canning, include:
 A variety of measuring cups is essential. An 8 cup batter bowl is handy for measuring fruit pulp to figure sugar additions for jam and fruit butters.  A handy item for fruit butters is a collandar. This one was my mother’s but you can still buy them online.  Another handy item for pastes and sauces is a food mill. It separates the skin and seeds from the pulp of tomatoes beautifully.  You will need a warm, wet dishcloth for wiping the rims of the jars and a dish towel on which to place the jars as they are being filled. It makes clean-up much easier by absorbing drips. It also makes a good cusion for the hot jars when they are removed from the canner. A Sharpie pen is handy for labeling the lids of your canned items with the contents and the date.  You will also need a small pot to fill with water and warm your lids  One of the best investments I made way back in the ’70’s was in a set of stainless steel nesting bowls. They have been invaluable for holding large amounts of fruits and veggies for raw packing. That biggest one can hold a whale of alot of tomatoes!  For stews, soups, chili and for blanching fruits and veggies, you will need to have some large stew pots. For years, I used hand-me-downs or thrift store finds, but about 10 years ago, I finally decided to save my money and invest in a set of Tramontina pots. There are four of them in different sizes. The largest holds 4 gallons of liquid. I love them because they are heavy weight 18 gauge stainless steel and the bottoms are three-ply stainless so that items don’t burn very easily on the bottom. I’m sure that I have forgotten something and if I think of other things, I will add them to the post, Hopefully this will help you have a visual list of items that you need for a day of canning and another list of items to which you can aspire! And if you have any questions, be sure to email them at the contact page or post in the comment section below! |
|
|
Oklahoma Pastry Cloth™ Company on Facebook
|
|
 |
|
|
National Can It Forward Day
Sunday, August 14th, 2011
 I am soooo out of the loop!! Did you know that Saturday, August 13th was National Can-It-Forward Day?? I didn’t!! NCIF Day was supposed to be honored by canning something or by teaching someone else to can something or by hosting a home canning party! How did we miss this fact? Canning Across America knew all about it, as did the Ball Company which sponsored canning parties, but heh – they invented the day!! I mean, as a canner, I think it’s kinda cool that my passion has its own day!! So, I’ll be making note for next year.  So, what did you do for NCIF Day? I canned of course, but not because I knew I was supposed to in honor of anything! I did it because that’s what I do all summer long to get ready for a very long and cold Oklahoma winter. So I canned 26 pints of beef vegetable soup while dehydrating 2 1/2 pounds of beef strips for jerky to vacuum seal in quart jars. And yes, there is a jerky post coming up! You bet!  So tell us if you did anything unusual to celebrate NCIF Day – or just tell us what you canned and pretend that you really knew that you were celebrating something!! |
|
|
Oklahoma Pastry Cloth™ Company on Facebook
|
|
 |
|
|


 Homestead Revival
 Paratus Familia
 Rural Revolution