 Yesterday, I started you onto a short version of my seven year journey into weird diseases. Today is a continuation of that explanation in hopes that someone out there has a lightbulb go off with their own symptoms and is able to get help. I’ll just give you a glimpse of some of the hurdles that have had to be overcome, especially in the medical community, and what led me to write this post. In 2005, my hair began falling out. Shockingly, prior to that, in one year my hair had gone from reddish brown to silvery platinum. (notice I do not say, “gray”!!) My hairdresser was astounded. My doctor was resolute – “Hormones,” he said. But despite replacement therapy and lots of money, my hair kept falling out in handfuls and the next year a dermatologist rendered the verdict that I had male pattern baldness. Rogain was in my forever future, according to this man. As you will see, he was wrong. In the meantime, I had a lump in my throat. Swallowing was difficult and annoying. Our family doctor did blood tests, but I was told that I was fine. No worries. All in my head. This continued for years with my occasional plea for more tests and normal results that indicated I was a hypochondriatic fruitcake. And then…in 2010 the weight gain began. I have always been pretty mindful of my diet and exercise and I have never really had much of a weight problem, but all of a sudden, on minimal calories, I started packing on the pounds. Now, we women have been accused of being overly conscious of our appearance, but the fact is, the men who make that accusation are pretty durned picky about how they want us to look!! And so, it is a natural dismay that surrounds a woman who watches the needle on the scales start ticking more and more to the right for no reason at all!! Mr. Fix-It has been the unusual man who has wisely kept his mouth shut about such things and I appreciate it. It was in May of 2011 that I gave up on our family physician and went to a Naturopath/Nurse Practitioner who actually felt my throat when I complained of pills getting stuck. Lo and behold, there were nodules on my thyroid and I had confirmation that I am only partially off my rocker!! Many tests, including a biopsy on the nodules, later confirmed that my thyroid was a wasteland of holes and lumps, with autoimmune disease-style antibodies present and the diagnosis (by an extremely inappropriate if not downright vulgar endocrinologist) of Hashimoto’s disease. I made the decision not to go back to this doctor because the red flags were waving all over the place. I found out later that I wasn’t the only one with that complaint. But I was put on desicated thyroid and felt good for the first time in a long time. I thought we had conquered the beast. Little did I know…. And stay tuned tomorrow for the rest of the story.  |
|
|
Oklahoma Pastry Cloth™ Company on Facebook
|
|
 |
|
|
Archive for the ‘So You Have To Make It Educational!!’ Category
And The Beat Goes On
Wednesday, June 20th, 2012
In Hopes This Helps Someone!!
Tuesday, June 19th, 2012
 I’ve been debating how to approach occurrences of the last few weeks for you all. Life has been a bit strange in that time frame and I feel like I should explain in the hopes of possibly helping someone else who might be in the same boat as I. That boat seems to be a bit rickety and is letting in water, but it is the boat in which I find myself, none-the-less. I have been diagnosed with an unusual form of autoimmune disease that exhibits itself as both Graves and Hashimoto’s diseases. In other words, my white cells really hate the rest of me! Most people have one or the other of these diseases, but I am one of those people who is termed, “unlucky,” as I have both. You might surmise that there is more than one reason why I don’t play poker or go to the casinos!! Over the past couple of years, I have done a LOT of internet searching for information on my various symptoms, as doctors seemed to want to diagnose me as “a little crazy.” It has been a long journey from 2005 to the present accurate diagnosis and I have a few things to say to anyone out there who is having a health struggle of their own. (1) Trust your instincts: If you think something is wrong, then act on it. Seek help and don’t stop until you have a doctor who takes you seriously, who acts responsibly and who treats you with respect. (2) Do not be satisfied with anything less than the best in care, follow-up and scheduling. You are paying for services. Therefore, YOU are the customer and the doctor and his cohorts are serving YOU. Don’t be intimidated and don’t accept abusive behavior from anyone! (3) Be willing to change doctors and hospitals until you have accurate answers and top-notch care. (4) Educate yourself. The National Library of Medicine is an excellent source for research, etc. as is The Mayo Clinic site. For my particular issues, I was delighted to get information at the University of Michigan’s site. Many of the university medical schools have sites where one may research any disease. Read books. And don’t let ANYONE discourage you from educating yourself. (5) Be willing to look at alternative forms of treatment. There are natural approaches that far outweigh traditional medicine in many cases. For example: A year ago, I was told that I would have to have regular epidurals in my back for pain and eventually a rod placed in my spine for curvature of the spine. THAT sounded fun. (sarcasm there, folks) I am now under the care of a chiropractor who has succeeded in ridding me of any back pain and who has actually been able to straighten my spine significantly, without medication or surgery. (6) Pray for discernment and direction: My son made a comment to me one day when I was very discouraged with the progression of my disease. He reminded me, “Mom. There is a healer so much greater than any of these doctors!” He is so right. Healing can come in spite of doctors. Healing can come as God uses doctors. And healing may never come. But one thing is certain, healing of the spirit is more important than anything else. With that peace is acceptance and an ability to overcome in the midst of disease. I am going to make this a three day soap opera for you! Tomorrow, I’ll add the next installment. Will Dr. Moan find spots? Will Nurse Jane be able to draw blood on the first attempt? Stay tuned, as the world turns!!  |
|
|
Oklahoma Pastry Cloth™ Company on Facebook
|
|
 |
|
|
Vintage Cooking Pt IV
Thursday, January 19th, 2012
 That is the title of the last section of recipes, regarding meats, in Austin’s Domestic Science Books 1 & 2, my grandmother’s 1914 home economics book. I thought that, as the last installment in this line of posts, it would be fun to share some of this information from the past and give you a little bit of history. 2 cups flour 4 tsp baking powder 1/2 tsp salt 2 – 3 tbsp shortening 3/4 cup milk a quantity of cold roast beef or beefsteak (I used a quart of home canned rump roast) 1/2 onion 1 cup sliced potatoes water to cover potatoes beef stock 2 tsp corn starch salt and pepper to taste If using fresh beef, cut into cubes and cover with beef stock to boil until tender. Slice potatoes and cover with water in a second pot. Parboil for 8 minutes. Drain potatoes 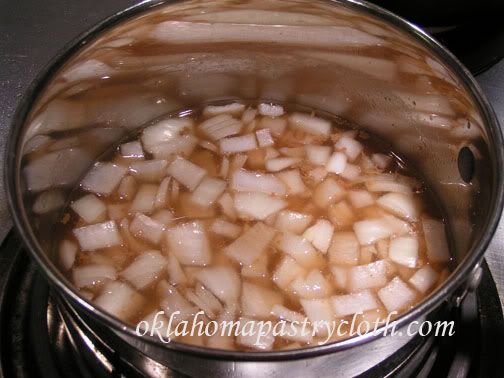 When beef is cooked, strain from stock and add onions to boil. 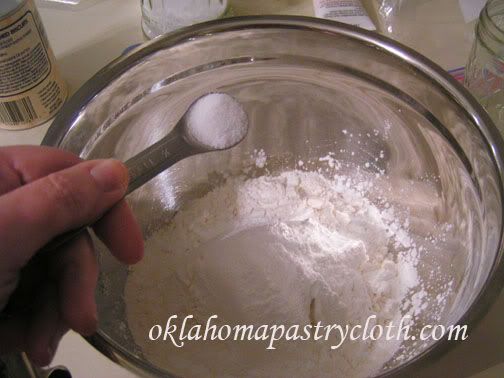 While onions are boiling, put flour, salt and baking powder into a bowl. 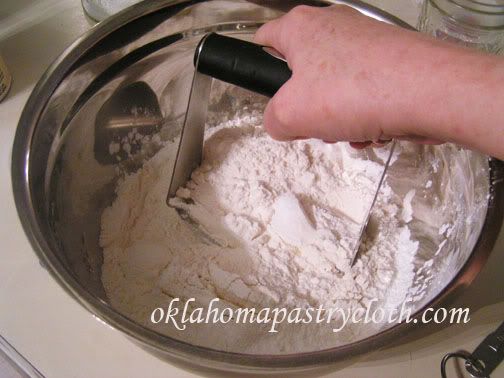 Cut in shortening until it looks like small granules 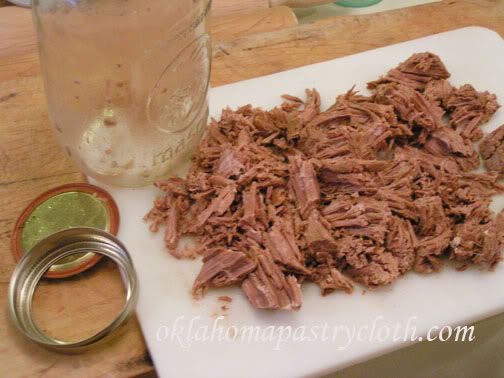 I used my canned rump roast for the beef. Beef should be tender and shredable. 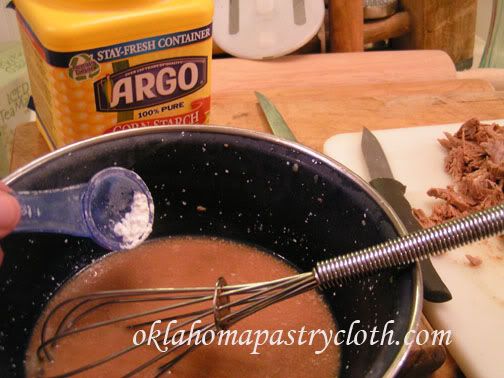 Take out a little beef stock to cool. Add some water to cool faster. Add cornstarch and blend. You can also add a tbsp of brown gravy mix if you would like for a richer flavor. 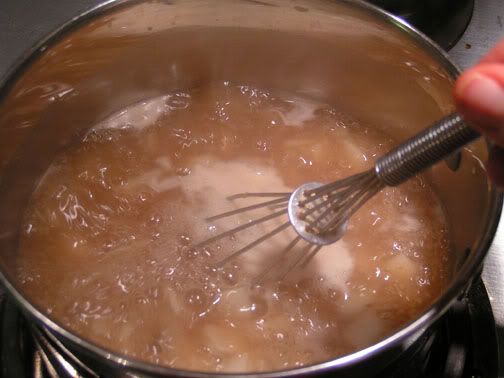 While stirring the simmering broth, add corn starch and broth mixture and stir to thicken slightly. 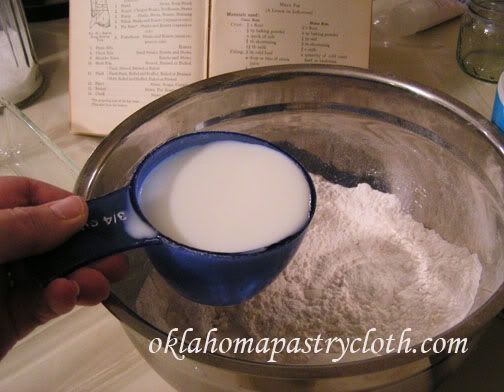 Add milk to the flour mixture and stir to form a dough ball. Add more milk if the dough is too dry. 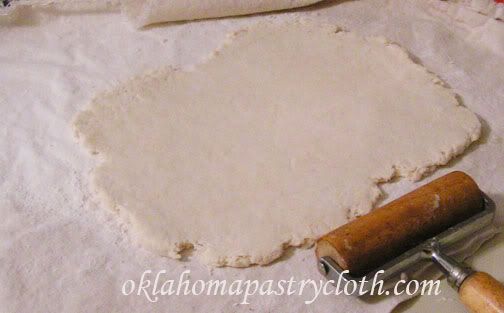 Roll the dough out into a rectangle and cut for sides leaving enough to use as a top crust. 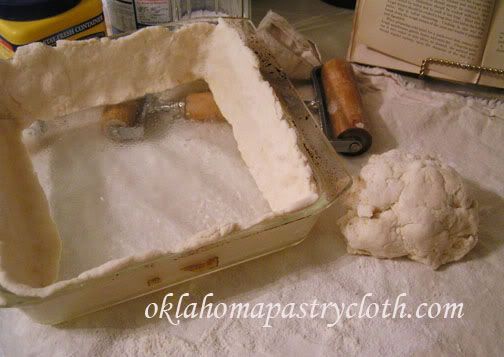 Place dough around the edges of a greased baking dish. Do not put any on the bottom 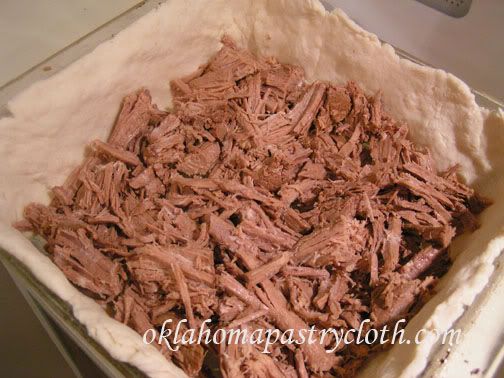 Fill the baking dish with meat 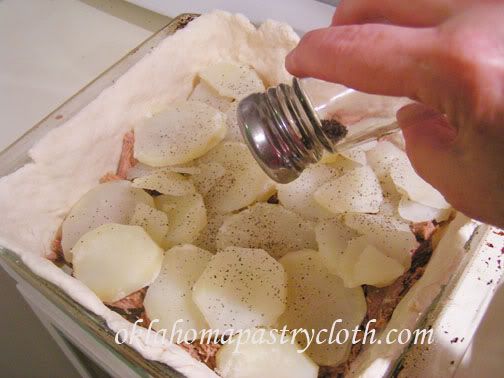 Add potatoes and salt and pepper 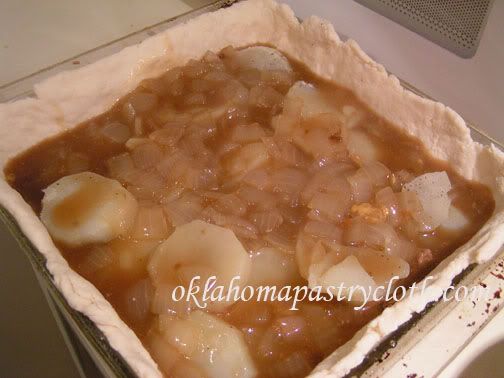 Pour the thickened broth with onions over the meat and potatoes 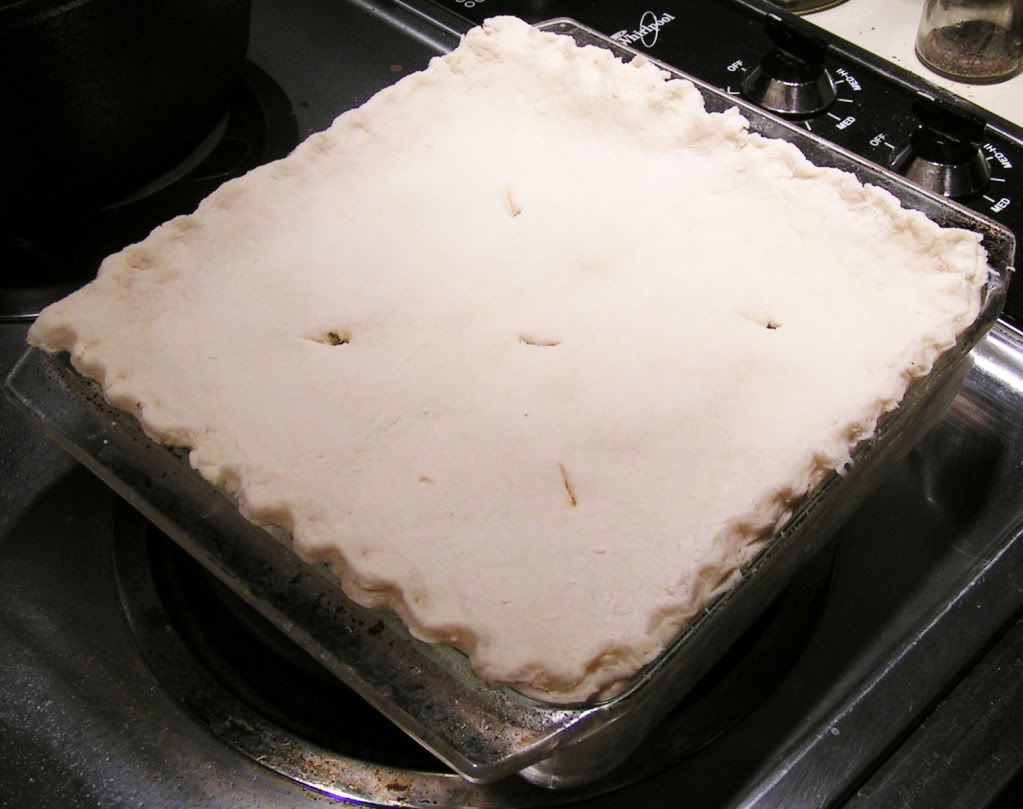 Place dough on top and crimp for appearance if you like. Make a few slits through the top of the crust. Bake at 425º for 30 – 35 minutes or until browned 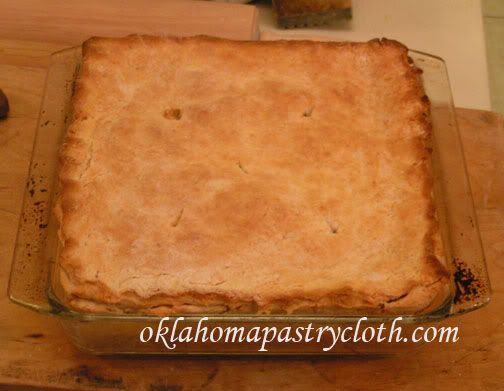 The crust browns nicely for an appetizing pie 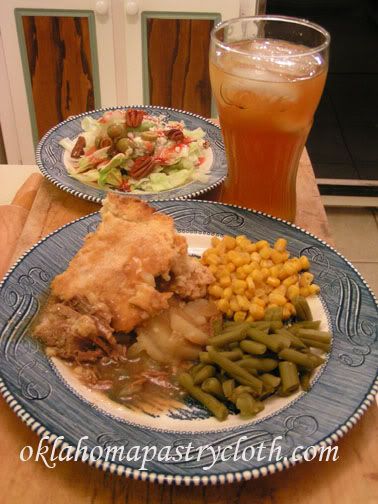 Serve with salad and veggies and you’re right back into the early 1900’s!!  |
|
|
Oklahoma Pastry Cloth™ Company on Facebook
|
|
 |
|
|
The Mississippi River Bridge
Thursday, September 15th, 2011
 I’m traveling. The artist in me has been screaming to get out all day. No, I haven’t been wanting to throw paint at passing cars…I’ve just been marveling at the landscape whizzing by and the architecture of the towns. It’s Americana begging to be painted. There was one moment, however, that sent me hurtling into the past with a giggle. You know how music or sounds bring moments to mind that occurred simultaneously with the music or sounds? Well, sights do that for me too and today, I was transported back to Mr. Gibson’s 3-D design class at Middle Tennessee State University. I wasn’t the most engineering design oriented art student in the world. To me, design was just about what looked good. Who cared if it could hold a couple of Sumo wrestlers? That attitude was not appreciated by Mr. Gibson, my professor, and I quickly learned that he was very serious about his students’ work being able to hold a couple of Sumo wrestlers. We students were each given a very large bag of popsicle sticks and told to purchase tubes of Duco Cement. Do you know how out in space you can get using Duco Cement?? But that was back before the FDA cared whether college students lived or died and it was the mid ’70’s when I am almost certain that college students were using hallucinogens equally disastrous. Anyway, we were instructed to build a tower that was structurally sound enough to hold 10 pounds of weight. (OK, so I exaggerated a little. Not quite Sumo wrestler poundage.) Structural soundness would be the main grade. Appearance would be secondary and minimal in determining our grade. Now, I freely admit that I wasn’t the most motivated student either and things like football games, concerts by Chicago, Elton John, Elvis and The Pointer Sisters and watching one of the male fraternities streak across campus seemed much more important than tackling a project that sounded like a summer of Vacation Bible School crafts. After all, who couldn’t put a bunch of popsicle sticks together and come out with a tower? It was the day before the project was due that I finally decided I needed to get busy. At 4 o’clock the next morning, I finished my monstrosity that measured 3 feet tall and had not one similar angle throughout the entire piece. In fact, about three quarters of the way up, the tower was relatively straight, but then an imperceptible angling began and the top fourth leaned ever so slightly – just enough to drive you crazy wanting to reach over and straighten it. The popsicle sticks were glued to each other in all kinds of wierd directions to create a sort of tall cylinder around empty air. I was so tired, I didn’t even go to bed because I had to be up and in class with my project by 8 that morning. Mr. Gibson was not a stupid man and he had a way of figuring out when one of us had waited until the last minute to do our work. He had a mean smirk on his face as he looked at my ‘leaning tower of haphazard’ and saved it for last so that the humiliation of watching it explode into a shower of popsicle sticks, when he placed the weight on it, would send me running to Shakey’s pizza parlor for solice in extra cheese. One by one, my classmates paraded their engineering marvels (did I mention that I was the only girl in the class?) before our artistic genius professor and one by one most collapsed under the weight of Mr. Gibson’s metal ingots. A few survived and the creators smugly returned to their seats ready to design a new Empire State Building. And then it was my turn. I feel pretty sure that I was sweating and that I didn’t appear all that self-assured, but I managed to drag my very heavy wooden tower to the front of the room for demonstration. Mr. Gibson placed one ingot onto the top of my “statue”. It didn’t move. He placed another and another and still it stood firm. I held my breath. Obviously frustrated, my professor placed another weight and, I am sure wished my tower to disintegrate to teach me a lesson, but it didn’t even creak. Ten pounds of metal perched atop my mess of popsicle sticks. I jumped up and down and clapped my hands. Not to be outdone, my professor continued to pile metal on top of my tower. At 15 pounds, he stopped. I passed with flying colors. But I gained a new appreciation for those who design and build the bridges, tunnels and architecture that we all take for granted. So today, when I crossed the Mississippi River and beheld the magnificent span of the bridge that has gotten millions and millions of cars from Arkansas to Memphis and back, I had to take pictures. The criss-cross of metal made me think of my popsicle stick project and I just had to say a quiet ‘thank you’ to the very smart people who not only made the bridge stand up under incredible weight, but made it pretty to boot. And I bet they didn’t wait until the night before it was due to build it!!      |
|
|
Oklahoma Pastry Cloth™ Company on Facebook
|
|
 |
|
|
Making a Solar Oven
Thursday, July 28th, 2011
 Yesterday it was somewhere around 110 degrees in Okieland. Shoot, at 7 pm it was still 107! It’s that kind of stifling heat that just puts you in a bad mood. A lot of people are in a bad mood around here. The sad part is that the weatherman says that it will be this way for the next 20 or so days unless a miraculous tropical storm comes ashore and moves north. I never thought that I would hope for a tropical storm! On days like these, one has a tendency to get a little odd. Heat has a way of doing that to people. It’s getting so bad that we in the country are seeing Dairy Queen mirages, in the distance, way down the gravel road and in a film of dust. You take off at a jog, salivating for a frozen, cold, chocolatey Dilly Bar, only to wind up in a cloud of lime dust as the mirage disappears, without so much as a popsicle stick. It is truly sad. Yesterday, to keep myself from going crazy, I decided to do something different. I mean, REALLY different. I had received an email from a reader, and questions from a friend, regarding solar ovens. As I said in the last post, my experience has been with reflector ovens, but a solar oven seemed of utmost interest considering we Okies are not allowed to even say the word fire, let alone strike a match in our parched environs right now. And the thought of not heating up the kitchen gave real incentive. So, I did some research and chose this hottest day of the week to harness the rays of the brutal sun to make dinner for Mr. Fix-It. I settled on a meal of chicken breasts, carrots, new potatoes and onions and thought I would surprise him with this delicious meal. Somehow, I knew his reaction would be, “Chicken cooked in the sun? Nope. Not taking my chances. Sounds like ptomaine poisoning in a box.” However, he always loses and eats whatever I put in front of him. He hasn’t died yet. So the following is a step-by-step process for making a very simple solar oven. I kid you not – it works!!
 Fold the flaps of the small box inside the box or cut them off. Line the inside of the box with aluminum foil and press against the sides as smooth as possible. Tape the foil to the outside of the box or just fold it over in place.  Cut a sheet of construction paper to fit the bottom of the small box. I had to piece this one together and taped it together on the underside of the paper. As I was cutting the construction paper, I felt like Captain Kangaroo with safety scissors showing a craft project on television. I think it was that sound of cutting construction paper. OK. So the heat is getting to me. Just ignore me.  Wad up sheets of newspaper or newsprint and make a cushion on the bottom of the large box.  Center the small box inside the large box and pack wadded paper around the small box as insulation.  Measure the opening of the large box and cut the extra cardboard to measure 4″ longer and wider.  Cover the cardboard with aluminum foil and tape or glue onto the back. Note: I can see using mirrors instead of aluminum foil in this project and getting some hot heat!   Staple the cardboard to the back flap of the large box with the aluminum foiled surface facing toward the box opening. Tape the flap to the cardboard piece for extra strength.  I sprinkled garlic powder, paprika, thyme and pepper on boneless, skinless chicken breasts  I added new potatoes, carrots and onions into the bottom of a dark enamel pot. The pots or pans need to be dark and so cast iron or enamel work well.  Chicken breasts were placed on top of the veggies and 1 tbsp of Italian dressing, 1/3 cup of water and 1 tsp of chicken bouillon granules were added.  The pot is placed inside the small box (a thermometer is hanging from the handle of the pan) and plastic wrap is stretched tightly over the opening of the large box. The plastic wrap is taped to the sides.  Voila – I just covered the front flap with foil to make it look balanced. It’s the artist in me.  Now, I discovered a problem for Oklahomans. We have wind. REAL wind – you know, that comes sweeping down the plain ala the movie. So, I grabbed a trashcan full of 2 x 4 scraps and put it behind the cardboard reflector. I ran packing tape from the reflector around the trash can. That way, I could move the trash can and repostition the cardboard if I needed to in order to catch the sun right.  Within minutes it got up to 160º  I checked it about every 45 minutes but only looked at the food once. It cooked for 8 hours with the highest temperature reaching 190º. When planning your recipes, look at it like a crockpot slow cooker.  All done  It was delicious! Really. So tender! I think that the only thing I might have changed would be that I would add some cream of mushroom soup to the chicken! Now you can bake in the sun and not use a drop of suntan lotion!! |
|
|
Oklahoma Pastry Cloth™ Company on Facebook
|
|
 |
|
|
Making A Reflector Oven
Monday, July 25th, 2011
|
I’m probably gonna step on some toes. I have a funny way of doing that occassionally. But I see something ridiculous in our culture and I just have to poke fun. I can’t resist. It’s a disease. When I see something dumb, I just can’t keep my mouth shut. Invariably, I wind up offending SOMEBODY. C’est la vie. So as a disclaimer, loving the following appliances is just fine and dandy. But you have to admit that the name is rather humorous. I ran across a website for a brand of appliance that has quite a catchy brand name: Back To Basics. Now I ask you, when you think of back to basics, what do you think of? I picture washboards, rolling pins, clotheslines, grain mills, the Oklahoma Pastry Cloth™, and canning apple butter. In fact, being the campers that we are, a campfire, a chicken on a spit and marshmallows on a stick are REALLY back to basics in my book. Think, “Latrine”. And so, when I saw that there was a brand of kitchen item called, “Back To Basics”, I thought that I’d be finding some pretty neat retro stuff. Ha! Did you know that in today’s culture, Back To Basics, basically means, “Not eating at McDonald’s” and not going to the neighborhood sno-cone stand. For under $100 you can have your own Back To Basics sno-cone stand in your home and invite all of the neighborhood children for free cones, thereby teaching them the principles of capitalism; ie; giving away freebies undercuts your competitor until he goes out of business and then you can start charging out the wazoo. It all depends on how much you are willing to shell out to the neighborhood kids!  But the one that just had me giggling was the Egg and Muffin Toaster. Boy, I’m sure those 1889 Oklahoma Sooners couldn’t have made it in their sod huts without their egg and muffin toasters. Sure, they didn’t have any electricity but you know that toaster was a basic! And I’m sure my mom has memories of my grandmother getting up early to pop muffins and eggs into her toaster to create those sandwiches that hadn’t been invented yet by Ray Kroc of McDonald’s. Shoot, that isn’t even the way he made those egg and muffin sandwiches! OK, so now that I’ve poked fun at the marketing department of an appliance company, I’ll go back to that camping discussion and really getting back to basics. Having been a Girl Scout all the way through Seniors, I learned alot about living with the basics. We camped regularly and had to learn survival skills for various badges. One of those skills was how to make and cook in a ‘reflector oven’. We baked biscuits, brownies, cookies and my favorite, gingerbread, in many a cardboard box lined with aluminum foil. We were so proud of ourselves when we successfully presented a hot treat.  I continued to use these contraptions through parenthood as we hauled children, tents, cooking equipment and fishing poles to our favorite spots. The kids thought that using the reflector oven was the best part of a camping trip. My favorite story about one of those trips happened not too awfully many years ago. We had all four kids, at that time teenagers, with us and had set up two tents at a beautiful park in Arkansas. Our camping spot was next to the biggest, shiniest, most expensive motor home any of us had ever seen. We looked like slum dwellers living next to the Taj Mahal. The next morning, I got up early and started a fire in the fire pit, got some bacon frying in a cast iron skillet, scrambled eggs, shredded hashbrowns and mixed up some biscuits. I had made my reflector oven the night before and it was ready and waiting for hot coals to bake my biscuits. I loaded the oven with the coals and the biscuits, closed it and covered it with a towel to bake for 20 minutes. The family chowed down on the meal that would ready them for a day of fishing and swimming. After breakfast, I had heated up water in my two waterbath canners to wash dishes and was doing so when the man from the big, fancy motor home timidly approached the table on which I was working. He introduced himself and then said, “Um. We couldn’t help but notice that you had a mighty fine breakfast there this morning.” I said, “It was pretty good.” He continued, “Well, we saw that you was eatin’ some biscuits. We was just wonderin’ where you made those biscuits.” I showed him my reflector oven and he turned to yell at his wife whose face was pressed against the screen of their motor home. “She baked ’em in a box, hon!!! She baked ’em in a box!!” Yes siree. I shore did. And so, here are the directions for a reflector oven that may come in handy for you one day. They are just dandy for when the electricity goes out. Note: This is an outdoor project!! Do not attempt to use this oven inside because the coals give off dangerous carbon monoxide.  Line the inside of a medium sized cardboard box (I’m using an 18 x 18 here) with heavy duty aluminum foil. This includes the top flaps. If you can find a box that has had the entire top cut like a lid, rather than flaps, it’s even easier.  Start coals as for grilling or you can use coals from a wood stove or campfire. Today, I will be using pretend coals because in Oklahoma we are under a burn ban and can’t even grill a steak!!  While the coals are heating up, place an old pan or foil pan in the bottom of the box and stand a brick upright on each side of the pan. This pan will be used to hold the coals. You can also make a metal rack to use instead of the bricks  Pour the hot coals into the pan that has been placed at the bottom of the box.  Place your pan of biscuits, brownies, cookies or cake mix on top of the bricks or rack  Fold the lid or the flaps of the box down to close and cover with a heavy bath towel. Bake for recommended time.  You will have baked goods in a jif! I promise. Now THAT’S back to basics! |
|
|
Oklahoma Pastry Cloth™ Company on Facebook
|
|
 |
|
|
Breadbasket Country
Monday, July 18th, 2011
 Mr. Fix-It and I and our little dog, Ellie (the Tin Man and Cowardly Lion weren’t available) followed the Yellow-Lined Road called I-35 to the breadbasket part of our state, Alva, Oklahoma, to see the son’s new digs. It was a sobering trip as acre after acre after acre of dry, parched farmland spread out as far as the eye could see. Brown and yellow with touches of green are the colors that painted the entire expanse. Lines of green trees spotted with yellowing leaves acted as windbreakers. Ponds had been reduced to half depths of green, brackish water and creeks and streams were simply dry beds. This is where much of Oklahoma’s wheat, corn, milo and canola are produced and this year has been rough. The wheat harvest in Oklahoma was 38% below 2010 numbers while the Texas harvest, just across the state line, was 63% below normal. Corn has not been much better. Oklahoma is over 11″ of rain behind normal, while Texas is as much as 25″ below normal. People are starting to talk of the Dust Bowl days and yesterday Oklahomans across the state prayed for relief at the request of our governor. Yesterday, it was 106º in Alva with 28% humidity. The amazing thing for me, on this trip, was finding that while I thought our area around Oklahoma City was so drought stricken, it is actually quite green compared to western Oklahoma. It is disheartening to know how much higher food prices are going to go because of the shortage of grains. Not good for Americans who are already struggling with food budgets and even worse for countries that depend totally on imported grains for survival. A shortage of grain impacts just about every foodstuff, including meat, but a shortage of water makes it even worse. Ranchers all over Texas and Oklahoma are selling off hundreds of thousands of cattle and sheep because there is just not enough water or grass to feed them. This will have a long term impact on the price of meat in the supermarket. But back to our trip – in spite of the water and heat problems, northwestern Oklahoma has a beauty all its own. I spent my time taking pictures so that I could share that part of my state with you. Traveling to the western part of Oklahoma makes one feel like one should be riding in a 1940’s Chevy truck. It is a step back in time with all the trimmings of today’s technology. Alva is no different. It is a lovely town with lovely people and the slow-moving pace of yesteryear. It is made up of the kind of people who suffered throught the drought, heat and dust of the Depression. Homes from the early 1900’s are scattered among homes of the 1940’s and 1950’s while huge, newer homes dot the outskirts. It is a small town but has those essentials of Walmart, Pizza Hut, Sonic and McDonalds! It has to because Alva is also home to Northwestern Oklahoma State University, a wonderful state secret. This university is near and dear to our hearts as two of our progeny graduated this school. A daughter even represeted NWOSU at Miss Oklahoma! The beautiful campus, caring professors and administration, mixed with the atmosphere of the kind of university my parents and grandparents remember, amazing scholarships and reasonable tuition makes this our favorite state institution of learning.  And so, put on your overalls and follow me to Western Oklahoma in pictures.  Along highway 11, grain bins dot the horizon and even crowd the street corners of tiny towns.  Cars of yesteryear parked on Hwy 11 near Numa  All across the prairie/farm landscape are dunes of sand covered in grass. These dunes were created by millions of tons of sand and dirt removed and relocated during the horrible years of the Dust Bowl. If you are interested, there is an amazing book written by Timothy Egan called, The Worst Hard Time. True stories and stunning photographs take you to the realities of those midwestern people of the Depression who suffered through drought, extreme heat and cold with dust storms that infiltrated every nook and cranny of their lives.  The Great Salt Plains just outside of Alva is an international attraction. It gets its name from the salt crystals that cover the ground, leaving an almost ‘snowy’ landscape. The site of much history, Native American tribes fought each other for control of this landscape as it was a huge attraction for wild buffalo and deer seeking the salt.  The area of salted sand is exactly 11,000 acres and the salt is continually replenished by saline groundwater that flows just a few feet underground. When the water evaporates, a layer of salt covers the surface. This also forms the unusual Selenite crystals that are hunted by visitors. We have a boxful from previous trips   Ellie’s “do” was showing that “windblown” look in the stout Oklahoma breeze at the Great Salt Plains. Note: Ellie was a “dump” dog. We figure a puppy mill dumped her at 12 weeks old because she has a terrible overbite and shouldn’t be bred. Their loss!! She’s a hoot.   On down the highway and getting closer to Alva, the traveler will find a fenced off area on the south side of the road with an artesian well pumping thousands of gallons of mineral water a minute. Health concious people from all over bring water jugs to fill with the crystal clear water. And for those who like Watercress sandwiches, there is a hearty crop floating in the pond made by the running water. This place is a green oasis due to the underground springs.  Many of the farmers in Western Oklahoma are using practices that reduce the chances of a dust bowl happening again. Using ‘No Till” farming, they plant rows of a new crop in the stubble of the previous crop without turning and exposing the dirt. This new crop of soybeans is pretty and green, but if you notice the grasses in the foreground, I am wondering how long they will stay that way. We saw no irrigation going on.  An antique Chevy? I suppose you could say it literally got “driven into the dirt”?  Coming into the town of Alva, many of the buildings and homes have a Swedish and German look to them due to the influence of the large number of immigrant families who settled the area. Also, Alva was home to a WWII prison camp for German war prisoners. Many of them loved the area so much that they stayed and made Alva their home after the war.  Drilling new oil wells in and around the town and in the entire area, is nothing unusual. Western Oklahoma is rich in the black stuff and is also a huge producer of natural gas.  We buzzed by the university  Alva has a beautiful little airport with concrete runways – no grass strips there! – a terminal and rows of hangars for housing small airplanes. It is also home to Vantage Plane Plastics, a world leader in the production and installation of aircraft interiors. That is where our son is employed and so aviation has become an important part of our lives! Vantage has small planes fly in from all over the world to this little town for service.  Of course, the son had to show us the plane that he is flying as he finishes up the requirements for a pilot’s license.   I got a chuckle out of the various decals I noticed decorating several of the planes. At least there weren’t any naked women!! Good boy.  It was a pleasant trip on a hot, dry weekend, and it was wonderful. Northwestern Oklahoma has an appeal and a beauty that is unique. Jump in your car and make a visit! |
|
Oklahoma Pastry Cloth™ Company on Facebook
|
 |
A Fun Project For the Kiddos
Monday, May 9th, 2011
 Friday afternoon, I had the pleasure of spending time with a precious group of home schooled girls who have formed a group called, “Keepers”. They are all ages and are polite, gentle, giggly and ready to tackle anything that is put in front of them. I was asked to do an art project with them that could be accomplished by all ages, even the very young, and so I decided that mock stained glass windows were just the thing. The beauty about this project is that there is no right or wrong to it and even tiny fingers can paint glue and tear paper. I loaded up the car with supplies, including a roll of newsprint for covering the dining table where we would be working. Most newspaper offices will sell you their end rolls of newsprint which offer you a plentiful supply of the paper for everything from covering tables to long murals for tempera paint. Our office charges by the inch thickness of paper on the roll.
 Cover the table with newsprint or an old tablecloth and place the stained glass pattern onto the table. Lay the plexiglas over the pattern and center. Place tape at either side of the plexiglas onto the pattern to hold the plexiglas in place. Using a Sharpie pen, trace the pattern onto the plexiglas. For thicker lines, go over the lines again. Remove the tape and pattern and turn the plexiglas face side down (side with the drawn pattern down).  Pour Elmer’s glue into small paper cup and add enough water to make it easy to paint – about 3 parts glue to 1 part water. Using a paintbrush, paint the glue mixture onto a portion of the traced pattern on the plexiglas. Tear pieces of tissue paper to fit shapes and lay onto the glue. Paint over the back of the paper, once on the plexiglas, with a thin coat of the glue mixture.  Offer lots of different colors  Continue painting each section of the drawing with glue and add different colors of paper according to what part is being completed. Be sure that the back of the papers are painted with the glue mixture as well.  This is one time that “staying inside the lines” has absolutely no application! Colors can overlap, glue can get splattered. It doesn’t matter.  Young children are really successful with this project because it does not have to be exact.  A dove is starting to emerge!  The youngest one has finished. A damp cloth easily removes any wayward glue. When the glue has dried, hot glue the plexiglass into the frame by placing little dots of hot glue in each inside corner of the frame. Display on a wire easle or add a hanger and hang in the window on a suction cup hanger that can be purchased at Hobby Lobby or Michaels. Be sure and choose a window that does not have direct sunlight as it will fade the colors of the paper.  They all did such a good job, don’t you think? This is an easy and fun project for kids of all ages. I hope that you get a chance to try it. |
|
Oklahoma Pastry Cloth™ Company on Facebook
|
 |
The Vintage Kitchen
Thursday, April 7th, 2011
 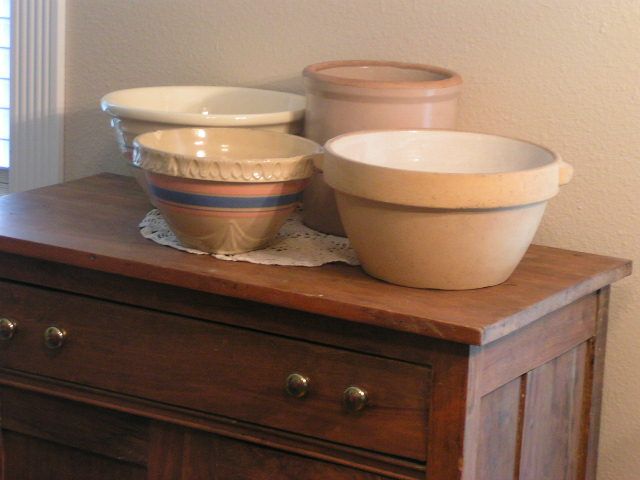 Martha Stewart has a really neat site for women in business where they can share their accomplishments, new products, business ideas, accounting help and countless other types of discussions. One of the women has started a forum about the vintage lifestyle and I decided to join these lovely ladies. Jolene encouraged me to do a post about some of the things that I have from the vintage kitchen. I thought that would be fun and so I grabbed the camera and just started taking pictures. Of course, that led to the vintage lighting and furniture and everything else, so I got a boatload of photos. These are things that have been in my family for generations or that we have picked up along the way. I have used many of the items in my kitchen just for the fun of it and it makes me feel a bond with grandmothers and great-grandmothers as I imagine them standing in their kitchens, hands grasping the very same utensils. Hope you have fun scrolling through yesteryear! 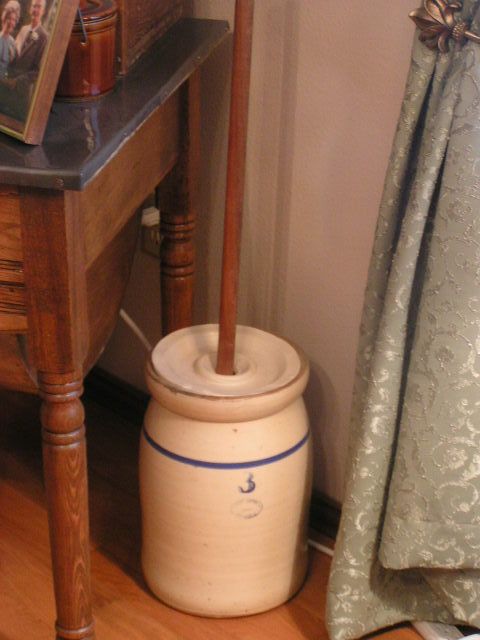 The country kitchen had a butter churn for all that sweet cream carried in from an early morning milking 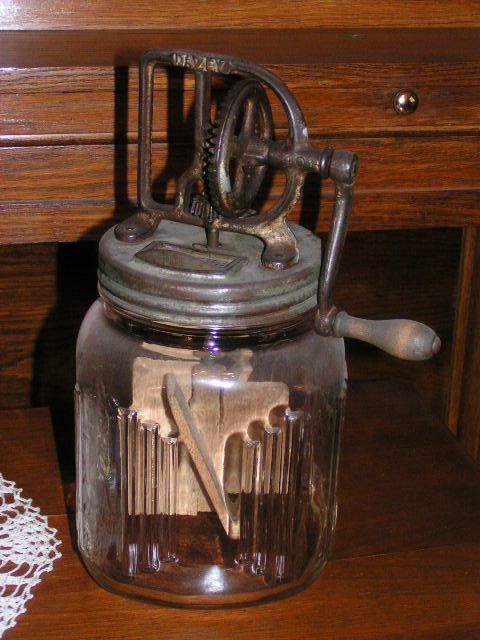 And if they were lucky, they could afford a Daisy Churn with paddles and a handle that turned for faster butter. 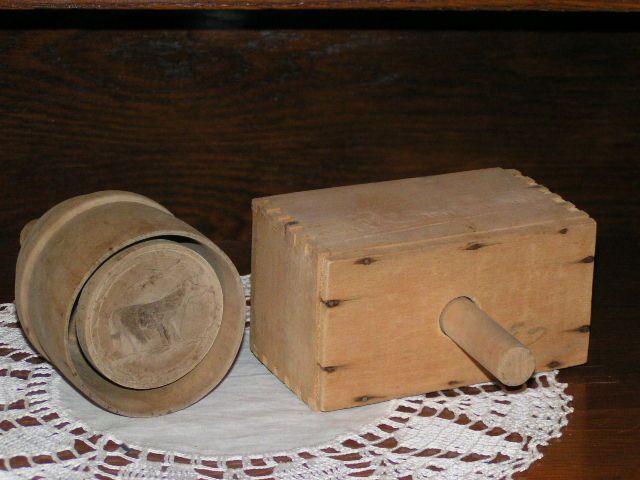 And of course, that butter was put into butter molds to shape into blocks for the table 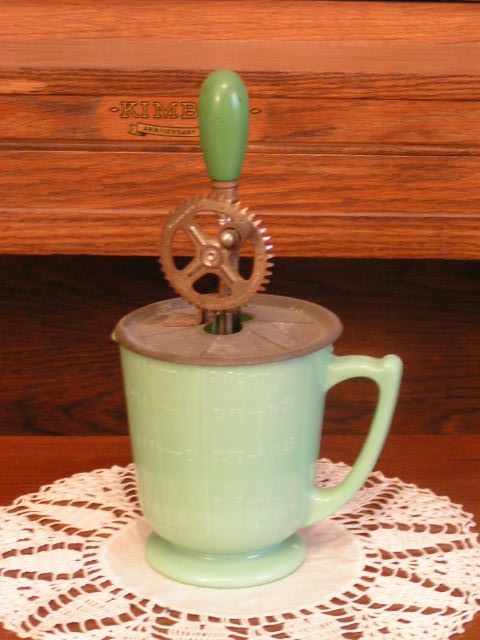 Sometimes the cream was whipped with sugar to top some dessert and a jadite beater bowl with accompanying hand mixer was just the thing for the job. 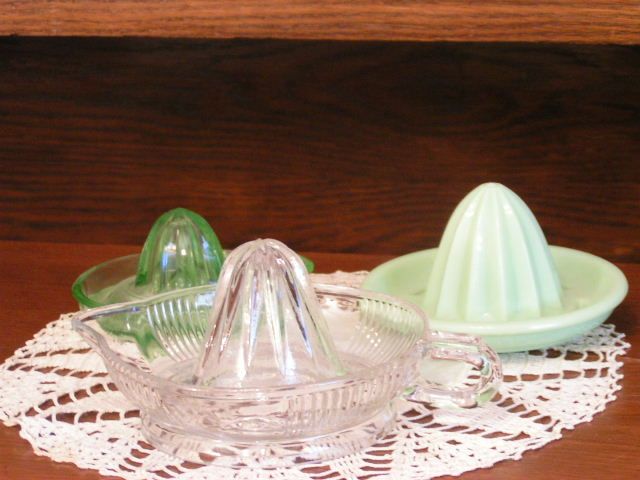 Juicers were a necessity for juicing oranges, lemons and limes. These glass juicers are made of jadite, Vaseline Depression glass, and clear, pressed glass. 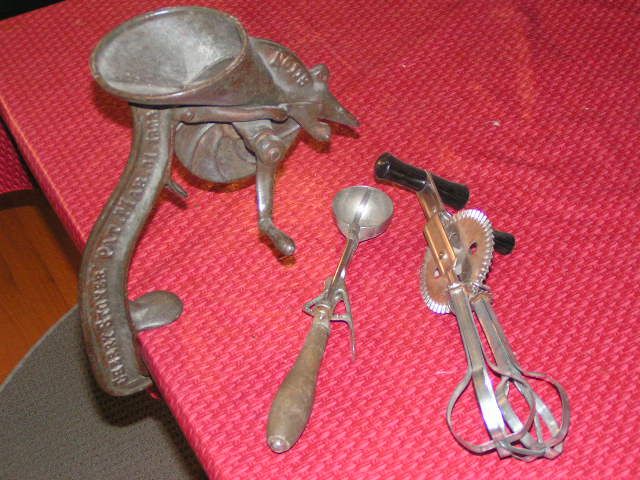 When turned, a cherry pitter clamped to the table, pressed the stones out of fresh cherries that were dropped into the hopper. Ice cream was served with this wooden handled dipper and this hand beater did a number on the eggs! 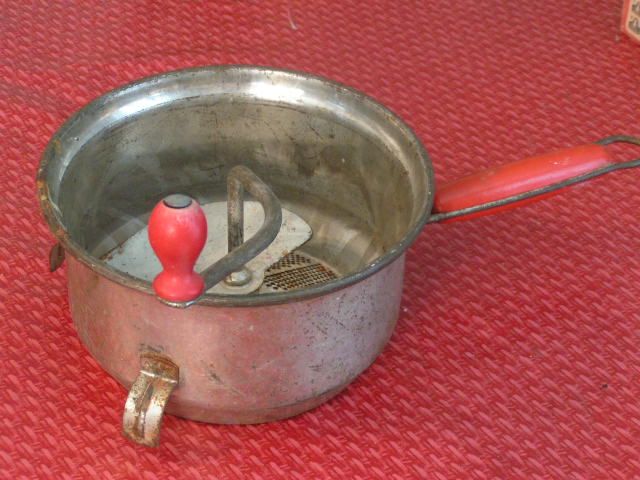 A Foley Food Mill pressed potatoes, peaches, cooked apples and anything else that required mashing. This particular mill was used for pressing ripe persimmons for persimmon pudding. 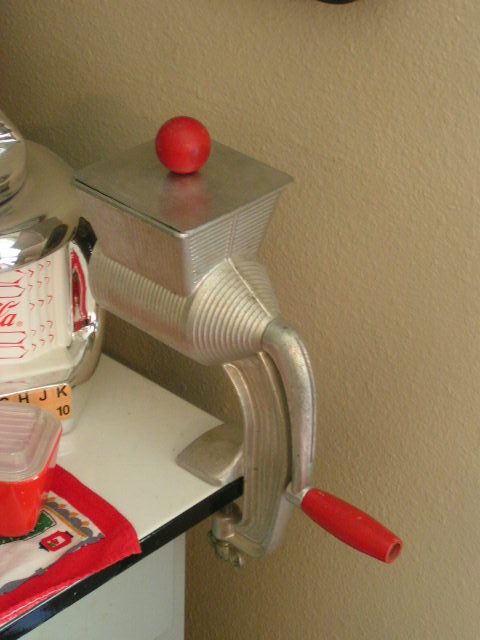 The modern food processor of the day was not electric! Different drums were placed inside the mouth of this utensil depending on whether the cook wanted grated, sliced or zested. The food was fed through the hopper with the turn of the handle. 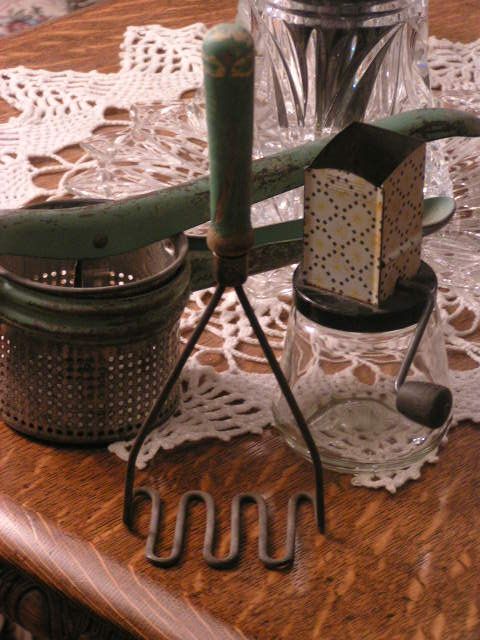 This nut chopper was my grandmother’s and I still use it. You turn the handle and the nuts are grabbed by sharp teeth that cut them and then push them through more blades. The potato ricer to the left is from my husband’s family as is the wooden handled potato masher in the foreground. 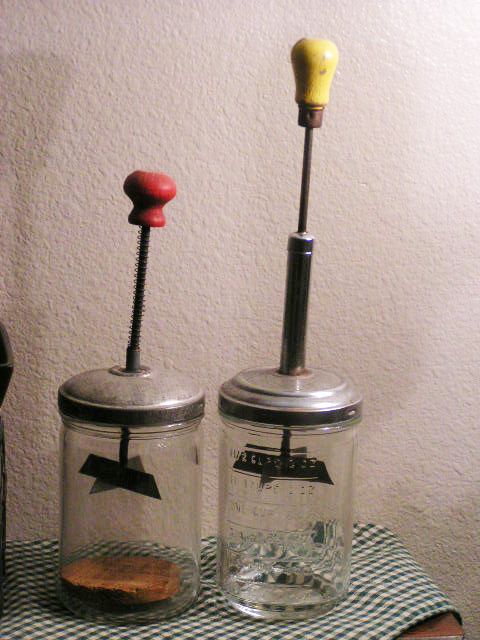 Other choppers were used to dice onions, garlic and other small veggies. 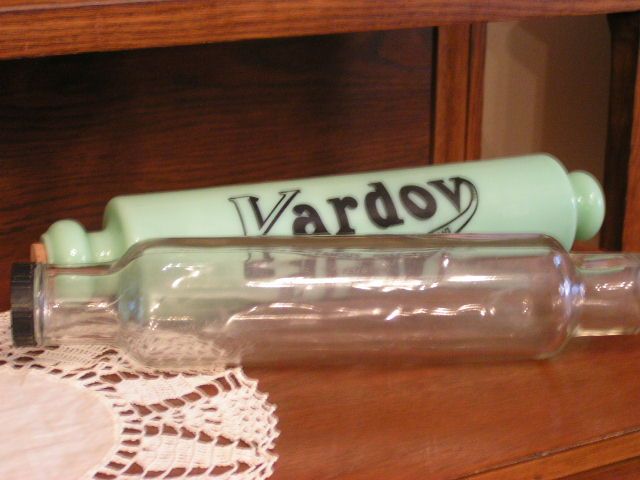 Wooden rolling pins, as today, were common and cherished. But glass rolling pins were not uncommon either. They were great for buttery pastry dough because they were filled with ice and water , capped and provided an icy cold surface to roll out the dough. The clear glass rolling pin was my grandmother’s. The jadite is not antique, but is a replica of an old rolling pin. 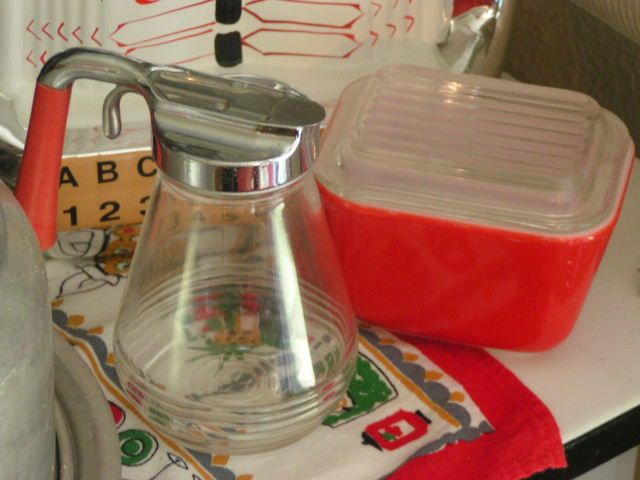 Syrup dispensers haven’t changed much over the years, except for the telltale wooden handle of the vintage ones. A red, glass refrigerator dish brightly colored the refrigerator. 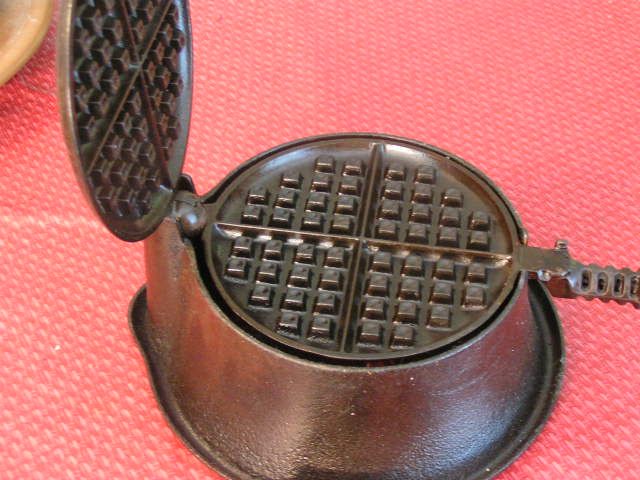 Of course, no household could do without a waffle iron and for the early 20th century, wood cookstove, a Griswold cast iron model was just the ticket with its tall base for perfect waffles. And perfectly seasoned, this was the first “nonstick” cookware! 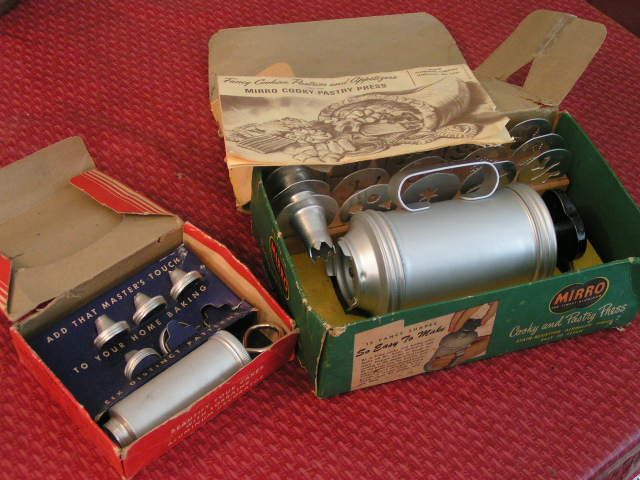 In the ‘50’s Mirro introduced a handy cookie press with all kinds of wonderful shapes to create beautiful cookies. I grew up turning out cookies at Christmas, sprinkling colored sugar balls and sugars on them to decorate. An aluminum cake decorator came in handy too. 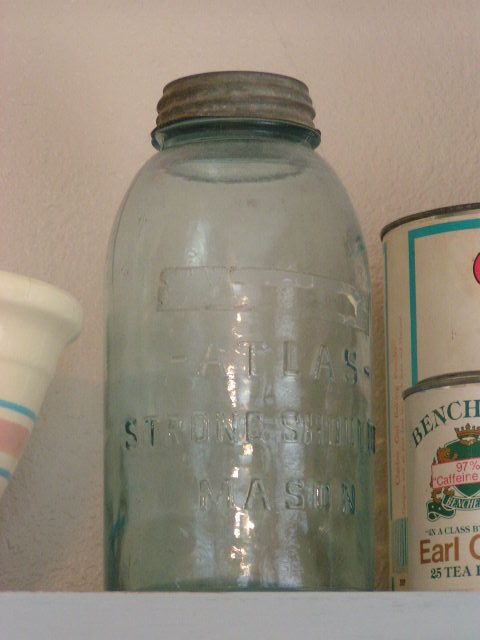 Blue Atlas and Ball canning jars were sealed with zinc lids to hold meats and goodies from the garden. 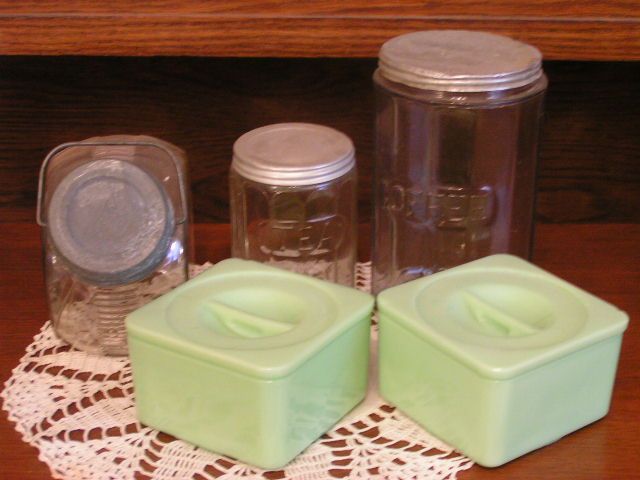 There was no Tupperware or Rubbermaid back then and for the early “ice boxes” and newer electric Frigidaires, glass refrigerator dishes provided safe keeping for leftovers. These are made of Agite Jadite. And for those with special kitchen cabinets first created in Nappanee, Indiana, called Hoosier, tea, coffee and sugar were kept in special glass canisters. 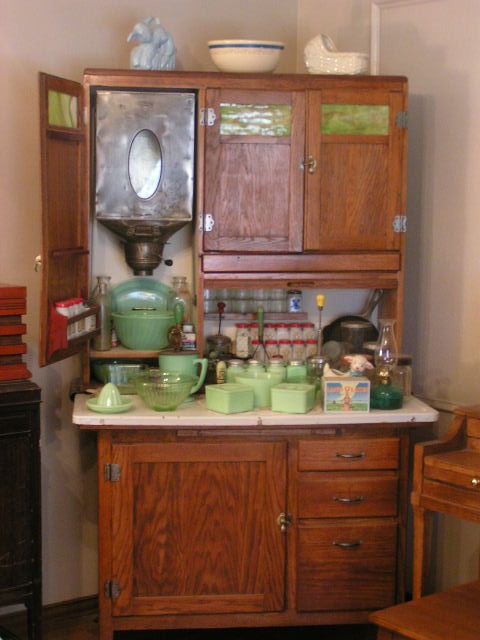 This original Hoosier style cabinet called a Boone Cabinet – circa early 1920’s – was kitchen central for the lucky cook. The large sifter holds an enormous amount of flour and actually pulls out on jointed arms over the floor to make it easier to load the flour. The white jars with red caps are vintage spice jars. The doors are decorated with the original cuts of agite glass and the open cupboard below can be hidden with the tambour door that smoothly rolls down. 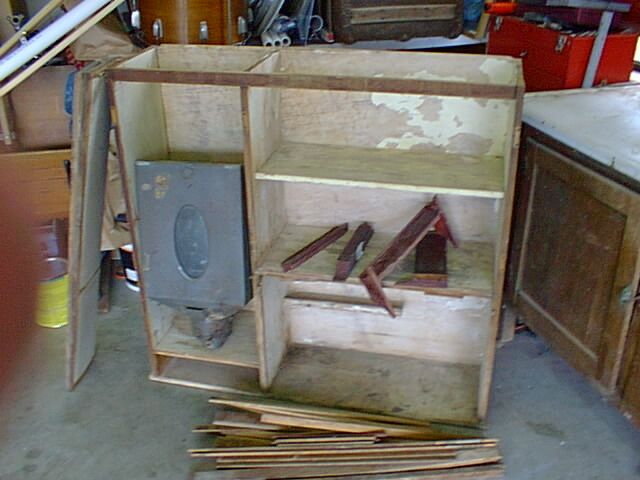 This is what the cabinet looked like before I refinished it and put it back together!! The pile of sticks is the tambour door in pieces. I am rather proud of that project. Mr. Fix-It wasn’t convinced that I could fix it. 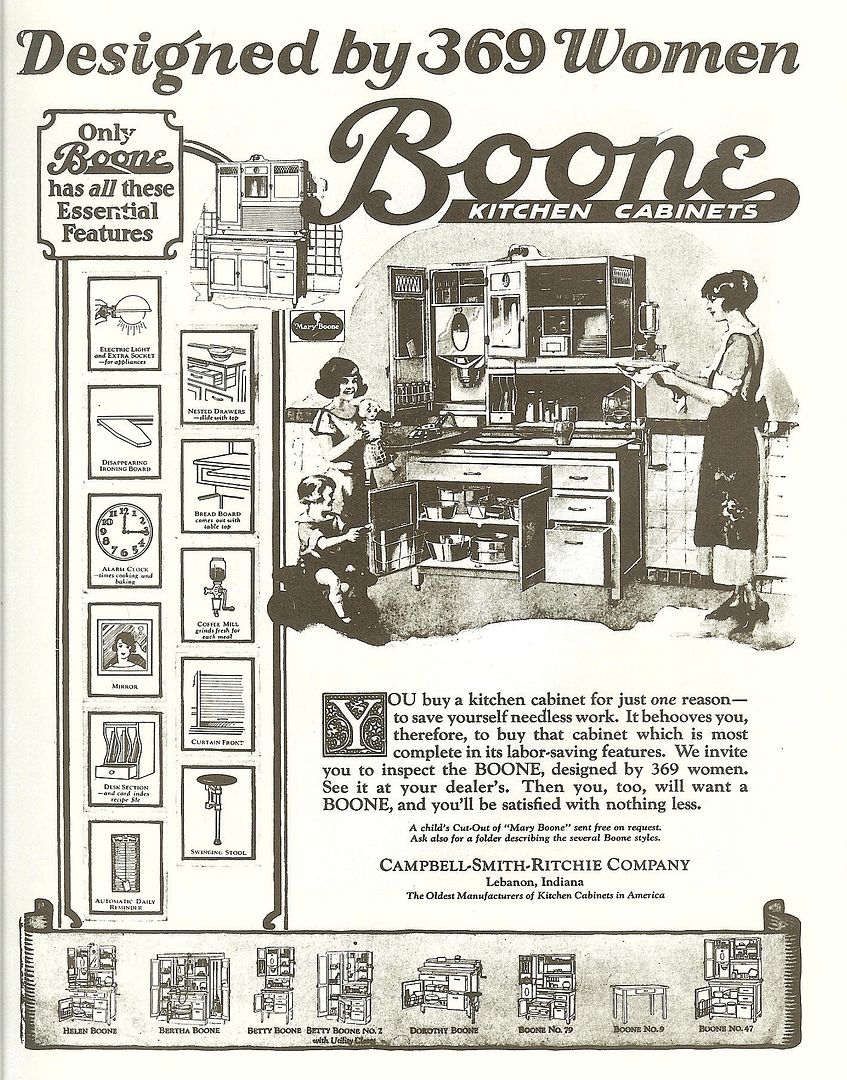 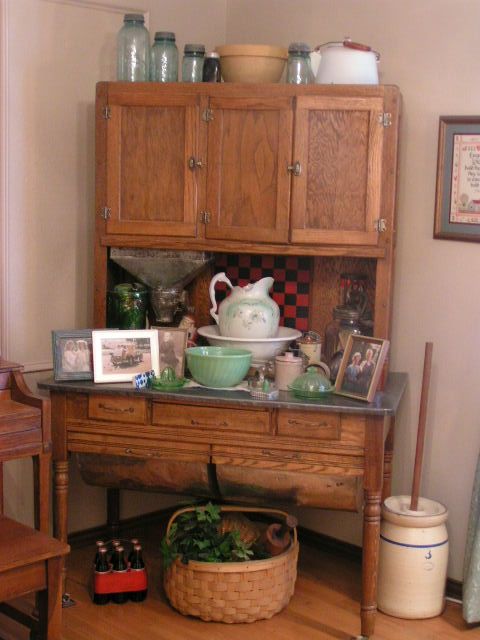 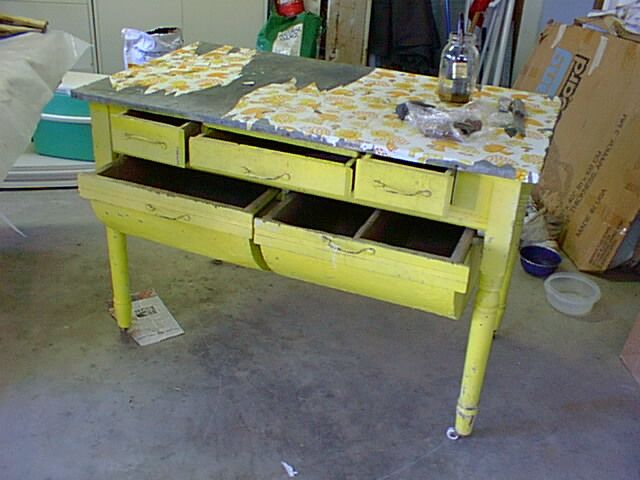 This cabinet was a real pill to refinish too. Somebody had spray-painted it yellow and covered the zinc top with 60’s era psychedelic mushroom contact paper . The turned legs were fun too. A wire brush was all that got the paint out of the cracks. I love to refinish furniture because I love working with wood, but I also enjoy watching the process of going from ugly to beautiful. 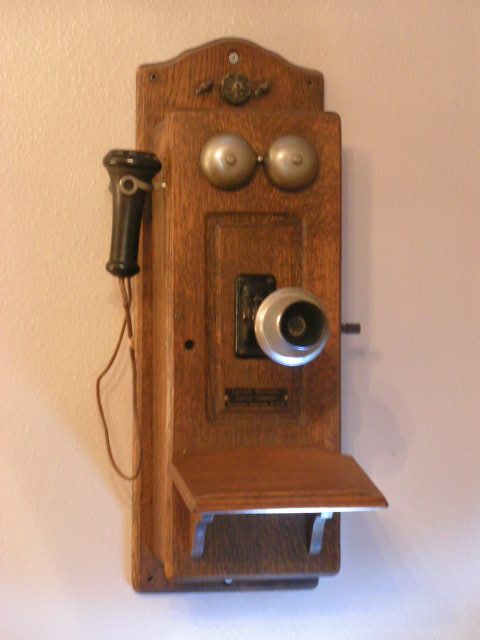 Life changed drastically when people were able to call each other on the new telephones. This one has been in my family since it was my great aunt’s. 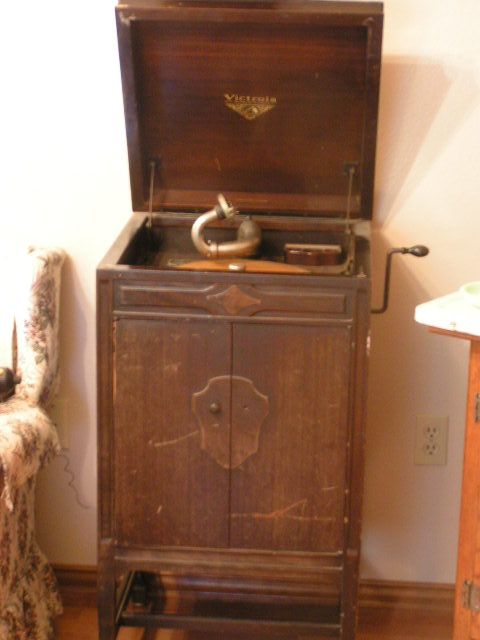 The Victrola entertained the family with music and talking records. This was my great-grandmother’s and is one of my next refinishing projects. 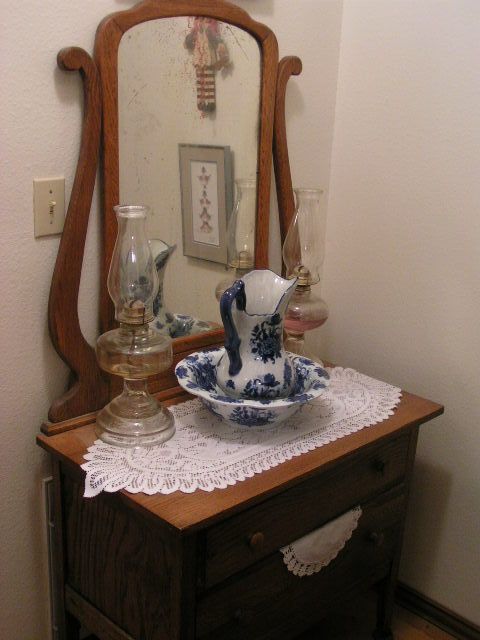 The bowl and pitcher was a must for daily cleansing and kerosene lamps gave light in the evenings. An oak washstand was the precursor to our bathroom vanities. Just a little bit of info: the lamp on the left is from the early 20th century as the wick section is threaded to screw into the bottom half. The one on the right is a newer lamp since the wick section has a threaded ring that screws over the bottom half. 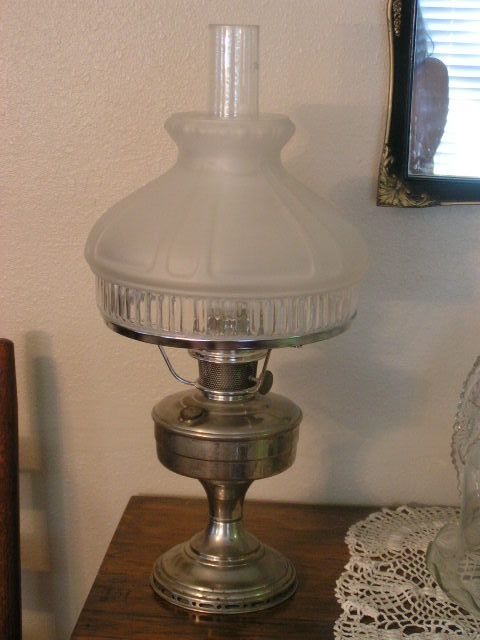 More elegant lamps graced stately homes. This pewter lamp with frosted glass globe is very pretty. 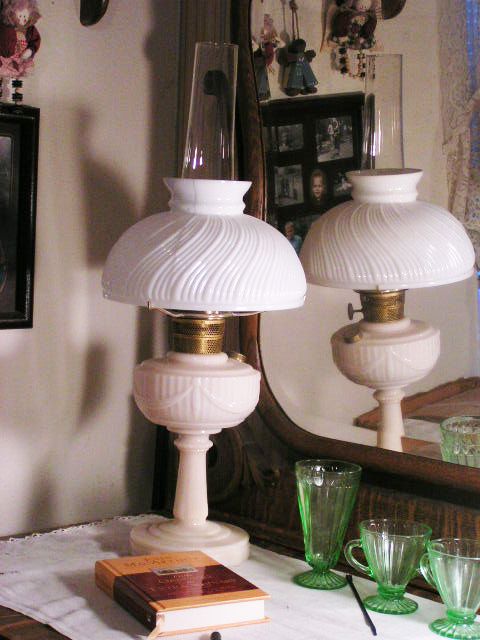 But nothing compared to the towering Lincoln Drape lamp. It was elegance deluxe and is made of agite glass all the way to the base. This was Mr. Fix-It’s mother’s. And so there you have a little bit of history in pictures. I hope you enjoyed the tour.  |
|
Oklahoma Pastry Cloth™ Company on Facebook
|
 |


 Homestead Revival
 Paratus Familia
 Rural Revolution