Archive for the ‘Unique Gift Ideas’ Category


The More Things Change…And All That


Wednesday, April 15th, 2015

 photo TheOkieHomeMaker_zpsd701b0ad.jpg


It’s been a long time since last Fall, I know. And a lot of things have happened – busy, busy, busy. Lots of changes and lots of work but the time away from the blog has been good for me. I’ve really focused on getting my ankle and feet back as normal as possible, with therapy, exercises and swimming. Yep, swimming. I am a regular Esther Williams now – well – minus the pink, sparkly swimsuit, fountains, lighted swings, rings of fire and synchronized swimmers. My swimsuit is more like something from the 1920s, including the skirt and the colors, white and black. I haven’t included the striped tights or the big hair bow, but I’m close. I’m taking a water aerobics class at the local college and doing free swims on top of that. The summer Olympics are the next step. I just haven’t been able to find a coach who believes my hair is platinum blonde and not gray.


But most exciting of all – we have a wedding coming up in just a few months – Sir Flying Ace is getting married! And the coolest thing is that he’s bringing into the family our own Ms Amelia Air-Heart – a lady pilot and aviation mechanic who is beautiful, smart and who has her own wrench with which to handle Sir Flying Ace when he gets out of line. Wish I’d thought of that. We are very excited.


 photo DSC_1015_zps70l6peab.jpg


Basically, however, things have been pretty normal and I have continued down the same path of lunacy which has always been my life. An incident a few days ago illustrates this fact. First, I’ll set up the background. Mr. Fix-It and I are diligently trying to lose weight. I am diligent. He’s a man. That means that I struggle daily to count my calories, do my exercises, record every drop of water that goes into my mouth and faithfully weigh every Monday to note that I’ve gained another pound. Mr. Fix-It, on the other hand, has cut out Sonic Chocolate or Strawberry shakes and has lost 10 lbs in the same amount of time. I’m just wondering why, if we women came from a man’s rib, we didn’t get that male characteristic to go with it – the one that allows men to eat a foot-long sandwich and a Krispy Kreme donut and lose 2 pounds in one afternoon.


Anyway, we’ve been on this long, calorie restricted journey and so the other night a special salad sounded really yummy. We had some leftover, grilled, New York Strip steak, so I decided to create a salad of mixed greens, iceberg lettuce, cucumbers and crumbled blue cheese and low-calorie raspberry-pecan dressing topped with sugared pecans and sliced New York Strip steak.


I needed to sugar the pecans and so added a tbsp. of butter to a stainless skillet, melted the butter and tossed whole pecans in the butter until coated. Then I sprinkled a mere 1 tsp of sugar over the pecans and continually stirred and turned until a caramelized coating formed. Ever the taste tester, I decided that I needed to know if I had used enough sugar and put a little of the caramel onto a spoon. I vigorously blew on the liquid but as I did so, it being slippery with butter, slid off the spoon right onto my lower lip – on the inside AND the outside. I dropped the spoon and let out an, “Oh! Oh!” and tried to remove the caramelized sugar with my tongue. The sugar had hardened and adhered to my lip, still burning through soft layers of skin to the point that I was terribly afraid I would have what looked like a lip piercing gone horribly wrong. I stuck my face under the kitchen faucet and poured cold water over my mouth. The burning was excruciating.


It was then that I remembered ice. Ice! My mother always used ice on a burn. So I grabbed a piece of ice out of the icemaker and shoved it between my lips, making sure that it was right on the burn….where it stuck…frozen to my skin and adding burn onto burn while adhering to my top lip too. I couldn’t open my mouth. Both lips were stuck to the ice, frozen like Flick’s tongue to the flagpole in ‘A Christmas Story’. Now I was really in pain and, though I was by myself in the kitchen, I moaned and squealed as I raced back to the sink and back under the solid stream of water coming out of the faucet. The ice came off, but the inside and outside of my bottom lip were severely burned and now swelling. When you look like you took a left punch to the jaw, how do you tell people that in reality you got your lips stuck together with ice??


So as you can see, nothing has really changed. Except that I AM back and ready to roll up my sleeves to see what more damage I can do. It’s a gorgeous Spring at the Oklahoma Pastry Cloth™ digs and the lilacs are in full bloom. The garden is in, asparagus is up and we’re just waiting on okra planting weather. Hope you are having as beautiful a Spring as we Okies are!
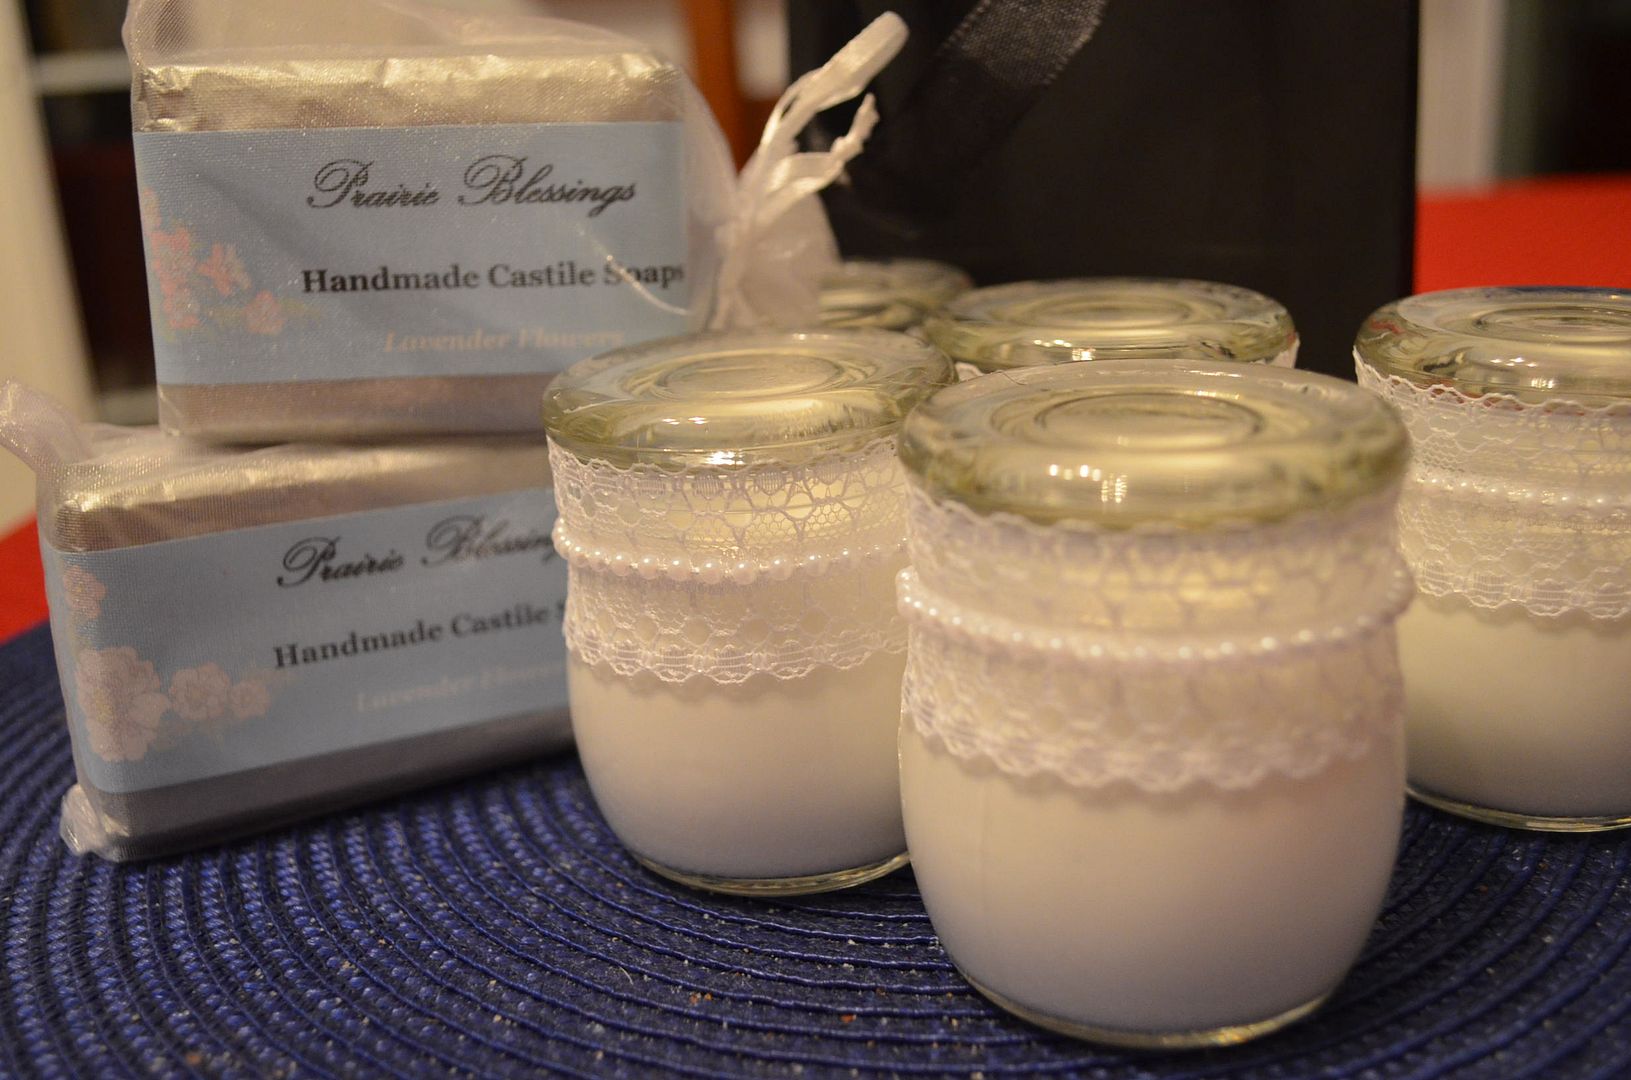

 photo DSC_1027_zpsm4wjdmpw.jpg


I just have to show you what we’re doing here in our shop. Weddings seem to be teeming ’round here and brides are thinking “hostess” and “thank you” gifts. We are putting together some pretty cute ones with our Prairie Blessings Soaps and our new body cream, totally custom made to the brides’ specifications. This particular bride requested everything be Lavender and we gladly obliged. We pretty much pull off any fragrance desired and even play around to create something new if requested. Keep us in mind for your next really, really special occasion or gift needs. For custom orders, just give a shout to 405-275-5639 or email me at oklahomapastrycloth@oklahomapastrycloth.com.


Happy April!!


 photo DoughlightfullyYours_zps6d6bcd4d.jpg

MB


A Fun Project For the Kiddos

Monday, May 9th, 2011


“Stained Glass Windows”


Image and video hosting by TinyPic


Friday afternoon, I had the pleasure of spending time with a precious group of home schooled girls who have formed a group called, “Keepers”. They are all ages and are polite, gentle, giggly and ready to tackle anything that is put in front of them. I was asked to do an art project with them that could be accomplished by all ages, even the very young, and so I decided that mock stained glass windows were just the thing. The beauty about this project is that there is no right or wrong to it and even tiny fingers can paint glue and tear paper.

I loaded up the car with supplies, including a roll of newsprint for covering the dining table where we would be working. Most newspaper offices will sell you their end rolls of newsprint which offer you a plentiful supply of the paper for everything from covering tables to long murals for tempera paint. Our office charges by the inch thickness of paper on the roll.


The supplies that you will need for this project for each child are as follows:

  • A plain wooden frame that is open on the back with no type of channel
  • A piece of 1/8″ plexiglas cut to the size of the frame that you choose to use. You can purchase plexiglas at any local glass company and they will cut it to size. It will run you anywhere from $1 to $5 depending on the size.
  • paint brush
  • Good quality, thicker tissue paper like you find at Hobby Lobby – lots of colors
  • A Medium or large black Sharpie Pen
  • Elmers glue
  • a small paper cup
  • tape
  • Stained glass pattern – you can print one from this site or you can draw your own. I drew these patterns just for this project. They would not be suitable for actual stained glass work because of the layout.


  • Image and video hosting by TinyPic


    Cover the table with newsprint or an old tablecloth and place the stained glass pattern onto the table. Lay the plexiglas over the pattern and center. Place tape at either side of the plexiglas onto the pattern to hold the plexiglas in place. Using a Sharpie pen, trace the pattern onto the plexiglas. For thicker lines, go over the lines again. Remove the tape and pattern and turn the plexiglas face side down (side with the drawn pattern down).


    Image and video hosting by TinyPic


    Pour Elmer’s glue into small paper cup and add enough water to make it easy to paint – about 3 parts glue to 1 part water. Using a paintbrush, paint the glue mixture onto a portion of the traced pattern on the plexiglas. Tear pieces of tissue paper to fit shapes and lay onto the glue. Paint over the back of the paper, once on the plexiglas, with a thin coat of the glue mixture.


    Image and video hosting by TinyPic


    Offer lots of different colors


    Image and video hosting by TinyPic


    Continue painting each section of the drawing with glue and add different colors of paper according to what part is being completed. Be sure that the back of the papers are painted with the glue mixture as well.


    Image and video hosting by TinyPic


    This is one time that “staying inside the lines” has absolutely no application! Colors can overlap, glue can get splattered. It doesn’t matter.


    Image and video hosting by TinyPic


    Young children are really successful with this project because it does not have to be exact.


    Image and video hosting by TinyPic


    A dove is starting to emerge!


    Image and video hosting by TinyPic


    The youngest one has finished. A damp cloth easily removes any wayward glue. When the glue has dried, hot glue the plexiglass into the frame by placing little dots of hot glue in each inside corner of the frame. Display on a wire easle or add a hanger and hang in the window on a suction cup hanger that can be purchased at Hobby Lobby or Michaels. Be sure and choose a window that does not have direct sunlight as it will fade the colors of the paper.


    Image and video hosting by TinyPic


    They all did such a good job, don’t you think?


    This is an easy and fun project for kids of all ages. I hope that you get a chance to try it.


    Happy Crafting!


    MB
    Please join us on FaceBook!!


    Join in the conversation by leaving a comment below!


    Image and video hosting by TinyPic


    Craft Corner: Stretching a Buck

    Monday, February 28th, 2011


    Money May Not Grow On

    Trees, But

    It Makes a Mean Flower!


     photo TN_money-green-dollars5_zps4c56929c.jpg


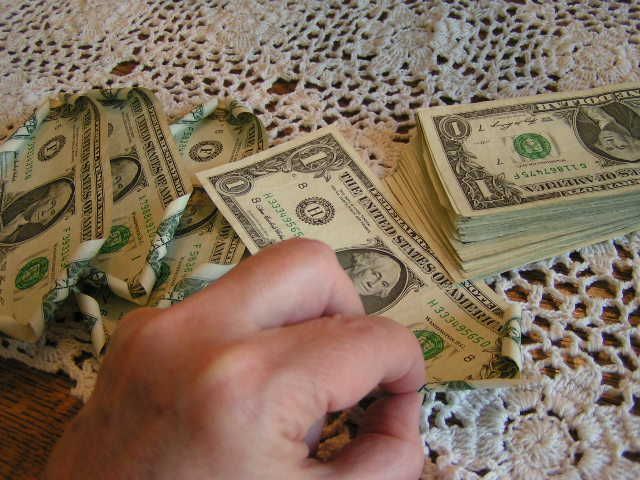
    I thought that I would take a little break from cooking and canning and share something fun that I like to do for bridal showers, graduations, weddings and birthdays. Spring is a comin’ and that means all kinds of those things! I am sure that some of you have seen these roses made, but I like to add a little zing to the presentation. The roses are quite simple to make and it is so fun to see the look on the recipient’s face upon receiving a bouquet of “money roses.” And it LOOKS expensive!!


    All you need to make the roses is:
    ~Crisp, new bills in whatever denomination you choose (I use dollar bills – yes, I’m cheap but I can make more flowers!)
    ~Floral wire
    ~Floral tape
    ~Leaves from silk flowers
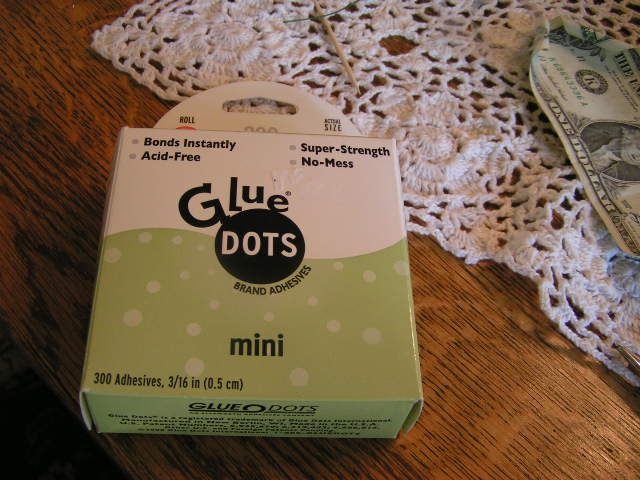
    ~Glue Dots


     photo PICT0393_zps7909223f.jpg


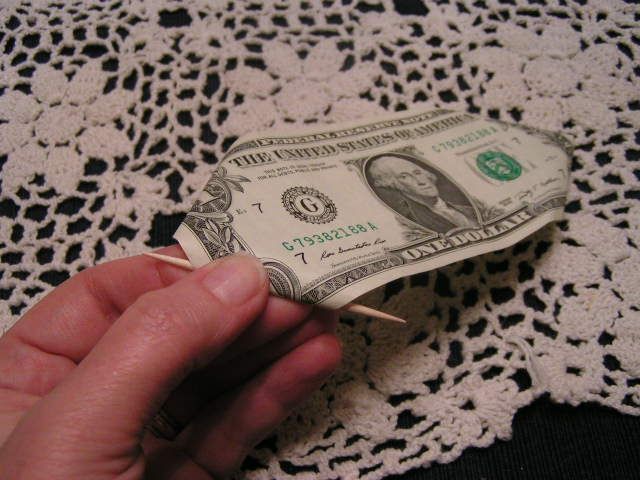
    Choose which side of the bills that you want to be facing up and determine how many roses you will be making. You will be using three or four bills per rose. I usually do $20 into 5 roses. Prepare to make the center petals for each flower. Using a toothpick, roll the corners of the bills, that will be the centers, around the toothpick and roll until you have rolled past halfway of the short end of the bill. Repeat this process on all four corners. I do the center piece in two different ways: Either using it with the corners rolled toward the inside or with the corners rolled to the outside. I just judge which way will look better for what I want to do. You will see what I mean later.


     photo PICT1219_zps69f4fb6e.jpg


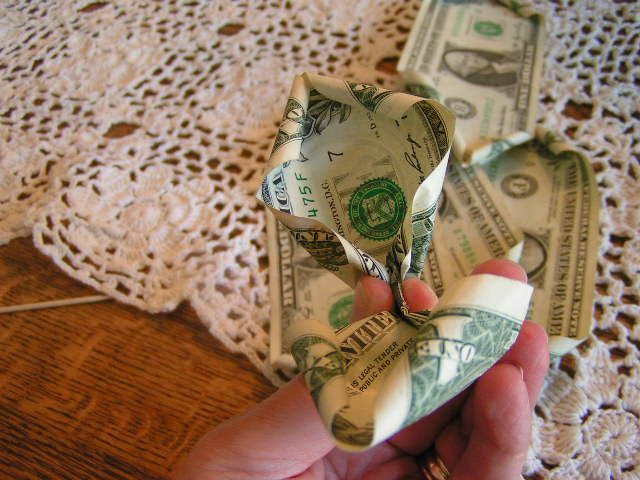
    Roll all of the rest of the bills with the corners rolled under, away from the the top.


     photo PICT0398_zps7c72030d.jpg


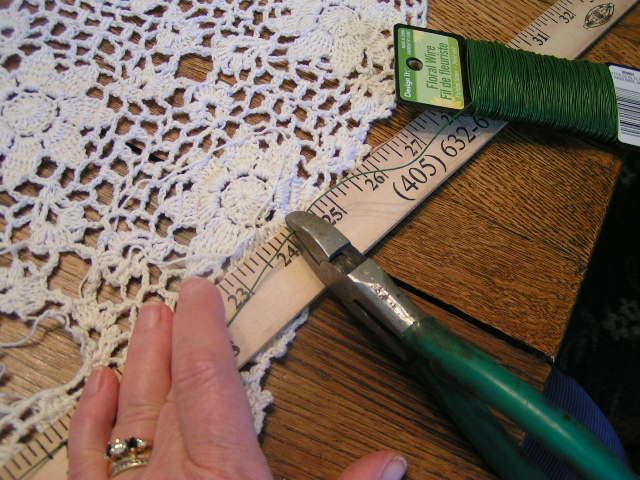
    For each bill, cut a piece of floral wire about 24″ long and fold in half


     photo PICT0397_zps76e1d465.jpg


    Pinch the center of the bills that will be the middle of the roses – in this case, the ones with the corners rolled to the inside


     photo PICT0400_zpsacd494c6.jpg


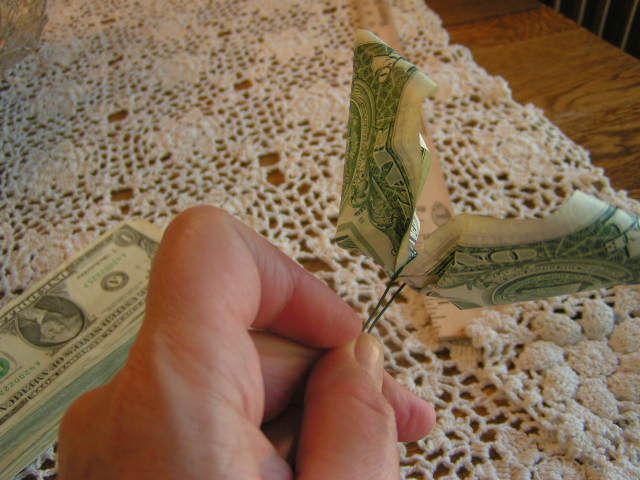
    Put a wire over the pinched center of the bill and twist wire tight with no more than two twists and lay aside in a pile


     photo PICT0402_zpse4857132.jpg


    Put wires over all of the other “petals” with the rolled corners rolled under the bills. Twist them tight as above and lay them aside separate from the ‘middles’ that have the corners rolled up toward the center.


     photo PICT0403_zps20a73b71.jpg


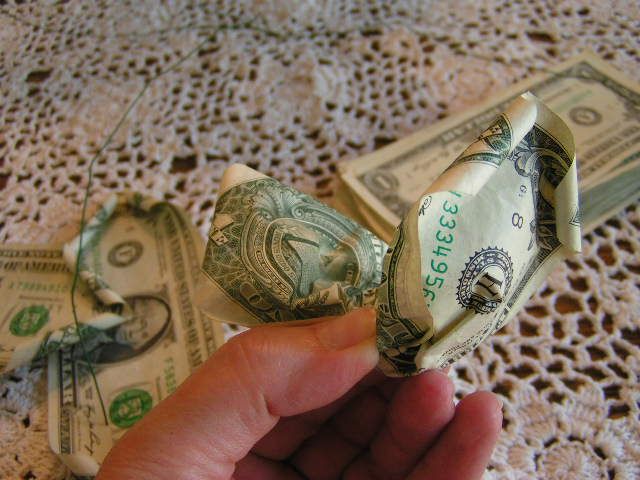
    Place one “middle” in the center of one of the bills that will be petals and hold the wires together.


     photo PICT0406_zpsa9aeedbe.jpg


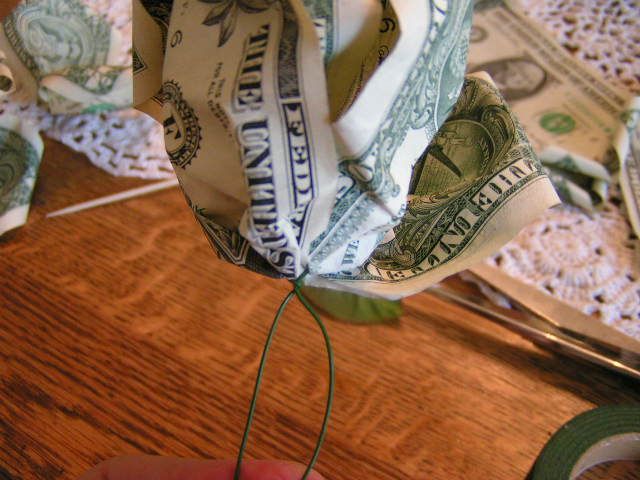
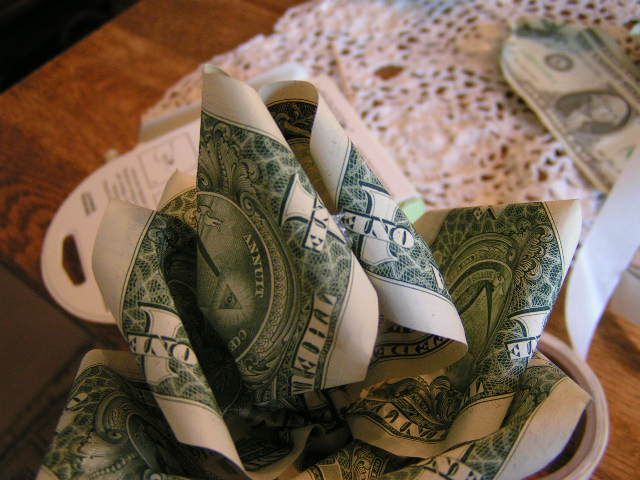
    Place a third bill perpendicular to the second bill and hold the wires together. You can add a fourth petal perpendicular to the third for a fuller rose. Press/pull the bills together from the base to tighten the flower.
    Twist all the wires together


     photo PICT0409_zps80e4f5e5.jpg


     photo PICT0407_zpsbae14841.jpg


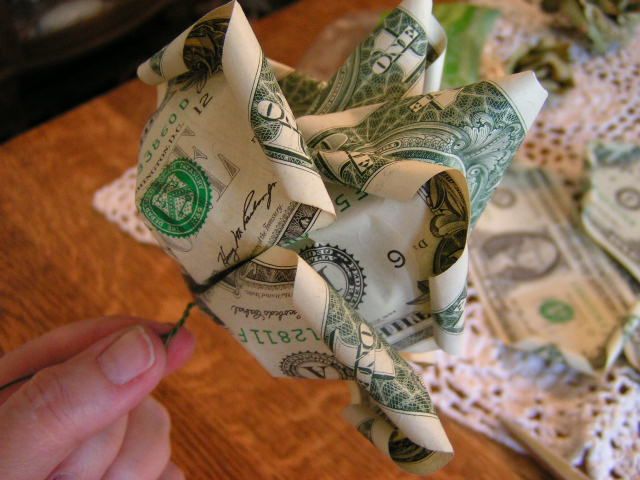
    If the center petals have the corners rolled inward, use a glue dot to pull them together in a point. If you choose to use all bills with the corners rolled under, use a glue dot on the two edges of the center bill to pull the two sides together.


     photo PICT0411_zps37ba9698.jpg


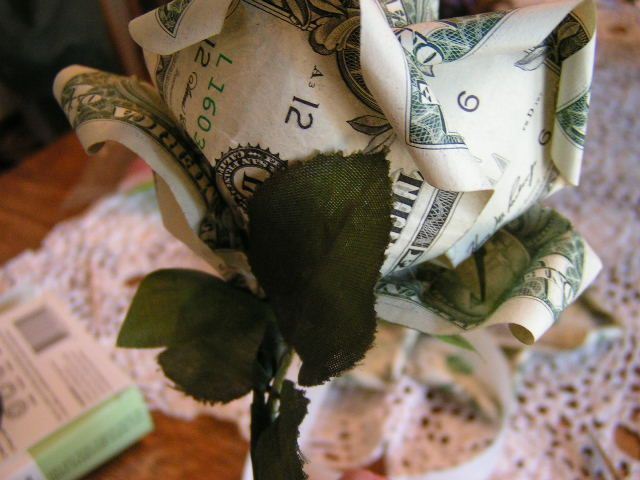
    Place a few leaves around the bottom of the flowers and, using floral tape, attach them to the base and wires.


     photo PICT0412_zps32a512b3.jpg


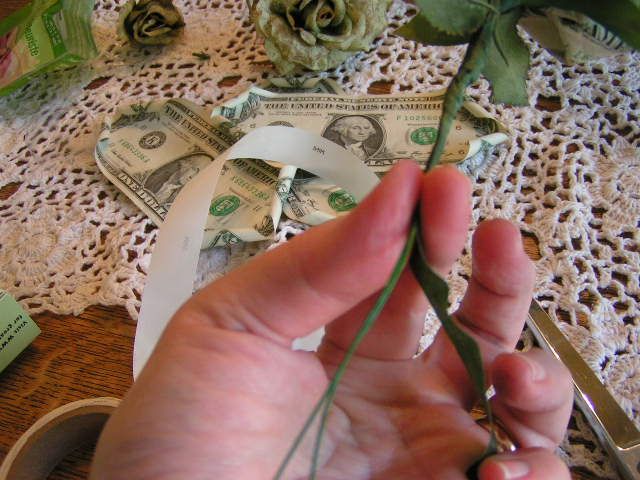
    Tightly wrap, stretching as you go, several layers of floral tape down the wire to produce a “stem”.


     photo PICT0414_zps6549d0fb.jpg


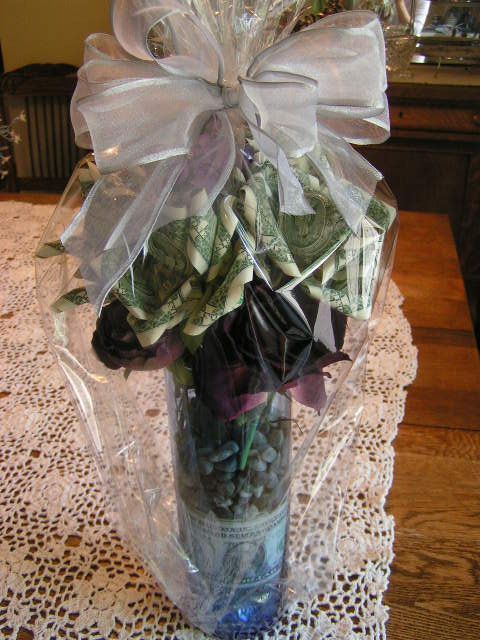
    I like to arrange my “roses” in a tall, cylindrical floral vase that costs all of $3 at Walmart. They come in all different colors and it is fun to fill the bottom with colored rocks or glass. Sometimes, I will put two one dollar bills in the bottom facing out just to add some interest. Here, I have added a few silk flowers as the base of the arrangement and then put the “roses” above them. The arrangement is surrounded by a cello bag, which can be purchased from Walmart or Hobby Lobby, which is gathered at the top with a rubber band and then tied with a bow and ribbon.


     photo moneyroses4_zps6b0867eb.jpg


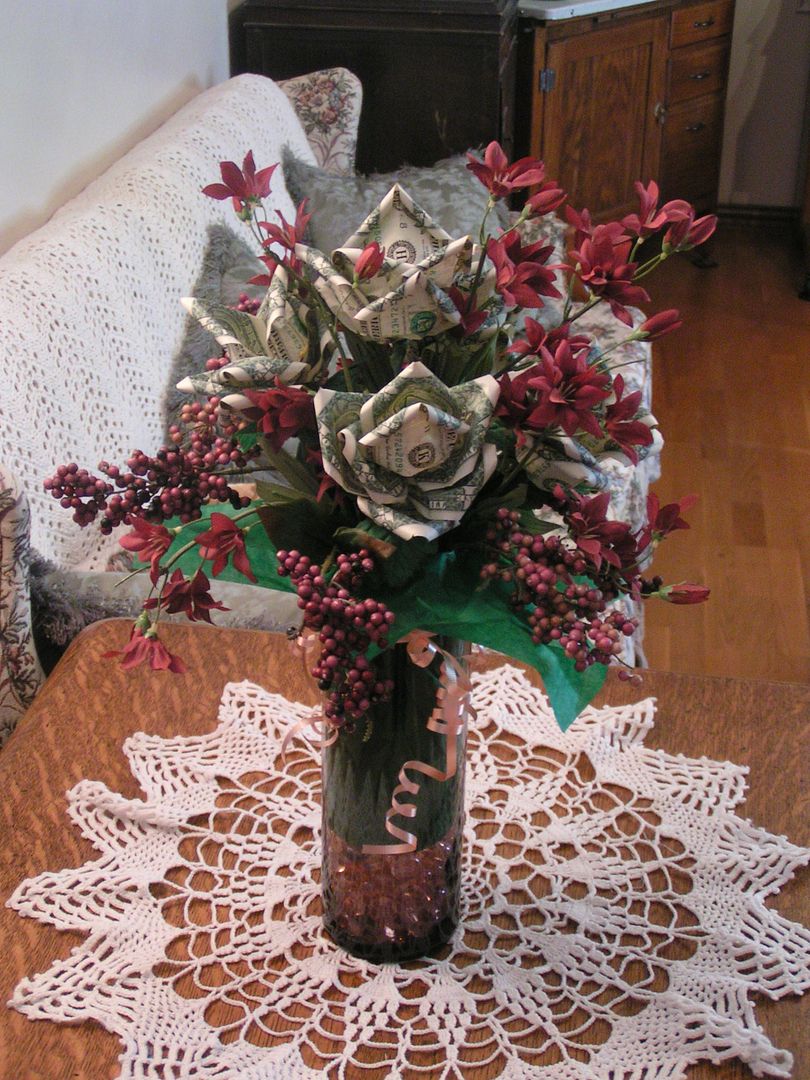
    This one is a little more onate with multiple silk flowers, berries and curling ribbon. I put glass beads in the bottom and then took green tissue paper and pushed down inside the vase with the corners hanging out around the top of the vase so that it would act as a backdrop for the arrangement. In this arrangement, the centers of the roses are rolled under like the rest of the petals. Just thought I’d show the difference.


    These roses look like they are difficult to make, but they are EASY and you can do it in one afternoon. And talk about a conversation starter!!

    Happy Crafting!

    MB
    Please join us on FaceBook!! And don’t forget to leave a comment below in the comment section!


    Gift Ideas

    Friday, February 4th, 2011


    Unique Valentine’s Day

    Gifts!


    Introducing the Tea of

    the Month Club!


     photo untitled_zps96ca4156.png


    Valentine’s Day is just around the corner! If you want to know the history of this “Day of Love” ala the Oklahoma Pastry Cloth™ historians, you can catch it at last year’s post. I’m sure that it is accurate. Really.


     photo PICT1189_zps92ce6bdb.jpg

    Tea Of The Month Club


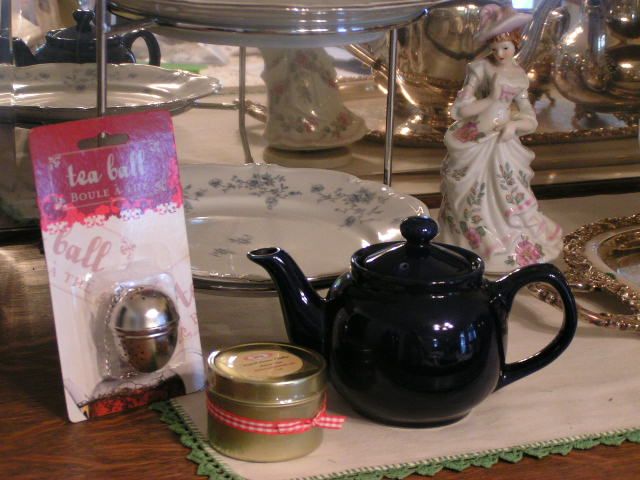
    Our newest and most unique gift, though, is our new club plan that will tickle any tea lover’s fancy. The new Tea of the Month and Tea and Treat of the Month Clubs were introduced in January and are already a hit. The Tea of the Month Club can be given for three, six or twelve months and each month the recipient receives a tin of a new flavor of tea. The first month includes a 2-cup tea pot and tea infuser too!


     photo PICT1183_zps6dd6ab4a.jpg

    Tea and Treat of the Month Club


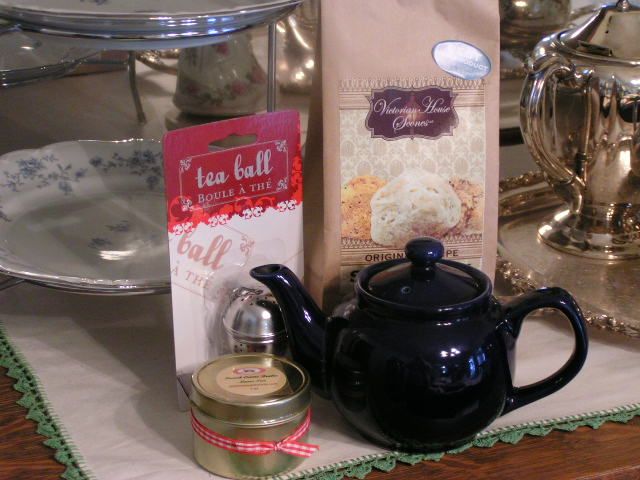
    The Tea and Treat of the Month is also offered in increments of three, six and twelve months but has the bonus of a new treat along with a tin of tea each month. Scones, muffin and cookie mixes, as well as our chocolates, are included with each delivery. The first month also includes a 2-cup tea pot and tea infuser.


     photo PICT0278_zps2f41617f.jpg

    Bread Basket Gift Set


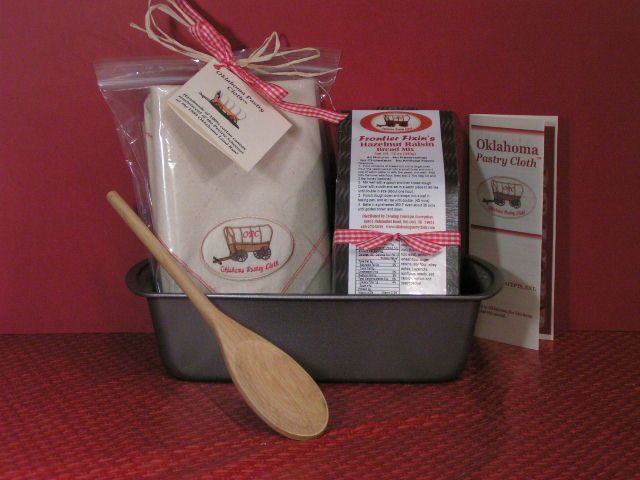
    We also have a large variety of readymade gift baskets that include the Oklahoma Pastry Cloth™ for the cook out there, male OR female. Check out the shopping page!! And have a Happy Valentine’s Day.


     photo MC900444779_zpsfe7bcf10.jpg


    Happy Shopping!


    MB
    Please join us on FaceBook!!


    Join in the conversation by leaving a comment below!