  I like to think of myself as “Low-maintenance”. It doesn’t sound all that spectacular, I know. Mr. Fix-It says that he considers me to be “pretty low maintenance”. I think he appreciates that I don’t beg him for the latest $250 shoes or a bigger house with swimming pool and hot tub.. I’m positive he was relieved when I liked a Nissan Versa rather than a Mercedes (as if we could afford a Mercedes!). And it’s been a really, really, really long time since I’ve gotten a piece of jewelry. I don’t wear it and so I don’t care about it. I’m at the age where I’ve finally figured out that “you can’t take it with you”, and so practical and useful in the here and now is more on my wish list than gorgeous and flashy. Out here in the country, the squirrels, cows and bunny rabbits could care less whether any of us has a diamond or a cubic zirconia. I guess what I’m trying to say is that I get more excited over kitchen items then I do a fur coat! So, you can understand how excited I’ve gotten over a new product introduced to me by friend and reader, Shari. As an avid canner and as a canning teacher, any new-fangled canning item is a treat for me. When I learned about the Tattler Reusable Lids, I just had to try them. These lids can be used over and over instead of tossing them as one must do with traditional lids after use. The website offers free shipping, which is awesome, and sometimes there is a sale – which is how I ordered mine! I have been waiting until my first crop – the strawberries – came in to try the lids out and so this past weekend’s pick of 8 quarts of strawberries gave me the opportunity. 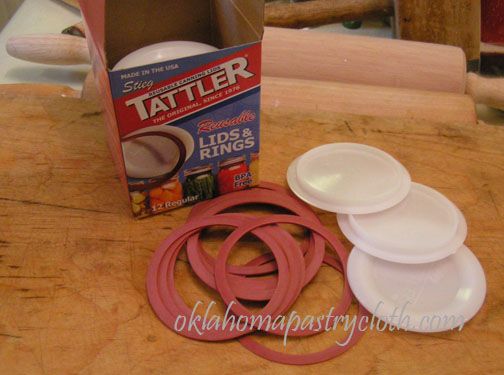 A box of 12 reusable lids includes 12 plastic lids and 12 rubber rings. These items are BPA free. 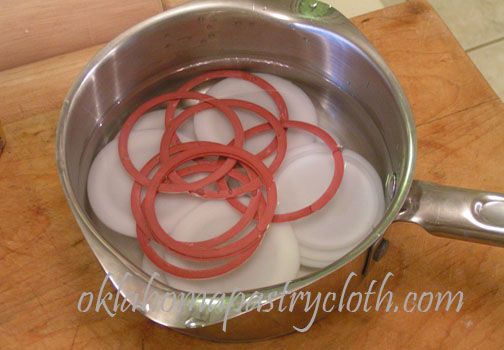 The lids and the rubber rings are prepared in hot water (do not boil) just like the traditional metal lids. 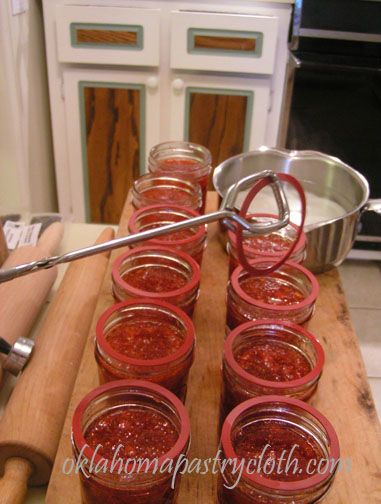 After washing the rims of filled jars, the rubber rings are placed onto the rims. 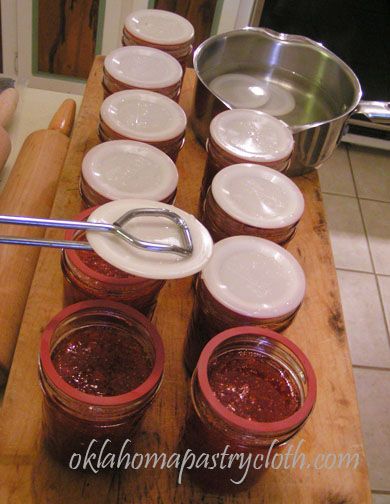 Then the lids are carefully placed over the rubber gaskets. 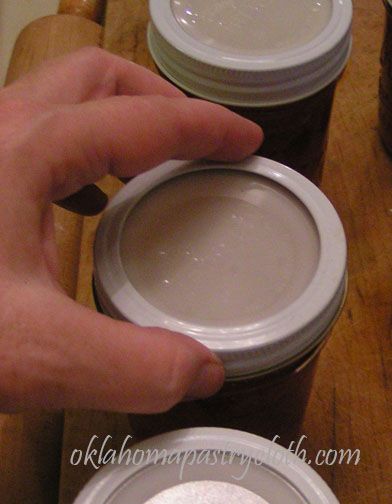 Metal rings are screwed onto the jars but not tightened. Using one finger to press onto the lid, finger tighten the ring. (I had to use one hand to take the picture so no finger on the lid!!) 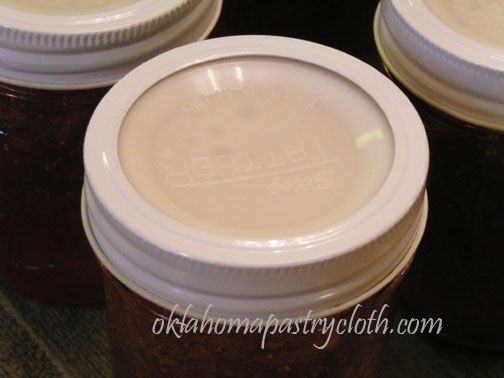 Jars are processed exactly as jars with the traditional lids. Since this is strawberry jam, I waterbathed the jars for 15 minutes. When jars are removed, the lids are immediately tightened. When the jars have cooled completely, remove the metal rings and pull gently on the lids to make sure they have sealed. You can either store with the metal ring reattached or without it. To use the food in a jar, a dull table knife is gently inserted between the rubber gasket and the glass rim to pry up the lid. Once used, just wash the lid and rubber ring in warm, soapy water and store for next time. Reusable! Cool, huh?  |
|
|
Oklahoma Pastry Cloth™ Company on Facebook
|
|
 |
|
|
Archive for the ‘Let’s Cook!’ Category
Adventures In Canning
Tuesday, May 1st, 2012
Original Fish or Chicken Rub
Tuesday, April 24th, 2012
  As is usual for out in the country, the internet has been down for a few days and my I-phone has served for emergency web surfing. Yes, there is such a thing as emergency web surfing. One must bare one’s soul on Facebook and email or life comes to a screeching halt! And yes, I do know the definition of addiction. But the I-Phone is no substitute for a laptop when it comes to blog work. And speaking of baring souls, I guess I’ll have to come clean and admit that I can really make a mess of things. Yep. I have done some really dumb things in my life, but I’ll have to say that last week proved that I can top even the dumbest things I’ve done. On Friday, my daughter and her husband asked us to babysit for our little 4 1/2 month old granddaughter so that they could go to a banquet. At 3 in the afternoon, I gathered supplies at their house, placed diaper bag and gear into my car and snapped the carseat, little granddaughter snugly harnessed, into the base which is in the back seat. I tossed my keys into the front driver’s seat to have both hands free and arranged everything to my satisfaction. Aiming to run around to the driver’s side, I slammed the back door shut, only to hear a sickening “click” as my car locked all of the doors with a, “See? Who’s in control NOW, sucker!!” I freaked. It was cool outside, but the sun was shining directly onto the back of my hatchback and so I knew that it was going to get warm really fast in the car. I ran up the steps of my daughter’s front porch and started pounding on the door to catch her before she got into the shower. Now, there is one thing that I have come to realize about grandmotherhood. Your grandchild isn’t your child and so there’s this feeling of extra, extra, extra responsibility that goes with the title of ‘grandparent’. I didn’t even think about the fact that my daughter might tell me that I’m an imbecile or that I shouldn’t even HAVE keys to a car in the first place. My only thought was focused on my poor little grandbaby locked in my child-eating car. It was at the moment my daughter opened the door and was quizically assessing my panicked face that I had the humbling feeling that I would definitely be dropping in my daughter’s admiration of my intelligence. I explained what had happened. Without a word, she was quickly on the phone with a locksmith. Well, did you know that locksmiths don’t unlock cars with babies in them? Something about liability. If they don’t get there on time, then they are liable. The locksmith told my daughter to call 911. Next, I heard her tell the situation to the 911 operator and as she hung up the phone, I could hear the wail of sirens in the distance. Pretty fast! A minute later, the biggest, shiniest, reddest fire truck roared into place in front of my daughter’s house (which is in a neighborhood of many, many nosy neighbors) and I would say that the entire fire department unloaded from the vehicle. I am thinking that they all wanted to see what the dumb, old broad looked like who would lock a precious baby in a car. Using a wedge and this thing that looked like a blood pressure checker, they pried the door of my nearly new car about 1/2″ apart and pushed a rod down to the locking mechanism to push on the unlock symbol. Click. Simple as that. My dear granddaughter, hair starting to mat against her head from sweat, was staring at her stuffed cow, blowing bubbles through her tiny lips and carrying on a conversation that only she could understand. When one of the firemen opened the back door, she grinned at him, face all lit up, as if to say, “You having fun too?!” He commented on what a happy baby she is and that she is awfully cute. We think so. I tried to pay him (he didn’t want a hug) but he said that this was just part of the job. Our heroes rode off in their bright red chariot as we waved them on. I am sure that the neighbors still wonder what that was all about. I have learned a new truth. The only people who can retrieve babies from locked cars are firemen. And firemen do it all the time because there are more idiots around than just me! Other people have automatic door locks too and their cars like to show them who’s boss too! I feel so much better. But I will never let my keys off of my person ever again!! Of course, cooking always strokes my wounded self-esteem and so I decided to do a little inventing to really make myself feel intelligent again. Mr. Fix-It had read about a rosemary-ginger seasoned salmon filet, grilled to perfection at some restaurant and as I could see his mouth watering as he tried to tell me about it, I decided that I might as well take a stab at my own version. I had a number of wild Alaskan salmon filets and so I thawed them and set to work throwing together a savory seasoning to rub onto the surfaces of the fish steaks. About a half an hour later, I had sampled a tiny taste of my mixture and decided it was perfect. It worked great as a rub and the charcoaled filets were perfection if I do say so myself! And Mr. Fix-It said they were too. He was a happy camper. This rub would work great on chicken as well. So if you would like to try something with a fresh and different flavor, here is the rub that I threw together. 3 Tbsp garlic powder 3 Tbsp any bottled garlic and herb mix (I used Frontier’s Garlic and Herb) 3 Tbsp paprika 3 Tbsp dried onion flakes 3 Tbsp dried rosemary 2 Tbsp ground ginger 3 Tbsp sugar 2 Tbsp salt Process first 6 ingredients in the blender until a powder. Add salt and sugar and mix thoroughly. Place in airtight container. Use as rub on fish or chicken, coating both sides, and charcoal. 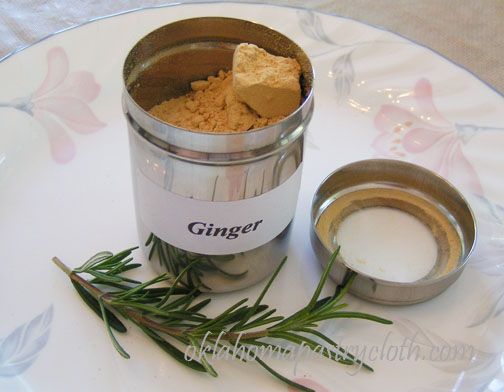 Ginger and Rosemary make this rub taste so unique 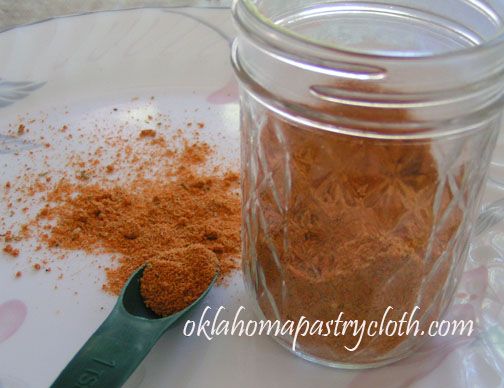 Grinding all of the ingredients, except for the salt and sugar which are added after grinding, makes a uniform rub that can be easily sprinkled and rubbed into the meat.  |
|
|
Oklahoma Pastry Cloth™ Company on Facebook
|
|
 |
|
|
Cooking in the 1930’s Part III
Tuesday, April 10th, 2012
 I’ve been posting some hand-written recipes in my grandmother’s 1931 issue of the Rumford Cookbook as I am trying them out, myself. It is just too neat to see my grandmother’s penmanship on favorite recipes and to know that I am mixing what she used to mix up for her family, including my dad and my Aunt Lois. In my last post, I gave you a little tidbit of my father’s memories as recorded in his book, Sailing Down The River Of Memories. I thought that I would post a few more of those memories here, that I thought you might enjoy: “We churned our own butter. Lois and Dad liked the buttermilk, but I never developed the taste for it. We never used Oleo margarine (called Oleo) although we sold it in the store. During the thirties, oleo came in a clear sack and looked like white shortening because the butter industry had a law passed to keep it from being colored yellow and looking like butter. A small package of yellow food dye was included in the package. The oleo had to be kneaded with the dye until it turned yellow. Sometimes a person didn’t do a good job kneading it because there would be reddish-yellow streaks throughout the oleo. Some mothers didn’t take the time to color it so it looked as if they were serving lard. As I said, we had butter to go with Mom’s jellies and jams as well as wild honey. I don’t remember anyone in the community with a bee hive, but Dad or some farmer might find a bee tree down by the river that they cut down and then divided the honey among friends. Wild honey was dark, strong and delicious on hot biscuits… Mom was a woman ahead of her time. During the summer of 1940, she got the idea of freezing strawberries so she wrapped a couple of quarts in waxed butcher paper and put them in the ice cream freezer [at the store]. Then, she served them for Christmas. Why was this ahead of her time? Because frozen food didn’t come to the rest of the country until 1945 when frozen orange juice and Swanson and Sons frozen chicken and turkey came to market. People really thought she was smart. Oh yes, one winter we put some snow balls in the freezer and had a snow ball fight the next summer. Unfortunately, they got icy and never thawed out, so they sort of hurt when we got hit… Eating in a restaurant was a big event because we didn’t do it very often, but when we did, we went to family types, not the more expensive ones. Dad and I ate at the stockyards where we took cows and hogs. We ate at the ‘dime store’ such as Woolworth or Kresses or Newberry when Mom took us to Joplin. My favorite was the ‘blue plate special’. It was sliced roast beef on a slice of bread with mashed potatoes covered with gravy, slaw and a coke. A real special was a three-decker club sandwich at the Crown Drugstore. Man, was that good. Down at Pawhuska we went to a pig stand for pork bar-b-que and limeaid or coke…The first fast food place I remember was in Joplin out on Seventh and Maiden Lane during the late 1930’s. It was called “Chicken in the Rough” and had a logo of a rooster with a golf club. We got a paper plate with fried chicken, shoe string potatoes, a dish of honey and hot rolls. We sat in the car and ate it with our fingers which is why it was called “in the rough”. The Checkerboard Cafe’ with the outside walls painted red and black like a checkerboard was noted for coney islands. We sometimes ate at Chili King who served the best chili but he would not serve milk to drink because according to him, it would make a person sick. Oh yes, we did not drink milk when we had fish either. Why? Because. That was explanation enough!” There are 362 pages of memories, geneologies and photographs for us to cherish! And as I posted last time, one of the recipes that my father mentions as a favorite, was my grandmother’s Red Devil Food Cake. I found it in the tattered pages of the Rumford Cookbook, written quickly and precisely. However, there are no baking instructions at all! I had to elaborate on my own. In looking in our family cookbook, I saw that my Aunt Lois also included this recipe and with the note, “(The cake I learned to bake as a child and it was served often at family get togethers)…Note: There are no baking instructions included in my recipe” So here is the recipe and my decision to bake the cake layers at 350º for 20-25 minutes. 1/2 cup sour cream, lard or butter 2 cups flour 1 egg 1 1/2 cups sugar 1 tsp soda 4 Tbsp Cocoa 1 tsp vanilla extract 1/2 cup buttermilk or sour milk 1/2 cup boiling water chopped pecans (optional) Sift together flour and soda and set aside. 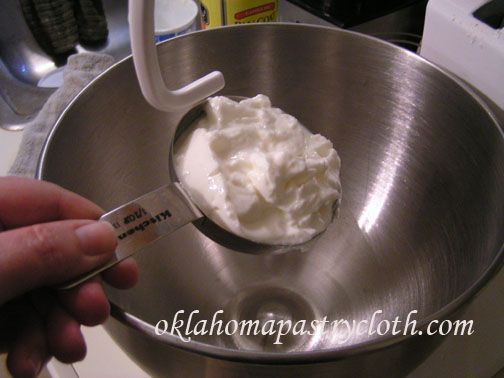 Place sour cream, butter or lard into a mixing bowl. I decided to try sour cream. Next time I am going to try butter. 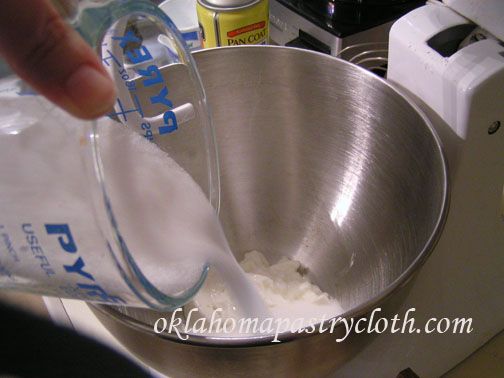 Add sugar 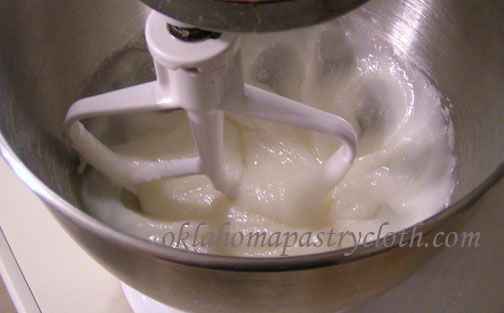 Cream until smooth 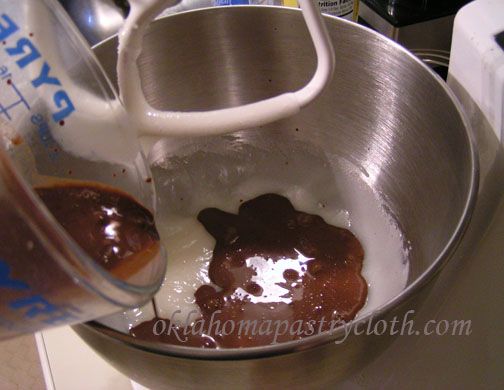 In a mixing cup, place cocoa and whisk as 1/2 cup boiling water is slowly added to dissolve. When the mixture is nice and smooth, add to the creamed mixture. 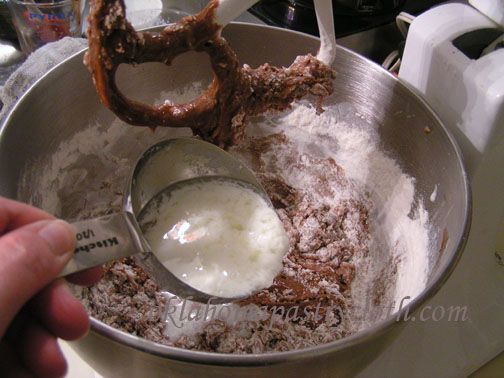 Add flour/soda mixture and stir and then add buttermilk or sour milk. You can sour milk by adding 1 tbsp vinegar into a mixing cup and then pour 3/4 cup milk into the vinegar. Allow to stand for 20 minutes and it will curdle. Pour out 1/2 of the thickest curds. 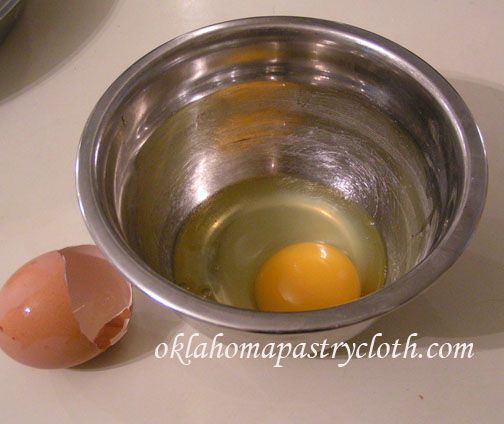 Add one egg and mix until batter is smooth and uniform 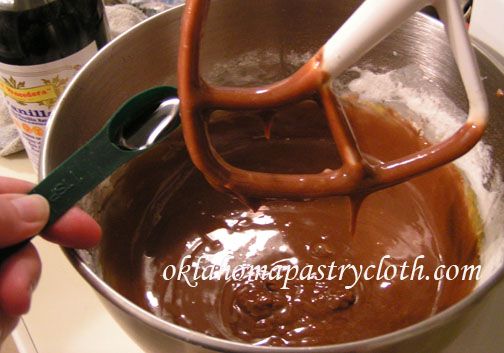 Add vanilla and mix. Unlike the batter in the last cake recipe, this batter is runny. My dad and his family also referred to it as “gravy cake”. 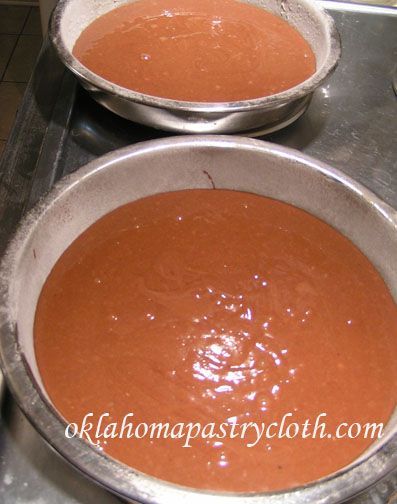 Divide the batter between two greased and floured cake pans. Bake at 350º for 20 – 25 minutes. Use a toothpick to check for doneness at 20 minutes to make sure you do not over bake. Invert pans onto cooling racks and allow to cool completely. Ice with recipe in the last post or use your own. Sprinkle with chopped pecans. 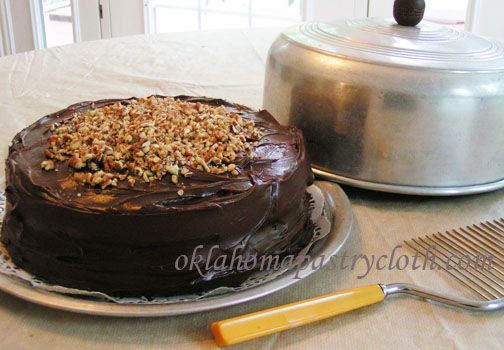 Here’s something neat. I am keeping the cake in my Grandmother T’s cake keeper in which she used to house the same confection! And generations of cooks continue on!  |
|
|
Oklahoma Pastry Cloth™ Company on Facebook
|
|
 |
|
|
Cooking In the 1930’s Part II
Monday, April 2nd, 2012
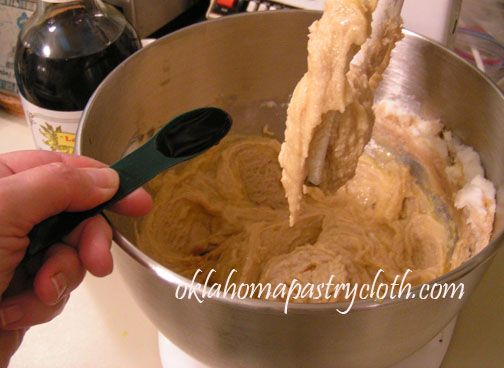
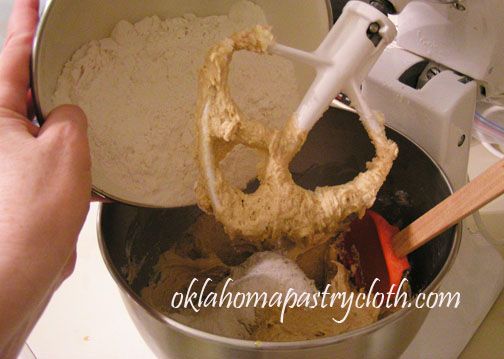
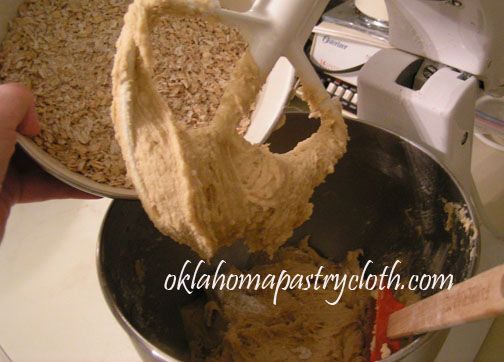
 Previously, I showed you photographs of the worn and ragged Rumford Cookbook that served as my grandmother’s journal and recipe collection. She evidently never cooked out of the book, but used it to record family events and geneologies and favorite recipes which consisted almost totally of desserts! Now I know where I get my sweet tooth. 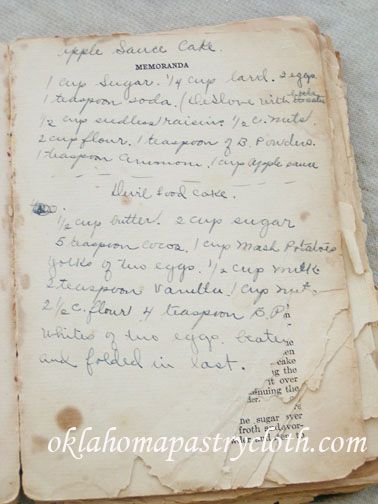 It is a precious thing to have this book with my grandmother’s writing scribbled throughout, but to make it even more special, my father, who will be 84 on July 4th, wrote a book about his early life in Missouri and his experiences in Germany during the WWII era and it includes the story of the Rumford Cookbook. Dad’s book is a volume of memories that I can pass on to my grandchildren and great-grandchildren in a way that my parents, grandparents, great-grandparents, aunts and uncles will never be forgotten. They will always be alive in words and photographs. Here is an exerpt from the book that I thought you might enjoy: According to the old saw, some people eat to live, meaning they aren’t particular about what they eat or how it is prepared. Well, I think it is fair to say my family “lived to eat.” We enjoyed food!! It may not have been prepared in a fancy way, but it was fixed with love. Don’t ask me why but the folks said “fixed” instead of “prepared” as in “I’ll have supper fixed directly.” Mom, Grandmother Hightower and other members of the family prided themselves on being good cooks and well they should. Light rolls were high and light. Fried catfish was crisp on the outside and moist on the inside. Steak was tender enough to cut with a fork. And who could stop with just one piece of red devil’s food cake with fudge icing? 1/2 cp butter 2 cups sugar 5 tsps cocoa 1 cup mashed potatoes 2 eggs, separated (beat whites to fluffy) 1/2 cup milk (I used half and half) 2 tsps vanilla 1 cup nuts 2 1/2 cup flour 4 tsp baking powder Icing 2 squares chocolate 2 cups sugar 2 tbsps syrup (I assume Karo White but I used plain old pancake syrup and it was great) 1/2 cup milk (I used half and half) 2 sticks butter 1 tsp vanilla powdered sugar to thicken if needed 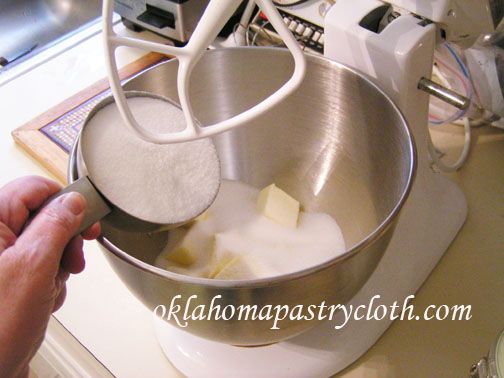 Cream sugar and butter until fluffy 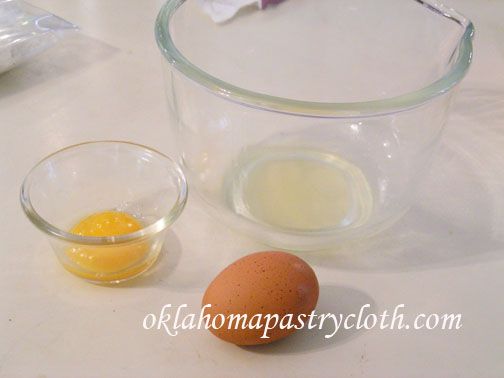 Separate eggs and place egg whites into a bowl to be whipped. 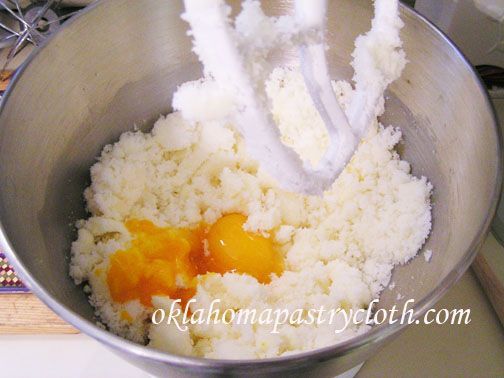 Add yolks to the sugar and butter mixture and mix 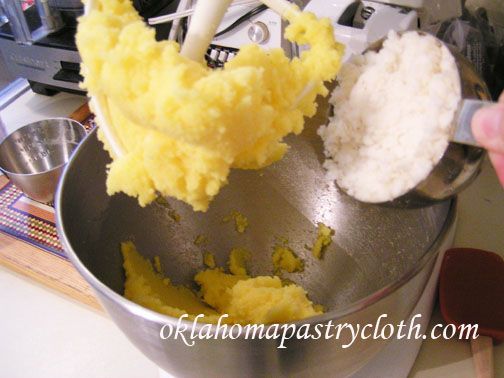 Add potatoes and beat 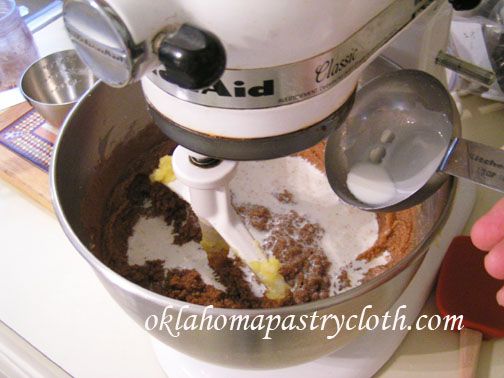 Add cocoa and milk and mix thoroughly 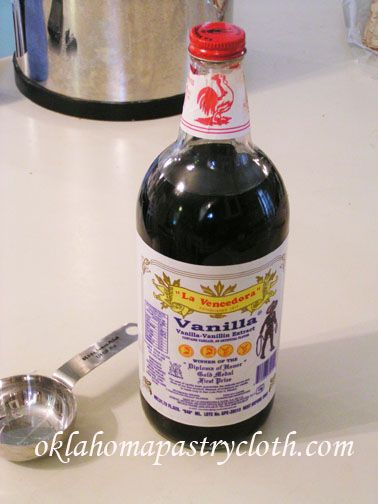 Add vanilla 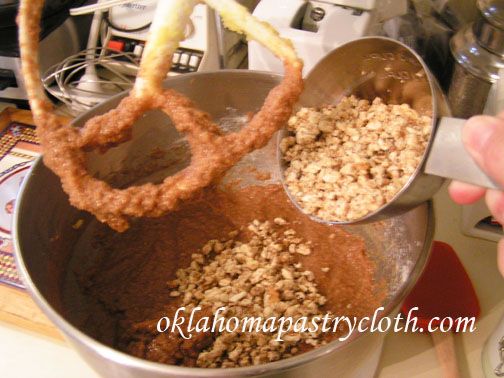 And nuts..I used English walnuts, but pecans would be great too. 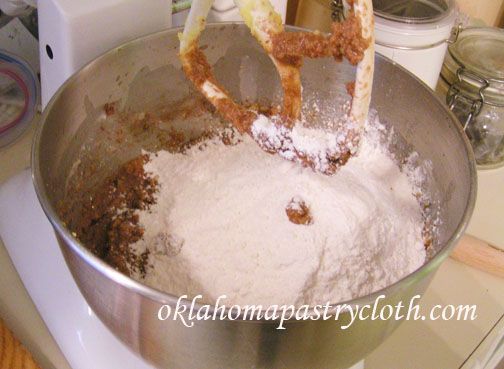 Add the flour that is mixed with the baking powder. Now here, I will caution that because of all of the different flour types, the 2 1/2 cups may be too much with certain types. If you grind your own wheat and are using a soft, white wheat pastry flour, you will definitely not need the full amount. I suggest that you add the flour 1/2 to 1 cup at a time until the consistency is smooth and not too dry. This batter is not a thin batter like we are used to with boxed cakes. It is almost the consistency of whipped icing. 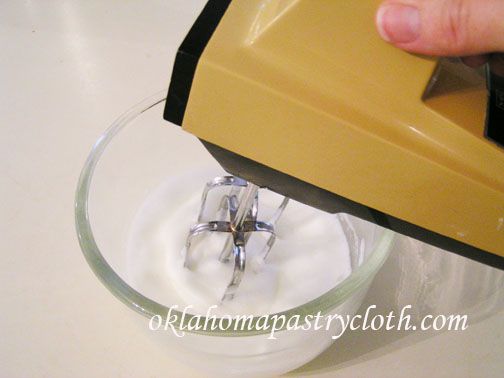 Beat the egg whites until stiff and fluffy 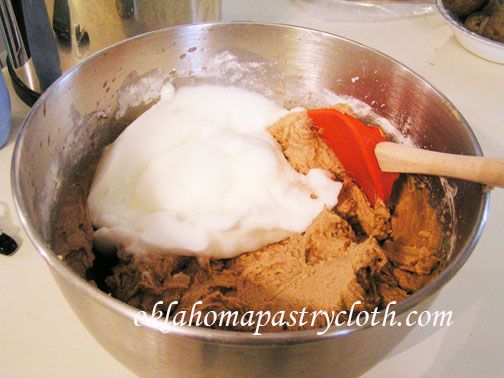 Fold in the egg whites with a spatula by gently turning the batter over on top of the whites again and again until the egg whites are incorporated into the batter. 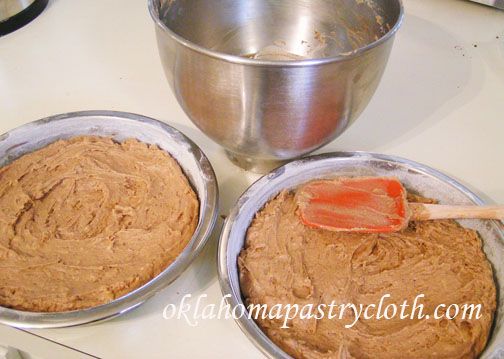 Divide the batter equally between two greased and floured 9″ round cake pans. Bake in a preheated 350º oven for 30 – 35 minutes. Test with a toothpick or sharp knife to make sure it comes out clean. DO NOT OVERBAKE. Check at 30 minutes and if it is not quite done add a minute at a time. 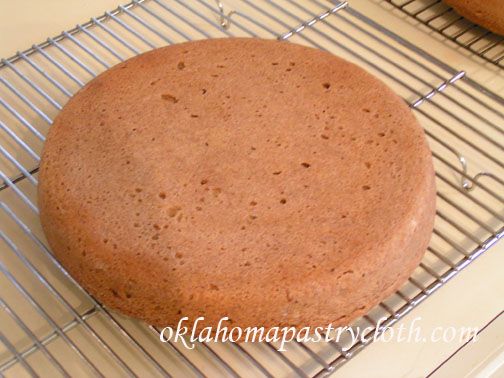 Invert cakes onto cooling racks and allow to cool 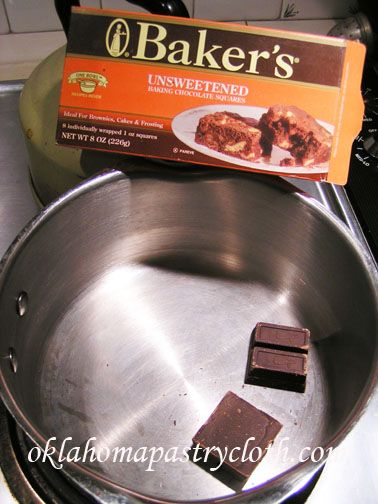 Meanwhile, place two squares of Baker’s Chocolate into a 1 1/2 quart saucepan. 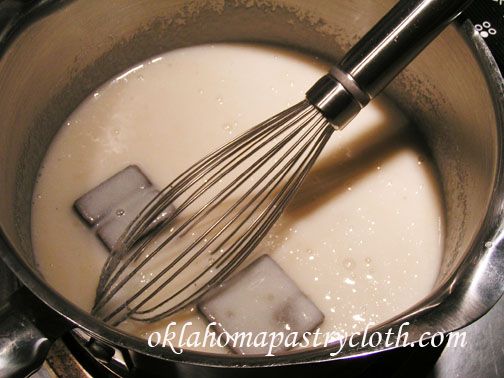 Add sugar and milk or half and half and stir, with a whisk, over low heat until sugar is dissolved. Turn up the heat and, continually stirring, as the chocolate melts and the mixture comes to a low boil. 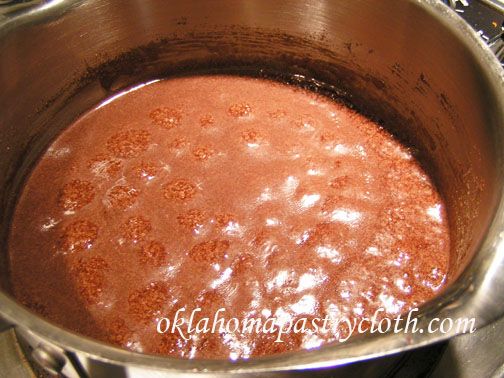 Stop stirring mixture and allow to boil for 2 full minutes. 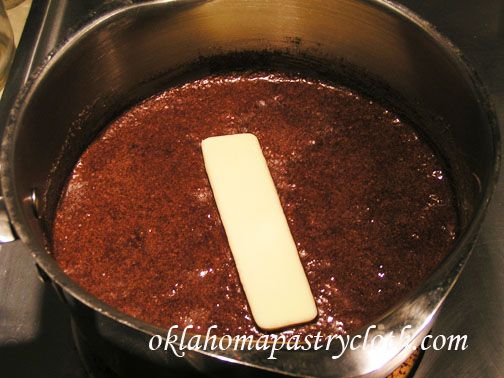 Remove from heat and add butters and vanilla. Stir until butter is melted and incorporated. Cool until the icing becomes hard. Stir to whip to spreadable consistency. If you want a thicker spread then you feel you are getting, add powdered sugar, 1/4 of a cup at a time until you reach the consistency you want. 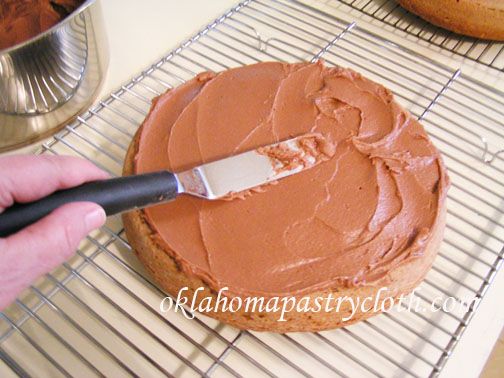 I like to place my bottom layer of the cake onto a piece of wax paper. Then, I can slide the cake onto a cake plate after I am finished icing, for a nice, clean look. Ice the top of the bottom layer of the cake with a thick layer. Place the top layer of the cake onto the bottom layer and make sure they are centered on top of one another. 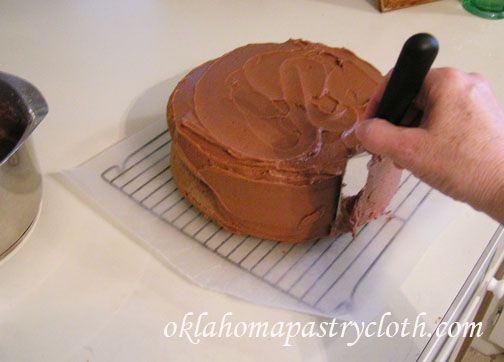 Ice the tops and the sides of the cake 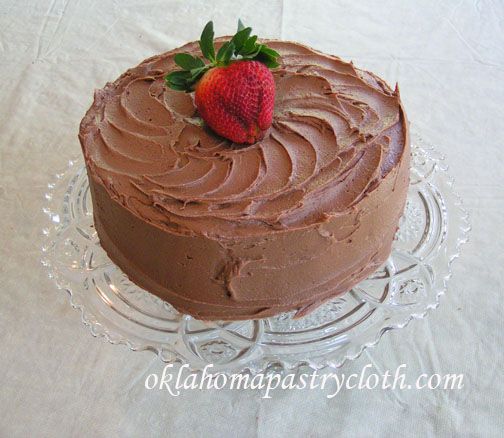 Garnish with a strawberry or chocolate shavings. 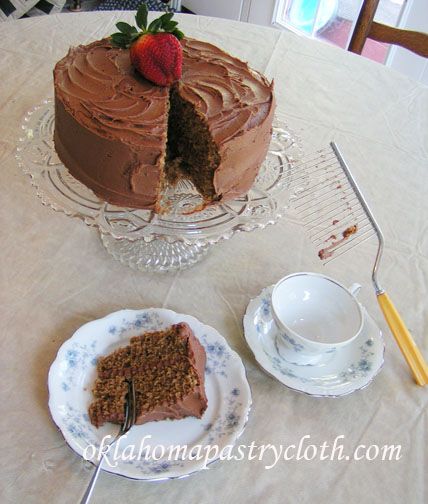 Of course, I had to use my vintage cake cutter that I found at an antique store. It is just like the one that I grew up with that my mom used to cut her cakes. It beats a knife to smithereens!! The cake is tasty, especially with strawberries and the longer it sits, the more most it seems to get. Next time, I’ll do the Red Devil Food Cake that Dad talked about and we will see what it is like!  |
|
|
Oklahoma Pastry Cloth™ Company on Facebook
|
|
 |
|
|
Cooking From the 1930’s – Part I
Wednesday, March 14th, 2012
 Don’t forget to leave a comment to enter the Bread Pan Giveaway to win two unique bread pans. The winner will be chosen on St. Patrick’s Day I’ve had an interesting week and it isn’t even over yet! My sister, from the Dallas area, flew here to spend time with me and to meet my little granddaughter for the first time. We had a blast taking care of my granddaughter for two solid days. She is three months old, is grinning from ear-to-ear and is making every sound in the world in an attempt to communicate. And as all grandmothers are supposed to do, I worked hard to teach her the kinds of things that three month olds are supposed to know, especially how to make a sustained “ahhhh” while grandmother bounces a finger over baby’s mouth to make a vibrating “ahhhh”. Of course, I made a video and of course I put it on Facebook for the family. It is amazing to me that I am a grandmother. I remember my times spent with my grandmothers and it is just mind-boggling how time marches on from one generation to another. Someday, this little, budding personality in my arms will be a grandmother too and I’ll be long gone. However, my name and my memory will carry on just as my grandmothers’ names and memories carry on for me in my memories, my stories, my pictures and in my cooking. It is such a daunting task, but such an honor, to be able to pass on faith, values and lessons to the little ones. Recently, my cousin sent me a treasure from the past that is most dear. She had, in her possession, the Rumford Complete Cookbook that my grandmother (on my father’s side) had used from the early 1930’s until she died in the early 1970’s. The funny thing is, there is not one, single recipe in that cookbook that any of us remember my grandmother fixing. She did not use those recipes! She used the book, and its many blank pages, to record in her distinctive pen, her own favorite recipes, accounts of everyday life, and geneologies. When family would come for a visit, family members wrote their own observations of the time too. It is a precious collection of moments in time. 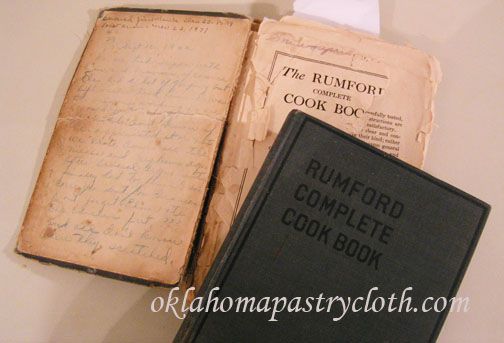 On the inside of the front cover is a combination of my grandmother’s handwriting recording the first snow in 1939 (December 23) and the first snow in 1971 (November 22) and then below, my great-aunt Suzie wrote the oddest entry: “Sept 16 1942 We all took supper with Chas. and Frances [my grandparents], of course. Chas did a lot of griping but after all I told him he was the only one working so we would just not [illegible]. Don’t know if he appreciated it or not. We wrote down all the nieces and nephews ages after several arguments finally had to finish up correspondent for Frances. Don’t forget Elmer ate the chicken feet and all – don’t know where they scratched.” Elmer was my great-uncle Elmer and he was worried about where the chicken feet he’d just eaten had been while on the chicken!! 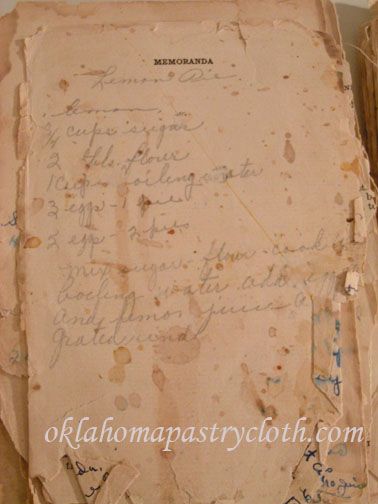 I decided that since I did a series on my mother’s mother’s cookbook of 1914, I would do one on my father’s mother’s cookbook of 1931 as well. Only, instead of using the recipes printed in the book like “Codfish Fritters” and “Perfect Fish Balls”, I’d use the tried and true recipes that my grandmother recorded and actually made. And since today is “Pi Day” (It’s March 14th – 3.14 – silly!!) I thought that I would make Grandmother Thurman’s lemon pie. I can remember her whipping one out at the stove while I watched. She dearly loved anything lemon, especially lemon sour candy, but her pies were not to be outdone. 1 Pie shell, baked 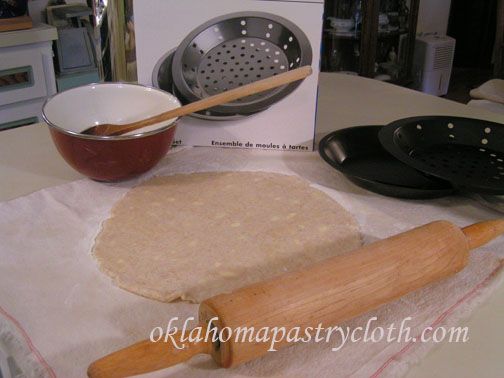 I keep my pie crust mix in the freezer, take out enough to make however many pie crusts I plan and let the mix thaw for a little while before mixing with water. Having it cold makes it much flakier. Roll out your pie crust, of course on an Oklahoma Pastry Cloth™! Place the pie crust in your tin. I am using a tin that you can find at the shopping page that has a perforated insert to keep the crust from shrinking. 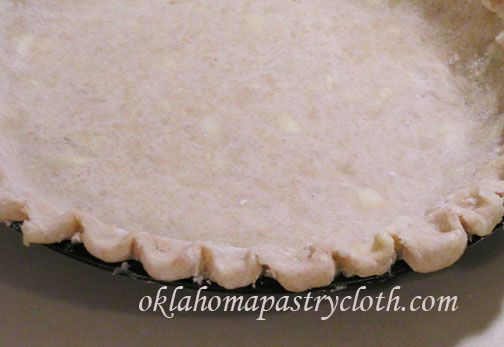 I like to flute my crusts 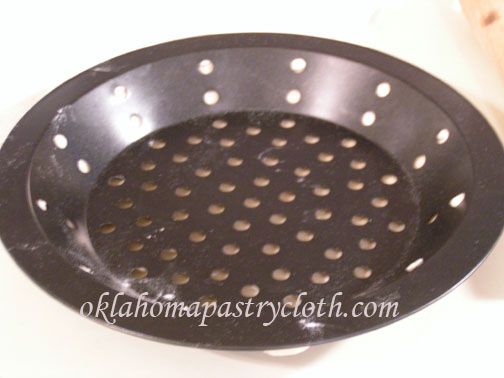 When using the additional perforated tin, it is placed into the pie tin over the crust. Bake the crust at 400º for 15-20 minutes and allow to cool 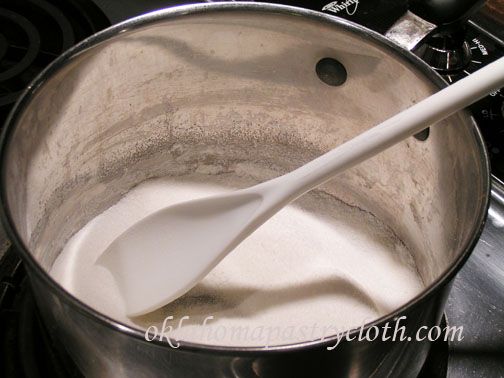 In the meantime, place sugar and flour into a medium saucepan and stir to mix 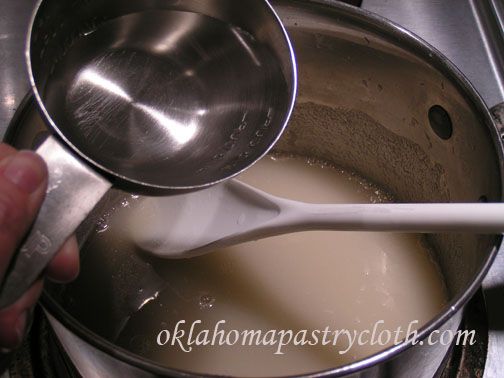 Add cup of boiling water very slowly and stir to make a creamy mixture and heat to boiling 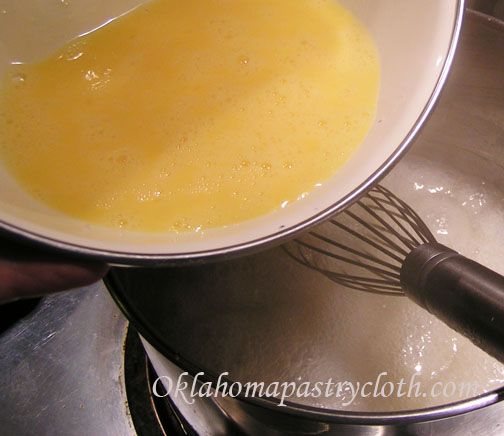 Slowly add beaten eggs, whisking as you pour. 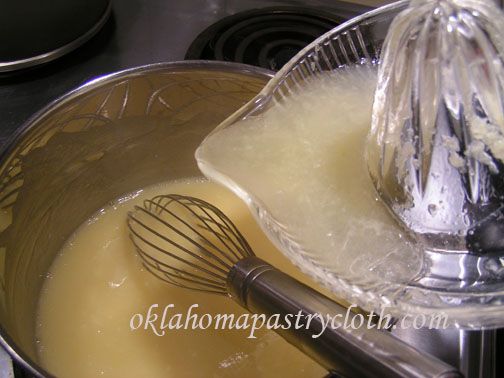 Add lemon juice and lemon zest. 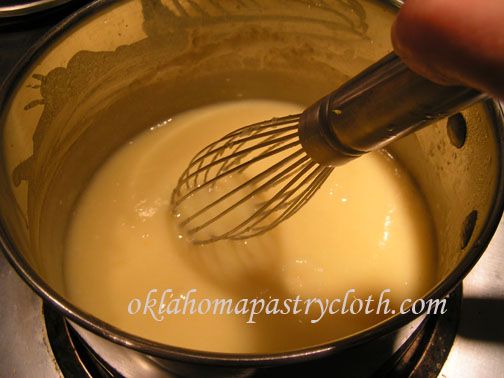 Stir until thickened to a pudding texture 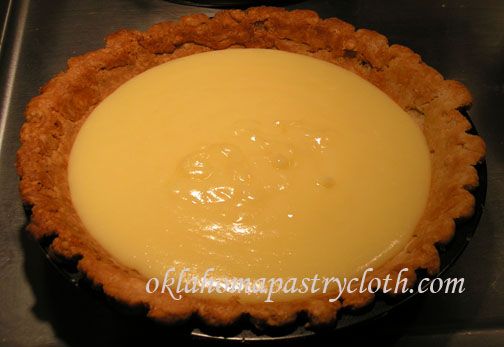 Pour the custard into the baked pie shell. Chill in the refrigerator until cold all the way through. There will be enough room in the pie shell to also add a topping 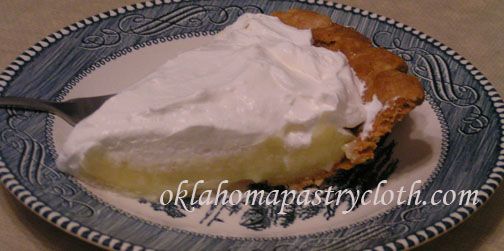 Slice and serve topped with freshly made whipped cream or canned whipped cream. I don’t like the flavor of Cool Whip with it. Or you can make meringue to place on top and bake until lightly browned. I’m not a big pie meringue fan but lots of people are!  |
|
|
Oklahoma Pastry Cloth™ Company on Facebook
|
|
 |
|
|
For follow button place this after Click Here To Comment and above the
:

C’est La Vie – C’est La Soup
Friday, March 9th, 2012
 I know. I know. I’m behind. I can’t seem to catch myself coming or going. But I did manage to catch a car!! And it didn’t involve one of those icky salesmen either. We got a normal, honest one.  For those of you who follow the blog, you know that I have been on a frustrating search for a hunk of metal with four wheels that doesn’t take $100 to fill the gas tank and that uses what IS put in its tank, sparingly. I have driven one model after another, enamored with the outsides, only to find doors that felt like aluminum foil and innards like a bumper car. And then I discovered the Nissan Versa Hatchback and fell in love. It is heavy for a car its size, is very roomy inside (seats 5 people), actually has pep and gets 33 mpg highway miles (Mr. Fix-It and I checked it). I splurged and got fancy alloy wheels today and so now I really look Up-Town…well, as Up-Town as a platinum haired (we don’t say ‘gray’ around here) woman can look. I love the back end space where there is plenty of room to haul Oklahoma Pastry Cloth™ gift baskets for delivery. Yep. I’m a happy camper. Oh yes, and I found out today, that it actually stays on the highway when we have our 40 mph winds sweeping down the plains!! And so, between finding a car, filling orders and playing with my grandbaby, time has slipped away and I all of a sudden realized that this is Thursday. Oh no!! I’ve been seriously blogless this week. Of course, the March Bread Pans Giveaway is still ongoing, so be sure to leave comments to enter. And it appears that quite a number of people tried the new bread recipe posted last week and found it as delightful as Mr. Fix-It and I did. Therefore, I thought I’d show you one of the ways that I use the French bread from my last post which just tickles Mr. Fix-It to death. I make my own French Onion Soup recipe and top it with a toasted piece of this yummy bread, melted Swiss Cheese over that and serve it piping hot. Here is my recipe for French Onion soup. (And you must remember that I am a dump cook so I measured what I was dumping for you. You can increase amounts according to the size of your family) 2 tbsp real, honest to goodness (not the margarine or yogurt stuff) butter 2 tbsp flour 1/2 cup cool water 1 medium onion sliced into thin rings 1 clove garlic finely minced or pressed 4 cups beef broth or 4 cups water and 4 beef bouillon cubes 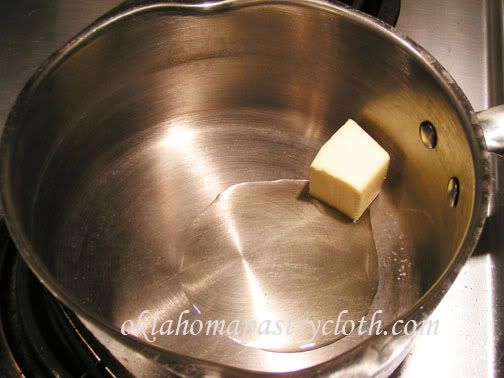 Melt butter in a 2 quart sauce pan over medium high heat 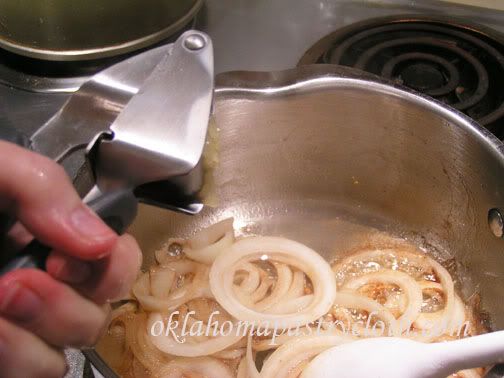 Add onions and garlic and sauté until onions are tender 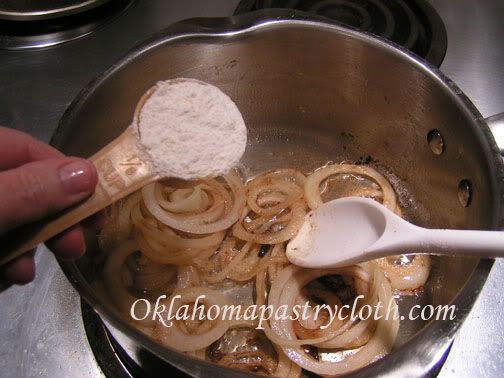 Add two tbsp flour and stir to make a roue 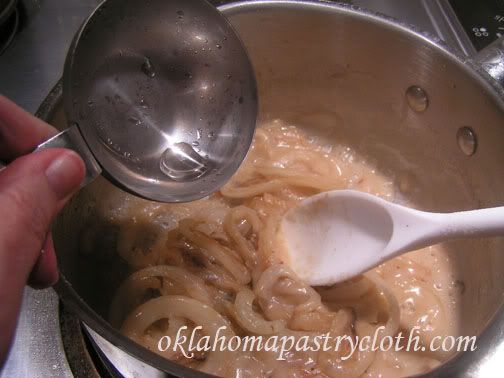 Add 1/2 cup cool water, stirring quickly to form a thick gravy 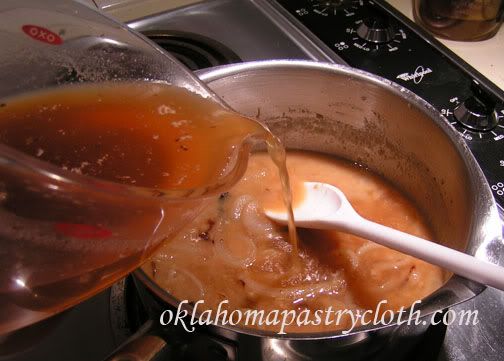 Add beef broth and stir until thoroughly mixed. 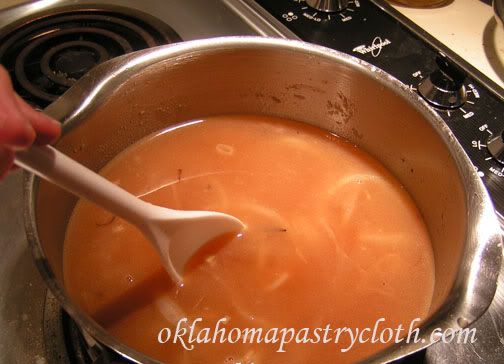 Stir soup occassionally as it simmers at a low boil for 30 minutes, adding water or broth if liquid reduces 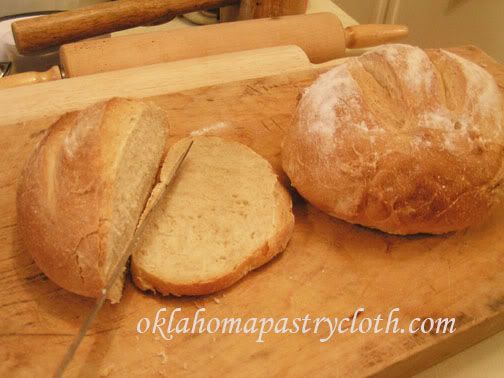 Take 4 slices of crusty french bread and toast lightly. May butter if you wish. 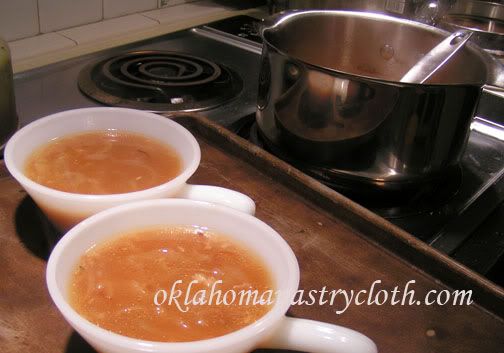 Pour soup into bowls that have been placed on a cookie sheet. 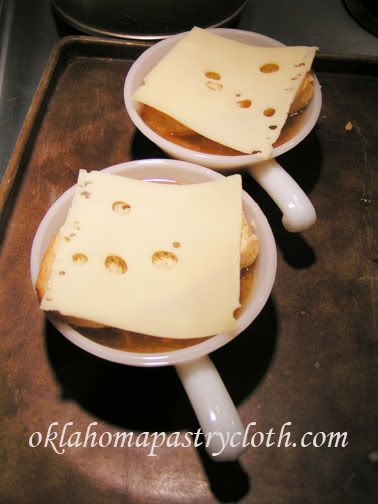 Place bread slices on top of the soup and top with slices of Swiss cheese. Place the cookie sheet and bowls into the oven on broil. Broil until cheese is bubbly. 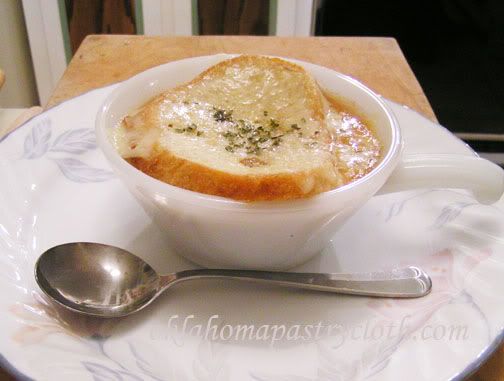 Garnish with parsley and serve hot with a salad or fruit. Yum!!  |
|
|
Oklahoma Pastry Cloth™ Company on Facebook
|
|
 |
|
|
A Bread For Everything
Friday, March 2nd, 2012
  Don’t forget to comment below to enter the drawing for these wonderful and unique bread pans!! Quick and easy is good, right?! Well, I guess taste has to come in there somewhere! Reader and FB fan, Penny, shared a wonderful recipe that’s quick AND tastes good, located at the lovely blog The Italian Dish. It looked so interesting that I had to try it. Since there is a giveaway going on right now for bread pans that require a good, crusty recipe, I figured this was a great time to post one. Though this recipe works best on a baking stone, I can see it working equally as well in the bread pans for the drawing. I’m going to digress a bit first. You know me and my memories…well, I’m going back there again. And I’m going wayyyy back! I’m remembering my childhood when, I believe, I was in the fourth grade. I thought I was a big dog back then and because I was the oldest child, I guess I was! My family was in Quebec’s Gaspé, at Bonaventure Island, staying in a tiny cabin warmed with a potbelly wood stove. My mom had put a pot of beans on the stove, to cook, and we kids had ventured out to watch the sea smash against the rocks below the cliff on which we stood. Oh yes, and I had this hat. It was one of those tourist hats that looked like a sailor cap, but that had embroidered across the front, turned-up rim, “Bonaventure Island”. I thought I looked cool, but what does a fourth grader know? Earlier that day, while driving the countryside, we had been amazed to see women in front of their homes, taking hot bread out of large, brick ovens that had been built alongside the road. These French-speaking ladies offered their breads for sale and we had stopped at one such oven to purchase a large, hot and crusty loaf. I can still remember the smell enveloping us inside our trusty Rambler station wagon as we headed toward the cabin. The day was finally made even more special for me because my mother gave me money and let me walk, all by myself, down to the little town to purchase a pound chunk of butter to slather on the bread. I don’t think beans and French bread have ever tasted so good since. And so, it was as I was baking the round loaf that is the result of the recipe following, and then tasted the first slice with its chewy, crusty exterior and soft, yummy center that those memories came flooding back. It tasted just like that bread so many years ago! So I have found a new favorite bread that is as good with a turkey sandwich, bistro style, as it is with a huge plate of ravioli. And talk about easy. It just doesn’t get any easier than this! So give it a try! And by the way, I showed you how to make Sourdough Bread in a past post. This bread takes on the same qualities without all the work.
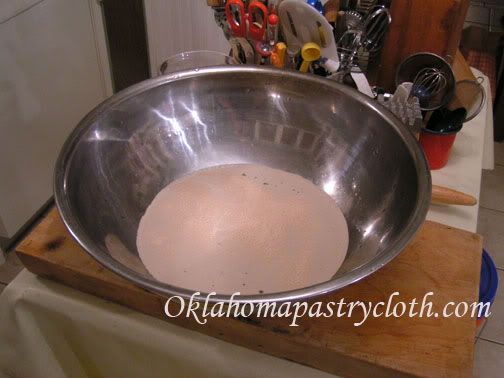 Your water should be around 100º. In a large bowl (this one is 8 quarts and a 4 or 5 quart one would be easier to handle) or a large plastic container with a lid, add the salt to the water and sprinkle the yeast over the surface. 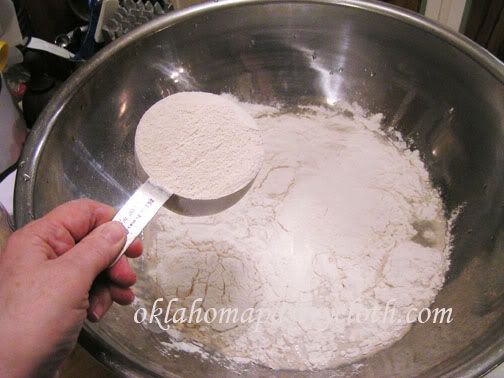 Add the flour. You don’t even have to proof the yeast. Of course, as I thought about this, you are in a world of hurt (and out some flour) if your yeast is no good, so I may go ahead and proof the yeast from now on. 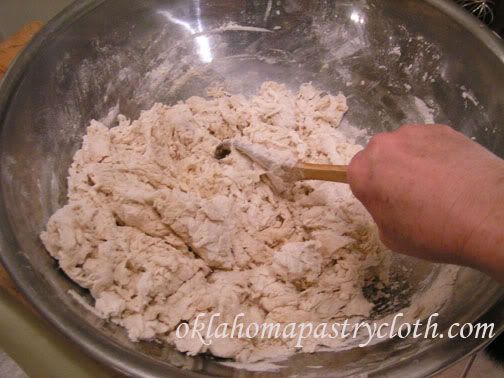 Stir the dough with a wooden spoon until everything is evenly moistened. The original baker noted that she went ahead and used her Kitchenaid mixer to do this step. I will too, next time! Note: You do not knead the dough 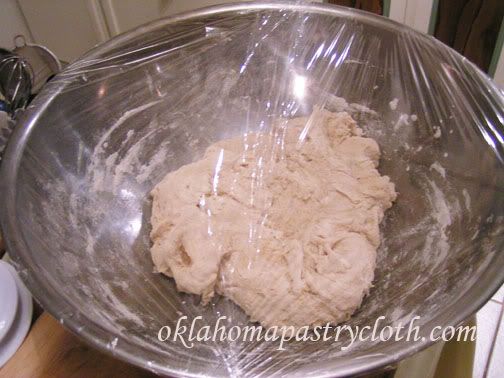 If the dough is in a plastic tub, cover with the lid, but do not snap down all the way around to allow the gasses to escape. I put plastic wrap loosely around the top of my bowl. Allow to rise in a nice warm place for at least 2 hours. 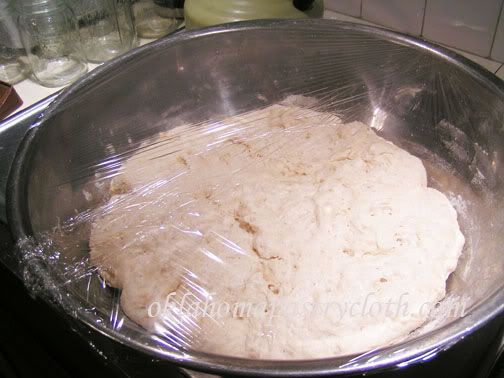 The dough should be nice and bubbly and starting to smooth on the top. You can use the dough anytime after this step, but refrigerating the dough until it is cooled down makes it less sticky and easier to work with. I refrigerated mine overnight and even waited until the next afternoon to make the bread. And any dough not used remains refrigerated. 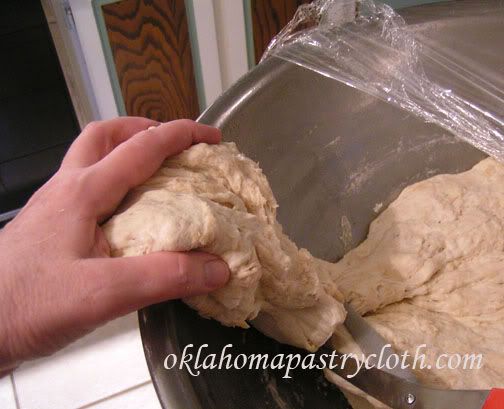 When you are ready to make the bread, pull some of the dough up and cut it off with a pair of scissors. Choose the amount you need for the type of loaf you will make. Here, I am making boules, but you can make a French loaf or baguettes too. 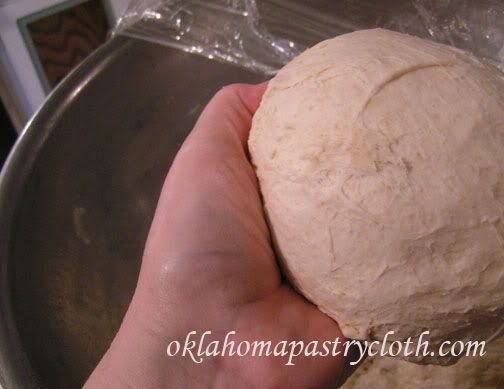 Shape the loaves by pulling the sides down and under to make the top as smooth as possible. It doesn’t matter what the underside looks like. 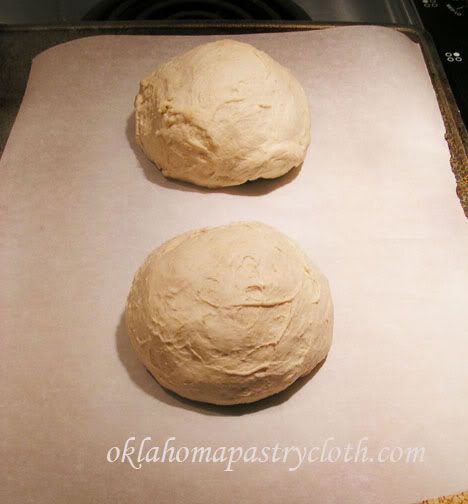 Place the loaves on parchment paper, either on a cookie sheet that has no sides or turn a cookie sheet upside down and place the parchment paper and the loaves on the bottom. The purpose of this is so you can slide the parchment paper and loaves onto a baking stone later. Allow the loaves to rise for 40 minutes. It said that there is no need to cover them with a damp cloth, but here in Oklahoma, we are so dry that I felt a damp cloth was a must. It worked great. 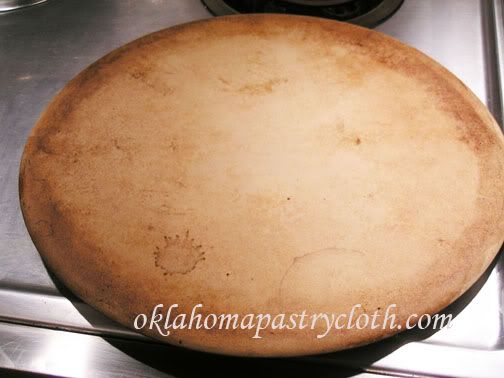 About 20 minutes into the rising, turn your oven on to 450º and place a baking stone on the middle rack to heat for 20 minutes. As you can tell, my baking stone is well-used!! The bottom rack will be used to hold a pan with a cup of water in it to steam the bread loaves. If you don’t have two racks, use a pan that can sit in the bottom of the oven without disturbing the heating elements. 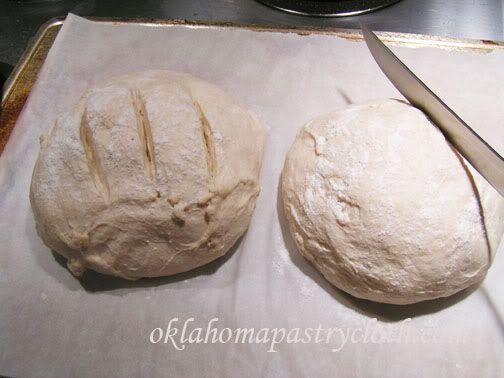 When the bread has risen, sprinkle flour on the top surface of the risen loaves and score the tops to release some of the trapped gas so the loaves will hold their shape. You can do parallel slashes, cross-cuts or whatever you like to make the bread loaves look pretty. Now here is where I did it a little different from the instructions. I opened the oven door and placed the pan of water on the bottom rack of the oven and closed the door to let the oven heat back up to 450º. At that point, I opened the oven again and slid the parchment paper with the loaves of bread, gently onto the baking stone. Closing the door, quickly, the bread bakes for 30-35 minutes depending on the size of the loaf. 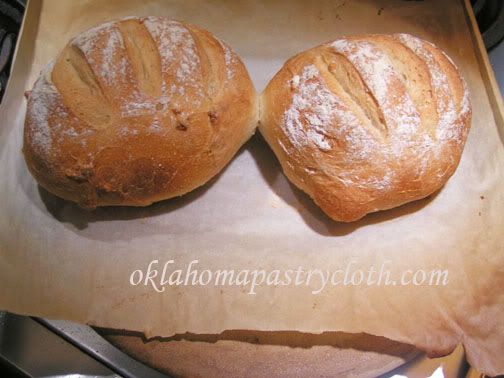 Remove the loaves and let them cool before slicing. They really are better after they have cooled, but I couldn’t wait and got a slice anyway. Oh yes. It’s good hot too! 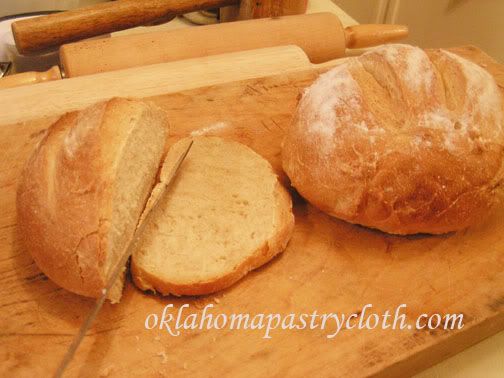 After the loaves have cooled slice and serve. You can store your leftover dough up to 14 days and as it sits, the flavor will improve like sourdough. When you use up your dough, don’t clean out the container, but just mix right in with the leftover pieces to add to the flavor. I have decided to use one of my gallon crocks with a loose plastic lid over it to store my dough. It should get really tasty in there!  |
|
|
Oklahoma Pastry Cloth™ Company on Facebook
|
|
 |
|
|
For follow button place this after Click Here To Comment and above the
:

Canning Turkey
Friday, February 24th, 2012
 Mr. Fix-It’s birthday was yesterday and I was all ready to surprise him with tickets to a Thunders basketball game. I was going to go all out with a Beef Wellington complete with deuxelles! (Just had to throw that in to mess with you all!) 🙂 And then….he got called out on big job. I guess people don’t matter, but let a computer situation arise and the whole world comes to a screeching halt. So I got him the two movies, “Flywheel” and “Courageous” with one of those buckets of Orville Redenbacher’s Movie Popcorn. We’ll have a movie night this weekend! Just as good as any ol’ Thunders game, wouldn’t you say? 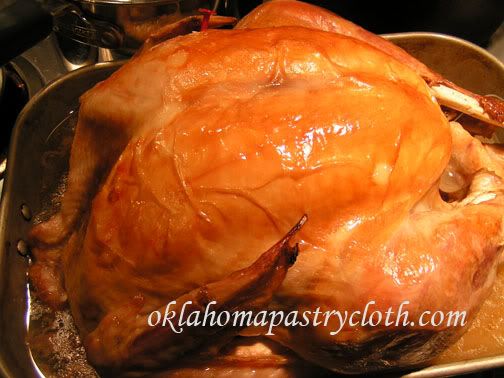 I was going through pictures and found a couple that I forgot to post awhile back and so I thought that I would take the opportunity to put them up. I don’t know about you, but we eat turkey more than just at Thanksgiving. We love Turkey, but with fewer people in the house, a big Turkey could go to waste. So, I rectify that problem by canning the leftovers. In a past post, I showed you how to can chicken by using the raw pack method. The chicken cooks in the processing. However, already cooked meat may be canned as well. The steps are the same as in this post. I bone my turkey and cut the pieces into nice chunks and place the meat into jars to about a 3/4″ head space. I then mix the juices from the cooked turkey with water and chicken bouillon to make a broth, or you can mix the drippings with canned chicken stock as well. I pour that over the meat in each jar to 1/2″ from the top of the jar, wipe the rims, add the lids that have been warming in hot water, add the rings and adjust and process in a pressure canner at 10 lbs pressure for 75 minutes. 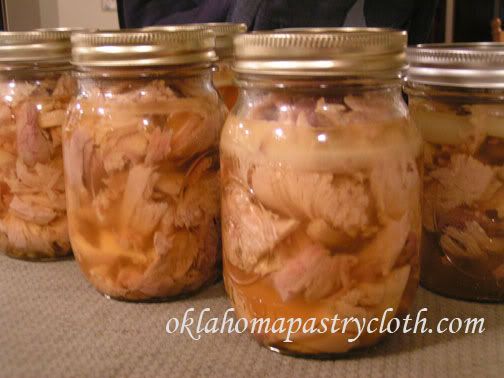 Canned turkey makes the most amazing pot pies. I just make a crust to lie a pie pan, spread the turkey on the bottom (reserve the liquid for the sauce), add some potato chunks that have been parboiled with some chopped carrots (to make sure they cook all the way through in the baking) and some frozen peas, and cover with a sauce mixture of 1 can cream of chicken soup, 1 pouch McCormick’s turkey gravy mix and two to two and a half cups of liquid combining the liquid from the jar with water. I put a pie crust over that, flute it, slice the top in a few places to let air escape and bake at 400º for one hour or until golden brown and bubbly. Yummy!!  |
|
|
Oklahoma Pastry Cloth™ Company on Facebook
|
|
 |
|
|



 Homestead Revival
 Paratus Familia
 Rural Revolution
Wings of Champions
Friday, February 17th, 2012Here in Okie Land, there is only one thing that we Okies would rather do than eat…and that’s watch sports. Sports is the one way that we can bring our large neighbors to the south – Texas – down a notch. There is a reason that the OU Sooners vs the UT Longhorns is called the Red River Rivalry. Sports is the way that we little southwest nobodies can whoop up on some northerners like the Boston Celtics or some west coast smarty-pants like the Lakers. It looks like we have the number one pro basketball team both in the Western Conference and the nation, you know! And even here in Prairie Country where winter lasts all of a month, we have a professional hockey team with its own ice arena. Shoot, on the Oklahoma River in downtown Oklahoma City, we have boat houses where teams from all over the country suit up to compete with rowing teams on those long, skinny boats that look like something out of the Middle Ages powered by chained prisoners!
I have to say that I get pretty engaged in a good game if I have an interest in one of the teams. The Thunder’s games have become a regular show at our home and during the Fall with football weather, OU, OSU and Baylor (my niece attends Baylor) grab my attention. I am known to jump up and down and scream on occasion and Mr. Fix-It seems not to mind. He’ll let go with a shout every so often, but he is such a patient man.
One of my favorite pastimes concerning sports, however, is to write down the really stupid things that sports casters say. It’s like they have to be yammering throughout an entire game and don’t even realize that they sound really ridiculous. Here are some that I have heard in the past and also caught just recently at the Super Bowl and a few basketball games:
• “He’s not a normal human being!! Normal human beings don’t make a living of trying to get killed.” (I’ll second that)
• “He’s gonna fall off and drop back.” (Sounds like a recipe for injury to me!)
• “I wanna know what’s going on in that locker room!” (And then proceeds to tell us exactly what the coach is saying as if the sports announcer is really there!)
• “We can move the football.” (Doesn’t look like it so far, buddy!)
• “We have to move the football.” (That’s the object of the game!)
• “Look!! Look! He passed with his left hand!! He’s amphibious, you know!!” (Somebody hand him a dictionary!!)
• We’re going to get a double crack (That sounds painful)
• “It’s all about getting the ball down the court.” (Well, duh)
• “It’s about making points. If they don’t make those points, they don’t win.” (Another, “well, duh”)
Get out your pencil and pad and keep track of your own “Stupid Sports Comments” and you’ll get double the entertainment watching any particular contest! But as I said, second to sports in Oklahoma is eating, and so I thought I’d show you how I fix hot wings for Mr. Fix-It to munch on while he quietly holds in the normal male urge to jump up and scream as his OU quarterback races down the field for a touchdown. Someday, he’s just gonna let go and be just like me!!
Brine
3 cups water
1 tbsp salt
Coating
1 1/2 cups all-purpose or whole wheat flour
1 tsp paprika
1 tsp thyme
1 tsp black pepper
1/2 tsp salt
1 tsp garlic powder
1/2 tsp onion powder
Milk
2 to 3 dozen chicken wing portions
In a large container, mix salt into water to make a brine. Place the chicken wing portions into the brine and soak in the refrigerator for several hours.
Meanwhile mix flour with spices and stir until thoroughly mixed.
Drain the chicken (but do not dry) and place into flour mixture.
Toss to coat all chicken wing pieces
Fry pieces in oil that is about 1/4″ deep. You can use canola oil, olive oil or coconut oil for healthier oils.
Turn pieces and brown on the other side. Don’t worry if the chicken is not totally cooked when browned.
Place wing pieces on a rack (I am using old cookie racks) over a cookie sheet. Place in a 350º oven and bake for 35 minutes. This is a very important step. It helps to take out a lot of the grease from frying, cooks the chicken all the way through so that it just falls off the bone and seals the crust.
Remove wings from oven and allow to cool 10 minutes. Place into a large bowl.
Pour your favorite hot wing sauce over the wing pieces. Put just enough that when you toss the chicken, it will be covered but not saturated. I am using “Wing Time” brand Buffalo Wing Sauce (medium heat).
Toss the wing sections in the sauce, gently, with a large spoon or spatula
Place the coated wing sections back onto the rack and place back into the 350º oven for 15 more minutes.
Serve the chicken with blue cheese dressing and celery as a game snack. Or serve for dinner with mashed potatoes and the works!
Tags: basketball, commentators, football, hot wings, sports, tasty snack, Wing Time Sauce
Posted in A Day In the Life Of An Okie, Humorous, Meats and Main Dishes | No Comments »