 Today, we cooks have all kinds of new products to process the various meats that we love to store in the freezer. Electronic sealers, zippered freezer bags and machines that vacuum pack into plastic bags can be costly and, though they promise no freezer burn, often times, the frost and freezer burn still appear. I love my FoodSaver Vacuum sealing system, but I have to say, the tried and true wrapping in freezer paper, like I did at my job in the meat department many years ago, still seems to be the best way to preserve food in the freezer. In fact, if you really want to preserve your meats, you can vacuum pack them and THEN wrap them in freezer paper. I continue to wrap most of my meats in the wax coated freezer paper that can be found at any store. It comes in a large roll that is found in the same grocery section with the plastic wrap and aluminum foil and wax paper. The most common brand is Reynolds. I thought that I would show you how I have wrapped my meats for the past 35 years, having cut and packaged meat professionally after graduating college. (An art degree just didn’t put food on the table – let alone wrap it!!! ) What you need: Roll of freezer Paper Freezer tape or Masking tape Sharpie for labeling 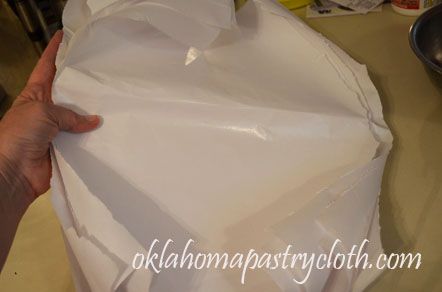 Cut paper to at least 6″ wider than the object that is going to be wrapped. If you are doing large steaks, use two thicknesses of wax paper to place between the steaks. If you are wrapping small steaks or pork chops, chicken breasts, etc, lay the meat side-by-side with large end of the first piece of meat next to the small end of the second piece of meat. The freezer paper should be at least 6″ wider than the width of the two together. 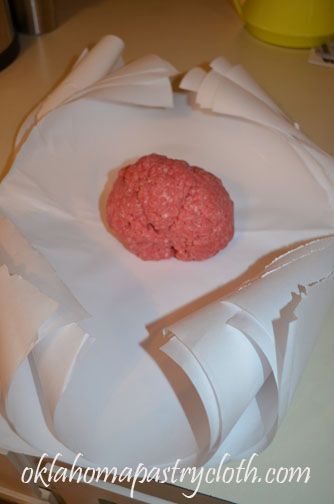 Place the meat in the center of the paper. Here, I am wrapping one pound balls of ground beef. 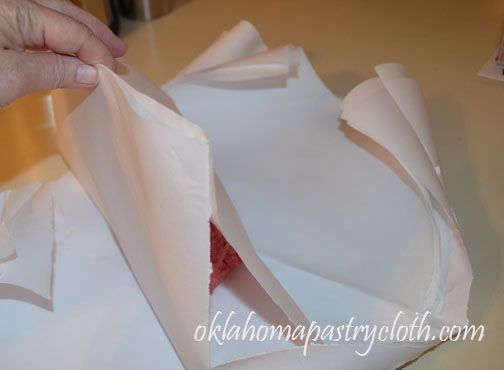 Pull uncut ends of the paper up between fingers and match the edges so that they are equal and even. 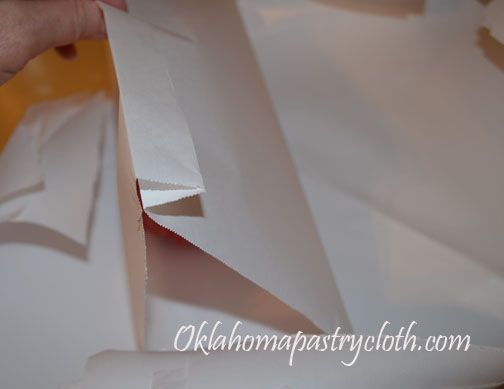 Fold over and slide fingers across the crease to make flat and crisp 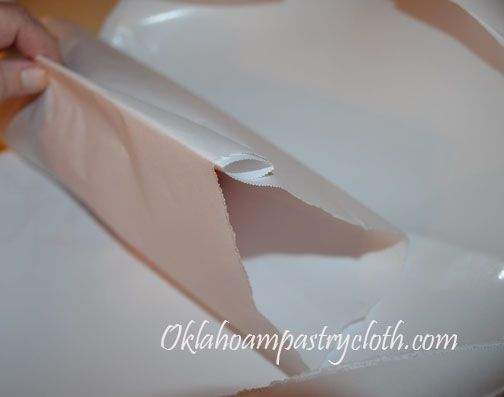 Continue folding and creasing over and over until your fingers are stopped by the meat inside the package 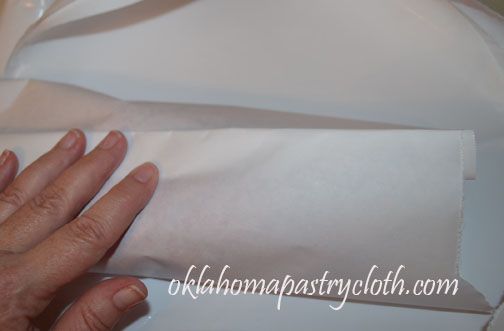 Press the flattened roll to the top of the package to make a flat seam 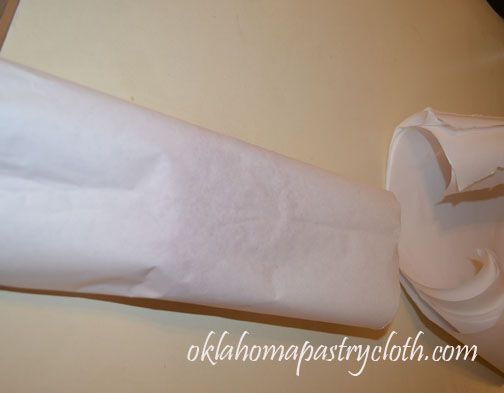 Turn package over to seam side down  Press finger tips into the end of the package to force down the top paper into the bottom, as done when wrapping a present  As in wrapping a present, fold the edges over to a point 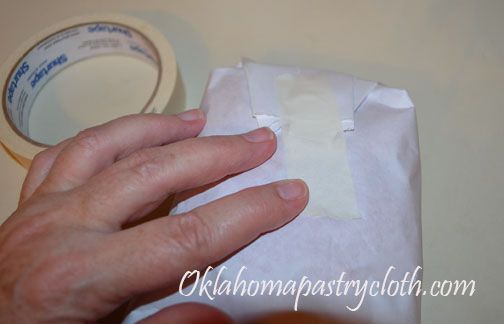 Pull pointed end over to the back of the package and tape. Repeat process for the other end of the package  Turn the package over to the seam end and write the date and what type of meat has been wrapped. 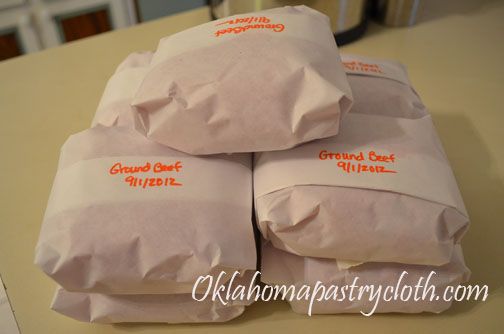 Stack packaged meat and then carry to the freezer. Lay meats into the freezer in layers of one to two packages deep on several shelves until they are completely frozen. Stacking too much unfrozen meat into one area of the freezer keeps flash freezing from occuring and can make the packages freeze unevenly. Once frozen, you can move and stack them however deep you wish.  |
|
| |
|
Oklahoma Pastry Cloth™ Company on Facebook
|
|
 |
|
|
|
Archive for the ‘Let’s Cook!’ Category
How To Freezer Wrap Meat Like the Professionals
Friday, October 12th, 2012
Fair Food At Home!!
Thursday, September 20th, 2012
 Well, it’s that time of year. Fair time…and in Oklahoma, as the song states over the radio, ♪♪ It’s a great state of a-fair! ♪♪ Okies look forward to the Oklahoma State Fair. Even in this hoity-toity, modern world, the exhibit buildings are still full of canning and garden entries, photography contests and the tasty baked goods from home cooks itching for a ribbon and winner cash. The barns overflow with show cattle, sheep, pigs and horses and the drone of announcers instructing showmen in the rings permeates the agriculture part of the fairgrounds. And of course, every tornado shelter company, shop building firm and hot tub emporium has a display of their particular pride and joy features, not to mention the thousands of home product hawkers housed in the fairgound’s numerous, spacious expanses of concrete and skylights. This year, Mr. Fix-It and I got to spend a day at the fair with the daughter, son-in-law and 9 month old granddaughter. Now THAT was a trip!! Watching my little grandbaby taking in all of the sights was pretty funny. And sights there were. Oh my goodness. I crawled out of my cave and noticed today’s fashions, evidently for the first time. I’ve decided that the fair is the excuse for any human being to leave home without ever looking in a mirror or even opening their eyes to judge their clothing before walking out the door. Older men and women in jeans obviously from a time when they were in high school and 200 lbs lighter, thought nothing of leaning over to expose bare buttocks and rotund waists. Lace shirts over brightly colored underwear and shorts with holes so big that I wanted to run to the rescue with a safety pin to help them avoid any humiliation – which they obviously felt none. We giggled at men with the dumbest hats, won at various arcades, and they wore them proudly to the chagrin of their wives or girlfriends. Of course, the callers at the arcades wore the same, dumb hats.  The strangest piece of clothing we saw came in the form of boots worn by a boatload of men. I’ve never seen them before. Back in “the day” here in the midwest, we used to have pointy-toed cowboy boats called, “Roach Killers” because one could trap a roach in a corner and squash it with the very pointed toe of the boot. But these new boots defy explanation, as the toes are so long that the longer worn, the more they curl back toward the ankle. We saw one pair of candy apple red and cream boots that curled so much, they looked like jester’s shoes. And I thought our 70’s fashions were weird!  The dirty little secret about going to the fair, though, is that inside every fair-goer’s heart is this lame excuse to go berserk over foods that no ordinary individual would consider logical, let alone healthy! And my daughter is the fair-goer food officianado. She enters the front gate, brushing past the ticket taker with a wave of her receipt and a single-minded purpose in her eyes – heading toward the various food shrines like a teenager preparing to pay homage to Lady GaGa. My daughter walks the entire length of kiosks that stretch for a 100 miles (it felt that way to my feet anyway), to assess what kind of damage can be done to one body in the form of calories, grease and salmonella. Then, she maticulously makes a list in her mind ordering which confection will be first and which will be last. Sweet always comes first and protein comes last.       One of the fair treats that is of lesser offense to the health conscious psyche is the funnel cake. The batter is very basic and if cooked in a healthy fat and dusted with just a little powdered sugar, one can share a fair-sized cake with nine or ten people and really feel smug over the idiot eating the chocolate bacon! 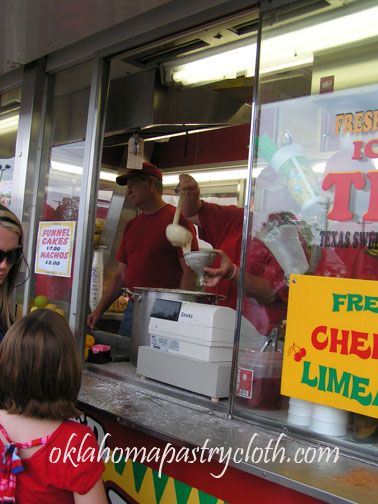  The batter is poured into a funnel and then evenly distributed in concentric rings into a deep vat of hot peanut oil to achieve the characteristic pile of crisp and tender bread dusted with powdered sugar. For extra money, the cooks will add fresh strawberries topped with whipped cream to make this confection so much more healthy. I said that it’s fruit, right?!! Well, funnel cakes are something that this cook has been making at home for years. The kids loved them and it was a treat that I could give them on occassion without having to fork over $100 for tickets to go have someone else make them at the fair. I thought that I’d share my recipe with you and that way, you can have your own fair experience at home, just in case you don’t make it to the real thing!! Ingredients: 2 cups milk 2 eggs 1 tsp baking powder 1 tsp salt 1/2 tsp vanilla 1 tbsp melted butter 2 to 2 1/2 cups sifted flour Directions:  Add milk to eggs and beat until frothy. I use my small, electric hand mixer. 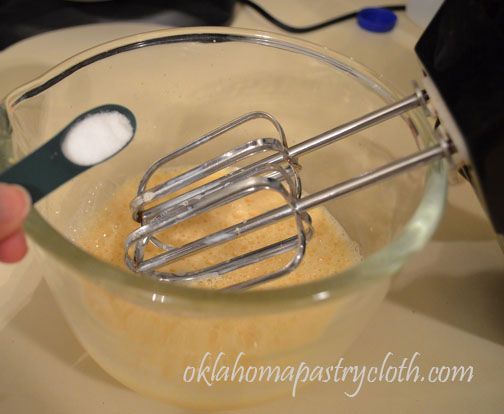 Add salt 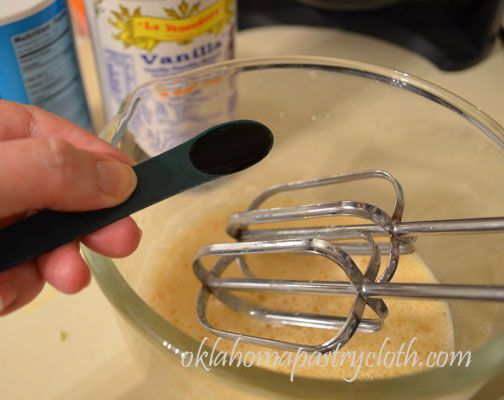 And vanilla 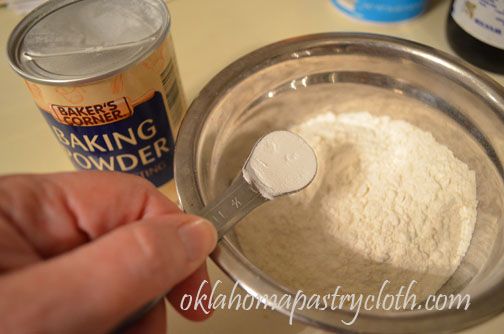 In a separate bowl, mix 1 cup of flour with baking powder. 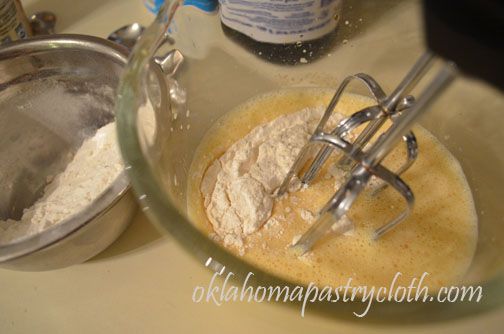 Add the one cup of flour and baking powder, a little at a time, to the egg mixture and continue to beat. 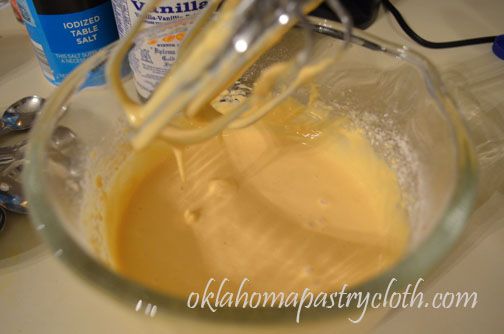 Continue to add second cup of flour, slowly, until batter has the consistency of a thin pancake batter or pudding. Add more if needed, but do so slowly so as to not add too much. 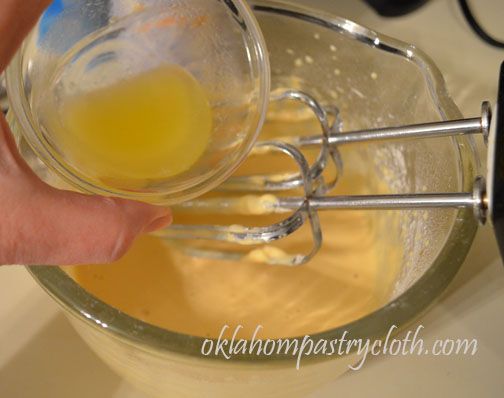 Beat in melted butter 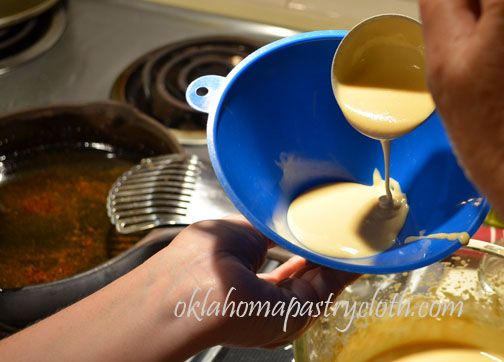 Pour batter into a medium sized funnel, keeping the tip of your finger over the funnel end to prevent any batter from running through. 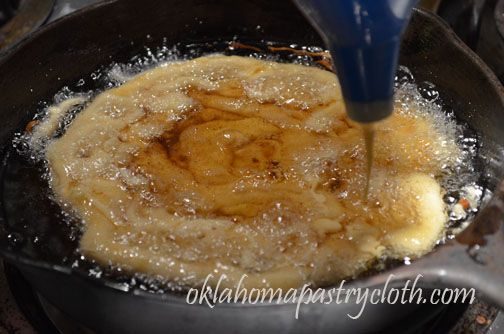 Over a skillet of 1/2″ to 1″ oil – peanut or coconut oil is good – heated to 350º, remove finger from the end of the funnel and move the funnel around to create concentric circles in the hot oil. After getting the size cake you want, bring the batter back over the cake to add more circles.  Turn the funnel cake when browned and cook the other side.  Remove and drain on a paper towel. Sprinkle with powdered sugar, using a shaker or sifter. Serve hot. For an added tasty treat, put fresh, sliced and sweetened strawberries on top and a dollop of whipped cream. I hope the fair is coming near you!!  |
|
| |
|
Oklahoma Pastry Cloth™ Company on Facebook
|
|
 |
|
|
|
Random Thoughts: Reunions and Things
Thursday, August 30th, 2012
 It’s been rather crazy around here. Much, much traveling with back-to-back trips. One trip was to Georgia so that Mr. Fix-It could do some training while I got to spend time with my precious Aunt Lois and Uncle Ed and see the new cottage that they are building. It is next to what will be their daughter’s home. They are in a retirement home right now and all I can say is that I am THRILLED that they are getting out of there and into their own place. I am not lying. I felt 90 years old when I left that retirement home. No smiles. No laughter. No sound. No nothing. Very dismal. It is so gratifying to see how my cousins are willing to give their parents the support, encouragement and help that honors the sacrifices that my aunt and uncle made for their children over the years.  Of course, if one is in Georgia during peach season, one MUST buy peaches and that is exactly what Mr. Fix-It and I did at the most enormous peach orchard I’d ever seen. There was no end to the peach trees and it just made me tired to think of all the work that goes into dealing with that many peaches. This family-owned orchard also supplies homemade peach ice cream to perspiring customers who brave the heat and humidity to purchase baskets of huge fruit. And what fruit it was! “Like candy,” comes to mind.   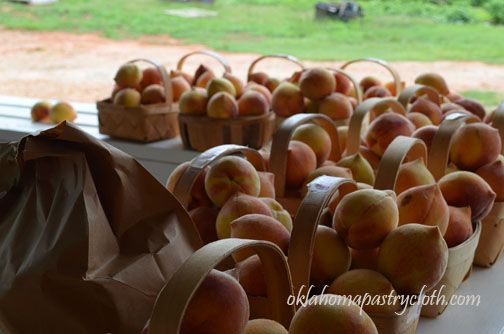   Mr. Fix-It and I came home to an even hotter Oklahoma of 110º – 114º days with no rain. We watched as grasses dried to a crunchy carpet of brown and trees slowly died, even though Mr. Fix-It diligently watered everything as best he could. Fires raged in nearby areas and the thought of leaving again was not really an option. But I had a high school class reunion to attend and I am sure that y’all can imagine that Mr. Fix-It was chomping at the bit to attend it with me!! This reunion, I am willing to admit, was my 40th year shindig. Yep. My classmates are all old. I’m not old, but they are! Fortunately, we Okies got about an inch of rain to alleviate any fears of leaving home to the fires and so Mr. Fix-It got his wish to be dragged, kicking and screaming, to a party where he was to converse with people he’d never met, didn’t know and who played absolutely no part in his world. As for my part, I agonized over what to wear. You know: “What outfit will make me look like I stepped out of Vogue even though, I don’t know what Vogue is or how one steps out of it? What jewelry will give the appearance that the Queen of England felt obliged to give me the crown jewels? Sandals or dress shoes? Heels or flats? Teeth whitening or ventriloquize through closed lips?” And my Thyroid Eye Disease tends to make me look like I’m either drunk or shocked at the sight of everything – wide, red, watery and exaggerated – how was I going to downplay that? Let me tell you, if you make it to your 40th reunion, you no longer care what the guys think. You simply want the girls…er..women..er…mature females…to look at you and gush, “Oh MY! You haven’t changed a bit! Why, you are just as cute as a bug’s ear and pretty as a peach,” while thinking, “Oh my gosh. I’d have never known her without a name tag. Her hair is platinum (remember?! We don’t say gray!) and I thought she used to be thin! I’m thinkin’ she’s eaten one buttermilk pie short of a bakery!!” And so I chose my wardrobe carefully to reflect only half a bakery and settled for a raid on James Avery for jewelry. There was nothing to be done about my eyes, except to keep them closed – along with my lips. The trip was uneventful – 15 hours of driving through drought-stricken Oklahoma and Arkansas and a stop at Trader Joe’s in Nashville, Tennessee. Trader Joe’s is my favorite. I’ve begged them to come to Oklahoma but was told by a number of their young, geographical geniuses that it isn’t possible to get over the Oklahoma mountains. What part of “wind comes sweepin’ down the PLAINS” do they not get?? We rolled into Knoxville to the home of our dear friends, Clyde and Mary, and settled in for the evening. It was then, that my vanity reared its ugly head. (Yes, admitting one’s flaws is a direct road to continuing them without embarrassment.) I had taken my wedding rings off. I wanted to wear these beautiful gifts from Mr. Fix-It the next day, to prove to my classmates that I had really talked somebody into sharing his paycheck with me on a regular basis, but my ring finger knuckle had swollen twenty times its normal size. Not to be deterred, at 11:30 that night, with Mr. Fix-It and our host and hostess already in bed, I decided to make sure that I could wear the rings. I don’t know why. Don’t even ask me. All I know is that I was determined. I slathered a ton of hand cream all over my hand and finger and got the rings to the knuckle and then, with tongue stuck out between my unwhitened teeth, I forced them the rest of the way into place. There!! They were on. And as I happily looked at them, my finger began to swell more. Oh no. I knew that my finger was going to turn blue. I tip-toed in to Mr. Fix-It, at midnight, and woke him up to inform him that my rings were stuck. You can imagine the sense of compassion and urgency he felt. He said, “I really wish you hadn’t done that. It’s midnight.” Long story short, he watched as I walked around the room with my hand over my head, stuck my hand in the freezer, ran cold water over my finger and tried another round of lotion to no avail. Clyde and Mary, stayed asleep, I think. By 12:30 am, the swelling had at least stopped and since my finger had not fallen off, Mr. Fix-It chose sleep over panic and I slept on the couch with my hand on the back cushions to keep it elevated. About 2 am, Mr. Fix-It came in to check on me, scared me to death and said, “I really wish you hadn’t done that. It’s 2 in the morning.” The next morning, finger still immensely swollen, our friends recommended their family jeweler, Lamon Jewelers, for rescue and I was driven to a very painful experience of getting my rings cut off of my sausage finger. It hurt!!!! And when my precious jewelry had finally been removed, it lay in a bent and twisted heap of metal and jewels that looked nothing like a set of wedding rings. I didn’t cry, but I wanted to. However, this afternoon, I signed for a FedEx package that contained my repaired and glistening rings, shipped all the way from Tennessee and they look just like new. Thank goodness for skilled craftsmen!!! The day of the reunion was full of fun, including a luncheon with a group of my former girlfriends and an afternoon spent with my friend, Robyn, traipsing through old neighborhoods to find the homes in which we had grown up. We found them and shot pictures of ourselves in front of the structures and even met the people who currently live in them. I found out that my old home is haunted – yep – that’s what they tried to tell me – and Robyn traded email addresses with the lovely woman who now calls her place “home” in order to send photos of the house from 50 years ago. The reunion was grand and I so enjoyed seeing the gang that I ran around with in high school, some of whom read this blog and were eager to meet Mr. Fix-It to verify that he is truly the wonderful man portrayed! They were in agreement. The trip back to Oklahoma the next day was also uneventful except for the moment that I came out of a restroom stop and calmly entered the car, wondering where Mr. Fix-It had gone, only to see him sitting in another car nearby. I was in the wrong car. He was laughing his head off. 1900 miles in four days is a bit rough, but it was worth it and I will treasure the memories of seeing so many people from my past. I thought that I would show those of you who haven’t ever made a peach pie before, how I do mine if I am not using my homemade peach pie filling. That was the case with the peaches from Georgia. I froze them in slices and thawed a gallon to make a pie, but I also use fresh. I figure that I’ll be ready for the next reunion where they can say that I only look like I’ve been eating one peach pie short of an orchard. Much healthier, I think. 1 gallon sliced peaches 1/2 cup flour 1/2 cup sugar 1/2 tsp cinnamon 1/4 tsp nutmeg 1 double pie shell 2 pats butter cinnamon sugar Make your pie crust. My recipe for multiple pie crusts is great for a quick pie. 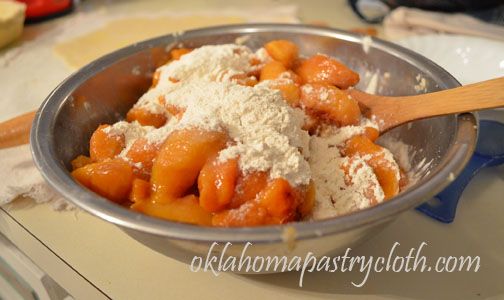 Put peach slices into a large bowl with flour, sugar, cinnamon and nutmeg and toss until pieces are coated.  Pour coated peaches into an unbaked pie shell 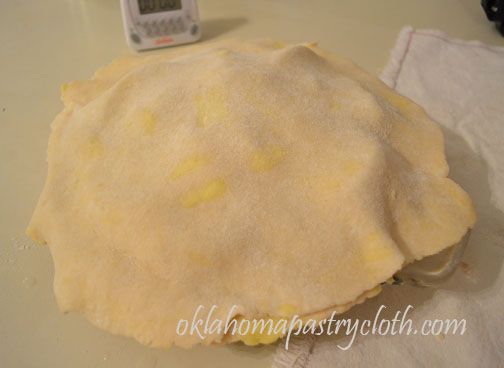 Wet the edges of the bottom crust with ice water and lay top crust on top. 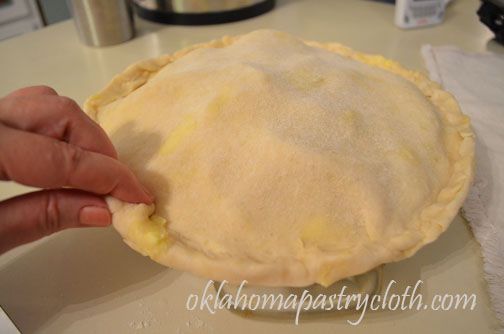 Roll bottom and top crust edges together to form a coil around the edge of the pie.  Flute the edges by using a floured knife end and pushing the pie dough into the pinched fingers of your opposite hand 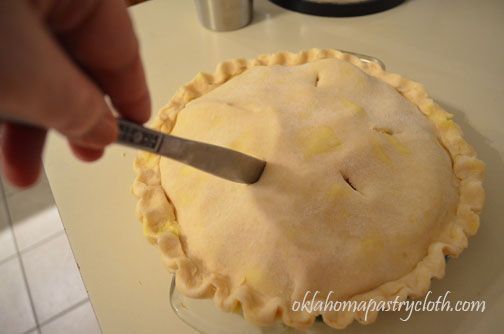 Cut slits in the top of the pie dough to vent the pie 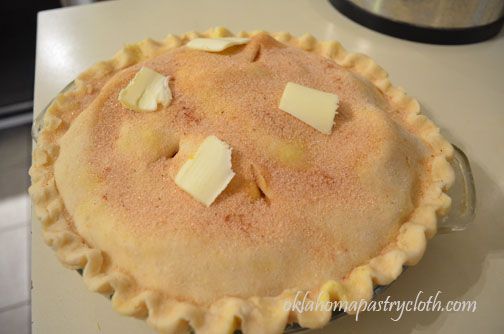 Sprinkle cinnamon/sugar over the top of the pie crust and dot with butter. Bake in a preheated 400º oven for one hour or until golden brown and filling is bubbling. Remove from the oven and allow to cool on a rack for an hour before cutting. 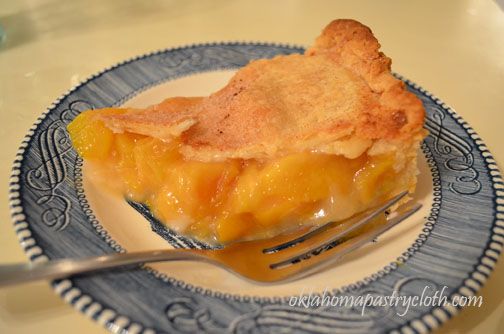  |
|
| |
|
Oklahoma Pastry Cloth™ Company on Facebook
|
|
 |
|
|
|
Buttermilk Pie
Tuesday, August 21st, 2012
  (Don’t forget to comment to enter our newest giveaway for this heavy, heavy, marble and wooden rolling pin and package of a Made In Oklahoma mix to roll out! Winner will be announced Labor Day weekend.) Those of you who have been reading this blog over the past four years – yes, y’all! Four years! – know that I am a little crazy. Well, not certifiable, just nutty. Sometimes, I wonder if God wired my brain differently from other people so that it operates just a tad off-the-wall. It just seems that I look at my situations, circumstances and just plain life with the oddest revelations. I can’t just say, “Oh! Look! Fresh corn is on sale!” No. I have to ponder the price, calculate how many ears it will take to fill 50 wide-mouthed pint jars, and, though it’s June, immediately plan who I will be inviting to Thanksgiving dinner in order to determine if 50 wide-mouthed jars of corn can meet the yellow vegetable requirement on the menu! And a simple act of compassion in nature of taking in an orphaned raccoon to bottle feed until it is old enough to make it in the wild on its own, turns into an emergency room visit with a leg broken in five places and a doctor who doesn’t believe I wasn’t up in a tree with the raccoon. OK. So who does that anyway? So, this past weekend, I made Mr. Fix-It a pretty, darned good buttermilk pie, if I do say so myself. And the kitchen smelled heavenly. If you haven’t ever had a Buttermilk Pie, you HAVE to try it! According to Wikipedia, it was originally a British desert that became a standard here in the deep south. Evidently, it offered a sweet alternative to fruit pies when fruit was out of season. However, Wikipedia also said that you just don’t hear about these pies anymore. I don’t know what they are talking about, because Buttermilk Pie is served in restaurants around here, and Texans claim that, of course, their’s is the best there is! There is a drastic difference between a Buttermilk Pie and a Chess Pie as there is no corn syrup or corn meal in a Buttermilk Pie, and individual cooks like to add their own touches of extra nutmeg and cinnamon, or cloves, lemon extract and rind, or other various flavorings to this versatile custard pie. Anyway, I’m guessing you won’t be surprised that as I made my pie, rolling out the pastry, beating the eggs and such, even though I had no clue that this was a British confection, my brain had a 1960’s British Invasion, and I couldn’t stop singing the Beatles’ Uncle Albert song. You know – “so I had a cup of tea and a butter pie (you have to pronounce it ‘buttah’); the butter wouldn’t melt so I put it in the pie”. And I’m STILL singing it. ~Sigh~ Parts of the tune are hauntingly beautiful and the lyrics are harmless enough, although those boys must have had way too much pie as they came up with that song – or maybe something else. Here, you can click on the song so that it will rattle around in YOUR head for a week. Here is my recipe for Buttermilk Pie. It’s a pretty ancient one. I sure hope you enjoy it as much as Mr. Fix-It. And as you munch on it, just contemplate what a special man he is to patiently endure my crazier side!! Ingredients: 2 cups sugar 1/2 cup butter, softened (1 stick) 3 tablespoons all-purpose flour 3 eggs beaten 1 cup buttermilk 1 teaspoon vanilla extract 1/8 teaspoon nutmeg 1 9″ pie unbaked pie shell variations: Add 1 tsp cinnamon and 1/4 tsp ground cloves or Add 1 tablespoon lemon extract and 1 tsp lemon zest 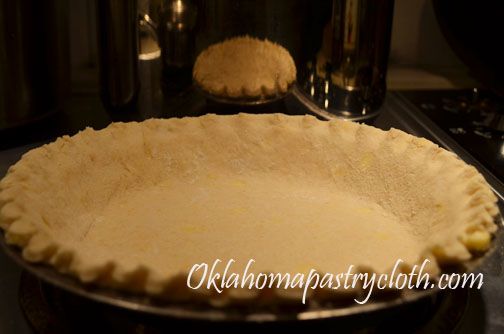 You can use any pie crust recipe. Of course, I use my recipe! I like my recipe because it has butter in it instead of just shortening. Flaky and buttery! Roll out your crust and place it in a 9″ pie tin. Of course, you CAN use a store bought pie crust..cough..cough. 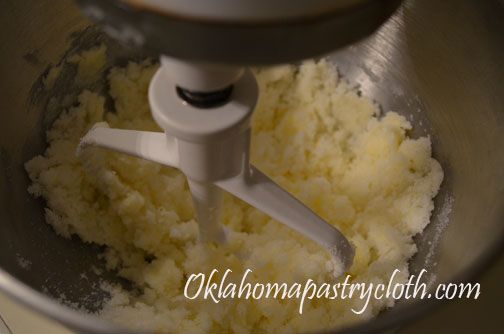 Cream the butter and sugar until light and fluffy. Add the flour and mix further. 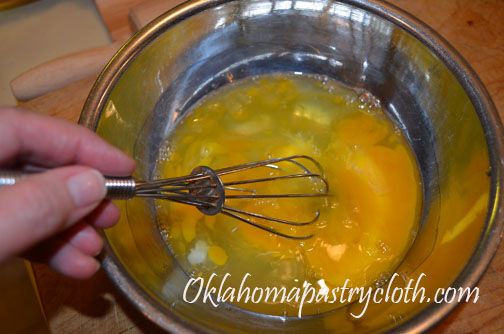 In a separate bowl, lightly beat the eggs. 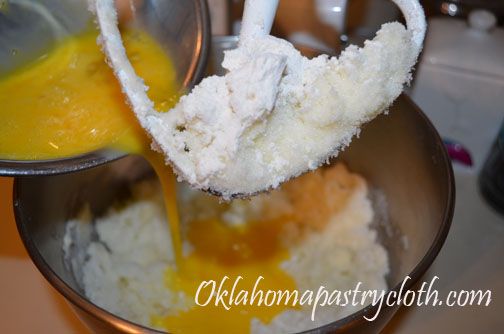 Add the beaten eggs to the creamed butter and sugar mixture 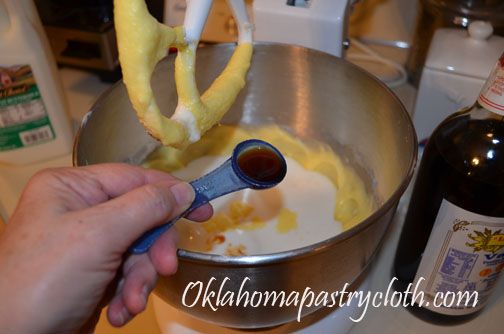 Add the buttermilk and vanilla  Add the nutmeg. If you want to add cinnamon, cloves, more nutmeg or any other flavorings, you would do that here. Mix until well incorporated and creamy. 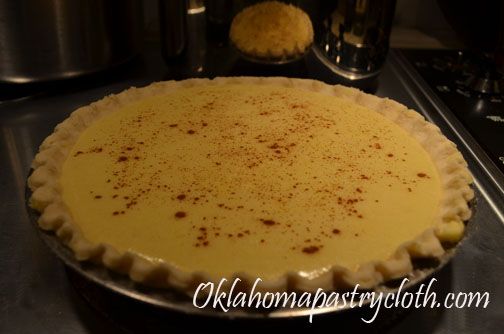 Pour the creamy custard into the pie shell. Dust the top of the custard with cinnamon. Bake in a 425º oven for 15 minutes and turn down to 350º to continue baking for 30-40 more minutes or until top is golden brown and center is firm, not liquid. It will jiggle a bit but won’t be sloshy. The center will solidify as it cools. Chill and serve cold, but some people like it at room temperature.  Serve with whipped cream and unhook your belt!! Singing!  |
|
| |
|
Oklahoma Pastry Cloth™ Company on Facebook
|
|
 |
|
|
|
Warm Spiced Parsley Ginger Marinade!Yummy!!
Tuesday, August 14th, 2012
  (Don’t forget to comment to enter our newest giveaway for this heavy, heavy, marble and wooden rolling pin and package of a Made In Oklahoma mix to roll out! Winner will be announced Labor Day weekend.) I’ve been sitting here, patiently twiddling my thumbs, having dutifully turned off all computers and the water heater due to a power outage this afternoon, that occurred without warning. I called the power company to alert them that we are without electricity and the woman laughed at me! She did. I asked if she had any idea how long this outage would last, and again, she laughed. Did I sound that funny? Or maybe she heard the terror in my voice as I assumed that she was hinting to me that we would never have electricity again? Mr. Fix-It isn’t here this afternoon and so I am totally on my own. I am like Mrs. Ingles on the prairie, only with two dogs and two cats instead of children. And you can’t eat your dogs and cats any more than you can eat your children!!! How will we survive? I have already assessed my stock of deydrated food stuffs, mentally preparing what could be on the menu for the evening meal. I still have two quart jars of my homemade beef jerky that I have managed to hide from Mr. Fix-It and lots of veggies. I have water in the Berkey to boil and pour in with the veggies and meat to make soup and figure that could last us a few weeks. But it just dawned on me that we are under a burn ban so there will be no fire to boil the water. And it is getting stuffy in here. Never mind that the 115 degree days have broken. It has been 88º outside and who can live in 88º without air conditioning? I mean, really? Well, that’s all there is to it. We are all going to die. I remember the nice man who came to talk to us about a generator. We had all chuckled that if we invested that much money into something, we would end up never needing it. That is how Murphy’s Law works, you know. We didn’t buy one. Now it is payback. No generator – no electricity. I can’t even get the car out of the garage because the door is electric and HEAVY and I haven’t competed with Olympic heavy-weight lifters in some time now. And I have no water! Ack. The well pump is not working. All I have is what is in the Berkey. I have to conserve and I feel like it’s been weeks since I had a drink of water. My tongue is sticking to the roof of my mouth. This is rough. Oh wait. Never mind. The lights just came on. Yep! And water is coming out of the faucets. I’m tellin’ you. That was the longest ordeal! The electricity was off, like…let’s see…hmm…an hour and a half? Really? Huh. I thought it was weeks. You know, you just lose all track of time when you are having to rough it. OK. So I’m being silly. The fact of the matter is that Mr. Fix-It is looking into a generator and I’m thinking this episode will give him a little extra boost toward that purchase! We lose electricity a lot in Oklahoma. And this has given more pause for thought on our water situation, as well. A hand pump would be a handy addition to our well system or a windmill with a tank. We’ll have to think about that too. We all need to be thinking about ways that we can live more sustainably without depending so much on outside forces. And trust me, two quarts of beef jerky won’t cut it!! This kind of thinking always sends my tastebuds to grilling out. Unfortunately, we can’t do that right now. Too dangerous with a chance of a grass fire. But it hasn’t been that long ago that we weren’t under a burn ban and I tried a meat marinade that Mr. Fix-It found online that is just to die for. He said that he found it at American’s Test Kitchen. It is wonderful and unique and doesn’t take much time. Try this out. I promise that you that you will be hugging yourself and saying, “Who needs a Steak House??!” So, here’s hoping that you have electricity all the days of your life…and that you will be well-prepared just in case you don’t!! Warm-Spiced Parsley Marinade with Ginger 1/2 cup (packed) fresh parsley leaves 1 jalapeno chile pepper, seeded and chopped course 1 (2-inch) piece fresh ginger, peeled and chopped course 3 medium cloves garlic, peeled 1 tsp ground cumin 1 tsp ground cardamom 1 tsp ground cinnamon 1/s cup olive oil 1 tsp salt 1/8 tsp ground black pepper 3 or 4 one inch to one and a half inch thick steaks, preferably New York Strip, Ribeye, Filets or Sirloin 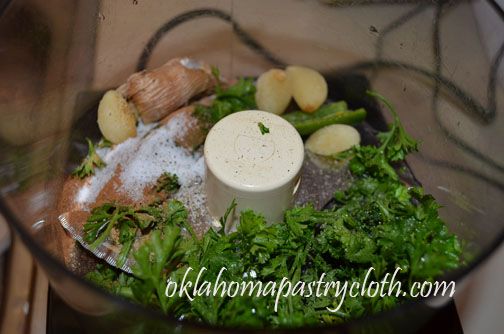 Place first 10 ingredients into a food processor or blender 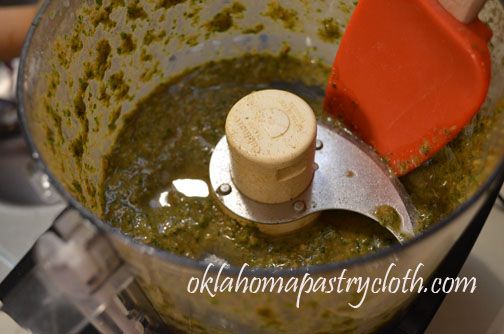 Process until all ingredients are well-blended and fine  For Kabobs, trim all fat from steaks and cut into 1″ cubes. Sprinkle with tenderizer. Or, leave steaks whole and sprinkle with tenderizer. 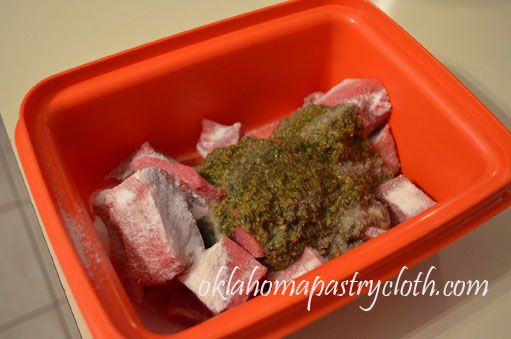 Place steaks or cubes into a container that has a tight lid and add marinade from the food processor. Seal with lid. 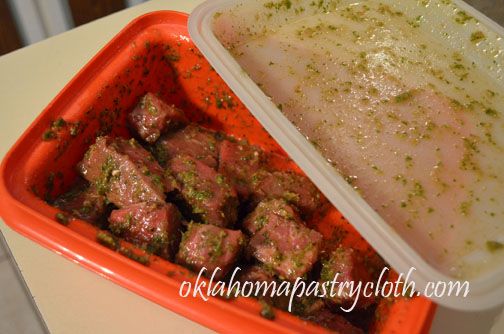 Toss until all cubes or steaks are coated with the marinade. Place in the refrigerator, covered, from 4 up to 24 hours. I did mine overnight and until the next evening – probably 18 hours. 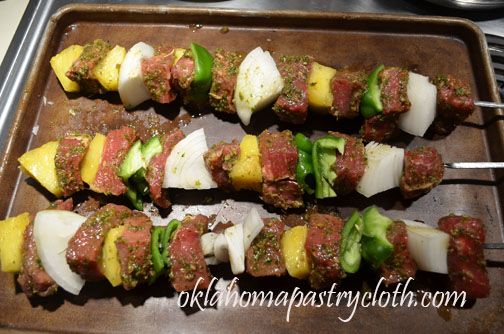 For kabobs, on skewers, alternate meat with pineapple, sweet onions, green pepper or you can also add mushrooms and parboiled new potatoes.  Place steaks or kabobs on a hot fire. Coals should be gray, glowing red. And these are now my instructions about how we cook a steak. Sear one side of the meat until browned and quickly turn to the other side. Immediately cover the grill with lid and allow steaks or kabobs to cook, undisturbed for 7 minutes for medium-well, 6 minutes for medium and 5 minutes for medium rare. 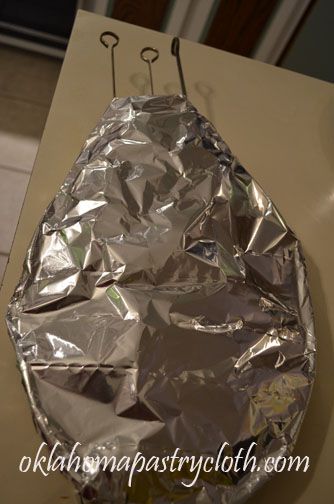 Immediately remove steaks or kabobs to a platter and cover with aluminum foil. Allow to rest for 10 minutes. 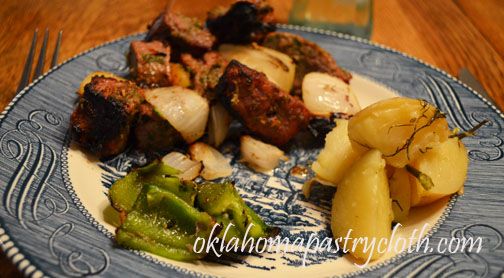 Serve immediately  |
|
| |
|
Oklahoma Pastry Cloth™ Company on Facebook
|
|
 |
|
|
|
Dried Ears
Tuesday, July 31st, 2012
  Well, it appears that my internet is totally hosed for who-knows-how-long. It has been down and I have waited patiently for a reawakening, only to find out that the company is down all the way into Kansas!! Somebody cut a cable. Dear Mr. Fix-It got me hooked into a mobile unit and so I get to write a really fast post!! Today, the subject is “Apricots”. Growing up, I loved dried apricots. We kids would get a bag and devour them instead of candy. I still love them today and I still call them what we used to call them, “Dried Ears”. Seeing my cousin recently, she affirmed that THEY call them dried ears as well! You can’t deny that dried apricots look like something some faraway, cannibal tribe collected from unsuspecting captives, not to mention that which Van Gogh sent to his lady love. OK, so now I’ve really made them appetizing, eh? Apricots are a member of the same family as peaches, plums, apples and pears but are most closely associated with plums. They grew wild in China as long ago as 2000 BC and it was the Chinese, through the silk and spice trade, that brought the fruit to the Middle East and Mediterranean countries. Romans made the apricot trees part of their culture around 100 BC as did the Greeks who called them, “the golden eggs of the sun”. By the Middle Ages, apricots were being cultivated throughout Europe. The Spanish brought the fruit trees to the New World, first planting in Mexico and later in what is today’s California, which is the leading producer in our country today. Because of our climate in Oklahoma, apricot trees produce quite well and quite prolifically. If you remember from the past post on the bunnies, Sir Flying Ace’s dog found those bunnies in an underground nest beneath his apricot tree. Last month, I joyfully emptied that tree of as many of the jewels as I could reach and then Sir Flying Ace brought me another sack that he had gathered. Mr. Fix-It and I have a young apricot tree, but it will not be ready to produce for another two years. From Sir Flying Ace, I got enough apricots to make some amazing jam, some baby food for the grandbaby and a goodly amount of dehydrated halves for snacks and dried apricot fried pies. I thought I’d give a few pictures of what that included. Apricot Jam 5 exact cups diced fruit (about 3-1/2 lb. fully ripe apricots) 1/4 cup fresh lemon juice 7 cups sugar, measured exactly into a separate bowl 1 box SURE-JELL Fruit Pectin 1/2tsp. butter or margarine 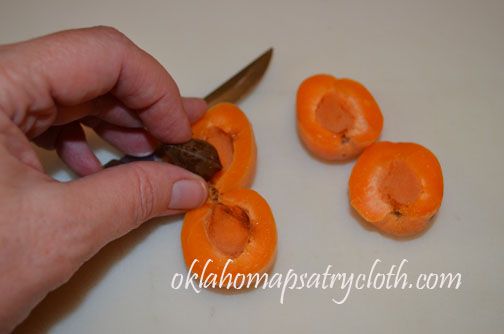 Apricots are easy, easy to prepare. They are used – minus the pit – skin and all. All you have to do is make a cut all the way around the fruit, to the pit, and then pull the halves away to lift out the pit. The pit doesn’t even stick. 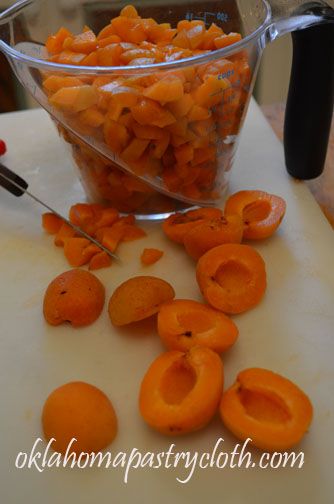 I use a food processor to chop my apricots. I use the pulse feature so that I don’t liquify them and make the pieces too small. 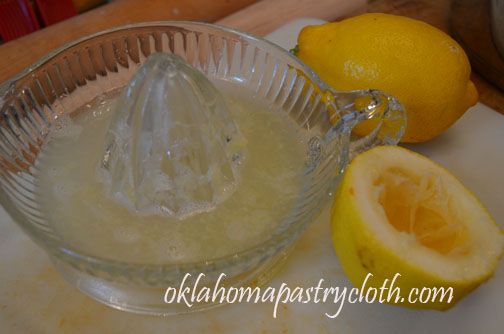 The chopped apricots are put into a large pot with lemon juice and the SureJel is sprinkled onto the fruit and stirred in until well dissolved. The butter is then added to keep frothing down.  On medium-high to high heat, the fruit is brought to a rolling boil. At this point, the sugar is added consistently and quickly as you stir. I use a wire whisk to stir the jam as I pour in the sugar. It is important to have the sugar measured out ahead of time because you will not have time to do that once the fruit has started boiling. Anyway, once the sugar is stirred in well, bring the jam back to a rolling boil and boil for one minute. 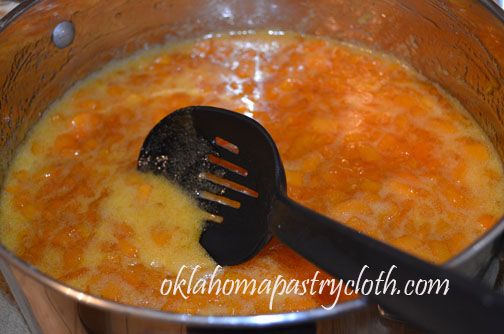 After one minute of boiling, remove the pot from heat and skim any froth off of the top with a spoon. You can put the froth into a bowl and use for jam yourself. Removing the froth just makes the jars prettier. 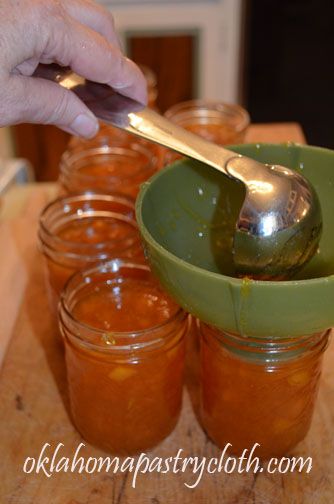 Ladle the hot jam into sterilized jelly jars to 1/2″ head space. 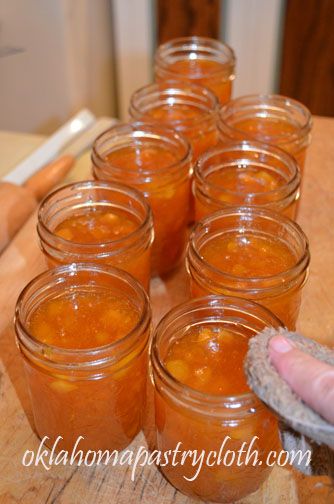 Wipe rims of jars with a warm, wet cloth to remove any drips or oils from your hands. 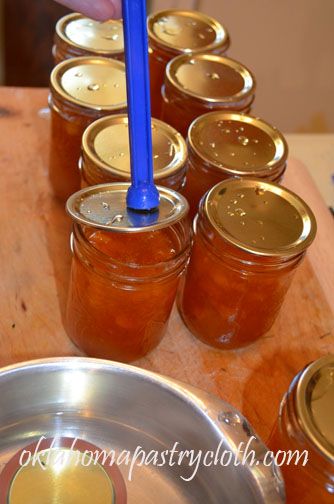 Place lids that have been warming in hot water onto the jars. Add rings and tighten and then back them off a smidge. 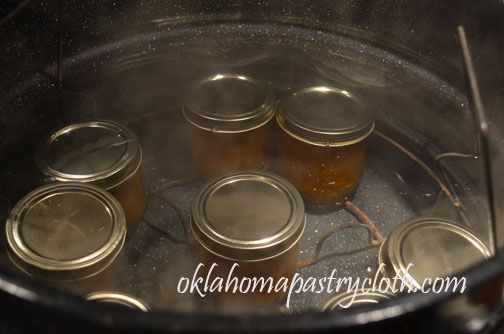 Place in a waterbath canner of warm water and process for 15 minutes. 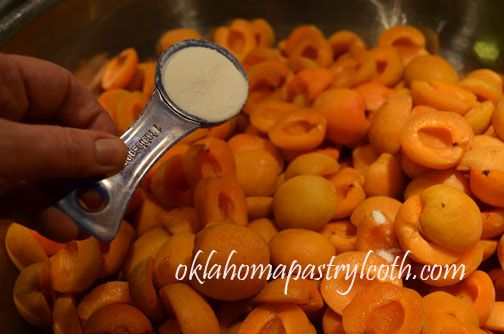 I also dehydrated a bunch of apricot halves. First, I cut the halves into a very large bowl and tossed them with a couple of tablespoons of Fruit Fresh. The apricots are not skinned. 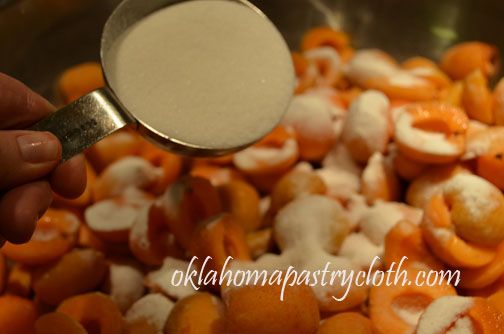 I then toss about 1/2 cup of sugar into approximately two gallons of apricot halves because I like for there to be a little bit of a glaze when they are dried. 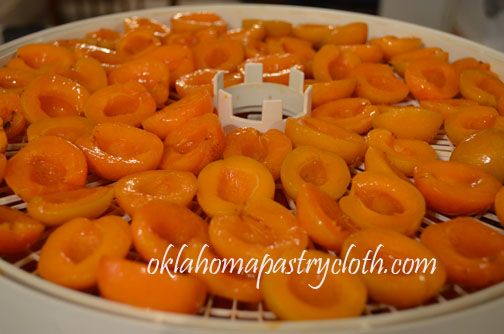 The halves are placed on the dehydrator trays. The trays have been sprayed with olive oil to keep the apricots from sticking. 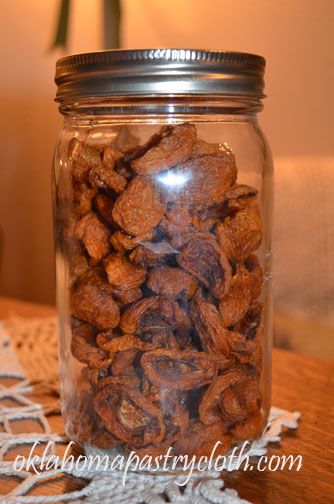 I store the dried apricots in quart jars that have been vacuum sealed with a FoodSaver.  |
|
| |
|
Oklahoma Pastry Cloth™ Company on Facebook
|
|
 |
|
|
|
Homemade Ice Cream Like No Other!
Thursday, July 5th, 2012
 Happy July 4th week. We had such a special day. We got to spend it with the oldest daughter, her husband and their little girl – yep – that grandbaby again!! We ate and talked and ate and watched old home movies and ate and shot off fireworks (since we live way out in the country) and then stopped eating. The grill got fired up for bratwurst, hot dogs and luscious hamburgers infused with olive oil, liquid smoke, garlic powder, salt and worchestershire sauce. Dinner was good. But dessert was better! Now, I have to interject here that I have never – and I seriously mean never – made a decent batch of homemade ice cream. In fact, I can truthfully say that I’ve never EATEN a decent batch of homemade ice cream. I grew up on the stuff and, I suppose I need to apologize to family, but I always hated it. Just hasn’t ever been my cup of tea – well – bowl of ice cream. It was always so fragile that it turned into soupy stuff too fast, was grainy with ice crystals and was just too, too sweet. Putting chocolate syrup on top of that made it sickly sweet. And then, when leftovers were frozen, the result was a brick the shape of the container that no jackhammer could chip! Just a big waste of ice, salt and electricity to me!  Last Father’s Day, we got Mr. Fix-It a fancy, schmancy wooden ice cream freezer that can either be used with a hand crank, or made so much easier with an electric crank. Sadly, the gift had never left its box and so on the 4th, Mr. Fix-It announced that he wanted homemade peach ice cream, made with peaches from our trees. I was bound and determined to find a recipe that would knock his socks off. AllRecipes.com came to my rescue!! In order to make this recipe, you have to plan ahead because the base needs to chill in the frig overnight. That is very important. I made the base at about 9 in the evening on July 3rd, poured it into a bowl and allowed it to cool for 20 minutes, putting it in the refrigerator to cool thoroughly all night and even about half of the next day. When we poured the custard mixture into the hopper of the ice cream freezer, Mr. Fix-It was a little nervous at the amount. It looked like there was very little in the barrel. However, as it churned, that amount doubled and then tripled and believe me, we had plenty of ice cream! When the ice cream freezer stopped, we packed the canister in ice for two hours before serving. I was amazed at the result. It was the creamiest, most solid, not too sweet confection I’ve ever tasted. I was ecstatic. My daughter and son-in-law had two helpings each and oohed and ahhed over its creamy texture. However, Mr. Fix-It was not a happy camper. I had not made the fragile, soupy, ice crystal laden, ice milk with which we had all grown up. He was so disappointed. He was visably disappointed. But tasting that creamy peachiness, I just couldn’t feel bad. I was so excited over my results that I just couldn’t feel bad. However, I guess that next time, I’m will get two machines going: one with junket-style, old-fashioned, ice milk style stuff and the other with this new recipe!! I can tell you ahead of time which one will disappear first! Mr. Fix-It will be happy to have one ice cream freezer all to himself! So, try this out on your next hot weekend and let me know what you think. Thanks, AllRecipes.com!! 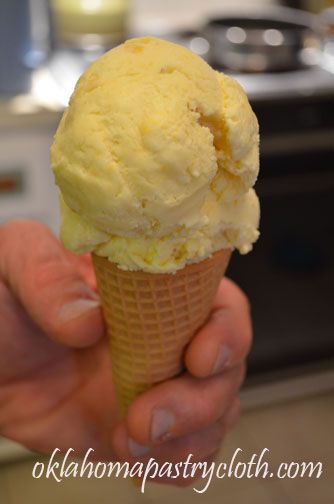 1 cup heavy cream 3 cups half-and-half cream 8 egg yolks 1 cup white sugar 1/8 teaspoon salt 1 tbsp vanilla (I added 2 tsps Mexican vanilla because it is so strong) Optional: 1 cup pureed fruit like peaches, apricots, strawberries, raspberries, bananas, etc. or 1/2 cup cocoa can be added to the egg mixture in the second step for flavored ice cream. Instructions: 1. Pour the heavy cream and half-and-half cream into a heavy saucepan, place over medium-low heat, and heat until barely simmering, stirring frequently. Turn the heat down to low. 2. In the meantime, whisk together the egg yolks, sugar, and salt in a large bowl until thoroughly combined. (Make any additions here) 3. Slowly pour about 1/2 cup of hot cream mixture into the egg yolk mixture, whisking constantly. Repeat three times more, for a total of 2 cups cream added, whisking thoroughly before adding each additional 1/2 cup of hot cream to the egg yolk mixture. Pour the egg yolk mixture back into the saucepan with the remaining hot cream, and whisk constantly over medium-low heat until the mixture thickens and will coat the back of a spoon, 5 to 8 minutes. Do not let mixture boil. 4. Pour the ice cream base into a bowl and allow to cool for about 20 minutes; place in refrigerator and chill overnight. The next day, pour into an ice cream maker, and freeze according to the manufacturer’s directions. Remove the ice cream, pack into a covered container, and freeze for 2 hours or overnight before serving. At this point, I removed the paddle and packed the canister in ice instead of removing the ice cream to another container. I only put the leftovers into a plastic container to store in the freezer. 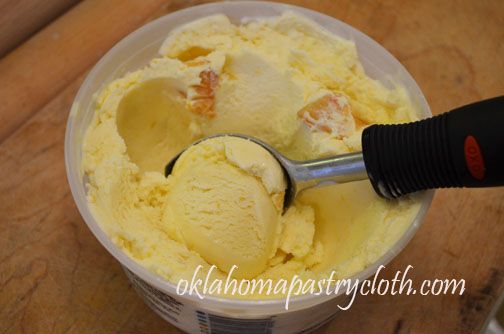 Even after freezing overnight and the next day, it is still just as creamy as can be.  |
|
|
Oklahoma Pastry Cloth™ Company on Facebook
|
|
 |
|
|
Canning For Baby
Monday, July 2nd, 2012
 The fruit overfloweth. Oh my. I have been covered up with apples, peaches, apricots and peacherines. The apricots came first and those went into jam and dried apricots. Then came the apples. These are my apples from our Lodi tree which are only good for apple butter, applesauce and apple juice. So, I made apple butter first, and had help from my daughter. Next, I made applesauce and half of that went into babyfood applesauce which I canned for my little granddaughter. You should see how she eats it, smacking her lips and licking every last drop. She loves her applesauce. 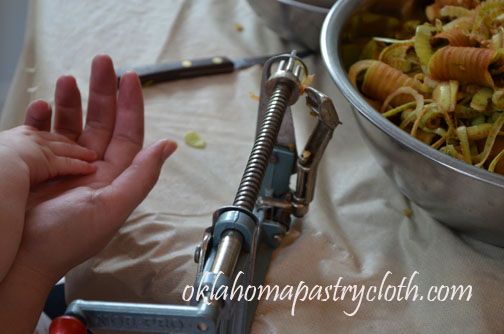 I have been making baby food since my children were little and it is a joy for me to have the opportunity to help my daughter in that preparation, now. We both make foods that are frozen and I do the canning for some so that there will be plenty of food in the waiting. Apricots, peaches and applesauce make up these, so far, because our Little Bit is just starting to eat solid food. No meats yet – just fruits, cereal, sweet potatoes, green beans, brocolli and squash. So, I thought that I would show you new mothers out there, what I do with apples and other fruits. 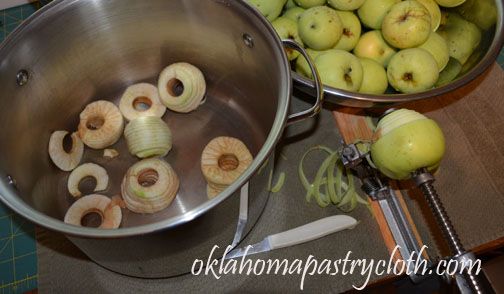 Wash and peel fruit and place in a large stock pot. 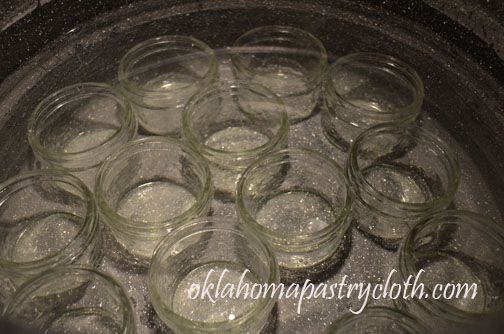 Sterilize jars, boiling in a large pot or by running through the sanitize cycle in the dishwasher 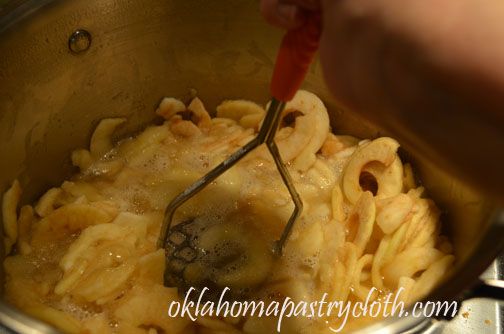 Simmer fruit over medium heat and press with a potato masher. 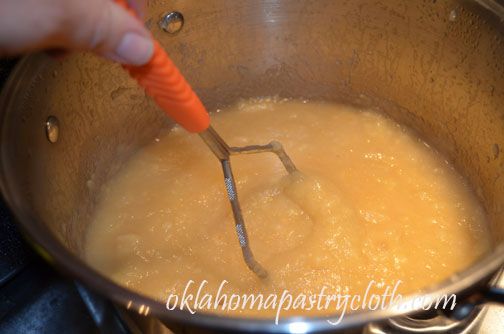 Mash until a pulpy sauce. This is for fruits like peaches, plums, apples, apricots, etc. Veggies, like green beans, brocolli, sweet potatoes and squash are cooked in water until they are soft and then pureed. (Bananas are just mashed without the cooking.) When pulp is pretty uniform, bring that to almost a boil and hold it there for 5 minutes to pasteurize. 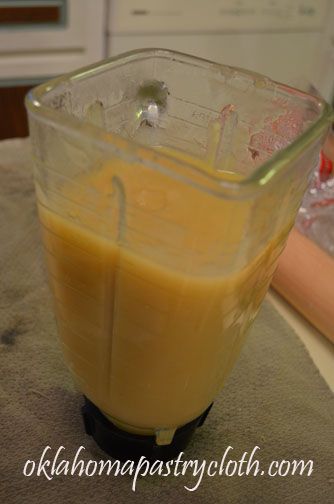 Pour about half of the pulp into a blender and puree. I have found that the blender is better over the food processor. The food processor does not necessarily remove all of the lumps and liquify like the blender. If, like our apples, the fruit is very sour, I use a little bit of Agave Nectar to cut the sourness. I checked to see if babies can have agave nectar and they can have small amounts. In order to keep the fruit from browning, I also add just a tad bit – about 1 tsp per pint – of fruit fresh or lemon juice. You can’t add much because the citric acid can upset babies tummy. 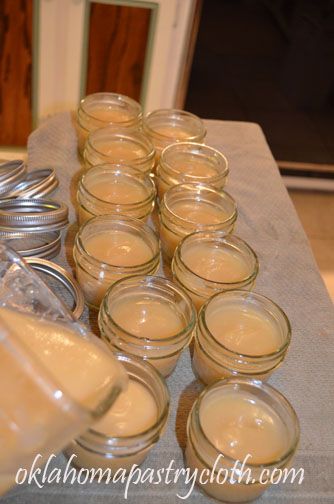 Pour the pureed fruit into 4 oz mason jars. I like the four oz because it is enough for two servings without the leftovers having to remain in the frig too long, gathering bacteria!! 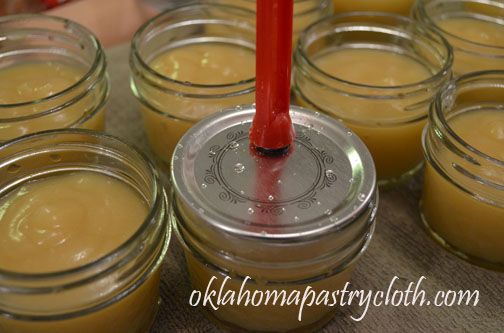 Wipe the rims of the jars with a warm, wet rag to remove any drips and place lids, which have been warming in hot water, onto the jars. Add rings and adjust. Waterbath jars submerged in warm water. Start timer for 15 minutes when water begins boiling. When timer goes off, remove jars to a towel on a table to cool. Listen for the “pop” of the lids sealing. Do not store any jars that have not sealed. Just use immediately. 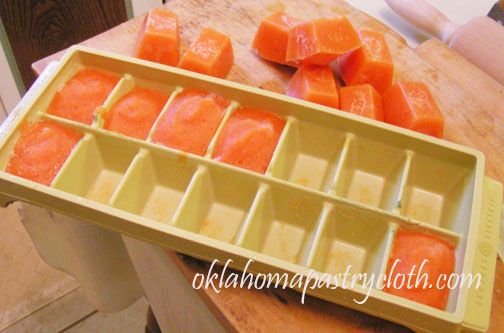 My daughter and I also freeze food for our Little Bit and ice trays really come in handy for that. Each section of a large ice tray holds roughly one ounce of pulp. The food is placed in the sections, frozen and then popped out like ice. 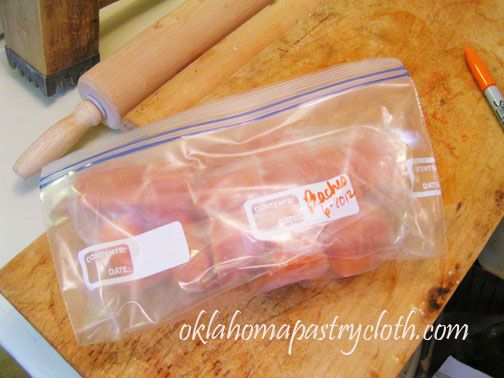 Storage in freezer bags or in FoodSaver bags works great in the freezer. To serve, just place cubes in a microwave-safe bowl and lightly microwave to thaw or place the cubes in a small jar and place the jar in hot water to thaw.  She may not be able to say, “Thank you” yet, but it isn’t required! Her smacking lips and smile say it all!!  |
|
|
Oklahoma Pastry Cloth™ Company on Facebook
|
|
 |
|
|
It’s 105º And Soup?!
Wednesday, June 27th, 2012
 The good news is that my meds seem to be working and I don’t feel like I’m burning up from the inside out, with the accompanying clammy persperation from a metabolism gone haywire. And my eyes are a teeny tiny better and that is awesome. Thank you so much for your kind words, thoughts and prayers. But the bad news is that it is 105º outside. There was a roadrunner on the drive, carrying a frilly, little parasol to beat off the heat as she looked for a lizard. OK. So, I’m exaggerating a little. It was actually just a tiny fan.  I have to tell you about my adventure with our little Ellie-dog, our long-haired mini dachshund, in this heat. I was driving on the interstate, after having made some deliveries, and Ellie went along for the ride. She was in the front seat, panting from the very hot day and trying to get comfortable, when all of a sudden she jumped down to the floor. I told her to get back into the seat, but she dove under the car seat to the crackling and rustling of paper and plastic wrap. Backing out of her hideout, she jumped into the seat with a stale, partially eaten, chocolate cupcake. Chocolate can be deadly to dogs and I knew it. Just to give background: A few weeks ago, in a moment of absolute insanity, I had purchased a packaged “Super Chocolate” cupcake from a huge pile on a table at the grocery store. The pile was so inviting to a person who is supposed to be totally abstaining from such things and besides, there was a big, big sign that declared, “SALE!!”. They were on sale. That’s a siren song to this coupon shopper. I had to have one. So I did. When I got to the car, I opened the package, took one bite and thought, “Bleh! That’s awful!!” and put it back into its plastic wrapping, intending to toss it in the trash. That was a sale down the drain. I don’t know if my separation from such things made that cupcake taste bad or if it was just a sorry product, but whatever, my picky tastebuds saved me from myself. I placed the wrapped cupcake in a small bag and put it on the floor of the car, where I promptly forgot about it. I must have stopped fast or something, because that little bag rolled under the seat where it went to live in a cupcake no-man’s land. That is, until Ellie found it. As soon as she had grabbed that cupcake, she jumped onto the seat cushions on the passenger’s side of the car while, at the same time, my hand shot out to grab her nose. Now, remember that I am on the interstate going 70 mph. Ellie was trying with all her might to wolf down her treasure before I could pry her mouth open. Driving with my left hand, I stuck two fingers of my right into the back of her jaw, opened her mouth and scooped out wads of slobbery cupcake as Ellie tried valiantly to grab it back along with my fingers. I yelped. Using the elbow of my left arm, with hand on the wheel, I managed to get the window open partway in order to toss the offending cupcake onto the highway. I figured that it was so slobbery that it would decompose and that wouldn’t be considered littering? I managed to hold Ellie’s collar in such a way that she could not move to grab the chocolate pieces that had broken off and scattered all over the seat. And I mean ALL over the seat. Instead of heading back to work, I made a detour to the vet and plopped my silly puppy onto the table, stating rather foolishly, “She ate a chocolate cupcake. Not all of it, but some of it and it said that it’s a Super Chocolate cupcake!” The vet dubbed her Cupcake Dog and did an exam, using the name frequently. He determined that she was just going to have a really bad tummy ache because – yes, we read the ingredients on the cupcake package – there wasn’t even enough chocolate to call it just a Regular Chocolate cupcake, much less Super Chocolate. False advertising indeed. And so, Ellie, Cupcake Dog, did fine and I bandaged my fingers where she had been unable to distinguish between them and globby cupcake. No harm done. Better for you than preservative-filled, pretend chocolate cupcakes are the veggies in your garden. You do have a garden, right?! If not, then start thinking about next year! If you are like me, your garden is coming in all at once right now. It makes an overwhelming task to deal with mountains of tomatoes, potatoes, corn and every other kind of vitamin-filled vegetable that show up at this time of year. At the request of a reader, who asked what other kind of soups I process that use potatoes, I thought I’d share a recipe that my friend Janis invented and shared with me a number of years ago. She serves it every cold, Halloween night to volunteers who help with her community project. Her method of making this soup is the “dump” method and the ingredients include the “kitchen sink” but I put together a batch and measured what I did so that I could pass that on to you. The nice thing about this soup is that it makes so much that you are able to can it in the pre-meat stage and then cook up your meat prior to serving so that it is fresh tasting and delicious. The recipe makes about 8 pints of base soup. Of course, you can make this large batch for a crowd and add your meat at the end, without worrying about canning it. So here you go: 6 – 8 cups fresh tomatoes that have been blanched, skinned and quartered or chopped. (You can use canned tomaotes if you do not have fresh, one can being Rotel tomatoes) 1 can chicken broth 1/2 to 1 jalapeno pepper diced (not needed if using Rotel tomatoes) 1/2 teaspoon baking soda 3 medium new potatoes chopped with skin left on 3 carrots, chopped 1 cup corn (frozen is fine) 1 cup green beans (frozen is fine) 1 cup fresh or frozen peas (optional) 1 large onion chopped 1 1/2 cup cooked pinto beans or kidney beans or a can of drained Ranch Style Beans 1 26 oz can of your favorite brand of spaghetti sauce – I like Hunts To Serve Soup (For 1 quart) 1/2 lb hamburger 3 cloves garlic salt and pepper 1/3 cup shell pasta 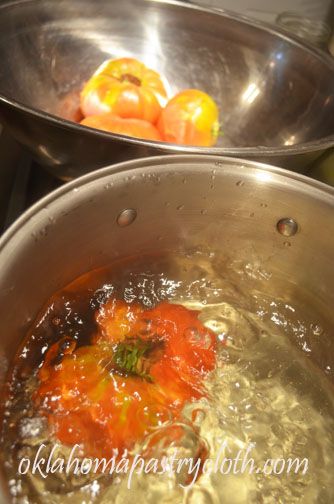 Drop tomatoes, whole, into boiling water and watch for the skins to split. Remove to ice water when the skins split. Slip skins off of tomatoes and quarter or dice tomatoes and place into a large stock pot. 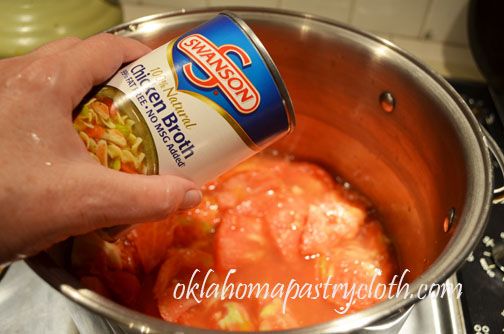 Add can of chicken stock to tomatoes and bring to a boil to stew. 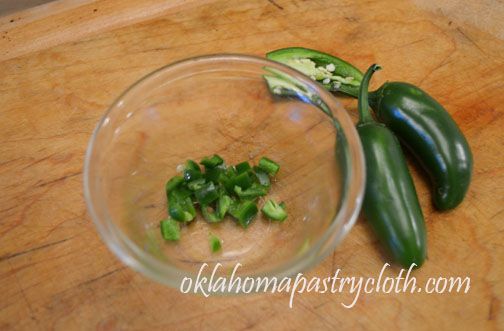 Add jalapeno  Add chopped new potatoes and carrots. Continue to boil until carrots are tender.  Add chopped onion  And just a little hint. When using fresh tomatoes and cooking them, often they have a slightly bitter taste. If you make spaghetti sauce or even juice from fresh tomatoes, this can be a problem. The solution is to add about 1/2 teaspoon of baking soda to the tomatoes as they cook. They will foam up like the top of a volcano! But this cuts the bitterness totally and gives a more smooth, nice taste. If using commercially canned tomatoes, this step can also be necessary. Note: Do not add soda if you are going to can tomatoes only, using the waterbath canning method. This cuts the acidity and reduces the safety of using waterbath canning. For this particular recipe, we will be pressure canning it, so reducing the acid will be fine. 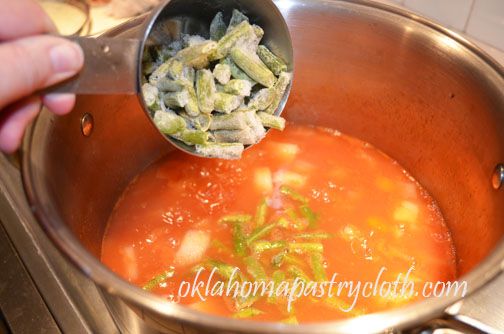 Add green beans, corn and peas (peas are optional). I am using frozen here, but fresh is great. 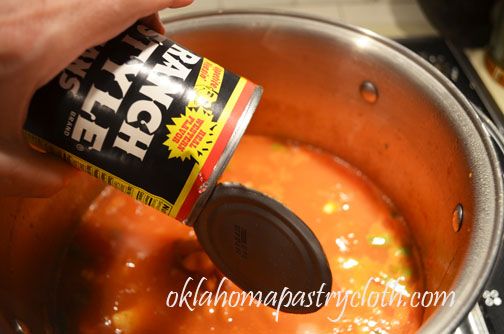 Add beans 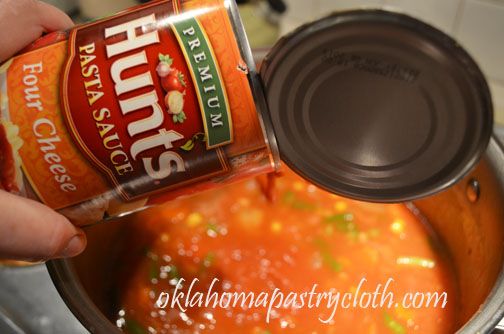 Add spaghetti sauce 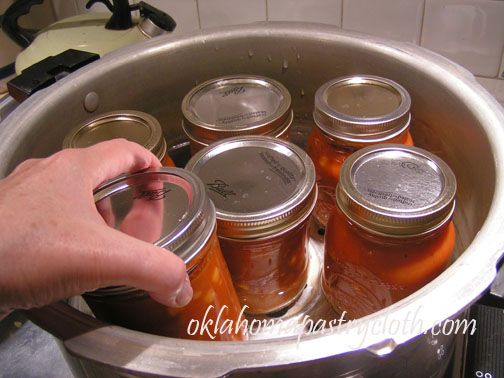 Put soup into jars, either pints or quarts, and process in a pressure canner on 10 lbs of pressure for 60 minutes for pints and 75 minutes for quarts. 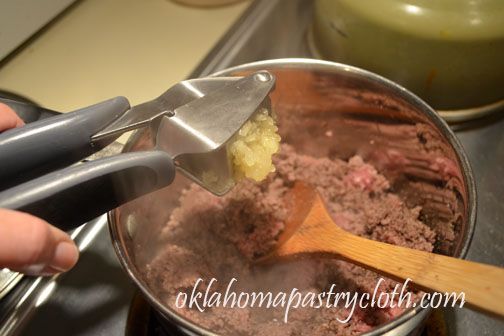 To serve, open a jar or two of the soup base and put into a deep pan. Add one cup of water for one quart of soup base. For 1 quart of soup, cook 1/2 lb of hamburger or ground chuck with 3 cloves of pressed garlic, salt and pepper, until browned. 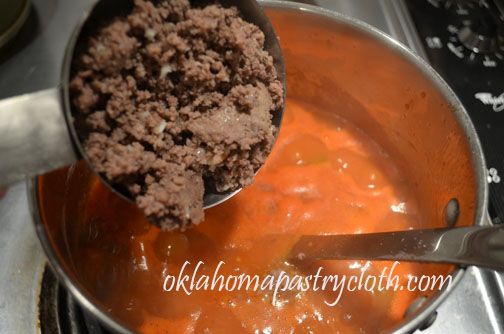 Add beef to the soup. I like to add pasta shells too. Boil until the pasta is tender and add more water as it cooks to thin if need be.  Serve hot with fresh cornbread. This is a wonderfully quick dinner on a cold, winter night. Also, just for information, this is great for camping. Dehydrated hamburger can be purchased at many hunting/camping stores, as well as at Costco. This meat can be rehydrated and cooked with the garlic and salt and pepper and then added to the soup. Great meal for around the campfire or when the electricity goes out!  |
|
|
Oklahoma Pastry Cloth™ Company on Facebook
|
|
 |
|
|
Canning A Refreshing Drink
Wednesday, June 6th, 2012
 Boy, do I love this time of year…I think. Everything is coming in at once – peaches, apricots, nectarines, raspberries, blueberries, potatoes. And all of these things have to be processed before they go bad. Waste not – want not!! God has been good to us Okies this year and what we are given, we must use!! It just means that the kitchen becomes our sole domicile for awhile, along with the heat and mess that includes. I am a messy cook. I DO wash dishes as I go, but it just seems that I can’t keep up with those dishes or the juices and goo that come from my various food sources. By the time I am finished, hard as I try, I’m still walking slower than usual as my shoe soles stick to the floor and I’m trying to reach gummy splatters on the walls two feet over my head, wondering how in the world they got there. And then of course, there’s my stupid choices of cooking utensils as happened with my first run of strawberry jam his year. I don’t ever seem to remember that I flunked the spacial perception test in the 8th grade. 1st Law of Jamming: Attempting to make jam in a pot that is too small always results in an overflow of thick, sticky jam onto the stove surface and under the stove top, down the front of the oven door and pooling in an oozing mess on the floor. 2nd Law of Jamming: The number of rolls of paper towels needed to clean up after making jam or jelly is directly proportional to the lack of spacial reasoning of the cook. It was with joy and relief that I was introduced to a recipe for my newly picked strawberries, by reader Margaret D., because it did not require boiling and the subsequent mess associated with such. She shared this amazing and refreshing fruit drink and of course I had to try it. Oh my. Delicious!! And what is so neat is that the drink is canned in jars to be used all summer, and even winter long! The process is easy – well, minus all the juicing required but if you have an electric juicer, no big deal – and the result is a concentrate that can be added to tonic water, ice water, Sprite or Ginger Ale. Here is her simple recipe: 6 cups hulled strawberries 4 cups freshly squeezed lemon juice (or lime juice) 6 cups granulated sugar Note: Blackberries or raspberries can be used for the fruit. Have a waterbath canner ready with warming water. Place lids into hot water to soften and have jars sanitized, warmed and ready. This recipe makes about 7 pints of mix. I did a combination of pints and half pints since there are only two of us.  There’s an excellent opportunity for strengthening arms if one uses an antique juicer like I did!! If you have an electric juicer, congratulations! I made this recipe with lime juice because we love limeaids. 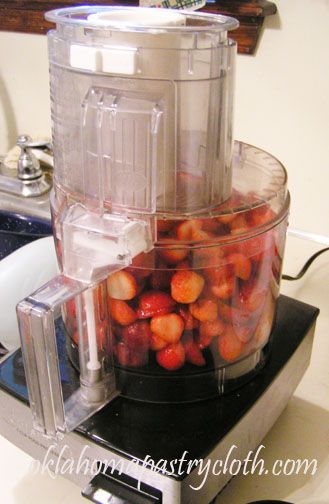 Puree the strawberries in a food processor or a blender. You CAN strain the juice of any strawberry seeds through cheesecloth if you are a hardworking and organized soul. I decided to live with the seeds!! 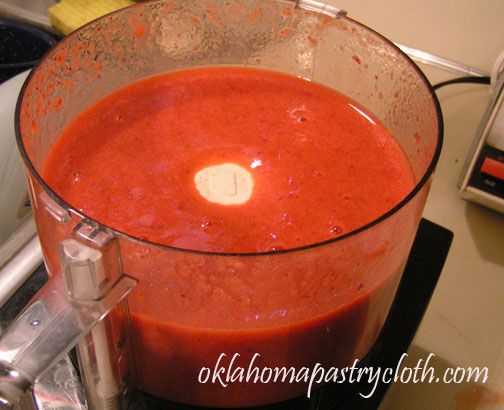 Liquify the berries.  Add sugar to the berries and stir until incorporated. I mixed everything in a large bowl and transferred to my pot, but you can mix directly into the pot if you like. 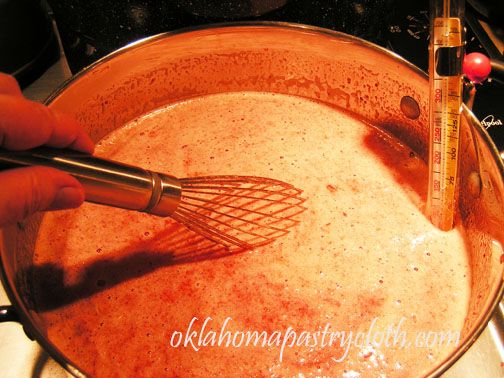 In a large stock pot, heat the mixture over medium-high heat. Using a candy thermometer, bring the liquid to 190º while stirring once in awhile. 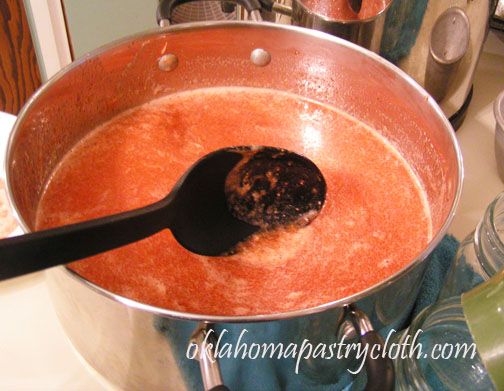 When heated to 190º, remove from heat and skim the froth off of the top. Just for info, I put the froth into a jar and threw that in the frig. Adding ice water to that made a wonderful drink! But removing the froth makes for prettier jars, especially if giving for gifts. 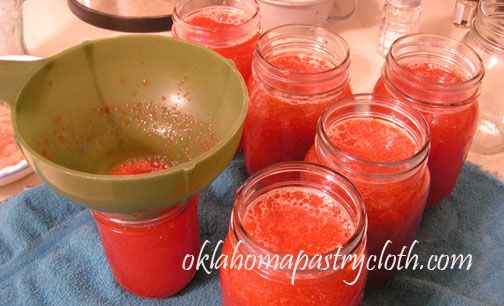 Pour hot liquid into jars 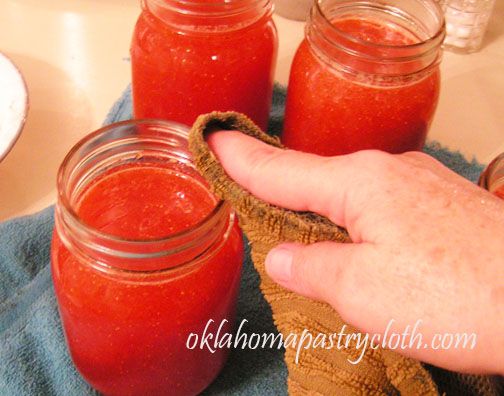 Wipe the rims of the jars of any drips with a warm, wet washcloth 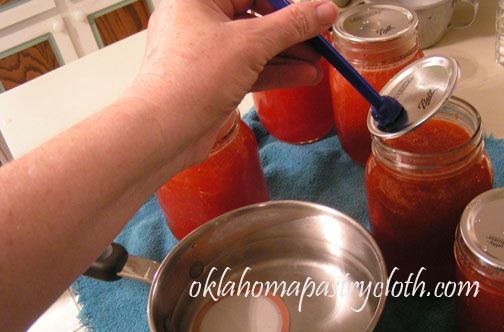 Place lids onto the jars and attach rings. Tighten and then back off slightly. Process in a waterbath for 15 minutes. Allow to stand and cool for 24 hours. Check seals. You can remove the rings and wash both jars and rings in soapy water to remove any residue. Replace rings when they are totally dry and the jars are totally dry. 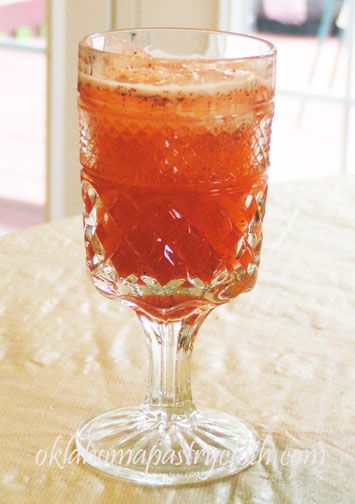 Reconstitute mix with equal parts of either ice water, tonic water, Sprite or Ginger Ale. Isn’t that a pretty drink? And so tasty too!! So thank you so much for sharing, Margaret!!  |
|
|
Oklahoma Pastry Cloth™ Company on Facebook
|
|
 |
|
|

 Homestead Revival
 Paratus Familia
 Rural Revolution