Archive for the ‘Let’s Cook!’ Category


How To Cut Up A Chicken, Butcher Style

Monday, March 7th, 2011


Everything But the Cluck


 photo MP900227810_zpse114c2cd.jpg


I’ve mentioned in past posts that I worked in the meat department of a grocery store in my previous life. At night, I helped cut and wrap custom beefs, lambs, hogs and deer. During the day, I was a butcher’s assistant, helping to cut, wrap and display all of the meats that were sold in the grocery. It was a fun job, believe it or not, made especially fun because of the people with whom I worked. It was a family operation and they treated their employees like members of the family. Practical jokes and laughs were a daily routine. One time, the butcher and his cousin had me convinced that I had guzzled Hydrogen Peroxide in my tea (the tea was fizzy), put there by a coworker who didn’t know any better, such that I was certain the stomach ache that ensued was due to gastric poisoning. There is a skull and crossbones on the bottle for heaven’s sake!!! I was handed the phone to call the doctor, who had been let in on the joke, and I was only encouraged further down the fantasy road of certain demise right there in the meat department. Finally, the giggles erupted and a bottle of Dr. Pepper was produced. My face could not have gotten any redder. I returnd the prank by heavily lathering the phone earpiece with vaseline and then calling the meat department from the phone at the front of the store. My boss answered the phone. Oh yeah. 🙂


I had to learn fast and hard in this job and being the competitive person that I am, thanks to the genes inherited from my tennis-playing grandfather, I was bound and determined to master whatever I was given to do. One of my first jobs involved wrapping the cuts of custom beefs in freezer paper and labeling the packages. It is a job that I still practice today every single time I freeze our own meats. There IS a method to wrapping! But that is for a later post.


In my day job, the first task I was immediately tossed into learning was the job of cutting up a chicken. My first attempt was a joke, but as time went by, I got faster and faster and could finally cut and package a chicken faster than you could say “Cocka-doodle-doo”. This is a skill that has helped me more than you can imagine! Whether raising your own chickens for meat or purchasing yours at the grocery, knowing how to cut them quickly is a blessing. Today, I buy whole chickens on sale and cut them up, dividing them into packages of separate parts. The other day, I found whole chickens for 65¢ per pound. After cutting them, I packaged breasts together, legs together, thighs together, and packaged cut-up wings for hot wings, while cooking the backs, skin and “innards” for broth. A package of breasts for 65¢ a pound? Find THAT in a store near you!


So here is the way that I learned to cut up a chicken. I learned from a pro – Greg, the Butcher! Thanks Greg, for all you taught me!!
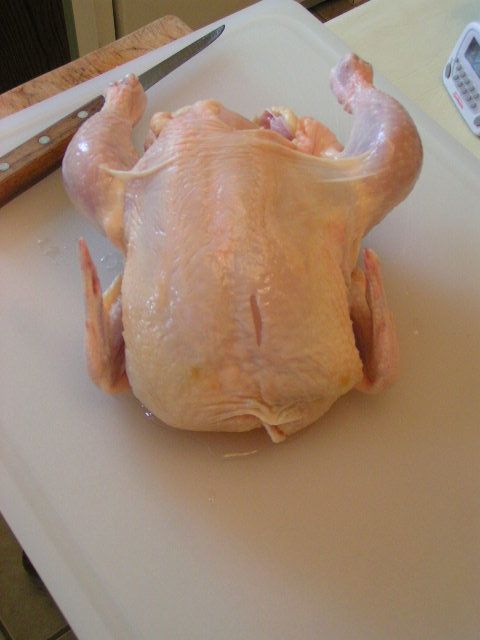

 photo PICT0198_zps5656cd7f.jpg


You will need a cutting board that is not wood. Wood soaks up bacteria that is found in chicken and it is very difficult to disinfect afterward. You will also need a good boning knife that is sharp. I use Forschner brand knives which are the brand that we used in the meat department. I like them because the blades are flexible and can bend slightly. Also, if you like, you can do what we used to do in the meat department and use rubber dishwashing gloves. These help you hold the chicken easier to avoid slips, and you are less likely to cut yourself if you do slip.
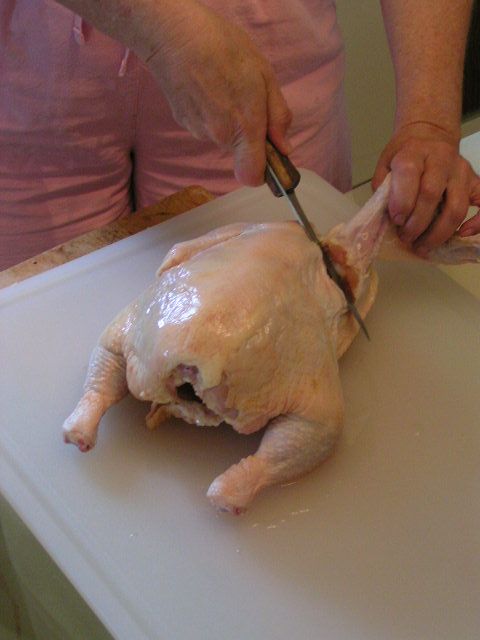

 photo PICT0199_zps58b950cb.jpg


With the breast side down, pull one wing out and away from the body and feel for the main joint. Slice between the two bones of the joint. You will slice down and around the joint bone.
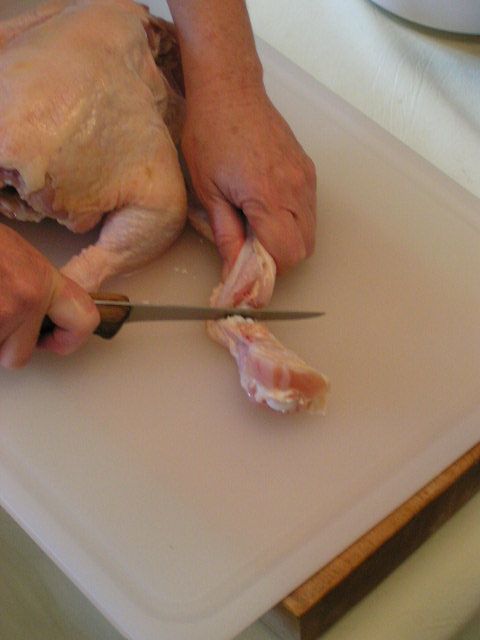

 photo PICT0201_zps3fb27bec.jpg


Cut at the joint between the shoulder section of the wing and the “bicep” section of the wing.
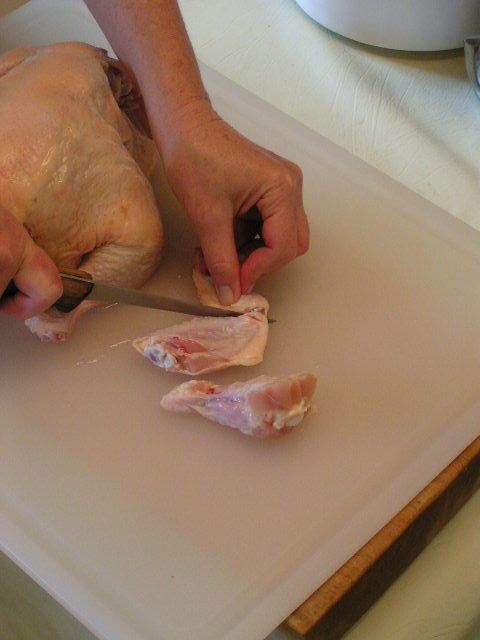

 photo PICT0204_zps78e1e9f5.jpg


Then cut between the joints that hold the “forearm” of the wing to the “bicep” section. I throw that little front part of the wing in with the back and other excess pieces to stew for broth. The two larger sections are packed together for “hot wings”.
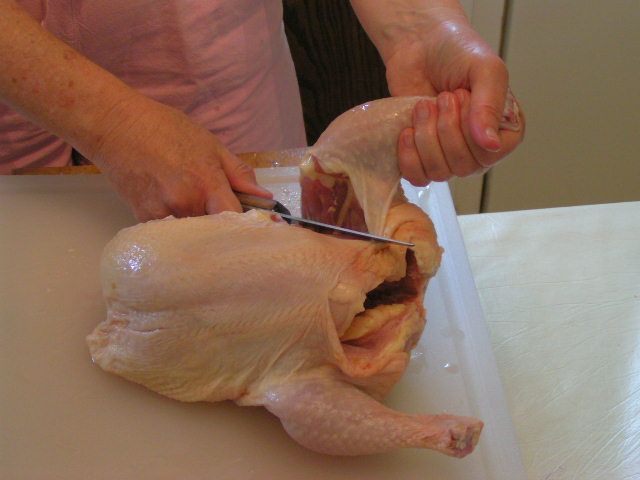

 photo PICT0207_zpsb33b7fd8.jpg


Next, turn the chicken on its side and pull a leg up so that it is pulled away from the body. Slice your knife right through the center of the skin until you hit bone. Stop.
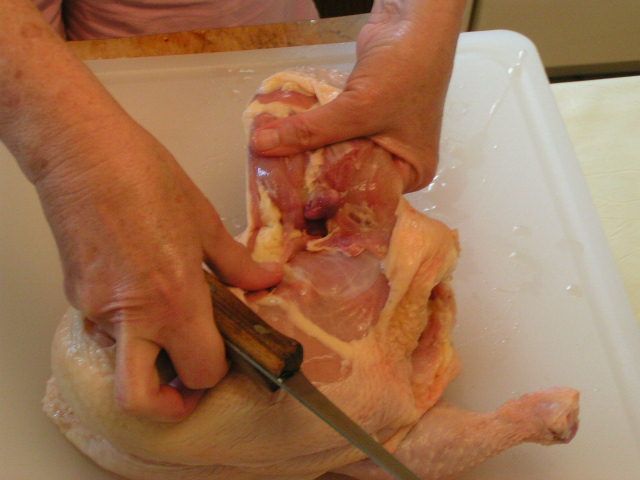

 photo PICT0209_zps84d57c4e.jpg


Using both hands, hold the body of the chicken and pop the thigh bone out of joint so that you see the end of it protruding.
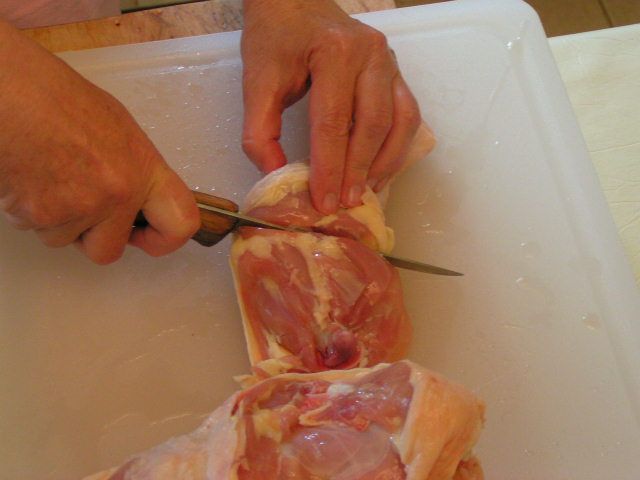

 photo PICT0212_zpsfdea80e4.jpg


Cut between the round end of the bone and the body to remove leg and thigh section. If you want to separate the leg and the thigh, on the inside of the leg and thigh section, using your first finger, feel for the indention that indicates the joint between the leg and the thigh. Slice between the two bones and separate the leg from the thigh.
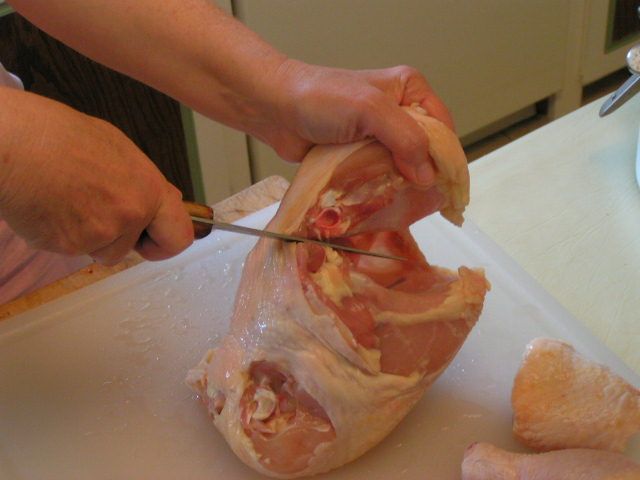

 photo PICT0217_zpsaf4b3463.jpg


Turn the chicken up on its front end and look for the soft section of skin between the back and the breast section. It is just a flap. Put the knife at a 45Âş angle to the back and slice in toward the backbone.
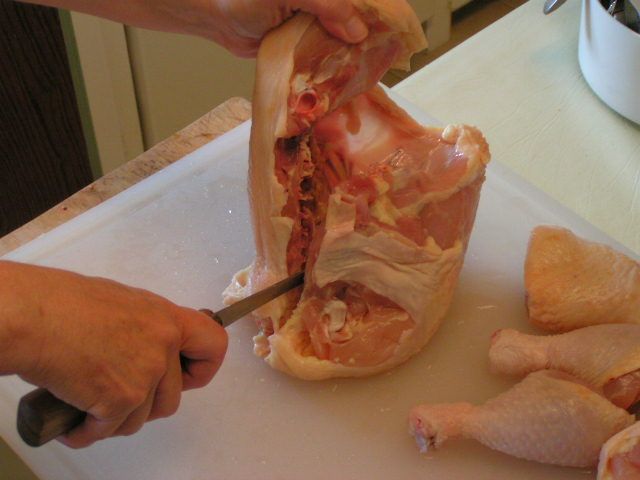


 photo PICT0218_zpse4450428.jpg


As soon as you hit bone, turn the knife blade down and slide the knife down along and between the backbone and the breast. There will be resistence because you are cutting through soft bone, but just push hard all the way to the end.
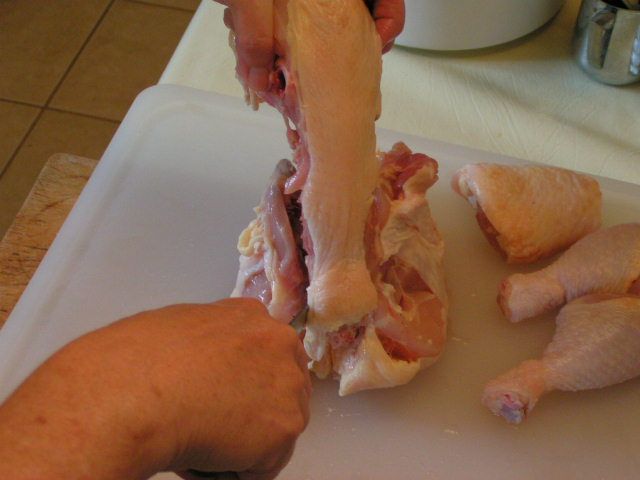

 photo PICT0220_zps9a4666ef.jpg


Repeat the same process on the other side of the backbone and lift the backbone out.
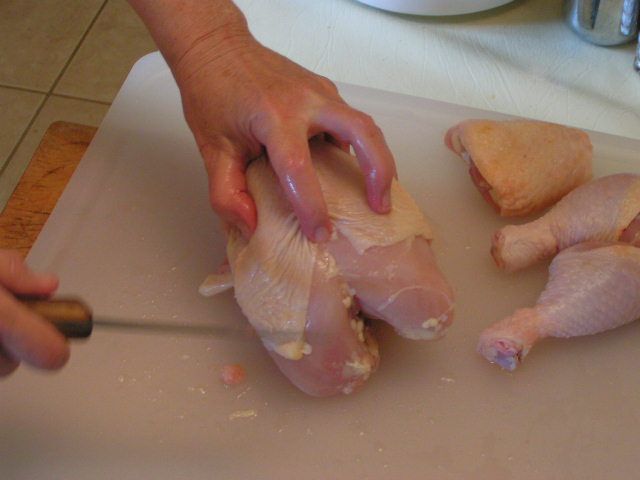

 photo PICT0222_zpsc1b76d4e.jpg


Now you are left with the breast section. If you like the ‘wishbone’ or your kids enjoy breaking it, simply turn the breast section over and slide your first finger down the center until you feel the tip end of the wishbone.
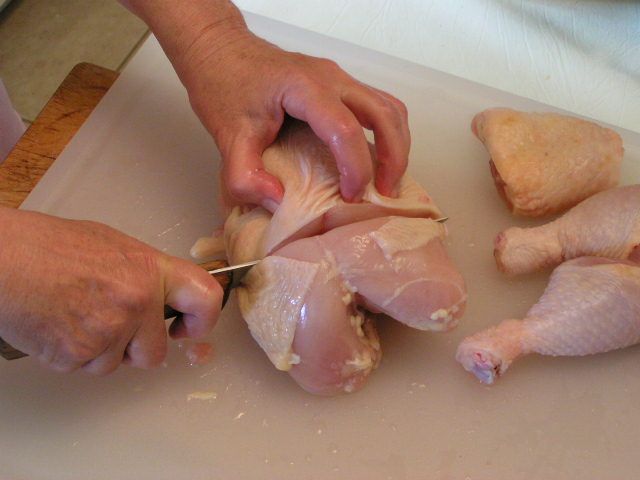

 photo PICT0224_zps36006135.jpg


Cut straight down behind the bone tip and between the rest of the breast section and stop when you meet resistance.
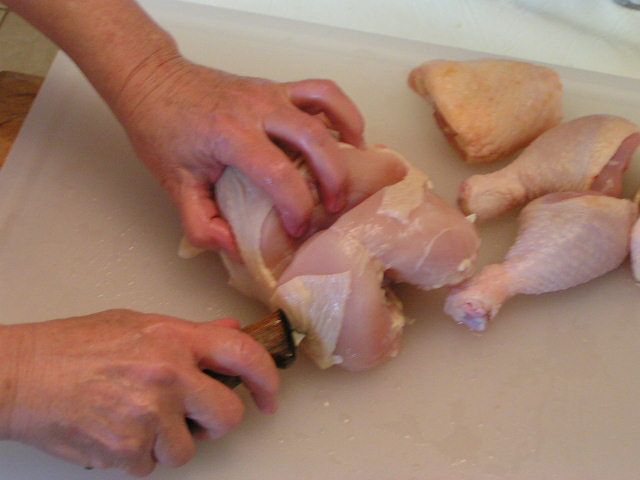

 photo PICT0226_zpsb8a038d5.jpg


Now turn the knife blade nearly parallel to the cutting board and slice along the front of the breast bone and under the wishbone.
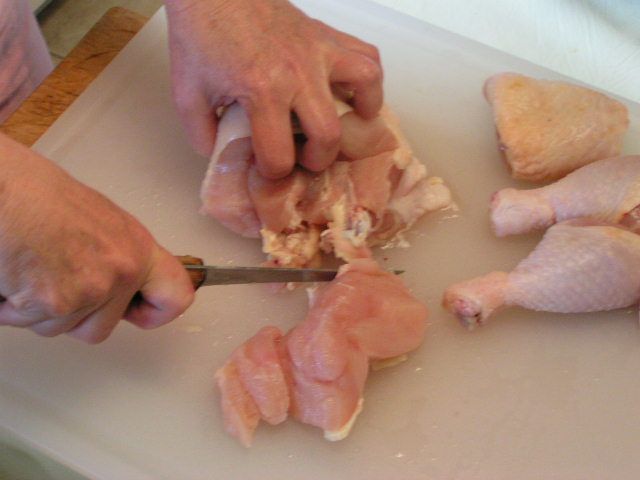

 photo PICT0229_zpsa10efb3c.jpg


Separate the wishbone from the breast
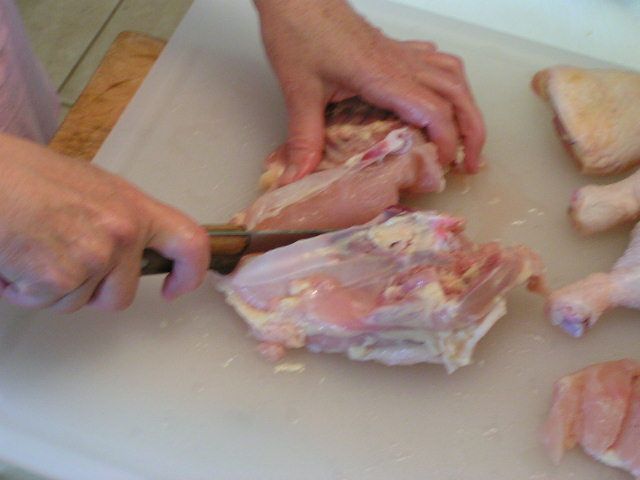

 photo PICT0232_zpsf26dfe10.jpg


Turn the rest of the breast section on its back and cut right down the middle of the bone. This is soft bone and so with a sharp knife you can cut it. Start by putting the point of the knife down into the bone and press down. It will snap that top of the bone in two and then you can start cutting.
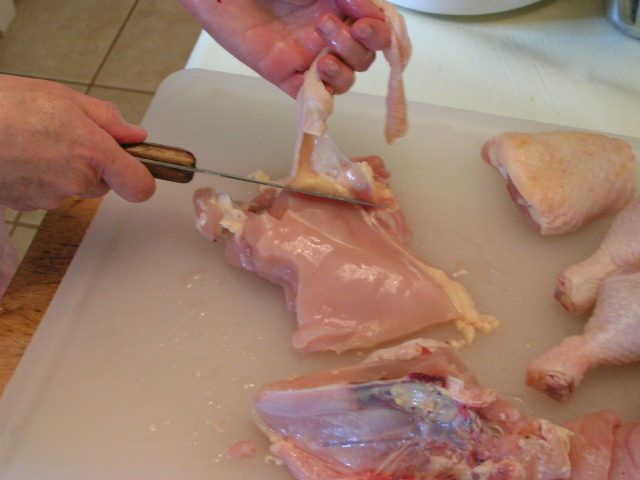

 photo PICT0233_zps5d15fbea.jpg


If you are like me and want to cut back on the fat and cholesterol of the skin, you can skin your pieces. This is a simple task, as the chicken skin easily separates from the meat. Just slide the point of the knife under the skin with one hand and with the other, pull the skin up to separate as you cut.


And so there you have it – a totally cut-up chicken that you can now cook, can or freeze. I’ll show how I can mine in the next post and how I use it out of the jar. Once you have processed the main pieces, you can boil all of the leftovers into the stock found in this previous post.


Happy Cutting!

MB
Please join us on FaceBook!! And don’t forget to leave a comment below in the comment section!


Canned Broth

Saturday, February 26th, 2011


Taking Stock


 photo PICT1191_zpsa0f1ad59.jpg


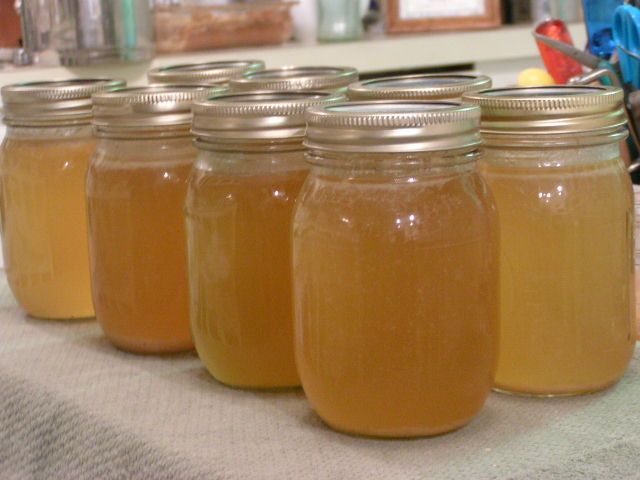
A reader of the very informative blog Rural Revolution, A. McSp, shared a wonderful recipe for chicken stock to be used for cooking pinto beans, soups – you name it. I decided to try it and am in love. First, the smell that permeates your house while cooking this stuff is enough to call Glade and ask if they make Chicken Stock in a Can Air Freshener, second, the flavor is so rich that it makes everything to which it is added have more body, and third, it’s canable – oh wait – that’s not a real word unless you’re talking about creepy hungry people and can’t spell. How about this: It can be canned! You know that always gets me right here (pointing to my heart now).


I’m afraid that I was so involved in the process that I didn’t do my normal photo session and so I’m just going to have to give you the recipe with only a few photos and a video. Sorry for my brain freeze. I did get a couple of shots!


Here are the steps to this amazing chicken stock!


1. When you cook a chicken, save the carcass, skin and all and if you aren’t going to make stock immediately, put it in the frig until you are ready, no more than a couple of days.
2. Cut or break the bones up into pieces using kitchen shears.
3. Put the bones and skin into a stock pot and cover with water, about a gallon plus.
4. Add 1-4 stalks of celery. I used my dried celery! 4 tbsp to equal 4 stalks. I love my dried celery!
5. Add 1/2 medium onion
6. Add 4-5 cloves of garlic
7. Add parsley if you have it
8. Add 1/2 tsp dill seed if you have it
9. Now here she said to add 1/2 tsp dried orange peel, but I didn’t have dried so I used 1 tsp of fresh orange zest. Oh my. I think I prefer that to the dried!!
10. Add 3 tbsp white vinegar and the juice of one half lemon or lime
11. Add salt and pepper to taste
(side note: If you want an even more robust chicken flavor add 1/2 – 1 tsp granulated chicken bouillon per pint jar of stock)


Bring to a boil and stew on low heat for two to three hours. The vinegar and the lime or lemon juice pull the calcium out of the bones and so your broth is rich in calcium.


As the stock stews, I add a little water to maintain the water level. When the cooking time is reached, I pour the broth, bones and veggies into a colandar that is sitting over a large bowl or another stew pot, to strain the broth. I press the stuff left in the colandar with a potato masher to get out all of the liquid and flavor into the stock in the bowl. At that point, I ladel the soup into jars, leaving a 1/2″ head space, clean the rims of the jars, attach the lids and rings and put them into a pressure canner of hot water (the jars of liquid are hot and will crack in cool water) to be processed for 20 minutes at 10 lbs pressure. One chicken gives me 10 pints of broth.
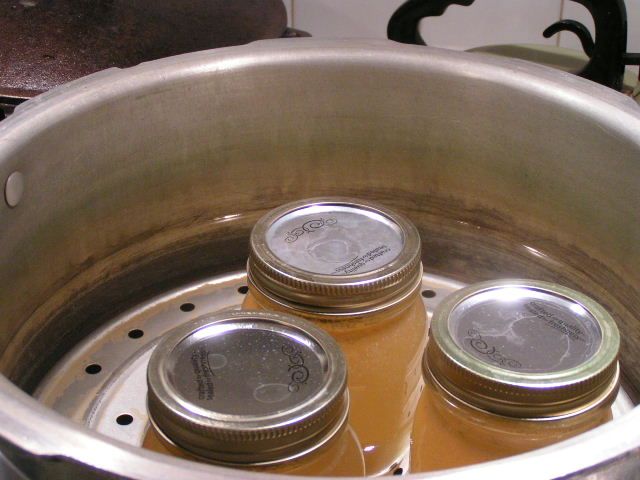

 photo PICT1183_zps9eaae8d4.jpg


Unlike waterbath canning, the water level in a pressure canner is only about 2″ deep.
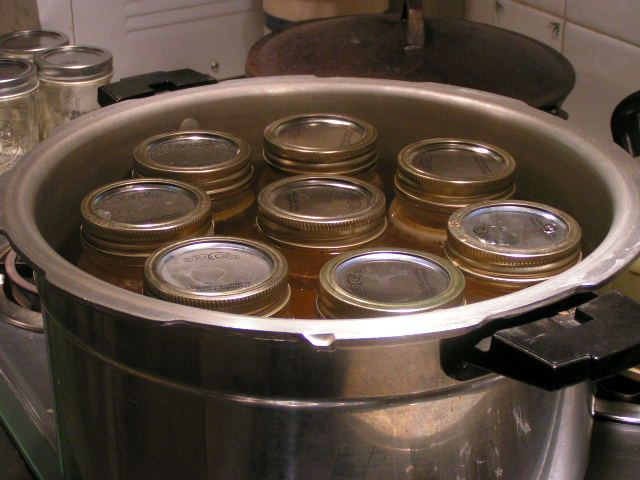

 photo PICT1185_zps5c9d1515.jpg


The jars sit in the water, but are not covered by it as in a waterbath.


I did a video of the pressure canner as it was doing it’s thing this afternoon. I’ve had several people ask me how it is supposed to sound. If you will notice, it jiggles for a bit and then stops and then jiggles and stops. That is the rhythm that you want to achieve to keep an even pressure. I start out on high heat and when the weight starts vibrating, I start turning the heat down until I get a uniform rhythm. I bought this canner in 1977! It has been a jewel. Pardon the noise of the microwave in the background. Halfway through I realized it and turned it off!


Last night, I made pinto beans with two pints of broth, two tbsp brown sugar and a slice of home-cured country ham. Oh my. I’m still grinning.


Happy Canning!


MB
Please join us on FaceBook!! And don’t forget to leave a comment below in the comment section!


Canning Butter

Thursday, February 24th, 2011


“Well Butter My Biscuits


And Call Me Canned!”


I have a question. If milk is nature’s most perfect food, as we ALL learned in our science classes many years ago and have heard on many a dairy commercial, why isn’t butter perfect too? Why has butter gotten such a bad rap when it is simply the richest part of the milk that has been whipped to a frenzy? All I know is that butter is all-natural and has to be a whole lot better for you than the fake spreads that marketers have tried to pawn off on us as the nutritionally better alternative. We humans seem to always go down the road of trying to improve on what comes naturally and then wind up right back where we started, concluding that the original product isn’t so bad after all.

 photo MH900293562_zpsecb26915.jpg


I have admitted my affinity for butter in past posts but I am in no way an addict to the stuff. Really. I can quit using it anytime. Really. I use it in moderation mixed with olive oil and am known to spread it sparingly on a slice of fresh homemade bread. Really. But there is simply no substitute for the stuff when it comes to sauces, cajun cuisine and toast.

 photo sun_zpsc2b6182e.jpg


So did you hear about the solar flares that scientists are afraid are going to destroy the earth? Well, not destroy exactly…just leave us in an electronic lurch which would pretty well destroy the majority of us who can’t live without a cell phone, computer or electric toothbrush. How in the world can I keep my precious butter from spoiling if our refrigerators aren’t running? Well, I can it, silly! I gathered all of the info I could from several sources on the internet and have started canning part of my butter when I find it on sale. The Indians in India have been canning clarified butter, called ghee, for ages and ages. I like to can my butter whole. Take a peek at what is working for me:
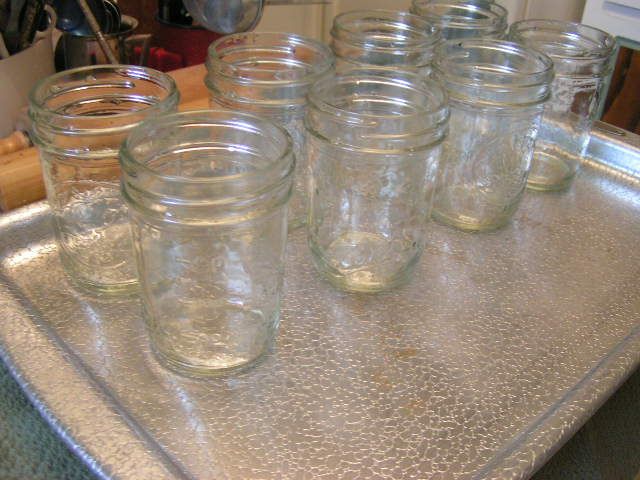

 photo PICT1167_zps99940fcb.jpg

Wash jars in hot soapy water and boil in a large pot or wash on the sterilize cycle in the dishwasher. Place the jars on a cookie sheet. Here I am using 8 oz jars which hold about 1 1/3 sticks of butter. In this run, I used 9 – 8 oz jars for 12 sticks of butter or 3 lbs. Put the cookie sheet of jars into a 250Âş oven and heat for 20 minutes.


 photo PICT1170_zps15458ade.jpg

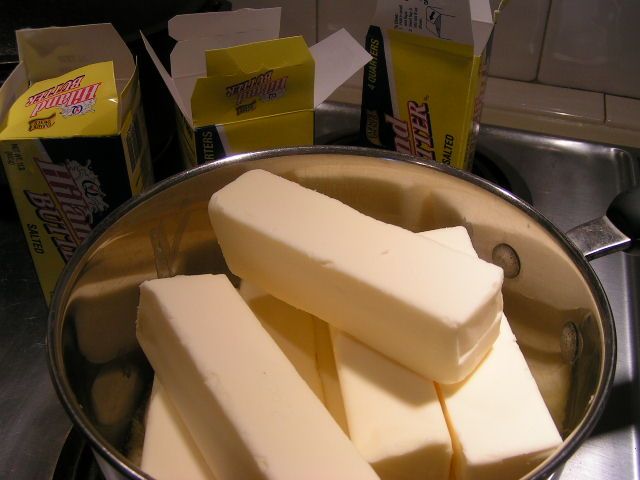
Place sticks of salted butter in a large pan. I do about three pounds at a time simply for ease. The larger pots get too heavy to manipulate and butter gets everywhere.
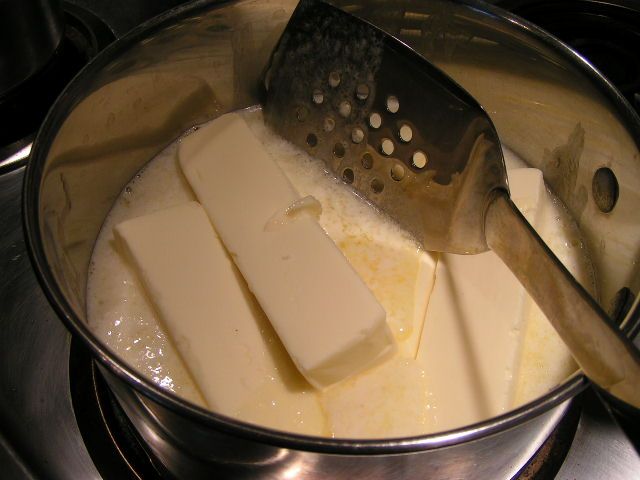

 photo PICT1172_zpsc6a1244a.jpg

Slowly melt the butter on medium heat, stirring constantly with a metal spatula to keep from scorching on the bottom. A spatula with holes is ideal because the melted butter is pushed through the holes during stirring and helps to keep it uniform.
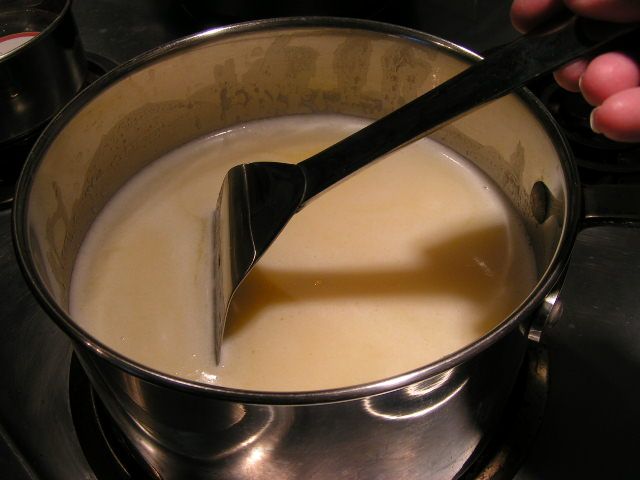

 photo PICT1175_zps8efb2970.jpg

When the butter is totally melted but not quite boiling, continue to stir and allow to simmer for 10 minutes. A thick, white foam will appear.
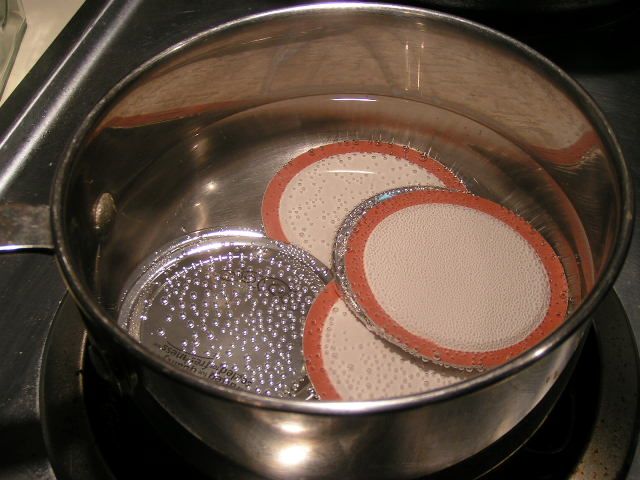

 photo PICT1179_zpsacf2b7af.jpg

While melting the butter, place lids in a pot of water and bring to a near boil to prepare lids. Turn heat down to keep lids warm.
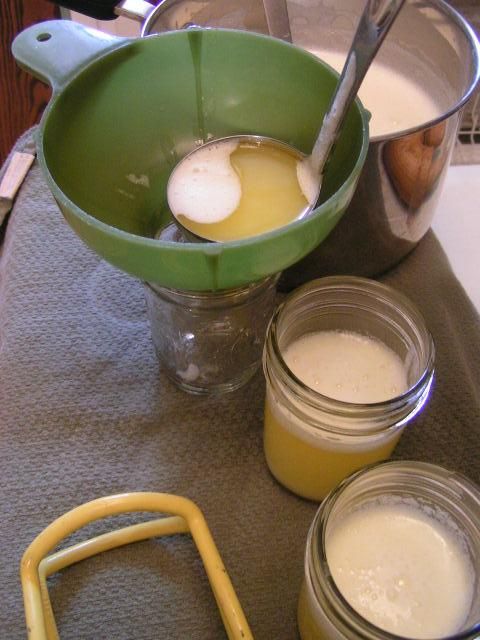

 photo PICT1184_zps81697096.jpg

Remove jars from oven and immediately ladel butter into the jars, using a canning funnel. Be sure and stir the butter around and dip deep, pulling up, in order to keep the butter uniform, as it separates. Fill to leave a 3/4″ head space.
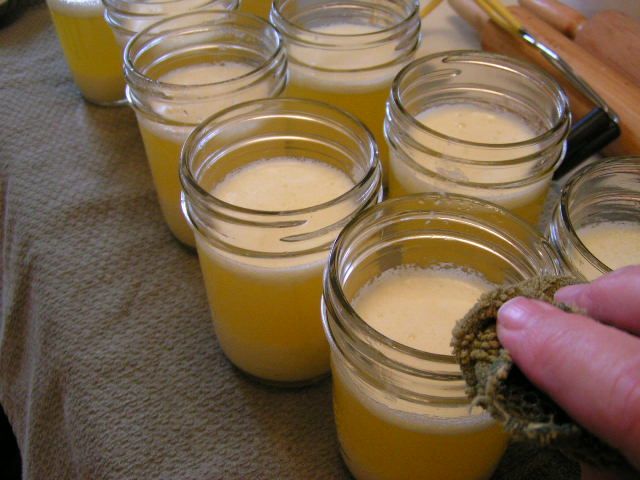

 photo PICT1187_zps37bb8a06.jpg

Carefully wipe the edges of the jars with a damp cloth to remove any butter. Butter on the rims will cause the jars not to seal.
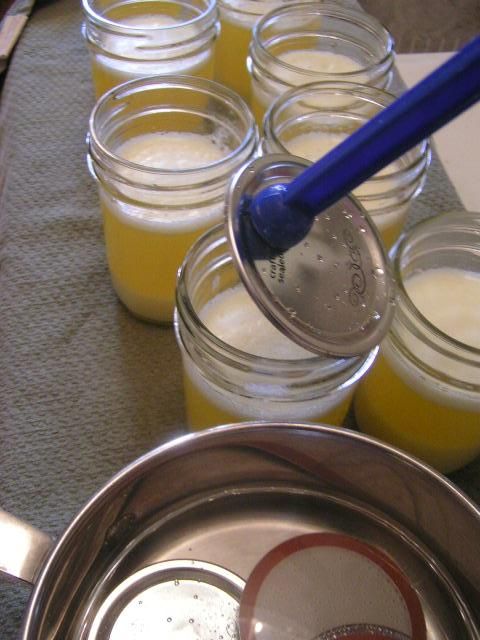

 photo PICT1188_zps10652aef.jpg

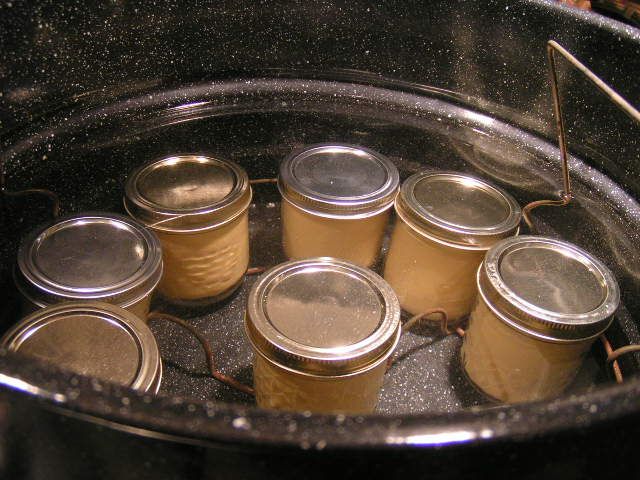
Place the lids on the jars and attach rings, tightening slightly. Place jars into a waterbath canner that has water already heated and enough to cover the jars 1″. The water needs to be heated because the jars of butter are hot and will crack in cool water. As soon as water begins to slowly boil, set timer for 15 minutes.
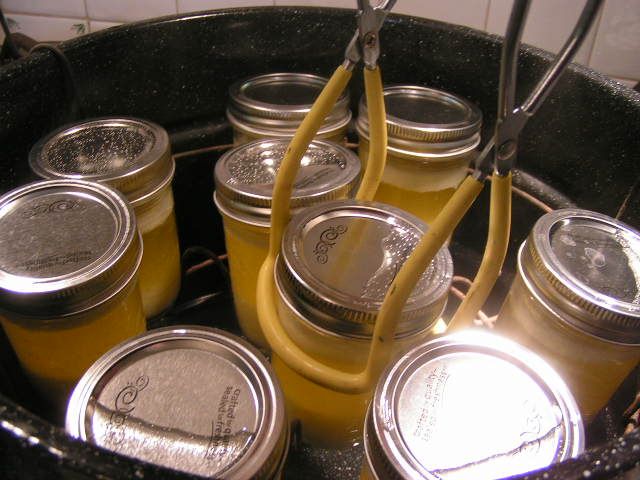

 photo PICT1205_zpsea2c3fbd.jpg

When jars have been processed for 15 minutes, turn off heat and allow to cool down in the water for another 10 minutes. Then, lift the rack to top of canner and remove jars with canning tongs.
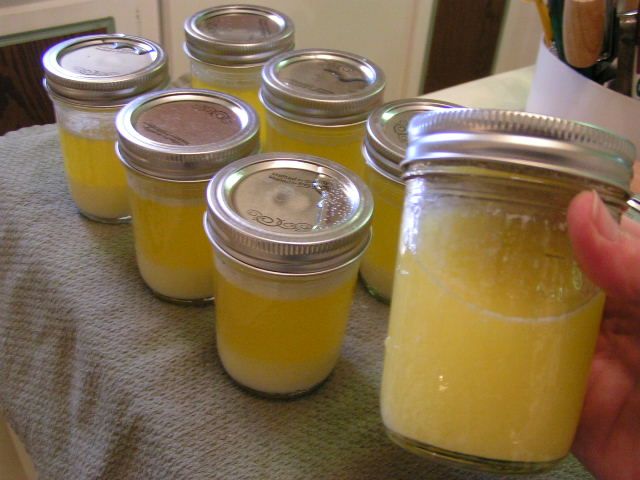

 photo PICT1208_zps2a0fbc4f.jpg

When the jars are cool enough to handle, now comes the tedious part. Every few minutes shake the jars up and down in order to make the butter uniform. If you notice in this photo, the jars to the left have sediment on the bottom and foam on the top. Shaking incorporates this into the clarified portion. Go about your business, but about every 5 minutes, stop and shake the jars. As they cool, they will stay more and more uniform. I set a timer to remind myself so that I can do clean-up.
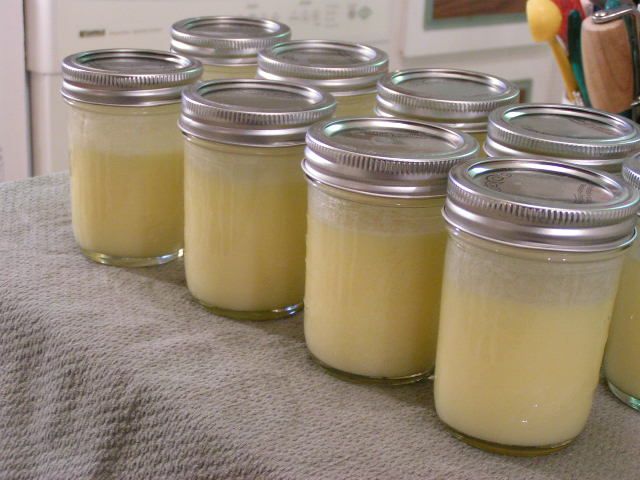

 photo PICT1212_zpsdfd875b2.jpg

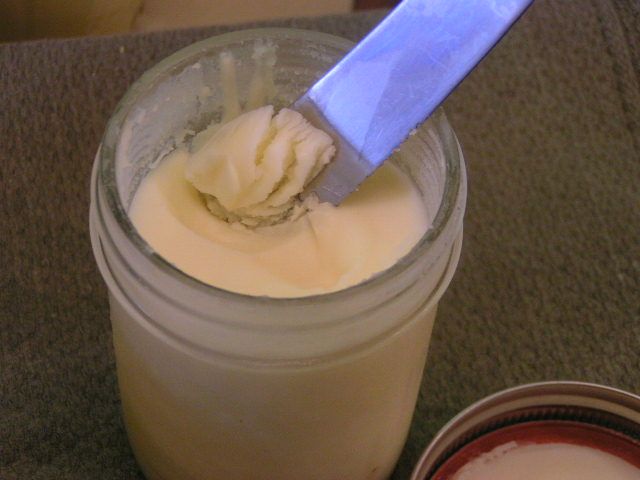
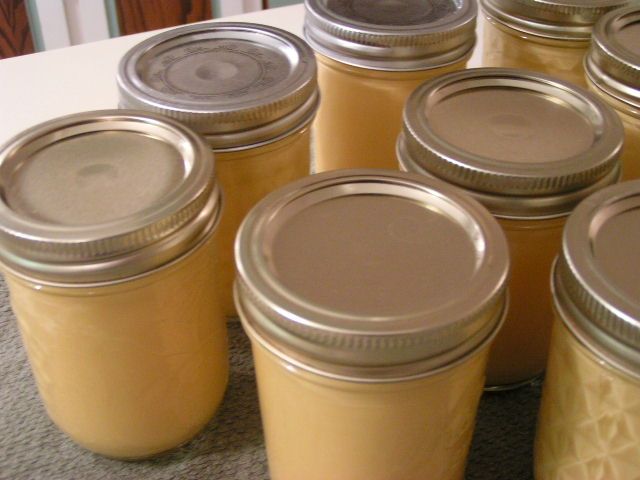
This butter is totally cooled and ready to store in the pantry. Aren’t they pretty? I read one homesteader’s take on canning butter and she said that they actually opened some from 1999 and it was still good. Don’t think I would keep it THAT long, but it wouldn’t matter because it wouldn’t last that long around here anyway!!
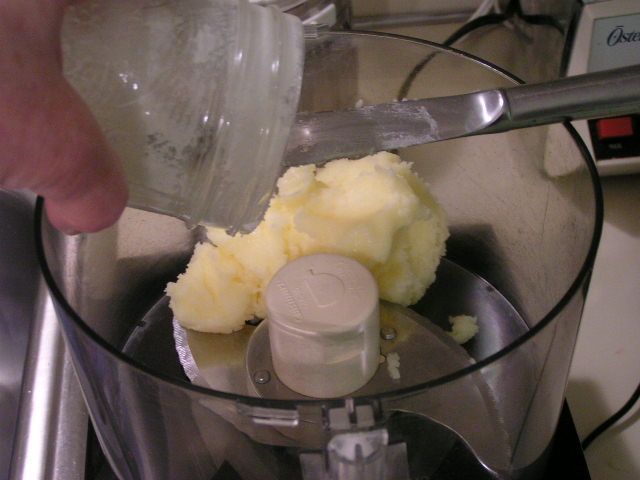

 photo PICT1172_zpsc57259b3.jpg

Canned butter is not quite as smooth as fresh butter, but if you are wanting a smooth, healthy spread, you can make the same recipe posted earlier with olive oil or canola oil. Just scrape butter from an 8 oz jar into the food processor or blender.
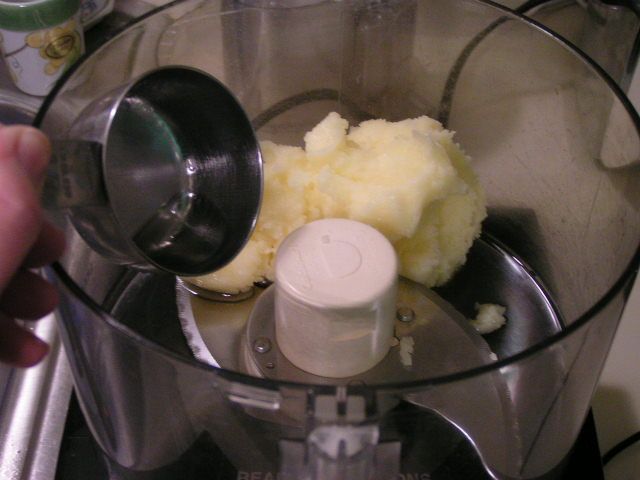

 photo PICT1174_zps1f91917b.jpg

Add 1/3 cup oil. If you have canned your butter in larger jars, adjust amounts of oil. For example, a 1 pt jar of butter would require 2/3 cups of oil.
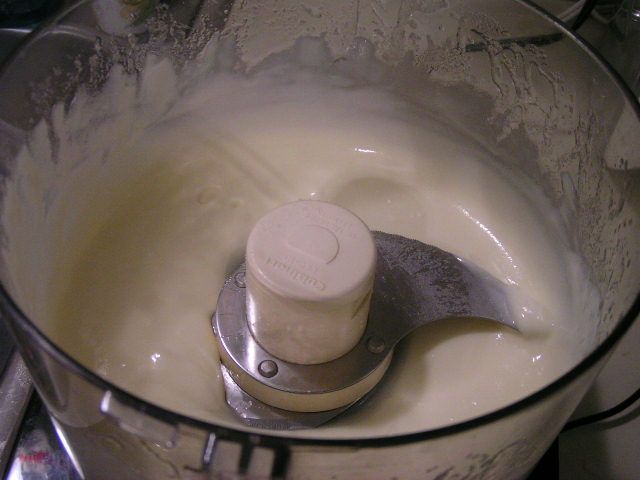

 photo PICT1176_zps89af1c02.jpg

Process until smooth


 photo PICT1170_zps299d4b0d.jpg

Pour back into jar and allow to harden in the frig. It will go back to the consistency of smooth, spreadable butter. Pass the Lobster, please!!


Happy Canning!


MB
Please join us on FaceBook!! And don’t forget to leave a comment below in the comment section!


Hashbrowns! Yum!!

Friday, February 18th, 2011


Potato With An E….


Is Misspelled…


It’s closing in on planting time for potatoes! I love fresh potatoes from the garden and have done posts before on them. I am planning on doing a full bed of the knobby things this year. Usually, we only do a half a bed, but we were out of potatoes too soon this time. And of course, I’ll be drying some of them.


But I have another favorite way to prepare potatoes for the long haul and I have been asked by reader, Shari, to share it here. Mr. Fix-It loves hashbrowns and it is easy to take a large batch of either garden potatoes or Russets from the store and make hashbrowns to last you a long, long time.
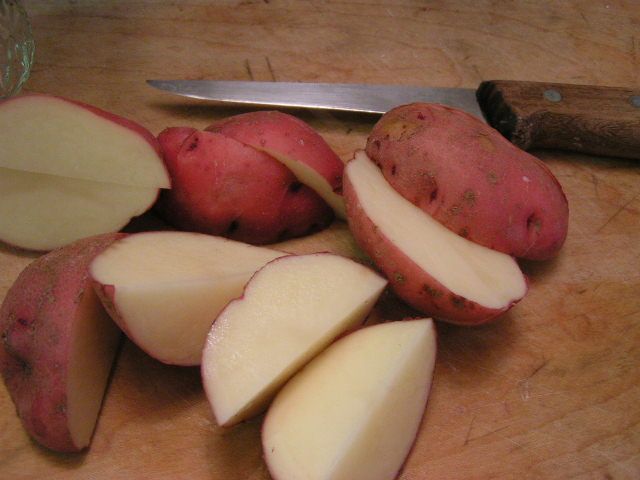
 photo PICT0166_zpsd708dc27.jpg

First cut up potatoes to fit into a food processor with a grating blade on it. You can also grate them by hand. Red and Yukon golds can keep the skins, but Russets are better peeled
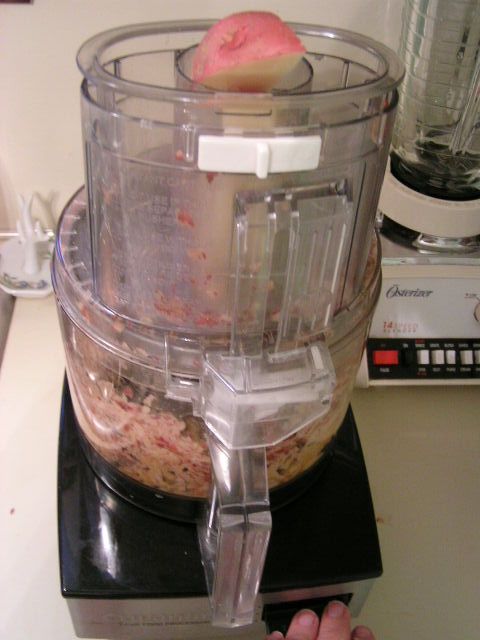

 photo PICT0164_zps989be888.jpg

Put into a food processor to grate or do it by hand
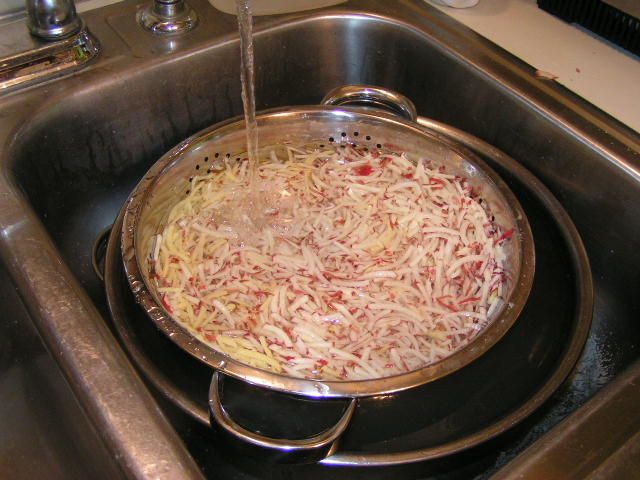

 photo PICT0159_zps2aa291fc.jpg

Once the potatoes are grated, put them into a collander that is in a larger bowl and pour water to cover the potatoes. Pick up the collander and swish it up and down. The water will be white and cloudy. Pour that off and do the same process until the water is clear. This washes off all of the starch that makes potatoes turn black.
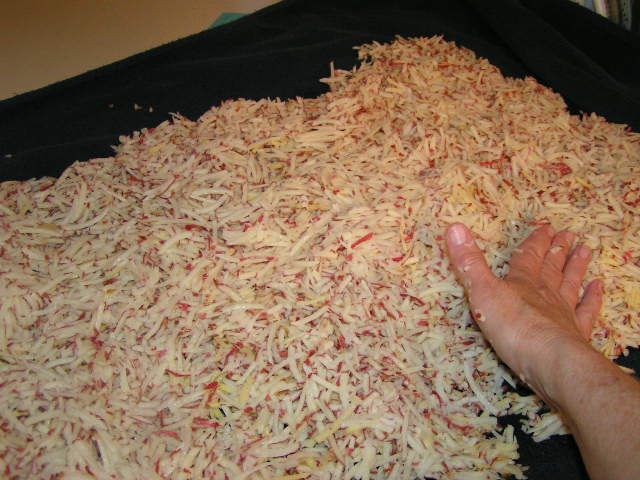

 photo PICT0172_zps6d7d9da0.jpg

Lay a large bath towel out on the counter and spread the grated potatoes over the towel.
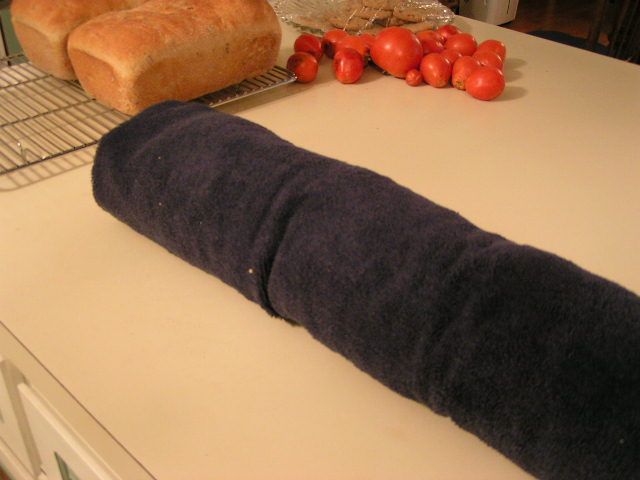

 photo PICT0175_zpsd7349a9a.jpg

Fold the edges of the towel over the top of the potatoes and roll the towel up like a jelly roll, pressing as you roll. This squeezes out excess water. When you unroll it, the potatoes will be dry.
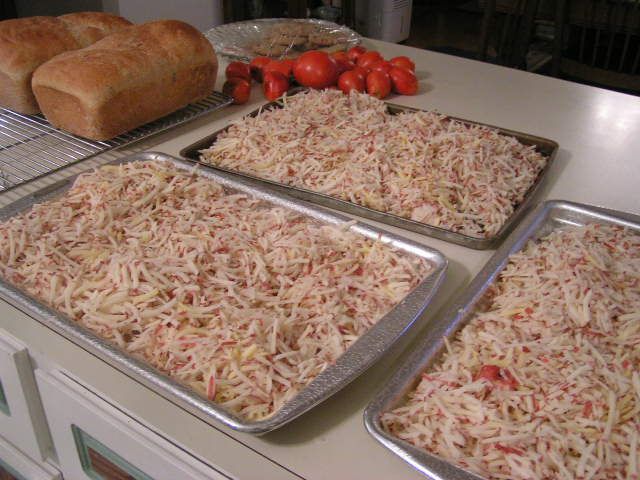

 photo PICT0179_zps2c23428b.jpg

Distribute the grated potatoes among cookie sheets and place in the freezer.
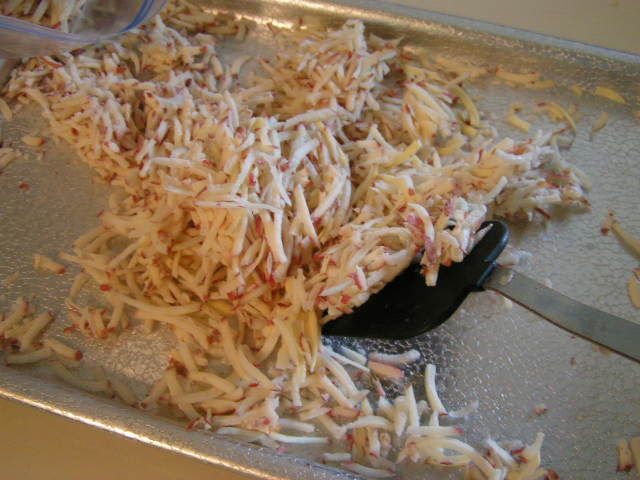

 photo PICT0187_zps73fcfc96.jpg

Remove from freezer and, using a spatula, lift potatoes off of the cookie sheets.
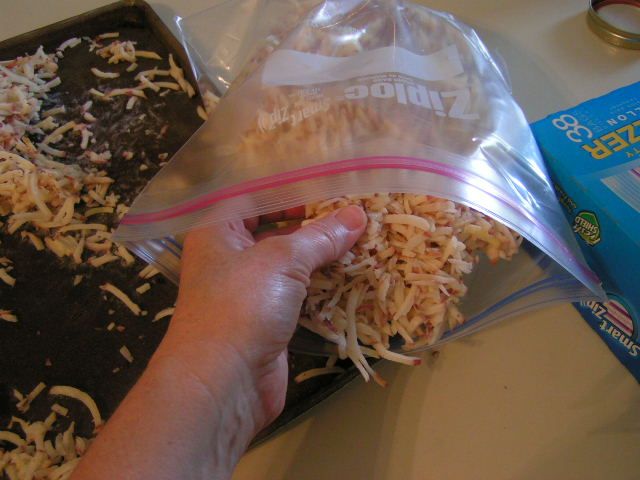

 photo PICT0182_zps85618288.jpg

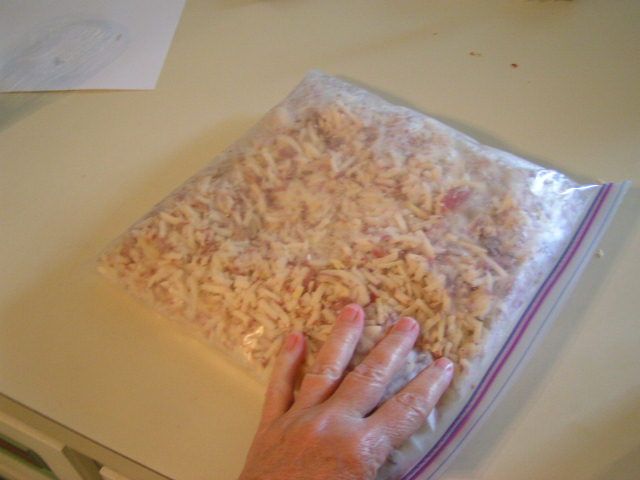
Place in plastic freezer bags


 photo PICT0184_zps97462b4f.jpg

Bend the bags around to break up the slabs of frozen potatoes. Label bags and place in the freezer.
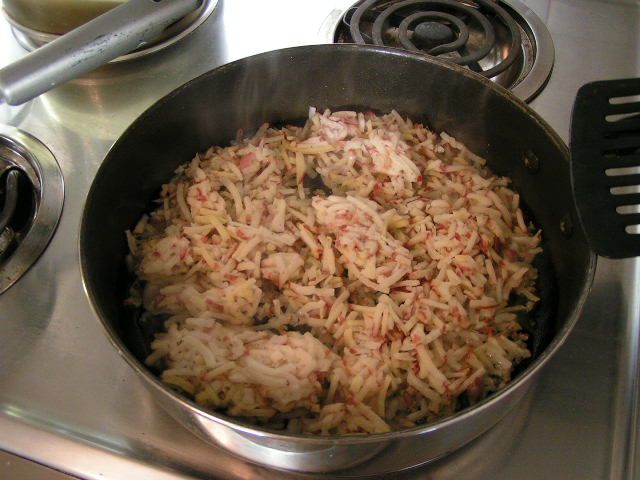

 photo PICT0316_zps49e9e823.jpg

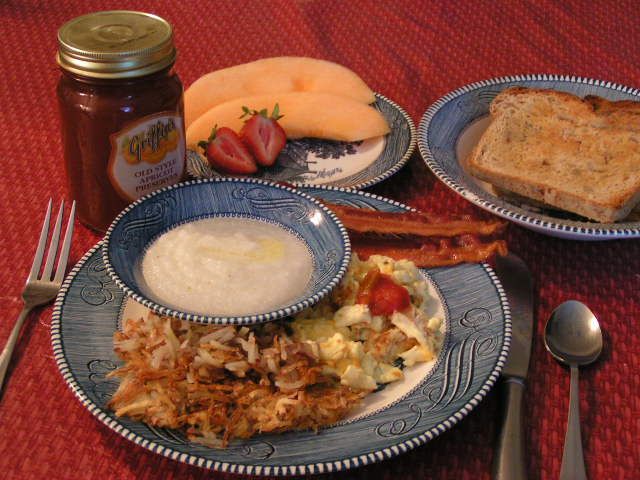
Your hashbrowns can now be used in any recipe calling for hashbrowns, even casseroles. To make old-fashioned hashbrowns for breakfast, put 2 – 6 tablspoons of oil (depending on the size of your skillet but barely covering the bottom), either olive oil or vegetable or coconut, in the bottom of a large skillet and heat on medium high. When heated, add hashbrowns to about 3/4 – 1 inch deep and salt to taste.
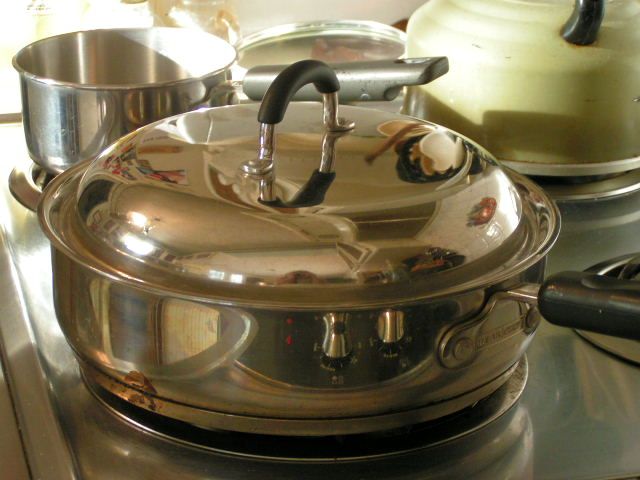

 photo PICT0317_zps9ff6d4c2.jpg

Cover with a lid and cook until the bottom of the potatoes is golden brown.
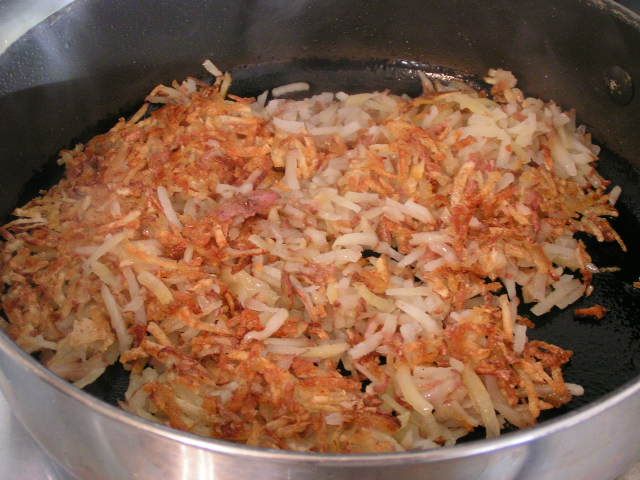

 photo PICT0319_zpsd5cce6d9.jpg

 photo PICT0325_zpsd6b145f4.jpg


Cook until the second side is browned and crisp. Remove from the pan and pat with paper towels to remove any excess oil. Serve as a side dish. And don’t forget the grits!!


Happy Cooking!


MB
Please join us on FaceBook!!


Join in the conversation by leaving a comment below!


Yep!! Canning Cheese

Wednesday, February 9th, 2011
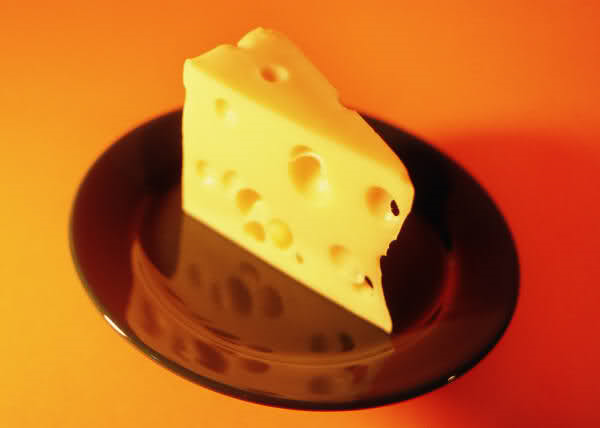


Say, “Cheese!”


 photo Cheese_zps05f116bd.png


I’ve always heard that “necessity is the mother of invention” but I also think that it is “the mother of learning something new”. Such was the case recently after a productive trip to our local grocery which is owned and operated by the Absentee-Shawnee Indian Tribe. On this particular day I discovered that the store had block cheese on sale; 1 8oz block for $1. Never one to pass up a good deal, I decided that if one block of cheddar was good, 20 blocks of a variety of cheese was phenomenal! I tossed mild cheddar, mozzarella, sharp cheddar, pepper jack and cojack into my cart and trotted on down the isle. To my surprise, I found that Velveeta was on sale too. Oh joy.


Now, I must digress here for a sec in defense of Velveeta cheese PRODUCT. Although I realize that Velveeta is the plasticized version of cheese, it is a must for any kitchen simply because it melts sooooo smoothly. It is wonderful for cream soups. It is true that nobody REALLY knows where Velveeta comes from. And while we are told that it is made from milk, it could be guinea pig milk for all we know. However, while we ponder how one milks a guinea pig, the rest of America is enjoying its queso made with Velveeta, picante sauce and maybe some ground beef flavored with taco seasoning. Velveeta is to the cheese world what Spam is to the ham world. Each has its purpose.


And so, I got my Velveeta and checked out. On my way home, it occurred to me that all of this cheese had to have a place to go to stay fresh. I usually grate my hard cheese, put it into bags that I can vacuum on my FoodSaver sealer and then freeze it, but this was going to be an enormous amount of grated cheese. What if I wanted sliced cheese? My experience with freezing blocks of cheese for slicing had been less than successful. I had been totally unhappy with frozen Velveeta, so what to do? What to do?


Thank goodness for the Internet. Enola Gay at Paratus Familia had the solution. Can it! Can cheese? Really? She showed how to can hard cheeses and that got me to thinking about canning the Velveeta too. I researched and researched and found several ways to do that as well. I wound up with what I think worked best for me. So first, I’ll show you how I canned the hard cheeses and then the Velveeta. Talk about handy. You can’t believe how wonderful it is to have canned cheeses. You can shred and slice the hard cheese and the Velveeta is just as good as if it were in the box. I suppose at this point I should throw in the disclaimer that I haven’t found anything that indicates the government watchdogs have given their seal of approval to this, but then, they don’t like us canning apple pie filling either. From everything I have read, these canned cheeses last up to two years.
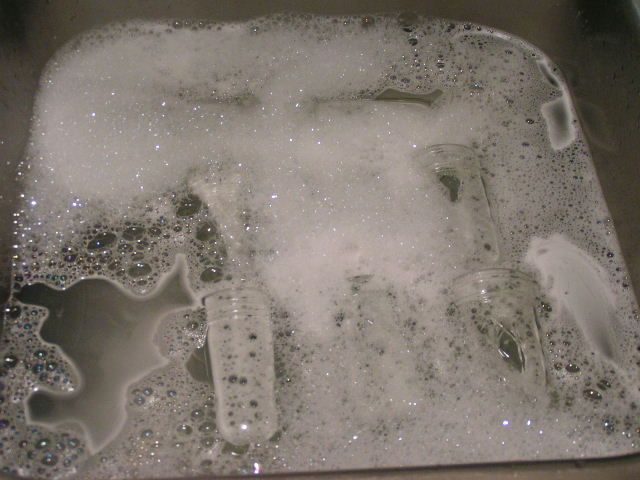

 photo PICT0944_zps3cedf397.jpg

It is important that you sterilize your jars. Here, I am using the 8 oz size because there are just two of us and that is perfect for two people. First I wash them in hot, soapy water and then place in a large pot to bring to a boil. Then I remove them to place upside down on a dry towel. It is important to use wide mouthed jars for easy removal of the cheese.


Canning Hard Cheeses

 photo PICT1074_zps949dda01.jpg

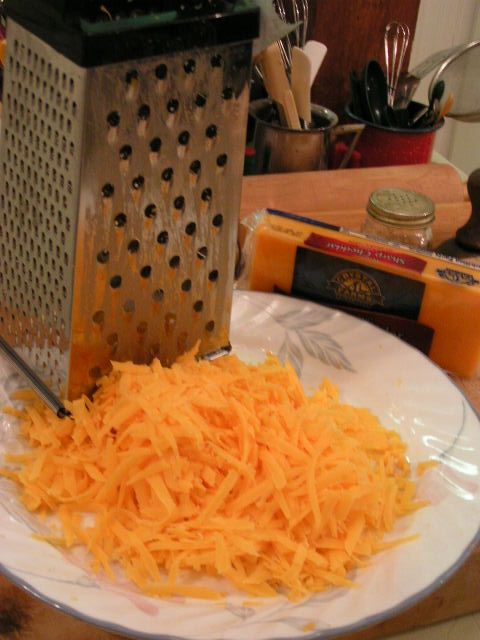
Shred the cheeses. You can use a food processor here, but by hand isn’t all that more time consuming.


 photo PICT1077_zpsd570f6a0.jpg

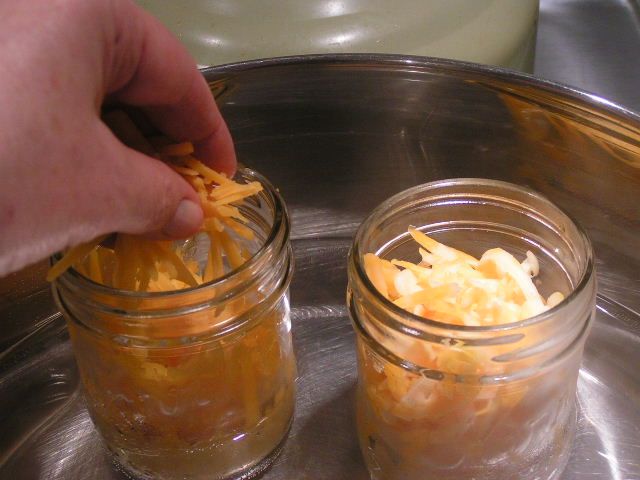
Place some of the shredded cheese into the warm jars and place the jars in warm water that you slowly bring to good and hot. Keep adding more cheese as the cheese melts.


 photo PICT1081_zpsdf0fe59f.jpg

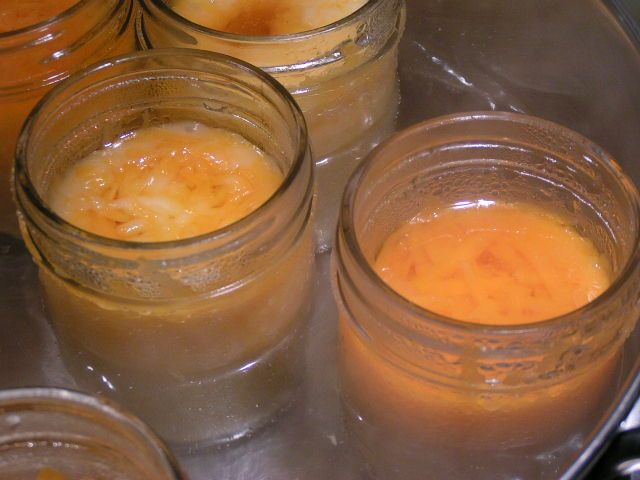
Continue adding and melting the cheese until it reaches a 1” headspace. This requires a deeper headspace because of the oils.


 photo PICT1084_zps89680435.jpg

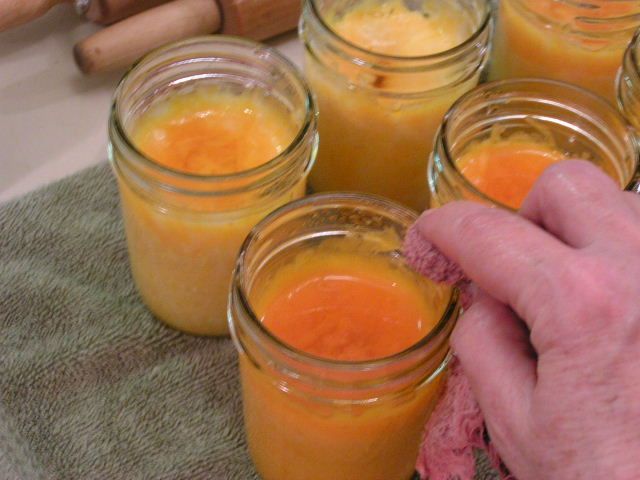
Carefully wipe the tops of the jars with a damp, soaped washcloth to remove all oils.


 photo PICT1086_zps0a2008fe.jpg

Place lids that have been warmed in nearly boiling water, onto the jars


 photo PICT1088_zpseb9a2bc4.jpg

Put the rings onto the jars, not too tight and place into the rack of a waterbath canner


 photo PICT1090_zpsad7d2f7f.jpg

Lower the jars into water that has already been heated. Putting them into cool water will crack the jars. Bring to a boil and at the point of boiling, set your timer for 40 minutes. Process for 40 minutes.


 photo PICT1093_zpsee85ae6c.jpg

Now here is the important part!! I didn’t figure this out until I pulled the first jar out of the water. DO NOT REMOVE THE JARS FROM THE WATER UNTIL THEY HAVE COOLED DOWN. If you take them out of the boiling water, the oil from the cheese boils out of the jars and they won’t seal. Just leave the jars of cheese under water and allow to cool slowly. THEN take them out of the water. When they have cooled all the way down, I remove the rings and wash jars and rings in hot, soapy water to remove any oils. After drying, I reapply the rings and store the jars of cheese.


 photo PICT1089_zpse733346c.jpg


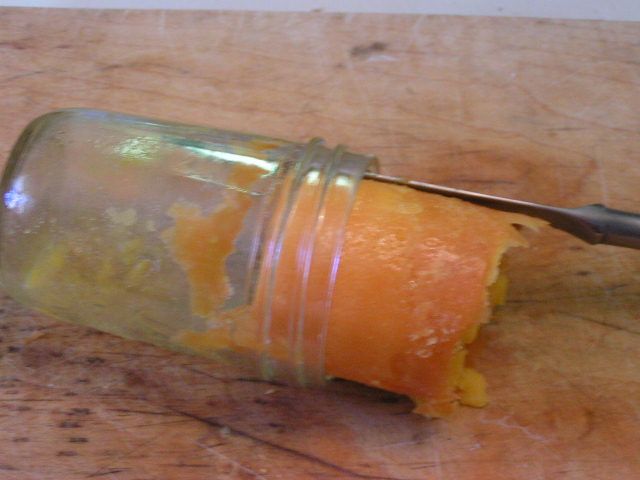
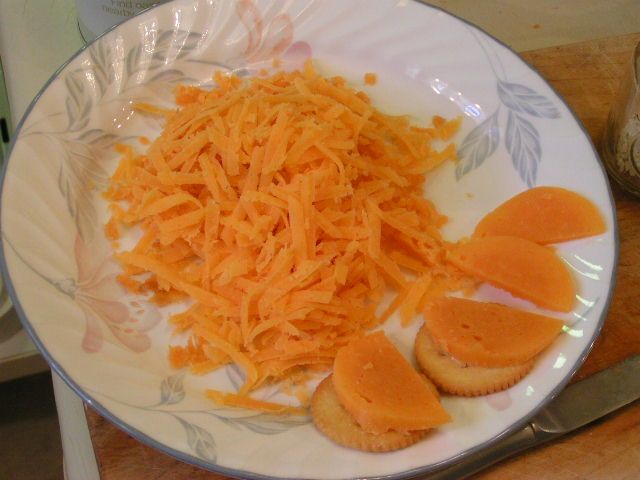
To remove the cheese, open the jar and slide a knife inside the jar and around the cheese. The cheese will just slide out. You can then grate it. At first it is a little oily, but that is just because it is at room temp and some of the oils have separated.


 photo PICT1104_zpsce20aee2.jpg

Or slice it! It’s perfect for crackers and cheese.


Canning Soft Velveeta or Soft Cheese


 photo PICT0945_zps544250d7.jpg

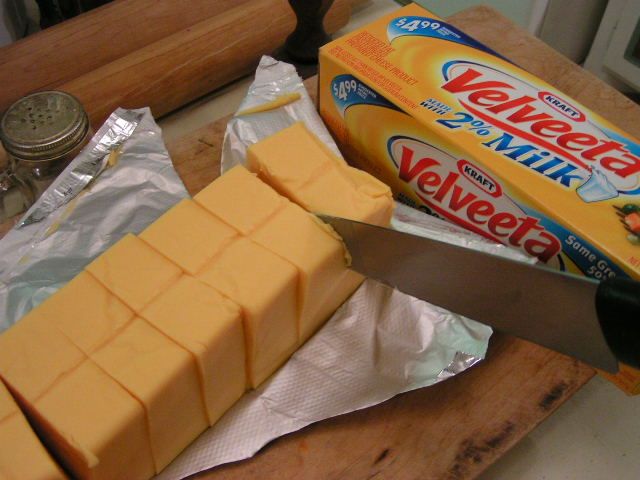
Cube a box of Velveeta


 photo PICT0959_zps514a5e4f.jpg


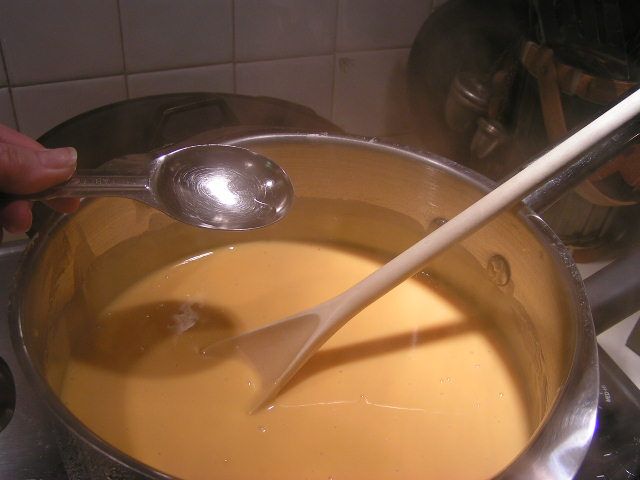
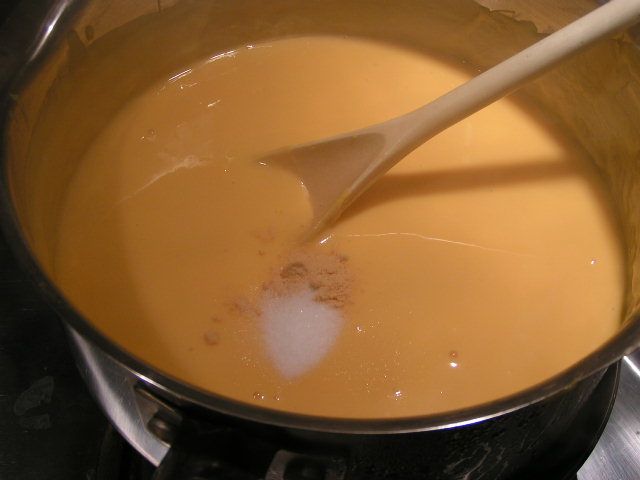
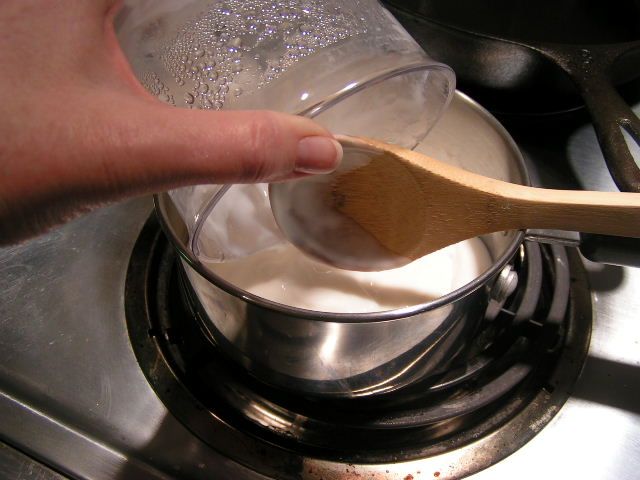
Place in a double boiler with 3 oz canned milk and slowly melt. When melted, add 1 tablespoon of vinegar and stir in


 photo PICT0962_zps93d08181.jpg

Add 1/2 teaspoon of dry mustard and 1/2 tsp salt and stir well until totally smooth and melted


 photo PICT0963_zps8c6e724b.jpg

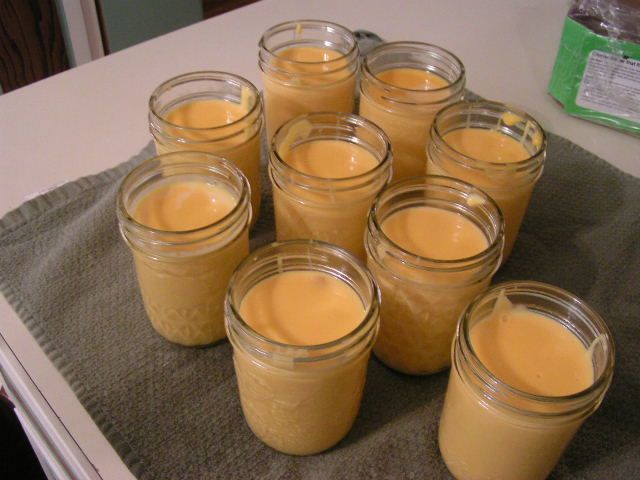
Pour the cheese into jars leaving a 1/2 inch headspace. I use 8 oz jars. I can always open two 8oz jars if I need a pint.


 photo PICT0966_zpsb742b8d3.jpg

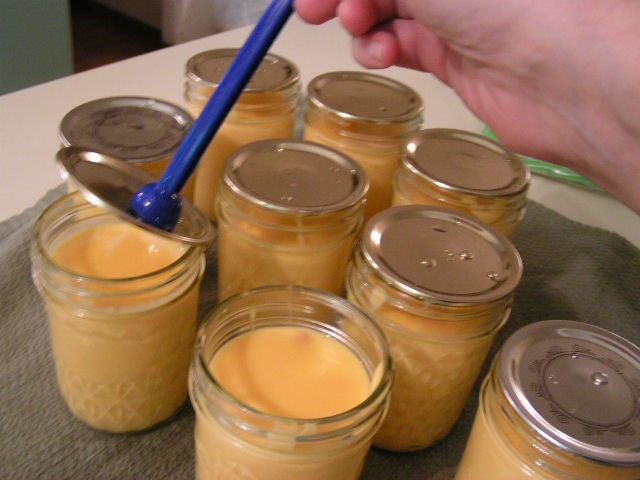
Carefully wipe the rims of the jars to remove any wayward cheese and place lids that have been heated in nearly boiling water on top of jars


 photo PICT0974_zps09884f2c.jpg


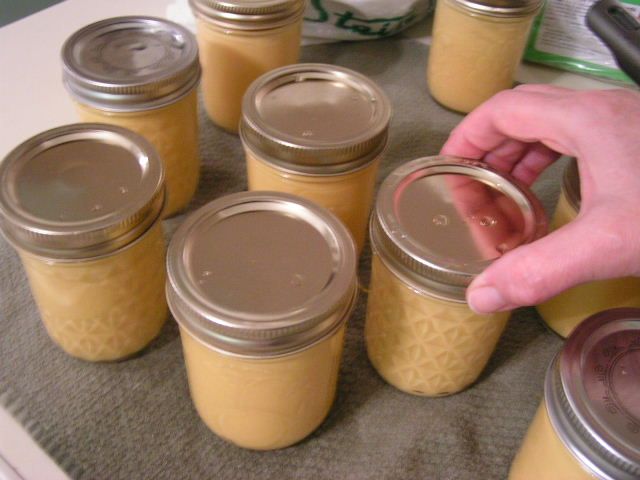
Put rings onto the jars and tighten down slightly. Place jars in waterbath canner rack and lower into water that has already been heated so not to crack the hot jars of cheese. Bring the water to a boil and at the point of boiling, set your timer for 10 minutes and continue to boil.


 photo PICT0977_zps578d9c7f.jpg

Remove jars from water and allow to cool on a dry towel. You will hear the lids pop as they seal.


And so, I’ve learned something new out of necessity. I LOVE having cheese in the can. It is so easy and I don’t have to worry about refrigeration. The cheddar gets a little sharper as it ages and tastes wonderful when opened. So cut the cheese and call me “Happy”!!


Happy Cooking!

MB


Please leave your comments at the comment link that follows!


Dehydrating Series Pt IV

Monday, January 24th, 2011


Part I
Part II
Part III

Dehydrating Part IV

Or

Soup’s On!!


I’m sitting here listening to my sweet hubby laugh his head off as he is pulling up YouTube videos of “Carl” (Billy Bob Thorton) from the movie Slingblade making prank calls to restaurants and asking the clerks for “French fried pertaters and biscuits and I like some mustard with those biscuits, uh-huh”. The clerks are attempting to take this order with as much grace as possible. I have to admit that I’m laughing too. I guess I’m remembering the phone calls I used to make, from our church phone on Wednesday service nights no less, to Weigel’s Dairy Store in Knoxville, Tennessee to tell the clerk, in high pitched squeals, “Your cows are out!” immediately hanging up the phone. Real smooth, huh? Kinda like the phone calls my grandparents used to receive in the ’30’s, at their grocery store, where a voice asked if they carried Prince Albert in a can and with the answer in the affirmative, young voices would yell, “Then let him out!!” We are so brilliant when we are young. However, it seems that Mr. Thorton is still brilliant – he’s entertaining my husband, anyway!


I’ve noticed that in the blog world, bloggers of the feminine persuasion have dubbed their loving husbands with honorary names that reflect everything from their appearance to their personality. The Pioneer Woman refers to her life partner as her Marlboro Man while another at the Rural Revolution refers to hers simply as Husband of The Boss. I’ve been musing for the past few days about what I should title the perfect man in my life – the one who can fix literally anything, including a sad day. He can take a car apart and put it back together, as well as a computer and its software, a refrigerator, an antique telephone and my hair dryer and have them all working as a result. He fixes up Christmas for our adult kids, fixes boo-boos on the animals and is currently fixing a whole new room addition on the house complete with a wood stove. He says he’s suffered through the last ice storm without heat!! He even has a tool belt like Tool Time Tim of Home Improvements. So yep, that’s what the love of my life’s moniker shall be from now on; Mr. Fix-It. And as an aside, just to let you know, he says that he married me because I came with power tools!!


Image and video hosting by TinyPic


There is nothing I enjoy more than putting a piping hot meal before Mr. Fix-It after a long day’s work. I especially love him because he loves soup and that is one of my favorite things in the whole world on these cold days. But I’m weird. I love it on warm days too – homemade that is. When I go to Olive Garden, I’m the “Never Ending Soup and Salad” kinda gal. Therefore, it is really pleasant to have all of the ingredients for soup right at my fingertips, dried and ready to reconstitute for any quick, hot meal. In this fourth and final in my series on dehydrating, I’ve got a recipe for broccoli cheese soup that will leave you craving more. Let’s go!

Broccoli Cheese Soup


1 Tbsp Olive Oil
1 Tbsp dried celery (1 stalk fresh chopped)
1 tsp dried bell pepper (tbsp fresh)
1 Tbsp dried onion (2 Tbsp diced fresh onion)
1/4 tsp dried garlic (1 tsp fresh, chopped garlic)
1/3 cup dried potatoes (1 cup cubed fresh potatoes)
1/2 cup dried broccoli (1 1/2 cup chopped fresh broccoli)
4 chicken bouillon cubes
4 1/2 cups water
1 can milk or 3/4 cups half and half
1/4 lb Velveeta Cheese + or –
1 Tbsp corn starch + 2 Tbsp water


Image and video hosting by TinyPic


Put 1 tbsp Olive Oil in a 3 qt sauce pan and add onion and dried garlic. Sauté. If using dried onions, just stir around a little to get the flavors going. That was the only thing I was out of. Gotta dry some more!


Image and video hosting by TinyPic


Add dried celery and dried bell pepper. For the purposes of less typing, I’ve included fresh equivilents in the recipe above but not in the directions, but you CAN make this with all fresh veggies


Image and video hosting by TinyPic


Add dried potatoes and continue stirring in the oil


Image and video hosting by TinyPic


Add dried broccoli


Image and video hosting by TinyPic


Add three cups of water and stir.


Image and video hosting by TinyPic


Add 4 chicken bouillon cubes. Bring to a boil and turn heat down to medium for a slow boil and cook for 30 minutes uncovered.


 photo PICT0838_zps7vl8xuhz.jpg


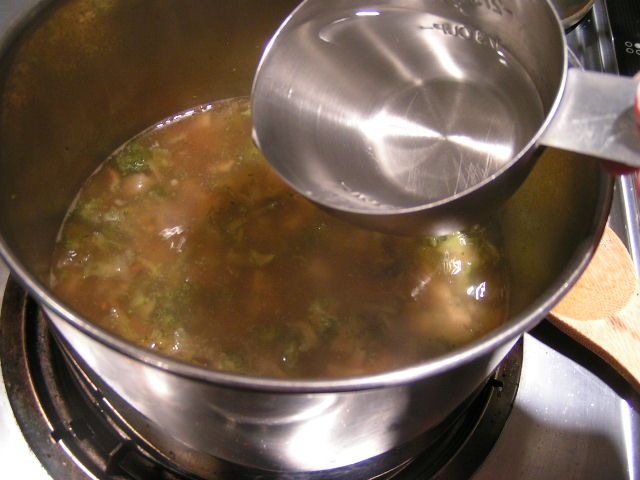
Add 1 1/2 cups additional water


 photo PICT0840_zpso9ddhyp9.jpg


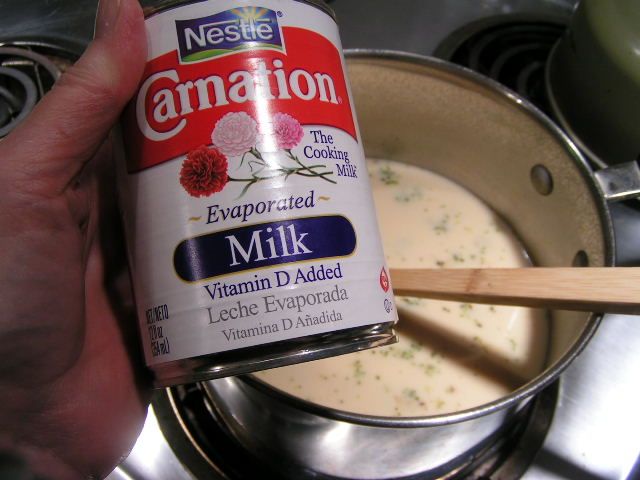
Add one can of milk. The canned 2% and Fat Free is fine too. If you want a richer soup, you can use half and half


Image and video hosting by TinyPic


I canned Velveeta Cheese that was on sale (I’ll blog about that at a later date) and put it into 8 oz jars. Here, I have heated the jar to soften the cheese and am using 1/2 jar or not quite a 1/4 of a pound of Velveeta. You can add more or less according to your taste.


 photo PICT0845_zpsgf49emkz.jpg


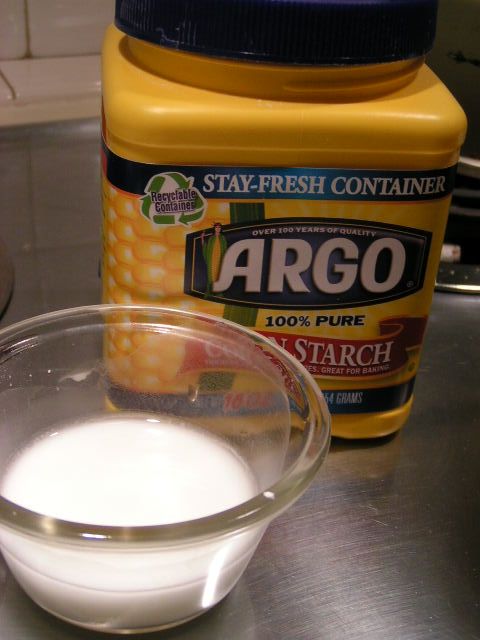
Mix one tablespoon cornstarch with 2 tablespoons COLD water until cornstarch is totally dissolved


Image and video hosting by TinyPic


As soup is boiling slightly, stir in cornstarch mixture and continue stirring to avoid lumps


 photo PICT0849_zpsxh2b0pgr.jpg


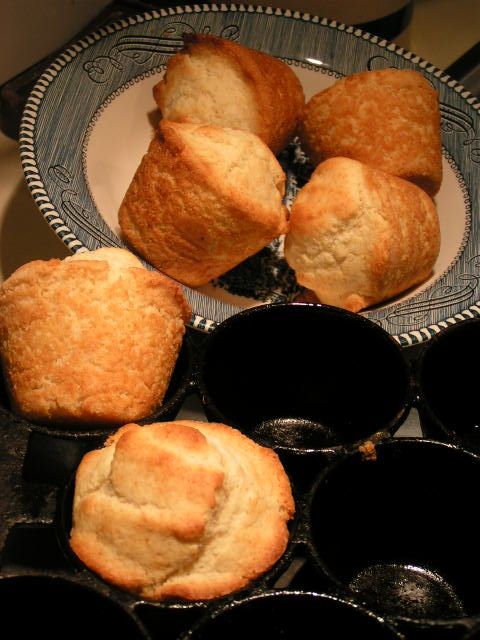
You can make some corn muffins with my cornbread recipe and make everybody happy! I used my cast iron muffin pan. I love cast iron!


Image and video hosting by TinyPic


And there you have it. Soup that, if you dehydrate and can everything, can be made with no need for refrigeration and would be easy to make over a fire if the electricity goes out! In this state, that is no unusual circumstance!!


Happy Cooking!


MB
Please join us on FaceBook!!


Join in the conversation by leaving a comment below and enter our January Giveaway!


Dehydrating Series Pt III Peppers

Wednesday, January 19th, 2011

Part I
Part II


Dehydrating Part III

OR

The Incredibly Shrinking

Pepper


ImageHost.org


Another vegetable that is fast and easy to dry is the bell pepper. All peppers can be dried, including jalopenos, but that is one pepper you will want to process in the garage or outside. Your eyes and nose won’t be able to stand the fumes while drying!! Here’s a fast rundown on drying peppers.


ImageHost.org


Wash peppers. I will be using green, red and yellow bell peppers


ImageHost.org


Slice peppers


ImageHost.org


Chop peppers and spread onto racks of your dehydrator


ImageHost.org


I have trays of green peppers on the bottom, then yellow and then red because I like to have a few of the red and yellow fall through to the greens for a pretty mix and then have a mixture of yellow and red as well.


ImageHost.org


Dry overnight or for 12-15 hours and the peppers pieces will be shrunken and hard


ImageHost.org


Dried peppers make a pretty gift for the cooks in the family. They can be used in any recipe that calls for peppers! You can either reconstitute by letting them soak in warm water or just put them into a recipe to reconstitute as it cooks.

Happy Cooking!

MB


Please leave your comments at the comment link that follows! You will be automatically entered in our January Giveaway! And join us for updates on Facebook by clicking on the FaceBook icon below.


Vacuum Sealing Jars

Saturday, January 15th, 2011


Hoover Ain’t Got Nothin’

On This

Little Bit Of Technology!


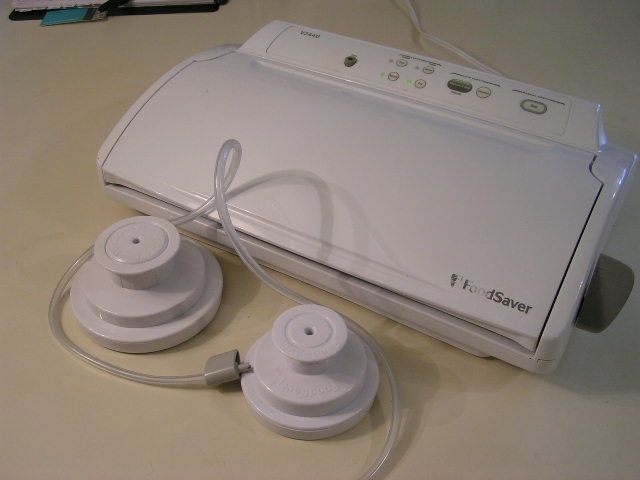
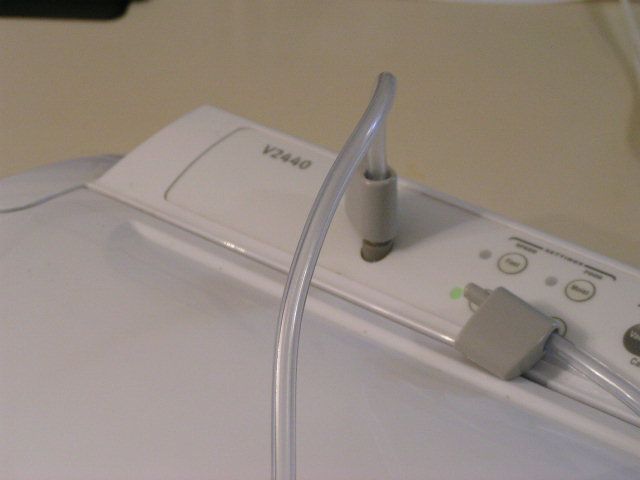
I have had a number of readers ask me how a vacuum sealer works with jars, since posting the two articles on dehydrating veggies. I thought that I would break into the middle of that series and answer those questions in pictures. Just as background info, I have a FoodSaver V2440 which is quite ancient in the world of technology. I am thinking that I got it somewhere around 2000 or 2001. I am sure that you can find that particular model on Ebay but I highly doubt anyone is selling it new. Target , Walmart and Amazon all carry FoodSaver products or you can order from the company directly at FoodSaver.com. Just make sure that whatever model you choose has the “accessory port” which is the little raised button that you will see in my pictures. Some of the models do not have this feature. I looked on the website and found one particular model that seemed reasonably priced and with the port feature. Just click above if you’d like to view it. The canning accessories must be purchased separately unless the website happens to be having a combined special. You can find the jar sealing items here. There is one for wide mouthed jars and for jars with regular openings. The following are pictures of how I use my vacuum sealer for both bags and jars.


 photo PICT1022_zps8f11677f.jpg


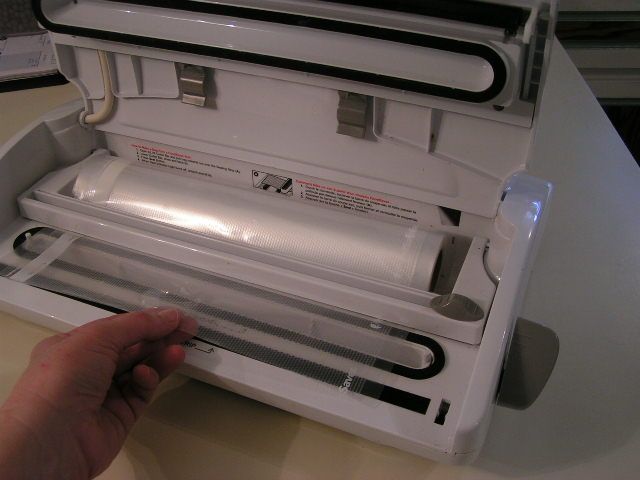
My vacuum sealer is equipped to do both bag vacuuming and container vacuuming. To bag items, first pull the plastic sheeting from the roll to cover the sealing plate.


 photo PICT1025_zps7ffac889.jpg


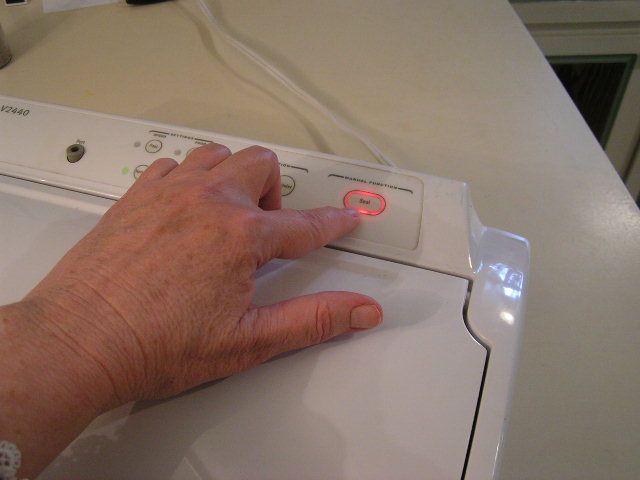
Secure the lid and press the ‘seal’ button and allow to seal what will become the bottom end until the light goes off or until the time you have determined is enough. If you predetermine a time, you have to manually stop the sealing feature by repressing the ‘seal’ button. Pull the plastic out to make a bag long enough to hold your food. The sealed portion acts as the bottom. Cut with the cutting feature.


 photo PICT1035_zpsc0349a2e.jpg


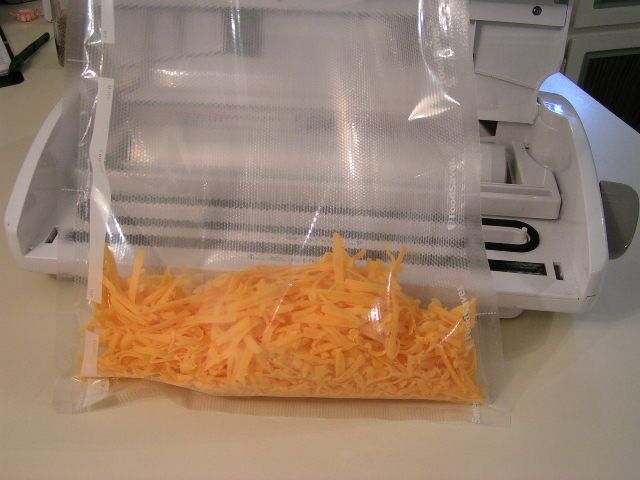
I bought a boatload of cheese on sale (1 block for $1.00!) and so since we like grated cheese, and I have found that you can freeze grated cheese really well, here I have grated a block of cheddar. You can also use a food processor. Cheese may also be canned!! But that’s for another post. Pour in the cheese or whatever you are sealing


 photo PICT1040_zps0a538f03.jpg


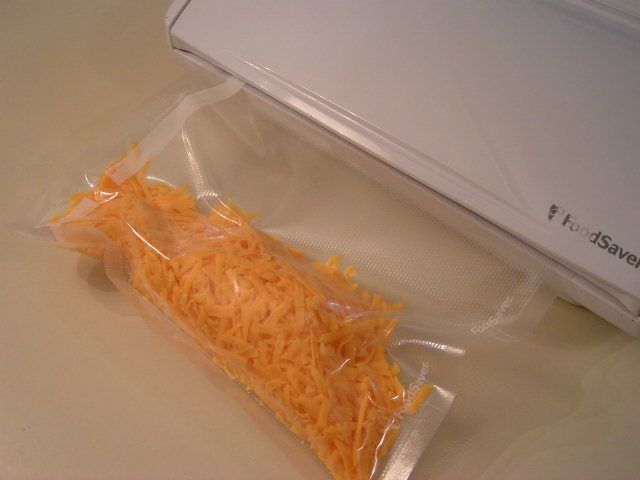
Place the open end of the bag down into the chamber that attaches to the suction holes and close the lid and fasten Press the “vacuum and seal” button and watch it work!


 photo PICT1042_zps5d85111e.jpg


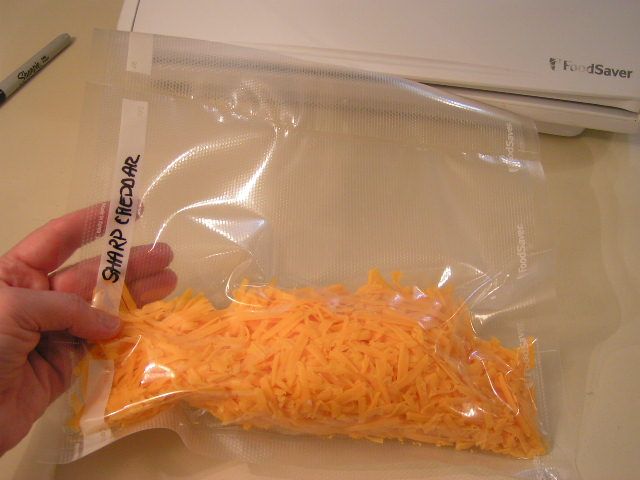
You can stop it at any time, which is what I am doing here in order to keep the cheese from being too tightly pressed.


 photo PICT1044_zps4d606b05.jpg


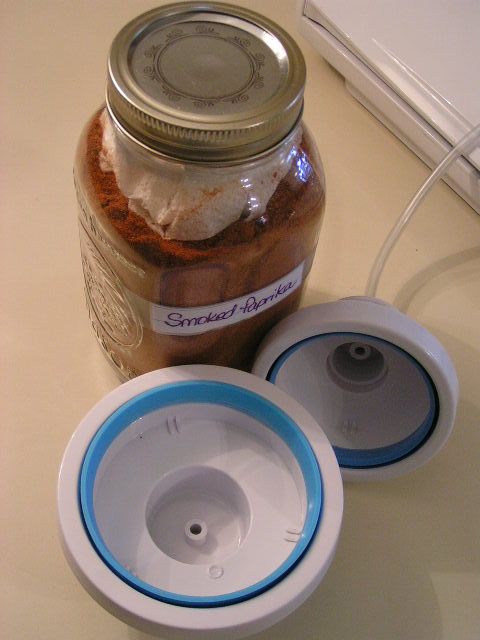
To vacuum jars, you must have the jar sealers and hoses that can be purchased separately. They run anywhere from $8 – $10


 photo PICT1045_zps20db3898.jpg


First, attach the hose to the accessory port


 photo PICT1047_zpsd64099f3.jpg


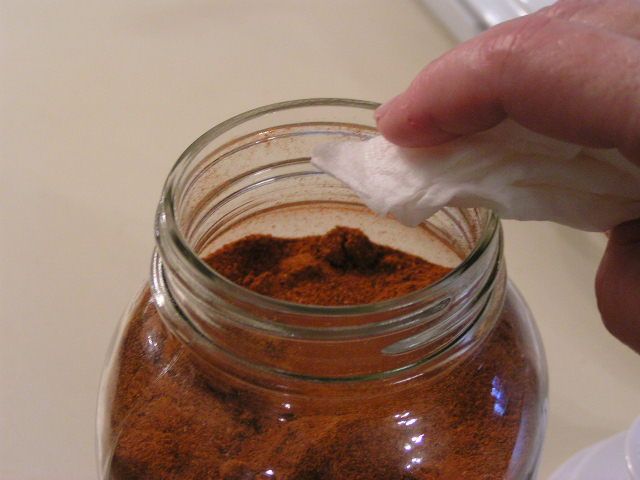
Wipe the edges of the jar with a damp cloth or paper towel to remove any residue or oil


 photo PICT1049_zpsd7b9f7e6.jpg


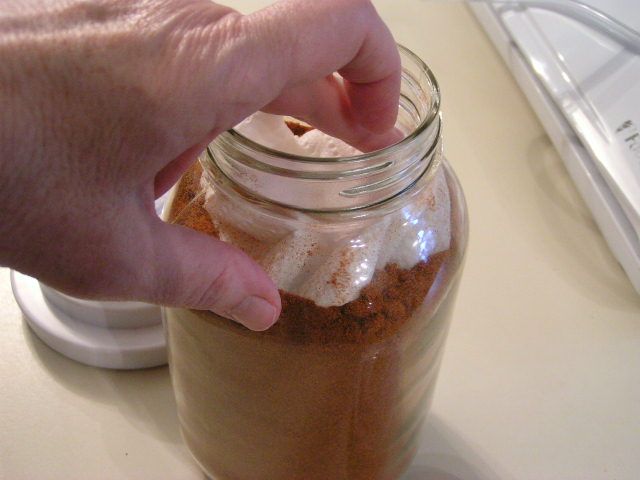
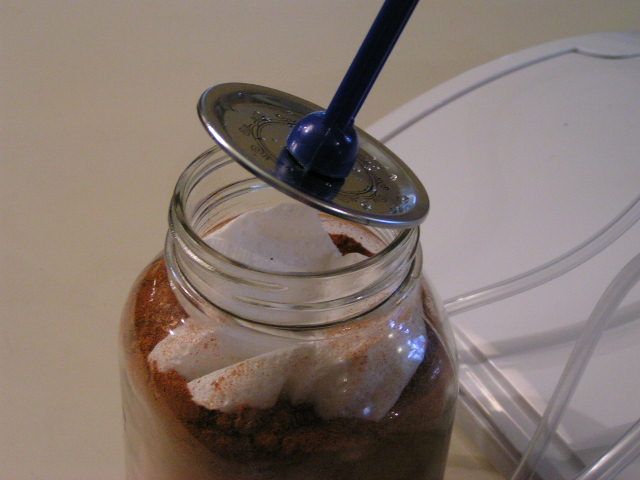
Place a dry, folded paper towel over powdery substances in the jar. Not needed for fruits and vegetables, etc.


 photo PICT1021_zpsb5d63e55.jpg


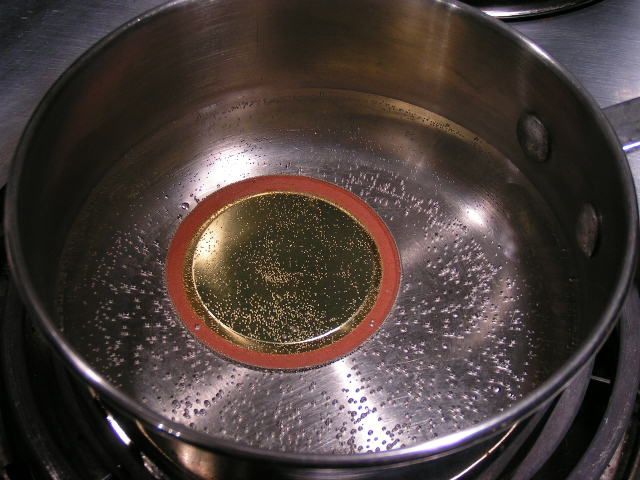
A new lid should be softened in a pan of nearly boiling water


 photo PICT1063_zpse47e1466.jpg


Place lid on top of jar


 photo PICT1053_zps7a8c2da0.jpg


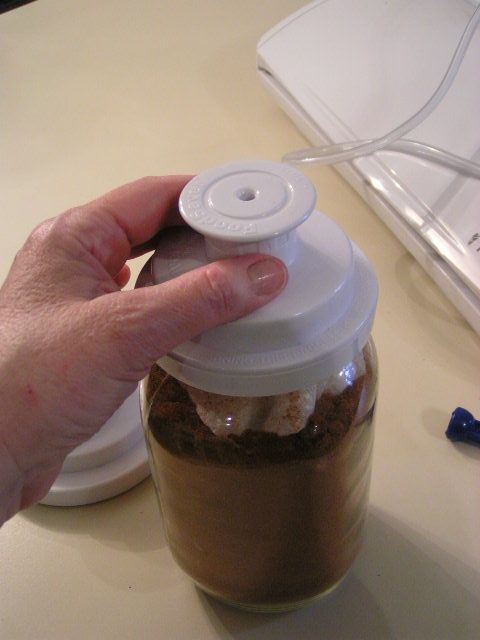
Place appropriate width jar sealer over the lid. This is the sealer for a regular mouthed jar. I find that sometimes it helps to wet your finger and run it around the inside edge of the sealer before putting it on the jar to create an even tighter vacuum.


 photo PICT1055_zps306df411.jpg


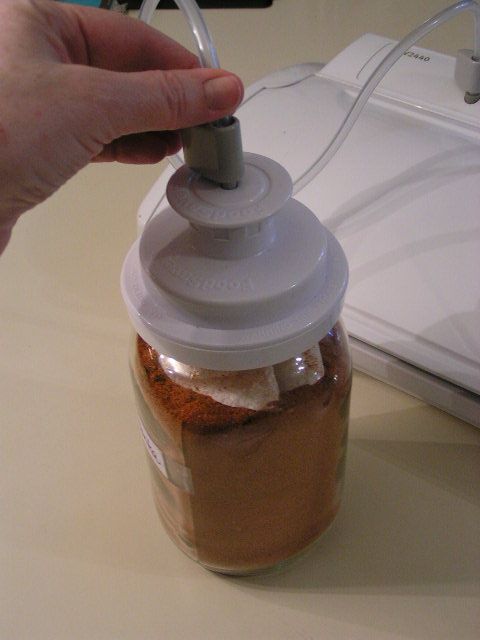
Attach hose to jar sealer


 photo PICT1060_zps3181eea4.jpg


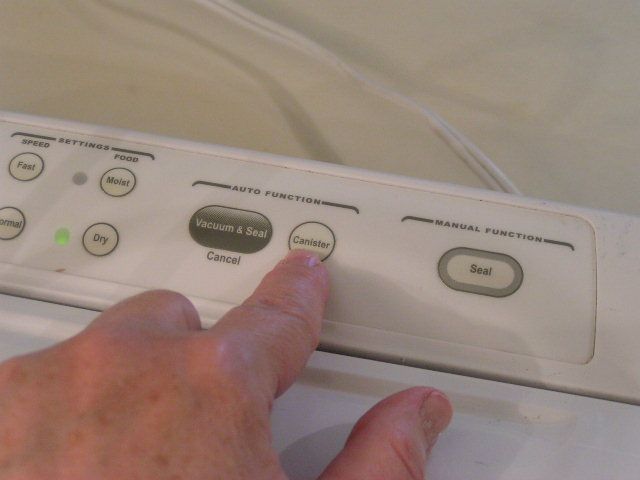
Press the canister button. If you get a newer model sealer, then the button may be different


 photo PICT1067_zps6bc0e18f.jpg


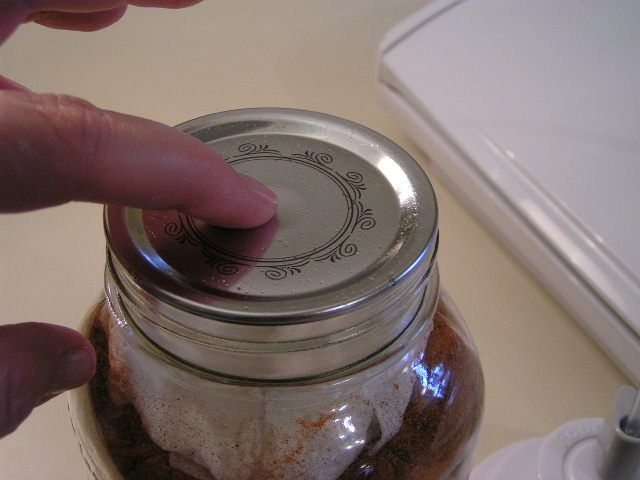
After removing the jar sealer, the “button” on the center of the jar lid should be concave and will not pop when you push the center of the jar lid.


 photo PICT1069_zpsf2cb2bca.jpg


So there you have it. My darling daughter refers to this wonderful piece of equipment as “the sucker thing” and asked for one for Christmas. Did I mention that she is 29?!


Happy Cooking!


MB
Please join us on FaceBook!!


Join in the conversation by leaving a comment below and enter our January Giveaway!


Dehydrating Series Pt II – Potatoes

Thursday, January 13th, 2011


Part I

Dehydrating Series Pt II

Or

A Big Spud in a Little Jar


 photo PICT0823_zpsaa829959.jpg


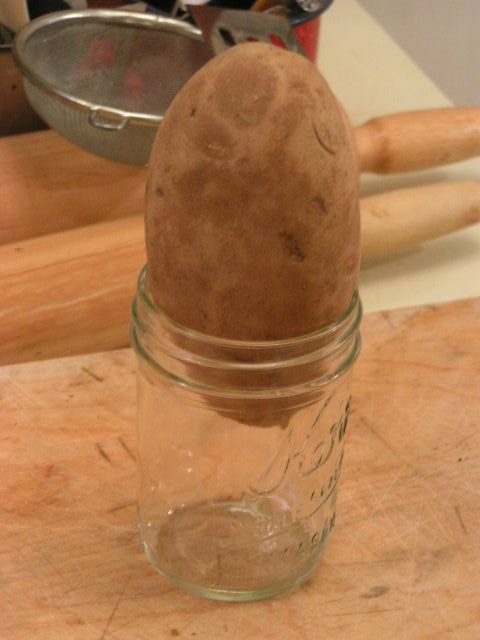
I’m going to get right to the point today as a continuation of Part I with photos of how to dry potatoes. Potatoes are one of my favorite garden items and I devote an entire bed to both red and Yukon Gold spuds. These “new” potatoes take a little longer to dry than the traditional Russetts which I am demonstrating here. Also, at the end is a recipe in which to use the sliced and dried potatoes. My next post will be about drying peppers and then you’ll get a recipe for broccoli cheese soup made from all of your dried veggies that will have your family licking the pot. So keep following!
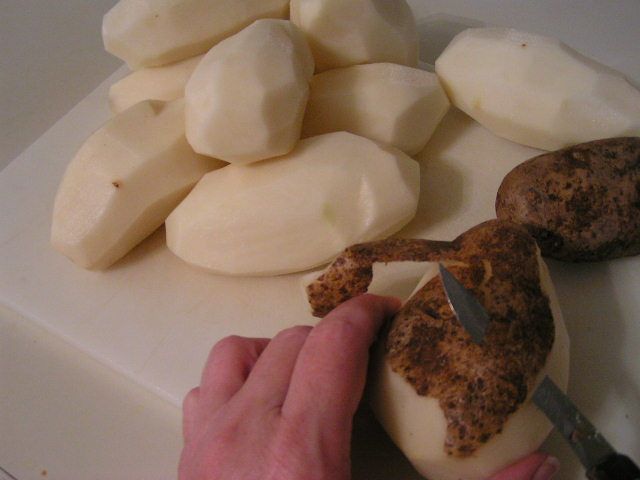


 photo PICT0798_zps93e2069c.jpg


Peel potatoes


 photo PICT0801_zpsd93848fc.jpg


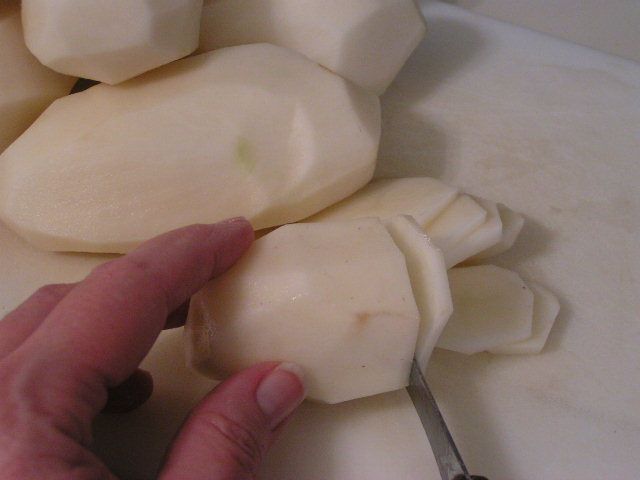
Thinly slice potatoes


 photo PICT0804_zpse3cec2c3.jpg


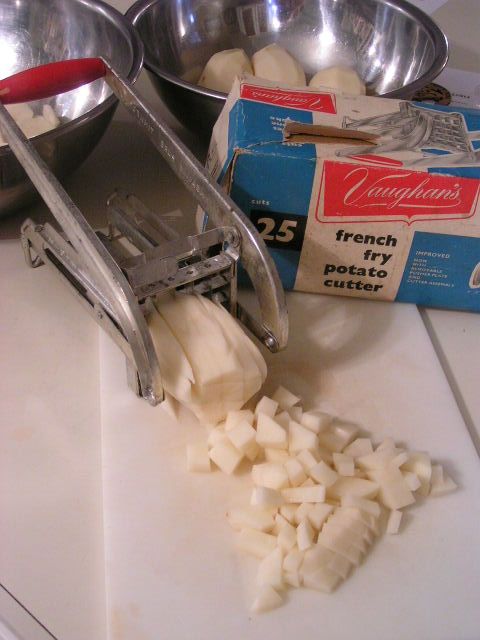
Or you can dice the potatoes. Here, I am using my grandmother’s old french fry cutter – it even has a wooden red handle…and dice by cutting across the potato strips


 photo PICT0808_zpsb0680277.jpg


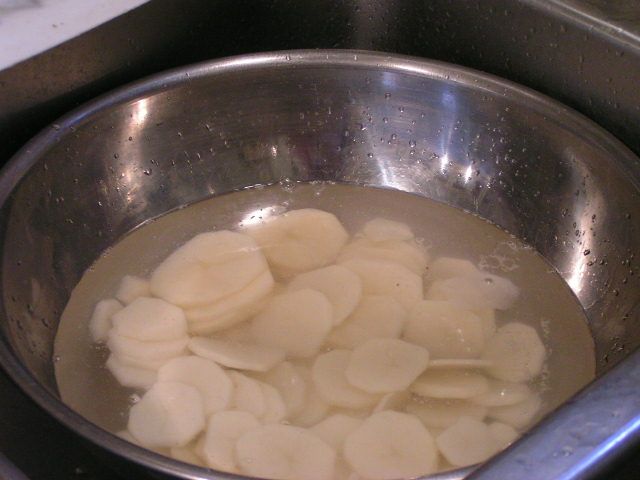
In a large bowl, rinse potato slices under water, strain and rinse again until water runs clear and all of the starch is washed off.


 photo PICT0819_zps02f3a2a0.jpg


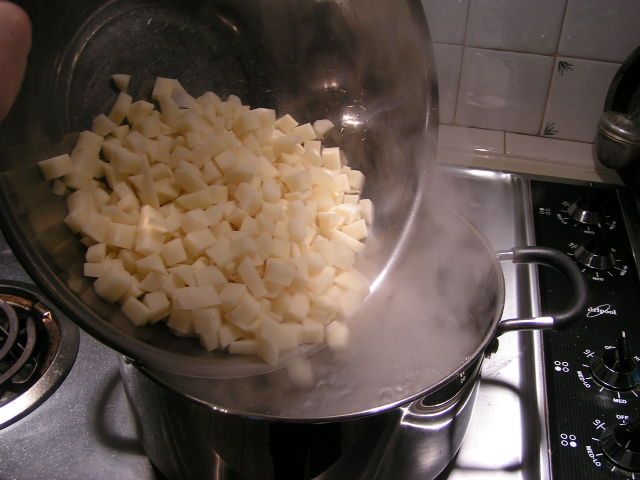
Bring water to a boil in a large stock pot. Pour potato slices or cubes into the boiling water. Allow to parboil for 2 minutes. Drain and put parboiled potatoes into ice water in a large bowl until totally cooled.


 photo PICT0816_zps077bda80.jpg


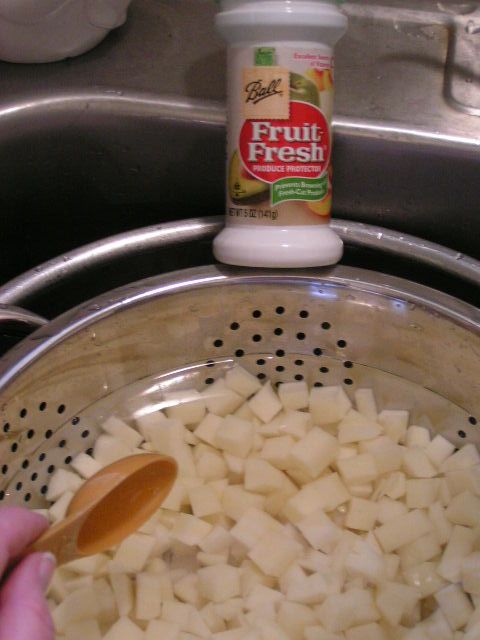
You can add a tablespoon of Fruit Fresh or other citric acid product to the water for added protection against discoloration, according to directions.


 photo PICT0817_zps98eb9285.jpg


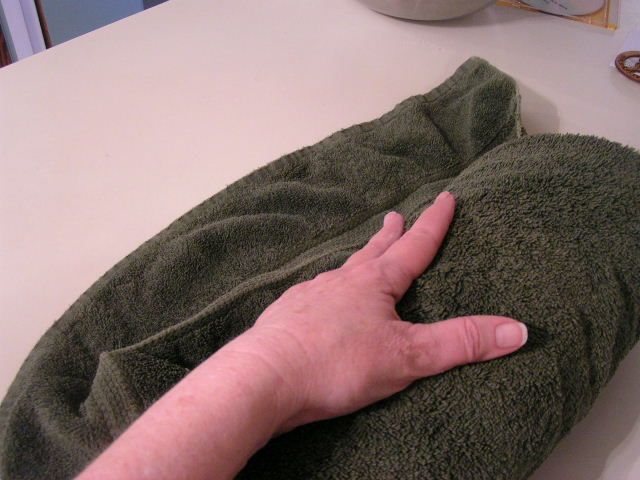
Spread the potato slices or diced pieces onto a large towel to dry. Roll the towel up to squeeze as much water out as possible


 photo PICT0827_zps60a73265.jpg


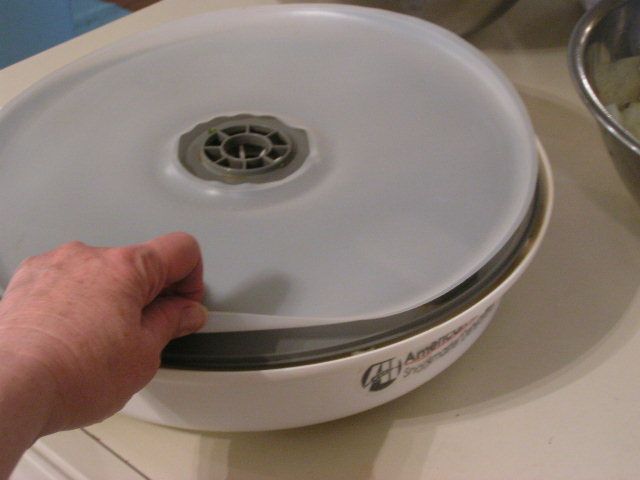
My dehydrator came with a plastic tray to place inside of the larger trays to make fruit rollups. However, I have found that it is also a wonderful edition when drying veggies or fruits that can fall through the cracks when dried all the way. So, I put the tray over the main motor housing of my dehydrator and stack the larger trays on top of that. If anything falls through the cracks it is caught in the fruit rollup tray and easily transferred to a bowl when the drying is finished.


 photo PICT0828_zps36c821b8.jpg


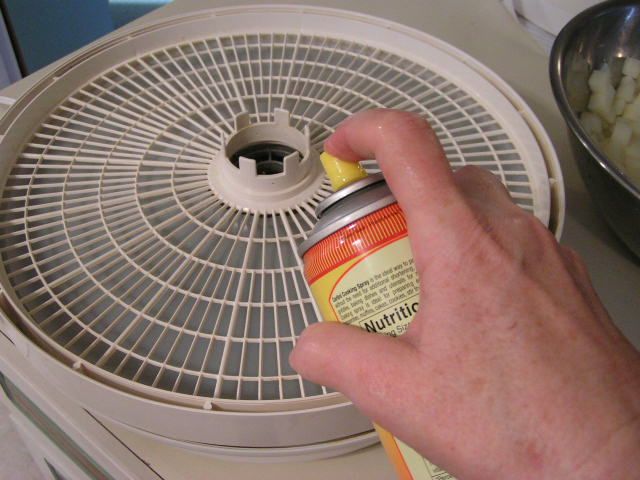
You can lightly spray your racks with oil if you are worried about easy removal of your dried fruits or veggies.


 photo PICT0830_zps70422a28.jpg


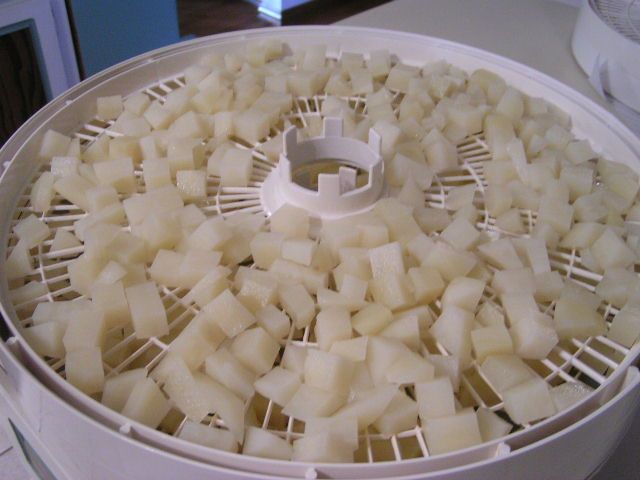
Evenly spread diced potatoes on the racks and stack racks


 photo PICT0833_zps1143eaf8.jpg


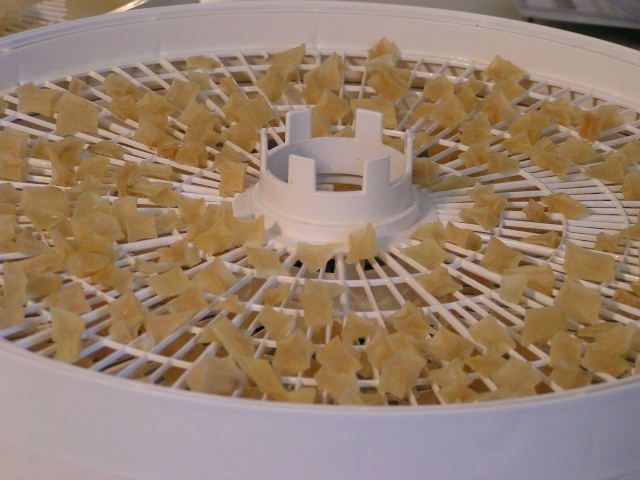
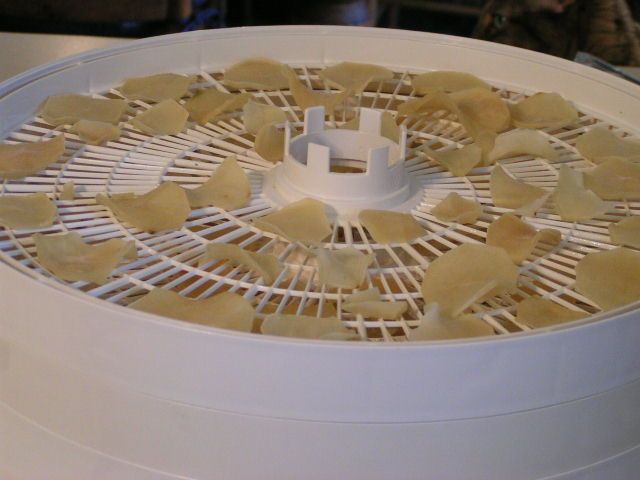
Dry overnight or for 12 – 15 hours. Potatoes should be hard


 photo PICT0832_zps688de371.jpg


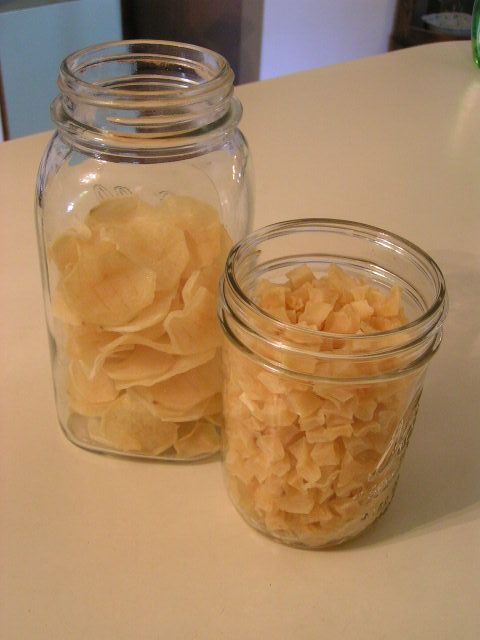
Dried potato slices should look like potato chips


 photo PICT0835_zpsca21ecb8.jpg


Store the dried potatoes into jars and seal with a vacuum sealer or just place a lid and ring in place and fasten tightly. Heavy weight plastic freezer bags work well too


Au Gratin Potatoes


(Or as my friend Janis calls them, “Old Rotten Potatoes”)


1 pkg Shawnee Mills Country Gravy Mix
2 1/4 cups water
OR make 2 cups of your own white sauce from your favorite recipe
1 cup dried sliced potatoes
1/2 medium onion
1/2 cup shredded cheddar cheese
2 tbsp Hormel Real Bacon Bits or 3 slices bacon chopped into pieces
French’s French Fried Onions
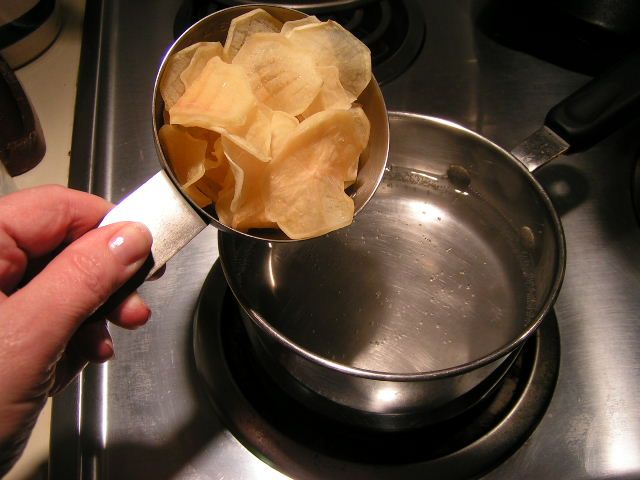

 photo PICT0847_zps4996893e.jpg


Pour potatoes into boiling water and cook for 15 minutes


 photo PICT0843_zps13a4a0eb.jpg


 photo PICT0850_zps15c9761f.jpg


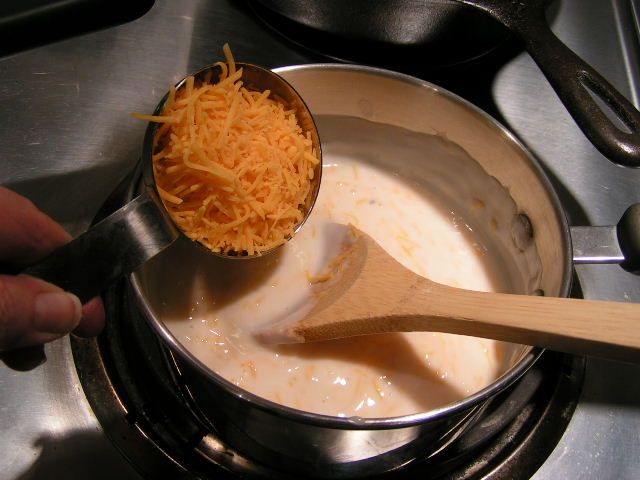
Make gravy according to directions, adding 1/4 cup more water – or make your own white sauce. I like to use the gravy mix because (1) it is fast and (2) it is low fat and low calorie. Add shredded cheese to the sauce and stir until totally incorporated into the sauce.


 photo PICT0856_zpsba0fc650.jpg


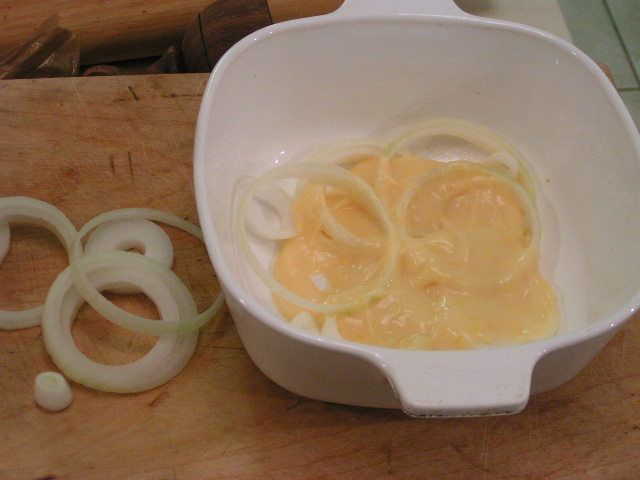
Slice 1/2 onion into rings and place half of them into the bottom of a small baking dish. This is a 1 quart dish. Pour 1/4 of the cheese sauce over the top of the onions.


 photo PICT0860_zps73d5f166.jpg


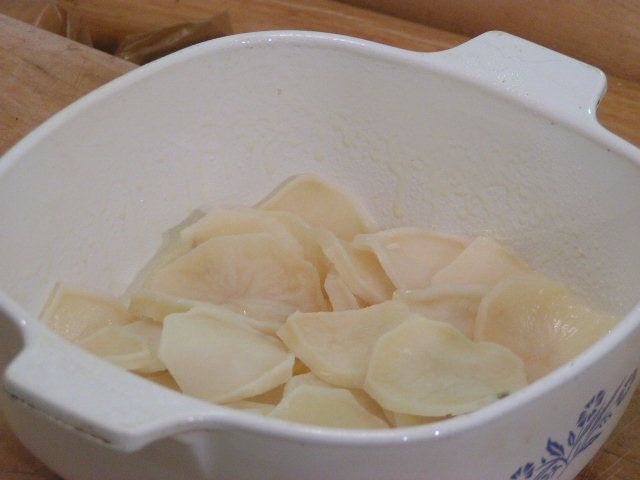
Drain potatoes and layer them in baking dish over onions


 photo PICT0861_zpsfe892d1c.jpg


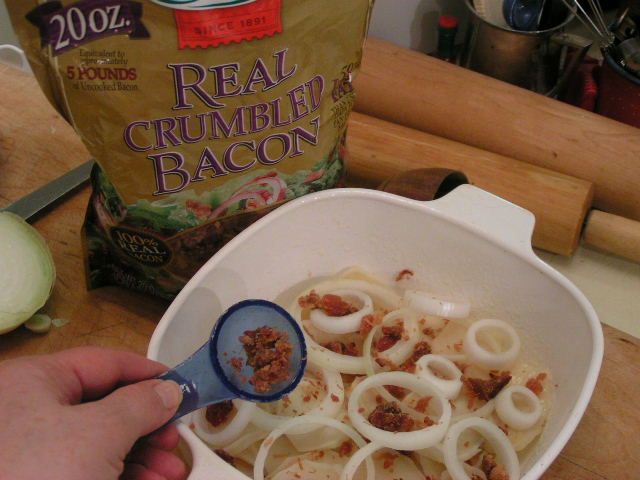
Layer rest of the onions over the potatoes and sprinkle the Hormel Bacon pieces or fresh bacon pieces over the onions and potatoes.


 photo PICT0862_zps10368a75.jpg


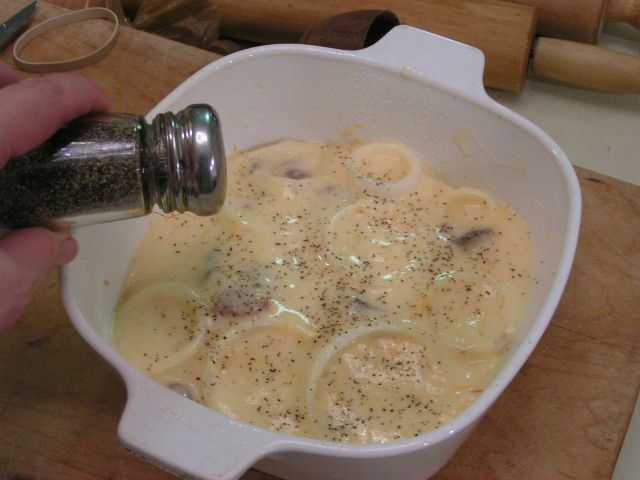
Pour remaining cheese sauce over the potatoes and sprinkle with pepper to taste.


 photo PICT0863_zps82b90c4c.jpg


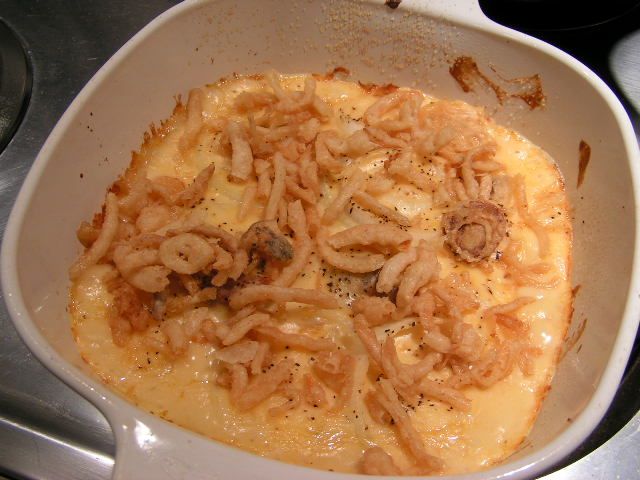
Bake for 30 minutes and remove from oven. Sprinkle with French’s onions and return to oven to cook 10 minutes more


 photo PICT0864_zps12a2c9f5.jpg


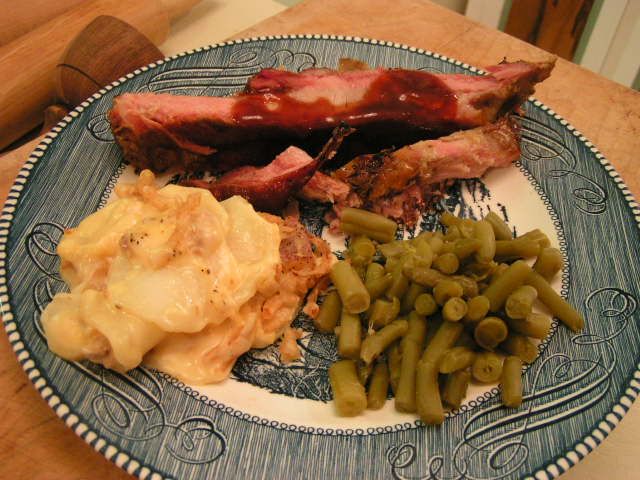
Can we say “Yuuuuummmm”?


Happy Cooking!


MB
Please join us on FaceBook!!


Join in the conversation by leaving a comment below and enter our January Giveaway!


Dehydrating Series Pt I – Celery

Monday, January 10th, 2011


Part II

Dehydrating Series Part I

Or

How To Pack 8 Bags of Celery Into

A One Quart Jar


Here in Oklahoma, most of us are tough old birds. We’ve learned the only thing predictable is that there is nothing much predictable in this state. One minute you can bake a chicken in your car and the next minute you’re trying to figure out how to get that car out of a snow drift. Of course, the car can get cooked in one of our prairie fires as well. Ice storms can paralyze daily life for a week and tornadoes can change lives forever. And then of course, there are the hail storms.


So, we Okies have pretty much figured out that you don’t need a government commission on emergency preparedness to tell us to be prepared. We’ve been prepared since the days of the Land Run when barrels of beans, flour and sugar and a crock of sourdough starter meant protection from starvation when the WalMart shelves were empty. Unfortunately, there ARE some city dwellers here who have either forgotten these facts or who moved here from some foreign country, like Los Angeles, who get caught with their rations down. But for the most part, we’re a pretty prepared and flexible lot. I got tickled the other day when a 30 minute program was aired to remind us that we have the likes of tornadoes and such here in Oklahoma. Ya think? A body would have to be living in a cave 24/7 to miss that little bit of reality. Anyway, the Oklahoma preparedness program has been called “Red Dirt Ready” and the name symbolizes the fact the Okies immediately jump in to help after a disaster, getting all covered in Oklahoma’s famous red dirt. That’s true. We do. It’s what makes this state great.


 photo IceStorm1-27-09003_zps64602f77.jpg


 photo PICT0032_zps15eac0a6.jpg


Imagine this on the power lines. That tree totally disentegrated. So do our electric lines!!


Electricity can be a problem around here. It is not unusual for us to be without for a couple of days and in many areas that can run into a number of weeks. That wreaks havoc on one’s frozen vittles if one hasn’t a generator and so it is nice to have plenty of stock that requires no refrigeration. That would seem impossible for such things as fruits and veggies, but not so! The age old art of dehydrating comes in really handy to offer up a pantry full of wonderful and healthy treats that will last a looooong time.


Having a garden each year, I dehydrate stuff yearly, but lately, I’ve been a dehydrating fool. I have been challenging myself to see what I can dry next and how best to use it. I’ve decided to do a series on using a dehydrator with recipes. Today I’m demonstrating celery and broccoli drying. I was inspired to do the celery because our local store, Firelake Grocery, had celery on sale, 3 large bags for $1. The broccoli was on sale as well – two good sized heads for $1. I use a lot of both.


Now, I need to sidetrack here for a sec because I realize that these are not organic items coming from a local grocer. However, with food prices soaring, many people can’t afford the more expensive organic foods and I want to let them know that it’s ok. This is where my faith comes into play. I see 3 large bags of celery for $1 as a blessing and I see God as my provider of blessings. Therefore, I just trust that all I can do is the best that I can and trust God to take care of me. In other words, I eat as healthily as I can and leave the rest up to the Lord. Shoot, I used to break thermometers when I was young and chase the little balls of mercury around on the table for hours with my friends! I promise, I don’t glow in the dark – although I do have very white hair. Do you suppose – – – ?


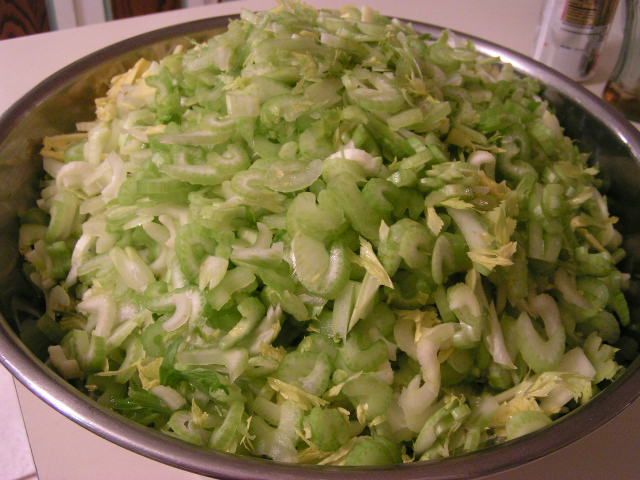
Back to the celery and broccoli. The long and the short of it is that I bought 16 bags of celery and a lot of broccoli. Neither of these items is anything you can keep for any amount of time unless you dry them or freeze them. I like to freeze celery by chopping it, leaves and all, and spreading it onto a cookie sheet, freezing it hard and then taking it off of the sheet to place it into freezer bags. That way the pieces stay separate and don’t clump up. Frozen celery is a quick addition for sautéing and putting into chicken salad. However, as I said, frozen is useless when there is no electricity. Plus, I don’t have that much freezer space! I froze one bag of this celery and all of the rest I dried.


 photo PICT0689_zps26a77d51.jpg


I used electricity on those suckers with a food processor! Beat having to cut them all up by hand. But I could have done it – Really.


 photo PICT0695_zps4c5bc851.jpg


 photo PICT0694_zps5f6dd73b.jpg


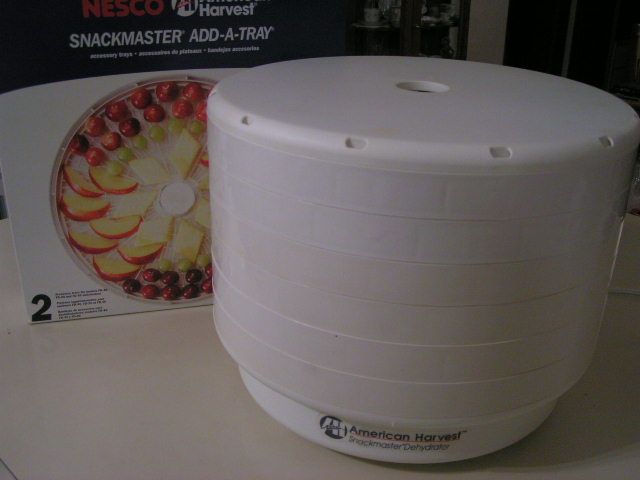
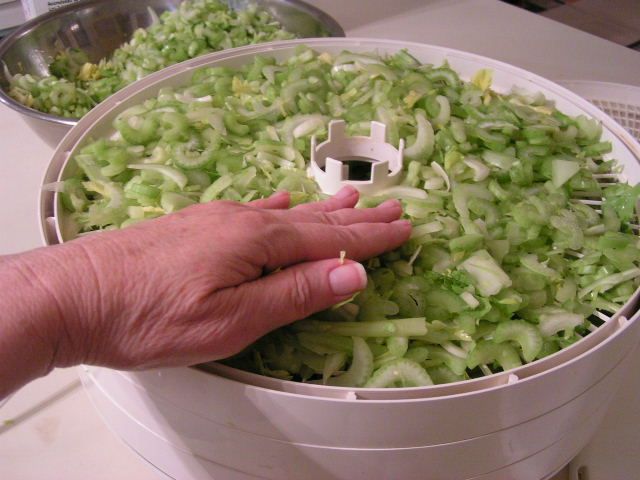
I use an American Harvest dehydrator that I have had for years. Got it at Walmart. They still carry them as far as I know, in season, but they are offered elsewhere as well. I also ordered extra racks from the company. Sprinkle the celery evenly on the dehydrator racks. It doesn’t matter if the celery is several layers thick. Continue adding celery to racks and layer one rack on top of the other. Dry overnight for 12 – 13 hours.


 photo PICT0708_zps8195570a.jpg


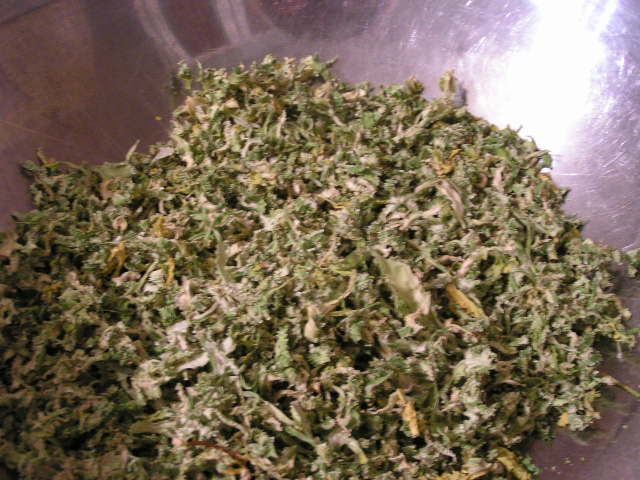
The celery should be totally dry and crisp in thin areas.


 photo PICT0709_zpsded1406f.jpg


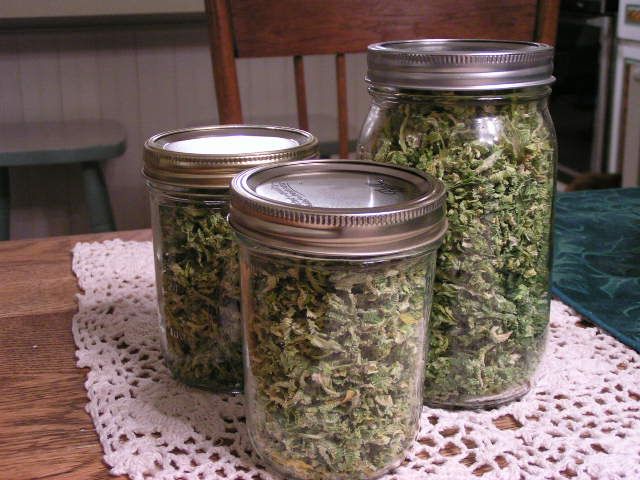
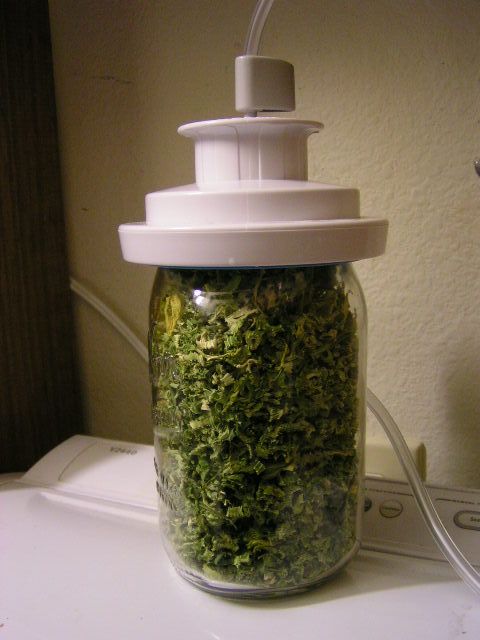
To make it easier to put the celery into jars with less mess, I have a very large bowl into which I shake the pieces. Then, using a canning funnel, I scoop the dried celery into jars. I like to use jars because I can vacuum seal them on my FoodSaver sealer. That takes out all air for good preservation. The nice thing is that you can unseal and reseal these jars with the vacuum sealer.


 photo PICT0714_zps4a691c61.jpg


15 bags of celery!! 1 tbsp = 1 stalk of celery


 photo PICT0713_zps26052810.jpg


 photo PICT0771adj_zps04704d9e.jpg


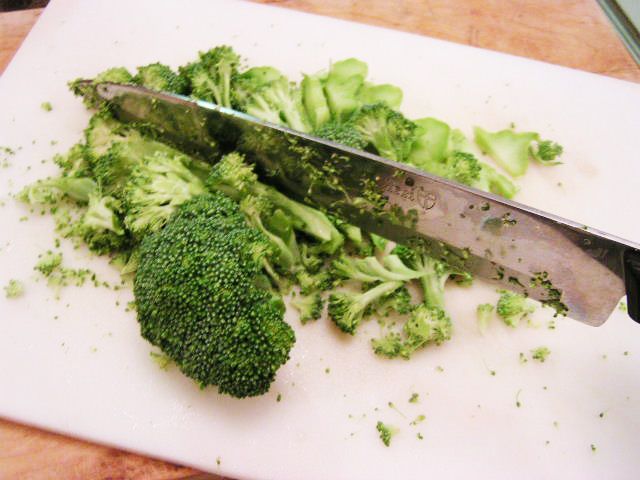
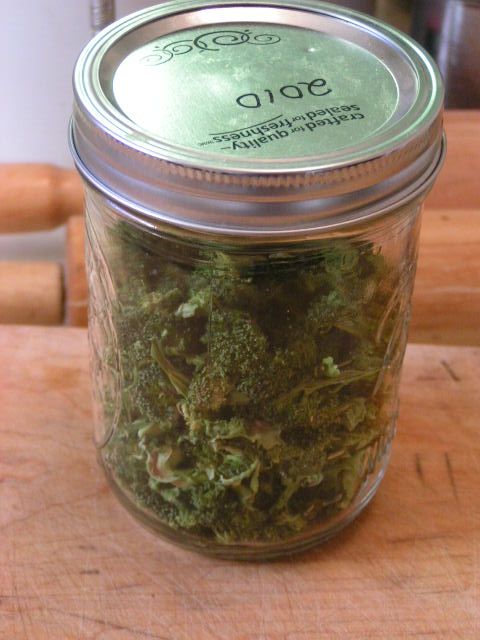
The same can be done with broccoli. You have a choice – if the brocolli is fresh from the garden and tender, I just cut it right up. If it is older or from the grocery store, I blanch in boiling water for 2 minutes, dump into ice water and then dry before cutting it up.


 photo PICT0778_zps0699519b.jpg


Dried Broccoli


 photo PICT1180_zps4453900d.jpg


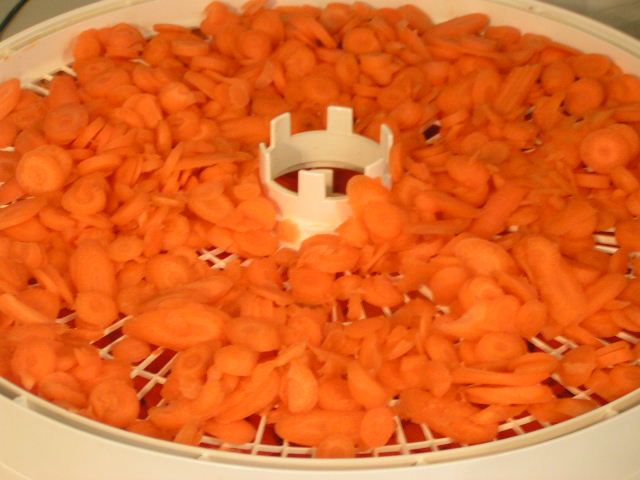
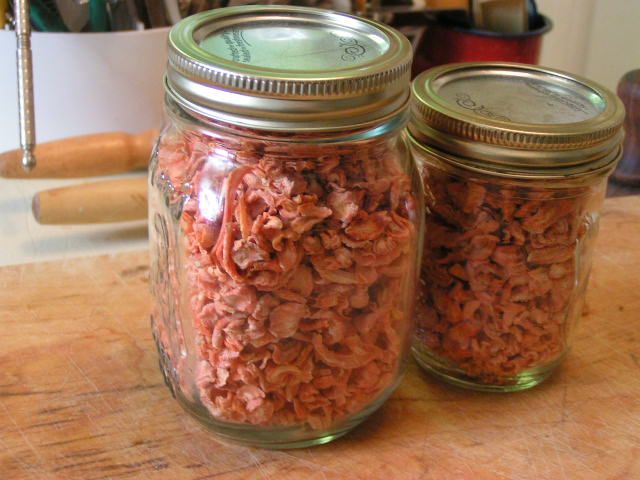
You can dry sliced carrots too


 photo PICT1182_zpsfbe9e539.jpg


They look pretty in the jar. The one thing about carrots is that they need to be soaked with FruitFresh because they will lose their color over time, if kept for long.


 photo PICT0661_zps1ada8f9c.jpg


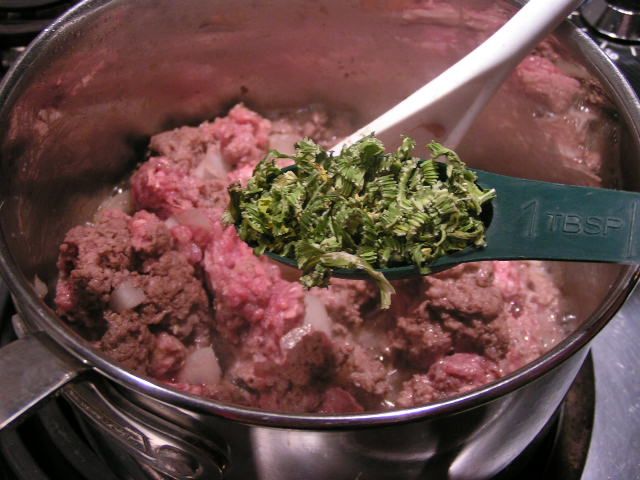
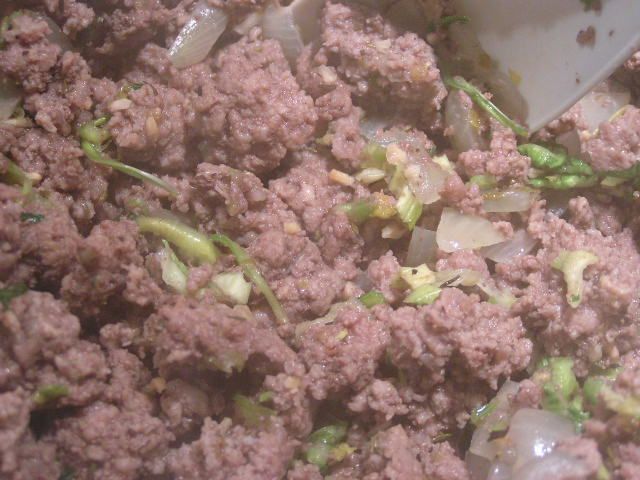
The dried veggies are wonderful for cooking. Add dried celery to browning hamburger for homemade spaghetti sauce or to the tomatoes for meatless sauce.


 photo PICT0666_zpsea3d6a74.jpg


It reconstitutes beautifully! Or, for chicken salad or other times you want crispy celery, place dried celery into a bowl and cover with cold water to an inch over the top of the dried celery. Place in the frig overnight. Drain the next day and you have celery like fresh!!


So there you have it. That will keep you busy for a couple of days and by Thursday, you’ll be ready for a recipe. I’ve made a New Year’s Resolution – I’m going to do my dead level best to post twice a week, hopefully Mondays and Thursdays. Just remember what happens to New Year’s Resolutions – they’re kinda all dried up too.


Happy Cooking!


MB
Please join us on FaceBook!!


Join in the conversation by leaving a comment below and enter our January Giveaway!