|
I love onions. Such a mundane little vegetable – but it has such a pleasant shape and flavor, especially the Vidalia variety. Georgia has a right to be proud of that little onion. There is no onion sweeter and you can eat it like an apple – if you like onion flavored apples, I guess! Personally, I think the onion is a necessity in cooking because it makes all the difference in the world…well…second only to tons of garlic. I bet you’d love to have an up close and personal conversation with us at the OPC™ digs, eh? Onions are one of the simplest veggies to put in a garden. Cheap too! A bundle of onions costs around $1.50 to $4 and offers you anywhere from 50 to 100 sets. I usually put out two or three bundles. Row furrows are dug, fertilizer is sprinkled down the center of the furrows and then chopped in and covered to make a raised row. I plant my onions using a stick in one hand to make a hole and then dropping an onion set with the other hand. I then go back and pull the dirt up around each set using both hands (yes, I wear gardening gloves) which also straightens the onions to standing. In my neck of the woods, I have to plant them deeper than usual because our soil is a sandy loam and dries out really fast in our stiff winds. Once the onions are established, I pull the dirt away from them to expose the top of the bulb. Turning the soil between rows can be done by using a hoe, a mantis or a tiller or mulch can be used as well. This year, we had a dickens of a time keeping a really weird grass in check. Hand weeding around each bulb was a not fun necessity, but this has been an unusual year. The only other maintenance that we perform on our growing onions is pinching off any seed heads if they form and a side dress of 10/20/10 fertilizer every three weeks if there has been much rain. Otherwse, a series of soaker hoses does the trick. The nice thing about onions is that you can pick them at any stage of the game. Small onions are great for salads and garnish as ‘green onions’. Medium sized onions are wonderful to throw in with green beans or pintos or they can be left to expand to slicing size.  At the later stage of growth, onions have the soil pulled away from the bulb to allow the bulb free room to grow.  Eventually, the green tops start to fall over.  After the tops fall over, the onions are left for about two weeks before pulling.  Onions are easy to pull out of the ground.  We use 5 gallon buckets to gather our onions. Makes for easy carrying.  I wash my onions a few at a time in a big stainless tub/bowl or in another large bucket. After cutting off green tops no closer than 1 1/2″ from the bulb, I submerge the bulbs in water and use my hand to wash them back and forth.  I separate out sizes of bulbs and freeze the smallest ones for seasoning beans, etc. or cut them up for dehydrating. These I prepare, after washing, by removing the roots, the stem and the outer skin.  The medium to large ones are left whole to cure on racks for use as fresh onions. The roots and the stem will dry up and will be clipped. These onions will stay fresh until as long as November or December, stored in a cool dark place.  The largest are sliced and frozen on cookie sheets covered with wax paper and will be put into freezer bags. These will be used for homemade onion rings, for cooking on the grill and for use in casseroles.  Onions for dehydrating are chopped by hand because the food processor makes the pieces too small. The chopped onion is spead out on dehydrator racks. I start the process outside because the smell is overpowering and keeps you from crying. 🙂 After about 6 hours, I move the dehydrator inside.  After drying about 15 to 18 hours, depending on the moisture content, these onions are packaged into jars. Here, I have dried some of both our yellow and white onions. Storage for these dried onions is years. They are wonderful for using in soups and stews but you can also use them in chicken or tuna salad or for seasoning a cooking hamburger by putting a tablespoon or two into a bowl, covering with water and then placing into the frig overnight. You will have rehydrated onions to use like fresh! That is actually what some restaurants do. |
|
Oklahoma Pastry Cloth™ Company on Facebook
|
 |
Archive for the ‘Let’s Cook!’ Category
Processing Onions for Long-term Storage
Monday, June 13th, 2011
Blueberry Season In Full Swing
Sunday, June 5th, 2011
 The blueberries are coming in with a bang this year. They are so big and juicy! Oklahoma’s gonna compete with Maine, I’d say!! When I was a girl, my family would go to Cadillac Mountain in Maine and pick wild blueberries to our heart’s content. Wild raspberries and strawberries could be found as well. There was just nothing like standing on that high mound of granite that was covered in short blueberry bushes, loaded with small, ripe berries. The book Blueberries For Sal was a favorite of ours. Now, I harvest Oklahoma blueberries – large, plump and sweet. The bushes are much larger than those of the Maine wild blueberries. The berries are wonderful for jelly, muffins, scones and coffee cake and today, I thought I’d share a yummy coffee cake recipe that we like. Canned blueberries work fine in this recipe too. Enjoy! For Cake:
 Cream butter, sugar and eggs together  Add vanilla and either lemon or orange zest and mix  Add sour cream and mix in  Add flour that has been mixed with soda, salt and baking powder. Stir  Add fresh blueberries that have been tossed with sugar or use canned blueberries  Grease a 9” round or square pan with Crisco or other shortening. I use a paper towel to do this. I find that it covers more surface than a brush.  Flour the pan by shaking flour around the surface of the pan until all areas are covered. Shake out excess flour. In cookbooks, this is what is meant by “greasing and flouring “ your pan.  Meanwhile, melt stick of butter over medium heat and remove from heat  Add white and brown sugars and stir  Add cinnamon and stir until completely blended  Stir nuts into the batter  Add flour and stir until everything is totally incorporated. It will be crumbly and sticky.  Pour batter into baking pan and crumble topping over the surface of the batter  Crumble the topping all the way to the edge of the pan. Place in a 350º preheated oven and bake for 40 – 55 minutes. Test for doneness with a knife or a toothpick. It should come out clean.  Allow to cool for 10 – 15 minutes and sprinkle with Confectioners sugar. Serve warm. Leftovers can be cut up and frozen. |
|
Oklahoma Pastry Cloth™ Company on Facebook
|
 |
Summer Sandwich
Wednesday, June 1st, 2011
|
It’s been really hot today. A wet blanket over a sweat lodge couldn’t be any heavier than this afternoon’s humidity. I really didn’t want to heat up the kitchen too much and when it gets hot, we kinda lose our appetite. Sandwiches sounded good to me, but Mr. Fix-It likes something a little more substantial. So, I put my brain in gear and started assessing my alternatives.  I got four chicken tenders out of the freezer and let them thaw just until I was able to cut them. Then I placed each tender on its side and sliced it almost in half, butterflying it.  I sprinkled evenly over both sides of the butterflies, thyme, garlic powder, paprika, salt and pepper  Finally, I sprinkled a total of a teaspoon of sugar over the four tenders  In a skillet, I browned the chicken in 1/2 tablespoon of butter and 1/2 tablespoon of olive oil  I turned the pieces and browned them on the other side  Four slices of homemade whole wheat sandwich bread would be my sandwich base  I sprayed one side of each slice with olive oil  I got this grill at WalMart several years ago on clearance. It’s a pretty good sized grill. It isn’t the George Foreman brand but works just as well. I melted a tablespoon of butter on the bottom grill and then used a brush to brush it over both surfaces.  First, I put two slices of bread, olive oil side down, onto the grill and put two of the butterflied chicken tenders on each slice. I used provolone cheese here, but asiago is good, as is swiss or sharp cheddar.  Then I put our favorite spreads on the other slice of bread (olive oil side out). Here, Mr. Fix-It reqested my hot sauce which is 1 part Chinese Chili sauce to 2 parts mayo. I mixed my own spread using 1 tablespoon of mayo with 1 tablespoon of Marzetti Italian with Blue Cheese Crumbles. Yum! The spreads went onto the slices of bread which were then placed on top of the rest of the sandwich. The grill was closed tightly and the sandwiches were cooked until they were nice and crispy on the outside. I took them off the grill and added fresh lettuce out of the garden and fresh onions out of the garden. We haven’t got tomatoes yet, so we had to do without (can’t stomach the store bought ones) and with homemade pickles added, it was super!!  |
|
Oklahoma Pastry Cloth™ Company on Facebook
|
|
leaving a comment below!  |
Lemon Curd
Monday, May 30th, 2011
  A number of posts ago, I put up my own, special scones recipe and intended to post my favorite lemon curd recipe shortly thereafter. As good intentions usually go, mine disappeared into the oblivion of a ‘To Do List’. Does anyone ever really do what’s on their ‘To Do List”? I mean, my list grows to at least three pages and then I see something on page three that should have gone onto page one and the next thing I know, the list is in the trash and I’m digging around for something to eat. I know. You’re supposed to just list the most pressing items in the manner of “How do you eat an elephant? One bite at a time.” However, I’ve never even thought about eating an elephant and I’m not all that good at determining which is pressing, which is nagging and which is “get it done now or the IRS is coming to put you under a bright light for interrogation!!” And so my list grows exponentially and I get sidetracked. I’m easily diverted. Take for example, today, while working in the garden. I had a mental “To Do List” that was at least five pages long and I decided to tackle #2 on page four – weed the onions. We’ve had some good rain and a really strange grass has grown up for the first time ever in my onion rows. My onions have been coughing and gasping for help and so I felt that this might be a “pressing” matter. I began weeding and had that wonderful sensation of accomplishing something as foot after foot of dark, rich dirt became exposed and completely clean around my Texas 1015’s. I had finished row two when a bright red color caught my eye. Two beds over, more raspberries were ripe! Oh! And blueberries too. I had to go get a bag to pick them and left my other rows of onions helplessly begging me to please continue the weeding. Ignoring them, I picked berries, sneaking a lucious bite on occassion, and finally headed in to wash them and get them laid out onto cookie sheets for freezing. As I patted the raspberries and blueberries dry, they made me think of making jam, which made me think of things on which to put jam, which made me think of scones, which made me think of lemon curd which reminded me that I had not posted my favorite recipe. Add to that, a gentle reminder from one of my readers to post it or else (actually, it was my sister-in-law but she’s a reader), and lemon curd went to the top of my ‘To Do List’ that really doesn’t exist. And so, the onions have been left for another day. Hopefully, you are more disciplined than I, but I have to say, it’s not so bad. Mr. Fix-It says that I wake up each day to a whole new world. That’s good, right? VARIATIONS: Substitute Lime juice and lime zest or raspberry juice and 1 tbsp crushed raspberries or concentrated orange juice and orange zest  I have a double-boiler and you can use one if you like, but I like to use a shallow stainless steel bowl over a pan of boiling water in which to make my curd. It makes it easier to whisk the entire area of curd without having to deal with the side crevices of a pan. This gives me a much smoother curd that does not have to be strained for lumps.  Place three large eggs into the bowl or double boiler  Add 3/4 cup of sugar 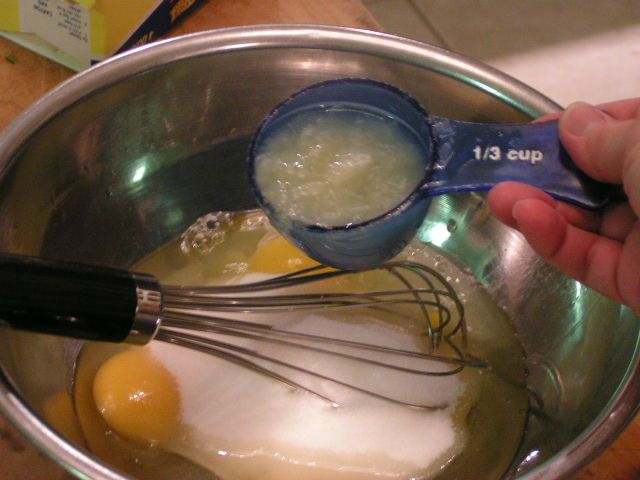 And 1/3 cup of lemon juice 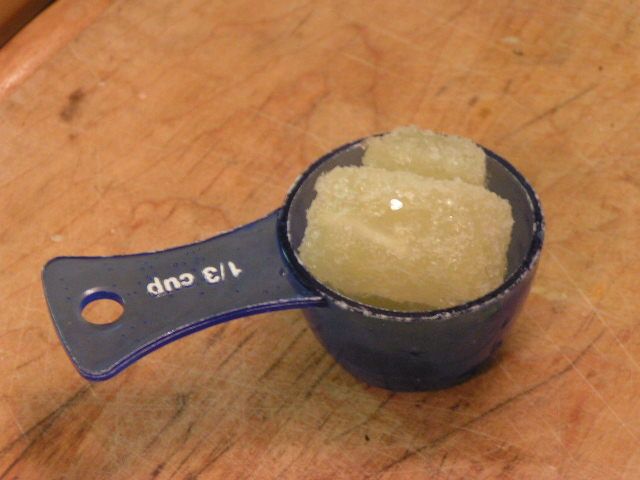 Just as a hint, I buy my lemons in bulk when on sale and juice them all, freezing the juice in ice cube trays. I pop them out and store them in the freezer in bags. I freeze the leftover rinds for easier zesting. This is one recipe where my dehydrated lemon zest is just not as good. I melt the frozen juice in the microwave 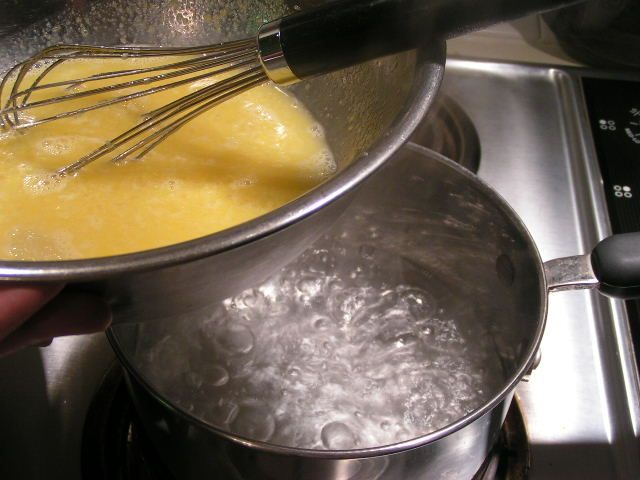 Place bowl over boiling water and immediately begin whisking 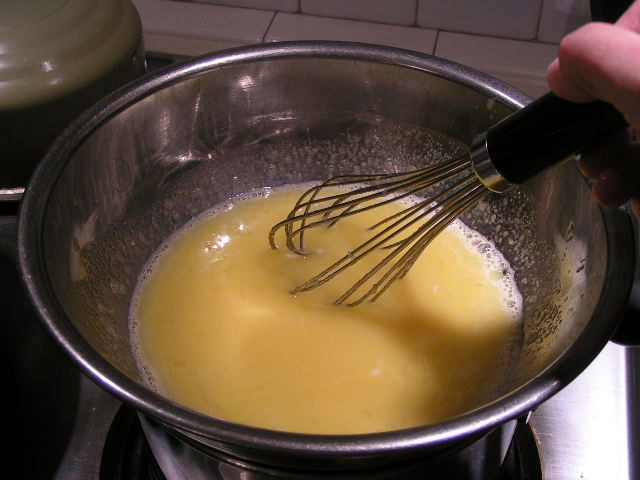 Continually stir with the whisk and do not let the curd stand idle at all in order to keep from getting lumpy 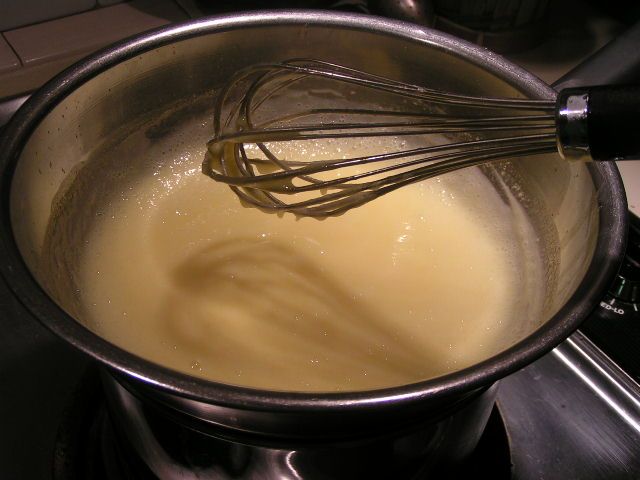 The curd will begin to thicken to the consistency of thin pudding. This takes about 7 -10 minutes. If your curd gets lumpy, you can strain it through a strainer. 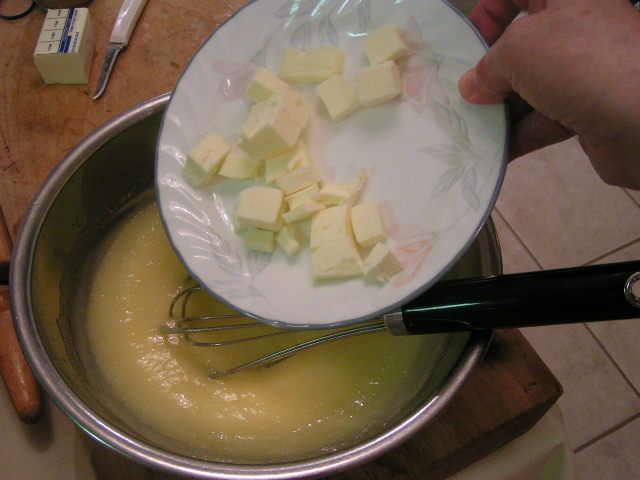 Remove from heat and immediately add butter 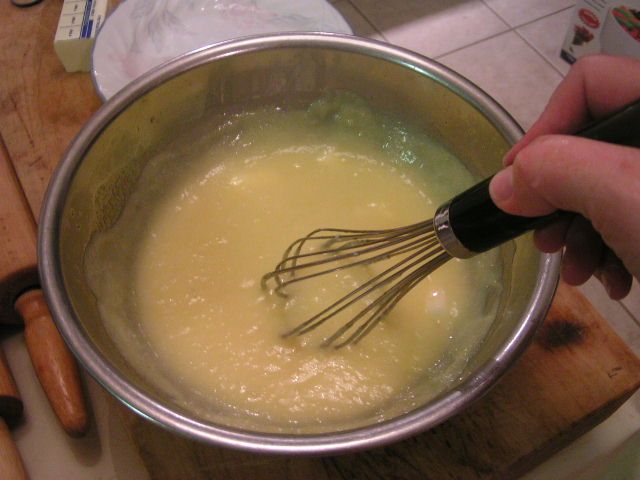 Stir until melted 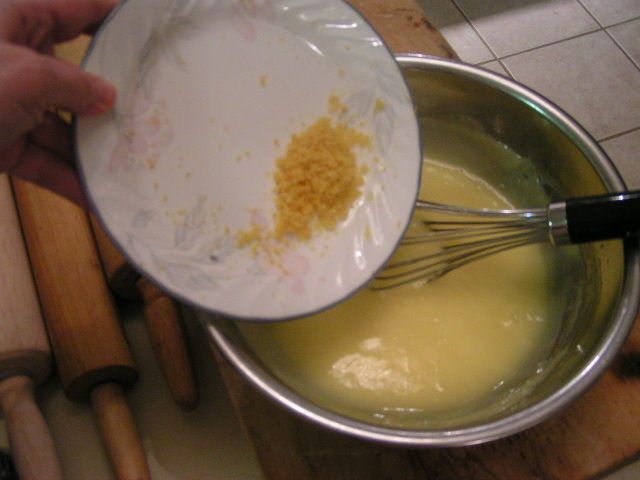 Add lemon zest and stir in 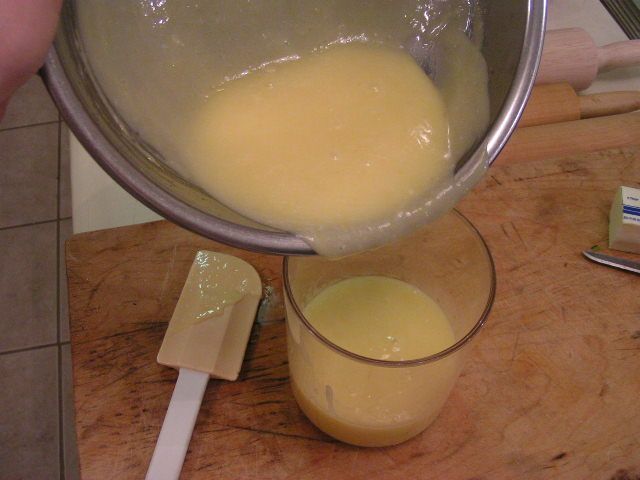 Pour into a container and allow to cool. Place in frig. If you do not plan on eating all of the curd right away, you can pour it into ice cube trays or small refrigerator dishes to be frozen. Remove from freezer and allow to thaw about 20 minutes before serving. 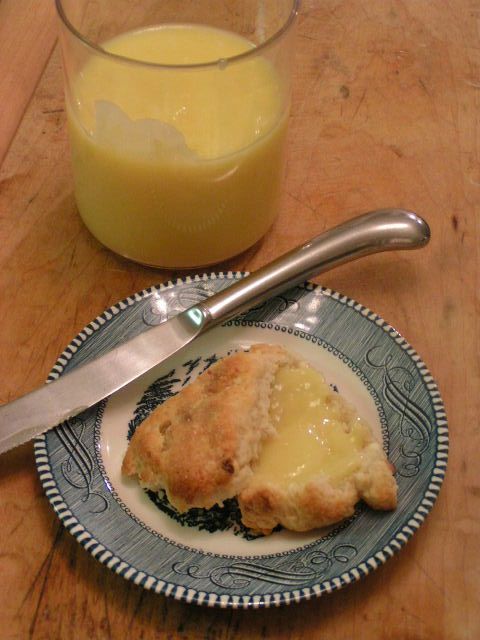  There is just nothing like lemon curd on scones. Here, I am serving our Victorian House Scones made with 1/2 cup white chocolate chips and 1/2 cup Craisins added. The Victorian House scones are wonderful to keep on hand when you don’t have time to make them from scratch. One package makes 16 large scones. Check them out at the shopping page. |
|
Oklahoma Pastry Cloth™ Company on Facebook
|
 |
Strawberry Muffins II
Saturday, May 21st, 2011
|
As in the previous post, at the request of OPC Facebook Fan, Melissa, and because the strawberries are rolling in, I’m posting two separate recipes for strawberry muffins. The first one is Mr. Fix-It’s favorite and is pretty basic while this one is more along the lines of a soda banana bread. They are larger than the previous muffins with a different flavor. They are quite light for muffins.
 Preheat oven to 375º. Place strawberries in a bowl and use 2 tablespoons of the sugar to toss with the berries. Set aside  In a batter bowl or large mixing bowl, place butter and shortening  Add flour and cut butter and shortening into flour until it resembles course crumbs  Add soda and salt  In a separate bowl, whisk together eggs, buttermilk and sour cream  Whisk until smooth  Add strawberries to flour mixture  Stir until strawberries are coated with flour  Add strawberry extract flavoring to the egg mixture  Stir egg mixture into dry ingredients.  Continue stirring until all ingredients are incorporated. Do not over stir.  Mix Turbinado sugar and cinnamon in a small container  Evenly distribute muffin batter between muffin tins. Sprinkle tops of muffins with sugar mixture. Bake at 375º for 25 – 35 minutes on the center rack. Depending on your oven, 25 minutes is usually long enough, but test with a toothpick or knife for doneness.  As you can tell, these muffins are larger. They have a unique taste and are very flaky. They also may be frozen and reheated. |
|
Oklahoma Pastry Cloth™ Company on Facebook
|
 |
Strawberry Muffins I
Saturday, May 21st, 2011
|
At the request of OPC Facebook Fan, Melissa, and because the strawberries are rolling in, I’m posting two separate recipes for strawberry muffins. This first one is Mr. Fix-It’s favorite and is pretty basic. These muffins are easy to freeze and heat up nicely. They are scrumptious with butter and if you really want to “gild the lily” get out some of that strawberry jam you’ve just canned and spoon some on!
 Preheat oven to 400º and grease two 6 cups or one 12 cups muffin tins with shortening. (I use a paper towel to get a good coat of shortening.) These are my favorite tins, as you can tell!! I use the shortening because nonstick pans and oil sprays do not give the same crisp outside texture that we like.  Toss strawberries with 1 tblsp sugar and set aside  Add 1/2 cup sugar to 1 1/2 cups flour  Add 2 teaspoons baking powder  And 1/2 tsp salt  Measure 1/4 cup shortening into a microwave proof container. Microwave until melted  Add strawberries to flour mixture  Toss until berries are covered and incorporated   In a separate bowl, whisk together egg, milk and strawberry flavoring.  Pour into the flour mixture, the milk/egg mixture and melted shorting  Stir well until all dry ingredients are moistened and incorporated. This batter is very heavy and stiff.  Spoon batter equally into muffin cups.  Sprinkle Turbinado sugar over the tops of each muffin, about 1 tsp each. Bake in 400º oven for 20 – 25 minutes on center rack  Serve hot with butter or butter and jam. Enjoy!! |
|
Oklahoma Pastry Cloth™ Company on Facebook
|
 |
Home-Cured Ham
Friday, May 20th, 2011

 The unique feature of country ham is the layer of mold that forms on the wrapping paper and ham surface as it hangs and ages. Newbies who receive a Tennessee Country Ham for a gift usually freak when they unbag their present and then unwrap the paper that has shrouded the meat all during the curing process. A nice, moldy carpet coats portions of the rind and paper. This is simply removed by scrubbing the ham with a mixture of vinegar and water or with plain water and a stiff bristle brush. The meat is sliced with a saw just 1/4″ thick. Having worked in a meat department that was constantly visited by local farmers toting their treasured cured hams to be sliced, I learned that it was ‘bragging rights’ when it came to how long one of these hams were hung. Three years was the limit, but it seemed that the more mold and the longer aged the better these ‘specialists’ viewed their product. Hog killing commenced around Thanksgiving, hams, bacon and shoulders were cured and smokehouses were loaded with the goodies to be smoked or to be used without smoking. I remember one farmer’s story about a most disastrous year. He had corn fed and slaughtered his pigs to put up meat for the year. After a gruelling day of salting down, wrapping and hanging portions, cutting up roasts, chops, ribs and other cuts for the freezer, grinding sausage and rendering lard, this industrious man and his family went to bed and slept the sleep of hard workers. The family went about the rest of the year and on into winter with the happy knowledge that come Fall, there would be good eatin’s from the smokehouse for sure. Sometime during the summer, the farmer went to the smokehouse and opened the door. To his horror, all that he found hanging from the rafters were bones tied with rope and picked totally clean of any shred of meat. Rats had crawled along the rafters, shinnied down the ropes and feasted on the cured meats without so much as asking! In the meat department, we cured hams all year long. We purchased fresh hams from our local packing plant, which you can do as well. We let them warm at room temperature for a couple of hours and then coated with our cure, hanging them in the cooler for the first 12 weeks. As meat begins to cure, it must be kept cool. This is why the farmers always waited until Thanksgiving or later to kill their hogs. With a walk-in cooler or refrigerator, however, the curing process can take place any time of the year.  I thought that I would give you a step-by-step lesson on how to create these wonderful hams with the help of some great kids. A group of home schooled students got to mix an anatomy and physiology class with learning to cure meat at the Oklahoma Pastry Cloth™ digs. We had purchased a hog that was taken to our local packing house and then we picked up the quarters to process ourselves, including curing the hams. As you will see, curing meat is a pretty simple process and is a wonderful way to preserve meats for a long time. One note, however, once these hams are sliced, the meat must be wrapped in freezer paper and frozen or, if eaten soon after slicing, kept in the refrigerator for a short time.
           So there you have it!! |
|
Oklahoma Pastry Cloth™ Company on Facebook
|
 |
Dehydrating Mushrooms
Tuesday, May 17th, 2011
Dehydrating Part IV Our local Aldi’s had a sale. And what a sale. Mushrooms were 69 cents for an 8 oz box! Can you believe it? And they were beautiful. So what is a sale junkie to do? Well, dehydrate them, of course!! There’s nothing like having dehydrated mushrooms at your fingertips for soups, spaghetti sauce and even to put on top of steak, sautéed with onions and green peppers! Mushrooms are easy to rehydrate and only require covering with water, to be placed in the frig overnight, or for quick rehydration, by covering with hot water and allowing to sit for an hour or so. Canned mushrooms are great, but to me, the dried ones keep more of the original mushroom flavor and consistency than canned. So, of course, I loaded up on mushrooms and trotted home with my prize. This past weekend, I set to the task of getting them dried.      |
|
Oklahoma Pastry Cloth™ Company on Facebook
|
 |
Wheat Germ!
Thursday, May 12th, 2011
 You know me by now. I can’t leave anything alone. I have to tweak it, experiment with it and see how many ways I can change it before I can be still. And “IT” can be a recipe, a sewing project, a painting, dehydrating/canning or the directions to a new movie theatre in Oklahoma City. My motto is, “Waste Not, Want Not” and though some might try to convince that this statement comes from the Bible, (Like “God helps those who help themselves,” right?) I’m pretty sure it came from my dad – or Benjamin Franklin – or that Wesley guy. Whomever coined it, it is ingrained in my chromosomes. Therefore, when I made my most recent batch of bread for the week, using a combination of 3 parts Prairie Gold Hard White Wheat flour to 1 part barley flour, I wound up with my usual 1/2 cup of wheat germ sifted out of 5-6 cups of the flour after a round of four siftings and did not want to waste it. Yes, I sift the fire out of my freshly ground flour to add air and lightness and to take out some of the heavier germ/hull which makes bread heavy. Mr. Fix-It likes his bread to carry him off like a magic carpet of the mouth. He says, “Open Sesame” and it floats right in! Anyway, I had all of this germ and I didn’t want to throw it away. I continue to toss that 1/2 cup of germ in with the other 1/2 cups of germ in a freezer bag to store in the freezer. I have always known that I will use it for something like on salads, in peanut butter or to sprinkle on top of risen bread loaves for crunch and appearance, but that won’t use up as much as I have! It was then, with my Okie Pioneer spirit, that I hit on an idea. Here it is in pictures. Oh, and by the way, it worked!!  I brought 1 cup of water to a boil and added a pinch of salt and 4 tbsp of the wheat germ, and stirred then until everything was smooth.  I boiled the mixture for 6 minutes until it was nice and thick, uncovered, stirring occasionally.  You got it!! Cream of Wheat!! And it was good too, especially with butter and brown sugar. I now have a new breakfast favorite with 4 grams of fiber to boot! See, I could have survived in those pioneer days!! |
|
Oklahoma Pastry Cloth™ Company on Facebook
|
 |
Days of Strawberry Jam
Wednesday, May 11th, 2011
 Despite the drought-like conditions that Oklahoma has experienced this year, and in spite of the bitterly cold and snowy winter that attacked the state, the strawberries are showing how truly resilient they really are. We did lose some plants, but the ones that survived have rallied with a gumption. The plants and the berries are really large this year and drippy sweet. The varieties are Cardinal and Ozark . I’ve spent several days making jam and just thought I’d show the process for those who have never done it. I always go straight by the recipe for cooked jams in the Ball fruit pectin box. I like Ball fruit pectin better than SureJell but that’s just my personal preference. Be sure to have your waterbath canner ready, jars washed, sterilized and warm and lids sitting in warm water before you start. The jam goes pretty fast.               |
|
Oklahoma Pastry Cloth™ Company on Facebook
|
 |

 Homestead Revival
 Paratus Familia
 Rural Revolution