|
I’m probably gonna step on some toes. I have a funny way of doing that occassionally. But I see something ridiculous in our culture and I just have to poke fun. I can’t resist. It’s a disease. When I see something dumb, I just can’t keep my mouth shut. Invariably, I wind up offending SOMEBODY. C’est la vie. So as a disclaimer, loving the following appliances is just fine and dandy. But you have to admit that the name is rather humorous. I ran across a website for a brand of appliance that has quite a catchy brand name: Back To Basics. Now I ask you, when you think of back to basics, what do you think of? I picture washboards, rolling pins, clotheslines, grain mills, the Oklahoma Pastry Cloth™, and canning apple butter. In fact, being the campers that we are, a campfire, a chicken on a spit and marshmallows on a stick are REALLY back to basics in my book. Think, “Latrine”. And so, when I saw that there was a brand of kitchen item called, “Back To Basics”, I thought that I’d be finding some pretty neat retro stuff. Ha! Did you know that in today’s culture, Back To Basics, basically means, “Not eating at McDonald’s” and not going to the neighborhood sno-cone stand. For under $100 you can have your own Back To Basics sno-cone stand in your home and invite all of the neighborhood children for free cones, thereby teaching them the principles of capitalism; ie; giving away freebies undercuts your competitor until he goes out of business and then you can start charging out the wazoo. It all depends on how much you are willing to shell out to the neighborhood kids!  But the one that just had me giggling was the Egg and Muffin Toaster. Boy, I’m sure those 1889 Oklahoma Sooners couldn’t have made it in their sod huts without their egg and muffin toasters. Sure, they didn’t have any electricity but you know that toaster was a basic! And I’m sure my mom has memories of my grandmother getting up early to pop muffins and eggs into her toaster to create those sandwiches that hadn’t been invented yet by Ray Kroc of McDonald’s. Shoot, that isn’t even the way he made those egg and muffin sandwiches! OK, so now that I’ve poked fun at the marketing department of an appliance company, I’ll go back to that camping discussion and really getting back to basics. Having been a Girl Scout all the way through Seniors, I learned alot about living with the basics. We camped regularly and had to learn survival skills for various badges. One of those skills was how to make and cook in a ‘reflector oven’. We baked biscuits, brownies, cookies and my favorite, gingerbread, in many a cardboard box lined with aluminum foil. We were so proud of ourselves when we successfully presented a hot treat.  I continued to use these contraptions through parenthood as we hauled children, tents, cooking equipment and fishing poles to our favorite spots. The kids thought that using the reflector oven was the best part of a camping trip. My favorite story about one of those trips happened not too awfully many years ago. We had all four kids, at that time teenagers, with us and had set up two tents at a beautiful park in Arkansas. Our camping spot was next to the biggest, shiniest, most expensive motor home any of us had ever seen. We looked like slum dwellers living next to the Taj Mahal. The next morning, I got up early and started a fire in the fire pit, got some bacon frying in a cast iron skillet, scrambled eggs, shredded hashbrowns and mixed up some biscuits. I had made my reflector oven the night before and it was ready and waiting for hot coals to bake my biscuits. I loaded the oven with the coals and the biscuits, closed it and covered it with a towel to bake for 20 minutes. The family chowed down on the meal that would ready them for a day of fishing and swimming. After breakfast, I had heated up water in my two waterbath canners to wash dishes and was doing so when the man from the big, fancy motor home timidly approached the table on which I was working. He introduced himself and then said, “Um. We couldn’t help but notice that you had a mighty fine breakfast there this morning.” I said, “It was pretty good.” He continued, “Well, we saw that you was eatin’ some biscuits. We was just wonderin’ where you made those biscuits.” I showed him my reflector oven and he turned to yell at his wife whose face was pressed against the screen of their motor home. “She baked ’em in a box, hon!!! She baked ’em in a box!!” Yes siree. I shore did. And so, here are the directions for a reflector oven that may come in handy for you one day. They are just dandy for when the electricity goes out. Note: This is an outdoor project!! Do not attempt to use this oven inside because the coals give off dangerous carbon monoxide.  Line the inside of a medium sized cardboard box (I’m using an 18 x 18 here) with heavy duty aluminum foil. This includes the top flaps. If you can find a box that has had the entire top cut like a lid, rather than flaps, it’s even easier.  Start coals as for grilling or you can use coals from a wood stove or campfire. Today, I will be using pretend coals because in Oklahoma we are under a burn ban and can’t even grill a steak!!  While the coals are heating up, place an old pan or foil pan in the bottom of the box and stand a brick upright on each side of the pan. This pan will be used to hold the coals. You can also make a metal rack to use instead of the bricks  Pour the hot coals into the pan that has been placed at the bottom of the box.  Place your pan of biscuits, brownies, cookies or cake mix on top of the bricks or rack  Fold the lid or the flaps of the box down to close and cover with a heavy bath towel. Bake for recommended time.  You will have baked goods in a jif! I promise. Now THAT’S back to basics! |
|
|
Oklahoma Pastry Cloth™ Company on Facebook
|
|
 |
|
|
Archive for the ‘Let’s Cook!’ Category
Making A Reflector Oven
Monday, July 25th, 2011
Canning Blueberries
Thursday, July 21st, 2011
 Seems like blueberries have come in everywhere and it appears to me that there was a really good crop. That is one bit of produce that flourished here at the Oklahoma Pastry Cloth™ digs. Neither frost nor drought seemed to have an impact and so I have happily frozen boatloads of blueberries. I always freeze my blueberries when they first start coming in because I never have enough to can right off the bat. I can them after I have enough, even after having been frozen. Also, this gives me some flexibility on when I can my blueberries, putting them on the back burner behind the veggies that have to be processed immediately. So today I decided it was time to do the blueberries. I usually leave a couple of gallons in the freezer for pancakes, waffles, scones and yogurt, but I can the rest for blueberry muffins. Yummy blueberry muffins. I know this sounds crazy, but I would rather use canned blueberries for my muffins than fresh or frozen. For some reason, the canned makes muffins light on the inside and crunchy on the outside, and they just color those muffins the prettiest blue! I can my blueberries in two sizes of jars – half pint and pint – since there are just two of us. I use the raw pack method with a very light, thin syrup that hasn’t much sugar and drain it from the berries when making muffins. This leftover syrup gets turned into a light blueberry syrup for pancakes by adding pancake syrup and boiling hard for one minute. You can also can blueberries by putting them into a piece of cheese cloth and dipping them into boiling water until you see blue juice, packing them into jars immediately. However, that method is messy, messy, messy. Yes. It makes prettier jars, but, heh, I’m not eatin’ ‘pretty’. Before starting run your jars through the dishwasher to sanitize or boil them and allow to dry upside down.  Add 2 cups of sugar to 5 cups of water. Stir to dissolve  Bring water and sugar mixture to a rolling boil and boil for 5 minutes. Set aside.  Use either fresh or frozen blueberries. I know that it doesn’t look these are frozen, but they are!  Place blueberries into the jars, leaving a 1/2″ headspace. Ladle the syrup over the blueberries, again leaving a 1/2″ headspace. Use a canning spatula or butter knife to run around the inside perimeter of the jars to remove any air bubbles.  Wipe the rims of the jars with a warm, soapy dish cloth to remove any syrup that may have splattered onto the jars.  Add lids that have been warming in water to the jars and attach rings, tightening and then backing off just a smidge.  Place the jars into the canner and lower into water that should submerge the jars with at least 1″ of covering the top of the jars. Bring to a rolling boil and begin timing to process for 10 minutes.  When the time is up, lift rack of jars to rest on the side of the canner and remove jars with canning tongs. Allow to cool. The lids will pop as they seal. The light makes these look red, but they are really blue!  OK..now for the blueberry muffins. I use the recipe that I posted for Strawberry Muffins only I use drained, canned blueberries. They are even better than the strawberries! Go check out the recipe! |
|
Oklahoma Pastry Cloth™ Company on Facebook
|
 |
Fresh Coconut Pie – How to Crack A Coconut
Thursday, July 14th, 2011
|
Coconuts have always held a fascination for me. They’re like big, round, oversized Brazil nuts with hair and if you look at them square on, they look like little spider monkey faces! My father used to bring home coconuts for us to open, letting each of us 4 girls crunch on a chunk of the white meat as we watched him crack the next ones. Mom would deal with the rest, grating it and freezing it for use in baked products. It had to be baked because my father was dangerously allergic to fresh coconut and fresh coconut milk. But he liked coconut as long as it was cooked. Fresh coconut has a totally different taste from commercially shredded and bagged. It is crunchier, lighter tasting and not very sweet, hence sugar on the bagged stuff. I found some coconuts on sale at our local grocery for 50¢ each and so I grabbed three. Fresh coconut pie was calling my name. Mr. Fix-It loves coconut pie, so what better way to impress him than to make it straight from the tree?!  Mr. Fix-It assumed the responsibility of cracking open my grocery prizes and poked the “eyes” with a washed nail setter to open holes for the juice to escape. It’s a “He-Man” job after all.   As I counseled him to wrap each coconut in a towel before tapping with a hammer, (well, that’s the way WE did it when I was growing up) he gave me that “I dun’ need no stinkin’ towel” look. He proceeded to break the heavy hulls of the nuts in several places and proudly pointed out that he had not sent pieces flying. OK, so he’s good, but if you want to save a mess, wrap your whole coconut in a towel before breaking.  By sliding a table knife between the shell and the meat, the meat easily pops out with some of the shell membrane still attached.  Using a paring knife, peel off remaining shell – only don’t do it like Mr. Fix-It, who is cutting toward himself!!  Using a hand grater or the grating wheel on your food processor, grate coconut. 
 Bake a pie shell and set aside to cool  Put the sugar, cornstarch and salt into a saucepan that is not heating.  Pour coconut milk into a large measuring cup and finish to level 3 cups with cows milk.  Pour the milk mixture into the saucepan and stir until sugar and cornstarch are dissolved.  Beat egg yolks and add to the saucepan, stirring mixture to fully incorporate  Bring mixture to a boil over medium heat, stirring constantly to keep from sticking and from getting lumpy. As mixture thickens, let boil one minute.  Remove from heat and stir in butter…  and flavorings  Add coconut  Stir coconut into filling mixture  Pour filling into pie shell  Cover with plastic wrap and tap with your hand so that wrap touches the filling. Place in the frig to cool for at least 2 hours.  Remove from frig and cover with whipped cream or cool whip and sprinkled with toasted coconut.  For an extra zing, add grated chocolate. It’s a Mounds Bar flavor! |
|
Oklahoma Pastry Cloth™ Company on Facebook
|
 |
Canning Beef Stew
Tuesday, July 12th, 2011
 How hot is it? It is so hot in Oklahoma the snakes are looking for air conditioning and they’re cold blooded!! It so hot here that the nectarines are going straight from the tree into jars as jam. It’s so hot that the Gila Monsters have moved to Oklahoma from the Mohave Desert because it’s warmer here! Yeah, we’re setting records. The disturbing news for the rest of you is what this is doing to part of your food supply. Grain and cotton crops have simply burned up, causing both to rise in price. As a result, grain is becoming cost prohibitive for ranchers for their livestock. Grass is gone and so many ranchers are having to resort to expensive hay as well. I just talked with a friend, in south-central Oklahoma, who owns a very large cattle ranch and she said they are preparing to sell their entire herd of cows. She said the cows are losing weight so fast that they must be sold this week or she and her family will take an even worse beating. There is no grass and there is no water. I see cheap beef in the grocery stores in the shortrun, from ranchers selling off herds, and a shortage of beef/high prices in the longrun, so plan accordingly!! One would think that in this furnace that is the midwest, one wouldn’t even think of hot meals. But planning ahead is the stuff that makes us prairie folk able to contend with the unexpected. Using garden staples that have managed to survive to can foods for the winter is a great way to use these days indoors. I have been finding beef on sale and so, I’ve been putting up a Fall and Winter supply of beef stew, a veritable meal in a jar! Just open a jar, heat the stew in a pot, mix up a batch of cornbread and you’ve got supper! And if the electricty goes out in one of our famous ice storms, the wood stove or the grill make perfect heat sources for a pot of stew accompanied by bread or crackers. So here is how I do my beef stew for Mr. Fix-It. He loves having this around because he can fix it himself! (carrots, celery, potatoes, onion, etc)
 Pat 10 lbs of meat dry with paper towel. I use either chuck roast or rump roast, depending on what’s on sale. Today I’m using chuck roast.  This is a rump roast. If you will notice, the chuck roast has more fat and more loss, but it is also more flaky.  Cut meat into cubes  Remove fat and membranes by lifting as you cut underneath. As you lift, this gives more area to slice under the membrane or fat and also helps to release them from the meat.  Lightly salt the meat  Add a little of the meat at a time to a very large stock pot that is on medium heat. Brown and add more meat until most meat cubes are lightly browned on at least one side. Juices will begin releasing.  Add 4 1/2 pounds of mixed veggies. I am using potatoes, carrots, onions and celery. You can use whatever amounts of each that you prefer and you can add other vegetables according to taste.  Add water to cover  Add garlic powder  Add thyme  Add bay leaf  Add beef bouillon  Mix package of brown gravy with 1/2 cup water and add to the stew, stirring. At this point, if you like wine or burgandy in your beef stew, add 1/2 cup. Mr. Fix-It likes his without.  Cover and allow to simmer vigorously 1 hour, adding water to keep at the same level and stirring occassionally to keep from sticking.  Mix 1/2 cup corn starch with one cup of cold water. I start out with this much and add more if I need more thickening. I usually wind up using 3/4 cup corn starch with 1 1/2 cup water, however, I like to start out with less and adding more if needed. Do not make the broth too thick. It can always be reduced after opening a jar and bringing to a boil. If you get your broth too thick, it will thicken more in the processing and will become way too thick.  Stir continually as you pour into boiling stew broth to keep from lumping.  Find and remove bay leaf. Place stew into jars, dividing broth evenly between jars. Leave 1″ headspace.  Using a canning spatula or knife, remove any air bubbles by running around the inside perimeter of the jars.  Wipe the rims of the jars to remove any juices or oils  Add lids that have been warming in a pan of nearly boiling water  Add rings, tightening and then backing off just a hair  Place jars into canner, cover and process for 1 hour 30 minutes for quarts and 1 hour 15 minutes for pints at 10 lbs of pressure  Meanwhile, place all the trimmings into a pot and cover with water. Boil until trimmings are cooked down to very tender, continually adding water as needed. Strain broth from the trimmings and add broth to pint jars. Add 1/2 tsp salt to each pint and process with any extra jars of beef stew to make canned beef broth.  Place trimmings, a carrot and about 1/4 cup oatmeal into food processor or blender and turn into a puree. You can put this into jars too, with extra water, leaving 1 inch of head space to can. Or you can freeze it. Use it as canned dog food! Nothing has been wasted. |
|
Oklahoma Pastry Cloth™ Company on Facebook
|
 |
Ham Spread From Your Canned Ham
Friday, July 8th, 2011
|
In the previous cannng post, I showed you how I can leftover ham from a fully cooked shank, butt or whole ham. I thought that I would show you a couple of things that I do with that cooked ham. Today, I’ll demonstrate how I use a jar of canned ham to make ham spread – or as we in the south call it: Potted Meat. I always kid Mr. Fix-It, who loves ham spread, that it looks like it is pre-chewed. I guess that you can chop it as chunky as you like, but Mr. Fix-It likes it totally pre-chewed!  First, I open a pint jar of canned ham, drain it of all liquid and put the meat into my food processor. You can also do this with a hand chopper, a knife or carefully in your blender if you like.  I add 1/4 cup of chopped celery  Add 3 to 4 tablespoons of mayonnaise (Depending on how moist you want it and I use light) with 2 teaspoons of regular mustard  Next I add two tablespoons of sweet pickle relish  I process all these ingredients together until I have a spread. You do not have to chop yours up as fine. In fact, if you would prefer larger chunks of ham, process the other ingredients first and then add the ham to pulse just until chopped. BTW, sometimes, instead of canning the ham, I process it as the deviled ham spread here and can that in 8 oz jars for 1 hour and 15 minutes at 10 lbs pressure. It’s pretty nifty to have on hand to open in a pinch.  Mr. Fix-It likes it one of two ways: Either on Ritz crackers or spread on whole wheat bread, with lettuce and tomato. All you have to chew is the crackers or the bread and trimmings!! 🙂 |
|
Oklahoma Pastry Cloth™ Company on Facebook
|
 |
Canning Ham
Monday, July 4th, 2011
|
When I was a child, I remember going to my grandmother’s and granddad’s house and it just seems like everytime we visited, one meal always consisted of a very large baked ham. I hated that dinner (sorry Grandmother) because the gargantuan ham had rings of pineapple stuck strategically all over the skin, along with whole cloves that dotted the entire ham. Bleahh. And of course, it was accompanied by canned peas. Oh my. How I hated canned peas. To this day, I will not eat a pea if it is from a can. Give me fresh or frozen or even in a soup, but not on my plate as a mushy, squishy, round, green thing. You know what’s even ten million times worse? Creamed peas made with a white sauce and canned peas. They are the very picture of the pun of Miss America’s desire for “Whirled Peas”. My memory still nurtures a picture of a 14 year old me, sitting all by myself, at my grandparents’ dinner table with an all but empty plate – empty except for a pile of peas. My grandfather watched until I choked down the last pea, and then allowed me to leave the table. I wonder to this day where my parents were. Maybe they were secretly in on the plan to force me to like this canned excuse for a legume. Well, I showed them. I still hate ’em!! But back to the ham. I have never understood why anyone would want to mess with the simple and delectable flavor of a smoked, fully cooked ham – the kind that comes in that thick, plastic package, surrounded by a cloudy brine and sold as whole, shank or butt. I know, some people pour Coca Cola over theirs, and others use pineapple juice with brown sugar or some such syrup, but I am a purist. I want my ham as ham. If I want a sweet sauce, I’ll dip the ham in it as I eat. Just give me plain ol’ baked ham. The beauty of leaving a ham in the buff is that after serving it for a meal, you can process the rest in jars to have later on. I try to can ham twice a year – once for winter and once for summer. It is wonderful for ham salad, for omelettes, for eggs benedict, for casseroles and just as a side for eggs and biscuits or for dinner. I buy ham on sale and freeze it until I am ready to bake it, serve it and then can it. Tonight I did just that. I baked a 10 1/2 lb shank ham, served it with green beans and a wonderful hash brown casserole that I will post later. I bake my hams in brown-in bags which makes the cooking go faster. Baked at 325º, I usually average about 20 minutes per pound. Below, you’ll find how I then can the leftovers.  When using a brown-in bag to bake a ham, shake about 2 tbsps of flour inside the bag, place the ham ino the bag and then cut a 1″ slice into the plastic to allow steam to escape,  After 3 1/2 hours at 325º, this ham is succulent served with green beans and cheesy hashbrowns.  Once we’ve eaten, I take all of the meat off of the bone. When cooked in the brown-in bag, the meat just literally falls into your hand. Not much cutting required. And the beauty of it is that the fat falls off as well, so that you get very lean pieces.  The ham is placed into pint jars to about 3/4″ head space and the ham bone is frozen in a freezer bag for later use in a huge pot of pinto or navy beans. The juices can be evenly divided between the jars of meat or left out completely. The juices will darken the ham a little bit. Notice that in the bowl, all that is left is some fat, some skin and the plastic bag.   Boiling water fills the jars to within 1″ of the top of the jar rim  Using a knife or canning spatula, release air bubbles by forcing the utensil around the sides of the jars  Wipe the rims of the jars with a warm, wet, soapy dishcloth. This is very important because the grease from the ham can splash onto the rim and keep the lids from sealing in processing.  Have the lids ready in water that has been brought to a near boil. I like to place my lids alternating rubber ring up – rubber ring down, so that the lids do not stick to each other.  Using a canning wand or tongs, place lids onto jars and add rings. Tighten and then just barely back off the ring (loosen) You want the ring on tight, but not too tight.  Different canners require different numbers of quarts of water, but I use the rule of thumb of 2″ of warm water in the bottom of the canner.  Place the jars into the canner base making sure that there is space between them. Put lid in place. Process on 10 lbs for and hour and 15 minutes (75 minutes) for pints and and an hour and a half (90 minutes) for quarts.  Once the jars have cooled, wash the rings and jars in hot, soapy water to remove any oils. Dry and then replace rings when they are totally dry.  The jar on the left has been canned with the juices and boiling water and is still warm. When it cools, the fat will separate to the top as in the jar to the right. The jar to the right has been canned with just boiling water. I’ll be posting some recipes for you to use with your canned ham. |
|
Oklahoma Pastry Cloth™ Company on Facebook
|
 |
Canning Peach Pie Filling
Tuesday, June 28th, 2011
 There is just something about the smell and taste of peaches. The smell is great in potpourri. The smell and taste are awesome in iced tea and are especially good in our Peach Cordial and Peach Berry teas. Peaches just have a heady fragrance that even draws you to the grocery bins with an invisible wave that says, “You HAVE to have some peaches!” We only have one peach tree. But more are going to be planted this fall. It is best to have at least two different kinds of trees – and we did – but one died. Oklahoma has many peach orchards, but the heat is brutal and it got our other tree. Actually, one tree is plenty for one family, but as I said, two make for better fruit. I was very excited to see all the fruit on our tree this year. It got bigger and bigger and then one day we noticed little, clear sappy things oozing from tiny holes. Arrggghhh. Oriental Fruit Moths had had their way with my peaches!!! How depressing. These beautiful fruits look so pretty, but when sliced, brown tunnels weave through the ripe and juicy meat. So, next year, pheromone traps will be hanging from the tree like Christmas ornaments! What fruit we did get has been incredible. It’s like eating peach candy and so I have been diligent at getting these precious peaches stashed away for future use. One thing I love to do is make pie filling. I use the same method as my Apple Pie Filling, but I adjust the syrup for peaches – a litle thinner. The following is the recipe that I use for peaches. To see how to make the syrup just click on the link for the Apple Pie Filling and directions and pictures are there. Mix dry ingredients together in a large pot and slowly add water, stirring with a whisk until well blended. Bring to a boil while continually stirring and allow to boil until mixture thickens and becomes more transparent. Remove from heat and add lemon juice. Stir.  Wash 6 – 8 pounds of peaches. In this case, I used more because I had to cut so much off of each peach due to those nasty Oriental Fruit Moths.  Peel peaches  I find the easiest way to slice peaches is to make cuts about 1/2″ apart, cutting at an angle toward the pit so that there is very little meat being pulled away from the pit. In the case of most of my peaches, I ended up cutting out chunks around the worm holes so this batch isn’t very pretty!! I slice my peaches into a bowl that has a cup of water mixed with a tsp of FruitFresh in it. I continually toss the peach slices as I cut to keep them coated with the citric acid mixture.  Pack the peaches into jars leaving a 1″ head space from the top of the jar. I’ll be rearranging peaches from the jar on the front right to distribute among other jars because it is too full. Add 1/2 tsp apple cider vinegar to each jar of peaches.  Ladle syrup into jars leaving a 1″ head space of syrup. This prevents any from boiling out in the processing. I usually have around a quart of syrup left over and just use it for my next run or I can it and use it for fresh peaches in a pie.  Using a knife or canning spatula, run around the inside perimeter of the jars to release any air bubbles.  Wipe the rims of the jars with a wet cloth to remove any juices, oils or syrup which will keep a jar from sealing.  I like to place my lids in the water in a pan by alternating them rubber side up, rubber side down which helps to keep them from sticking together. The water is brought to just before a boil and then turned on low to keep the lids warm.  Using a canning wand or tongs, remove the lids from the water and place onto jars. Screw on the rings and adjust by tightening and then backing off just a smidge. Place in a water bath canner and fill with warm water to 1″ over the top of the jars. Bring to a full boil and boil for 20 minutes. Remove jars from canner and allow to cool. Listen for the “ping” pop that lets you know the jars are sealing.  These jars are ready to store. I will use one quart and one pint to make a pie, so this batch made enough for four pies! Just pour into your crust, top and bake at 400 degrees. Easy as…umm…peach pie!! |
|
Oklahoma Pastry Cloth™ Company on Facebook
|
 |
Dilled Salmon
Thursday, June 23rd, 2011
 I love wild Alaskan salmon. I understand that it is supposed to be really good for you with all those Omega fatty acids (why not Alpha fatty acids??) that are supposed to coat your heart and grease your brain, but I just like it because it tastes good. When I was a kid, my dad would go fishing with his buddies up in Maine for fresh water salmon and it was a treat indeed to watch my mom stuff one of the big fishes with dressing, truss it up like a corset and place it on the grill to slowly cook over charcoal. Oh my. Talk about heavenly. Topped with a cucumber sour cream sauce, that fish melted in your mouth like butter. So, I’ve had a love affair with salmon for a long time. It included lying on the floor, chin cupped in hands while riveted to the black and white tv, watching the Walt Disney hour explain how these trout-on-steroids swim upstream and jump over dams in a quest for a mate that would put E-Harmony to shame. I was always fascinated when the grizzly bear caught a wayward fish and carried it to shore flipping and flopping in the bear’s mouth. And so, speaking of putting salmon into the mouth, the following is my own recipe for baking salmon filets for a quick and pretty dinner. It doesn’t heat up your kitchen in summer because it doesn’t take long to bake the fish and it’s a hearty, warm meal in winter when Ol’ Man Winter is knocking at the door.   Mix mayo, thyme, garlic powder, salt, onion and dill in a bowl until well incorporated. I am using the Frontier Simply Organic spices at the website here. They are potent!!  When thoroughly mixed, take 1/3 cup of the mixture and place into another bowl and set aside.  Add 1/4 cup of white wine to the remaining mixture and cream well  Lightly pepper fillets. Place fillets on a greased or nonstick cookie sheet or into a greased glass baking dishand spoon wine mixture over cuts until all of it is used up. Bake in 350º oven for 20 – 25 minutes until the meat flake when lifted with a fork.  Serve with your favorite side dishes and top fillets with a dollop of the leftover mayo mixture. Yum! |
|
Oklahoma Pastry Cloth™ Company on Facebook
|
 |
Summer Treat
Monday, June 20th, 2011
 Continuing on my journey, I’ve moved from the red clay of Georgia to the Smoky Mountains of Tennessee. Oh my. How beautiful they are. It kinda gives the ol’ gut a wrench when I take in those cloud-covered peaks, old and worn, green and inviting. These are my old stomping grounds, but now I’m a ‘flatlander’. It’s ok, though. I don’t have to deal with this traffic out in the plains of Okie land!!!  I am staying in the mountain guest home of a wonderful family neighbor who has been so gracious to open their doors. I’ll be heading back to the Great Plains with pots of spearmint and pineapple sage from Brennan’s garden. I figure they will be great additions to homemade soaps. It is Father’s Day and I got to spend it with my dad (and Mom!). 850 miles is too much distance for sure, but I made it! Sunday worship at my folks’ church, a wonderful meal at a Japanese restaurant and an afternoon just sitting around and making memories completed the day. You see, my dad is all about making memories and when my family gets together we share those memories with lots of humor. My dad is an amazing cook and many of those memories have a backdrop of meals that he prepared. One of my memories is of Sunday summer nights, after “Training Union” and the Sunday night service at church, with the six of us – parents and four daughters – elbow-to-elbow around the table, munching on a fruit plate of watermelon, canaloupe, fresh cherries, oranges, peaches or nectarines, pineapple and grapes with maybe some cheeses and most definitely with orange or pineapple sherbert. That was supper! We thought it was wonderful. Dad and Mom worked side-by-side to put together a pretty arrangement of goodies for all of us. And so, tonight, when I caught my father, at 84, putting together a similar concoction for our Sunday night dinner, I decided to grab it in pictures, his hands still deftly slicing fruits in a labor of love.  Bananas, oranges, grapefruit and pineapple went into a bowl  Crunchy Red Delicious apples were added  Red grapes added more color  A dollop of smooth and creamy vanilla yogurt and a plate of Oatmeal Cranberry Walnut cookies (Mom’s version of my Georgia aunt’s ‘rock’ cookies) made for a healthy meal of fruits, whole grains, and protein. Yep. We know how to live! And memories have been made afresh. Oven: 375 degrees 10 – 15 minutes Cream shortening and brown sugar. Add eggs and beat well for 2 minutes. Combine dry ingredients. Then alternate with sour cream and add to creamed mixture. Add vanilla extract. Add raisins, oats and nuts and mix with spoon. Drop by teaspoon on cookie sheet. Bake in 375 degree oven 10 minutes for soft cookies and 12 to 15 minutes for “rocks” if you like crunchy cookies. Remove from pan to cooling racks immediately. |
|
Oklahoma Pastry Cloth™ Company on Facebook
|
 |
Shrimp Etouffée
Thursday, June 16th, 2011
  When I was in high school, my family spent a glorious week in New Orleans while my father spoke at an education convention there. We stayed in a beautiful, vintage home called the Lamothe House that was the traditional French style home surrounding a courtyard of gardens. I remember that the beds were also French with the tall, mahogany headboards spanning the wall to the ceiling and topped by an ornate mahogany half canopy. We felt pampered and awed by the opulence. That was in the early ’70’s and this gorgeous home is still a thriving bed and breakfast. Seeing the Preservation Hall jazz band with Billie and Dee Dee was a treat in an old, ramshackle building with wooden floors and folding chairs. Beignets at the Café Du Monde and meals at The Court of the Two Sisters, Antoine’s and several others that are no longer in business, started me on my love affair with French cuisine and all things Cajun. My favorite is Crawfish Bisque and that recipe will come later, but just for a quick summer meal, I thought I’d show how I make shrimp etouffée. I make a cajun seasoning mix that I store in a glass jar and use as needed. How hot you like your food determines how much cayenne pepper you use. I’m a weenie and Mr. Fix-It has had to swear off of hot food as the doctor has demanded, so cayenne is limited for us but it can be Katie-Bar-The-Door for you if you are brave. Hope you enjoy the recipes. Place all ingredients into a quart jar with a lid. Shake jar until all ingredients are well mixed. Store covered and use as any commercial seasoning.
 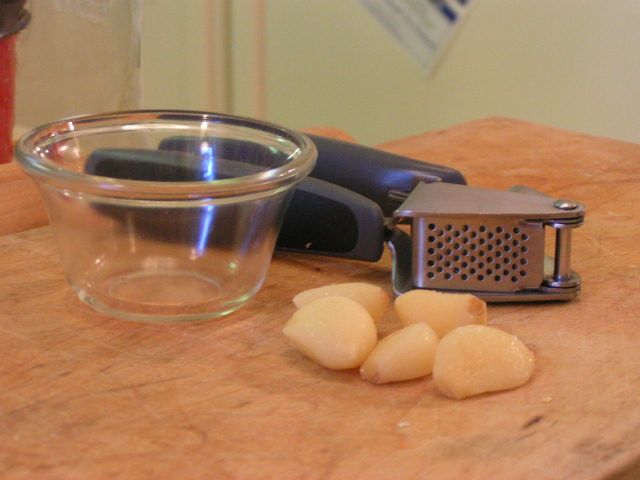 Press or chop 5 cloves of garlic and set aside 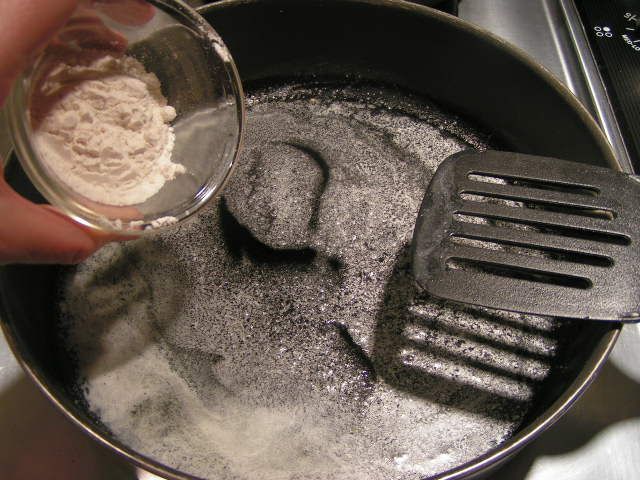 In a large, deep skillet, melt butter and add flour to make a roue 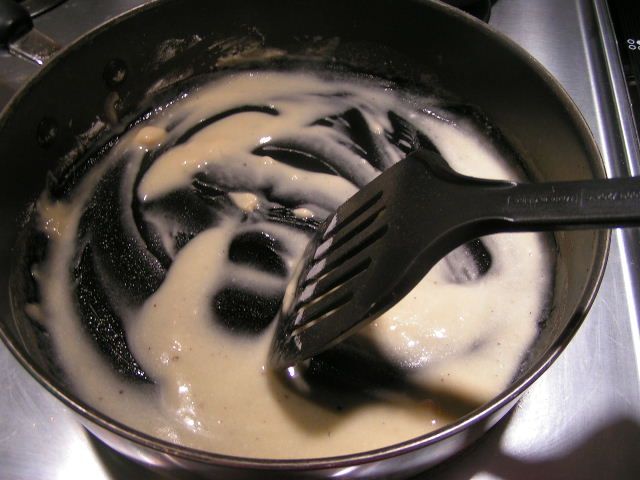 Stir flour into butter until a smooth paste is created 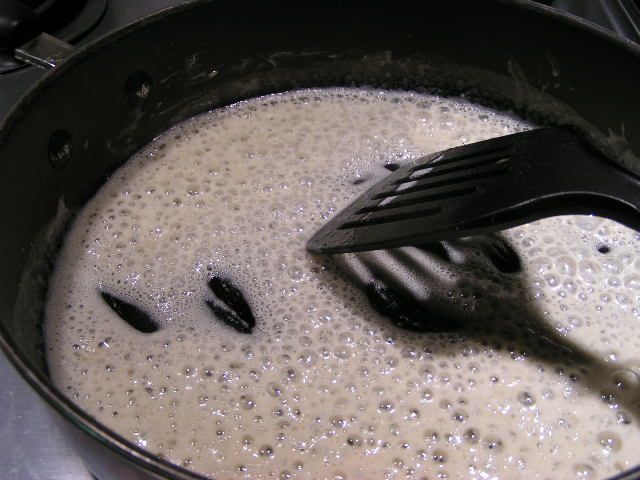 Cook on high heat, continually stirring. The roue will go from a thick paste to a thinner mixture and be very bubbly. 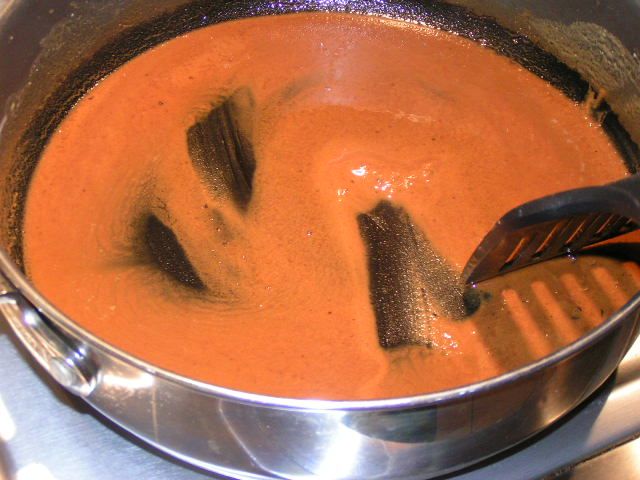 Continue stirring and cooking until the color of the roue is a deep caramel color. It will smell slightly burned. Set off of heat. 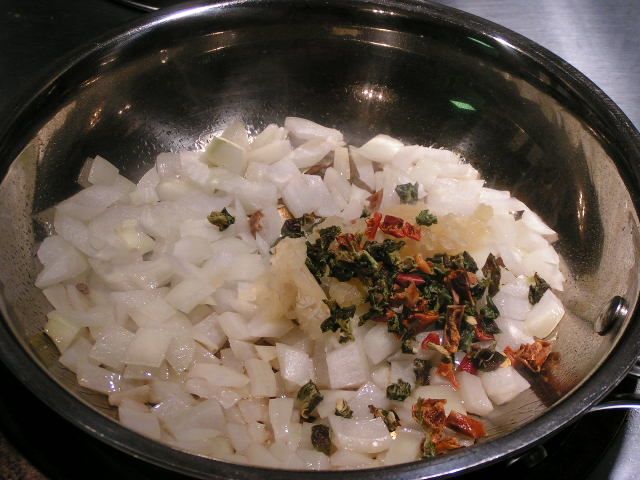 In a second skillet, sauté onions, garlic, bell pepper and celery in 1 Tblsp olive oil. I am using dried peppers and celery here, but fresh is great. 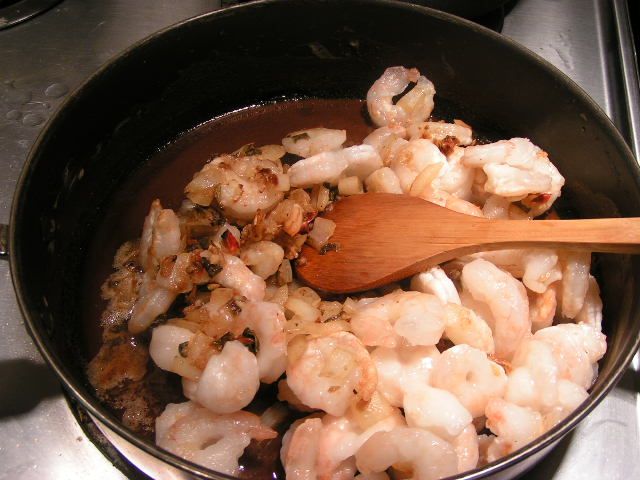 When onions are clear and tender, place skillet with roue back onto heat. Add veggies and shrimp and stir. 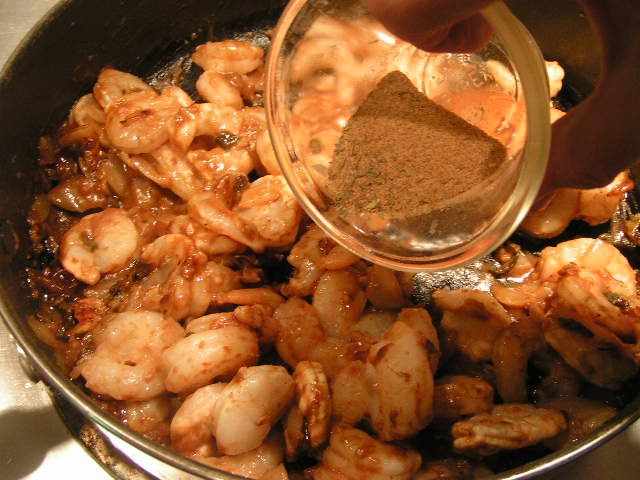 Add 1 Tblsp Cajun seasoning from mixture in recipe above. 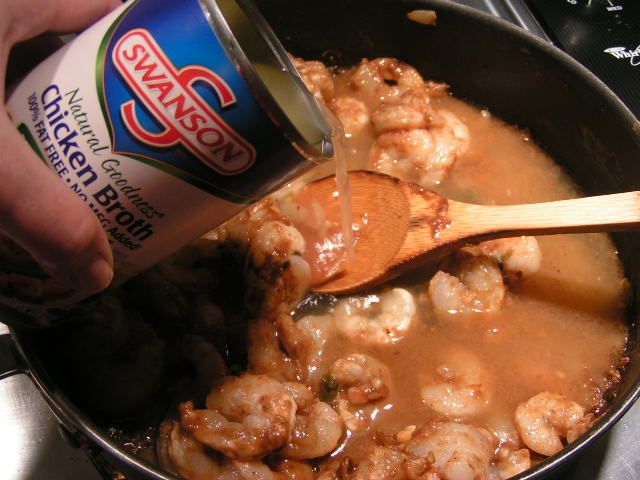 Add can of chicken broth 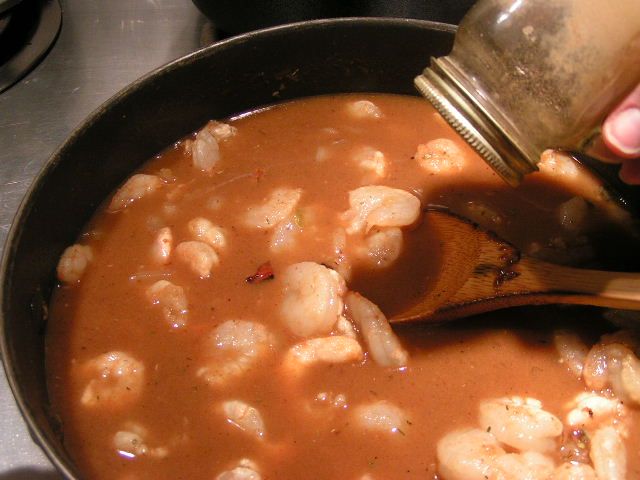 Add more black pepper to taste. We think that you can’t have too much black pepper! Simmer until liquid is reduced to a nice, thick gravy. 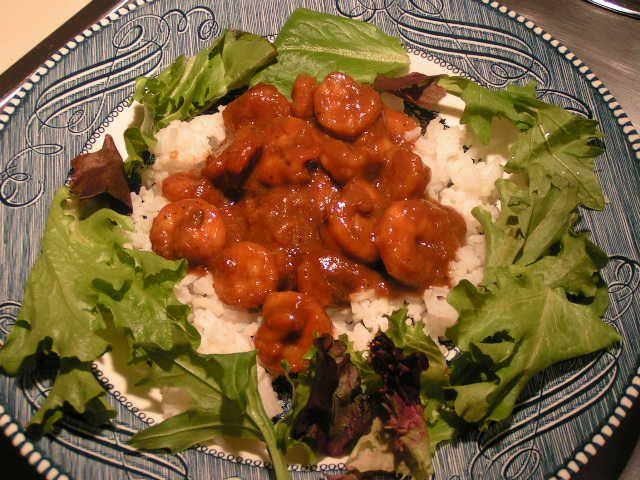  Serve Etouffée hot, over rice. Serves 4  |
|
Oklahoma Pastry Cloth™ Company on Facebook
|
 |

 Homestead Revival
 Paratus Familia
 Rural Revolution